After you create a connection between Synerise and Shopify, create one or more configurations to define what data is synchronized and how it maps to Synerise attributes. You can create a separate configuration for each data type: Customers, Orders, and Products.
Creating a connection automatically creates one Draft configuration for each data type. You can use these instead of creating new ones. You can also create additional Product configurations if you need more than one (for example, for a different catalog) - Customer and Order are limited to a single configuration each.
Once you activate a configuration (see Creating a configuration), it has three tabs:
- Overview - the configuration type and parameter mapping you defined while creating the configuration.
- Import preview - run a historical import.
- Webhook subscription - select which Shopify events trigger live synchronization.
Creating a configuration
- Go to
 Settings > (Shopify) Data import.
 - Click Create configuration.
Select the configuration type: Product, Order, or Customer.
Result: A configuration is created in Draft status, showing a checklist of setup steps:- Type - the configuration's data type, already set based on your selection. You can create only one Customer and one Order configuration, but you can create multiple Product configurations.
- Parameters mapping - required. Click Define to open the mapping editor described in Defining parameter mapping.
- Catalog - available only for Product configurations, and required for them. From the dropdown, select the catalog that will hold the product feed. The catalog is updated whenever the feed changes in Shopify.
- Metafields selection (optional). Click Define to select which Shopify metafields to make available in this configuration, as described in Selecting metafields.
- Filters (optional). Click Define to control which Shopify records are included, as described in Filtering synchronized data.
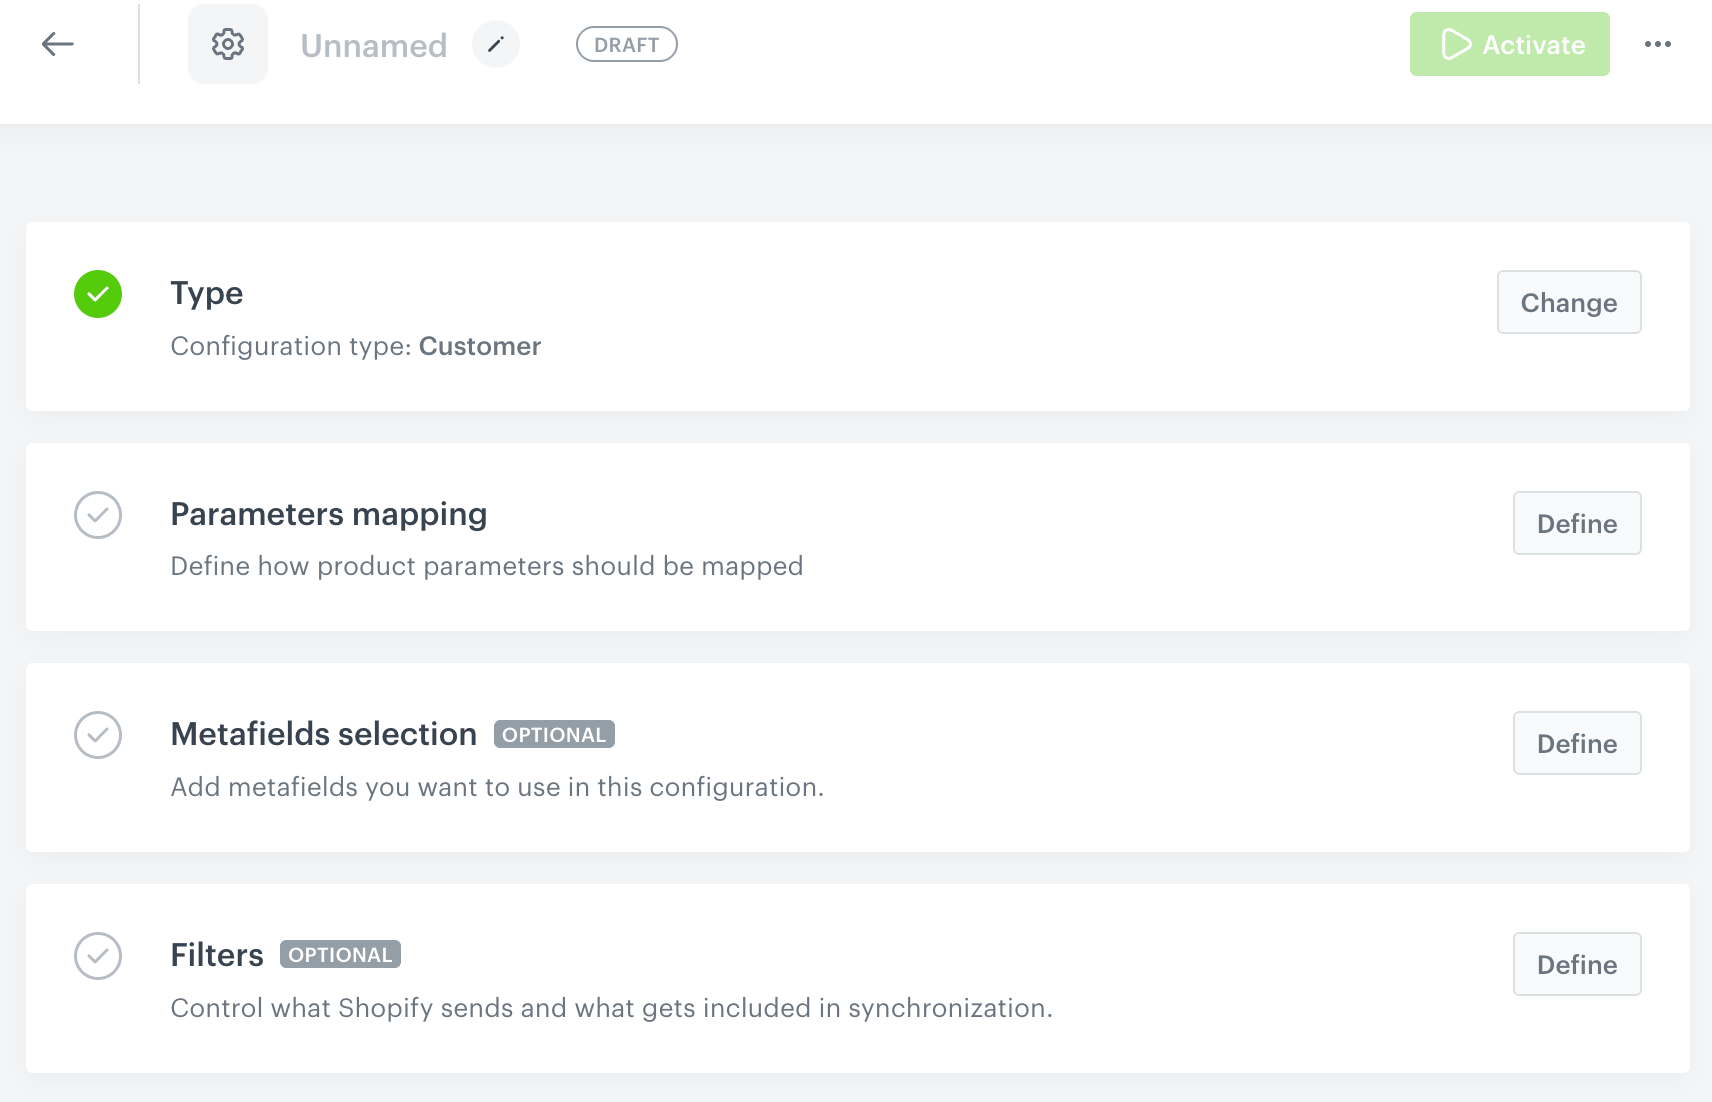
A newly created Customer configuration in Draft status, showing the Type, Parameters mapping, Metafields selection, and Filters setup steps - After you define the configuration, click Activate in the top right corner.
Result: The configuration is activated, and the Overview, Import preview, and Webhook subscription tabs become available. This first activation doesn't start any synchronization.
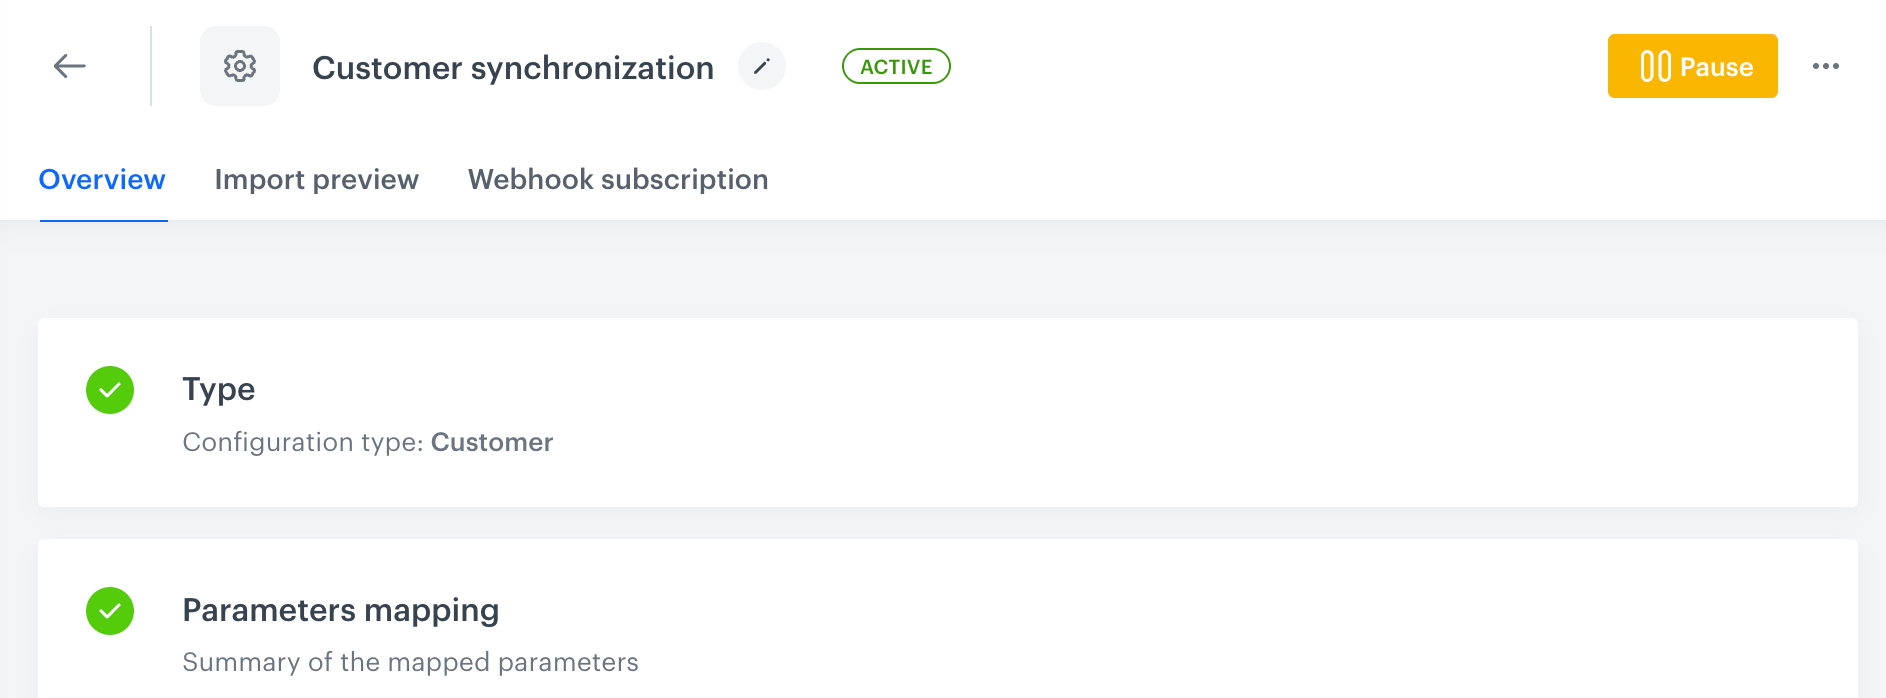
An activated Customer configuration, with the Overview, Import preview, and Webhook subscription tabs - Go to the Import preview and/or Webhook subscription tabs to configure and enable historical or live synchronization, as described in Running historical and live synchronization and Enabling live synchronization events.
Changes are saved and applied immediately - you don't need to click Activate again.
Selecting metafields
Metafields are custom Shopify fields that store additional information beyond a data type's default fields. On the Metafields selection step, Synerise loads the list of metafields available in your Shopify store, and you select which ones to make available in this configuration.
Selecting a metafield only makes it available - on its own, it doesn't affect synchronized data. To use a selected metafield, reference it in the parameter mapping; you can also use it in filters.
Filtering synchronized data
On the Filters step, you can define two separate filters, each scoped to a different synchronization mode:
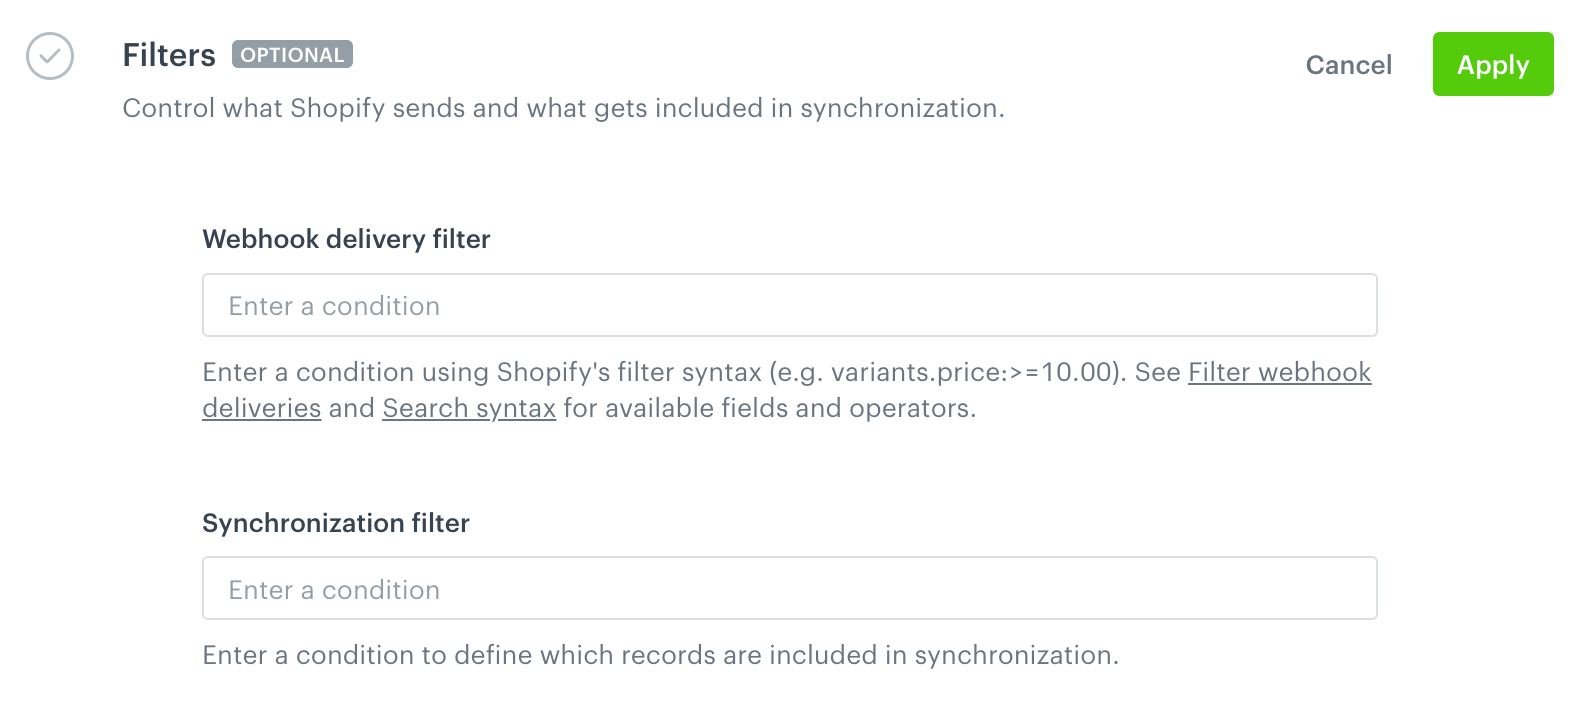
- Webhook delivery filter - controls which records trigger live synchronization. It uses Shopify's webhook filter syntax, for example
variants.price:>=10.00. For available fields and operators, see Shopify's documentation on filtering webhook deliveries and search syntax. - Synchronization filter - controls which records are included in a one-time historical synchronization. It uses Shopify's search syntax - pairs of a field name and a value, separated by a colon, for example
tag:viporcountry:USto only synchronize records from the United States. For the full syntax reference, see Shopify's documentation on search syntax.
Defining parameter mapping
Click Define next to Parameters mapping (or, once the configuration is activated, open the Overview tab) to define how fields from Shopify map to attributes in Synerise.
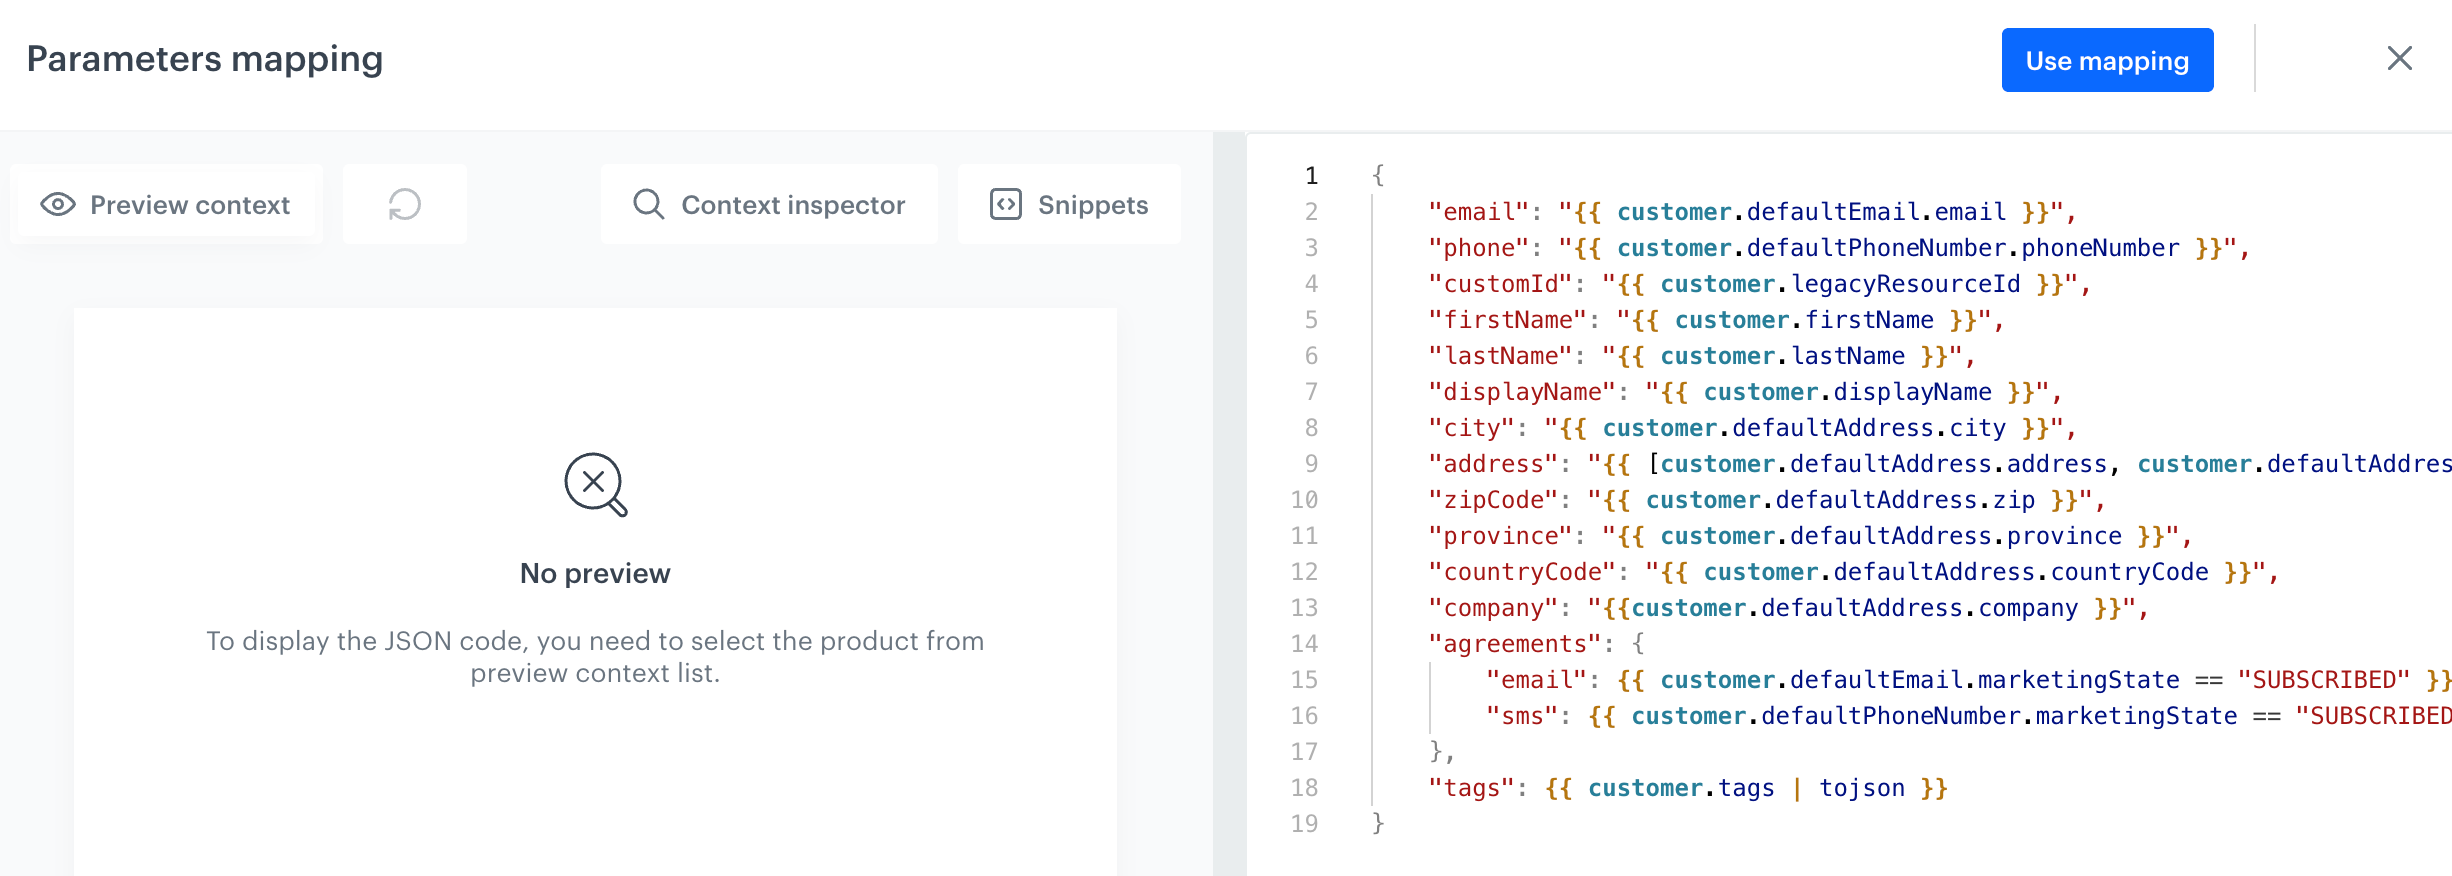
The mapping editor opens with a default mapping already filled in for the configuration's data type. You can use the default mapping as-is, or adjust it to your needs.
- Type - the configuration's data type (Customer, Order, or Product), set when the configuration was created.
- Parameters mapping - a JSON code editor where you define the mapping. Keys are Synerise attribute names; values are the corresponding Shopify fields, referenced using inserts.
- Mapping preview - shows how the mapping resolves for a sample record, so you can check the result before activating the configuration.
- Context inspector - lets you browse the Shopify fields available for the selected data type, with a description of each field. The Template usage section shows the exact syntax to insert into the mapping, for example
{{ order.id }}, so you can reference fields without looking up field names manually.
NOTE: For Order configurations, how you map eventSalt determines whether an order update overwrites the existing transaction.charge event or generates a new one. For details, see Enabling live synchronization events.
Example mapping
The following example maps Shopify customer fields to Synerise attributes:
{
    "customerMetafield": "{{customer.metafields.custom.customermetafield}}", {# reads a customer metafield by referencing it directly with Jinjava #}
    "email": "{{ customer.defaultEmail.email }}",
    "phone": "{{ customer.defaultPhoneNumber.phoneNumber }}",
    "customId": "{{ customer.legacyResourceId }}",
    "firstName": "{{ customer.firstName }}",
    "lastName": "{{ customer.lastName }}",
    "displayName": "{{ customer.displayName }}",
    "city": "{{ customer.defaultAddress.city }}",
    "address": "{{ [customer.defaultAddress.address, customer.defaultAddress.address2] | join(" ") }}", {# joins the two address lines into a single address attribute with the join filter #}
    "zipCode": "{{ customer.defaultAddress.zip }}",
    "province": "{{ customer.defaultAddress.province }}",
    "countryCode": "{{ customer.defaultAddress.countryCode }}",
    "company": "{{customer.defaultAddress.company}}",
    "agreements": { {# converts marketing consent states into boolean values #}
        "email": {{ customer.defaultEmail.marketingState == "SUBSCRIBED" }},
        "sms": {{ customer.defaultPhoneNumber.marketingState == "SUBSCRIBED" }}
    },
    "tags": {{ customer.tags | tojson }} {# converts the tags array into JSON with the tojson filter #}
}
NOTE: Metafields are custom fields you define on the Shopify side. To reference one in your mapping, use customer.metafields.<namespace>.<key>. For details on creating and managing metafields, see the Shopify documentation.
Running historical and live synchronization
On the Import preview tab, you can run a one-time historical synchronization to import your existing Shopify data into Synerise - recommended when you set up a configuration for the first time. The tab also lists the synchronizations you've run, showing each one's status, progress, selected time range, and start date.
There's no separate toggle for live synchronization - once a configuration is active, changes in Shopify are sent to Synerise in real time for the events you select on the Webhook subscription tab.
NOTE: To preview how records look after the mapping is applied, use the Mapping preview on the Overview tab instead.
Enabling live synchronization events
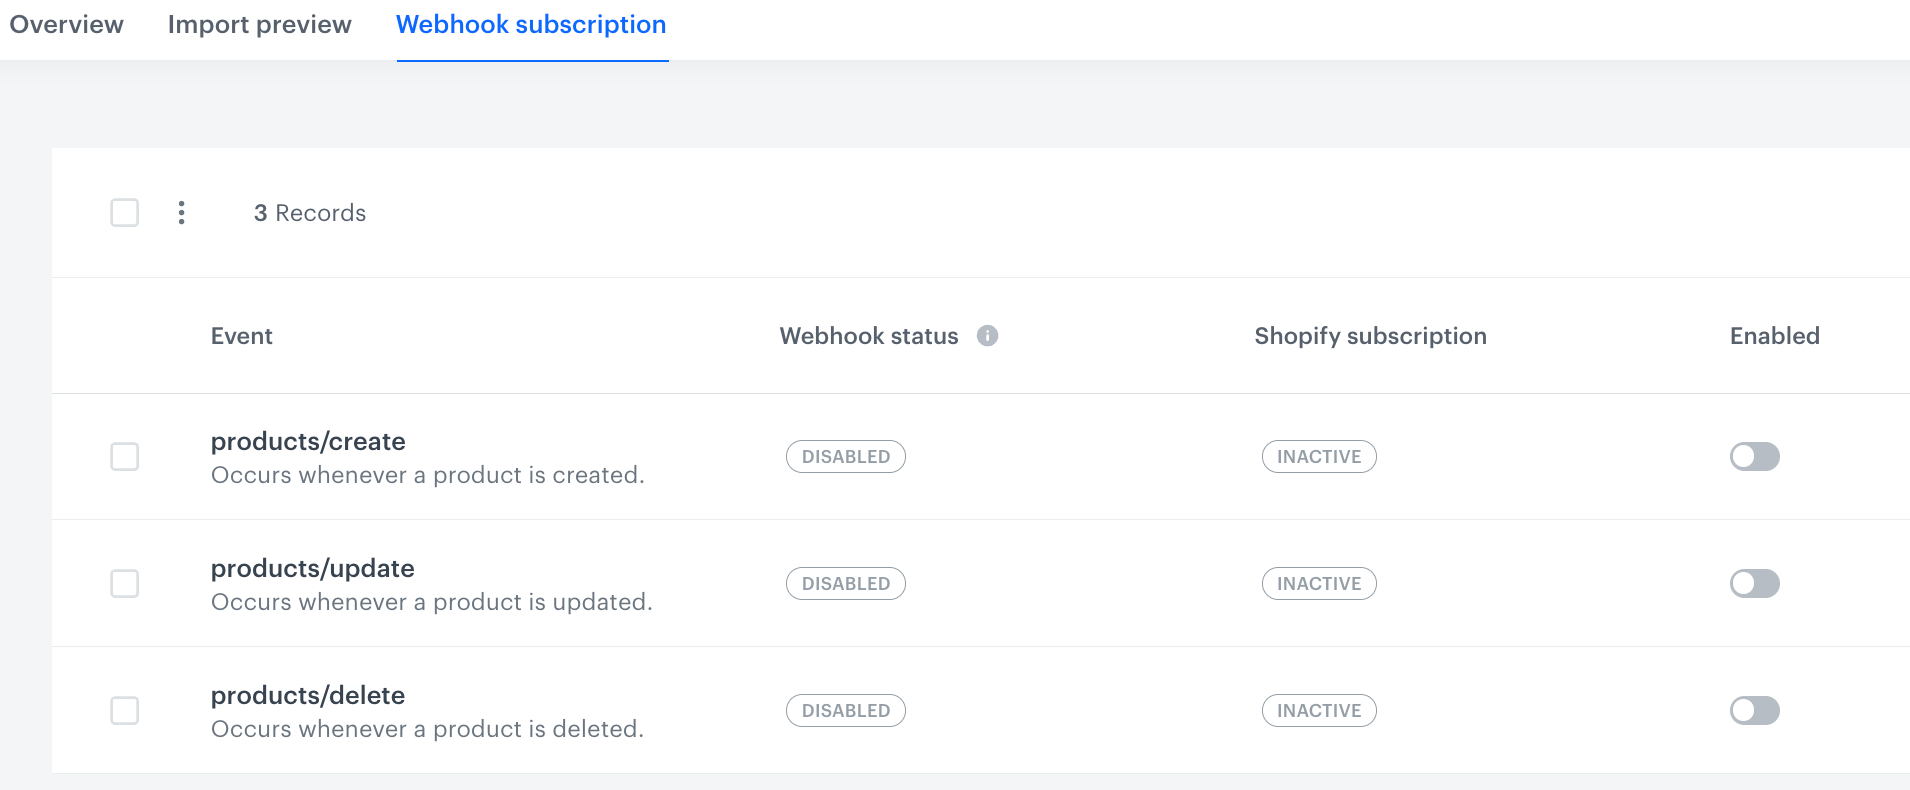
On the Webhook subscription tab, select which Shopify events trigger live synchronization to Synerise. For an event to work, both its Webhook status and Shopify subscription columns must show Active. Use the Enabled toggle to turn synchronization for that event on or off.
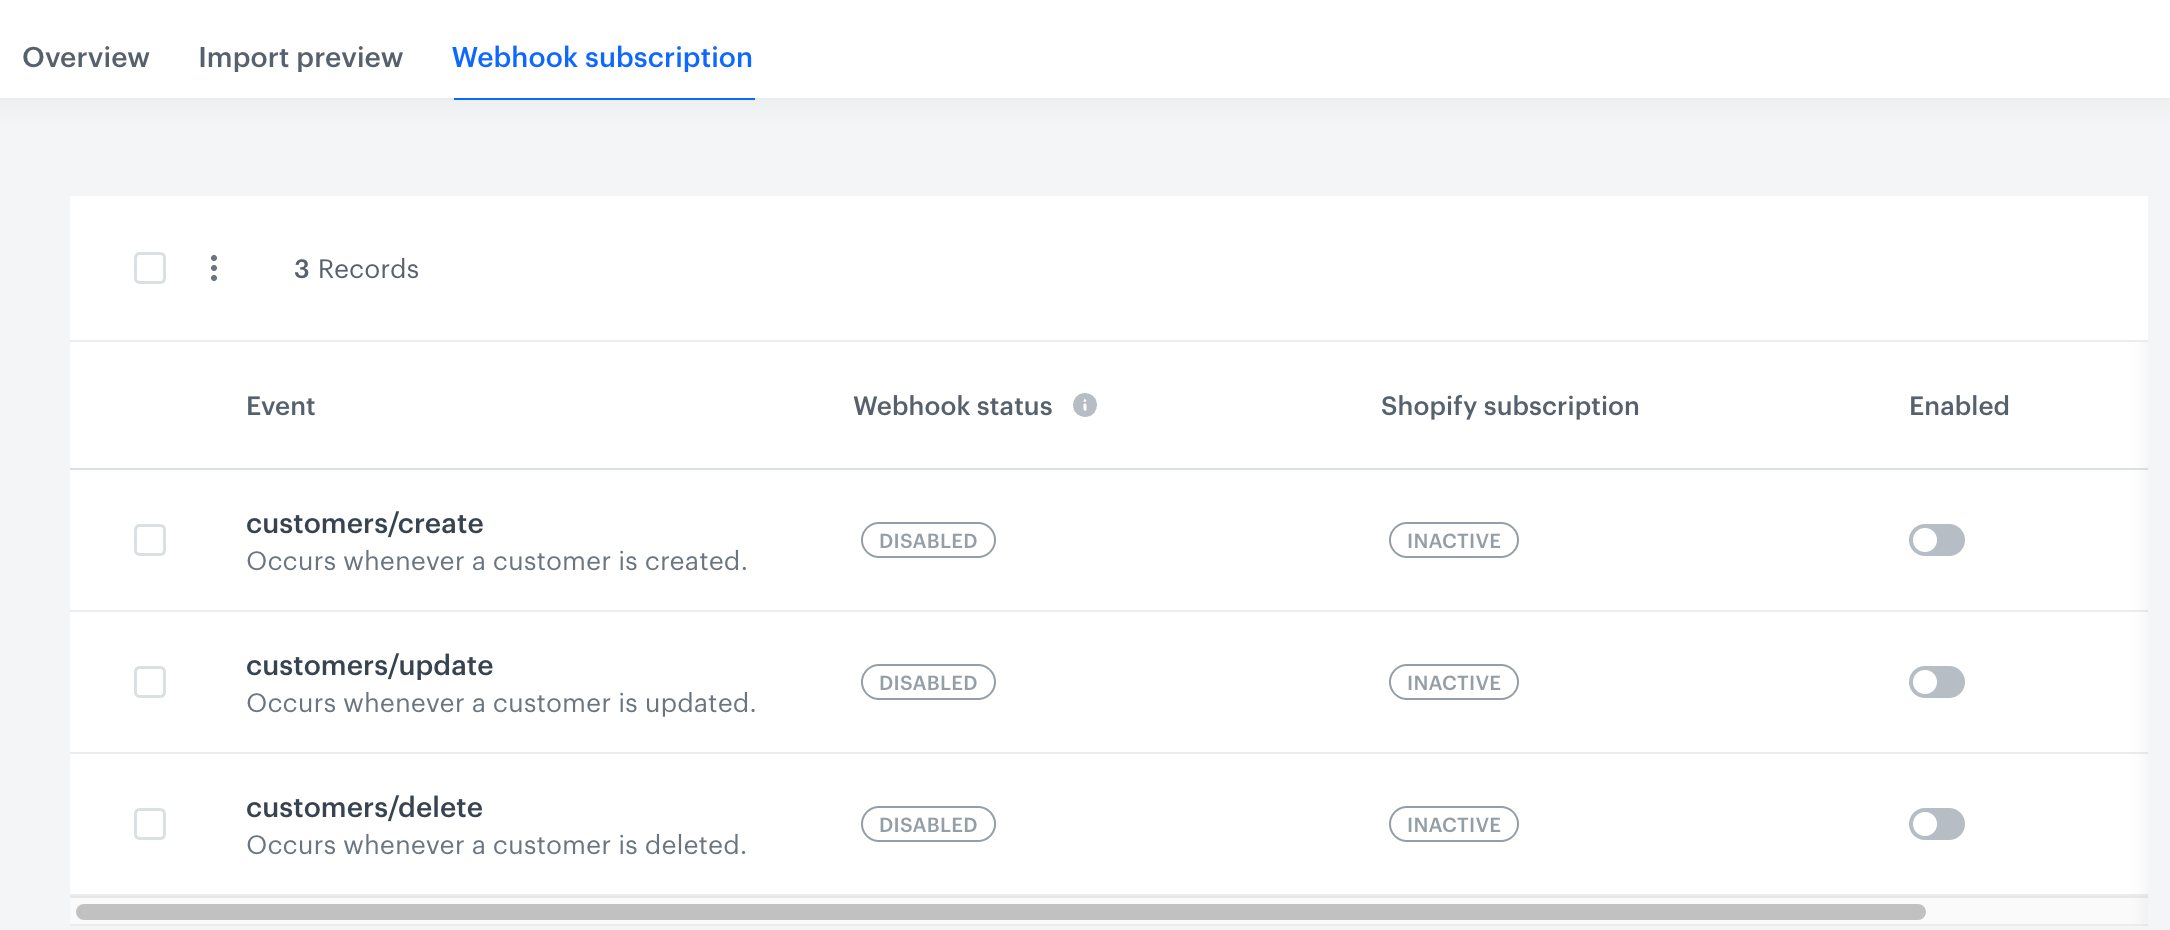
Customers
| Event | Description | Result in Synerise |
|---|---|---|
customers/create |
Occurs whenever a customer is created. | A client.add event is generated. The customer's profile is created in Synerise, with attributes set according to the parameter mapping you defined. |
customers/update |
Occurs whenever a customer is updated. | A profile.updated event is generated. The customer's profile in Synerise is updated according to the parameter mapping. |
customers/delete |
Occurs whenever a customer is deleted. | A profile is deleted from Synerise, no event is generated. |
Products
| Event | Description | Result in Synerise |
|---|---|---|
products/create |
Occurs whenever a product is created. | The item is added to the Synerise catalog associated with the configuration, with attributes set according to the parameter mapping. If the catalog doesn't exist yet, it's created automatically. |
products/update |
Occurs whenever a product is updated. | The corresponding item in the Synerise catalog is updated according to the parameter mapping. |
products/delete |
Occurs whenever a product is deleted. | The corresponding item is removed from the Synerise catalog. |
Orders
| Event | Description | Result in Synerise |
|---|---|---|
orders/paid |
Occurs whenever an order is paid. | A transaction.charge event is created (or updated, see note below) on the customer's profile, according to the parameter mapping. |
orders/create |
Occurs whenever an order is created. | A transaction.charge event is created (or updated, see note below) on the customer's profile, according to the parameter mapping. |
orders/updated |
Occurs whenever an order is updated. | The corresponding transaction.charge event is updated. |
orders/cancelled |
Occurs whenever an order is cancelled. | The corresponding transaction.charge event is updated. |
orders/fulfilled |
Occurs whenever an order is fulfilled. | The corresponding transaction.charge event is updated. |
orders/partially_fulfilled |
Occurs whenever an order is partially fulfilled. | The corresponding transaction.charge event is updated. |
orders/edited |
Occurs whenever an order is edited. | The corresponding transaction.charge event is updated. |
orders/delete |
Occurs whenever an order is deleted. |
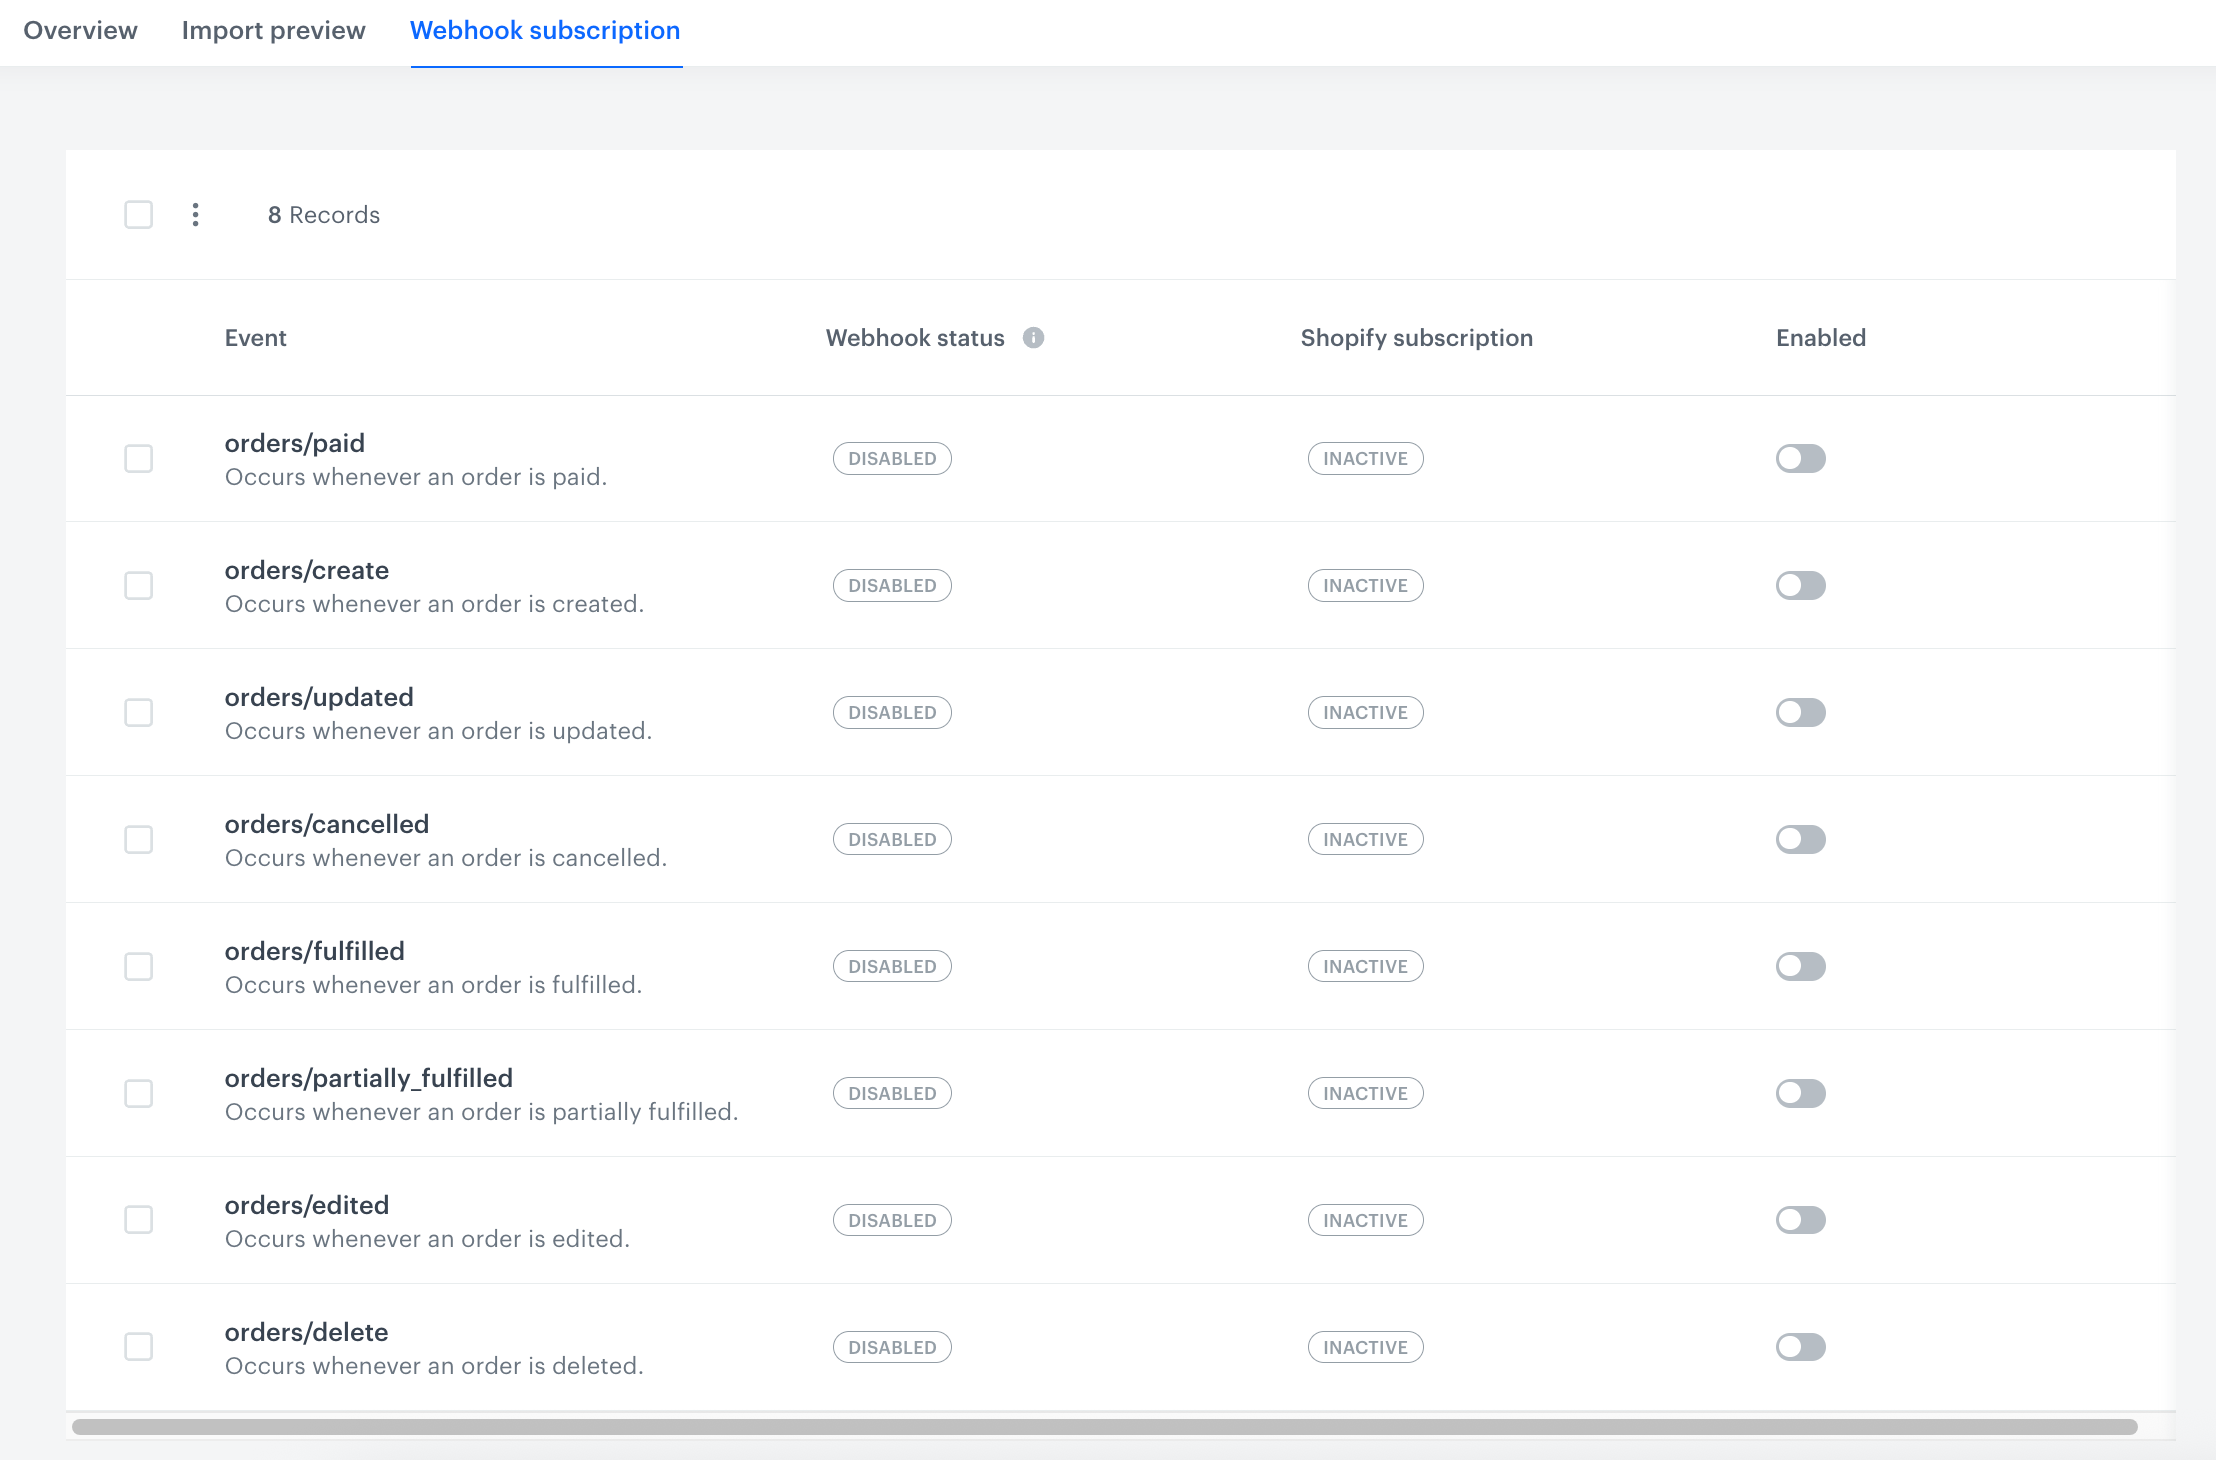
NOTE: An order can go through several of the events listed above during its lifecycle (for example, orders/create, then orders/paid, then orders/fulfilled). Whether these events update the same transaction.charge event or create separate ones depends on the eventSalt value you define in the parameter mapping. If eventSalt stays the same across the order's lifecycle (for example, when it's mapped to the order ID), subsequent events update the same transaction event, reflecting the order's latest status. To get a unique transaction event per status instead, define eventSalt so that its value changes with the order's status.