> Synerise Documentation — Campaigns
>
> This file contains the complete "Campaigns" section of the Synerise documentation. Each article begins with a top-level "# " heading. The manifest listing all sections is at https://hub.synerise.com/llms-full.txt
# Calendar
The calendar is an overview of all planned and draft messages. This organization tool lets you manage messages and schedule them at the best time possible for your customers.
## Benefits
---
- You can create any type of message directly from the calendar view.
- You can view all scheduled messages in daily, weekly, monthly, or yearly view.
- You can import external calendars to Synerise's Calendar (only the `ics` format is accepted).
This is useful for importing bank and marketing holidays to the calendar.
- You can export your calendar from Synerise.
The calendar doesn't show the messages sent through the automated scenarios (Automation Hub).
### Preview
Marketing calendar
## Adding a campaign to the calendar
---
1. Go to **Experience Hub > Calendar**.
2. Double-click the date slot you want to plan a message to send.
**Result**: A pop-up appears.
3. Optional: On the pop-up, fill in the **name**, **date** and **description**.
4. From the **Type** dropdown list, select the campaign type.
5. Click the **Creator** button.
**Result**: You are redirected to the message creation mode.
6. Follow the procedure of creating messages:
- [Email](/docs/campaign/e-mail/creating-email-campaigns)
- [Web push](/docs/campaign/Webpush)
- [Mobile](/docs/campaign/Mobile)
- [SMS](/docs/campaign/SMS)
- [Dynamic content](/docs/campaign/dynamiccontent/creating-dynamic-content)
7. After launching the message to be sent, it's visible in the calendar.
The calendar shows draft messages as well.
## Importing calendars to Synerise
---
You can use the import option to upload a calendar of the bank holidays, marketing holidays, or external campaigns which cannot be managed in Synerise.
The events that appear as a result of the import are not editable.
1. Go to **Settings > Calendar**.
2. On the right side, click **Import**.
**Result**: A pop-up appears.
3. On the pop-up, enter the name of the imported calendar (the name will be visible only on the list of special calendars).
4. Enter the description of the calendar (the description will be visible only on the list of special calendars).
5. Upload a calendar in the `ics` format.
**Result**: A calendar appears on the list. By default, it is set to be visible on the marketing calendar.
6. To modify the visibility of the calendar on the marketing calendar, switch the **Visibility** toggle on or off.
## Exporting marketing calendars
---
You can export the events from the calendar from a selected time range and import it to your calendar (option available only for calendars that accept the `ics` format).
1. Go to **Experience Hub > Calendar**.
2. On the right side of the screen, click **Export**.
**Result**: A pop-up appears.
3. Click the calendar and select the time range from which you want to export data.
4. Click **Apply**.
**Result**: The pop-up closes.
5. Click **Apply**.
**Result**: A file is downloaded to your device.
# Changes to Screen views
This article contains a summary of the changes to the Screen views feature.
## Terminology
With the release of the new version of the Screen views feature, we introduce new terms:
- **Screen view feed** - It is a category a screen view can be assigned to. For example, it can define a space in a mobile application it is dedicated to.
- **Group** - It functions as a tag/category for organizing [documents](/docs/assets/documents/whats-new).
## Summary
See the comparison below to find out what changed in the feature recently.
| Now | Before |
|-----------------------------------------------------------------------------------------------------------------------------------------------------------------------------------------------------------------------------------------------------------------------------------------------------------------------------------------------------------------------------------------------------------------------|------------------------------------------------------------------------------------------------------------------------------------------------------------------------------------------------------|
| You can display many screen views at a time | You could display only one screen view |
| You can assign a screen view to a feed (category) | No categorization of screen views was available |
| You can manually define the structure of a document | You could manually define the structure of a document |
| You can select single documents to be included in a screen view campaign | You could select single documents to be included in a screen view campaign |
| You can select documents which are assigned to a particular group | You could select documents from a list that contains all created documents |
| You can define the priority of a screen view | You could define the priority of a screen view |
| You can schedule a screen view campaign | You could schedule a screen view campaign |
| You can preview documents in the screen view campaign | You couldn't preview documents selected for a screen view campaign |
| No screen view campaign versioning | You could create versions of a screen view campaign and select a version to be published |
| A screen view can receive the following statuses: - **Draft** - a screen view is not published, it's editable - **Active** - a screen view is published - **Scheduled** - a screen view will be published at a selected date and time - **Paused** - a screen view is unpublished, it's editable and can be published again - **Finished** - a screen view activity period expired, the screen view campaign is archived and can't be run again | A screen view could receive the following statuses: - **Draft** - a screen view was not published, it was editable - **Active** - a screen view was published - **Inactive** - a screen view was unpublished |
## UI changes
| Action | Now | Before |
|--------------------------|-----|--------|
| Selecting the recipients | | |
| Defining the content | | |
| Defining the schedule | | |
| Publishing options | | |
## Deprecated endpoints
- [Get screen view - /screenViews/single/{screenViewId}/{screenViewVersion}](https://hub.synerise.com/api-reference/campaigns#operation/getScreenViewByVersion)
- [Get screen view versions - /screenViews/versions/{screenViewId}](https://hub.synerise.com/api-reference/campaigns#operation/getScreenViewByVersion)
- [Generate screen view - /v2/screenViews/generate](https://hub.synerise.com/api-reference/campaigns#operation/generateScreenViewWithAdditionalDataGet)
- [Copy content - /screenViews/content/{screenViewId}/{screenViewVersion}/copyFromExistingScreenView](https://hub.synerise.com/api-reference/campaigns#operation/copyContent)
- [Add content - /screenViews/content/{screenViewId}/{screenViewVersion}](https://hub.synerise.com/api-reference/campaigns#operation/createContent)
- [Add audience - /screenViews/audience/{screenViewId}/{screenViewVersion}](https://hub.synerise.com/api-reference/campaigns#operation/createAudience)
- [Publish screen view - /screenViews/publish/{screenViewId}/{screenViewVersion}](https://hub.synerise.com/api-reference/campaigns#operation/publishScreenView)
- [Update screen view name - /screenViews/single/{screenViewId}/{screenViewVersion}/name](https://hub.synerise.com/api-reference/campaigns#operation/updateNameOfScreenView)
- [Update screen view description - /screenViews/single/{screenViewId}/{screenViewVersion}/description](https://hub.synerise.com/api-reference/campaigns#operation/updateDescriptionOfScreenView)
- [Update screen view priority - /screenViews/single/{screenViewId}/{screenViewVersion}/priority](https://hub.synerise.com/api-reference/campaigns#operation/updatePriorityOfScreenView)
- [Discard changes - /screenViews/discardChanges/{screenViewId}/{screenViewVersion}](https://hub.synerise.com/api-reference/campaigns#operation/discardChanges)
- [Delete screen view version - /screenViews/single/delete/{screenViewId}/{screenViewVersion}](https://hub.synerise.com/api-reference/campaigns#operation/deleteSingleScreenView)
## Q&A
### 1 How to create a screen view?
The only difference in the processes before and now is the possibility of selecting a document group.
If you create a new screen view, you must complete the following steps (these steps are also required when you edit an existing document):
1. Define the recipients of the screen view campaign.
2. Select documents to be included in a screen view campaign and define priority of the screen view.
Instead of selecting documents one by one, you can select a document group to include all documents assigned to a particular group.
3. Schedule the activity time (when this document will be visible) of the document.
### 2 How to make my existing screen views work as previously?
The core logic of screen views remains the same - screen views display the contents of documents you select for the selected recipients at the selected time. If you're happy with the settings of your published screen views, you don't have to do anything.
If you want to edit activated and draft screen views or create new ones, you can't create many versions of a screen view, you must assign a screen view to a category (feed), and you can either select documents for the campaign based on a group (document category) or you can select individual documents.
### 3 What will happen to existing screen views?
- screen views which were previously in a draft state will:
- receive the **Draft** status
- be assigned to the `Global Default` feed
- have the **Schedule** section blank
- the published screen views:
- the latest version of the published screen view will be set to **Active**, previous versions will be deleted
- published screen views will be assigned to the `Global Default` feed
- audience settings, priority, content, and schedule settings will remain unchanged
- screen views which are published with the date at the future will receive the **Paused** status and will be resumed to the **Active** state at the scheduled date.
- expired screen views will be deleted
# Dashboard
In the Dashboard view of **Experience Hub**, you can view the number of sent messages in the following channels: email, SMS, web push, mobile push, and website (dynamic content and landing pages). You can view data for the last 30 days, last 7 days, the current day, and about scheduled messages for the near future.
## Channels
---
In this section, you can view the number of sent messages and activated web content such as dynamic content and landing pages in the last 30 days. This lets you quickly assess the message activity within the last 30 day and identify the most active channels. It also provides insights for scheduling future customer communication for which you can use the [marketing calendar](/docs/campaign/marketing-calendar).
Overview of message numbers in every channel in last 30 days
## Active hours
---
Out of service
## Recent
---
This section provides a list of messages sent in the last 7 days.
The number of campaigns sent within a channel
## Sent today
---
This section provides information on the number of campaigns sent within a specific channel in the past 24 hours. The chart displays the count of campaigns sent in that channel and excludes channels where no campaigns were sent.
The value for `Series [number]:` is the number of campaigns you sent within the channel.
The number of campaigns sent within a channel
## Upcoming
---
This section provides a list of campaign names which are scheduled in the next 10 days (campaigns cannot be scheduled for more than 10 days in the future, because Synerise operates best on real-time data).
The list of scheduled campaigns
# Introduction to dynamic content campaigns
Dynamic content is a feature that adjusts the content of your website to the preferences of the visitor.
The scope of personalization depends on the variety of data you have about the visitors to your website. Basic data, such as first name, date of birth, location gives you scope to display the content on your website as if it was prepared for a particular visitor on the word level. A good example of such personalization is using the visitor names in greetings.
This feature, however, can be used for more advanced personalization, as it can include product recommendations or display the data based on the analyses you can create in Synerise such as the number of collected loyalty points.
You can dedicate specific campaigns for [segments](/docs/analytics/segmentations) of customers based on behavioral data, their activity on the website, and so on.
## Requirements
---
A tracking code implemented into your website.
## Business benefits
---
- Connecting on a personal level with your customers
- Increasing the engagement of visitors
- Improved lead conversion
- Easy and simple content management on your website
- You can view the change history for this item from its configuration - see [Audit Log](/docs/settings/workspace/audit-log).
## Dynamic content statuses
---
The status of dynamic content is available on the list of dynamic content. In the [Communication statuses](/docs/campaign/statuses) article, you can check the statuses which can be assigned to dynamic content.
# Creating landing pages
A landing page is a destination where users are directed after clicking a link, such as in an email or a Facebook ad. It can function as an independent website with valuable information or as a microsite within a larger web domain. These pages are indispensable tools in promotional campaigns aimed at showcasing specific products or services.
Using landing pages unlocks extensive multichannel engagement possibilities, enabling you to share links in emails, SMS, mobile push notifications, and more to drive traffic, generate leads, promote offerings, and boost brand visibility and customer interaction.
### Feature overview
- **Personalization**: You can use [inserts](/developers/inserts/insert-usage) both in landing page content (in all template builders) and in configuration sections in the form (for example, in the URL, SEO, and Customize sections). This lets you incorporate Synerise objects such as recommendations, vouchers, promotions, metric, aggregates, expressions or customer attributes in a landing page to personalize its content.
- **User-friendly template configuration**: You can create user-friendly [configuration forms for landing page templates in the code editor](/docs/campaign/landing-page/creating-landing-page-templates/landing-page-template-builder). This lets non-developer users modify the design of the template.
- **Tracking traffic**: By default, Synerise tracks the following events in landing pages:
- [`landingpage.visit`](/docs/assets/events/event-reference/landing-page#landingpagevisit)
- [`landingpage.renderFail`](/docs/assets/events/event-reference/landing-page#landingpagerenderfail)
To maximize the effectiveness of your landing pages, you can additionally implement the tracking code in one of the steps in the configuration form (instructions are available in ["Customizing landing page" section](#customizing-landing-page) in this article).
Click to see advantages of adding a tracking code to your landing page
Website interaction events will be generated on the profile of the customer who visits the landing page; this will let you track user sessions and analyze their duration, you will have information about the page that the user was on before visiting the landing page, and so on.
Access to context management for rendering Jinjava on the landing page (for example, if a customer submits a form on a landing page, the customer context will reset like it does on the webpage in which the Synerise JS SDK implemented). You can read more about customer context in the "Establishing customer context" section.
- **Visitor tracking control**: You can [disable personalization and collecting events for the visitors who disabled tracking in their browsers](#disabling-tracking).
- **Domain configuration options**: You can choose one of the following landing page domain configurations:
- You can create a landing page **under Synerise's domain** - in such case, the address of the landing page will contain `.snrpage`, for example: `yourdomain.snrpage.com`, there are no requirements for this configuration;
- You can create a landing page **under your own domain** - in such case, you must meet [these requirements](#requirements-for-custom-domains)
## Requirements for custom domains
---
If you want to publish a landing page within your own domain, you must:
- Send the SSL certificate or give an approval for generating a certificate through Let's Encrypt.
- Configure DNS - add the `CNAME` record. Depending on the cloud where your workspace is hosted:
- for Microsoft Azure EU, set the CNAME to `lp.synerise.com`
- for Microsoft Azure USA, set the CNAME to `lp.azu.synerise.com`
- for Google Cloud Platform, set the CNAME to `lp.geb.synerise.com`
- If you want to provide your own certificate, make sure it is in `X.509` format and you must provide a private key.
- Submit a customer service request for configuring your domain in Synerise and adding this domain to the [**Domain**](#domain) dropdown list available in the configuration form of the landing page.
## Establishing customer context
---
Customer context is crucial for content personalization on landing pages. Depending on how much information we have about the visitor of a landing page, we can adjust the content accordingly and train our AI models on the basis of the customer's behavioral history.
Identification of a customer is based on the `snrs_uuid` cookie, which stores the visitor's UUID. If the cookie exists when the customer visits the landing page, the stored UUID is used as the context for rendering Jinjava. If the cookie doesn't exist, Synerise generates a new UUID as the context for Jinjava rendering, creates a new anonymous profile in CRM, and sets the `snrs_uuid` cookie in the browser.
The customer context (the value of `snrs_uuid` cookie) may be established or changed in various circumstances. You can do it by:
- **Retrieving UUID from an existing cookie** - When a visitor enters a landing page with the `snrs_uuid` cookie set in the browser, the UUID is used as the context for the landing page.
- **Example 1**: A user visited `example-domain.com` and received a UUID. In the same browser, the user entered a landing page `offer.example-domain.com` (a landing page created within the custom domain). As the cookie is shared between domain and subdomain, during the visit to the landing page, the cookie with UUID is used as the context for the landing page.
- **Example 2**: A user visited `example-domain.com` and received a UUID. In the same browser, the user entered a landing page `offer.example-domain.snrpage.com` (a landing page created within the Synerise domain). These two domains are different, so a new UUID is generated and saved in a cookie.
In this scenario, to address potential customer anonymity on the landing page, we strongly recommend adding the UUID in the landing page link as described below.
- **Passing UUID in the landing page link** - By passing the UUID in the landing page link, you can be sure that its content will be rendered exactly for the customer who is redirected there from a different channel or a different domain, for example when sending a mobile push or SMS with the link to personalized offer on a landing page.
- To pass UUID in the link to the landing page, you can:
- include a `snrs_cl` parameter in it and use an insert: `https://your.landingpage.com?snrs_cl={{customer.uuid}}`. The example link to a landing page above includes an [insert](/developers/inserts/insert-usage#customer-attributes) which retrieves UUID of a user.
- by inserting the link using `{% preparelink %}YOUR_LANDING_PAGE_URL{% endpreparelink %}` tags which automatically adds the `snrs_cl` parameter to the link.
Passing UUID in the link is particularly recommended for landing pages whose content is personalized and it is created within the Synerise domain.
- The UUID specified in the URL parameter always takes priority. Even if a cookie containing the UUID is present in the browser, it will be replaced by the UUID included in the URL parameters, which serves as the context for rendering Jinjava. This overwriting process is exclusive to the landing page domain (for example, `offer.example-domain.snrpage.com`), while cookies stored for the main domain (`example-domain.com`) remain unaffected.
## Creating landing pages
---
1. Go to **Experience Hub > Landing Pages > Create new**.
2. Enter the name of the landing page for the purposes of identifying the landing page on the list of landing pages.
3. Create a landing page according to the instructions in this article:
- [Create content of landing page](#create-content-of-landing-page)
- [Schedule the display](#schedule-the-display)
- [Adjust SEO](#adjust-seo)
- [Define landing page URL](#define-landing-page-url)
- [Customize landing page with JS scripts and CSS](#customizing-landing-page)
4. To:
- save and publish your landing page, click **Publish**.
- save your work for later, click **Save as draft**.
The status of a landing page is available on the list of landing pages. In the [Communication statuses](/docs/campaign/statuses) article, you can check the statuses which can be assigned to landing page.
### Create content of landing page
---
To create content for your landing page or select the template:
2. In the **Content** section, click **Define**.
3. Click **Create message**.
**Result**: You are redirected to the template library.
4. You can:
- Select the existing template for your landing page.
- Use the ready-made template from the **"Predefined templates"** folder.
The example template library with the Predefined templates folder
- Create a new one by clicking **New template**. Then, you can select one of the following template builders:
- [Code editor](/docs/campaign/landing-page/creating-landing-page-templates/landing-page-template-builder)
- [Basic drag&drop builder](/docs/campaign/landing-page/creating-landing-page-templates/landing-page-basic-drag-and-drop)
- [Advanced drag&drop builder](/docs/campaign/landing-page/creating-landing-page-templates/landing-page-advanced-drag-and-drop)
5. After you complete the template, in the upper right corner, click **Use in communication**.
6. To confirm the content for the landing page, in the **Content** section, click **Apply**.
### Schedule the display
---
In this part of the process, you can decide when your landing page will be active.
1. In the **Schedule** section, click **Define**.
1. From the **Timezone** dropdown list, choose the time zone that will serve as a reference point while selecting the start and end date of a landing page.
2. In **Start date**, decide when the landing page will be launched.
- **Immediately** - The landing page will be available immediately after publishing it.
- **Scheduled** - You can select the exact date and time of launching the landing page. After finishing the configuration of the landing page, you must publish it, so it can be visible at selected time and date.
3. In **End date**, decide when the landing page will expire.
- **Never end** - The landing page will be available all the time until you manually stop it.
- **Select date** - You can select the exact date and time of the landing page expiration.
4. Optionally, in **Type of period**, you can narrow down the display of the landing page to selected time of the day, week or month. You can use one period type at a time.
5. After configuring settings in this section, click **Apply**.
### Adjust SEO
---
In this part of the process you can define technical details concerning search engine optimization and increase the chances of placing high in search results.
1. In the **SEO** section, click **Define**.
1. In **Page title**, enter the title of the landing page. It will be displayed on the browser tab.
2. In **Description**, enter the description of your landing page. This description will be visible in the results of search engines under the title of the website.
3. To display this landing page in search results in web search engines, enable the **Index this page** toggle.
4. In **Advanced options**, to make the landing page responsive, add the following metadata:
The data added in this field will be added to the website's `` element.
### Define landing page URL
---
In this part of the process, define the URL address of your landing page.
By default, the landing page will be published within the Synerise domain (example format: `www.example.snrpage.com`). If you want to use your domain, you must meet the [requirements](#requirements-for-custom-domains).
1. In the **URL** section, click **Define**.
1. From the **Domain** dropdown list, select the address of your landing page. The list already contains the URL to your landing page.
- If you're creating a landing page on the Synerise domain, the value you entered in the **Workspace subdomain** field in **Settings > Workspace Details > Basic info** is part of the URL.
- If you're creating a landing page on the custom domain, the URL will be available on the list provided you met [the requirements](#requirements-for-custom-domains).
2. Optionally, if you want to add a part to the address after the domain, in **Nice URL** provide this part, for example, `dresses-and-skirts` (don't use a slash, it is added automatically).
3. In **URL for redirecting users when the landing expires (optional)** enter the URL to which you will redirect users after the landing page expires.
4. Optionally, in **Fallback URL** enter the URL to which users will be redirected if your landing page is unavailable due to errors (for example, when it can't be rendered due to Jinjava syntax error). If you leave this field empty, users will be redirected to a generic error page.
4. In **URL preview**, you are provided with a final link to your landing page. The preview is in real time, so if you fill a domain or URL, you get the preview of the address simultaneously.
5. Confirm the settings by clicking **Apply**.
### Disabling tracking
---
Optionally, you can disable tracking and personalization on your landing page for visitors who did not agree to tracking. You can only use this option if you implemented a Do Not Track mechanism. It involves the implementation of a cookie that must be stored in the browsers of visitors who rejected cookie consent. When the cookie is detected, the landing page is generated for an anonymous visitor, preventing the creation or updating of profiles, as well as the generation and storage of events and UUIDs in the system.
To disable tracking on a landing page, in the **Custom cookie name** field, enter the name of the cookie that indicates the Do Not Track setting.
### Adding HTTP headers
---
In this part of the process, you can add custom HTTP headers to your landing page. In the **HTTP headers** section, in **Key** and **Value** fields, enter a header and its value, respectively.
### Customizing landing page
---
In this part of the process, you can add CSS and scripts to your landing page. You can define the URLs to external sources or paste the snippets in this section.
In the JS section under the **Advanced options** option, to enable tracking users on your landing page, you can paste the [tracking code](/developers/web/installation-and-configuration#adding-the-tracking-code-to-your-site).
1. In the **Customize** section, click **Define**.
1. In **External URL for CSS**, enter a URL link your external source with CSS.
2. In **External URL for JS**, enter URL to your external source with JS.
3. If you want to use of specific icons, in **Favicon URL**, enter URL to the source with favicons.
4. In the JS section under the **Advanced options** option, to enable tracking users on your landing page, you can paste the [tracking code](/developers/web/installation-and-configuration#adding-the-tracking-code-to-your-site).
5. Confirm the settings by clicking **Apply**.
## Versioning landing page
---
Versioning only applies to published landing pages. The system doesn't save versions of landing page drafts.
In this part of the process, you can:
- preview current or earlier versions of your landing page. For the preview of current version of the landing page, you get the preview in a context of a customer or you can generate a preview for an anonymous customer. It's not possible for preview of older versions.
- create a new version of the existing landing page
### Previewing current version
1. On the top bar, click **Preview**.
2. On the pop up:
- to generate a preview for a specific customer, from the **Customer Context** dropdown, select a customer and confirm by clicking **Apply**.
- to generate a preview for an anonymous customer, click **Preview for anonymous**.
### Previewing older versions
1. On the top bar, click icon.
2. On the sidebar, find the version which you want to get the preview of.
3. Click .
4. From the dropdown list, select **Preview**.
### Creating new version
1. On the list of landing pages, select a published landing page.
2. On the top bar, click the field with the version.
3. On the list of versions, click icon on the version that you want to create another version from.
4. From the dropdown list, click **Edit**.
# Introduction to emails
Email is one of the most popular channel of communication with customers. The adventure begins with a customer sharing their email address and giving a consent to receive emails that contain marketing content. After that you can send emails with content personalized to each individual.
The content of the email can consist of something more than words. The various data collected by Synerise can be reused in various emails for personalization purposes, so you can make the recipients feel that the message is really directed at them. You can inject such data into emails with [snippets](/docs/assets/snippets).
## Business benefits
---
- The users can use this feature for the following and similar business case scenarios:
- Sending emails with abandoned carts
- Sending birthday emails
- Sending discount emails after the price of the product seen by a customer is reduced
- Sending product recommendations (last viewed products, personalized offers, visually similar products)
- Sending emails with coupons
For more use cases check our [library](/use-cases/)
You can view the change history for this item from its configuration - see [Audit Log](/docs/settings/workspace/audit-log).
## Requirements
---
To be able to make use of this marketing channel in Synerise, you must:
- [Create, configure and confirm an account](/docs/campaign/e-mail/configuring-email-account) from which emails will be sent
- [Configure single or double-opt ins](/docs/settings/configuration/newsletter-sign-up)
- Have customers who gave email marketing agreements
- [Configure communication limits](/docs/settings/configuration/campaign-limits)
## Creating email flow
---
1. Define the recipients of the email.
2. Prepare content of the email (email templates, images, attatchments, and so on).
3. Schedule the email.
4. Define the UTM parameters.
The flow of creating emails is similar for other types of messages as well.
## Sending emails
---
Emails can be sent in two ways:
1. Automatically by using [Automation Hub](/docs/automation). In response to customer activity, update of profile data, or other events (check the list of [triggers](/docs/automation/triggers) that start a workflow), an email can be sent to customers.
2. Manually by clicking the **Send** button while creating an email.
## Email status
---
The status of email communication is available on the list of emails. In the [Communication statuses](/docs/campaign/statuses) article, you can check the statuses which can be assigned to email communication.
# Introduction to screen views
A screen view campaign is used to show [document](/docs/assets/documents)-based content in a mobile application. This way, you can build entirely personalized visual layer of your mobile application in Synerise and measure the effects of your marketing strategies in the Mobile channel by analyzing events generated as a result of user interaction with screen views campaign.
You can use document groups to create an organized library of documents. When a document is added to a group, it's automatically included in all screen view campaigns that use the group.
## Terminology
---
- **Screen view feed** - It is a category a screen view can be assigned to. For example, it can define a space in a mobile application it is dedicated to.
- **Group** - It functions as a tag/category for organizing [documents](/docs/assets/documents/whats-new).
## Process
---
The process of creating a screen view invlovles:
- Selecting the audience of the screen view
- Assigning a screen view to a feed
- Selecting documents for a screen view campaign by:
- manually selecting documents from a list of documents
- selecting document groups to include all documents assigned to a particular group
- Managing screen view structure
- By default, the screen view consists only of documents which you select, however, you may customize its structure by adding other elements such as descriptions, images, content created in Synerise (such as promotions, recommendations, analyses), and so on.
- When you select groups of documents, you can preview the list of documents in selected groups
- You can go to the details of the selected documents
## Requirements
---
- Implement a tracking code into the website.
- Create a Profile [API key](/docs/settings/tool/api) that has the following permissions:
- from the **Schema** permission group:
- `SCHEMA_SERVICE_SCHEMA_CREATE`
- `SCHEMA_SERVICE_SCHEMA_READ`
- from the **Document** permission group: `SCHEMA_SERVICE_DOCUMENT_READ`
- [Create segmentations](/docs/analytics/segmentations/creating-segmentations) (optionally).
- [Create documents](/docs/assets/documents/creating-documents).
## Business benefits
---
- Managing the audience of the documents
- Creating content dedicated to specific customer groups in a mobile application
- Building the visual layer of the mobile applications based on screen view campaigns
- Measuring the effects of marketing strategies implemented by means of screen views
- You can view the change history for this item from its configuration - see [Audit Log](/docs/settings/workspace/audit-log).
## Screen view statuses
---
The status of screen views is available on the list of screen views. In the [Communication statuses](/docs/campaign/statuses) article, you can check the statuses which can be assigned to screen views.
# Introduction to in-app messages
In-app messages allow you to display any creation in a mobile application. This feature allows you to implement use cases such as abandoned cart, discount codes, or any information campaign, such as application update.
In contrast to push notifications which are sent (pushed) to the app user by Synerise, in-app messages are requested (pulled) by the user's device through Synerise mobile SDK. Thanks to this, you can design your mobile application to request and show notification precisely when you need to, making them more reliable in some scenarios than push notifications. Combining this with the capabilities of [segmentations](/docs/analytics/segmentations) and Decision Hub that allow you to measure the performance, in-app messages can be targeted better and more effective.
## In-app messages vs push notifications
---
| In-app messages | Push notifications |
|---------------------------------------------------------------------------------------------------|---------------------------------------------------------------|
| In-app messages are fetched to a device by using the SDK, but Firebase integration is needed for testing. | Firebase integration is required |
| In-app messages are displayed right after occurrence of a triggering event | The message is delivered as a push notification and the time of deliverability is dependent on Firebase |
| User's agreement is not required | A user's agreement is required |
| One in-app message can be displayed at a time | Push notifications are aggregated in the notification center |
| The possibility of full layout customization using HTML and CSS | Lack of HTML and CSS customization support |
| Support personalization (Jinjava) | Support personalization (Jinjava) |
## How it works
---
In-app messages are fetched:
- when the application is launched,
- after refresh of in-app definitions that occurs every 10 minutes by default,
- when the customer context changes (for example, a user logs in/logs out, UUID changes)
When a mobile application user performs an activity which triggers an in-app message, then the message is displayed.
The mobile application can display only 1 in-app message at a time. The selection of the in-app message to display is based on:
- the [priority assigned to the message](/docs/campaign/in-app-messages/create-inapp-message#priority)
- the [time windows](/docs/campaign/in-app-messages/create-inapp-message#schedule-the-message-display) a message is scheduled to display (if any are set)
- [limits](/docs/campaign/in-app-messages/create-inapp-message#frequency) established for a particular in-app message to not upset app users
The rest of the in-app messages which overlap are stored in the memory. They can be displayed if triggered.
## Key information
---
- In-app messages are fetched and kept by SDK for 6 hours. Because of this, when you stop the communication, customers may still see the message until in-app messages are fetched again and refreshed by the SDK
- If your mobile application is a single-activity application, an in-app message is displayed after switching between the screens in the application.
## In-app types
---
In Synerise, you can display your in-app messages in the following ways:
- **Top bar** - In-app messages are shown at the top bar of the application, and user interaction is limited to the area below the message.
- **Bottom bar** - In-app messages appear at the bottom bar of the application, with user interaction restricted to the area above the message.
- **Fullscreen** - In-app messages are displayed in the center of the mobile application, with no clickable elements within the application.
These display options are selectable in the [in-app template builders](/docs/campaign/in-app-messages/creating-inapp-templates).
## Requirements
---
- Recommended Mobile SDK version:
- Android - 5.3.0 or newer
- iOS - 4.12.0 or newer
- React Native - 0.12.0 or newer
- Flutter - 0.5.0 or newer
- If your in-app content (such as JavaScript, CSS, images, or fonts) is being loaded from your own server via HTTP and you have configured **CORS policies**, you need to set the **contentBaseUrl** to your server's address. For example, if you're loading resources from `https://www.synerise.com/example/font.woff`, you should configure **contentBaseUrl** to `https://www.synerise.com` (check this option in the [Settings](/developers/mobile-sdk/settings#content-base-url-for-in-app-message)).
- Enable the `IN_APP_DEFINITIONS_COMMUNICATION_READ` (**Experience Hub**) permission in the Profile (formerly Client) [API key](/docs/settings/tool/api) used by the mobile application so the mobile application can fetch in-app messages.
The API key permission matrix with the in-app permission
- **Inline** in-apps with automatic or on-demand trigger: create an `InlineInAppView` using the SDK and embed it in your app's UI. The placement key used in the SDK must match the one configured in the campaign.
## Events generated by in-app messages
---
Interaction with in-app messages generates the following events. Based on these events, you can create analyses to measure the performance of in-app messages.
See [In-app Mobile Campaigns section in the Event Reference](/docs/assets/events/event-reference/default-events#in-app-mobile-campaigns).
## In-app message status
---
The status of in-app messages is available on the list of in-app messages. In the [Communication statuses](/docs/campaign/statuses) article, you can check the statuses which can be assigned to in-app messages.
## Statistics
---
On [the list of the in-app messages](https://app.synerise.com/communications/in-app), you can find basic statistics on in-app performance such as:
- the number of times an in-app message has been displayed,
- the number of clicks in the links in an in-app have been clicked,
- Click-Through Rate (CTR)
You can create more advanced analyses in Decision Hub using the [events generated by in-app messages](/docs/campaign/in-app-messages/introduction-to-inapp-messages#events-generated-by-in-app-messages).
# Dynamic Content
Web dynamic content is a feature that adjusts the content of your website to the preferences of the visitor.
The scope of personalization depends on the variety of data you have about the visitors to your website. Basic data, such as first name, date of birth, location gives you scope to display the content on your website as if it was prepared for a particular visitor on the word level. A good example of such personalization is using the visitor names in greetings.
This feature, however, can be used for more advanced personalization, as it can include product recommendations or display the data based on the analyses you can create in Synerise such as the number of collected loyalty points.
You can dedicate specific campaigns for [segments](/docs/analytics/segmentations) of customers based on behavioral data, their activity on the website, and so on.
## Requirements
---
A tracking code implemented into your website.
## Business benefits
---
- Connecting on a personal level with your customers
- Increasing the engagement of visitors
- Improved lead conversion
- Easy and simple content management on your website
## Contents
# Creating landing page templates
In Synerise, you can create a landing page template in the following editors: code editor (allows you to create a landing page template with the possibility to edit it with a user-friendly configuration form) and drag & drop builders.
# Creating in-app message templates
In Synerise, you can create an in-app template in two types of editors: code editor (allows you to create an in-app template as a user-friendly configuration form) and drag & drop builder provided by BeeFree.
# Creating dynamic content templates
In Synerise, you can create a dynamic content template in two types of editors: code editor (allows you to create an email template as a user-friendly configuration form) and drag & drop builder provided by BeeFree.
# Configuring sender accounts
In order to send emails from Synerise, you must create a sender account.
The process requires the following actions:
1. Outside Synerise:
1. [Create an email account within a domain](/docs/campaign/e-mail/configuring-email-account#setting-up-and-email-account).
2. [Add DNS entries](/docs/campaign/e-mail/configuring-email-account#add-dns-to-your-domain).
3. If you don't have your own SMTP, decide which one to choose.
Simple Mail Transfer Protocol (SMTP) is responsible for moving your emails on and across IP networks that are typically only used for sending messages to a mail server for relaying. It's an internet standard for email transmission and it works closely with Mail Transfer Agent to send your emails to the right email inboxes.
2. Inside Synerise application:
1. [Select SMTP provider](/docs/campaign/e-mail/configuring-email-account#select-smtp-providers-in-synerise).
2. [Enable integration with an email provider in Synerise](#enable-integration-with-email-provider-in-synerise).
3. [Create a sender account](/docs/campaign/e-mail/configuring-email-account#configure-a-sender-account).
## Setting up and email account
---
Create an inbox within any domain.
## Add DNS to your domain
---
It is your responsibility to make sure the domain you use is safe and protected by adding the DNS entries which ensure satisfying email deliverability.
**WHY?** These entries allow mail clients to verify that you are the real sender of the message. Messages with those headers may be blocked or treated as spam. This is a widely accepted standard.
Before moving on to the further parts of the article, get to know the terms *header from* and *envelope from*. Header from (1) is an email address from which an email is sent, whereas envelope from (2) indicates a domain from which the email is sent (it can be a domain of a bulk mailing vendor or third party affiliates).
Examples of header from and envelope from in a Gmail inbox
There are three types of entries which must be added in the given order:
### SPF
Sender Policy Framework (SPF) must be added regardless of using a shared or your own SMTP. It is considered to be the standard of authorization. The recipient's mail server checks whether the sender's IP is authorized to send emails with a domain in `envelope from`. The list of the allowed IP addresses is included in the domain's DNS record.
For users of EmailLabs (sub-account of Synerise's main account)
If you are not sure about the region your EmailLabs sub-account belongs to, contact the Synerise support. Then, follow the procedure with regard to SPF configuration at the links below:
### DKIM
Domain Keys Identified Mail (DKIM) is:
- recommended when you use your own SMTP
- required if you want to comply with the [Gmail and Yahoo! authentication requirements (as of February, 2024)](#compliance-with-gmail-and-yahoo-authorization-restrictions)
An element of the email is encrypted with a private key. The other key, which is public, is contained within the domain an email is sent from. The recipient's mail server matches the public key with the private one. If the keys match, the email is verified as genuine.
For users of EmailLabs (sub-account of Synerise's main account)
The links below redirect to the instructions on adding the standard DKIM keys. If you want to comply with Gmail and Yahoo! authorization restrictions, add the standard keys and generate custom DKIM for your domain.
If you are not sure about the region your EmailLabs sub-account belongs to, contact the Synerise support. Then, follow the procedure with regard to DKIM configuration at the links below:
#### Compliance with Gmail and Yahoo! authorization restrictions
From February 2024, Gmail and Yahoo will implement new authentication requirements that enforce usage of:
- standard DKIM keys
- custom DKIM for your domain
- reinforced [DMARC](#dmarc).
#### How to generate custom DKIM for your domain?
- You can generate it on your provider's account.
- If you use EmailLabs as an SMTP provider which isn't a sub-account of Synerise's main account, you can generate keys in **Admin > Sender Authorization**
- If you have a sub-account of Synerise's main account in EmailLabs, to generate the keys, contact Synerise support.
#### I only have standard DKIM keys but I want to comply with Yahoo! and Gmail restrictions
- If you use a provider other than EmailLabs: Consult the documentation of your SMTP provider to check how to generate custom DKIM for your domain.
- If you use EmailLabs: generate custom DKIM keys in **Admin > Sender Authorization**, add the key and the standard keys to your DNS.
- If you use EmailLabs (a sub-account of Synerise's main account), contact Synerise support.
### DMARC
Domain-based Message Authentication (DMARC) is recommended when you use your own SMTP. Based on the two previous entries (at least one of them must exist), it verifies the domain. To be compliant with Gmail and Yahoo! authorization standards as of February, 2024, it is necessary to implement DMARC.
After adding DNS entries, you must wait at least 24 hours before sending emails because the processing of these entries takes time. Depending on your provider, this may take up to 72 hours.
## Select SMTP providers in Synerise
---
The full list of emails providers in Synerise is available at [Integrating email providers](/docs/settings/tool/integrating-email-providers).
## Enable integration with email provider in Synerise
---
You can find instructions how to enable integration with a provider in Synerise in the "Enabling integration" section of each article available in [Integrating email providers](/docs/settings/tool/integrating-email-providers).
After enabling the integration, proceed to step 1 in the [Configure a sender account](#configure-a-sender-account) section.
## Configure a sender account
---
A blank sender account form
#### Main account info
1. Go to **Settings > Email Accounts**.
2. Click **Add account**.
3. In the **Account name** field, enter the name of the account (it will be visible only on the list of sending accounts).
4. In the **From (email)** field, enter the email address from which emails are sent.
5. In the **From (name)** field, enter the name of the sender that is displayed in the recipient's inbox.
6. In the **Reply to (email)** field, enter the email address to which responses to newsletters will be delivered. [Dynamic values](/developers/inserts) are allowed in this field.
7. In the **Reply to (display name)** field, enter the name of the sender of email address to which responses are delivered. [Dynamic values](/developers/inserts) are allowed in this field.
8. In the **BCC email address** field, optionally enter the email address to send a blind carbon copy of every message sent through this account. [Dynamic values](/developers/inserts) are allowed in this field.
#### Unsubscribe configuration
1. In the **Unsubscribe configuration** section, you have the option to specify a custom resignation link in the **Resignation link** field. If a URL is provided, any customer visiting this link will have their email marketing agreement status automatically updated to opt-out. Resignation link must be embedded within the email message template using [predefined insert](/developers/inserts/email#adding-a-resignation-link).
This field is optional. If no resignation link provided, you can still embed an insert with the resignation link in your template. In such case, clicking the link will redirect customer to the default resignation page provided by Synerise.
2. In the **One-click unsubscribe** section, select the method of one-click unsubscription.
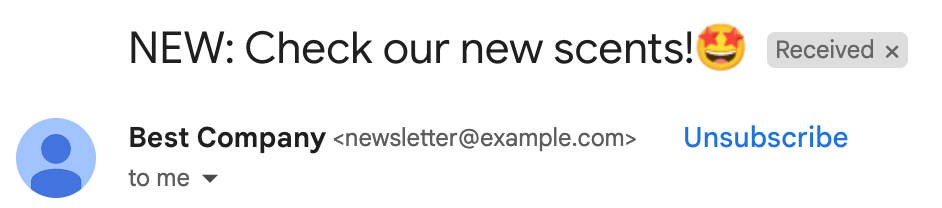
The one-click unsubscribe feature adds a button in an email, letting users easily opt out of a mailing list. The button may appear in the email or not, depending on the algorythms of email client. The button works because of adding the [list-unsubscribe header](/docs/campaign/e-mail/unsubscribe-link).
1. **Default method**: This option adds a header which handles URL and mailto methods and the email client chooses which will be used. Opting out is possible with just one click. You may optionally check the **Enable custom one-click method** box.
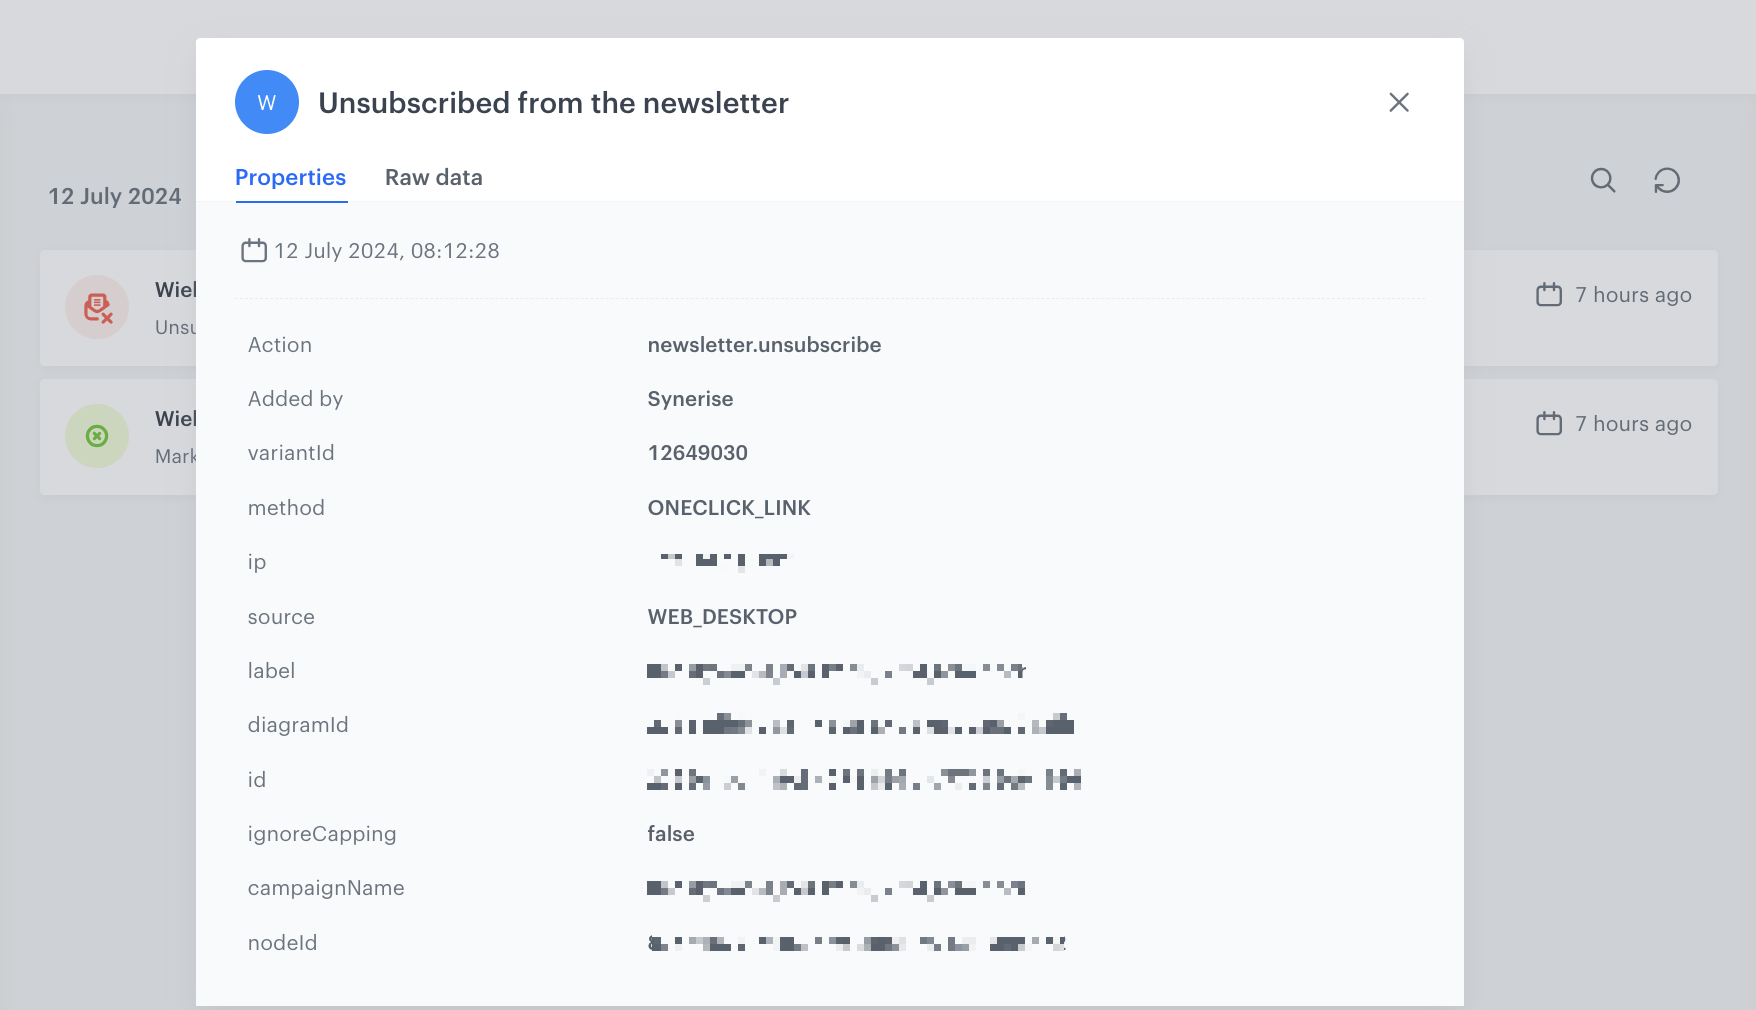
- When the box is unchecked, opting out automatically disables profile's email consent and generates a `newsletter.unsubscribe` event.
- When the box is checked, you are responsible for managing the delivery process of the unsubscribe information. The information about unsubscription isn't sent to Synerise automatically. To configure this option, enter both or one of the following fields:
- In the **List-Unsubscribe URL** field, enter the link that will be used to unsubscribe the customer when they click the button. You can use Jinjava in this field.
- In the **List-Unsubscribe mailto** field, enter the email address that will be used to send information about the unsubscription when the customer clicks the button. You can use Jinjava in this field.
2. **List-unsubscribe URL**: This option adds a header which only handles URL method. The customer is redirected to URL you provide for the confirmation after clicking the button. When choosing this option, you are responsible for managing the delivery process of the unsubscribe information. The information about unsubscription isn't sent to Synerise automatically. Verify both compatibility of this method with the providers you use and make sure which email clients support it.
Since this method is not supported by all email clients, choosing it may signifficatly lower your email delivery rate.
3. **Disable unsubscription (not recommended)**: This option disables one-click unsubscription in the email.
Choosing this method will significantly lower your email delivery rate. Verify the compatibility of this method with the providers you use (make sure if your provider doesn't add any one-click unsubscribe header on their side). Learn more about the sender requirements in the [Google documentation](https://support.google.com/a/answer/81126?hl=en#requirements-5k&zippy=%2Crequirements-for-sending-or-more-messages-per-day).
#### Mail provider
9. In the **Mail provider** section, select one of the options.
10. From the dropdown list, select an integration to use with this sender.
10. Confirm the settings by clicking **Save**.
**Result**: A confirmation email is sent to the email address in the **From(email)** field.
## Confirm the sender account
---
Go to your inbox and click the link in the confirmation email.
**Result**: The account is confirmed and can send messages. On the list of accounts, its status changes from **Awaiting confirmation** to **Confirmed**.
## Track hardbounces and softbounces
---
You can receive information about the bounces in the form of events. Based on these events, you can prepare statistics or exclude the email addresses from which you received a bounce message by defining conditions in a segmentation.
Example segmentation that excludes email addresses with all kind of bounces
The list of events:
| Event name | Description |
|-----------------------|-----------------------------------------------------------------------------------------------------------------------------------------|
| [newsletter.hardbounce](/docs/assets/events/event-reference/email#newsletterhardbounce) | The event is generated when the email is not delivered because an email address is invalid or the recipient blocked receiving emails. |
| [newsletter.softbounce](/docs/assets/events/event-reference/email#newslettersoftbounce) | The event is generated when the email is not delivered due to an overloaded inbox, server error, or email size. |
| [newsletter.spambounce](/docs/assets/events/event-reference/email#newsletterspambounce) | The event is generated when the recipient's email server recognized the message as potential spam. The email is rejected and **not saved**, even in the spam folder. |
| [newsletter.dropped](/docs/assets/events/event-reference/email#newsletterdropped) | The event is generated when the email is not delivered due to putting the email address from which the email is sent on the black list. |
To receive these events, refer to the "Tracking bounce events" section in each article in [Integrating email providers](/docs/settings/tool/integrating-email-providers).
# Introduction to mobile push notifications
Sending mobile push notifications offers plenty of benefits beyond merely delivering promotional content. These notifications serve as a powerful tool for providing users with valuable information, timely updates, helpful reminders, and captivating content, thus enhancing their overall app experience. By leveraging mobile push notifications, businesses can engage and connect with their users in a more personalized and impactful manner, increasing user engagement, retention, and satisfaction. Whether it's sharing important news, delivering personalized recommendations, or offering exclusive rewards, the versatility of mobile push notifications unlocks a wealth of opportunities to optimize the user experience and drive meaningful interactions.
In Synerise, you can use the following types of mobile push notifications:
- **Simple push** - a notification that is displayed in the notification center on mobile devices.
- **Silent push** - a hidden notification that is delivered to the app on a user's device. Unlike a typical push, it does not cause any interaction with the user. Silent notifications quietly deliver a certain set of data to the app. This is a great solution for letting apps know about changes in content.
The banner, first run message, mandatory upgrade, and walkthrough types of mobile push are deprecated. These types of messages can be sent using the [In-app messages](/docs/campaign/in-app-messages/introduction-to-inapp-messages) feature. You can use the ready-made templates which are available in the **Predefined templates** folder in **Experience Hub > In-app messages > Templates**.
## Anatomy of mobile push notification
---
A mobile push notification consists of the following elements:
Anatomy of iOS mobile push notification
| No. | Mobile push element | Function | Recommendations & possibilities |
|-----|----------------------|----------|-------------------------------------------|
| 1. | Mobile app icon | The icon of a mobile application | n/a |
| 2. | Title | This is the top text of your notification |- We suggest a 50-character limit to avoid being shortened, but the length depends on the OS - You can personalize the title using [inserts](/developers/inserts/webpush) and emojis |
| 3. | Time of notification | Displays how old the notification is. | n/a |
| 4. | Message | This is the main content of your notification | - We suggest a 100-character limit to avoid being shortened, but the length of the text vary across different OS - You can personalize the message using [inserts](/developers/inserts/webpush) and emojis |
| 5. | Image | On macOS, it serves as an expanded icon, while on Android, it acts as a custom image | - To use a large image in the notification, upload the image first in **Synerise > Data Modeling Hub > File** - You can personalize links to images by using Jinjava, this way an image will be different for every user, for example, you can display an image with recently seen product |
| 6. | Action buttons | They redirect users to a URL you indicate or to a view in a mobile application | - You can add up to 4 action buttons - You can personalize the text on the button by using [inserts](/developers/inserts/webpush) and emojis - You can add [inserts](/developers/inserts/webpush) to the URL and deep links |
## Examples of use
---
You can browse the collection of [mobile push notification use cases](/use-cases/?ordering=DESC&sortBy=publishDate&filters=channel%3D%3D%22mobile+push%22ORchannel%3D%3D%22mobile+application%22ANDtags%3D%3D%22mobile%22ORtags%3D%3D%22mobile+push%22).
## Requirements
---
- Enable the [Firebase integration](/docs/settings/tool/firebase).
- Configure mobile push notifications:
- [Android](/developers/mobile-sdk/configuring-push-notifications/android)
- [iOS](/developers/mobile-sdk/configuring-push-notifications/ios)
- [React Native](/developers/mobile-sdk/configuring-push-notifications/react-native)
- [Flutter](/developers/mobile-sdk/configuring-push-notifications/flutter)
- If you are going to attach images to your push notifications:
- Prepare images; you can use external links or [upload your images](/docs/assets/files-explorer#adding-new-files) in the Data Modeling Hub.
- **Android**: Follow the instructions [under this link](https://firebase.google.com/docs/cloud-messaging/android/send-image).
- **iOS**: Configure and implement [Notification Service Extension](/developers/mobile-sdk/configuring-push-notifications/ios#synerise-notification-service-extension) and [Notification Content Extension](/developers/mobile-sdk/configuring-push-notifications/ios#rich-media-in-push-notifications). According to your business needs, implement [Single media](/developers/mobile-sdk/configuring-push-notifications/ios#rich-media-in-push-notifications-single-media-implementation) and/or [Carousel](/developers/mobile-sdk/configuring-push-notifications/ios#rich-media-in-push-notifications-carousel-implementation).
- Implement URLs and deep links:
- [Android](/developers/mobile-sdk/campaigns/action-handling#handling-actions-from-campaigns-in-android)
- [iOS](/developers/mobile-sdk/campaigns/action-handling#handling-actions-from-campaigns-in-android)
- [React Native](/developers/mobile-sdk/campaigns/action-handling#handling-actions-from-campaigns-in-react-native)
- [Flutter](/developers/mobile-sdk/campaigns/action-handling#handling-actions-from-campaigns-in-flutter)
## Events related to mobile push notifications
---
Sending mobile push notifications to customers generates various types of events. These events can be triggered by both the customer's actions (such as clicking on the notification) and by the infrastructure (such as failed notification delivery). By analyzing these events, you can measure the effectiveness of your messages and their deliverability. Become familiar with:
- [default events associated with mobile push notifications](/docs/assets/events/event-reference/mobile-push)
- [default events associated with mobile push campaigns](/docs/assets/events/event-reference/mobile-communication)
## Mobile notification delivery flow
---
1. When a user opens the mobile application, a token is requested from Firebase Cloud Messaging (FCM). That token is passed on to Synerise to allow Synerise to authorize sending mobile push notifications to the user's device.
2. The push is sent to the user's device or devices with:
1. an active Firebase token
2. push notifications allowed in the device settings
3. After the push is delivered and displayed, or if the delivery fails, information about that is saved as an event. See [Mobile push events](/docs/assets/events/event-reference/mobile-push).
Overview of the process of sending a mobile push
### Conditions for sending and displaying mobile notifications
In order for mobile notifications to work, the following requirements must be met:
- The target profile must have an active marketing agreement for mobile push notifications.
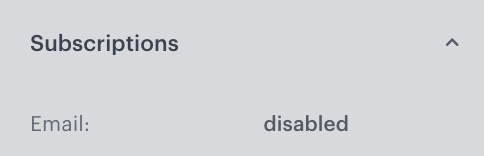
You can check this agreement in the lower-left corner of the profile card, under **Push**.
The Subscriptions section on a profile card
- The target profile must have the `snrs_has_mobile_push_devices` attribute set to `true`; the attribute sets to `true` when both of the following conditions are met:
1. The device allows push notifications (in the system settings).
Information about this is included in the [client.applicationStarted](/docs/assets/events/event-reference/web-and-app#clientapplicationstarted) event, under the `systemPushConsent` parameter. You can also find it on the profile card, in the **Identities** section:
The Identity section on a profile card
**Android 7.0 and above**: When the device doesn't allow push notifications, a [push.notView](/docs/assets/events/event-reference/mobile-push#pushnotview) event is generated after the push is sent.
2. The profile has an active Firebase Cloud Messaging (FCM) token.
A token is requested from FCM every time the mobile application is started.
The Audience filter for the push notification should check if the `snrs_has_mobile_push_devices` attribute in the profile is set to `true`. Without this filter, the audience size in the campaign's statistics is larger than the real number of profiles to whom the push is sent.
Synerise stores the last known FCM token. The notifications are only sent to the last device where the user opened the app.
**The token becomes invalid when**:
- The user opens the app on another device.
The new device receives a valid token and can receive push notifications.
- The user uninstalls/reinstalls the app. Synerise doesn't receive information about this.
To receive a new token, the user must open the app.
- The user clears the app data. Synerise doesn't receive information about this.
To receive a new token, the user must open the app.
- The token is inactive for 270 days.
From May 15, 2024 invalid tokens become expired. More information is available in [Google Firebase documentation](https://firebase.google.com/docs/cloud-messaging/manage-tokens#stale-and-expired-tokens).
**If the token in Synerise is invalid**:
1. A mobile push is sent, but can't be delivered to the device.
2. A [push.notRegistered](/docs/assets/events/event-reference/mobile-push#pushnotregistered) or [push.invalidRegistrationId](/docs/assets/events/event-reference/mobile-push#pushinvalidregistrationid) event is generated.
3. A token is removed from the [Identities table](/docs/crm/crm-profile#identities-and-identifiers).
3. If there are no more active tokens, the `snrs_has_mobile_push_devices` attribute in the profile is set to `false`.
For more information on FCM and tokens, see [Google documentation](https://firebase.google.com/docs/cloud-messaging).
### Common reasons for failed delivery
Using a large database of real profiles, we calculated that on average it takes 40 days for:
- the token to become invalid for any reason.
- the notification permissions for an app to be disabled on the device for any reason.
This is a rough estimate that may differ depending on the behavior of your mobile app users.
The following are the most common reasons for not delivering a push message:
- The profile doesn't meet the [conditions described above](#conditions-for-sending-and-displaying-mobile-notifications).
- The profile belongs to the control group.
In that case, a [push.controlGroup](/docs/assets/events/event-reference/mobile-push#pushcontrolgroup) is generated.
- Do Not Disturb mode on the device.
- Power saving settings on the device.
- The device stops your mobile application from running in the background.
- The mobile application was uninstalled.
- Other reasons; check the profile's activity history for the following events:
- [push.notSent](/docs/assets/events/event-reference/mobile-push#pushnotsent)
- [push.mismatchSenderId](/docs/assets/events/event-reference/mobile-push#pushmismatchsenderid)
- [push.invalidRegistrationId](/docs/assets/events/event-reference/mobile-push#pushinvalidregistrationid)
## Sending push notifications
---
There are two ways of sending mobile notifications in Synerise:
- Manually - If you want to send a one-off notification campaign to a predefined group of customers or an entire customer base, go to **Experience Hub > Mobile > Create new**. After filling out the campaign form, you can send it out to your customers.
- Using Automation Hub - If you want to send a one-off push notification campaign or automate sending push notifications (for example, in response to a customer behavior), go to **Automation Hub**. [Create a workflow](/docs/automation/creating-automation) and use the [Send Mobile Push node](/docs/automation/actions/send-mobile-push) in it.
## Notification status
---
The status of mobile push communication is available on the list of mobile push notifications. In the [Communication statuses](/docs/campaign/statuses) article, you can check the statuses which can be assigned to mobile push communication.
## Analyzing notification performance
---
You can analyze performance of your push notifications by creating analyses in the **Decision Hub** on the basis of [mobile push events](/docs/assets/events/event-reference/mobile-push).
You can view the change history for this item from its configuration - see [Audit Log](/docs/settings/workspace/audit-log).
# Testing dynamic content in the wizard
## Previewing dynamic content templates
The content of dynamic content may vary for each customer. You can check the preview of the dynamic content directly in the template builder or you can use the [Live preview](#the-live-preview-option) option to see how dynamic content looks on the target website.
### Preview in the template builder
1. Go to **Experience Hub > Dynamic Content >** **Templates**
2. Select the folder which contains the template you want to see the preview of.
3. Select the template.
4. To check the preview of the dynamic content for a particular customer or a product, on the upper left corner, click the **Preview contexts** button.
1. Enter the ID of a customer or a product.
2. Click **Apply**.
### The Live preview option
You can use the **Live preview** option in the [dynamic content template builder](/docs/campaign/dynamiccontent/creating-dynamic-content-templates/dynamic-content-template-builder) to preview the dynamic content on the target website. You don't have to activate the dynamic content and additionally, you can share the preview with other users.
The **Live preview** option works only for websites which have a [Synerise tracking code](/developers/web/installation-and-configuration#creating-a-tracking-code) implemented into their source code. This preview option generates a link to your website with unique parameters that enable you to see the template. When you access this link, you can only see the dynamic content template you're previewing, other dynamic content campaigns which are active at the time will not be rendered. The link is active for 3 hours during which all the changes applied to the template in the platform will be synchronized. However, any change to the template in the platform requires refreshing the website with the template preview.
1. Go to **Experience Hub > Dynamic Content >** **Templates**.
2. Select the folder which contains the template you want to see the preview of.
3. Select the template.
4. At the top of the website, click **Live preview**.
**Result**: A pop-up appears.
5. Select the dynamic content type:
- **Insert Object** - Dynamic content will be presented as an inserted object into the website code, so it can take the form of a frame, a banner, and so on.
- **Web layer** - Dynamic content will be presented as a layer on your website, for example a pop-up.
6. Follow the procedure according to your choice of dynamic content type:
1. In the **Website URL** field, enter the URL of the website on which you want to preview the dynamic content.
It must be a website with a [Synerise tracking code](/developers/web/installation-and-configuration#creating-a-tracking-code) implemented.
2. Optionally, from the **Customer context** field, select the identifier (for example, an email address, customer ID, and so on) based on which you will indicate a visitor for whom the preview will be generated and enter the value of the identifier.
If you omit this field, the preview will be generated for the UUID stored in the `snrs_uuid` cookie.
1. In the **Website URL** field, enter the URL of the website on which you want to preview the dynamic content.
It must be a website with a [Synerise tracking code](/developers/web/installation-and-configuration#creating-a-tracking-code) implemented.
2. In the **CSS selector** field, define where the object will be inserted into the website code.
3. Optionally, from the **Customer context** field, select the identifier (for example, an email address, customer ID, and so on) based on which you will indicate a visitor for whom the preview will be generated and enter the value of the identifier.
If you omit this field, the preview will be generated for the UUID stored in the `snrs_uuid` cookie.
7. Preview the output:
- To open the preview in the browser and share it with other people:
1. Click **Check live preview**.
2. Copy the URL of the preview page from your browser and send it to others.
- To open the preview on a mobile device:
1. Click **QR code link**.
2. Scan the generated QR code on your mobile device and open the page.
The link is active for 3 hours during which all the changes applied to the template in the platform will be synchronized.
# Creating screen views
Select [documents](/docs/assets/documents/introduction-to-documents) to be displayed in the mobile application for the defined audience.
If you are a regular user of the screen view feature, you may want to see a comparison of the new and previous version of the feature to understand what has changed with regard to your existing screen view campaigns. Read the summary of the changes [here](/docs/campaign/screen-views/whats-new).
## Requirements
---
A complete list of requirements is available in [this article](/docs/campaign/screen-views/introduction-to-screen-views#requirements).
## Creating a screen view
---
1. Go to **Experience Hub > Screen views > Create screen view**.
2. Enter the name of the screen view.
### Selecting recipients
---
4. To define the recipients of your screen view, in the **Audience** section, click the **Define** button. You can choose the audience in the following ways:
- You can select all mobile application users to be the audience of your screen view by clicking the **Everyone** option.
- You can choose segmentations of your customers by clicking the **Segment** button.
- You can choose the recipients of your screen view from scratch by clicking the **New audience** option.
5. Confirm your choice by clicking the **Apply** button.
If the audience of the screen view is more than one segmentation and one of the segmentation returns `0` results, then the whole audience is `0`. In such circumstances, such a screen view will not be visible when active.
### Creating content
---
6. To create the content of your screen view, in the **Content** section click the **Define** button.
A blank Content section in the Screen view form
1. From the **Screen views feed** dropdown feed, select [a feed](/docs/campaign/screen-views/whats-new#terminology) to which a screen view will be assigned. If needed, you can create a new screen view feed:
1. Click **Add screen views feed**.
2. On the pop-up, in the **Feed name** field, enter the name of the feed. It will be only visible in the Screen views feed dropdown.
3. In the **Slug** field, enter a unique identifier of this screen views feed. While retrieving screen views to a dedicated space in your mobile application, you will use this slug to display all screen views assigned to a particular feed.
We recommend following this slug name convention: `your-slug-name`. Special characters and white spaces are unsupported.
4. Confirm by clicking **Apply**.
2. In the **Priority** field, define the order in which a screen view will be displayed. Use numbers from 1 to 99, where 1 is the highest.
3. If you want to extend the structure of a screen view campaign besides including the documents you select, enable the **Advanced management of document structure** option.
1. In the text editor, enter the structure of documents you want to include.
It must contain the `{% screenviewcollection %}` tag which inserts all documents you select in the **Documents to display** section. This tag is included by default, but you can move it when changing the JSON structure.
You can also use the `{% document %}` tag to refer to a single document.
Other [inserts](/developers/inserts) can be used too.
Example structure of the screen view:
1. If you want to add add documents to your screen view campaign, add them in one of the following ways:
- By picking individual documents in the **Specified documents** tab.
1. Click the field.
2. From the dropdown list, select one or more documents.
3. Confirm your choice by clicking **Add**.
The order of documents is defined by the order defined on the interface. More details is available in the [Order of displaying documents in a screen view](#order-of-displaying-documents-in-a-screen-view) section.
- By picking all documents assigned to a specific group in the **Groups** tab.
1. Click the **Group** tab.
2. Click the field.
3. From the dropdown list, select one or more groups.
4. Confirm your choice by clicking **Add**.
5. To define the order of documents:
- By default the order of documents in a screen view is defined be the priority settings of each documents, regardless of the group they belong to.
- To enable enforcing manual ordering of the documents, enable the **Enforce manual order** option. You can define the order of document groups, however, the order of documents within the groups are still defined by documents priority.
More details is available in the [Order of displaying documents in a screen view](#order-of-displaying-documents-in-a-screen-view) section.
2. Confirm by clicking **Apply**.
### Scheduling screen view campaign
---
3. In the **Schedule** section, click **Define**.
1. To display the screen view immediately after the activation, click the **Run immediately** section.
2. To schedule the display of the screen view at a future date, click **Scheduled**.
3. For both options, you can set time windows (the **Set time windows** option) during which the content of the screen view will be visible in the mobile application.
4. Confirm the settings in the **Schedule** section.
5. To publish the screen view, in the upper right corner, click **Activate**.
## You may want to know
---
### Order of displaying documents in a screen view
While creating screen views, you can define the order of displaying documents:
- For the documents selected single-handedly (the **Specified documents** tab):
The order of displaying documents is defined only manually - drag and drop documents in the preferred order. The priority settings of each document is overridden.
Click here to see example
Single documents selected for a screen view campaign
In the example on the screen above, the order of displaying documents will be as presented on the UI, which means the `Root vegetables` document will be presented first.
- For the groups of documents (the **Groups** tab):
- By default, the order of the documents selected this way is defined on the basis of priority of documents. This means that division into groups is overridden and the documents are displayed according to their priority settings.
Click here to see example
Two groups of documents selected for a screen view campaign with display according to priority
In the example on the screen above, the order of displaying documents will be as follows:
`All fruit` document (priority 2)
`All veggies` document (priority 3)
`Root vegetables` document (priority 4)
- By enabling the **Enforce manual order** option, you define the order of document groups, however, the documents within the groups will be shown according to document priority.
Click here to see example
Two groups of documents selected for a screen view campaign and enforcing manual order option is enabled
In the example on the screen above, the order of displaying documents will be as follows:
`All veggies` document (priority 3)
`Root vegetables` document (priority 4)
`All fruit` document (priority 2)
### Conflicts
#### Screen views with the same priority
| Audience conditions | Outcome |
|---------------------|------------------------------------------------------------------------------------------------------------------------------------------------------------------------------------------------------------------------------------------------------------------------------------------------------------------------------------|
| The same | In such case, if a profile meets the conditions of the screen views, the screen view with the latest creation date will be displayed. |
| Various | - If a profile meets the conditions of one screen view, this screen view will be displayed - If a profile meets the conditions of both screen views, the screen view with the latest creation date will be displayed |
Expand for detailed logic
Logic of selecting a screen view to display during conflicts
#### Documents with the same priority
| Audience conditions | Outcome |
|---------------------|----------------------------------------------------------------------------------------------------------------------------------------------------------------------------------------------------------------------------------------------------------------------------------------------------------------|
| The same | In such case, if a profile meets the audience conditions of documents, the document with the latest creation date will be displayed. |
| Various | In such case, the choice of the document to be displayed for each profile will be different: - If a profile meets the conditions of at least one document, this document will be displayed - If a profile meets the conditions of both documents, the document with the latest creation date will be displayed |
Expand for detailed logic
Logic of selecting a document to display during conflicts
#### A document in a screen view whose audience conditions are mutually exclusive with screen view audience
The document will not be displayed in a screen view.
#### Finished, paused or draft document in an active screen view
The document will not be displayed in a screen view.
### Screen view audience vs document audience
For screen view campaigns:
- you can select up to 20 documents whose audience is one segmentation or more.
- you can't select a document which contains documents whose audience is other than **Everyone**.
- if the screen view audience and the audience of documents selected in the screen view is mutually exclusive, then the document won't be displayed in a screen view
### Screen view schedule vs document schedule
The screen view campaign displays only active documents.
- When a screen view contains the documents which are no longer active or are scheduled at the future date, they won't be displayed in a screen view.
- When a screen view expires and the documents in this screen view are still active, you can still fetch those documents directly from the database by using the API.
### How does deleting documents affect screen view campaigns?
When deleting a document, you will get a warning if it's used in a screen view campaign. If you delete such a document, it will no longer be displayed in the campaign.
# Creating dynamic content
## Requirements
---
- Implement a tracking code into your website.
- [Prepare a dynamic content template](/docs/campaign/dynamiccontent/creating-dynamic-content-templates/dynamic-content-template-builder) (or templates if you want to use several variants). If you configured [Service approval](/docs/settings/configuration/service-approval) for the Communication templates, the templates you created must receive an approval from the approver.
## Procedure
---
A blank dynamic content form
1. Go to **Experience Hub > Dynamic Content > Create new**.
2. Enter the name of the dynamic content.
3. Optionally, to let other users know about the purpose of the dynamic content, enter a short description.
## Define the type of dynamic content
---
Select the type of the dynamic content:
- **Insert object** - This type is an implementation of the dynamic content into the code of your website.
- **Web layer** - This type allows you to display an element that overlays the content of the website.
AI-driven A/B tests are unavailable for Web layer content.
## Define the recipients of dynamic content
---
1. In the **Audience** section, select an audience for the dynamic content by performing one of the following actions:
- If you want to create the dynamic content for everyone (default setting), click **Apply**.
- If you want to create the dynamic content for customers from an existing segmentation:
1. Select the **Segments** tab.
2. Click **Select segment**.
**Result**: A pop-up shows up.
3. On the pop-up, select a group or groups of customers.
The user is added to the audience if they belong to at least one of the selected segmentations.
4. Confirm your choice by clicking **Apply**.
- If you want to create the dynamic content for a new group of customers:
1. Select the **New audience** tab.
2. Click **Define conditions**.
3. Follow the instructions available [here](/docs/analytics/i_profile-filter).
4. When you complete building the filter, click **Apply**.
2. If you selected the **Segments** or **New audience** option, you can select how the content behaves for first-time visitors:
When a user visits your site for the first time, their profile may be created after a few seconds, after Dynamic Content is processed by the SDK. In those cases, Synerise can't check if that visitor belongs to your chosen audience or not.
In **Advanced options**, you can use the **Include first time visitors in audience** option to decide how the Dynamic Content works for such visitors:
- When this option is **disabled** (default):
First-time visitors can't see the Dynamic Content.
If a [global control group](/docs/settings/configuration/global-control-group) is enabled, first-time visitors are not treated as members of that group and no event is generated
- When this option is **enabled**:
First-time visitors are treated as members of the audience and see the Dynamic Content.
[Dynamic Content events](/docs/assets/events/event-reference/dynamic-content) are generated as usual, with an added `firstTimeVisitor = true` parameter.
If a [global control group](/docs/settings/configuration/global-control-group) is enabled, first-time visitors are NOT treated as members of that group and content is displayed.
3. Confirm the settings by clicking **Apply**.
## Create or select templates
---
In the **Content** section, you can create two types of dynamic content:
- [Simple message](#simple-message) - It is creating one version of the dynamic content.
- (Insert object content type only) [A/B test](#ab-testing) - You can create up to 6 variants of the dynamic content and launch the automatic allocation controlled by the AI engine. The AI engine selects the best-performing variant for every customer to achieve the goal of the dynamic content which is defined in the **Goals** section.
The **Make allocation automatically** option requires model training, that is why it may not be available for all workspaces. If this option is unavailable, contact the administrator.
### Simple message
1. (Insert object content type only) To define the place on the website where the dynamic content is displayed, in the CSS sub-section field, enter a CSS selector and use the dropdown to define the exact position of the inserted content in relation to that element.
You can learn more about selectors in ["CSS selector basics"](/docs/campaign/dynamiccontent/creating-dynamic-content/css-selectors).
2. To create the content or select a template, click **Create message**. Learn more about creating templates [here](/docs/campaign/dynamiccontent/creating-dynamic-content-templates/dynamic-content-template-builder).
**Result**: The template selection view opens.
A template needs an approval from the final approver. More about it [here](/docs/settings/configuration/service-approval).
7. The approved template appears in the **Content** section.
### A/B testing
A user is assigned to the dynamic content variant on the basis of local storage (browser). Logging out/resetting user's UUID won't result in reassigning the user to the different variant. If the user clears their local storage, they may be re-assigned to the same variant again.
To create more than one version of dynamic content, click Option of adding message variants is available in the Content section
#### Allocating A/B test variants and enabling control group
You can use A/B/x testing to display various versions of one message to see which variant provides the best results. In addition to the variants, you can use control groups to measure the full impact of a campaign within which you send a message. For example, you can analyze the behavior of customers who didn't receive the message and compare the analysis results with the behavior of the ones who did.
You can only define the size (allocation) of the control group and groups who will receive a particular variant. Profiles are assigned at the variants and the control group in the moment of displaying the dynamic content in the browser and assigning a specific profile to a specific group isn't possible.
Instructions on how to set variant allocation is available in ["Defining allocation for variants and control group"](#defining-allocation-for-variants-and-control-group).
#### Control group, test variants, and events
When a profile enters a website and meets conditions that triggers a dynamic content, a variant of the dynamic content is displayed and the system generates a [dynamicContent.show](/docs/assets/events/event-reference/dynamic-content#dynamiccontentshow) event (you can check the full reference of dynamic content events [here](/docs/assets/events/event-reference/default-events#dynamic-content)).
This event is also generated in the same circumstances for a profile who has been assigned to a control group. However, the value of the `variantName` parameter of this event is `Control group`.
#### How long is a profile assigned to a control group and variants?
A profile remains assigned to a variant or a control group for 30 days, which means that after 30 days the profile can be assigned to a different variant. In addition, control group is assigned within a given campaign, so for individual campaigns a profile can be in the control group in campaign A, but at the same time can be in the target group in campaign B.
#### Enabling AI-driven variant allocation
AI-driven variant allocation (also known as a variant optimizer) is a feature that intelligently assigns the most effective variant to each profile based on the optimization goal which you need to define by selecting an event and decide if you want the test to maximize or minimize that event's occurrences.
Using a variant optimizer is valuable because it leads to higher conversion rates, and better campaign performance. It adapts in real time to maximize your chosen goal efficiently and at scale.
Once the dynamic content is activated, you can monitor the optimization results in the details of the dynamic content. The variant that performs best will be labeled as the Winner. The results include the following metrics:
- The current probability of assigning each variant to a profile
- The average probability of conversion (the expected rate at which profiles complete the desired action)
- The conversion confidence interval (an estimate of the true conversion rate)
- The average conversion time (real average time it takes users to perform the desired action)
- The conversion time confidence interval (an estimate of the true average time profile take to perform the desired action)
Each time a variant is assigned to a profile, a [`variant.assign` event](/docs/assets/events/event-reference/dynamic-content#variantassign) is generated. This event can be used for further analysis and insights.
1. To let the AI engine allocate the content variants to customers, switch the **Make allocation automatically** toggle on.
**Result**: The **Optimization goal** section appears.
Optimization goal section
4. To define the goal of dynamic content:
1. From the **Define goal** dropdown list, select the event you want to influence.
2. Optionally, after selecting the event, define its parameter and the value by clicking **+ where**.
3. Confirm your choice by clicking **Apply**.
4. Select one of the two options:
- **Maximize** - The variant which receives the highest score wins and it is displayed to a customer. For example, you want to maintain the highest frequency of purchases over $20.
- **Minimize** - The variant which receives the lowest score wins and it is displayed to a customer. For example, you want to reduce the number of product returns.
6. Confirm the settings by clicking **Apply**.
Preview of variant optimizer results is available in the **Content** section after launching dynamic content.
Example results of a variant optimizer
#### Defining allocation for variants and control group
**For manual variant allocation**
1. To enable a control group, in the **Content** section, enable **Control group**.
2. Select the control group type:
- [Global control group](/docs/settings/configuration/global-control-group) - this group is selected from all profiles you have in Synerise.
- **Campaign control group** - this group will be selected from the profiles in the audience of this specific dynamic content.
2. Adjust the size of each variant and the control group by using the slider. The size of control group can be adjusted only for the **Campaign control group** option.
Variant size adjustment
3. Confirm by clicking **Apply**.
**For variant optimizer**
Enabling control group for AI-driven variant allocation is impossible.
To adjust the starting variant allocation, in **Starting allocation** sub-section in the **Content** section, use the slider.
## Schedule dynamic content
---
To define when you want to display dynamic content, go to the **Schedule** section.
1. Select one of the display options:
- **Display immediately** - The dynamic content starts right after clicking the **Activate** button. It's active until you switch it off.
- **Scheduled** - The dynamic content is active during a selected period.
2. For **Scheduled**: Pick the start and end dates on the calendar and confirm a choice for each date by clicking **Apply**.
3. For **Scheduled**: Select the time zone for the start and end dates.
4. In **Advanced options**, define the days of week and/or times of day when you want to display the dynamic content.
5. Confirm the settings by clicking **Apply**.
## Define triggers
---
1. To define the circumstances for displaying the content, go to **Display settings**.
2. Select the customer behavior which triggers the display of the dynamic content:
- **On landing** - The dynamic content is displayed when the visitor enters the website.
- **On exit** - The dynamic content is displayed when a visitor to the website moves a mouse cursor outside the area of website.
- **After scroll** - The dynamic content is displayed after scrolling down a percentage of the website.
## Define URL targeting
---
2. To define the pages where the dynamic content will be displayed or exclude some URLs from displaying the content, in the **Display settings** section, click **Advanced options**.
1. In the **Page targeting** section, change the selection to **Others**.
2. To define the pages where the dynamic content is displayed, under **Display on pages**, click **Add rule**.
3. From the left dropdown list, select one of the following options:
| Option | Description | Example |
|---------------------|------------------------------------------------------------------------------------------------------------------------------------------------------------------------------------------------------------------------------------------------------------------------|-----------------------------------------|
| Page with URL | This option lets you display dynamic content only on the provided URL. You must enter the whole URL. | `https://www.example.com/?black-friday` |
| Page URL containing | This option lets you display dynamic content on all pages that contain a specific phrase in URL. | `/?black-friday` |
| RegExp | This option lets you specify a regular expression to filter the pages where dynamic content will be shown. In the example, the provided regular expression demonstrates how to display dynamic content on pages with URLs that end with the word "friday". | `.*friday$` |
4. In the field, next to the dropdown list, provide a value.
3. To define the pages where the dynamic content won't be displayed, under **Not display on pages**, click **Add exception**.
5. Using the same options as described in the table above, specify which pages will be excluded from displaying the dynamic content.
### Dependency between conditions
The `OR` logical operator is used to determine the dependency between conditions in the **Display on pages** section. In the following example, the dynamic content will be displayed on pages that contain the words `home` or `appliances` (or both these words) in URL address.
Dependency logic between conditions in the Display on pages section
The `OR` logical operator is used to determine the dependency between conditions in the **Not display on pages** sections. In the following example, the dynamic content will not be displayed on pages which contain the words `gaming` or `garden` (or both these words) in URL address.
Dependency logic between conditions in the Not display on pages section
The `AND` logical operator is used to determine the dependency between conditions in the **Display on pages** and **Not display on pages** sections. This means that dynamic content will only be displayed if the conditions in both sections are met.
Dependency logic between Display on pages and Not display on pages logic
### Conflicting conditions
Conflicting condition between sections
In the example above, there's a conflicting condition where dynamic content is supposed to show and not to show on pages with `home` in the URL. As a result, the dynamic content won't be visible on pages that have `home` or `garden` in the URL, but it will be visible on pages that have `appliances` in the URL.
## Define visibility period
---
2. To define when the dynamic content stops being visible, in **Advanced options** proceed to **Stop display** section.
3. In the **Stop display** section, select one of the following options (this setting concerns individual viewers):
- **Always display dynamic content** - The dynamic content will be displayed all the time to a viewer until it expires or you stop the display dynamic content manually.
- **A viewer clicks a button or a link in dynamic content** - The dynamic content will be displayed to a viewer until they click a button on the dynamic content or a link contained in the dynamic content.
- **Dynamic content was shown to a viewer X times** - You can define the number of times a dynamic content is displayed to a viewer. After that, it won't be displayed to that viewer anymore.
## Define target devices
---
4. Define the devices on which the dynamic content will be displayed.
- If you want to show the DC on both mobile and desktop devices, select both options or none of them.
- If you want to show the DC on only one type of device, select it.
6. Confirm the settings by clicking **Apply**.
## Define the UTM parameters
---
You can add UTM and URL parameters to the links provided in the dynamic content through the [preparelink insert](/developers/inserts/webpush#adding-utm-and-tracking-parameters-to-link). If the links aren't provided in the preparelink insert, the parameters won't be added to the link in the message.
9. Optionally, to define the UTM parameters, go to **UTM & URL parameters**.
1. Define the UTM parameters:
- **Source** - This parameter defines the source of incoming traffic, it can be a specific page such as `synerise`, `newsletter`, and so on.
- **Medium** - This parameter identifies whether the traffic is paid, free, or originates from newsletters. The examples of most popular tags are `sms`, `banner`, `email`, and so on.
- **Term** - This parameter is used to mark keywords.
- **Campaign** - This parameter allows you to mark a specific campaign, for example a summer sale, black friday, christmas, and so on.
2. In advanced options, define your own URL parameters:
1. Click **Add parameter**.
2. In the **Parameter** field, enter the name of the parameter.
3. In the **Value** field, enter the value of the parameter.
3. Confirm the settings by clicking **Apply**
## Activating the message
---
To activate the dynamic content, in the upper right corner click **Activate**.
The status of dynamic content is available on the list of dynamic content. In the [Communication statuses](/docs/campaign/statuses) article, you can check the statuses which can be assigned to dynamic content.
# Using basic drag & drop builder
The basic drag & drop builder is an external solution provided by BeeFree implemented in Synerise that lets you create a landing page template by dragging and dropping elements.
It is a great choice for creating templates because it's user-friendly and efficient, provides visual control, offers customization options, supports collaboration, simplifies updates, and makes campaign management accessible to non-technical users.
You can personalize the content of the message by using [inserts](/docs/campaign/landing-page/creating-landing-page-templates/landing-page-template-builder#adding-a-snippet-to-the-template-code). Inserts let you refer to customer attributes (such as name, city, size), product recommendations (for example, last seen items or added to a cart), and the results of aggregates, expressions, and metrics.
You may build and preview templates directly in the platform during creation.
## Building templates
---
1. Go to **Experience Hub > Landing Page > Add landing page**.
2. In the **Content** section, click **Define**.
3. Click **Create message > New template**.
3. On the pop-up, select **Drag & drop builder > Basic builder**.
4. Proceed according to the instructions on building templates is available at the [BeeFree help center](https://support.beefree.io/hc/en-us/articles/360015405120-Building-Content-in-Beefree).
### Creating HTML blocks
---
Apart from the standard building elements such as Title, Paragraph, List, Image, Button, Divider, Social, HTML, Icons, and Menu, the basic builder includes the custom, Synerise-native **HTML blocks** element. The configuration of this element takes place in the [Synerise-native code editor](/docs/campaign/landing-page/creating-landing-page-templates/landing-page-template-builder), that lets you derive the benefits provided by the code creator such as:
- creating re-usable template elements (blocks),
- creating a block to be edited in an easy-to-use configuration form that doesn’t require programming skills
5. On the right side of the screen, select and drag the **HTML blocks** element to the template.
**Result**:
The HTML block added to the template
6. On the **HTML blocks** you added to the template, click **Configure**.
**Result**: A pop-up appears.
7. On the upper right side, click **New block**.
8. Create the structure of an HTML block by following the instructions in the ["Creating template"](/docs/campaign/landing-page/creating-landing-page-templates/landing-page-template-builder#creating-a-template) section.
- You can build a simple HTML structure in the **HTML** section.
- On the **HTML** tab, you [can build an easy-to-use configuration form](/docs/campaign/landing-page/creating-landing-page-templates/landing-page-template-builder#template-editing-simplification) which can be filled out by users with no programming skills. To do so, [add variables](/docs/campaign/landing-page/creating-landing-page-templates/landing-page-template-builder#adding-a-variable) to the block template such as color pickers and fields, so the users who will use this template in a builder will need only to fill out the fields in this form. For example:
Example field in a configuration form
9. To save this block as a template, click an arrow on the left to the **Next** button, and select **Save as**. On the pop-up, enter the name of the template and select the folder in which the template will be saved.
10. To use this block in a landing page template, click **Next**.
We recommend placing the HTML block as the sole element in the row. Additionally, ensure that the styling of the block is compatible with the styling of the template.
# Further email configuration
## Sign-up process
---
When a visitor to your website subscribes to your newsletter through a form (sumbits email address and agrees to receive emails from you), you can send emails to them. The newsletter subscription process must be configured first. There are two types of newsletter subscriptions: *single opt-in* and *double opt-in*.
The **single opt in** process saves the marketing agreement (email channel) without a user email confirmation. When a customer sends a newsletter submission form, the agreement is confirmed in their profile without requiring an email confirmation.
The **double opt-in** process is also started when a customer submits the form, but the agreement is not saved to the customer's profile until they click the confirmation link received by email.
More about the process of newsletter subscription configuration [here](/docs/settings/configuration/newsletter-sign-up).
## Email limits
---
It's important to define the number of emails that are allowed to be sent in a particular time. Email limits does make sense because it prevents from overwhelming the recipients with multiple emails which are sent manually as an independent email or sent automatically by automated scenario.
More about email limits [here](/docs/settings/configuration/campaign-limits).
# Introduction to SMS
SMS channel in Synerise allows you to send text messages to all recipients who gave you their phone number and gave you permission to communicate (in case of sending marketing communication) with them using this channel.
If you already use the SMS channel, find out how to [decrease the cost of SMS campaigns](/use-cases/decrease-sms-campaign-cost).
## Business profits
---
- You can send personalized SMS to a specific group of profiles in the right moment (for example, after making a specific action by them), this way it is much easier to reach them with the right content.
- You can send out the system communication to inform recipients about delivery delays, and so on.
- You can perform A/B testing to measure the performance of your text messages.
- Make your text messages look professional by [shortening the links included in the message](/docs/campaign/SMS/creating-SMS-template#short-links).
- For multibrand or multilingual operations, you can use a [dynamic sender](/docs/campaign/SMS/dynamic-sms-sender) to automatically assign the right phone number to each recipient based on their profile attributes.
- An easy-to-use text message builder allows you to save time and set up the moment of sending your messages automatically. This means that SMS messaging can be a part of your sales/communication cycle and be sent only to people who met specific conditions.
- Analyses of text messages let you compare and analyze results achieved in every message in real time, collect information about the number of sent text messages, and so on.
- You can view the change history for this item from its configuration - see [Audit Log](/docs/settings/workspace/audit-log).
## Requirements
---
- You must [integrate Synerise with an SMS gateway](/docs/campaign/SMS/configuring-sms-gateway#enable-integration) ( **Settings > Apps & Services**). You can integrate Synerise with the following gateways:
- SMSAPI
- SMS biz
- MessageFlow
- Materna
- Infobip
- TideMobile
- After integration, [create an SMS account](/docs/campaign/SMS/configuring-sms-gateway#create-sms-account) from which you will send the text messages.
- Collect phone numbers and SMS communication agreements in [profiles](/docs/crm/crm-profile).
### Phone number format
---
Synerise does not validate phone numbers when creating or updating profiles. Confirm the format of a phone number with your provider (for example, whether they require a prefix) and save it to the profiles according to the provider's requirement.
If you already have profiles with phone numbers in Synerise, you can use [Data Transformation](/docs/automation/data-transformation-and-imports/introduction) and [create a workflow](/docs/automation/creating-automation) to modify the phone numbers of your existing profiles.
#### Converting phone numbers of existing profiles to another format
1. Create a segmentation that contains all profiles that have a phone number.
Segmentation example: profiles with phone numbers that don't contain a "+48" prefix
2. Create a data transformation diagram that modifies the phone number format:
1. Add a sample file.
2. Use the **Edit values** node to define a rule.
For example, the rule may add or remove a prefix in the `phone` column.
Diagram transforming phone number format
3. Create a workflow that uses the segmentation of all your profiles with phone numbers, transforms their phone numbers, and imports them back to Synerise.
Workflow that changes the phone number of profiles and import them back to Synerise
### Collecting agreements for SMS communication
---
You can collect agreements for SMS communication and save them in Synerise in multiple ways:
1. By using [forms](/developers/web/tracking-form-data)
2. By importing profiles to Synerise with enabled SMS communication agreement
3. By SDK
4. By [API](https://hub.synerise.com/api-reference/profile-management#operation/BatchAddOrUpdateClients)
## Sending SMS
---
There are two ways you can send text messages in Synerise:
- [Manually](/docs/campaign/SMS/sending-sms#send-manually) - You [create a SMS template](/docs/campaign/SMS/creating-SMS-template), select the audience, and schedule the sending date
- [Send automatically](/docs/campaign/SMS/sending-sms#send-automatically) - You can send SMS by using a workflow triggered by a specific event
A phone number is not a unique profile identifier, so if multiple profiles with the same phone number exist, the text message will be sent several times.
## SMS status
---
The status of SMS communication is available on the list of SMS. In the [Communication statuses](/docs/campaign/statuses) article, you can check the statuses which can be assigned to SMS communication.
## Events generated through SMS channel
---
See [SMS events](/docs/assets/events/event-reference/sms).
# Introduction to web push
Web push notifications allow you to maintain communication with customers through a web browser. The unobtrusive character of web push notifications will keep your message away from spam folders or ad blocking software. The notifications will always be displayed to users who have agreed to receive them.
The following combinations of operating systems and browsers are supported for web push notifications:
- Windows: Chrome, Edge, Firefox, Opera
- macOS: Firefox, Chrome, Edge, Opera
- Android: Chrome, Samsung Internet, Firefox, Brave
Incognito Mode, Private Browsing Mode, and Guest Browser Mode do not support Web Push.
## Benefits
---
- Good way of increasing the number of your subscribers - users more eagerly agree to receive web push notifications rather than share their email address.
- Great deliverability in real time
- Good engaging results as directing traffic to a particular URL is only one click away
- Good way to increase the traffic (for example, with a catchy notification title)
- Good way to increase conversion as users can subscribe to web push notification to be informed about the product availability or discounts
- The possibility of personalizing content of notifications by using Jinjava variables (such as the first name of the user, the number of collected loyalty points, and so on).
- You can view the change history for this item from its configuration - see [Audit Log](/docs/settings/workspace/audit-log).
## Examples of use
---
See examples in [web push notification use cases](/use-cases/?ordering=DESC&sortBy=publishDate&filters=tags%3D%3D"web+push")
## Anatomy of web pushes
---
A web push notification consists of the following elements:
An example of a simple web push notification
| No. | Web push element | Function | Recommendations & possibilities |
|-----|------------------|--------------------------------------------------------------------------------------------------|------------------------------------------------------------------------------------------------------------------------------------------------------------------------------------------------------------------------------------------------------------|
| 1. | **Title** | This is the top text of your notification | - We suggest a 50-character limit to avoid being cut off, but the length depends on the browser - You can personalize the title using [inserts](/developers/inserts/webpush) and emojis |
| 2. | **Message** | This is the main content of your notification | - We suggest a 100-character limit to avoid being cut off, but the length of the text vary across different browsers - You can personalize the message using [inserts](/developers/inserts/webpush) and emojis |
| 3. | **Icon** | An icon helps in brand recognition | - We recommended using a size of 192x192 - To use an icon in the notification, upload the icon first in **Synerise > Data Modeling Hub > File**. |
| 4. | **Large image** | On macOS, it serves as an expanded icon, while on Windows and Android, it acts as a custom image | - Make sure to follow the [image requirements](/docs/campaign/Webpush/creating-webpush-templates#image-requirements) for optimal display - To use a large image in the notification, upload the image first in **Synerise > Data Modeling Hub > File** |
| 5. | **Action buttons** | They redirect users to a URL you indicate | - You can add up to 2 action buttons - You can personalize the text on the button by using [inserts](/developers/inserts/webpush) and emojis -You can add [inserts](/developers/inserts/webpush) to the URL |
| 6. | **Close button** | This button closes notification. The browser adds a close button to the notification. | n/a |
| 7. | **Domain** | The domain is automatically included in the notification. | n/a |
| 8. | **Browser badge** | The browser defines the browser badge. | n/a |
## Requirements
---
- [Integrate with Synerise JS SDK](/docs/settings/tool/tracking_codes)
- Create an account in Firebase
- [Integrate Firebase with Synerise](/docs/settings/tool/firebase)
- [Enable web push notifications in Synerise](/docs/campaign/Webpush/configuring-web-push#install-service-worker)
- [Prepare an agreement form](/docs/campaign/Webpush/two-step-agreement-form)
## How it works
---
Synerise uses Firebase Cloud Messaging (FCM) as a platform for real-time messaging and data exchange between servers and client applications. The process starts when Synerise sends messages to FCM, which manages the delivery of notifications to customers' browsers. To facilitate this process, the Firebase SDK is integrated through the JS SDK to generate a unique customer token. This token is then shared between Synerise and FCM.
FCM dispatches messages to customers with assigned FCM tokens. To display these messages in a browser, a service worker acts as a kind of proxy between the browser and the network, allowing for the interception and management of network requests, caching of files for offline use, and receiving web push messages from a server. Then, if a customer has provided consent for receiving web push notifications through a browser pop-up, the notification will be presented to the customer.
Overview of the process of sending a web push
### FCM token
An FCM token is a unique identifier which lets mobile and web applications receive messages from Firebase Cloud Messaging. It is generated by Firebase SDK and saved in the browser's storage. The token is also sent to FCM and to Synerise together with UUID of a customer who agreed to receive web push notifications through a browser's [agreement form](#marketing-agreement).
Tokens can be generated only when all the following conditions are met:
- Synerise and Firebase are integrated
- Web push notifications are enabled in the Synerise platform
- The service worker has been implemented into a website
- A customer agreed to receive web push notifications
### FCM token as attribute in Synerise
The status of a profile's FCM token is stored in the `snrs_has_web_push_devices` attribute. When the token is assigned, the value is `true`. This attribute is available:
- on the customer's card in **Synerise > Behavioral Data Hub > Profiles**, this way you can see the status of this attribute for each customer
- for use in Decision Hub
### Token TTL
Tokens generated by FCM for web push notifications remain valid until the customer revokes notification permissions or clears the browser/application data. In case when the token is inactive for 270 days, it is expired (change introduced by Google Firebase since May 15, 2024).
Every time a new token is generated for a customer, the [`webpush.tokenUpdate` event](/docs/assets/events/event-reference/webpush#webpushtokenupdate) is generated and added to the activity list on their card in **Profiles**.
#### Discrepancies between the number of customers with FCM token and the actual number of recipients of the notification
Differences may occur between the number of customers who have an FCM token in Synerise and the actual number of recipients who receive notifications. This is because Synerise isn't notified immediately when a customer withdraws an agreement in the browser settings or clears browser data and at the moment of sending, all the conditions in Synerise are still met. After a failed delivery, [`webpush.notRegistered`](/docs/assets/events/event-reference/webpush#webpushnotregistered) and [`webpush.tokenDelete`](/docs/assets/events/event-reference/webpush#webpushtokendelete) events are generated. As a result, the `snrs_has_web_push_devices` attribute is set to false, but the marketing agreement status remains unchanged.
The table below provides information what happens while [customer profiles are merged](/developers/api/clients/merging-profiles). The table contains only allowed merging combinations and each mention of `agreement` refers to the [web push marketing agreement](#marketing-agreement).
### FCM token migration
Token migration is a process in which the assignment of a FCM token is transferred from one user to another, along with associated changes in web push marketing consent. This migration occurs when a customer context changes in the browser, such as when a user logs out and a new user logs in, causing the FCM token to be reassigned to the new user or when [customer profiles are merged](/developers/api/clients/merging-profiles).
1. **An anonymous customer is recognized**
Token and marketing agreement will not change because the UUID of the customer is still the same. This customer can receive web push notifications.
2. **A customer context changes in the browser** - In the following scenario, both customers will not receive web push notification:
1. A customer is logged in as `john.doe@example.com` (further referred to as John Doe) in the browser. This customer has been assigned a Firebase Cloud Messaging (FCM) token and his marketing consent is enabled.
2. John Doe logs out.
3. `anna.smith@example.com` (further referred to as Anna Smith) logs in (the customer context in the browser changes). A new user, Anna Smith, has been added, and the FCM token that was previously assigned to John Doe is now passed to Anna Smith.
3. Anna Smith now has the FCM token, but her web push marketing consent is disabled. To receive web push notification, Anna must enable her agreement through an [agreement form](/docs/campaign/Webpush/two-step-agreement-form).
4. When attempting to send a web push notification to John Doe, the value of the `snrs_has_web_push_devices` attribute is changed from true to false, the marketing consent remains unchanged.
3. **Customers are merged**
The table below provides information what happens while [customer profiles are merged](/developers/api/clients/merging-profiles). The table contains only allowed merging combinations and each mention of `agreement` refers to the [web push marketing agreement](#marketing-agreement).
| Column: Source profile Row: Target profile | From: Anonymous, agreement disabled | From: Anonymous, agreement enabled |
|---------------------------------------------|-------------------------------------------------------------------------|-------------------------------------------------------------------------|
| To: Recognized, agreement enabled | Result: After merging the profiles, agreement is **enabled**. The token remains the same. | Result: After merging the profiles, agreement is **enabled**. The token from the recognized profile is kept. |
| To: Recognized, agreement disabled | Result: After merging the profiles, agreement is **disabled**. There is no token. | Result: After merging the profiles, agreement is **disabled**. The token from the anonymous customer is rejected. |
### Marketing agreement
Marketing consent is the permission in the browser to receive notifications. The customer can provide such consent through the native window displayed at the top of the page. The agreement is stored in the `receive_webpush_messages` attribute (this is the backend name of the attribute) which can be found in the profile card, in the Subscription section:
The Subscriptions section on a profile card
You can prepare such an agreement in Synerise, more information about that is in [Prepare an agreement form](/docs/campaign/Webpush/two-step-agreement-form) article.
### Marketing agreement across multiple browsers
Customers will receive web push notifications on any browser where they have consented to receiving them. If customers have provided consent on multiple browsers, they may receive the same web push notification on each of those browsers.
### Events related to web push notifications
As a result of implementing JS SDK, various types of events are automatically generated. These events can be triggered by both the customer's actions (such as clicking on the notification or dismissing the web push consent) and by the infrastructure (such as failed notification delivery due to invalid Firebase tokens or exceeding message limits). By analyzing these events, you can measure the effectiveness of your messages and their deliverability. See [default events associated with web push notifications](/docs/assets/events/event-reference/webpush).
## Creating web push
---
1. Define the recipients of the web push notification.
2. Prepare the content of the web push notification (web push templates).
3. Schedule the web push notification.
4. Define the UTM parameters.
## Sending methods
---
Web push notifications are sent in two ways:
1. Automatically by using [Automation Hub](/docs/automation). In response to customer activity, update of profile data, or other events (check the list of [triggers](/docs/automation/triggers) that start a workflow), a web push notification can be sent to customers.
2. Manually by clicking the **Send** button while creating web push notification.
## Web push status
---
The status of web push communication is available on the list of web push notifications. In the [Communication statuses](/docs/campaign/statuses) article, you can check the statuses which can be assigned to web push communication.
# Using the visual mobile push builder
Within the visual template builder, you can design your simple push notifications and preview them in real-time. The content of your message can be personalized using [inserts](/developers/inserts/mobile-push#common-tags-used-in-mobile-push-notifications), which enable you to reference customer attributes (such as name, city, or size), [product recommendations](/docs/ai-hub/recommendations-v2) (such as recently viewed or items in cart), and various [aggregates](/docs/crm/aggregates), [expressions](/docs/crm/expressions), [metrics](/docs/analytics/metrics), and [voucher pools](/docs/assets/code-pools). By using inserts, you can also [add tracking of UTM parameters and click events for redirect URLs](/developers/inserts/mobile-push#adding-utm-and-tracking-parameters-to-link).
Additionally, you can use the context preview, which allows you to preview the message from the perspective of a specific user and visualize the insert results for that user.
You should become familiar with the [prerequisites](/docs/campaign/Mobile/mobile_campaign#requirements) and [image requirements](#image-requirements) before creating a push notification template.
Visual builder is only available for the simple push notification type.
### Adding tracking parameters to links
---
To include [tracking parameters](/developers/web/user-identification#recognizing-customers-from-link-parameters) and [UTM and link parameters](/docs/campaign/Mobile/creating-mobile-push#define-utm-and-url-parameters) in the links in a template, always wrap the link with the [{% preparelink %}{% endpreparelink %} insert](/developers/inserts/email#adding-utm-and-tracking-parameters-to-links). You can only add tracking parameters to the links to external websites.
### Image requirements
- Allowed format: `.jpg`, `.jpeg`, or `.png`
- Allowed width: minimum 645 px
- Allowed size: maximum 1 MB
- Recommended aspect ratio is 2:1
## Opening the visual builder
1. Go to **Experience Hub > Mobile > Templates**.
2. In the upper-right corner, click **New template**.
**Result**: A pop-up appears.
3. Select **Simple Push**.
3. Select **Visual builder**.
**Result**: The builder opens:
Visual builder for push notification templates
## Defining basic notification features
4. In the **Title** field, enter the text that will display in the header of the notification. We suggest a 50-character limit to avoid being shortened, but the length depends on the OS. You can personalize the title using [inserts](/developers/inserts/insert-usage) and emojis.
2. In the **Message** field, enter the text that will display in the body of the notification. We suggest a 100-character limit to avoid being shortened, but the length of the text vary across OS. You can personalize the message using [inserts](/developers/inserts/insert-usage) and emojis.
7. To define what happens when the user clicks the notification, in the **Action type** section, select one of them:
- **Open app main screen** - After clicking the notification, the user is redirected to the main screen of your app.
- **Open app deep link** - After clicking the notification, the user is redirected to a place in your app, such as a message displayed in the application.
- **Open external web URL** - After clicking the notification, the user is redirected to the link which opens in a browser.
If you want to track UTM parameters and click events for this link, you must use [the preparelink insert](/developers/inserts/mobile-push#adding-utm-and-tracking-parameters-to-link).
3. Define the additional settings for operating systems of devices which will receive the notifications. Your choice must be consistent with the selected OS type in the [mobile push campaign settings](/docs/campaign/Mobile/creating-mobile-push#select-device-type). We recommend defining settings for both OS. For details, see ["Defining additional settings for Android"](#defining-additional-settings-for-android) and ["Defining additional settings for iOS"](#defining-additional-settings-for-ios).
## Defining additional settings for Android
### Adding image
You can add a single image to your notification which be displayed under the main text of the notification.
Example of a notification with a single image in the builder preview
1. To add an image to your notification, enable **Add image to your notification**.
2. Enter the URL of the image. It can be an external image source or an URL of an image from **Data Modeling Hub > Files**.
### Adding action buttons
Action buttons in push notifications let users take specific actions directly from the notification, such as proceeding to a product page.
1. To add a button to your notification, enable the **Action buttons** option.
2. In the top field, enter the text that will display on the button. You can personalize the text on the button using [inserts](/developers/inserts/insert-usage) and emojis.
3. Select the linking option:
- **URL** - Choose this option if you want to refer a user to a website.
If you want to track UTM parameters and click events for this link, you must use [the preparelink insert](/developers/inserts/mobile-push#adding-utm-and-tracking-parameters-to-link).
- **Deep link** - Choose this option if you want to refer a user to a place in the application.
4. In the **URL**/**Deep link** field, enter the address of the website or location in the app.
5. To add more buttons, click **Add**.
6. Repeat steps 2-4.
### Defining notification priority
Priority determines the behavior of push notification delivery in relation to the device's mode (such as battery-saving mode, focus mode, sleep mode, and so on).
1. To set the priority of the notification, enable **Priority**.
2. Select one of the priority modes:
- **Normal** - notifications are sent while considering the device's battery status. If the device is currently out of the normal mode (for example, battery-saving mode), the push notification will be displayed after the device exits this mode.
- **High** - the notification is sent immediately, regardless of the battery status of the device.
If you don't configure the Priority section, the platform default applies. On Android, the default is **Normal**. On iOS, the default is **High**.
### Defining custom notification sound
When a notification is delivered to a device, the user is alerted by the notification sound, which is typically a default sound chosen on the device. However, you can customize the notification sound to make it more unique and personalized for your app. You can do so by adding the file with your notification sound to the application bundle and then defining the name of the file in the configuration of the Sound section in the visual builder.
1. To set the custom notification sound, enable **Sound**.
2. In the **File name**, enter the name and the extension of the file with notification sound which you added to the application bundle, for example `custom-sound.mp3`
## Defining additional settings for iOS
---
### Adding a single image
You can add a single image to your notification, which is displayed under the main text of the notification.
Example of a notification with a single image in the builder preview
1. To add an image to your notification, enable **Add image to your notification**.
2. Enter the URL of the image. It can be an external image source or an URL of an image from **Data Modeling Hub > Files**.
### Adding image carousel
You can add a series of images or cards to be displayed horizontally within the push notification. Users can swipe through these images to view different content or offers directly from the notification.
The preview of example image carousel in the builder
1. To add a carousel of images to your notification, enable **Image Carousel**.
5. In the **Call to action URL/Deep link** field, enter the URL to which a user will be redirected after they click the image.
3. In the **Caption** field, enter the text that will be displayed at the bottom of the image.
4. In the **Subcaption** field, enter the text that will be displayed under the image.
2. In the **Image URL** field, enter the URL of the image source. It can be an external image source or an URL of an image from **Data Modeling Hub > Files**.
Example form configuration of image carousel
5. To add more images to the carousel, click **Add item** and repeat steps 2-5.
### Defining notification category
A category serves as a unique identifier of your notification type, enabling you to assign [Notification Content Extensions](https://developer.apple.com/documentation/usernotificationsui/unnotificationcontentextension) (if implemented) and distinguish between various notification scenarios.
1. To define a notification category, enable **Category**.
2. In the text field, enter a category name consistent with one of the values included in your application's `UNNotificationExtensionCategory` key in your Content Extension `\*.plist` file.
### Adding action buttons
Action buttons in push notifications let users take specific actions directly from the notification, such as proceeding to a product page.
1. To add a button to your notification, enable the **Action buttons** option.
2. In the top field, enter the text that will display on the button. You can personalize the text on the button using [inserts](/developers/inserts/insert-usage) and emojis.
3. Select the linking option:
- **URL** - Choose this option if you want to refer a user to a website.
If you want to track UTM parameters and click events for this link, you must use [the preparelink insert](/developers/inserts/mobile-push#adding-utm-and-tracking-parameters-to-link).
- **Deep link** - Choose this option if you want to refer a user to a place in the application.
4. In the **URL**/**Deep link** field, enter the address of the website or location in the app.
5. To add more buttons, click **Add**.
6. Repeat steps 2-4.
### Defining notification priority
Priority determines the behavior of push notification delivery in relation to the device's mode (such as battery-saving mode, focus mode, sleep mode, and so on).
1. To set the priority of the notification, enable **Priority**.
2. Select one of the priority modes:
- **Normal** - notifications are sent while considering the device's battery status. If the device is currently out of the normal mode (for example, battery-saving mode), the push notification will be displayed after the device exits this mode.
- **High** - the notification is sent immediately, regardless of the battery status of the device.
If you don't configure the Priority section, the platform default applies. On Android, the default is **Normal**. On iOS, the default is **High**.
### Defining custom notification sound
When a notification is delivered to a device, the user is alerted by the notification sound, which is typically a default sound chosen on the device. However, you can customize the notification sound to make it more unique and personalized for your app. You can do so by adding the file with your notification sound to the application bundle and then defining the name of the file in the configuration of the Sound section in the visual builder.
1. To set the custom notification sound, enable **Sound**.
2. In the **File name**, enter the name and the extension of the file with notification sound which you added to the application bundle, for example `custom-sound.mp3`
### Enabling content-available option
By enabling this option, the application can be activated even if it is not currently running, whether it is in the background or has been killed. This ensures that the necessary [method and code responsible for receiving background notifications](https://developer.apple.com/documentation/usernotifications/pushing-background-updates-to-your-app) will be executed. As a result, the application is woken up, allowing for the execution of startup processes, even if the application itself is not actively opened. For more information, refer to the [Content-Available parameter section in the Mobile SDK documentation](/developers/mobile-sdk/configuring-push-notifications/ios#content-available-parameter).
### Enabling mutable-content option
Enabling the Mutable-content option is required to fully support Simple Push communication for iOS.
To pass the notification to your [notification service extension](https://developer.apple.com/documentation/usernotifications/modifying-content-in-newly-delivered-notifications) before delivery, enable the **Mutable-Content** option. This allows modifying the content of a notification before it appears to the customer and tracking [`push.view`](/docs/assets/events/event-reference/mobile-push#pushview) events.
In order for this option to work, you must implement the [Synerise notification service extension](https://gitlab.synerise.com/core/synerise-user-docs/-/blob/master/developers/mobile-sdk/configuring-push-notifications/ios#synerise-notification-service-extension).
Enabling this option allows:
- gathering the [`push.view`](/docs/assets/events/event-reference/mobile-push#pushview) event will be generated
- including the thumbnail image (a smaller version of a full digital image) before expanding the notification.
- adding native action buttons, if the message contains any
Read more [in the Mutable-Content parameter section in Mobile SDK documentation](/developers/mobile-sdk/configuring-push-notifications/ios#mutable-content-parameter).
# In-app messages
In-app messages allow you to display any creation in a mobile application. This feature allows you to implement use cases such as abandoned cart, discount codes, or any information campaign, such as application update.
In contrast to push notifications which are sent (pushed) to the app user by Synerise, in-app messages are requested (pulled) by the user's device through Synerise mobile SDK. Thanks to this, you can design your mobile application to request and show notification precisely when you need to, making them more reliable in some scenarios than push notifications. Combining this with the capabilities of [segmentations](/docs/analytics/segmentations) and Decision Hub that allow you to measure the performance, in-app messages can be targeted better and more effective.
# Importing email templates
Synerise users can create email templates on their own and import it to Synerise. They can import templates either in the form of `.zip` files or URL.
While importing templates from `.zip` files and URLs, the system automatically uploads images from files to **Data Modeling Hub > Files** and replaces image references in the template with URLs to the images uploaded to Synerise, as shown in the **After import** tab in the example below.
For example:
<!DOCTYPE html>
<html>
<body>

<h1>My First Heading</h1>
<p>My first paragraph.</p>
<img src="cat.png" alt="cat" width="104" height="142">


</body>
</html>
## Requirements
---
- A `.zip` file must contain `.html` file, images, `.css` file(s), which cannot be nested in catalogs.
- The size of the `.zip` file cannot exceed 10MB.
To make sure that your `.zip` has flat structure, select a HTML file and images, and create a `.zip` from them, not from the catalog with those files.
## Importing an email template
---
Available options for email templates
1. Go to **Experience Hub > Email**.
2. On the left pane, click **Templates**.
3. In the upper right corner, click **New template**.
**Result**: A pop-up appears.
4. To import a template from ZIP or a URL, select **Upload from URL or ZIP**.
5. To import a template:
- from ZIP:
1. Select the **ZIP** tab.
2. Upload a `.zip` file.
3. Click **Apply**.
- from URL:
1. Select the **URL** tab.
2. Enter a URL address.
3. Click **Apply**.
6. If needed, make necessary modifications.
Learn how to use the [email code editor](/docs/campaign/e-mail/creating-email-templates/email-code-editor).
7. If you implemented the [Service approval](/docs/settings/configuration/service-approval) feature, a template will require an approval. For the instructions what to do next in such case, read the [Service approval documentation][/docs/settings/configuration/service-approval/]. If in your workspace Service approval is not implemented, in the upper right corner, click **Use in communication**.
# Landing Page
A landing page is a place where users are redirected after clicking a link (e.g. link in an email, advertisement on Facebook, etc.). It can be an independent website which will contain useful information, a microsite that will be a part of a larger website, or it may serve as a tool in promotional campaigns, for example, in which you want to promote one of your products or services you offer. These various methods allow you to draw the attention of customers.
No matter which option you choose, Synerise makes it possible to create simple and functional landing pages that will meet your business goals. To create a landing page, you can use one of two wizards: a WYSIWYG wizard or a code editor.
----
## Business profits
- Conversion increase
- Support of business goals
- Improvement of brand awareness
- Source of invaluable data and insights
# Creating email templates
In Synerise, you can create an email template in two types of editors: [code editor](/docs/campaign/e-mail/creating-email-templates/email-code-editor) (allows you to create an email template as a user-friendly configuration form) and visual builder. If you already have templates prepared, you can [import them to Synerise](/docs/campaign/e-mail/importing-email-templates) in a `.zip` file or from a URL address.
Predefined email templates are sorted into two folders:
- Predefined dynamic templates - This folder contains templates that include Jinjava
- Predefined simple templates
## Requirements
---
You must be granted permissions to access **Email** and to create templates.
### Tips before you start
---
- You can create an email template directly while sending an email. However, because of the approval procedure, it is more convenient to create a template and have it approved before defining the settings while sending an email as it speeds up the process of creating the email.
- While creating the template, save your template once in a while because there is no auto-save option.
- To include [tracking parameters](/developers/web/user-identification#recognizing-customers-from-link-parameters) and [UTM and link parameters](/docs/campaign/e-mail/creating-email-campaigns#define-utm-and-url-parameters) in the links in a template:
- **Template contains only static links**
No action required. The tracking parameters will be added automatically.
- **Template contains links generated using Jinjava**
Wrap the link with the [{% preparelink %}{% endpreparelink %} insert](/developers/inserts/email#adding-utm-and-tracking-parameters-to-links)
- Although Synerise automatically adds [the unsubscribe header](/docs/campaign/e-mail/unsubscribe-link), always add the resignation link to the template - without it, the emails may reach the spam folder.
- You can use [email inserts](/developers/inserts/email) to not only personalize the contents of the message but also to add such features as tracking click events and UTM parameters to redirecting URLs, or opening a message in the browser
- The **View in browser** link doesn't work in the preview. You must send a test email to test such links.
We do not recommend adding a **View in browser** link to templates that contain a reference to Automation event context (`event.params.{paramName}`) because previewing such messages is not supported.
- For better template organization, you can create template folders:
1. Go to **Experience Hub > Email**.
2. On the left side, click **Templates**.
3. Select **From template** tab.
4. Scroll down to the bottom of the page.
5. Click
**Result**: A pop-up appears.
3. On the pop-up, in the **Folder name**, enter the name of the folder.
4. Confirm by clicking **Apply**.
## Creating a template
---
1. Go to **Experience Hub > Email**.
2. On the left pane, click **Templates**.
3.
- To create a new template, click **Create new**.
- To create a template out of an existing template, click **From template**.
1. Select the template.
**Result**: The template is opened in the wizard in which it was originally created.
4. Select the wizard:
- **Drag&drop builder** - This builder exists in two versions:
- **Basic builder** - This builder is provided externally by BeeFree and you can create an email with ready-made components. This builder contains a [Synerise-native element: HTML blocks](/docs/campaign/e-mail/creating-email-templates/creating-custom-html-block-basic-builder).
- **Advanced builder** - This builder provides you with the same capabilities as [email code editor](/docs/campaign/e-mail/creating-email-templates/email-code-editor), but additionally it allows you to use CSS and JavaScript.
- [Code editor](/docs/campaign/e-mail/creating-email-templates/email-code-editor) - Email code editor allows you to:
- Create email templates from scratch and edit them by using HTML.
- Create email templates to be edited in an easy-to-use configuration form that doesn’t require programming skills.
## FAQ
---
### How do I preview an email before sending?
In the template editor, click Preview contexts, enter a customer profile ID, and click Apply to see the email rendered with that customer's actual data. Alternatively, use the Test section in the campaign creation form to send a test email to yourself or a colleague before the campaign goes live.
### How to remove the default Synerise parameters from links in emails?
The Synerise parameters are automatically added to your links in the email template for the purposes of collecting statistics. When you want to remove them, add the following parameter to a chosen link or links in the email template:
`?withoutRedirect=1`
For example: `http://example.com/?withoutRedirect=1`
This option allows you to skip Synerise parameters for a particular link.
Removing the Synerise parameters from a link results in the lack of statistics on clicking this particular link.
### How to redirect to a custom landing page after clicking a resignation link?
To modify the link in `{{synerise-resign-link}}`:
1. Access the settings [here](https://app.synerise.com/old-settings/mail/account).
2. Next to the email account you use, click .
3. In the **Resignation link** field, paste the URL of your custom landing page.
### Can I optimize sending time for an individual user while sending an email campaign?
No. Send-time optimization in Experience Hub calculates the best time for the entire audience, not per individual. For per-customer send-time optimization, create a workflow in Automation Hub and add an [Optimize Time node](/docs/automation/flow-control/optimize-time).
# Using in-app template builder
The in-app template builder allows you to:
- create in-app message templates from scratch and edit them by using HTML, CSS, and JavaScript
The `SRInApp.close()` method must be included in every in-app message.
- use the ready-made templates from the **Predefined templates** folder.
The **Predefined templates** folder provides you with templates for the most common campaign scenarios such as sending an abandoned cart, displaying a carousel with item recommendations, and displaying a simple banner with a button.
Modification of the ready-made templates doesn't require applying changes to the template code. The template builder contains a user-friendly configuration form that brings editing down to filling out fields that define the properties of the template. This makes editing templates possible by any user regardless of the programming skills. You can [simplify the editing of your own templates as well](#template-editing-simplification) by creating custom configuration form adjusted to your needs. Thanks to this you can edit your template or create its variations dedicated for different scenarios.
You can personalize the content of the message by [using snippets](#adding-a-snippet-to-the-template-code) and [Jinjava inserts](/developers/inserts) to inject data such as profile attributes (for example, name), recommendations, analysis results.
[Snippets](#adding-a-snippet-to-the-template-code) also let you re-use the same content in multiple templates, or create a reference to a fragment that you only need to update in one place to see the change in all templates where it's used.
## Character limits
The template to be used in an in-app message campaign cannot exceed 60,000 characters.
## Good practices
### Campaign planning recommendations
Using a large number of in-app messages in your application can impact rendering time, message delivery, and battery usage.
To maintain optimal application performance when using in-app campaigns:
- Avoid assigning more than 10 in-app messages to the same trigger event.
- Avoid having more than 20 in-app messages active at the same time in your application.
- Review and archive in-app campaigns that you no longer need.
### Template construction
When creating or editing in-app message content:
- Place the the `SRInApp.close()` (or `SRInApp.hide()`) method at the beginning of the JS script.
- Use try/catch to handle possible fatal errors in the JS script.
- Handle situations where Jinjava inserts return empty data.
- When adding external links to your message:
- Only link to sites you trust.
- Don't link to large images that may negatively affect performance.
- Don't link to resources whose CSS/HTML may be blocked. If you have resources loaded from your own URLs, set `Synerise.settings.inAppMessaging.contentBaseUrl` and use relative paths in HTML/CSS.
## Editing a ready-made template
---
1. Go to **Experience Hub > In-app messages**.
2. On the left pane, select **Templates**.
3. From the list of template folders, select **Predefined templates**.
4. Select one of the templates to edit.
- [Abandoned cart](/use-cases/abandoned-basket-inapp)
- Bottom bar
- [Carousel with context recommendations](/use-cases/in-app-cross-sell)
- [Carousel with recommendation campaign](/use-cases/in-app-recommendations)
- [Fullscreen](/use-cases/inapp-mandatory-upgrade)
- Modal
- [Price alert](/use-cases/in-app-price-drop-last-seen-products)
- [Swiping mechanism with recommendation campaign](/use-cases/in-app-swiping-mechanism)
- Top bar
- [Walkthrough](/use-cases/inapp-walkthrough)
**Result**: You are redirected to the code editor.
4. You can edit the template in two ways:
- Edit the code of the template ([add inserts](#adding-a-snippet-to-the-template-code), [add variables](#adding-a-variable)).
The code of the template is embedded in `` or `` elements.
- Go to the **Config** tab and fill out the form.
5. After you make changes to the template, you can check the [preview](#previewing-templates).
6. If the template is ready, in the upper right corner click **Save this template > Save as**.
7. On the pop-up:
1. In the **Template name** field, enter the name of the template.
2. From the **Template folder** dropdown list, select the folder where the template will be saved.
3. Confirm by clicking **Apply**.
## Creating a template
---
1. Go to **Experience Hub > In-app messages**.
2. On the left pane, select **Templates**.
3. In the upper right corner, click **New Template**.
4. In the pop-up that opens, select **Code editor**.
5. Use the **HTML**, **CSS**, and **JavaScript** tabs to define the properties of the template.
The code of the template is embedded in `` when the message is displayed, so it can't include the `` or `` elements.
6. If the template is ready, in the upper right corner click **Save this template > Save as**.
7. On the pop-up:
1. In the **Template name** field, enter the name of the template.
2. From the **Template folder** dropdown list, select the folder where the template will be saved.
3. Confirm by clicking **Apply**.
### Selecting in-app message type
To select the way of displaying your in-app message within a mobile application:
1. Above the builder view, in **In-app type**, select **Inline** or **Overlay**.
This option is not available if you opened the template editor directly from the in-app campaign creator.
2. If you selected **Overlay**:
1. select an option from the **Display type** dropdown list:
- **Fullscreen** - In-app messages are displayed in the center of the mobile application, with no clickable elements within the application.
- **Top bar** - In-app messages are shown at the top bar of the application, and user interaction is limited to the area below the message.
- **Bottom bar** - In-app messages appear at the bottom bar of the application, with user interaction restricted to the area above the message.
2. If you want to manage the display of in-app messages over safe area in your mobile application, use the **Cover safe area** option.
A safe area is the portion of a view that is not covered by elements such as a navigation bar, tab bar, or toolbar. Safe areas are important for ensuring visibility and access to a device's interactive features.
Available from the following application versions:
- iOS: `5.1.0` and higher
- Android: `6.1.0` and higher
- By enabling this option, the in-app message will extend into bars, notches and other UI elements.
- By disabling this option, the in-app message won't cover system UI elements such as top bars, notches, and so on. This is the default setting.
View of the Display type option in the template builder
### Adding a snippet to the template code
[Snippets](/docs/assets/snippets) let you:
- insert data such as profile attribute, recommendations, or analysis results into the communication.
- create re-usable pieces of static content, so you don't need to manually copy and paste between templates.
- create dynamic pieces of content that are updated in all templates when you update the snippet definition.
1. Click **Snippets**.
**Result**: The snippet widget opens.
2. Add a snippet as described in [Snippets](/docs/assets/snippets).
## JavaScript methods in in-app messages
JavaScript methods can be used to let the SDK Listeners and Delegates [handle actions from in-app messaging campaigns](/developers/mobile-sdk/campaigns/action-handling#handling-actions-from-campaigns). The methods only work when the Listeners/Delegates are implemented and running.
Every message must include a method to close or hide the message.
### Use a Mobile SDK method
You can use the `SRInApp.internalMethod` method to call Synerise Mobile SDK methods from the JS code in an in-app. This simplifies using those methods, without creating JS code to authorize and make API requests.
**Syntax**:
```javascript
SRInApp.internalMethod(String methodName, String arguments, onSuccess(String response), onError(Any error))
```
where:
- `methodName` is the mobile SDK method. See table below for available methods.
- `arguments` is a stringified JSON object with the method arguments, described in the method reference for each mobile SDK method. Some methods don't require any arguments.
- `onSuccess` is the function to call when the method succeeds.
In its arguments, `response` is a stringified response from the mobile SDK method. The structure depends on the mobile SDK method.
- `onError` is the function to call when the method fails.
| `methodName` | Corresponding SDK method |
| -------------------------------------- | -------------------------------------------------------------------------------------------------------------------------------------------------------------------------------------------------------------------------------------------------------------------- |
| `Promotions/getPromotionsWithApiQuery` |
|
**Example**:
This is how you can activate a promotion when a button is clicked:
function internalMethodOnSuccess () {
  console.log("ACTIVATED");
};

function internalMethodOnError () {
  console.log("FAILED TO ACTIVATE");
};

(function () {
    const params = {
        uuid: '7cdc22d5-cf8c-4102-a853-a9f00d0256b0'
    };
    var button = document.querySelector(".in-app-button");
    button.addEventListener("click", function () {
        SRInApp.internalMethod("Promotions/activatePromotionByUuid", JSON.stringify(params), internalMethodOnSuccess, internalMethodOnError)
    });
})();
### Close a message
This method sends an [inApp.discard](/docs/assets/events/event-reference/inapp#inappdiscard) event when closing the in-app.
```javascript
SRInApp.close()
```
The method has no parameters.
The mobile SDK allows closing in-app messages from outside the message. See [Mobile SDK documentation](/developers/mobile-sdk/campaigns/in-app-message/overlay-in-app#closing-a-message).
### Close message and send an event
This method sends an additional event ([inApp.discard](/docs/assets/events/event-reference/inapp#inappdiscard) is sent automatically) when closing the in-app.
```javascript
SRInApp.closeAndTrigger(action,params,label)
```
- `action` is the event's action name (string) in the `context.action` format, for example `page.visit`. The maximum length is 32 characters.
- `params` is an object with free-form JSON parameters to send with the event.
- `label` is a string with a human-readable summary of the event. It is obligatory, but not saved in persistent storage and can't be used in Decision or Automation Hubs and is not displayed in **Behavioral Data Hub > Profiles**.
### Hide a message
**Only for overlay in-apps**
This method sends an [inApp.hide](/docs/assets/events/event-reference/inapp#inapphide) event when hiding the in-app.
```javascript
SRInApp.hide()
```
The method has no parameters.
### Open URL
This method sends an [inApp.click](/docs/assets/events/event-reference/inapp#inappclick) event when a customer opens an URL by clicking a link in the message.
```javascript
SRInApp.openUrl(url)
```
`url` is the address to open (string).
### Open deeplink
This method sends an [inApp.click](/docs/assets/events/event-reference/inapp#inappclick) event when a customer clicks a link (deeplink).
```javascript
SRInApp.openDeeplink(deeplink)
```
`deeplink` is the deeplink to open (string).
### Resize a message
**Only for overlay in-apps**
This method resizes the message.
```javascript
SRInApp.resize(resizeTarget, function)
```
where:
- `resizeTarget` informs the mobile SDK about the resize type:
- `FULLSCREEN`
- `TOP_BAR`
- `BOTTOM_BAR`
- `function` is the name of the JS function that performs the resize on the device.
When the method is triggered:
1. The `resizeTarget` is sent to the mobile SDK.
2. The mobile SDK returns information about the width and height of the device's screen.
3. The `function` is triggered with parameters received from the mobile SDK and the message size changes.
**Example**:
function resizeCallbackFull (width, height) {
  const container = document.getElementById('webview-simulation');
  container.classList.remove('bottom-bar');
  container.classList.remove('top-bar');
  container.classList.add('full-screen');
  container.style.height = height + 'px';
  console.log("Changed to fullscreen");
};

function resizeCallbackTop (width, height) {
  const container = document.getElementById('webview-simulation');
  container.classList.remove('full-screen');
  container.classList.remove('bottom-bar');
  container.classList.add('top-bar');
  container.style.height = '250px';
  console.log("Changed to top bar");
};

function resizeCallbackBottom (width, height) {
  const container = document.getElementById('webview-simulation');
  container.classList.remove('full-screen');
  container.classList.remove('top-bar');
  container.classList.add('bottom-bar');
  container.style.height = '250px';
  console.log("Changed to bottom bar");
};
### Send a custom event
This method sends a custom event.
```javascript
SRInApp.trackCustomEvent(action, params, label)
```
- `action` is the event's action name (string) in the `context.action` format, for example `page.visit`. The maximum length is 32 characters.
- `params` is an object with free-form JSON parameters to send with the event.
- `label` is a string with a human-readable summary of the event. It is obligatory, but not saved in persistent storage and can't be used in Decision Hub and is not displayed in Behavioral Data Hub.
### In-app storage
You can store and retrieve JSON data (a key/value pair) on the device. The data is assigned to a profile and can only be accessed by that profile, so you can keep separate data sets between users of the same device.
Thanks to this storage, you can enrich your in-app scenarios, for example:
- If the user has already seen a story, hide it or display an alternative layout or version.
- Resume the story from the exact point where the user previously stopped watching.
- Show different content on the first view versus subsequent views (e.g. intro vs. summary).
- Track completed vs. partially viewed stories and adjust messaging accordingly.
- Personalize call-to-action buttons based on prior interactions (e.g. “Continue” vs. “Watch again”).
You can use these methods:
- [Save and get data](#save-and-get-data)
- [Delete data](#delete-data-one-value)
- [Delete all data](#delete-all-data)
#### Save and get data
You can save primitive data types and complex types, such as objects.
Each key/value pair is saved separately and expires after 90 days. You can reset the expiration counter by resending the same key.
- The `setItem` method is asynchronous and may include a callback.
- The `getItem` method is synchronous. If the requested value doesn't exist, it returns `undefined`
#### Delete all data
You can wipe all data from the storage assigned to the current profile, with an optional callback.
// Simple delete all data of current user
SRInApp.storage.clear();

// Delete all storage for current user, with callback
SRInApp.storage.clear(
    function() {
        console.log('All data cleared!');
    },
    function(error) {
        console.log('Clear failed:', error);
    }
);
### Trigger a custom action
This method allows you to pass data to a custom action. You must create logic in your mobile application to perform the action, which is triggered when a Listener/Callback processes the JS method and returns the name and parameters of the custom action. The method generates an [inApp.customHook](/docs/assets/events/event-reference/inapp#inappcustomhook) event.
```javascript
SRInApp.handleCustomAction(name, params)
```
- `name` is used as the identifier that triggers a logic associated with it.
- `params` is an object with free-form JSON parameters to pass to the logic.
### Get device information
You can retrieve some details of the device as a JSON object.
```javascript
SRInApp.getDeviceData()
```
This returns the following object:
You can use data from this object in your JavaScript.
### Manage inline in-app host component
These methods let the in-app JavaScript query and control the size of the host component that contains the inline in-app. They only work for inline in-app messages — for overlay (modal) messages they are no-ops.
#### Get component size
**Only for inline in-apps**
Returns the current size of the host component in pixels.
```javascript
SRInApp.getComponentSize()
```
This method returns an object with `width` and `height` properties (in pixels) of the component that contains the in-app.
#### Set component size
**Only for inline in-apps**
Asks the host application to resize the component that contains the in-app. You need to implement listening to the request and changing the size (see examples in the [Mobile SDK guide](/developers/mobile-sdk/campaigns/in-app-message/inline-in-app)).
```javascript
SRInApp.setComponentSize(width, height)
```
- `width` is the requested width in pixels (number).
- `height` is the requested height in pixels (number).
#### Listen for component size changes
**Only for inline in-apps**
Register a callback that fires whenever the host component's measured size changes (for example, due to layout changes or device rotation).
### Receive context from the application
These methods let the in-app message receive live data from the mobile application while the message is displayed. This is useful when the application state changes during the lifetime of an in-app and the message content must react to those changes.
**Example**: An in-app displays a progress bar showing how many items in the cart qualify for a promotion. When the customer adds an item to the cart, the application updates the context so the in-app can refresh the progress bar without being closed and re-opened.
#### How it works
1. On its side, the application sets context values by using
- `Injector.setInAppContext`
- `Injector.inAppContext.put("key", "value")` (Android)
- `Injector.inAppContext["KEY"] = "VALUE` or `Injector.inAppContext = ["KEY": "VALUE"]` (iOS)
2. To push the updated context to the in-app, the application calls `Injector.notifyInAppContextChange()`.
3. In the in-app JavaScript, [the `onContextFromApp` callback](#listen-for-context-changes) fires with the new context.
#### Get context on demand
You can request the current context from the application at any time:
```
SRInApp.getContextFromApp()
```
This method returns the context object that the application has set.
#### Listen for context changes
Register a callback that fires every time the application calls `Injector.notifyInAppContextChange()`:
SRInApp.onContextFromApp = function (context) {
    console.log("Context updated:", context);
    // Update the in-app UI based on the new context
};
### Call a custom application method
This method lets the in-app JavaScript call a custom operation implemented on the application side. The call is asynchronous — the application performs the operation and returns a success or failure result to the in-app.
**Example**: During the lifetime of an in-app, you need to your own backend for additional data that is not available in Synerise. Instead of making a web request from the in-app (which lacks the security features of an app, such as SSL pinning), you delegate the request to the application.
**Syntax**:
```
SRInApp.customMethod(name, params, timeoutMs)
```
where:
- `name` is a string identifier of the custom method to call on the native side.
- `params` is a JSON object with parameters to pass to the native method.
- `timeoutMs` is the timeout in milliseconds. If the application does not respond within this time, the call fails.
The method returns a `Promise` that resolves with the result from the application or rejects on failure or timeout.
On its side, the application receives the call through a callback:
The application performs its work and responds by calling `completion.success` or `completion.failure`, which resolves or rejects the `Promise` on the JavaScript side.
**Example**:
## Template editing simplification
To make your template more accessible to users without programming skills, you can add a configuration form with variables dedicated for the template, so the user can make adjustments to the template.
The effect of template editing simplification is that you can edit templates by filling out a user-friendly configuration form (available in the **Config** tab) whose fields define the value for each property of the template.
The process of template simplification involves replacing values with variables in the HTML, CSS, and JavaScript code elements, such as alignment, font, color in CSS, or HTML tags as title, description or buttons. You can also add a variable in the place of Jinjava elements, such as a recommendation campaign ID, voucher pool ID, or catalog name. Variables inserted in the code appear in a form the **Config** tab when editing the template.
#### List of variables
| Variable name | Description | Example output |
|------------------------|------------------------------------------------------------------------------------------------------------------------------------------|----------------|
| **Synerise insert select** | Allows you to add a dropdown list with aggregates, expressions, metrics, voucher pools, recommendations, files, catalogs, or attributes. | Example: selecting a Synerise object from the list |
| **String** | Allows you to add a field that requires a string value. | Example: Filling out a field |
| **Select** | Allows you to add a dropdown list with configurable values. | Example: selecting an option from a dropdown list |
| **Switch** | Allows you to add a field which is enabled/disabled by a toggle. | Example: enabling an option |
| **Color** | Allows you to add a color selector. You can either select a color or enter its code manually. | Example: selecting a color |
| **Number** | Allows you to add a field that requires a number. You can either select a number from a dropdown or enter it manually. | Example: defining a number |
#### Results of simplifying template editing
Instead of modifying the design of the template directly in the code, a user can go to the **Config** tab and define the properties of the template by filling out configuration form.
The image below presents the easy-to-edit form that lets users without coding expertise change the variable values:
Defining the settings of a string variable
### Adding a variable
1. Select one of the code editor tabs.
The tabs may be **JSON**, **HTML**, **CSS**, and **JavaScript**, depending on the communication type.
2. Position the cursor in the place where you want to add the variable.
3. On the right side, click **+ Variable**.
**Result**: A sidebar appears.
4. In the **Identifier** field, enter the ID of the variable.
This will be the title of the field unless you define the **Label** field.
The first character of the ID can't be a number.
5. From the **Type** dropdown list, select the type of variable.
Allows you to add a field that requires a string value.
1. In the **Label (Optional)** field, enter the name of the field.
If this field is empty, the name of the field will be taken from the **Identifier** field.
2. In the **Description (Optional)** field, enter a short explanation of the field's purpose.
3. In the **Default Value** field, enter the default value.
Allows you to add a dropdown list with configurable values.
1. In the **Label (Optional)** field, enter the name of the field. If this field is empty, the name of the field will be taken from the **Identifier** field.
2. In the **Description (Optional)** field, enter a short explanation what this field is for.
3. In the **Display Name** field, enter the name that will be visible in a dropdown.
4. In the **Value** field, enter a value.
5. In the **Default Value** field, enter the default value.
A select variable during configuration
Allows you to add a dropdown list with aggregates, expressions, metrics, voucher pools, recommendations, files, catalogs, and attributes.
1. In the **Label (Optional)** field, enter the name of the field. If this field is empty, the name of the field will be taken from the **Identifier** field.
2. In the **Description (Optional)** field, enter a short explanation what this field is for.
3. From the **Insert Type** dropdown list, select the type of resource:
- **Aggregates, AI recommendations, Expressions, Metrics, Voucher pools**: creates a dropdown list of available resources of the selected type. When the user selects a resource in the form, its ID is inserted into the code of the template. This ID can be used in [Jinjava](/developers/inserts/insert-usage) to display the value of the selected resource.
- **Catalogs**: creates a dropdown list of catalogs. When the user selects a catalog in the form, its name is inserted into the code of the template. This name can be used in [Jinjava](/developers/inserts/insert-usage#catalogs) to retrieve a value from the catalog.
- **Files**: creates a dropdown list of [files](/docs/assets/files-explorer). When user selects a file, its URL is inserted into the code.
- **Profile attributes**: creates a dropdown list of profile attributes. When a user selects an attribute, its name is inserted into the code of the template. This name can be used in [Jinjava](/developers/inserts/insert-usage#customer-attributes) to retrieve the attribute value.
3. In the **Default Value (Optional)** field, enter the default value.
**Result**: A dropdown with the insert is added to the form in the **Config** tab. From the dropdown list, you can select an item of the chosen type (for example, aggregates). As a result, the value of variable will be ID of the selected item.
Synerise insert select in the configuration form
Allows you to add a field which is enabled/disabled by a toggle.
1. In the **Label (Optional)** field, enter the name of the field. If this field is empty, the name of the field will be taken from the **Identifier** field.
2. In the **Description (Optional)** field, enter a short explanation what this field is for.
3. In the **Default Value** field, select the default value (true/false).
Allows you to add a color selector. You can either select a color or enter its code manually.
1. In the **Label (Optional)** field, enter the name of the field. If this field is empty, the name of the field will be taken from the **Identifier** field.
2. In the **Description (Optional)** field, enter a short explanation what this field is for.
3. In the **Default Value** field, enter the default value.
Allows you to add a field that requires a number. You can either select a number from a dropdown or enter it manually.
1. In the **Label (Optional)** field, enter the name of the field. If this field is empty, the name of the field will be taken from the **Identifier** field.
2. In the **Description (Optional)** field, enter a short explanation what this field is for.
3. In the **Default Value** field, enter the default value.
6. If you want to add the variable to a group that can be more easily displayed together in the form:
1. Click **Variable Group**.
2. Select or create a group:
- To select a group, click its name.
- To create a group:
1. Click **Add new group**.
2. Enter a group name.
3. Enter a group ID.
4. Click **Apply**.
**Result**: On the **Config** tab, the groups can be collapsed and expanded.
5. In the upper right corner, click **Add**.
**Result**: In the template code, a variable appears (it starts with `####`). It also becomes available on the **Config** tab.
6. Optionally, to modify the order of variables appearing in the configuration form, add the `order` parameter to the variable formula (for example, `#### type: "string", id: "string", label: "Text", order: 1 !####`).
## Previewing templates
For inline in-app messages, the **Preview Alignment** option is for test purposes only. It does not reflect how the message will be displayed in the container in a real app.
1. To check the preview of the template for a particular customer or a product, click the **Preview** button on the upper left side.
2. Enter the ID of a customer or a product.
3. Click **Apply**.
# Using the email template builder
The email code editor allows you to:
- create email templates from scratch and edit them by using HTML.
- create email templates to be edited in an easy-to-use configuration form that doesn't require programming skills.
- use the ready-made templates from the **Predefined dynamic templates** folder as a base for your own designs
The folders with predefined templates provide you with templates for the most common campaign scenarios such as AI recommendations, abandoned cart, recommendations based on the context of the last seen item, and so on.
Using the predefined templates doesn't require making changes to the template code. The template builder contains a user-friendly configuration form for defining the properties of the template. This makes editing templates possible by any user, regardless of their programming skills.
You can also [simplify the editing of your own templates](#template-editing-simplification) by creating a custom configuration form adjusted to your needs. Thanks to this, you can edit your template or create its variations dedicated for different scenarios.
You can personalize the content of the message by [using snippets](#adding-a-snippet-to-the-template-code) and [Jinjava inserts](/developers/inserts) to inject data such as profile attributes (for example, name), recommendations, analysis results.
[Snippets](#adding-a-snippet-to-the-template-code) also let you re-use the same content in multiple templates, or create a reference to a fragment that you only need to update in one place to see the change in all templates where it's used.
Additionally, when you create an email template from scratch, the HTML section contains a default email structure.
### Tips before you start
---
- You can create an email template directly while sending an email. However, because of the approval procedure, it is more convenient to create a template and have it approved before defining the settings while sending an email as it speeds up the process of creating the email.
- While creating the template, save your template once in a while because there is no auto-save option.
- To include [tracking parameters](/developers/web/user-identification#recognizing-customers-from-link-parameters) and [UTM and link parameters](/docs/campaign/e-mail/creating-email-campaigns#define-utm-and-url-parameters) in the links in a template:
- **Template contains only static links**
No action required. The tracking parameters will be added automatically.
- **Template contains links generated using Jinjava**
Wrap the link with the [{% preparelink %}{% endpreparelink %} insert](/developers/inserts/email#adding-utm-and-tracking-parameters-to-links)
- Although Synerise automatically adds [the unsubscribe header](/docs/campaign/e-mail/unsubscribe-link), always add the resignation link to the template - without it, the emails may reach the spam folder.
- You can use [email inserts](/developers/inserts/email) to not only personalize the contents of the message but also to add such features as tracking click events and UTM parameters to redirecting URLs, or opening a message in the browser
- The **View in browser** link doesn't work in the preview. You must send a test email to test such links.
We do not recommend adding a **View in browser** link to templates that contain a reference to Automation event context (`event.params.{paramName}`) because previewing such messages is not supported.
- For better template organization, you can create template folders:
1. Go to **Experience Hub > Email**.
2. On the left side, click **Templates**.
3. Select **From template** tab.
4. Scroll down to the bottom of the page.
5. Click
**Result**: A pop-up appears.
3. On the pop-up, in the **Folder name**, enter the name of the folder.
4. Confirm by clicking **Apply**.
## Editing a predefined template
---
This section describes how to edit the predefined templates (static and dynamic). As a result of editing a predefined template, a copy of a predefined template will be created. Overwriting a predefined template is impossible.
1. Go to **Experience Hub > Email**.
2. On the left pane, select **Templates**.
3. From the list of template folders, select **Predefined dynamic templates**.
4. Select one of the templates to edit.
**Result**: You are redirected to the code editor.
4. You can edit the template in two ways:
- Edit the code of the template ([add inserts](#adding-a-snippet-to-the-template-code), [add variables](#adding-a-variable)).
- Go to the **Config** tab and fill out the form.
5. After you make changes to the template, you can check the [preview](#previewing-templates).
6. When the template is ready, in the upper right corner click **Save this template > Save as**.
7. On the pop-up:
1. In the **Template name** field, enter the name of the template.
2. From the **Template folder** dropdown list, select the folder where the template will be saved.
3. Confirm by clicking **Apply**.
## Creating a template
---
An email code editor
1. Go to **Experience Hub > Email**.
2. On the left pane, select **Templates**.
3. In the upper right corner, click **New Template**.
4. Use the **HTML** tab to define the properties of the template.
6. When the template is ready, in the upper right corner click **Save this template > Save as**.
7. On the pop-up:
1. In the **Template name** field, enter the name of the template.
2. From the **Template folder** dropdown list, select the folder where the template will be saved.
3. Confirm by clicking **Apply**.
### Adding a snippet to the template code
[Snippets](/docs/assets/snippets) let you:
- insert data such as profile attribute, recommendations, or analysis results into the communication.
- create re-usable pieces of static content, so you don't need to manually copy and paste between templates.
- create dynamic pieces of content that are updated in all templates when you update the snippet definition.
1. Click **Snippets**.
**Result**: The snippet widget opens.
2. Add a snippet as described in [Snippets](/docs/assets/snippets).
## Template editing simplification
To make your template more accessible to users without programming skills, you can add a configuration form with variables dedicated for the template, so the user can make adjustments to the template.
The effect of template editing simplification is that you can edit templates by filling out a user-friendly configuration form (available in the **Config** tab) whose fields define the value for each property of the template.
The process of template simplification involves replacing values with variables in the HTML elements, such as alignment, font, color in CSS, or HTML tags as title, description or buttons. You can also add a variable in the place of Jinjava elements, such as a recommendation campaign ID, voucher pool ID, or catalog name. Variables inserted in the code appear in a form the **Config** tab when editing the template.
#### List of variables
| Variable name | Description | Example output |
|------------------------|------------------------------------------------------------------------------------------------------------------------------------------|----------------|
| **Synerise insert select** | Allows you to add a dropdown list with aggregates, expressions, metrics, voucher pools, recommendations, files, catalogs, or attributes. | Example: selecting a Synerise object from the list |
| **String** | Allows you to add a field that requires a string value. | Example: Filling out a field |
| **Select** | Allows you to add a dropdown list with configurable values. | Example: selecting an option from a dropdown list |
| **Switch** | Allows you to add a field which is enabled/disabled by a toggle. | Example: enabling an option |
| **Color** | Allows you to add a color selector. You can either select a color or enter its code manually. | Example: selecting a color |
| **Number** | Allows you to add a field that requires a number. You can either select a number from a dropdown or enter it manually. | Example: defining a number |
#### Results of simplifying template editing
Instead of modifying the design of the template directly in the code, a user can go to the **Config** tab and define the properties of the template by filling out configuration form.
The image below presents the easy-to-edit form that lets users without coding expertise change the variable values:
Defining the settings of a string variable
### Adding a variable
1. Select one of the code editor tabs.
The tabs may be **JSON**, **HTML**, **CSS**, and **JavaScript**, depending on the communication type.
2. Position the cursor in the place where you want to add the variable.
3. On the right side, click **+ Variable**.
**Result**: A sidebar appears.
4. In the **Identifier** field, enter the ID of the variable.
This will be the title of the field unless you define the **Label** field.
The first character of the ID can't be a number.
5. From the **Type** dropdown list, select the type of variable.
Allows you to add a field that requires a string value.
1. In the **Label (Optional)** field, enter the name of the field.
If this field is empty, the name of the field will be taken from the **Identifier** field.
2. In the **Description (Optional)** field, enter a short explanation of the field's purpose.
3. In the **Default Value** field, enter the default value.
Allows you to add a dropdown list with configurable values.
1. In the **Label (Optional)** field, enter the name of the field. If this field is empty, the name of the field will be taken from the **Identifier** field.
2. In the **Description (Optional)** field, enter a short explanation what this field is for.
3. In the **Display Name** field, enter the name that will be visible in a dropdown.
4. In the **Value** field, enter a value.
5. In the **Default Value** field, enter the default value.
A select variable during configuration
Allows you to add a dropdown list with aggregates, expressions, metrics, voucher pools, recommendations, files, catalogs, and attributes.
1. In the **Label (Optional)** field, enter the name of the field. If this field is empty, the name of the field will be taken from the **Identifier** field.
2. In the **Description (Optional)** field, enter a short explanation what this field is for.
3. From the **Insert Type** dropdown list, select the type of resource:
- **Aggregates, AI recommendations, Expressions, Metrics, Voucher pools**: creates a dropdown list of available resources of the selected type. When the user selects a resource in the form, its ID is inserted into the code of the template. This ID can be used in [Jinjava](/developers/inserts/insert-usage) to display the value of the selected resource.
- **Catalogs**: creates a dropdown list of catalogs. When the user selects a catalog in the form, its name is inserted into the code of the template. This name can be used in [Jinjava](/developers/inserts/insert-usage#catalogs) to retrieve a value from the catalog.
- **Files**: creates a dropdown list of [files](/docs/assets/files-explorer). When user selects a file, its URL is inserted into the code.
- **Profile attributes**: creates a dropdown list of profile attributes. When a user selects an attribute, its name is inserted into the code of the template. This name can be used in [Jinjava](/developers/inserts/insert-usage#customer-attributes) to retrieve the attribute value.
3. In the **Default Value (Optional)** field, enter the default value.
**Result**: A dropdown with the insert is added to the form in the **Config** tab. From the dropdown list, you can select an item of the chosen type (for example, aggregates). As a result, the value of variable will be ID of the selected item.
Synerise insert select in the configuration form
Allows you to add a field which is enabled/disabled by a toggle.
1. In the **Label (Optional)** field, enter the name of the field. If this field is empty, the name of the field will be taken from the **Identifier** field.
2. In the **Description (Optional)** field, enter a short explanation what this field is for.
3. In the **Default Value** field, select the default value (true/false).
Allows you to add a color selector. You can either select a color or enter its code manually.
1. In the **Label (Optional)** field, enter the name of the field. If this field is empty, the name of the field will be taken from the **Identifier** field.
2. In the **Description (Optional)** field, enter a short explanation what this field is for.
3. In the **Default Value** field, enter the default value.
Allows you to add a field that requires a number. You can either select a number from a dropdown or enter it manually.
1. In the **Label (Optional)** field, enter the name of the field. If this field is empty, the name of the field will be taken from the **Identifier** field.
2. In the **Description (Optional)** field, enter a short explanation what this field is for.
3. In the **Default Value** field, enter the default value.
6. If you want to add the variable to a group that can be more easily displayed together in the form:
1. Click **Variable Group**.
2. Select or create a group:
- To select a group, click its name.
- To create a group:
1. Click **Add new group**.
2. Enter a group name.
3. Enter a group ID.
4. Click **Apply**.
**Result**: On the **Config** tab, the groups can be collapsed and expanded.
5. In the upper right corner, click **Add**.
**Result**: In the template code, a variable appears (it starts with `####`). It also becomes available on the **Config** tab.
6. Optionally, to modify the order of variables appearing in the configuration form, add the `order` parameter to the variable formula (for example, `#### type: "string", id: "string", label: "Text", order: 1 !####`).
## Previewing templates
5. To check the preview of the template for a particular profile, click the **Preview contexts** button on the upper left side.
1. Enter the ID of a profile.
2. Click **Apply**.
# Using basic drag & drop builder
The Basic drag & drop builder is an external solution provided by BeeFree implemented in Synerise that lets you create an email template by dragging and dropping elements.
It is a great choice for creating email templates because it's user-friendly and efficient, provides visual control, offers customization options, supports collaboration, simplifies updates, and makes campaign management accessible to non-technical users.
You can personalize the content of the message by using [inserts](/docs/campaign/e-mail/creating-email-templates/email-code-editor#adding-a-snippet-to-the-template-code). Inserts let you refer to customer attributes (such as name, city, size), product recommendations (for example, last seen items or added to a cart), and the results of aggregates, expressions, and metrics.
### Tips before you start
---
- You can create an email template directly while sending an email. However, because of the approval procedure, it is more convenient to create a template and have it approved before defining the settings while sending an email as it speeds up the process of creating the email.
- While creating the template, save your template once in a while because there is no auto-save option.
- To include [tracking parameters](/developers/web/user-identification#recognizing-customers-from-link-parameters) and [UTM and link parameters](/docs/campaign/e-mail/creating-email-campaigns#define-utm-and-url-parameters) in the links in a template:
- **Template contains only static links**
No action required. The tracking parameters will be added automatically.
- **Template contains links generated using Jinjava**
Wrap the link with the [{% preparelink %}{% endpreparelink %} insert](/developers/inserts/email#adding-utm-and-tracking-parameters-to-links)
- Although Synerise automatically adds [the unsubscribe header](/docs/campaign/e-mail/unsubscribe-link), always add the resignation link to the template - without it, the emails may reach the spam folder.
- You can use [email inserts](/developers/inserts/email) to not only personalize the contents of the message but also to add such features as tracking click events and UTM parameters to redirecting URLs, or opening a message in the browser
- The **View in browser** link doesn't work in the preview. You must send a test email to test such links.
We do not recommend adding a **View in browser** link to templates that contain a reference to Automation event context (`event.params.{paramName}`) because previewing such messages is not supported.
- For better template organization, you can create template folders:
1. Go to **Experience Hub > Email**.
2. On the left side, click **Templates**.
3. Select **From template** tab.
4. Scroll down to the bottom of the page.
5. Click
**Result**: A pop-up appears.
3. On the pop-up, in the **Folder name**, enter the name of the folder.
4. Confirm by clicking **Apply**.
## Building templates
---
1. Go to **Experience Hub > Email**.
2. On the left pane, click **Templates > New template**.
3. On the pop-up, select **Drag & drop builder**.
4. Proceed according to the instructions on building templates is available at the [BeeFree help center](https://support.beefree.io/hc/en-us/articles/360015405120-Building-Content-in-Beefree).
### Creating HTML blocks
---
Apart from the standard building elements such as Title, Paragraph, List, Image, Button, Divider, Social, HTML, Icons, and Menu, the basic builder includes the custom, Synerise-native **HTML blocks** element. The configuration of this element takes place in the [Synerise-native code editor](/docs/campaign/e-mail/creating-email-templates/email-code-editor), that lets you derive the benefits provided by the code creator such as:
- using a predefined set of HTML blocks:
- [Context recommendations](/use-cases/predefined-html)
- [Products with recent interactions](/use-cases/last-seen-html)
- Recommended products
Library of predefined blocks
- creating re-usable HTML block templates,
- creating a block to be edited in an easy-to-use configuration form that doesn’t require programming skills
- previewing the block in the context of a specific customer in isolation from the email template
You can also preview the whole email template in the context of a specific customer.
1. Go to **Experience Hub > Email**.
2. On the left pane, click **Templates > New template**.
3. On the pop-up, select **Drag & drop**.
4. Select **Basic builder**.
5. On the right side of the screen, select and drag the **HTML blocks** element to the template.
**Result**:
The HTML block added to the template
6. On the **HTML blocks** you added to the template, click **Configure**.
**Result**: A pop-up appears.
7. On the upper right side, click **New block**.
8. Create the structure of an HTML block by following the instructions in the ["Creating template"](/docs/campaign/e-mail/creating-email-templates/email-code-editor#creating-a-template) section.
- You can build a simple HTML structure in the **HTML** section.
- On the **HTML** tab, you [can build an easy-to-use configuration form](/docs/campaign/e-mail/creating-email-templates/email-code-editor#template-editing-simplification) which can be filled out by users with no programming skills. To do so, [add variables](/docs/campaign/e-mail/creating-email-templates/email-code-editor#adding-a-variable) to the block template such as color pickers, dropdown lists (with aggregates, expressions, metrics, voucher pools, and recommendations created in Synerise), and fields, so the users who will use this template in an email builder will need only to fill out the fields in this form. For example:
Example block configuration form
9. To save this block as a template, click an arrow on the left to the **Next** button, and select **Save as**. On the pop-up, enter the name of the template and select the folder in which the template will be saved.
10. To use this block in an email template, click **Next**.
We recommend placing the HTML block as the sole element in the row. Additionally, ensure that the styling of the block is compatible with the styling of the template.
# Screen Views
A screen view lets you define the recipients of each [document](/docs/assets/documents) you create. This way, you can create and deliver the content dedicated to defined customer groups and bring new ideas for your marketing strategies.
## Requirements
---
- Implement a tracking code into the website.
- [Create segments of customers](/docs/analytics/segmentations/creating-segmentations) (optionally).
- [Create documents](/docs/assets/documents/creating-documents).
## Business benefits
---
- Managing the audience of the documents
- The possibility to create content dedicated to specific customer groups
## Contents
# Using basic drag & drop builder
The basic drag & drop builder is an external solution provided by BeeFree implemented in Synerise that lets you create a dynamic content template by dragging and dropping elements.
It is a great choice for creating dynamic content templates because it's user-friendly and efficient, provides visual control, offers customization options, supports collaboration, simplifies updates, and makes campaign management accessible to non-technical users.
You can personalize the content of the message by using [inserts](/docs/campaign/dynamiccontent/creating-dynamic-content-templates/dynamic-content-template-builder#adding-a-snippet-to-the-template-code). Inserts let you refer to customer attributes (such as name, city, size), product recommendations (for example, last seen items or added to a cart), and the results of aggregates, expressions, and metrics.
You may build and preview templates directly in the platform during creation. However, the template preview may differ from its appearance on the target website because of styles inheritance. Use [live preview](/docs/campaign/dynamiccontent/testing-dynamic-content/previewing-dynamic-content#the-live-preview-option) to preview the template on the target website.
## Building templates
---
1. Go to **Experience Hub > Dynamic content**.
2. On the left pane, click **Templates > New template**.
3. On the pop-up, select **Drag & drop builder**.
4. Proceed according to the instructions on building templates is available at the [BeeFree help center](https://support.beefree.io/hc/en-us/articles/360015405120-Building-Content-in-Beefree).
### Creating HTML blocks
---
Apart from the standard building elements such as Title, Paragraph, List, Image, Button, Divider, Social, HTML, Icons, and Menu, the basic builder includes the custom, Synerise-native **HTML blocks** element. The configuration of this element takes place in the [Synerise-native code editor](/docs/campaign/dynamiccontent/creating-dynamic-content-templates/dynamic-content-template-builder), that lets you derive the benefits provided by the code creator such as:
- using a predefined set of HTML blocks:
- [Context recommendations](/use-cases/predefined-html)
- [Products with recent interactions](/use-cases/last-seen-html)
- Recommended products
Library of predefined blocks
- creating re-usable HTML block templates,
- creating a block to be edited in an easy-to-use configuration form that doesn’t require programming skills
- previewing the block in the context of a specific customer in isolation from the dynamic content template
You can also preview the whole template in the context of a specific customer.
5. On the right side of the screen, select and drag the **HTML blocks** element to the template.
**Result**:
The HTML block added to the template
6. On the **HTML blocks** you added to the template, click **Configure**.
**Result**: A pop-up appears.
7. On the upper right side, click **New block**.
8. Create the structure of an HTML block by following the instructions in the ["Creating template"](/docs/campaign/dynamiccontent/creating-dynamic-content-templates/dynamic-content-template-builder#creating-a-template) section.
- You can build a simple HTML structure in the **HTML** section.
- On the **HTML** tab, you [can build an easy-to-use configuration form](/docs/campaign/dynamiccontent/creating-dynamic-content-templates/dynamic-content-template-builder#template-editing-simplification) which can be filled out by users with no programming skills. To do so, [add variables](/docs/campaign/dynamiccontent/creating-dynamic-content-templates/dynamic-content-template-builder#adding-a-variable) to the block template such as color pickers, dropdown lists (with aggregates, expressions, metrics, voucher pools, and recommendations created in Synerise), and fields, so the users who will use this template in a builder will need only to fill out the fields in this form. For example:
Example field in a configuration form
9. To save this block as a template, click an arrow on the left to the **Next** button, and select **Save as**. On the pop-up, enter the name of the template and select the folder in which the template will be saved.
10. To use this block in a dynamic content template, click **Next**.
We recommend placing the HTML block as the sole element in the row. Additionally, ensure that the styling of the block is compatible with the styling of the template.
## Previewing templates
1. To check the preview of the template for a particular customer or a product, click the **Preview** button on the upper left side.
2. Enter the ID of a customer or a product.
3. Click **Apply**.
# Creating in-app messages
In this article, you will learn how to create and activate an in-app message.
To find more information on in-app messages in Synerise, see Introduction to in-app messages.
## Select audience
---
In this part of the process, define the conditions a user must meet to be included in the group of recipients of the in-app message.
1. In the **Audience** section, click **Define**.
2. Select one of the following tabs:
**Everyone** - Selecting this option means that the message is directed to all app users (it doesn't mean the whole customer base).
- **Segmentation** - If you have prepared a segmentation or segmentations of recipients before, you can select them in this tab.
1. Click **Select segmentations**.
2. On the pop-up, select one or more segmentations.
3. Confirm by clicking **Apply**.
4. Optionally, if you want to check if a user still belongs to the segmentation right before rendering the in-app message, enable **Dynamically check audience condition**.
In such case, the in-app message won't be available in offline mode.
- **New audience** - If you want to define the conditions for the group of recipients from scratch, select this tab.
## Create content
---
In this part of the process, prepare the message you want to display in your mobile application. You can use HTML, CSS, and JS to design the content and layout. If you want to personalize the content of the message, you can use [inserts](/developers/inserts). Additionally, you may perform A/B testing of in-app messages. The message variant is assigned to an app user permanently, which means that the user will only receive one version of the in-app message.
### Character limits
If you create a message in an [in-app template builder](/docs/campaign/in-app-messages/creating-inapp-templates/creating-inapp-template), the message cannot exceed 60,000 characters (this includes the whole message code). This limit applies separately for each variant of a message.
However, there are no character limits to messages created in the [basic drag & drop builder](/docs/campaign/in-app-messages/creating-inapp-templates/inapp-drag-and-drop).
### Good practices
### Campaign planning recommendations
Using a large number of in-app messages in your application can impact rendering time, message delivery, and battery usage.
To maintain optimal application performance when using in-app campaigns:
- Avoid assigning more than 10 in-app messages to the same trigger event.
- Avoid having more than 20 in-app messages active at the same time in your application.
- Review and archive in-app campaigns that you no longer need.
### Template construction
When creating or editing in-app message content:
- Place the the `SRInApp.close()` (or `SRInApp.hide()`) method at the beginning of the JS script.
- Use try/catch to handle possible fatal errors in the JS script.
- Handle situations where Jinjava inserts return empty data.
- When adding external links to your message:
- Only link to sites you trust.
- Don't link to large images that may negatively affect performance.
- Don't link to resources whose CSS/HTML may be blocked. If you have resources loaded from your own URLs, set `Synerise.settings.inAppMessaging.contentBaseUrl` and use relative paths in HTML/CSS.
### Creating content
1. In the **Content** section, click **Define**.
2. Click **Create message**.
3. If you want to use predefined in-app templates, go to the **Predefined templates** folder.
- Select the template from the list.
**Result**: You are redirected to the template editing mode in an [in-app template builder](/docs/campaign/in-app-messages/creating-inapp-templates/creating-inapp-template).
Discover how the predefined in-app templates have been used in [use cases](/use-cases/?ordering=DESC&sortBy=publishDate&filters=tags%3D%3D"predefined+in-app+templates").
3. If you want to create a message from scratch, click **New template**.
- Select one of the following builders:
- [Code editor](/docs/campaign/in-app-messages/creating-inapp-templates/creating-inapp-template)
- [Basic drag & drop builder](/docs/campaign/in-app-messages/creating-inapp-templates/inapp-drag-and-drop)
5. Create the contents of your in-app message according to instructions of the builder selected in step 3 or 4.
If an in-app message contains inserts, it becomes *dynamic* and won't be displayed when the application is in offline mode.
6. Click **Next**.
7. If you want to perform A/B/x test, you can create more variants by clicking the icon.
Message variants are assigned to user's UUIDs. If a user is logged in on multiple devices, they may be assigned different variants. Resetting the UUID will result in a change of the assigned message variant.
8. If you performed step 7, in the **Allocation** sub-section, you can enable:
- **Control group** - This option allows you to set up a control group.
The control group consists of users who will not receive any version of the in-app message. Users are assigned to the control group based on their UUID. If a user is logged in on multiple devices, they may receive the message on some devices if they do not belong to the control group on those devices. Resetting the UUID will result in excluding the user's UUID from the control group.
- **Equal allocation** - Using the slider, you can adjust the size of each variant and the control group.
8. Confirm by clicking **Apply**.
## Define trigger for the message
---
In this part of the process, you define which user or system activities launch the in-app message.
The user interface allows selecting up to 3 trigger events, however, in Android, only for `5.8.1` SDK version (released on 28.08.2023) or higher all triggers are considered altogether. For older SDK versions in Android, only the last event from the trigger list will be considered.
These limitations don't apply in iOS.
1. In the **Trigger events** section, click **Define**.
2. Click **Add event...**.
3. From the dropdown list, select an event.
You must select the events connected with a mobile application. Otherwise, an in-app message may not be displayed to any app user.
4. Define conditions that the event must meet:
1. Click **where**.
2. From the dropdown list, select an event parameter.
You must select the original parameter of the event - the event parameters [that were added by using event enrichment](/docs/assets/events/adding-event-parameters#enriching-events-with-data-from-catalogs) will not trigger the message.
3. Using logical operators, define the condition of the parameter's value.
5. To add more events, repeat steps 2-4.
6. Confirm by clicking **Apply**.
## Schedule the message display
---
In this part of the process, plan the time when the in-app message is active and displayed.
1. In the **Schedule** section, click **Define**.
2. Select one of the following options:
Run immediately
From the dropdown list, select the time zone consistent with the time zone of your workspace.
If you want to display the message on particular week days, enable Set time windows.
Select the days of the week. To select more than one day, press `shift` or `ctrl` (`cmd` for Mac users).
To select the time of the display on the selected day or days, enable Add time.
In the left field, enter the start time.
In the right field, enter the end time.
Confirm by clicking Apply.
Scheduled
In the Start field, select the date of in-app message activation. Synerise performs best with real-time data. This is why you can’t schedule a message for more than 10 days in the future.
In the End field, select the date until which the in-app message will be active.
From the dropdown list, select the time zone consistent with the time zone selected for your workspace.
If you want to display the message on particular week days, enable Set time windows.
Select the days of the week. To select more than one day, press `shift` or `ctrl` (`cmd` for Mac users).
To select the time of the display on the selected day or days, enable Add time.
In the left field, enter the start time.
In the right field, enter the end time.
Confirm by clicking Apply.
## Define the display settings
---
In this part of the process, you can set up the priority of the in-app message and define the limits of displaying it.
### Priority
The mobile application restricts the display of in-app messages to one at a time. It means that, if several in-app messages are triggered, the system must choose only one to display. In such case, the system chooses the in-app message for display based on the priority assigned to the message (`1` being the highest). If several in-app messages with the same priority are triggered, the most recently edited in-app message is displayed.
The rest of in-app messages will be kept in memory, but they may be displayed if:
- The event that triggers them occurs and they are active
- The capping limit is not exceeded
### Frequency
By default, an in-app message is displayed every time the conditions for its display are fulfilled. To avoid upsetting users, you can define the general frequency of displaying any in-app message or set a limit for a specific in-app message, especially if the trigger conditions are likely to occur often. If the message cannot be displayed to the user due to the frequency limit, the [`inApp.capping` event](/docs/assets/events/event-reference/inapp#inappcapping) is generated.
### Capping
Capping lets you define a limit on the total number of times a specific in-app message will be shown to a user. Capping is counted separately for each device used by the customer, so if capping is set to `3`, the message can be shown 3 times on each customer's device. If the message cannot be displayed to the user due to capping, the [`inApp.capping` event](/docs/assets/events/event-reference/inapp#inappcapping) is generated.
Capping isn't restarted after UUID changes.
You cannot change capping settings for active and paused in-app message campaigns.
#### Configuration of display settings
---
1. In the **Display settings** section, click **Define**.
2. In the **Delay display** field, enter the time after which the in-app message will be rendered. The counting starts with the trigger event.
3. In the **Priority index** field, enter the priority of the in-app message (choose between 1 and 1000, 1 being the highest).
4. Optionally, you can specify the [frequency](#frequency) of in-app message display within a defined time period.
- When the message is triggered, the system checks how many times the message has been displayed within the specified period, counting back from the current date.
- Regardless of which type of time interval you choose (hour, day, week), the time is analyzed in terms of hours. For example, if you select a 1 day period, the last 24 hours are analyzed, if you select 2 days, the last 48 hours are analyzed, and so on.
- **Example**: You configured the message to be displayed a maximum of 2 times within 1 day, so the system will track the number of times the message has been displayed in the past 24 hours. If a user was first shown the in-app message on March 3, at 08:23 and then at 14:45, the next in-app can be displayed after March 4, 08:23. If the in-app conditions are met before March 4, 08:23, the message won't be shown and the [`inApp.capping` event](/docs/assets/events/event-reference/inapp#inappcapping) will be generated.
1. Enable **Frequency limit**.
2. In the **Show maximum** field, enter how many times you want to display the message to a user.
3. In the **In period of** field, enter the time span for the limit set in **Show maximum**.
5. Optionally, you can set [capping](#capping) on the in-app message. To do so:
1. Enable **Capping limit**.
2. In the **Show maximum** field, enter the number.
6. Confirm by clicking **Apply**.
## Define UTM and URL parameters
---
In this part of the process, you may define UTM and URL parameters which will be attached to the links embedded in the content of the in-app message.
If the links aren't provided in the [preparelink insert](/developers/inserts/webpush#adding-utm-and-tracking-parameters-to-link), the parameters won't be added to the link in the message.
1. To define UTM parameters, in the **UTM & URL parameters** section, click **Define**. If you don't want to define these parameters, click **Skip step**.
1. Fill in the following fields: **UTM campaign**, **UTM medium**, **UTM source**, and **UTM term**.
2. Optionally, you can add URL parameters by clicking **Add parameters**.
3. Confirm by clicking **Apply**.
## Testing
---
To test an in-app message, you must integrate with Firebase.
You can test any variant of your in-app message regardless of the campaign's current status.
- For testing purposes, the message is sent to the device by using Google Firebase in order to omit the trigger conditions. This means you can send the test message only to profiles with the `has_mobile_push_devices` attribute set to `true`.
- You can send a test message to up to 15 profiles.
- The test in-app message always has a greater priority than any active in-app message, so testing serves only for checking the content of the message. It is not meant for testing segmentation conditions, frequency of display, limits, and so on.
- Test messages are not counted towards capping limits.
1. In the **Test** section, click **Define**.
2. If your message has more than one variant, select the variant of the message which you would like to use for testing.
3. In the **Select the user you want to send the test message to** searchbox, search the recipients by name, surname, email address, custom ID, or UUID.
**Result**: A dropdown list with search results appears.
4. On the dropdown list:
- if you have saved list of recipients in the past, click the **Saved lists** tab.
- if you want to define a one-off list of recipients, select the users to include in your list.
5. Confirm your choice by clicking **Add** in the searchbox.
6. Optionally, to save the list of recipients for future use, click **Save list**.
**Result**: A pop-up appears.
1. In the **List name** field, enter the name of the list of recipients.
2. Confirm by clicking **Apply**.
**Result**: The list is available in the **Saved lists** tab on the dropdown of searchbox when it's clicked.
5. To send the message, click **Send test**.
**Result**: The message is sent immediately.
## Adding custom parameters
---
You can add up to 10 parameters which will be added to every event generated by this communication. Their values are the same for every event in the communication. You can use this, for example, to create a common parameter for events from different types of communication that belong to one marketing campaign.
The list below contains the events to which additional parameters are added:
- `inApp.show`,
- `inApp.click`,
- `inApp.discard`,
- `inApp.capping`,
- `inApp.controlGroup`,
- `inApp.hide`
- `inApp.customHook`
- `inApp.renderFail`
1. To define the custom event parameters, in the **Additional parameters** section, click **Define**.
2. Click **Add parameter**.
3. In the **Parameter** field, enter the name of the parameter.
The following parameters cannot be sent:
- `modifiedBy`
- `apiKey`
- `eventUUID`
- `ip`
- `time`
- `businessProfileId`
- `correlationId`
- `clientId`
- `uuid`
4. In the **Value** field, enter the parameter value.
The value is always sent as a string when the event's JSON payload is generated. The maximum length of the string is 230 characters.
Dynamic values are not supported in the **Parameter** and **Value** fields.
5. If you want to add more parameters, click **Add parameter**, and repeat steps 3-4.
**Result**: the parameters will be added to all events listed above with the values you entered. This is an example event saved in the database, with the custom parameter `season` is located in the `params` object:
{
   "action": ...
   ...
   "params": {
    "clientId": 1111111111,
    "season": "autumn",
    "campaignName": "Back to school",
    "time": 1662392318050,
    "title": "Have you prepared for coming back to school?",
    "businessProfileId": "xxx"
   }
   }
6. Confirm the settings by clicking **Apply**.
## Activating the message
---
To activate the message, in the upper right corner click **Activate**.
The status of in-app messages is available on the list of in-app messages. In the [Communication statuses](/docs/campaign/statuses) article, you can check the statuses which can be assigned to in-app messages.
You can view the change history for this item from its configuration - see [Audit Log](/docs/settings/workspace/audit-log).
# Creating mobile push templates
# Testing dynamic content on a production site
This testing method is dedicated for advanced users.
When you create dynamic content, you may want to check if it renders correctly on your website, especially if it contains Jinjava or JavaScript. For this purpose, you can use [life preview](/docs/campaign/dynamiccontent/testing-dynamic-content/previewing-dynamic-content#the-live-preview-option), however, it lets you preview this campaign in isolation, without checking its impact on other dynamic campaigns.
This article contains instructions on how to test a dynamic content campaign along with other active dynamic campaigns on the website.
If you test dynamic content that contains references to a profile's data/attributes, make sure that the profile used for the test contains these attributes.
## Activate dynamic content for one user
This option is best if you want to see how the dynamic content campaign renders on the website only for a particular user. You can do so by indicating a particular email address (only for a recognized user) or UUID as the audience of the dynamic content.
Removing cookies or changing the browser's mode to incognito resets UUID.
Click here to expand the instruction on getting your UUID
Go to your website.
Open a browser console.
Execute the following command: `SyneriseTC.uuid` Result: Your UUID is returned. The image presents browser console with the Get UUID script executed
Copy the UUID and save it in the notepad.
1. In the settings of the dynamic content, in the **Audience** section, click **Define**.
2. Select the **New audience** tab.
3. Click **Choose filter**.
4. On the dropdown list, in the search box, enter `Email address` or `UUID`.
A user with the specific UUID is selected
A user with the specific email address is selected
5. Select the searched attribute.
6. From the **Choose operator** dropdown list, select **Equal**.
7. In the text field, enter the email address or UUID you saved in the notepad.
**Result**:
One user selected as the audience of the dynamic content
8. Confirm by clicking **Apply**.
9. Confirm the settings in the **Audience** section by clicking **Apply**.
10. In the **Schedule** section, click **Define**.
11. Select the **Display immediately** option.
12. Confirm the settings in the **Schedule** section by clicking **Apply**.
13. In the upper right corner, click **Activate**.
**Result**: Dynamic content runs on the website (if this is the Insert object type, it appears in the specific area on the website indicated in the **Content** section) and is visible only to the user with specific email address/UUID.
## Activate dynamic content for a user group
This option is best if you want to let multiple people test the dynamic content. This involves assigning a tag to their profiles and setting the DC's audience to the profiles with this tag.
You can assign a tag in the following ways:
- Add a tag manually on the profile card of the testing users.
The Tags section on a profile card
- Each tester executes a command in the browser's console (as described in ["Assign a tag to testing users"](#assign-a-tag-to-testing-users)).
This method is recommended for the testers who are unrecognized users on the website. The advantage of this method is that the access to the Synerise platform is unnecessary.
- Assign a tag to testing users through API using one of the following methods:
- [Update a profile (identify by ID)](https://hub.synerise.com/api-reference/profile-management#operation/UpdateAClient
)
- [Assign tag to profile](https://hub.synerise.com/api-reference/profile-management#operation/assignTagPOST)
Alternatively, you can perform the instructions in ["Activate dynamic content for one user"](#activate-dynamic-content-for-one-user) and include more users by indicating their UUIDs/email addresses by adding one condition with a specific identifier per tester.
### Assign a tag to testing users
1. Decide on the name of the tag, for example `campaigns-testing-snrs`
2. Each tester must perform the instructions below:
1. Go to your website.
2. Open the browser console.
3. Paste the following code to the console and execute it:
Replace `campaigns-testing-snrs` with your own tag.
**Result**: A tag is assigned to users.
The image presents the browser console with the 'Assign tag' function executed
### Define the users with a tag as campaign audience
1. In the settings of the dynamic content, in the **Audience** section, click **Define**.
2. Select the **New audience** tab.
3. Click **Choose filter**.
4. On the dropdown list, in the search box, enter the name of the tag.
5. Select the tag.
6. From the **Choose operator** dropdown list, select **Is true**.
**Result**:
A user with the specific tag is selected
8. Confirm by clicking **Apply**.
9. Confirm the settings in the **Audience** section by clicking **Apply**.
10. In the **Schedule** section, click **Define**.
11. Select the **Display immediately** option.
12. Confirm the settings in the **Schedule** section by clicking **Apply**.
13. In the upper right corner, click **Activate**.
**Result**: Dynamic content runs on the website (if this is the Insert object type, it appears in the specific area on the website indicated in the **Content** section) and is visible only to the users with the selected tag.
## Activate dynamic content with a query parameter
This option is best if you want to see how dynamic content campaign renders on the testing page within the monitored domain.
1. In the settings of the dynamic content, in the **Display settings** section, click **Define**.
2. Expand the Advanced options.
3. In the **Page targeting** section, select **Others**.
4. From the dropdown list, select **Page URL containing**.
5. In the text field, enter the URL of the subpage within your monitored domain.
**Result**:
Selecting the URL where the dynamic content will be displayed
6. Confirm the settings by clicking **Apply**.
7. Make sure the dynamic content is set to display immediately.
8. In the upper right corner, click **Activate**.
**Result**: Dynamic content appears under the specified URL (if this is the Insert object type, it appears in the specific area on the website indicated in the **Content** section).
URL where dynamic content is displayed
## Combining test methods
You can combine the methods; for example by creating a group of test users and displaying different versions of the dynamic content depending on the query parameter they enter.
# Using basic drag & drop builder
The basic drag & drop builder is an external solution provided by BeeFree implemented in Synerise that lets you create an in-app message template by dragging and dropping elements.
It is a great choice for creating in-app templates because it's user-friendly and efficient, provides visual control, offers customization options, supports collaboration, simplifies updates, and makes campaign management accessible to non-technical users.
You can personalize the content of the message by using [inserts](/docs/campaign/in-app-messages/creating-inapp-templates/creating-inapp-template#adding-a-snippet-to-the-template-code). Inserts let you refer to customer attributes (such as name, city, size), product recommendations (for example, last seen items or added to a cart), and the results of aggregates, expressions, and metrics.
## Good practices
### Campaign planning recommendations
Using a large number of in-app messages in your application can impact rendering time, message delivery, and battery usage.
To maintain optimal application performance when using in-app campaigns:
- Avoid assigning more than 10 in-app messages to the same trigger event.
- Avoid having more than 20 in-app messages active at the same time in your application.
- Review and archive in-app campaigns that you no longer need.
### Template construction
When creating or editing in-app message content:
- Place the the `SRInApp.close()` (or `SRInApp.hide()`) method at the beginning of the JS script.
- Use try/catch to handle possible fatal errors in the JS script.
- Handle situations where Jinjava inserts return empty data.
- When adding external links to your message:
- Only link to sites you trust.
- Don't link to large images that may negatively affect performance.
- Don't link to resources whose CSS/HTML may be blocked. If you have resources loaded from your own URLs, set `Synerise.settings.inAppMessaging.contentBaseUrl` and use relative paths in HTML/CSS.
## Building templates
---
1. Go to **Experience Hub > In-App Messages**.
2. On the left pane, click **Templates > New template**.
3. On the pop-up, select **Drag & drop builder**.
4. Proceed according to the instructions on building templates is available at the [BeeFree help center](https://support.beefree.io/hc/en-us/articles/360015405120-Building-Content-in-Beefree).
### Selecting in-app message type
To select the way of displaying your in-app message within a mobile application:
1. Above the builder view, in **In-app type**, select **Inline** or **Overlay**.
This option is not available if you opened the template editor directly from the in-app campaign creator.
2. If you selected **Overlay**:
1. select an option from the **Display type** dropdown list:
- **Fullscreen** - In-app messages are displayed in the center of the mobile application, with no clickable elements within the application.
- **Top bar** - In-app messages are shown at the top bar of the application, and user interaction is limited to the area below the message.
- **Bottom bar** - In-app messages appear at the bottom bar of the application, with user interaction restricted to the area above the message.
2. If you want to manage the display of in-app messages over safe area in your mobile application, use the **Cover safe area** option.
A safe area is the portion of a view that is not covered by elements such as a navigation bar, tab bar, or toolbar. Safe areas are important for ensuring visibility and access to a device's interactive features.
Available from the following application versions:
- iOS: `5.1.0` and higher
- Android: `6.1.0` and higher
- By enabling this option, the in-app message will extend into bars, notches and other UI elements.
- By disabling this option, the in-app message won't cover system UI elements such as top bars, notches, and so on. This is the default setting.
View of the Display type option in drag and drop builder
### Adding links
---
Universal links and deep links are used to navigate to specific content within an app, while web links can display web content within the app itself. In the template builder, the **Link type** option lets you incorporate links into your in-app template. The builder automatically recognizes the link type you enter, triggering the corresponding action without requiring further configuration.
The following SDK versions automatically recognize the link type and adjust the action accordingly:
- Android: `5.19.0` and higher
- iOS: `4.18.0` and higher
1. Drag the **Button** widget to the canvas.
**Result**:
A button widget added to the canvas
2. Go to the widget editing mode by clicking the widget on the canvas.
**Result**: The editing options appear on the right pane.
The configuration of the Button widget
3. In the **ACTION** section, set the **Link type** option to **Open web link**:
- To add a web or universal link, in the **Url** field, enter a URL address including the HTTP or HTTPS protocol, for example: `https://example-link.com/`
- To add a deep link, in the **Url** field, enter a URL in the format of mobile deep linking, for example: `myapp://product?id=123`
You can use Jinjava inserts in links for personalization.
### Creating HTML blocks
---
Apart from the standard building elements such as Title, Paragraph, List, Image, Button, Divider, Social, HTML, Icons, and Menu, the basic builder includes the custom, Synerise-native **HTML blocks** element. The configuration of this element takes place in the [Synerise-native code editor](/docs/campaign/in-app-messages/creating-inapp-templates/creating-inapp-template), that lets you derive the benefits provided by the code creator such as:
- creating re-usable HTML block templates,
- creating a block to be edited in an easy-to-use configuration form that doesn’t require programming skills
- previewing the block in the context of a specific customer in isolation from the in-app message template
You can also preview the whole template in the context of a specific customer.
5. On the right side of the screen, select and drag the **HTML blocks** element to the template.
**Result**:
The HTML block added to the template
6. On the **HTML blocks** you added to the template, click **Configure**.
**Result**: A pop-up appears.
7. On the upper right side, click **New block**.
8. Create the structure of an HTML block by following the instructions in the ["Creating template"](/docs/campaign/in-app-messages/creating-inapp-templates/creating-inapp-template#creating-a-template) section.
- You can build a simple HTML structure in the **HTML** section.
- On the **HTML** tab, you [can build an easy-to-use configuration form](/docs/campaign/in-app-messages/creating-inapp-templates/creating-inapp-template#template-editing-simplification) which can be filled out by users with no programming skills. To do so, [add variables](/docs/campaign/in-app-messages/creating-inapp-templates/creating-inapp-template#adding-a-variable) to the block template such as color pickers, dropdown lists (with aggregates, expressions, metrics, voucher pools, and recommendations created in Synerise), and fields, so the users who will use this template in a builder will need only to fill out the fields in this form. For example:
Example field in a configuration form
9. To save this block as a template, click an arrow on the left to the **Next** button, and select **Save as**. On the pop-up, enter the name of the template and select the folder in which the template will be saved.
10. To use this block in a dynamic content template, click **Next**.
We recommend placing the HTML block as the sole element in the row. Additionally, ensure that the styling of the block is compatible with the styling of the template.
## Previewing templates
5. To check the preview of the template for a particular customer or a product, click the **Preview** button on the upper left side.
1. Enter the ID of a customer or a product.
2. Click **Apply**.
# Using advanced drag & drop builder
An advanced landing page drag and drop builder lets create customizable landing pages without the need for coding or technical expertise. You can easily arrange and personalize different page elements like text, images, forms, and buttons. Just drag and drop them where you want them to appear on the page.
If you use AdBlock, you need to disable it before proceeding to the Landing Page Creator. Otherwise, you may not be able to use it.
## Creating a template
---
1. Go to **Experience Hub > Landing Page > Add landing page**.
2. In the **Content** section, click **Define**.
3. Click **Create message > New template**.
3. On the pop-up, select **Drag & drop builder > Advanced builder**.
**Result**: You are redirected to the advanced builder.
Advanced landing page builder
### Widget reference
---
- To access widget library, on the right pane, click
- You can make use of the folders in the widget library:
- **Basic** - This library offers a collection of basic widgets that provide a starting point for your designs.
| Basic | Description |
|-------------|---------------------------------------------------------------------|
| 1 section | Inserts one box |
| 1/2 section | Inserts one box divided into two smaller spaces |
| 1/3 section | Inserts one box divided into three smaller spaces |
| 3/7 section | Inserts one box divided into two spaces - one smaller, one bigger |
| Button | Inserts a button |
| Divider | Inserts a line that can be used to divide content inside a template |
| Text | Inserts a text box |
| Image | Inserts a box dedicated for image upload to the template |
| Image link | Inserts a container for the link to the image |
| Quote | Inserts a text box with a default setting of italic font |
| Link | Inserts a link |
- **Predefined** - This library offers a collection of pre-designed widgets. Each widget comes with a variety of design options, allowing you to select the most suitable design that aligns with your specific requirements and customize it to match your needs.
| Predefined | Description |
|------------|-------------------------------------|
| Headers | Inserts a header of a landing page |
| Menu | Inserts a top menu of landing page for easy navigation between different content sections |
| Profile | Inserts a box which you can dedicate to introducing people|
| Divider | Inserts a line which lets you separate content sections in a template |
| Gallery | Inserts a section with the boxes in which you can add images |
| Link | Inserts a section dedicated to links, it contains spaces into which you can incorporate short description, icons, and images |
| Module | Inserts a box with a large image, description, and action link |
| Product | Inserts a section dedicated to products, it contains dedicated space for images, product descriptions, and links |
| Footer | Inserts a bottom section of the page that typically appears across all pages of a website. It contains a variety of information such as contact details, links to important pages, social media icons, copyright notices, and legal disclaimers. |
- To add a widget to the canvas, drag it from the library and drop it to the canvas
- You can customize the design of the widget ([widget personalizing options](#widget-personalizing-options)) and define functional options in the Components section available on the right pane by clicking
### Widget personalizing options
---
To customize the widget design, click the widget on the canvas. On the right pane, the following options will be available:
- **Classes** - This section lets you define a class of the widget you are editing.
- **General** - This section lets you adjust the position of the widget, define the size of the space between the widget and the top, bottom, left and right edges.
- **Dimension** - This section lets you change the size of the widget, its width and height, space between the widgets and padding.
- **Typography** - This section lets you adjust the font-related settings, you can change font type and size, its weight and letter spacing. Such options as text alignment, text shadow and text decoration will help you make the content on the landing page look more attractive.
- **Decorations** - This section lets you change opacity, background color, the rounding corner, the width and border style.
- **Extra** - This section lets you change the dimension of the widgets, by making them look tilted or turned upside down.
- **Flex** - This section lets you create a container of elastic blocks and manipulate those blocks in regard of their parent and children elements.
Additionally, in the components settings tab (), you can add additional parameters of the widget you are editing. For example, for an image it will be an alternative description that will appear instead of an image if it cannot be correctly displayed in the browser. For a button it will be a link to a website and settings whether a website will open in a new window.
### Template body preview
---
You can check the structure of the landing page and change the position of widgets used in the landing page. The template body preview is available on the right pane by clicking Body preview in Advanced landing page builder
### Saving template
---
- To save the template, on the top of the page, click **Save as**.
1. On the pop-up, in the **Template name** field, enter the name of the template.
2. Select the template directory in which the template will be saved.
3. Click **Save**.
- To use the template in for a landing page, click **Use in communication**.
**Result**: You will be redirected to the configuration form of the landing page.
# Configuring web push notifications
Before you create and send your first web push notification, you must:
- integrate with Synerise via JS SDK,
- create a Firebase account and integrate it with Synerise to start collecting web push agreements on your website.
- [install service worker on your server](#install-service-worker).
Web push notifications will be shown to a visitor, who agreed to receive web push notifications, according to the settings. The following web push related events are collected by default:
- `webpush.subscribe` - a visitor has agreed to receive web push notifications
- `webpush.subscribeBlock` - a visitor hasn't agreed to receive web push notifications
- `webpush.subscribeDiscard` - a visitor closed an agreement form (there is a possibility that the visitor will subscribe in the future)
- `webpush.send` - a web push notification was sent
- `webpush.show` - a web push notification was displayed
- `webpush.click` - a visitor clicked a web push notification
- `webpush.notRegistered` - a web push notification wasn't sent due to an invalid token
## Requirements
---
- You must be granted user permissions to access **Settings**.
- Your site must fully support HTTPS.
- Your site must redirect all `http://` requests to `https://` requests.
- [Integrate with Synerise via Synerise JS SDK](/docs/settings/tool/tracking_codes) (make sure your tracking code covers web push notifications).
Perform the configuration in the given order.
## Integrate Firebase with Synerise
---
The full procedure of Integrating Firebase with Synerise is available [here](/docs/settings/tool/firebase).
## Install service worker
---
1. Go to **Settings > Web push**.
2. Click **Show** in **General** section.
2. Switch the **Web notifications currently disabled** toggle to **Web notifications currently enabled**.
**Result**: The installation instruction appears.
The installation instruction
3. Follow the commands on the interface.
The file should be available under the site root with the same filename, for example: `example.com/snr-sw.js`. Example for a subfolder: `example.com/other/path/snr-sw.js`.
If you choose other directory than the root, to properly use the service worker you must declare the `Service-Worker-Allowed: /` header. In case you use a different worker, you can add `snr-sw.js` contents to your worker file and rename it to `snr-sw.js`.
4. In the **Path to service worker** field, enter the path.
5. Confirm by clicking **Apply**.
**Result**: The configuration is completed. The next step is to prepare [web push agreement forms](/docs/campaign/Webpush/two-step-agreement-form).
In service worker version 3.0.0 (or higher), we have optimized the size of webpush frames sent to Firebase and enabled action buttons in web push notifications. The version of the service worker stored in the customer's browser can be identified in the [webpushToken.update](/docs/assets/events/event-reference/webpush#webpushtokenupdate) event in the version parameter
What if web push notifications still don't display?
Make sure the web push notification doesn't contain errors.
In case there are any snippets used in the template, make sure that the item of information you want to display using an snippet is available on the customer cards of the recipients. For example, if you want to mention the recipient's city name in the template, check if all recipients have the name of the city in the customer's card, otherwise, this snippet will not display.
If a web push is displayed differently than expected, check how the specific browser, operating system, or device handles web pushes.
If the web push notification is created correctly, go to your website.
Open the console.
Search for SR.init.
If there is the disableWebPush parameter, contact your developers to remove it.
Console view
# Integrating SMS gateway
An SMS gateway lets you send SMS messages by providing a relay to a telecom network. Synerise can integrate with SMS gateways and help you organize and effectively manage SMS communication.
You can integrate Synerise with the following gateways:
- SMSAPI,
- Smsbiz,
- Materna,
- Infobip,
- TideMobile,
- [Twilio](/docs/settings/tool/integrating-sms-gateways/twilio),
- MessageFlow - This integration allows you to use an in-built feature of shortening links. Synerise passes a message with the link in a long form to the gateway and the gateway sends it as a shortened URL. To use this feature, you must enable it by switching the **Short URL mechanism** toggle on.
## Enable integration
---
1. Go to **Settings > Apps & Services**.
2. Find the SMS gateway you want to configure and next to the name of the gateway, click **Show**.
3. Click **Add connection**.
4. Switch the **Enable connection** toggle on.
3. Enter the credentials of the gateway (available on your gateway account).
4. Confirm by clicking **Apply**.
After enabling the integration with the SMS gateway, [create an SMS account](/docs/campaign/SMS/configuring-sms-gateway#create-sms-account) from which the text messages will be sent to your recipients.
## Create SMS account
---
5. Go to **Settings > SMS > Add SMS account**.
6. In the **Account name** field, enter the name of the account. It will be displayed on the list of SMS accounts.
7. In the **From name (SenderId)** field, enter the name (alias) that will be displayed as the name of sender in the inbox of the recipient.
Make sure the gateway plan covers this feature.
8. From the SMS provider list, select the SMS gateway.
9. Confirm by clicking **Save**.
**Result**: The new account is visible on the list in **Settings > Configuration > SMS**.
You can add only one SMS account with a given provider.
Now, you can [create a template of SMS](/docs/campaign/SMS/creating-SMS-template) and [send your message](/docs/campaign/SMS/sending-sms).
# Creating dynamic content
# Using mobile push code editor
The code editor allows you to:
- use JSON to create and update templates of simple and silent push notifications.
- [create templates to be edited in an easy-to-use configuration form that doesn't require programming skills](#template-editing-simplification).
You can personalize the content of the message by [using snippets](#adding-a-snippet-to-the-template-code) and [Jinjava inserts](/developers/inserts) to inject data such as profile attributes (for example, name), recommendations, analysis results.
[Snippets](#adding-a-snippet-to-the-template-code) also let you re-use the same content in multiple templates, or create a reference to a fragment that you only need to update in one place to see the change in all templates where it's used.
You should become familiar with the [prerequisites](/docs/campaign/Mobile/mobile_campaign#requirements) before creating a push notification template.
## Adding tracking parameters to links
---
To include [tracking parameters](/developers/web/user-identification#recognizing-customers-from-link-parameters) and [UTM and link parameters](/docs/campaign/Mobile/creating-mobile-push#define-utm-and-url-parameters) in the links in a template, always wrap the link with the [{% preparelink %}{% endpreparelink %} insert](/developers/inserts/email#adding-utm-and-tracking-parameters-to-links). You can only add tracking parameters to the links to external websites.
## Opening the code editor
---
1. Go to **Experience Hub > Mobile**.
2. On the left pane, select **Templates**.
3. In the upper right corner, click **New Template**.
4. Select the push notification type:
- **Simple Push** - a notification that is displayed in the main screen of a mobile device. Simple push messages appear in the notification center on mobile devices when the screen is locked or they are visible in the top bar when the screen is unlocked.
- **Silent push** - a hidden notification that is delivered to the app on a user's device. Unlike a typical push, it does not cause any interaction with the user. Silent notifications quietly deliver a certain set of data to the app. This is a great solution for letting apps know about changes in content.
5. On the pop-up, select **Code editor**.
## Creating a template
---
A mobile push code editor
4. Use the **JSON** tab to define the properties of the template.
6. When the template is ready, in the upper right corner click **Save this template > Save as**.
7. On the pop-up:
1. In the **Template name** field, enter the name of the template.
2. From the **Template folder** dropdown list, select the folder where the template will be saved.
3. Confirm by clicking **Apply**.
### Adding a snippet to the template code
[Snippets](/docs/assets/snippets) let you:
- insert data such as profile attribute, recommendations, or analysis results into the communication.
- create re-usable pieces of static content, so you don't need to manually copy and paste between templates.
- create dynamic pieces of content that are updated in all templates when you update the snippet definition.
1. Click **Snippets**.
**Result**: The snippet widget opens.
2. Add a snippet as described in [Snippets](/docs/assets/snippets).
## Template editing simplification
To make your template more accessible to users without programming skills, you can add a configuration form with variables dedicated for the template, so the user can make adjustments to the template.
The effect of template editing simplification is that you can edit templates by filling out a user-friendly configuration form (available in the **Config** tab) whose fields define the value for each property of the template.
The process of template simplification involves replacing values with variables in the JSON elements, such as title, description or priority. You can also add a variable in the place of Jinjava elements, such as a recommendation campaign ID or voucher pool ID. Variables inserted in the code appear in a form the **Config** tab when editing the template.
#### List of variables
| Variable name | Description | Example output |
|------------------------|------------------------------------------------------------------------------------------------------------------------------------------|----------------|
| **Synerise insert select** | Allows you to add a dropdown list with aggregates, expressions, metrics, voucher pools, recommendations, files, catalogs, or attributes. | Example: selecting a Synerise object from the list |
| **String** | Allows you to add a field that requires a string value. | Example: Filling out a field |
| **Select** | Allows you to add a dropdown list with configurable values. | Example: selecting an option from a dropdown list |
| **Switch** | Allows you to add a field which is enabled/disabled by a toggle. | Example: enabling an option |
| **Color** | Allows you to add a color selector. You can either select a color or enter its code manually. | Example: selecting a color |
| **Number** | Allows you to add a field that requires a number. You can either select a number from a dropdown or enter it manually. | Example: defining a number |
#### Results of simplifying template editing
Instead of modifying the design of the template directly in the code, a user can go to the **Config** tab and define the properties of the template by filling out configuration form.
The image below presents the easy-to-edit form that lets users without coding expertise change the variable values:
Defining the settings of a string variable
### Adding a variable
1. Select one of the code editor tabs.
The tabs may be **JSON**, **HTML**, **CSS**, and **JavaScript**, depending on the communication type.
2. Position the cursor in the place where you want to add the variable.
3. On the right side, click **+ Variable**.
**Result**: A sidebar appears.
4. In the **Identifier** field, enter the ID of the variable.
This will be the title of the field unless you define the **Label** field.
The first character of the ID can't be a number.
5. From the **Type** dropdown list, select the type of variable.
Allows you to add a field that requires a string value.
1. In the **Label (Optional)** field, enter the name of the field.
If this field is empty, the name of the field will be taken from the **Identifier** field.
2. In the **Description (Optional)** field, enter a short explanation of the field's purpose.
3. In the **Default Value** field, enter the default value.
Allows you to add a dropdown list with configurable values.
1. In the **Label (Optional)** field, enter the name of the field. If this field is empty, the name of the field will be taken from the **Identifier** field.
2. In the **Description (Optional)** field, enter a short explanation what this field is for.
3. In the **Display Name** field, enter the name that will be visible in a dropdown.
4. In the **Value** field, enter a value.
5. In the **Default Value** field, enter the default value.
A select variable during configuration
Allows you to add a dropdown list with aggregates, expressions, metrics, voucher pools, recommendations, files, catalogs, and attributes.
1. In the **Label (Optional)** field, enter the name of the field. If this field is empty, the name of the field will be taken from the **Identifier** field.
2. In the **Description (Optional)** field, enter a short explanation what this field is for.
3. From the **Insert Type** dropdown list, select the type of resource:
- **Aggregates, AI recommendations, Expressions, Metrics, Voucher pools**: creates a dropdown list of available resources of the selected type. When the user selects a resource in the form, its ID is inserted into the code of the template. This ID can be used in [Jinjava](/developers/inserts/insert-usage) to display the value of the selected resource.
- **Catalogs**: creates a dropdown list of catalogs. When the user selects a catalog in the form, its name is inserted into the code of the template. This name can be used in [Jinjava](/developers/inserts/insert-usage#catalogs) to retrieve a value from the catalog.
- **Files**: creates a dropdown list of [files](/docs/assets/files-explorer). When user selects a file, its URL is inserted into the code.
- **Profile attributes**: creates a dropdown list of profile attributes. When a user selects an attribute, its name is inserted into the code of the template. This name can be used in [Jinjava](/developers/inserts/insert-usage#customer-attributes) to retrieve the attribute value.
3. In the **Default Value (Optional)** field, enter the default value.
**Result**: A dropdown with the insert is added to the form in the **Config** tab. From the dropdown list, you can select an item of the chosen type (for example, aggregates). As a result, the value of variable will be ID of the selected item.
Synerise insert select in the configuration form
Allows you to add a field which is enabled/disabled by a toggle.
1. In the **Label (Optional)** field, enter the name of the field. If this field is empty, the name of the field will be taken from the **Identifier** field.
2. In the **Description (Optional)** field, enter a short explanation what this field is for.
3. In the **Default Value** field, select the default value (true/false).
Allows you to add a color selector. You can either select a color or enter its code manually.
1. In the **Label (Optional)** field, enter the name of the field. If this field is empty, the name of the field will be taken from the **Identifier** field.
2. In the **Description (Optional)** field, enter a short explanation what this field is for.
3. In the **Default Value** field, enter the default value.
Allows you to add a field that requires a number. You can either select a number from a dropdown or enter it manually.
1. In the **Label (Optional)** field, enter the name of the field. If this field is empty, the name of the field will be taken from the **Identifier** field.
2. In the **Description (Optional)** field, enter a short explanation what this field is for.
3. In the **Default Value** field, enter the default value.
6. If you want to add the variable to a group that can be more easily displayed together in the form:
1. Click **Variable Group**.
2. Select or create a group:
- To select a group, click its name.
- To create a group:
1. Click **Add new group**.
2. Enter a group name.
3. Enter a group ID.
4. Click **Apply**.
**Result**: On the **Config** tab, the groups can be collapsed and expanded.
5. In the upper right corner, click **Add**.
**Result**: In the template code, a variable appears (it starts with `####`). It also becomes available on the **Config** tab.
6. Optionally, to modify the order of variables appearing in the configuration form, add the `order` parameter to the variable formula (for example, `#### type: "string", id: "string", label: "Text", order: 1 !####`).
## Previewing templates
If your template contains dynamic elements (Jinjava), their result will be different for every user. The preview in the builder lets you define the user identifier and the Jinjava tags/inserts will be rendered specifically for that user.
1. To check the preview of the template for a particular profile, click the **Preview contexts** button on the upper left side.
2. Enter the ID of a profile.
3. Click **Apply**.
# Creating emails
The next step after preparing an email template or templates (if you plan to send more variants and perform A/B testing) or importing it to Synerise, is picking the recipients, scheduling sending of the message, defining UTM parameters and testing.
The process consists of 5 steps out of which only 3 are obligatory. After that, you can send an email or save it as a draft.
## Requirements
---
1. To be able to send the email, you must configure a [sender account](/docs/campaign/e-mail/configuring-email-account).
2. The audience to which you send an email (especially if it's marketing content) must give their consent (in Synerise we call it a marketing agreement). You can check the status of the marketing agreement for each customer on their customer card in Profiles.
3. Optionally, you can prepare a [segment](/docs/analytics/segmentations/creating-segmentations) of customers before creating an email to have a list of recipients ready.
## Creating an email
---
A blank sending email form
1. Go to **Experience Hub > Email > Create new**.
2. Enter the name of the email (it is only visible on the list of emails).
## Select recipients of the message
---
1. In the **Audience** section:
1. Choose the recipients:
- **Everyone** - Everyone who gave marketing consent will receive your message. The estimated reach takes into account the number of customers who have given marketing consent to this type of communication (this means that in the case of communication such as mobile push, the estimated reach may be higher than the number of customers who have your mobile application).
- **Segment** - You can send the message to one or more existing segments in the system.
- **New Audience** - Create new segments and specify the conditions which the target must meet.
- Regardless of the way of selecting the audience, the system limits the audience to those who have the marketing agreement on, unless you override this behavior in the advanced options.
- If the audience is larger than 500000 profiles, consider using **Batch delivery** in the advanced options to avoid timeouts.
2. **Optional**: Open **Advanced options** and configure additional settings.
Advanced options - explanation
Batch delivery - It prevents sending emails to all recipients at once. When to use it? When the target audience is so large that the email provider might not be able to process all messages at once.
If you plan to send messages to an audience larger than 15,000 profiles, we recommend this option.
For example, if the expected performance of your messaging provider is 1 million messages per hour and the expected audience is 5 million profiles, you can split the communication into 60 batches sent 5 minutes apart: every batch will include ~83000 profiles sending all messages will take 5 hours. If a batch is too large (or the batch delivery option is not used), it may time out in your messaging provider's system and the messages may not be delivered. For details on provider performance, contact the provider. If a batch takes more than 8 hours to complete for any reason, it is cancelled in Synerise.
Enable control group - It creates a subgroup of the recipients who won't receive any email variant. When to use it? When you send one or several variants of an email (A/B testing). When a customer is assigned to their control group, the information is available in their Profiles card as an event.
Send without marketing agreement check - To comply with GDPR resolutions, Synerise by default filters out the recipients with marketing agreement off. This option, however, allows to send an email to those whose marketing agreement is off (after ticking this option, the number in the estimated reach don't refresh). When to use it? While sending messages that don't contain marketing content, for example, information about delays in shipping.
Include audience changes - Available only for scheduled emails. It recalculates the number of recipients right before sending the email. By default, the size of the customer segment chosen for the email is the same as in the moment of sending, even if the number of customers in the chosen segment changed between scheduling the email and sending. When to use it? When the size of the segments of customers selected as the audience of the email can change dynamically.
Ignore limits - If you want to make sure that this message is sent to a customer, even it exceeds the global limit of this type of messages for a single customer per day (more information is available here), enable the Ignore limits toggle. You may apply it to system messages such as a transaction confirmation, notifications about order delays, and so on.
1. Confirm the selection by clicking **Apply**.
## Select or create an email template
---
2. To select email templates and attachments, in the **Content** section, click **Define**.
3. Select the sender type:
- **Fixed sender** — sends the email from a single sender account configured for this campaign.
- **Dynamic sender** — assigns a sender account to each recipient dynamically, based on their profile attributes. Use this option for multibrand or multilanguage operations where different markets require separate sender accounts with dedicated IP pools to maintain deliverability standards. For more information, see [Dynamic email sender](/docs/campaign/e-mail/dynamic-email-sender).
The Fixed sender tab in the Content section of the email campaign
1. In the **From name** field, enter the sender name that is displayed in the mailbox. When you leave this field empty, the name will be taken from the email sender configuration.
2. In the **Subject** field, enter the subject of the email that is displayed in the mailbox.
3. **Optional**: In the **"Reply to" email address**, enter an email address to override the reply to email address defined in the sender account configuration. [Dynamic values](/developers/inserts) are allowed in this field.
4. **Optional**: In the **"Reply to" name**, enter a name to override the reply to name defined in the sender account configuration. [Dynamic values](/developers/inserts) are allowed in this field.
5. **Optional**: In the **Attachments**, by dragging and dropping you can add files up to 20kB. Accepted formats: `.png`, `.jpg`, `.pdf`.
6. To create or add a ready template, click **Create message**.
Dynamic sender allocation follows the Brickworks schema, which defines how an email account is assigned to each recipient. The **"Reply to" name** and **"Reply to" email address** fields let you override the sender account-specific settings (from **Settings > Email accounts** ). Leave them blank to keep the existing sender account-specific configuration.
The Dynamic sender tab in the Content section of the email campaign
1. In the **Schema** dropdown list, [select a schema which maps](/docs/campaign/e-mail/dynamic-email-sender#creating-the-schema) a value of a specific profile attribute to the sender account. You can hover over a schema in the list to preview its type, creation date, last update, and usage.
2. **Optional**: In **Name**, enter a sender name to override the original sender name settings from the sender account configuration.
3. In **Subject**, provide the subject of the message, it will display in the inbox. This is a universal subject.
2. **Optional**: In the **"Reply to" email address** field, enter an email address to override the reply to email address defined in the sender account configuration.
2. **Optional**: In the **"Reply to" name** field, enter a name to override the reply to name defined in the sender account configuration.
3. **Optional**: In the **Attachments**, by dragging and dropping you can add files up to 20kB. Accepted formats: `.png`, `.jpg`, `.pdf`.
4. To create or add a ready template, click **Create message**.
Although Synerise automatically adds [the unsubscribe header](/docs/campaign/e-mail/unsubscribe-link), we strongly recommend to add the resignation link to the template - without it, the emails may reach the spam folder.
## Schedule the send date
---
Schedule section
3. To set the date for the email, in the **Schedule** section, click **Define**.
4. Select a scheduling mode:
- To send the email at once, select **Immediately**.
- To send the email later, select **Scheduled** and configure the following parameters:
To select the best time of sending the email, take a look at the suggestion from the AI engine that calculates the best time (for all recipients). If time optimization is disabled, click [here](/docs/settings/configuration/time-optimizer) to learn more how to enable it and use it.
1. In the **Start** field, from the calendar, pick the day.
Synerise performs best with real-time data. This is why you can't schedule a message for more than 10 days in the future.
2. To select hour of the day, click **Select time**.
3. Confirm the date by clicking **Apply**.
**Result**: The pop-up closes.
4. Select the time zone.
2. Select the **Silence Hours** setting:
- **Without silence hours** - The communication can be processed and sent out to the recipients at any time during the day.
- **Include silence hours** - With this option, you can set a time of day when the communication can't be sent:
1. In the **From** field, select when the silence hours start.
2. In the **To** field, select when the silence hours end.
The period can't be longer than 12 hours.
When a message can't be sent due to silence hours, a `message.skipped` event is generated.
- When silence hours are enabled, the **Discard messages** option is always enabled. This means that messages blocked by silence hours are discarded entirely. **The discarded messages are not sent when silence hours end**.
- If the **Start** time of the schedule is in the silence hours, you can't apply the settings.
- If communication is scheduled for sending just before silence hours (for example, silence hours start at 22:00 and sending is scheduled at 21:59:59), the communication may be processed, sent, and logged in the events a short time after the silence hours start.
3. To save the changes, click **Apply**.
## Define UTM and URL parameters
---
In this part of the process, you may define UTM and URL parameters which will be attached to the links embedded in the content of the in-app message.
We recommend adding links to the contents of the message through[preparelink insert](/developers/inserts/email#usage).
7. To define UTM parameters, in the **UTM & URL parameters** section, click **Define**.
1. Fill in the following fields: **UTM campaign**, **UTM medium**, **UTM source**, and **UTM term**.
2. To add URL parameters, in the **URL parameters** section, click **Add parameter**.
3. Enter the parameter and value pair in the **Parameter** and **Value** fields, respectively.
4. To save the configuration, click **Apply**
## Testing
---
For testing purposes, you can send the message or one of its variants to the recipients you indicate in this section. You can do this regardless of the campaign's current status, except when the campaign is in the **Sending** status.
- You can select profiles from the database (available in the **Behavioral Data Hub > Profiles**) or you can send the message to recipients who are not in the database.
- When you send the test message to the recipients who are not in the database, the customer Jinjava tags will not render if the message contains any. The only Jinjava tags that will be rendered are non-customer Jinjava tags (metrics and catalog references).
- The **View in browser** option is unavailable in the test emails:
- for the recipients who are not in the database
- which are sent through **Automation Hub**
- Test messages are not counted towards capping limits.
- The system doesn't count clicks from test messages. If you click a link in the test message, an event will be not generated.
- If you want to send a test message to the user that is in the database, they need to be assigned an email address.
1. In the **Test** section, click **Define**.
2. If your message has more than one variant, select the variant of the message which you would like to use for testing.
3. In the **Select the user you want to send the test message to** searchbox:
- To select an existing recipient list:
1. In search results, select the **Saved lists** tab.
2. Select the list or lists.
3. Confirm by clicking **Add**.
- To add recipients from the database to a new list:
1. Search the recipients by name, surname, email address, custom ID, or UUID.
**Result**: A dropdown list with search results appears.
2. From the dropdown list, select the users to include in your list of recipients.
3. Confirm your choice by clicking **Add** in the searchbox.
- To add recipients who are not in your database to a new list, add them one-by-one:
1. In the searchbox, enter the email address you want to add.
**Result**: A dropdown list appears.
2. In the dropdown list, click **Add {the email address you entered}**.
4. Optionally, if you create a new list of recipients, to save it for future use, click **Save list**.
This option lets you create two types of lists: with recipients from the database and with recipients who are not in your database. It's impossible to create a list that combines recipients from both categories.
**Result**: A pop-up appears.
1. In the **List name** field, enter the name of the list of recipients.
2. If your list includes both types of recipients (those from the database and those who are not in the database), select one of the following options:
- **Save profile list** - to save a list with recipients from your database only.
**Result**: Recipients who are not in the database will be removed from the list after you save it.
- **Save custom email list** - to save a list only with recipients who are not in your database.
**Result**: Recipients who are in the database will be removed from the list after you save it.
3. Confirm by clicking **Apply**.
**Result**: The list is available in the **Saved lists** tab of the recipient search result list.
5. To send the message, click **Send test**.
**Result**: The message is sent immediately.
## Adding custom parameters
---
You can add up to 10 parameters which will be added to every event generated by this communication. Their values are the same for every event in the communication. You can use this, for example, to create a common parameter for events from different types of communication that belong to one marketing campaign.
Additional parameters will be added to [email events](/docs/assets/events/event-reference/email).
1. To define the custom event parameters, in the **Additional parameters** section, click **Define**.
2. Click **Add parameter**.
3. In the **Parameter** field, enter the name of the parameter.
The following parameters cannot be sent:
- `modifiedBy`
- `apiKey`
- `eventUUID`
- `ip`
- `time`
- `businessProfileId`
- `correlationId`
- `clientId`
- `uuid`
4. In the **Value** field, enter the parameter value.
- The value is always sent as a string when the event's JSON payload is generated. The maximum length of the string is 230 characters.
- You can use Jinjava only in this field with the following restrictions:
- it will be rendered in the `.send`, `.notSent`, `webpush.notRegistered`, and `push.notRegistered` events
- the 230-character limit applies to the **Value** field both before and after Jinjava rendering; if the length exceeds this limit at any stage, the value will be truncated.
- if a Jinjava does not render, a raw code will be visible in the parameter value.
5. If you want to add more parameters, click **Add parameter**, and repeat steps 3-4.
**Result**: the parameters will be added to all events listed above with the values you entered. This is an example event saved in the database. The custom parameter `season` is located in the `params` object:
{
   "action": ...
   ...
   "params": {
    "clientId": 1111111111,
    "season": "autumn",
    "campaignName": "Back to school",
    "time": 1662392318050,
    "title": "Have you prepared for coming back to school?",
    "businessProfileId": "xxx"
   }
   }
6. Confirm the settings by clicking **Apply**.
## Sending an email
---
9. To complete the email:
- To save as a draft, click **Finish later**.
Neither a test email nor the actual email are sent if:
- It contains Jinjava snippets with syntax errors.
- It contains dynamic content (inserts and/or jinjava snippets that refer customer data) that doesn't return values for the recipient to which an email is directed to.
- To send the email, click **Send**.
The status of email communication is available on the list of emails. In the [Communication statuses](/docs/campaign/statuses) article, you can check the statuses which can be assigned to email communication.
# Dynamic email sender
The dynamic email sender feature lets you send one campaign from different email accounts, depending on who the recipient is. Instead of using one sender for everyone, the system checks a specific attribute assigned to each recipient and automatically chooses the right sender account based on that. The selection is based on a [Brickworks](/docs/assets/brickworks) schema, where the mapping between attribute values and sender accounts is defined.
This is designed for multibrand or multilingual operations where each market or brand requires a dedicated sender account. For example, a company that operates in multiple regions can ensure that recipients in each region receive the email from the correct regional sender account, with the appropriate IP pool and sender identity.
If a recipient's profile attribute value does not match any record in the schema, or if the schema has been deleted, the campaign is not sent to that recipient. A `message.notSent` event is generated instead.
## Requirements
---
- At least two [email sender accounts](/docs/campaign/e-mail/configuring-email-account) must be configured in the workspace.
- You must have the following user permissions:
- [create and edit schemas](/docs/settings/identity-access-management/permissions/data-management-permissions#create-and-edit-schemas)
- [create and edit records](/docs/settings/identity-access-management/permissions/data-management-permissions#create-and-edit-records)
- if you plan to create versioned schemas, then you need permissions to [publish records](/docs/settings/identity-access-management/permissions/data-management-permissions#publish-records).
- The recipients of the email must have a profile attribute whose values correspond to the mappings defined in the Brickworks schema. You choose which attribute to use - any profile attribute can serve as the basis for sender account assignment.
## Creating a Brickworks schema with mapping
---
Before you can use the dynamic sender in a campaign, you must create a Brickworks schema that maps profile attribute values to sender accounts.
### Getting the sender account ID
In further steps, you will need the IDs of the sender accounts. To find the ID of a sender account:
1. Go to **Settings > Email accounts**.
2. Click the sender account you want to use.
3. Copy the ID from the URL of the page.
The URL of the page with the highlighted ID of the email sender account
### Creating the schema
In this part of the process, you will create a schema with the following fields:
| Field | Type | Constraints | Description |
|---|---|---|---|
| `profile_attribute_name` | String | Required, Constant | The name of the profile attribute used for matching. The value must be identical across all records in the schema. |
| `attribute_value` | String | Required, Unique | The value of the profile attribute that corresponds to this sender account mapping, for example, a region code such as `PL` or `EN`. |
| `sending_account` | Number (Integer) | Required | The ID of the email sender account to use for recipients whose attribute matches the `attribute_value`. |
1. Go to **Data Modeling Hub > Brickworks**.
2. Create a new schema. For more information on creating schemas, see:
- [Creating a schema](/docs/assets/brickworks/quick-start/creating-a-schema)
- [Field types](/docs/assets/brickworks/schema-field-types)
3. In the **Fields** tab, add the following fields:
1. Add a **String** field:
- In **API name**, enter `profile_attribute_name`
- Select the following options for this field:
- **Required field**
- **Block record-level overwriting** - This setting requires you to provide a default value for this field in each record — enter the name of the profile attribute used for matching.
2. Add a **String** field:
- In **API name**, enter `attribute_value`
- Select the following options for this field: **Required field** and **Unique values only**.
3. Add a **Number** field:
- Set the type to **Integer**.
- In **API name**, enter `sending_account`
- Select the **Required field** checkbox.
4. Save the schema.
Preview of a schema for dynamic sender allocation
### Adding records
After creating the schema, add a record for each sender account you want to map:
1. Open the schema and go to the **Records** tab.
2. For each mapping, add a record with the following values:
- In `profile_attribute_name`, the value is already provided due to the **Block record-level overwriting** option in the field setting.
- In `attribute_value`, enter the attribute value that identifies this group of recipients (for example, `PL`).
- In `sending_account`, enter the ID of the sender account assigned to this group.
An example record
3. Repeat for each sender account you want to map.
To learn about limits on schemas and records, see [Limits and constraints](/docs/assets/brickworks/limits).
#### Example
In this example, three records are added to the schema:
| Records | `profile_attribute_name` | `attribute_value` | `sending_account` |
|---|---|---|---|
| record1 | `region` | `PL` | `6235` |
| record 2 | `region` | `DE` | `6236` |
| record 3 | `region` | `EN` | `6237` |
In this example, recipients with `region = PL` will receive the email from account `6235`, recipients with `region = DE` from account `6236`, and so on.
### Selecting the schema in a campaign
Once the schema is ready, select it when creating an email campaign:
1. In the **Content** section of the campaign, select **Dynamic sender**.
2. In the **Email account allocation schema** field, select the schema you created.
For the full email setup, see [Creating emails](/docs/campaign/e-mail/creating-email-campaigns).
### Selecting the schema in the Send Email node
You can also use dynamic sender allocation in the **Send Email** node in Automation Hub:
1. In the **Sender details** section of the node, select the **Dynamic sender** tab.
2. In the **Schema** field, select the Brickworks schema you created.
3. Optionally, fill in the following fields to override the default settings of the assigned sender accounts:
- **From name** — the sender name displayed in the recipient's inbox.
- **"Reply to" email address** — the email address to which replies are delivered.
- **"Reply to" name** — the name associated with the reply-to address.
If you leave these fields blank, the original settings of each sender account defined in the schema are used.
4. Confirm by clicking **Apply**.
For the full Send Email node setup, see ["Send Email" node](/docs/automation/actions/send-email).
# Email
Email is one of the most popular channel of communication with customers. The adventure begins with a customer sharing their email address and giving a consent to receive emails that contain marketing content. After that you can send emails with content personalized to each individual.
The content of the email can consist of something more than words. The various data collected by Synerise can be reused in various emails for personalization purposes, so you can make the recipients feel that the message is really directed at them. You can inject such data into emails with [snippets](/docs/assets/snippets).
## Business benefits
---
- The users can use this feature for the following and similar business case scenarios:
- Sending emails with abandoned carts
- Sending birthday emails
- Sending discount emails after the price of the product seen by a customer is reduced
- Sending product recommendations (last viewed products, personalized offers, visually similar products)
- Sending emails with coupons
For more use cases check our [library](/use-cases/)
## Requirements
---
To be able to make use of this marketing channel in Synerise, you must:
- [Create, configure and confirm an account](/docs/campaign/e-mail/configuring-email-account) from which emails will be sent
- [Configure single or double-opt ins](/docs/settings/configuration/newsletter-sign-up)
- Have customers who gave email marketing agreements
- [Configure email campaign limits](/docs/settings/configuration/campaign-limits)
## Creating email flow
---
1. Define the recipients of the email.
2. Prepare content of the email (email templates, images, attatchments, and so on).
3. Schedule the email.
4. Define the UTM parameters.
The flow of creating email is similar for other types of messages as well.
## Sending email
---
Emails can be sent in two ways:
1. Automatically by using [Automation Hub](/docs/automation). In response to customer activity, update of profile data, or other events (check the list of [triggers](/docs/automation/triggers) that start a workflow), an email can be sent to customers.
2. Manually by hitting the **Send** button while creating emails.
## Contents
# SMS
SMS channel in Synerise allows you to send text messages to all recipients who gave you their phone number and gave you permission to communicate (in case of sending marketing communication) with them using this channel.
If you already use the SMS channel, find out how to [decrease the cost of SMS campaigns](/use-cases/decrease-sms-campaign-cost).
## Business profits
---
- You can send personalized SMS to a specific group of profiles in the right moment (for example, after making a specific action by them), this way it is much easier to reach them with the right content.
- You can send out the system communication to inform recipients about delivery delays, and so on.
- You can perform A/B testing to measure the performance of your text messages.
- Make your text messages look professional by [shortening the links included in the message](/docs/campaign/SMS/creating-SMS-template#short-links).
- For multibrand or multilingual operations, you can use a [dynamic sender](/docs/campaign/SMS/dynamic-sms-sender) to automatically assign the right phone number to each recipient based on their profile attributes.
- An easy-to-use text message builder allows you to save time and set up the moment of sending your messages automatically. This means that SMS messaging can be a part of your sales/communication cycle and be sent only to people who met specific conditions.
- Analyses of text messages let you compare and analyze results achieved in every message in real time, collect information about the number of sent text messages, and so on.
## Contents
# Using dynamic content template builder
The dynamic content template builder allows you to:
- create dynamic content templates from scratch and edit them by using HTML, CSS, and JavaScript
- use the ready-made templates from the folders with predefined templates.
The folders with predefined templates provide you with templates for the most common campaign scenarios such as surveys, opinion avatars, subscription forms, cookie banners, pop-ups, and so on.
Modification of the ready-made templates doesn't require applying changes to the template code. The template builder contains a user-friendly configuration form that brings editing down to filling out fields that define the properties of the template. This makes editing templates possible by any user regardless of the programming skills. You can [simplify the editing of your own templates as well](#template-editing-simplification) by creating custom configuration form adjusted to your needs. Thanks to this you can edit your template or create its variations dedicated for different scenarios.
Additionally, you can personalize the content of the message by [using snippets](#adding-a-snippet-to-the-template-code) and [Jinjava inserts](/developers/inserts) to inject data such as profile attributes (for example, name), recommendations, analysis results.
[Snippets](#adding-a-snippet-to-the-template-code) also let you re-use the same content in multiple templates, or create a reference to a fragment that you only need to update in one place to see the change in all templates where it's used.
## Editing a ready-made template
---
1. Go to **Experience Hub > Dynamic content**.
2. On the left pane, select **Templates**.
3. From the list of template folders, select a folder with the predefined templates.
- Insert object templates - This folder contains the templates that can be used for a dynamic content that inserts an object into your website code. For example, a frame with recommendations, banner with timer, and so on.
- Web layer templates - This folder contains the templates that can be used for a dynamic content that is displayed as a layer on your website, for example, a pop-up, surveys, a frame with recommendations in the form of a pop-up, exit intents, and so on.
- Script templates - This folder contains the templates that are used only to execute certain JS scripts. For example, script for AB tests, for gathering web push agreements, and so on.
4. Select one of the templates to edit.
**Result**: You are redirected to the code editor.
4. You can edit the template in two ways:
- Edit the code of the template ([add inserts](#adding-a-snippet-to-the-template-code), [add variables](#adding-a-variable)).
- Go to the **Config** tab and fill out the form.
5. After you make changes to the template, you can check the [preview](#previewing-templates).
6. If the template is ready, in the upper right corner click **Save this template > Save as**.
7. On the pop-up:
1. In the **Template name** field, enter the name of the template.
2. From the **Template folder** dropdown list, select the folder where the template will be saved.
3. Confirm by clicking **Apply**.
## Creating a template
---
1. Go to **Experience Hub > Dynamic content**.
2. On the left pane, select **Templates**.
3. In the upper right corner, click **New Template**.
4. Use the **HTML**, **CSS**, and **JavaScript** tabs to define the properties of the template.
6. If the template is ready, in the upper right corner click **Save this template > Save as**.
7. On the pop-up:
1. In the **Template name** field, enter the name of the template.
2. From the **Template folder** dropdown list, select the folder where the template will be saved.
3. Confirm by clicking **Apply**.
### Adding a snippet to the template code
[Snippets](/docs/assets/snippets) let you:
- insert data such as profile attribute, recommendations, or analysis results into the communication.
- create re-usable pieces of static content, so you don't need to manually copy and paste between templates.
- create dynamic pieces of content that are updated in all templates when you update the snippet definition.
1. Click **Snippets**.
**Result**: The snippet widget opens.
2. Add a snippet as described in [Snippets](/docs/assets/snippets).
## Template editing simplification
To make your template more accessible to users without programming skills, you can add a configuration form with variables dedicated for the template, so the user can make adjustments to the template.
The effect of template editing simplification is that you can edit templates by filling out a user-friendly configuration form (available in the **Config** tab) whose fields define the value for each property of the template.
The process of template simplification involves replacing values with variables in the HTML, CSS, and JavaScript code elements, such as alignment, font, color in CSS, or HTML tags as title, description or buttons. You can also add a variable in the place of Jinjava elements, such as a recommendation campaign ID, voucher pool ID, or catalog name. Variables inserted in the code appear in a form the **Config** tab when editing the template.
#### List of variables
| Variable name | Description | Example output |
|------------------------|------------------------------------------------------------------------------------------------------------------------------------------|----------------|
| **Synerise insert select** | Allows you to add a dropdown list with aggregates, expressions, metrics, voucher pools, recommendations, files, catalogs, or attributes. | Example: selecting a Synerise object from the list |
| **String** | Allows you to add a field that requires a string value. | Example: Filling out a field |
| **Select** | Allows you to add a dropdown list with configurable values. | Example: selecting an option from a dropdown list |
| **Switch** | Allows you to add a field which is enabled/disabled by a toggle. | Example: enabling an option |
| **Color** | Allows you to add a color selector. You can either select a color or enter its code manually. | Example: selecting a color |
| **Number** | Allows you to add a field that requires a number. You can either select a number from a dropdown or enter it manually. | Example: defining a number |
#### Results of simplifying template editing
Instead of modifying the design of the template directly in the code, a user can go to the **Config** tab and define the properties of the template by filling out configuration form.
The image below presents the easy-to-edit form that lets users without coding expertise change the variable values:
Defining the settings of a string variable
### Adding a variable
1. Select one of the code editor tabs.
The tabs may be **JSON**, **HTML**, **CSS**, and **JavaScript**, depending on the communication type.
2. Position the cursor in the place where you want to add the variable.
3. On the right side, click **+ Variable**.
**Result**: A sidebar appears.
4. In the **Identifier** field, enter the ID of the variable.
This will be the title of the field unless you define the **Label** field.
The first character of the ID can't be a number.
5. From the **Type** dropdown list, select the type of variable.
Allows you to add a field that requires a string value.
1. In the **Label (Optional)** field, enter the name of the field.
If this field is empty, the name of the field will be taken from the **Identifier** field.
2. In the **Description (Optional)** field, enter a short explanation of the field's purpose.
3. In the **Default Value** field, enter the default value.
Allows you to add a dropdown list with configurable values.
1. In the **Label (Optional)** field, enter the name of the field. If this field is empty, the name of the field will be taken from the **Identifier** field.
2. In the **Description (Optional)** field, enter a short explanation what this field is for.
3. In the **Display Name** field, enter the name that will be visible in a dropdown.
4. In the **Value** field, enter a value.
5. In the **Default Value** field, enter the default value.
A select variable during configuration
Allows you to add a dropdown list with aggregates, expressions, metrics, voucher pools, recommendations, files, catalogs, and attributes.
1. In the **Label (Optional)** field, enter the name of the field. If this field is empty, the name of the field will be taken from the **Identifier** field.
2. In the **Description (Optional)** field, enter a short explanation what this field is for.
3. From the **Insert Type** dropdown list, select the type of resource:
- **Aggregates, AI recommendations, Expressions, Metrics, Voucher pools**: creates a dropdown list of available resources of the selected type. When the user selects a resource in the form, its ID is inserted into the code of the template. This ID can be used in [Jinjava](/developers/inserts/insert-usage) to display the value of the selected resource.
- **Catalogs**: creates a dropdown list of catalogs. When the user selects a catalog in the form, its name is inserted into the code of the template. This name can be used in [Jinjava](/developers/inserts/insert-usage#catalogs) to retrieve a value from the catalog.
- **Files**: creates a dropdown list of [files](/docs/assets/files-explorer). When user selects a file, its URL is inserted into the code.
- **Profile attributes**: creates a dropdown list of profile attributes. When a user selects an attribute, its name is inserted into the code of the template. This name can be used in [Jinjava](/developers/inserts/insert-usage#customer-attributes) to retrieve the attribute value.
3. In the **Default Value (Optional)** field, enter the default value.
**Result**: A dropdown with the insert is added to the form in the **Config** tab. From the dropdown list, you can select an item of the chosen type (for example, aggregates). As a result, the value of variable will be ID of the selected item.
Synerise insert select in the configuration form
Allows you to add a field which is enabled/disabled by a toggle.
1. In the **Label (Optional)** field, enter the name of the field. If this field is empty, the name of the field will be taken from the **Identifier** field.
2. In the **Description (Optional)** field, enter a short explanation what this field is for.
3. In the **Default Value** field, select the default value (true/false).
Allows you to add a color selector. You can either select a color or enter its code manually.
1. In the **Label (Optional)** field, enter the name of the field. If this field is empty, the name of the field will be taken from the **Identifier** field.
2. In the **Description (Optional)** field, enter a short explanation what this field is for.
3. In the **Default Value** field, enter the default value.
Allows you to add a field that requires a number. You can either select a number from a dropdown or enter it manually.
1. In the **Label (Optional)** field, enter the name of the field. If this field is empty, the name of the field will be taken from the **Identifier** field.
2. In the **Description (Optional)** field, enter a short explanation what this field is for.
3. In the **Default Value** field, enter the default value.
6. If you want to add the variable to a group that can be more easily displayed together in the form:
1. Click **Variable Group**.
2. Select or create a group:
- To select a group, click its name.
- To create a group:
1. Click **Add new group**.
2. Enter a group name.
3. Enter a group ID.
4. Click **Apply**.
**Result**: On the **Config** tab, the groups can be collapsed and expanded.
5. In the upper right corner, click **Add**.
**Result**: In the template code, a variable appears (it starts with `####`). It also becomes available on the **Config** tab.
6. Optionally, to modify the order of variables appearing in the configuration form, add the `order` parameter to the variable formula (for example, `#### type: "string", id: "string", label: "Text", order: 1 !####`).
## Previewing templates
1. To check the preview of the template for a particular customer or a product, click the **Preview** button on the upper left side.
2. Enter the ID of a customer or a product.
3. Click **Apply**.
# Push
Sending mobile push notifications offers plenty of benefits beyond merely delivering promotional content. These notifications serve as a powerful tool for providing users with valuable information, timely updates, helpful reminders, and captivating content, thus enhancing their overall app experience. By leveraging mobile push notifications, businesses can engage and connect with their users in a more personalized and impactful manner, increasing user engagement, retention, and satisfaction. Whether it's sharing important news, delivering personalized recommendations, or offering exclusive rewards, the versatility of mobile push notifications unlocks a wealth of opportunities to optimize the user experience and drive meaningful interactions.
## Contents
# Creating SMS templates
In the Synerise template builder, you can create your SMS. The editor includes real-time SMS validation that detects character encoding (GSM-7 or UCS-2), calculates the estimated number of SMS messages sent per recipient, and highlights problematic characters in the preview. If the message contains invisible or non-GSM-7 characters, you can use the **Clean SMS** tool to fix them before saving. After you create the template, you can proceed to [sending the text message](/docs/campaign/SMS/sending-sms).
Alternatively, you can create a template on the go while [creating the SMS communication](/docs/campaign/SMS/sending-sms).
## Create a template
---
1. Go to **Experience Hub > SMS**.
2. In the menu on the left, click **Templates**.
3. Click **Create new**.
The text editor and SMS preview open.
5. In the text box on the right, enter the contents of your message. You can:
- use emoji,
- [shorten the links](#short-links),
- [use inserts to personalize content](/developers/inserts/sms#common-tags-used-in-text-messages) and [add tracking of UTM parameters and click events for redirect URLs](/developers/inserts/sms#adding-utm-and-tracking-parameters-to-link),
- [remove invisible and non-GSM-7 characters using Clean SMS](#clean-sms).
Example of an SMS template
### Tracking parameters in links
To include [tracking parameters](/developers/web/user-identification#recognizing-customers-from-link-parameters) and [UTM and link parameters](/docs/campaign/SMS/sending-sms#define-utm-and-url-parameters) in the links in a template, always wrap the link with the [{% preparelink %}{% endpreparelink %} insert](/developers/inserts/email#adding-utm-and-tracking-parameters-to-links).
### Short links
If you send links in text messages, you can use a Jinjava code to shorten the URL addresses to make the text message look professional and the link more reliable.
- The default domain of the shortened links is `snrs.it`. If you want to use your own domain, see [Custom subdomain for shortened links](/docs/campaign/SMS/custom-shortener-domain).
- The shortened links don't require HTTPS. If you include a link with `http://` in the message, it will be redirected to HTTPS when opened.
- You can combine short link insert with [prepare link](/developers/inserts/sms#adding-utm-and-tracking-parameters-to-link) to track URL's parameters (such as UTM) and click events from a message.
The shortened link is valid for 14 days from the date the message is sent.
#### Result
Shortened URL in a text message
### Personalization
You can also personalize the message by inserting dynamic elements, for example:
- an attribute such as the name or any other piece of information you collected about a profile (city, age, and so on),
- the number of collected loyalty points,
- a discount coupon.
In [Insert usage](/developers/inserts/insert-usage), you can find a list of inserts and examples of their usage.
### SMS validation
The editor includes a real-time SMS validation panel below the message field. The panel shows three values:
SMS validation panel in the template editor
- **Characters** - the number of characters in the current message.
- **Encoding** - the encoding the message will use: **GSM-7** or **UCS-2**.
- **SMS count** - the estimated number of SMS messages sent per recipient. Use this to anticipate the cost of your campaign before sending.
The segment limits depend on encoding:
- **GSM-7** - 160 characters per segment.
- **UCS-2** - 70 characters per segment.
Copying text from Word or Google Docs can introduce invisible Unicode characters — for example, zero-width spaces (ZWSP), non-breaking spaces, or smart quotes. These characters silently switch encoding from GSM-7 to UCS-2, which cuts the per-segment limit from 160 to 70 characters and can more than double the number of SMS segments sent, increasing cost without a visible change to the message text.
#### Preview color coding
The **Preview** section below the validation panel highlights problematic characters using color:
- **Red** - look-alike or invisible characters (for example, ZWSP).
- **Yellow** - non-GSM-7 characters.
- **Cyan** - Jinjava tags (excluded from the character count).
#### Personalization and character count
Jinjava personalization tags (for example, `{{customer.firstname}}`) are excluded from the character count because their rendered length varies per recipient. When your message contains personalization, the **Characters** and **SMS count** fields show a minimum estimate (for example, `>=100` and `>=1`). To check the character count for a specific recipient, click **Preview contexts** in the upper left corner and select a user profile.
#### Clean SMS
If the message contains hidden or non-GSM-7 characters, the **Clean SMS** button becomes active. Click it to open the **Clean SMS** modal, which shows a before-and-after comparison:
Clean SMS modal: before and after comparison of encoding and segment count
- **Before Clean** - the current message with character count, encoding, and SMS count.
- **After Clean** - a preview of the cleaned message with updated stats.
1. To replace non-GSM-7 characters, hidden characters, and accented letters with their ASCII equivalents, select **Clean all UCS-2 characters**. This can reduce the SMS count, but it also removes non-English characters that are intentional.
2. To replace the message content with the cleaned version, click **Apply**.
When the message contains no problematic characters, the panel displays: *Content is clean — fits in GSM-7, no hidden characters.*
### Preview the template
---
1. To check the preview of the template for a particular customer, click the **Preview context** button on the upper left side.
2. Enter the ID of a customer.
4. Click **Apply**.
**Result**: You see the preview of the template for the particular customer. If you use a [custom domain for short links](/docs/campaign/SMS/custom-shortener-domain), the preview shows the default domain, but the custom domain will be used in the actual campaign.
### Save the template
---
- If [Service approval](/docs/settings/configuration/service-approval) is not configured:
- To go directly to launching an SMS campaign, click **Use in communication** and follow the instructions [here](/docs/campaign/SMS/sending-sms).
- To save the template:
1. Enter the name of the template.
2. Select the folder where the template will be saved.
3. Click **Save this template**.
**Result**: A dropdown appears.
4. Click **Save as**.
**Result**: The template is saved in the selected folder.
- If [Service approval](/docs/settings/configuration/service-approval) is enabled for **Experience Hub**, to complete the work over the template:
- If you are a regular user, to send the template to reviewers and a final approver, click **Send to approval**.
- If you are a reviewer, to approve a template, click **Approve**.
**Result**: If the template is approved, it will either be automatically sent to the final approver or await approval from another reviewer. If the template is disapproved, it will be marked as Rejected and the review process will start over.
- If you are a final approver, to let yourself approve the template, click **Approve**.
**Result**: The template can be used in an SMS campaign.
# Creating and sending mobile push
The banner, first run message, mandatory upgrade, and walkthrough types of mobile push are deprecated. These types of messages can be sent using the [In-app messages](/docs/campaign/in-app-messages/introduction-to-inapp-messages) feature. You can use the ready-made templates available in the **Predefined templates** folder in **Experience Hub > In-app messages > Templates**.
A push is a notification that is displayed in the main screen of a mobile device or directly in a mobile app. Simple push messages appear in the notification center when the screen is locked or they are visible in the top bar when the screen is unlocked. A silent push is a hidden notification that is delivered to the app on a user's device.
This is a great solution to:
- Inform about current promotions.
- Share important information connected with the app usage.
- Send personalized content based on the recipient's behavioral profile.
## Prerequisites
---
- Enable the [Firebase integration](/docs/settings/tool/firebase).
- Configure mobile push notifications:
- [Android](/developers/mobile-sdk/configuring-push-notifications/android)
- [iOS](/developers/mobile-sdk/configuring-push-notifications/ios)
- [React Native](/developers/mobile-sdk/configuring-push-notifications/react-native)
- [Flutter](/developers/mobile-sdk/configuring-push-notifications/flutter)
- If you are going to attach images to your push notifications:
- Prepare images; you can use external links or [upload your images](/docs/assets/files-explorer#adding-new-files) in the Data Modeling Hub.
- **Android**: Follow the instructions [under this link](https://firebase.google.com/docs/cloud-messaging/android/send-image).
- **iOS**: Configure and implement [Notification Service Extension](/developers/mobile-sdk/configuring-push-notifications/ios#synerise-notification-service-extension) and [Notification Content Extension](/developers/mobile-sdk/configuring-push-notifications/ios#rich-media-in-push-notifications). According to your business needs, implement [Single media](/developers/mobile-sdk/configuring-push-notifications/ios#rich-media-in-push-notifications-single-media-implementation) and/or [Carousel](/developers/mobile-sdk/configuring-push-notifications/ios#rich-media-in-push-notifications-carousel-implementation).
- Implement URLs and deep links:
- [Android](/developers/mobile-sdk/campaigns/action-handling#handling-actions-from-campaigns-in-android)
- [iOS](/developers/mobile-sdk/campaigns/action-handling#handling-actions-from-campaigns-in-android)
- [React Native](/developers/mobile-sdk/campaigns/action-handling#handling-actions-from-campaigns-in-react-native)
- [Flutter](/developers/mobile-sdk/campaigns/action-handling#handling-actions-from-campaigns-in-flutter)
### Image requirements
- Allowed format: `.jpg`, `.jpeg`, or `.png`
- Allowed width: minimum 645 px
- Allowed size: maximum 1 MB
- Recommended aspect ratio is 2:1
## Create a simple push
---
1. Go to **Experience Hub > Mobile Push > Create new**.
2. Enter the name of the push notification (it is only visible on the list of notifications).
3. Select one of the notification types:
- **Simple push**
- **Silent push**
### Select device type
---
In this part of the process, you will declare the operating system of devices which will receive the notifications.
1. On the **Device type** section, click **Define**.
2. Select one of the following tabs:
- **Android** - The push notification will be delivered only to Android devices.
- **iOS** - The push notification will be delivered only to iOS devices.
- **All** - The push notification is will be delivered to devices with any kind of operating system.
The device type section
3. Confirm your choice by clicking **Apply**.
### Select recipients
---
In this part of the process, define the recipients of the push notification.
1. In the **Audience** section:
1. Choose the recipients:
- **Everyone** - The notification will be delivered to all users who:
- gave marketing consent.
- have the `snrs_has_mobile_push_devices` attribute set to `true`.
[More information about conditions for sending and displaying notifications](/docs/campaign/Mobile/mobile_campaign#conditions-for-sending-and-displaying-mobile-notifications).
- **Segment** - You can send the message to one or more existing segments in the system.
- **New Audience** - Create new segments and specify the conditions which the target must meet.
- Regardless of the way of selecting the audience, the system limits the audience to those who have the marketing agreement on, unless you override this behavior in the advanced options.
- If the audience is larger than 500000 profiles, consider using **Batch delivery** in the advanced options to avoid timeouts.
2. **Optional**: Open **Advanced options** and configure additional settings.
Advanced options - explanation
Batch delivery - It prevents sending notifications to all recipients at once.
If you plan to send messages to an audience larger than 15,000 profiles, we recommend this option.
For example, if the expected performance of your messaging provider is 1 million messages per hour and the expected audience is 5 million profiles, you can split the communication into 60 batches sent 5 minutes apart: every batch will include ~83000 profiles sending all messages will take 5 hours. If you send a large number of messages all at once, there is a chance that your application may experience a sudden increase in traffic. To prevent any issues, make sure your application is fully prepared to handle this potentially significant surge in traffic. If a batch takes more than 8 hours to complete for any reason, it is cancelled in Synerise.
Send to all devices - This option lets you send a message to all devices used by a customer. It's unselected by default. If this option remains unselected, the message will be sent to the customer's most recently active device only.
Enable control group - It creates a subgroup of the recipients who won't receive any push notification variant. When to use it? When you send one or several variants of a notification (A/B testing). When a customer is assigned to their control group, the information is available in their Profiles card as an event.
Send without marketing agreement check - To comply with GDPR resolutions, Synerise by default filters out the recipients with marketing agreement off. This option, however, allows to send push notifications to those whose marketing agreement is off (after ticking this option, the number in the estimated reach don't refresh). When to use it? While sending messages that don't contain marketing content, for example, information about delays in shipping.
Include audience changes - Available only for scheduled notifications. It recalculates the number of recipients right before sending the message. By default, the size of the customer segmentation chosen for the push notification is the same as in the moment of sending, even if the number of customers in the chosen segment changed between scheduling the notification and sending. When to use it? When the size of the segments of customers selected as the audience of the notification can change dynamically.
Ignore limits - If you want to make sure that this message is sent to a customer, even it exceeds the global limit of this type of messages for a single customer per day (more information is available here), enable the Ignore limits toggle. You may apply it to system messages such as a transaction confirmation, notifications about order delays, and so on.
The Audience section
1. Confirm the selection by clicking **Apply**.
### Select or create a push template
---
In this part of the process, you will select or create a push template.
#### A/B/x testing
You can create up to 3 push notification templates and send them within one campaign. If you use more than 1 template in a campaign, you can define the allocation of recipients to the template variants. If you enabled a control group while [defining the recipients](#select-recipients) of your push notification campaign, you can additionally define the percentage of recipients who will belong to the control group (these customers won't receive a push notification and a [`push.controlGroup`](/docs/assets/events/event-reference/mobile-push#pushcontrolgroup) event will be generated on their activity list on a profile card).
1. In the **Content** section, next to **Variant A**, click .
2. To create or select a ready template, click **Create message**.
- To select a ready template, from the template library select a template. Then you will be directed to the builder in which you can make changes to the template, to use it in the campaign, click **Use in communication**. If you use [Approval Service](/docs/settings/configuration/service-approval), click **Send to approval**.
- To create a new template, in the upper right corner, click **New template**.
1. Select the builder in which you will create a template:
- [See instruction on creating a template in the Visual builder](/docs/campaign/Mobile/creating-mobile-push-templates/mobile-push-visual-builder)
- [See instruction on creating a template in the Code builder](/docs/campaign/Mobile/creating-mobile-push-templates/mobile-push-code-editor)
2. Once the template is ready, click **Use in communication**. If you use [Approval Service](/docs/settings/configuration/service-approval), click **Send to approval**.
### Schedule the notification
---
In this part of the process, you will define when the push notification will be sent.
1. In the **Schedule** section, click **Define**.
1. You can choose between two options:
- To send your notification after clicking the **Send** button on the upper right corner, use the **Display immediately** option.
The notification display is dependent on the [priority](/docs/campaign/Mobile/creating-mobile-push-templates/mobile-push-visual-builder#defining-notification-priority) and/or [content-available option](/docs/campaign/Mobile/creating-mobile-push-templates/mobile-push-visual-builder#enabling-content-available-option) defined in the template, so the display of the notification may not be immediate.
- To plan a message to be sent at a future date, use the **Scheduled** option. Set the start time and the time zone.
Synerise performs best with real-time data. This is why you can't schedule a message for more than 10 days in the future.
To select the best time of sending the message, take a look at the suggestion from the AI engine that calculates the best time (for all recipients). If time optimization is disabled, click [here](/docs/settings/configuration/time-optimizer) to learn more how to enable it and use it.
2. Select the **Silence Hours** setting:
- **Without silence hours** - The communication can be processed and sent out to the recipients at any time during the day.
- **Include silence hours** - With this option, you can set a time of day when the communication can't be sent:
1. In the **From** field, select when the silence hours start.
2. In the **To** field, select when the silence hours end.
The period can't be longer than 12 hours.
When a message can't be sent due to silence hours, a `push.skipped` event is generated.
- When silence hours are enabled, the **Discard messages** option is always enabled. This means that messages blocked by silence hours are discarded entirely. **The discarded messages are not sent when silence hours end**.
- If the **Start** time of the schedule is in the silence hours, you can't apply the settings.
- If communication is scheduled for sending just before silence hours (for example, silence hours start at 22:00 and sending is scheduled at 21:59:59), the communication may be processed, sent, and logged in the events a short time after the silence hours start.
3. To save the changes, click **Apply**.
### Define UTM and URL parameters
---
You can add UTM and URL parameters to the links provided in the message through the [preparelink insert](/developers/inserts/mobile-push#adding-utm-and-tracking-parameters-to-link). If the links aren't provided in the preparelink insert, the parameters won't be added to the link in the message.
7. To define UTM parameters, in the **UTM & URL parameters** section, click **Define**.
1. Fill in the following fields: **UTM campaign**, **UTM medium**, **UTM source**, and **UTM term**.
2. To add URL parameters, in the **URL parameters** section, click **Add parameter**.
3. Enter the parameter and value pair in the **Parameter** and **Value** fields, respectively.
4. To save the configuration, click **Apply**
### Testing
---
For testing purposes, you can send the message or one of its variants to the recipients you indicate in this section. You can do this regardless of the campaign's current status, except when the campaign is in the **Sending** status.
- You can send the test message only to the users available in the **Profiles** list and who have the `has_mobile_push_devices` attribute set to `true`.
- Test messages are not counted towards capping limits.
1. In the **Test** section, click **Define**.
2. If your message has more than one variant, select the variant of the message which you would like to use for testing.
3. In the **Select the user you want to send the test message to** searchbox, search the recipients by name, surname, email address, custom ID, or UUID.
**Result**: A dropdown list with search results appears.
4. On the dropdown list:
- if you have saved list of recipients in the past, click the **Saved lists** tab.
- if you want to define a one-off list of recipients, select the users to include in your list.
5. Confirm your choice by clicking **Add** in the searchbox.
6. Optionally, to save the list of recipients for future use, click **Save list**.
**Result**: A pop-up appears.
1. In the **List name** field, enter the name of the list of recipients.
2. Confirm by clicking **Apply**.
**Result**: The list is available in the **Saved lists** tab on the dropdown of searchbox when it's clicked.
5. To send the message, click **Send test**.
**Result**: The message is sent immediately.
### Define additional parameters
You can add up to 10 parameters which will be added to every event generated by this communication. Their values are the same for every event in the communication. You can use this, for example, to create a common parameter for events from different types of communication that belong to one marketing campaign.
Additional parameters will be added to [mobile push events](/docs/assets/events/event-reference/mobile-push).
1. To define the custom event parameters, in the **Additional parameters** section, click **Define**.
2. Click **Add parameter**.
3. In the **Parameter** field, enter the name of the parameter.
The following parameters cannot be sent:
- `modifiedBy`
- `apiKey`
- `eventUUID`
- `ip`
- `time`
- `businessProfileId`
- `correlationId`
- `clientId`
- `uuid`
4. In the **Value** field, enter the parameter value.
- The value is always sent as a string when the event's JSON payload is generated. The maximum length of the string is 230 characters.
- You can use Jinjava only in this field with the following restrictions:
- it will be rendered in the `.send`, `.notSent`, `webpush.notRegistered`, and `push.notRegistered` events
- the 230-character limit applies to the **Value** field both before and after Jinjava rendering; if the length exceeds this limit at any stage, the value will be truncated.
- if a Jinjava does not render, a raw code will be visible in the parameter value.
5. If you want to add more parameters, click **Add parameter**, and repeat steps 3-4.
**Result**: the parameters will be added to all events listed above with the values you entered. This is an example event saved in the database. The custom parameter `season` is located in the `params` object:
{
   "action": ...
   ...
   "params": {
    "clientId": 1111111111,
    "season": "autumn",
    "campaignName": "Back to school",
    "time": 1662392318050,
    "title": "Have you prepared for coming back to school?",
    "businessProfileId": "xxx"
   }
   }
6. Confirm the settings by clicking **Apply**.
## Notification status
---
The status of mobile push communication is available on the list of mobile push notifications. In the [Communication statuses](/docs/campaign/statuses) article, you can check the statuses which can be assigned to mobile push communication.
# Using landing page template builder
The landing page template builder allows you to create landing page templates from scratch and edit them by using HTML, CSS, and JavaScript. To each template you can [add variables](#template-editing-simplification) which enable to build a configuration form that simplifies the template editing. Thanks to this, modification of such a template doesn't require applying changes to the template code. The template builder contains a user-friendly configuration form that brings editing down to filling out fields that define the properties of the template. This makes templates editing possible by any user regardless of the programming skills.
You can personalize the content of the message by [using snippets](#adding-a-snippet-to-the-template-code) and [Jinjava inserts](/developers/inserts) to inject data such as profile attributes (for example, name), recommendations, analysis results.
[Snippets](#adding-a-snippet-to-the-template-code) also let you re-use the same content in multiple templates, or create a reference to a fragment that you only need to update in one place to see the change in all templates where it's used.
## Editing a ready-made template
---
1. Go to **Experience Hub > Landing page > Add landing page**.
2. In the **Content** section, click **Define**.
3. Click **Create message**.
4. Select the folder with predefined templates.
4. Select one of the templates to edit.
**Result**: You are redirected to the code editor.
4. You can edit the template in two ways:
- Edit the code of the template, [add variables](#adding-a-variable)).
- Go to the **Config** tab and fill out the form.
5. After you make changes to the template, you can check the preview.
6. If the template is ready, in the upper right corner click **Save this template > Save as**.
7. On the pop-up:
1. In the **Template name** field, enter the name of the template.
2. From the **Template folder** dropdown list, select the folder where the template will be saved.
3. Confirm by clicking **Apply**.
## Creating a template
---
1. Go to **Experience Hub > Landing page > Add landing page**.
2. In the **Content** section, click **Define**.
3. Click **Create message**.
3. In the upper right corner, click **New Template**.
4. On the pop-up, select **Code editor**.
4. Use the **HTML**, **CSS**, and **JavaScript** tabs to define the properties of the template.
6. If the template is ready, in the upper right corner click **Save as**.
7. On the pop-up:
1. In the **Template name** field, enter the name of the template.
2. From the **Template folder** dropdown list, select the folder where the template will be saved.
3. Confirm by clicking **Apply**.
### Adding a snippet to the template code
[Snippets](/docs/assets/snippets) let you:
- insert data such as profile attribute, recommendations, or analysis results into the communication.
- create re-usable pieces of static content, so you don't need to manually copy and paste between templates.
- create dynamic pieces of content that are updated in all templates when you update the snippet definition.
1. Click **Snippets**.
**Result**: The snippet widget opens.
2. Add a snippet as described in [Snippets](/docs/assets/snippets).
## Template editing simplification
To make your template more accessible to users without programming skills, you can add a configuration form with variables dedicated for the template, so the user can make adjustments to the template.
The effect of template editing simplification is that you can edit templates by filling out a user-friendly configuration form (available in the **Config** tab) whose fields define the value for each property of the template.
The process of template simplification involves replacing values with variables in the HTML, CSS, and JavaScript code elements, such as alignment, font, color in CSS, or HTML tags as title, description or buttons. Variables inserted in the code appear in a form the **Config** tab when editing the template.
#### List of variables
| Variable name | Description | Example output |
|------------------------|------------------------------------------------------------------------------------------------------------------------------------------|----------------|
| **Synerise insert select** | Allows you to add a dropdown list with aggregates, expressions, metrics, voucher pools, recommendations, files, catalogs, or attributes. | Example: selecting a Synerise object from the list |
| **String** | Allows you to add a field that requires a string value. | Example: Filling out a field |
| **Select** | Allows you to add a dropdown list with configurable values. | Example: selecting an option from a dropdown list |
| **Switch** | Allows you to add a field which is enabled/disabled by a toggle. | Example: enabling an option |
| **Color** | Allows you to add a color selector. You can either select a color or enter its code manually. | Example: selecting a color |
| **Number** | Allows you to add a field that requires a number. You can either select a number from a dropdown or enter it manually. | Example: defining a number |
#### Results of simplifying template editing
Instead of modifying the design of the template directly in the code, a user can go to the **Config** tab and define the properties of the template by filling out configuration form.
The image below presents the easy-to-edit form that lets users without coding expertise change the variable values:
Defining the settings of a string variable
### Adding a variable
1. Select one of the code editor tabs.
The tabs may be **JSON**, **HTML**, **CSS**, and **JavaScript**, depending on the communication type.
2. Position the cursor in the place where you want to add the variable.
3. On the right side, click **+ Variable**.
**Result**: A sidebar appears.
4. In the **Identifier** field, enter the ID of the variable.
This will be the title of the field unless you define the **Label** field.
The first character of the ID can't be a number.
5. From the **Type** dropdown list, select the type of variable.
Allows you to add a field that requires a string value.
1. In the **Label (Optional)** field, enter the name of the field.
If this field is empty, the name of the field will be taken from the **Identifier** field.
2. In the **Description (Optional)** field, enter a short explanation of the field's purpose.
3. In the **Default Value** field, enter the default value.
Allows you to add a dropdown list with configurable values.
1. In the **Label (Optional)** field, enter the name of the field. If this field is empty, the name of the field will be taken from the **Identifier** field.
2. In the **Description (Optional)** field, enter a short explanation what this field is for.
3. In the **Display Name** field, enter the name that will be visible in a dropdown.
4. In the **Value** field, enter a value.
5. In the **Default Value** field, enter the default value.
A select variable during configuration
Allows you to add a dropdown list with aggregates, expressions, metrics, voucher pools, recommendations, files, catalogs, and attributes.
1. In the **Label (Optional)** field, enter the name of the field. If this field is empty, the name of the field will be taken from the **Identifier** field.
2. In the **Description (Optional)** field, enter a short explanation what this field is for.
3. From the **Insert Type** dropdown list, select the type of resource:
- **Aggregates, AI recommendations, Expressions, Metrics, Voucher pools**: creates a dropdown list of available resources of the selected type. When the user selects a resource in the form, its ID is inserted into the code of the template. This ID can be used in [Jinjava](/developers/inserts/insert-usage) to display the value of the selected resource.
- **Catalogs**: creates a dropdown list of catalogs. When the user selects a catalog in the form, its name is inserted into the code of the template. This name can be used in [Jinjava](/developers/inserts/insert-usage#catalogs) to retrieve a value from the catalog.
- **Files**: creates a dropdown list of [files](/docs/assets/files-explorer). When user selects a file, its URL is inserted into the code.
- **Profile attributes**: creates a dropdown list of profile attributes. When a user selects an attribute, its name is inserted into the code of the template. This name can be used in [Jinjava](/developers/inserts/insert-usage#customer-attributes) to retrieve the attribute value.
3. In the **Default Value (Optional)** field, enter the default value.
**Result**: A dropdown with the insert is added to the form in the **Config** tab. From the dropdown list, you can select an item of the chosen type (for example, aggregates). As a result, the value of variable will be ID of the selected item.
Synerise insert select in the configuration form
Allows you to add a field which is enabled/disabled by a toggle.
1. In the **Label (Optional)** field, enter the name of the field. If this field is empty, the name of the field will be taken from the **Identifier** field.
2. In the **Description (Optional)** field, enter a short explanation what this field is for.
3. In the **Default Value** field, select the default value (true/false).
Allows you to add a color selector. You can either select a color or enter its code manually.
1. In the **Label (Optional)** field, enter the name of the field. If this field is empty, the name of the field will be taken from the **Identifier** field.
2. In the **Description (Optional)** field, enter a short explanation what this field is for.
3. In the **Default Value** field, enter the default value.
Allows you to add a field that requires a number. You can either select a number from a dropdown or enter it manually.
1. In the **Label (Optional)** field, enter the name of the field. If this field is empty, the name of the field will be taken from the **Identifier** field.
2. In the **Description (Optional)** field, enter a short explanation what this field is for.
3. In the **Default Value** field, enter the default value.
6. If you want to add the variable to a group that can be more easily displayed together in the form:
1. Click **Variable Group**.
2. Select or create a group:
- To select a group, click its name.
- To create a group:
1. Click **Add new group**.
2. Enter a group name.
3. Enter a group ID.
4. Click **Apply**.
**Result**: On the **Config** tab, the groups can be collapsed and expanded.
5. In the upper right corner, click **Add**.
**Result**: In the template code, a variable appears (it starts with `####`). It also becomes available on the **Config** tab.
6. Optionally, to modify the order of variables appearing in the configuration form, add the `order` parameter to the variable formula (for example, `#### type: "string", id: "string", label: "Text", order: 1 !####`).
## Previewing templates
5. To check the preview of the template for a particular customer, click the **Preview** button on the upper left side.
1. Enter the ID of a customer.
2. Click **Apply**.
# Removing screen views
If you no longer needs a screen view, you can delete it.
1. Go to **Experience Hub > Screen view**.
2. On the list of screen views, find the one you want to delete.
3. Click the icon and from the dropdown list select the **Delete** option.
4. Confirm your choice by clicking **OK**.
**Result**: The screen view is deleted. The documents you used in the screen view are not deleted.
# Two-step agreement form
While implementing web push notifications, it is crucial to facilitate a process that allows a visitor to your website to explicitly express their consent to receiving these notifications. For this reason, in addition to a browser form, we recommend creating an additional visual layer that requires interaction from the visitor because this ensures you that the visitor is aware of and accepts receiving these notifications.
This article describes how to create a two-step agreement in the form of a [dynamic content](/docs/campaign/dynamiccontent) that will be displayed on your website. The process of creating the form involves:
- using [ready-made web push agreement templates](/docs/campaign/dynamiccontent/creating-dynamic-content-templates/dynamic-content-template-builder) that can be edited in the simplified configuration form. These templates already contain the scripts that invoke the dynamic content form and agreement form from the browser.
- the possibility to [preview the dynamic content on the target website](/docs/campaign/dynamiccontent/testing-dynamic-content/previewing-dynamic-content#the-live-preview-option).
### Benefits
---
- You will follow the browser policy.
- You will prevent being blocked by the anti-spam functions.
- You will improve user engagement and retention.
- You will be compliant with GDPR.
### Visitor perspective
---
When a visitor whose web push agreement is disabled enters a website, a dynamic content form appears. The visitor can give or decline a permission to receiving web push notifications.
The visitor gives permission
An agreement form from the browser appears.
When a visitor declines or closes the browser form, then their web push agreement state doesn't change (disabled).
When a visitor agrees, then their web push agreement state changes to enabled. The `profile.updated` event appears on the activity list of the visitor.
The visitor declines permission
A pop-up window is closed. The web push agreement attribute doesn't change (disabled).
## Requirements
---
- Implement a [tracking code](/developers/web/installation-and-configuration) to your website.
- You must be granted user permissions that allow accessing **Experience Hub**, creating and executing actions.
## Creating the agreement form
---
1. Go to **Experience Hub > Dynamic content > Create new**.
2. Select **Insert object**.
### Select the recipients
---
3. In the **Audience** section, click **Add info**.
1. Select the **New audience** tab.
2. Click **Define conditions**.
**Result**: A pop-up appears.
3. Click **Choose filter**.
4. From the dropdown list, select **receive_webpush_messages**.
This attribute is available after completing [web push configuration](/docs/campaign/Webpush/configuring-web-push).
5. Click the **Choose operator**.
4. Select the tab.
5. Select **Is false**.
Selected group of recipients
6. Confirm the settings on the pop-up by clicking **Apply**.
4. Confirm the settings in the **Audience** section by clicking **Apply**.
### Prepare the pop-up window
---
1. In the **Content** section, click **Add info**.
2. Leave **Simple message** at default.
3. In **CSS selector**:
1. Select **After (in div)**
2. In the field, enter `.snrs-modal-wrapper`
3. Click **Create message**.
4. Select the **Insert object templates**.
5. Select either `Gather web push agreement 1` or `Gather web push agreement 2`.
The difference between them is only visual and both can be edited in the simplified configuration form.
**Result**: A dynamic content template builder appears.
6. Configure the settings in the **Config** tab.
Click to expand the form description of Gather web push agreement 1
Environment mode - This option lets you display the preview of the template in the wizard. From the dropdown list, select one of the following options:
Development - This option is reserved only for template editing mode, its selection enables the preview of the template in the editor.
Production - This option must be selected when the template is finished and ready to be published. It's important to select this option before publishing, so the form will not display if the browser won't be able to process it.
Is open? - In this field, you can define whether a pop-up opens automatically. If not, clicking an icon invokes the agreement form.
Alignment - In this field, define the alignment of the pop-up on the website.
Title - In this field, enter the title that displays in the header of the pop-up.
Image - In this field, you can enter the URL of the image that will be used in the pop-up.
Button - In this field, enter the text on the confirmation button.
Primary color - Use color picker to define the color of the confirmation button.
Click to expand the form description of Gather web push agreement 2
Environment mode - This option lets you display the preview of the template in the wizard. From the dropdown list, select one of the following options:
Development - This option is reserved only for template editing mode, its selection enables the preview of the template in the editor.
Production - This option must be selected when the template is finished and ready to be published. It's important to select this option before publishing, so the form will not display if the browser won't be able to process it.
Two steps window agreement everywhere - Enable this option to display two-step agreement form in every browser. If this option is disabled, browsers based on the Chromium engine will only display the native web push consent window.
Image - In this field, you can enter the URL of the image that will be used in the pop-up.
Title - In this field, enter the title that displays in the header of the pop-up.
Description - In this field, enter the main text that displays on the pop-up.
Plain button - In this field, enter the text on the decline button.
Accept button - In this field, enter the text on the confirmation button.
Prime color - Use color picker to define the color of the confirmation button.
7. If you want to define or edit more parameters of the pop-up, you can do so in the **HTML**, **CSS**, and **JavaScript** tabs.
Learn more about [editing a ready-made template](/docs/campaign/dynamiccontent/creating-dynamic-content-templates/dynamic-content-template-builder#editing-a-ready-made-template).
10. You can use the [live preview](/docs/campaign/dynamiccontent/testing-dynamic-content/previewing-dynamic-content#the-live-preview-option) option to preview the dynamic content on the target website.
Once template editing is finished, in the **Environment mode** field set the value to **Production**. This option prevents displaying the form when the browser cannot process it.
6. Click **Next**.
Configured Content section
7. Confirm the settings in the section by clicking **Apply**.
### Schedule the display
---
1. In the **Schedule** section, to define when you want to start displaying the agreement form, click **Add info**.
2. You can choose:
- Immediate and continuous display by clicking **Display immediately**.
At the end of the process you must activate the dynamic content anyway.
- Future date by clicking **Scheduled**.
1. In the **Start** field, define the start date.
2. In the **End** field, define the end date.
3. Select the time zone.
3. Confirm your choices by clicking **Apply**.
After dynamic content is activated, wait several minutes for the content to be loaded.
### Set delay time
---
1. In the **Display settings** section, click **Define**.
2. Leave the **Triggers** at default (**on landing**).
4. Optionally, you can adjust the **Advanced settings**.
You can find explanation of the options in **Advanced settings** [here](/docs/campaign/dynamiccontent/creating-dynamic-content/creating-dynamic-content).
Configured Display settings section
5. Confirm by clicking **Apply**.
### Activate the form
---
In the right upper corner, click **Activate**. The form will appear on the website according to the settings defined. You can proceed to [creating a web push notification](/docs/campaign/Webpush/creating-webpush-campaigns).
# Email statistics
There are several ways to measure the effectiveness of your emails. You can start from predefined statistics within Experience Hub and end up with the detailed results of your email available on a customizable dashboard.
- [General dashboard](/docs/campaign/e-mail/email-campaign-statistics#general-dashboard) - in this place you can preview statistics on sent and scheduled mailings.
- [List of emails](/docs/campaign/e-mail/email-campaign-statistics#list-of-emails) - it contains information about the number of messages sent in last 24 hours and their basic statistics such as clicks, opened emails, OR and CTR (all of them are calculated on the basis of generated events).
- [Details of a sent email](/docs/campaign/e-mail/email-campaign-statistics#email-details) - when you go to the details of the email you already sent, you can check the detailed statistics about this email.
- [Workflow details](/docs/campaign/e-mail/email-campaign-statistics#workflow-details) - when you sent emails through Automation Hub, check the statistics of the email in the details of the workflow.
## General dashboard
---
To access the dashboard, go to **Experience Hub > Dashboard**.
General dashboard in Experience Hub
The dashboard shows:
- information about the number of mailings sent in the last 30 days (counted from the current day)
This number doesn't reflect the number of messages sent within one mailing.
- information about the number of mailings sent recently
- information about the number of mailings to be sent in the future
- information about the number of mailings sent in the last 7 days (counting from the current day)
## List of emails
---
To access the list of emails, go to **Experience Hub > Email**.
Statistics on the email list
The list contains emails sent through Automation Hub.
- Above the list, you can find the statistics of mailings from the last 24 hours:
These numbers don't reflect the number of messages sent within one mailing.
- **Active** - the number of emails which are being sent
- **Scheduled** - the number of emails which are planned to be sent in the next 24 hours
- **Sent** - the number of sent email creations
- **Opens** - the number of opened emails (based on the `newsletter.open` event)
- **Clicks** - the number of clicks in the email links in the last 24 hours (based on the `newsletter.click` event)
- The list header contains the following email parameters:
- **Sent** - the number of messages sent within an email creation
Hover the mouse cursor over the number to see the number of messages blocked by [capping](/docs/settings/configuration/campaign-limits).
- **CTR/Clicks** - the ratio of the clicked links in the message to the number of sent messages (based on the `newsletter.click` and `message.send` events).
- **OR/Opened** - the ratio of the opened messages to the number of sent messages (based on the `newsletter.open` and `message.send` events).
## Email details
---
You can preview the results of the sent email.
1. Go to **Experience Hub > Email**.
2. On the list of emails, you can find emails which were sent manually and through automation.
3. Click the name of the sent email.
**Result**: You are directed to the overview of the email.
The details of the sent mailing
4. Click the **Email campaign** tab.
**Result**: The preview of the detailed statistics is displayed.
You can create analytical dashboards of emails and add them to the default email statistics by clicking . More info [here](/docs/analytics/analytics-dashboard/creating-dashboards#adding-dashboards-to-campaign-statistics).
The scope of default statistics of email is wide. It's divided into three sections: overview, mailbox statistics and conversion:
Statistics of an email
## Workflow details
---
Full statistics of the email sent through **Automation Hub** are available on the list of emails, but if you want to check the statistics on the Send Email node, follow the instruction below:
1. Go to **Automation Hub > Workflows**.
2. On the list of emails, click the name of the active or stopped workflow that contains the Send Email node.
**Result**: You are directed to the overview of the workflow.
4. Hover a mouse cursor over the Send Email node.
## Events generated by email communication
See [Email event reference](/docs/assets/events/event-reference/email).
# Web Push
Web push notifications allow you to maintain communication with customers through a web browser. The unobtrusive character of web push notifications will keep your message away from spam folders or ad blocking software. The notifications will always be displayed to users who have agreed to receive them.
The following combinations of operating systems and browsers are supported for web push notifications:
- Windows: Chrome, Edge, Firefox, Opera
- macOS: Firefox, Chrome, Edge, Opera
- Android: Chrome, Samsung Internet, Firefox, Brave
Incognito Mode, Private Browsing Mode, and Guest Browser Mode do not support Web Push.
## Benefits
---
- Good way of increasing the number of your subscribers - users more eagerly agree to receive web push notifications rather than share their email address.
- Great deliverability in real time
- Good engaging results as directing traffic to a particular URL is only one click away
- Good way to increase the traffic (for example, with a catchy notification title)
- Good way to increase conversion as users can subscribe to web push notification to be informed about the product availability or discounts
- The possibility of personalizing content of notifications by using Jinjava variables (such as the first name of the user, the number of collected loyalty points, and so on).
- You can view the change history for this item from its configuration - see [Audit Log](/docs/settings/workspace/audit-log).
## Examples of use
---
See examples in [web push notification use cases](/use-cases/?ordering=DESC&sortBy=publishDate&filters=tags%3D%3D"web+push")
## Anatomy of web pushes
---
A web push notification consists of the following elements:
An example of a simple web push notification
| No. | Web push element | Function | Recommendations & possibilities |
|-----|------------------|--------------------------------------------------------------------------------------------------|------------------------------------------------------------------------------------------------------------------------------------------------------------------------------------------------------------------------------------------------------------|
| 1. | **Title** | This is the top text of your notification | - We suggest a 50-character limit to avoid being cut off, but the length depends on the browser - You can personalize the title using [inserts](/developers/inserts/webpush) and emojis |
| 2. | **Message** | This is the main content of your notification | - We suggest a 100-character limit to avoid being cut off, but the length of the text vary across different browsers - You can personalize the message using [inserts](/developers/inserts/webpush) and emojis |
| 3. | **Icon** | An icon helps in brand recognition | - We recommended using a size of 192x192 - To use an icon in the notification, upload the icon first in **Synerise > Data Modeling Hub > File**. |
| 4. | **Large image** | On macOS, it serves as an expanded icon, while on Windows and Android, it acts as a custom image | - Make sure to follow the [image requirements](/docs/campaign/Webpush/creating-webpush-templates#image-requirements) for optimal display - To use a large image in the notification, upload the image first in **Synerise > Data Modeling Hub > File** |
| 5. | **Action buttons** | They redirect users to a URL you indicate | - You can add up to 2 action buttons - You can personalize the text on the button by using [inserts](/developers/inserts/webpush) and emojis -You can add [inserts](/developers/inserts/webpush) to the URL |
| 6. | **Close button** | This button closes notification. The browser adds a close button to the notification. | n/a |
| 7. | **Domain** | The domain is automatically included in the notification. | n/a |
| 8. | **Browser badge** | The browser defines the browser badge. | n/a |
## Requirements
---
- [Integrate with Synerise JS SDK](/docs/settings/tool/tracking_codes)
- Create an account in Firebase
- [Integrate Firebase with Synerise](/docs/settings/tool/firebase)
- [Enable web push notifications in Synerise](/docs/campaign/Webpush/configuring-web-push#install-service-worker)
- [Prepare an agreement form](/docs/campaign/Webpush/two-step-agreement-form)
## How it works
---
Synerise uses Firebase Cloud Messaging (FCM) as a platform for real-time messaging and data exchange between servers and client applications. The process starts when Synerise sends messages to FCM, which manages the delivery of notifications to customers' browsers. To facilitate this process, the Firebase SDK is integrated through the JS SDK to generate a unique customer token. This token is then shared between Synerise and FCM.
FCM dispatches messages to customers with assigned FCM tokens. To display these messages in a browser, a service worker acts as a kind of proxy between the browser and the network, allowing for the interception and management of network requests, caching of files for offline use, and receiving web push messages from a server. Then, if a customer has provided consent for receiving web push notifications through a browser pop-up, the notification will be presented to the customer.
Overview of the process of sending a web push
### FCM token
An FCM token is a unique identifier which lets mobile and web applications receive messages from Firebase Cloud Messaging. It is generated by Firebase SDK and saved in the browser's storage. The token is also sent to FCM and to Synerise together with UUID of a customer who agreed to receive web push notifications through a browser's [agreement form](#marketing-agreement).
Tokens can be generated only when all the following conditions are met:
- Synerise and Firebase are integrated
- Web push notifications are enabled in the Synerise platform
- The service worker has been implemented into a website
- A customer agreed to receive web push notifications
### FCM token as attribute in Synerise
The status of a profile's FCM token is stored in the `snrs_has_web_push_devices` attribute. When the token is assigned, the value is `true`. This attribute is available:
- on the customer's card in **Synerise > Behavioral Data Hub > Profiles**, this way you can see the status of this attribute for each customer
- for use in Decision Hub
### Token TTL
Tokens generated by FCM for web push notifications remain valid until the customer revokes notification permissions or clears the browser/application data. In case when the token is inactive for 270 days, it is expired (change introduced by Google Firebase since May 15, 2024).
Every time a new token is generated for a customer, the [`webpush.tokenUpdate` event](/docs/assets/events/event-reference/webpush#webpushtokenupdate) is generated and added to the activity list on their card in **Profiles**.
#### Discrepancies between the number of customers with FCM token and the actual number of recipients of the notification
Differences may occur between the number of customers who have an FCM token in Synerise and the actual number of recipients who receive notifications. This is because Synerise isn't notified immediately when a customer withdraws an agreement in the browser settings or clears browser data and at the moment of sending, all the conditions in Synerise are still met. After a failed delivery, [`webpush.notRegistered`](/docs/assets/events/event-reference/webpush#webpushnotregistered) and [`webpush.tokenDelete`](/docs/assets/events/event-reference/webpush#webpushtokendelete) events are generated. As a result, the `snrs_has_web_push_devices` attribute is set to false, but the marketing agreement status remains unchanged.
The table below provides information what happens while [customer profiles are merged](/developers/api/clients/merging-profiles). The table contains only allowed merging combinations and each mention of `agreement` refers to the [web push marketing agreement](#marketing-agreement).
### FCM token migration
Token migration is a process in which the assignment of a FCM token is transferred from one user to another, along with associated changes in web push marketing consent. This migration occurs when a customer context changes in the browser, such as when a user logs out and a new user logs in, causing the FCM token to be reassigned to the new user or when [customer profiles are merged](/developers/api/clients/merging-profiles).
1. **An anonymous customer is recognized**
Token and marketing agreement will not change because the UUID of the customer is still the same. This customer can receive web push notifications.
2. **A customer context changes in the browser** - In the following scenario, both customers will not receive web push notification:
1. A customer is logged in as `john.doe@example.com` (further referred to as John Doe) in the browser. This customer has been assigned a Firebase Cloud Messaging (FCM) token and his marketing consent is enabled.
2. John Doe logs out.
3. `anna.smith@example.com` (further referred to as Anna Smith) logs in (the customer context in the browser changes). A new user, Anna Smith, has been added, and the FCM token that was previously assigned to John Doe is now passed to Anna Smith.
3. Anna Smith now has the FCM token, but her web push marketing consent is disabled. To receive web push notification, Anna must enable her agreement through an [agreement form](/docs/campaign/Webpush/two-step-agreement-form).
4. When attempting to send a web push notification to John Doe, the value of the `snrs_has_web_push_devices` attribute is changed from true to false, the marketing consent remains unchanged.
3. **Customers are merged**
The table below provides information what happens while [customer profiles are merged](/developers/api/clients/merging-profiles). The table contains only allowed merging combinations and each mention of `agreement` refers to the [web push marketing agreement](#marketing-agreement).
| Column: Source profile Row: Target profile | From: Anonymous, agreement disabled | From: Anonymous, agreement enabled |
|---------------------------------------------|-------------------------------------------------------------------------|-------------------------------------------------------------------------|
| To: Recognized, agreement enabled | Result: After merging the profiles, agreement is **enabled**. The token remains the same. | Result: After merging the profiles, agreement is **enabled**. The token from the recognized profile is kept. |
| To: Recognized, agreement disabled | Result: After merging the profiles, agreement is **disabled**. There is no token. | Result: After merging the profiles, agreement is **disabled**. The token from the anonymous customer is rejected. |
### Marketing agreement
Marketing consent is the permission in the browser to receive notifications. The customer can provide such consent through the native window displayed at the top of the page. The agreement is stored in the `receive_webpush_messages` attribute (this is the backend name of the attribute) which can be found in the profile card, in the Subscription section:
The Subscriptions section on a profile card
You can prepare such an agreement in Synerise, more information about that is in [Prepare an agreement form](/docs/campaign/Webpush/two-step-agreement-form) article.
### Marketing agreement across multiple browsers
Customers will receive web push notifications on any browser where they have consented to receiving them. If customers have provided consent on multiple browsers, they may receive the same web push notification on each of those browsers.
### Events related to web push notifications
As a result of implementing JS SDK, various types of events are automatically generated. These events can be triggered by both the customer's actions (such as clicking on the notification or dismissing the web push consent) and by the infrastructure (such as failed notification delivery due to invalid Firebase tokens or exceeding message limits). By analyzing these events, you can measure the effectiveness of your messages and their deliverability. See [default events associated with web push notifications](/docs/assets/events/event-reference/webpush).
## Creating web push
---
1. Define the recipients of the web push notification.
2. Prepare the content of the web push notification (web push templates).
3. Schedule the web push notification.
4. Define the UTM parameters.
## Sending methods
---
Web push notifications are sent in two ways:
1. Automatically by using [Automation Hub](/docs/automation). In response to customer activity, update of profile data, or other events (check the list of [triggers](/docs/automation/triggers) that start a workflow), a web push notification can be sent to customers.
2. Manually by clicking the **Send** button while creating web push notification.
## Web push status
---
The status of web push communication is available on the list of web push notifications. In the [Communication statuses](/docs/campaign/statuses) article, you can check the statuses which can be assigned to web push communication.
## Contents
# Sending SMS
After [integrating SMS gateway](/docs/campaign/SMS/configuring-sms-gateway), [creating SMS account](/docs/campaign/SMS/configuring-sms-gateway#create-sms-account) from which messages will be sent, and [preparing SMS template](/docs/campaign/SMS/creating-SMS-template), you can proceed to sending the text message.
In Synerise, you can send a text message in two ways:
- You can [send it manually in the form of a one-off campaign](/docs/campaign/SMS/sending-sms#send-manually)
- You can [send it automatically by Automation Hub](/docs/campaign/SMS/sending-sms#send-automatically)
## Requirements
---
Meet all requirements listed in [Introduction to SMS](/docs/campaign/SMS/introduction-to-sms#requirements)
## Send manually
---
1. Go to **Experience Hub > SMS > Create new**.
2. Type the name of the communication definition (it will only display on the list of definitions).
Blank SMS form
### Select recipients
---
1. In the **Audience** section:
1. Choose the recipients:
- **Everyone** - Everyone who gave marketing consent will receive your message. The estimated reach takes into account the number of customers who have given marketing consent to this type of communication (this means that in the case of communication such as mobile push, the estimated reach may be higher than the number of customers who have your mobile application).
- **Segment** - You can send the message to one or more existing segments in the system.
- **New Audience** - Create new segments and specify the conditions which the target must meet.
- Regardless of the way of selecting the audience, the system limits the audience to those who have the marketing agreement on, unless you override this behavior in the advanced options.
- If the audience is larger than 500000 profiles, consider using **Batch delivery** in the advanced options to avoid timeouts.
1. **Optional**: Open **Advanced options** and configure additional settings.
Advanced options - explanation
Batch delivery - You can use this option to prevent sending the message to all recipients at once. When to use it? When the target audience is so large that the messaging provider might not be able to process all messages at once.
If you plan to send messages to an audience larger than 15,000 profiles, we recommend this option.
For example, if the expected performance of your messaging provider is 1 million messages per hour and the expected audience is 5 million profiles, you can split the communication into 60 batches sent 5 minutes apart: every batch will include ~83000 profiles sending all messages will take 5 hours. If a batch is too large (or the batch delivery option is not used), it may time out in your messaging provider's system and the messages may not be delivered. For details on provider performance, contact the provider. If a batch takes more than 8 hours to complete for any reason, it is cancelled in Synerise.
Send without marketing agreement check - To comply with GDPR resolutions, Synerise by default filters out the recipients with marketing agreement off. This option, however, allows to send a message to those whose marketing agreement is off (after ticking this option, the number in the estimated reach don't refresh). When to use it? While sending messages that don't contain marketing content, for example, information about delays in shipping.
Enable control group - You can use this option to create a subgroup of the recipients who won't receive any communication variant. When to use it? When you send one or several variants of a communication (A/B/x testing). When a customer is assigned to a control group, the information is available in their Profiles card as an event.
Include audience changes - You can use this option only for scheduled communication. It recalculates the number of recipients right before sending the communication. By default, the size of the customer segment chosen for the communication is the same as in the moment of sending, even if the number of customers in the chosen segment changed between scheduling the communication and sending it. When to use it? When the size of the segments of customers selected as the audience of the communication can change dynamically.
Ignore limits - You can use this option to send this message to a customer, even if it exceeds the global limit of this type of messages for a single customer per day (more information is available here), enable the Ignore limits toggle. You may apply it to system messages such as a transaction confirmation, notifications about order delays, and so on.
1. To save your changes, click the **Apply** button below.
Remember that you can send SMS only to users who gave you their phone number and permission. This is the reason why estimated reach is lower than total audience.
### Select or create a template
---
4. In the **Content** section, click **Define**.
5. Select the sender type:
- **Fixed sender** — sends the SMS from a single sender account configured for this campaign.
- **Dynamic sender** — assigns a sender account to each recipient dynamically, based on their profile attributes. Use this option for multibrand or multilingual operations where different markets require separate phone numbers. For more information, see [Dynamic SMS sender](/docs/campaign/SMS/dynamic-sms-sender).
The Fixed sender tab in the Content section of the SMS campaign
1. From the **Sender name** list, select the [SMS account](/docs/campaign/SMS/configuring-sms-gateway#create-sms-account) from which the message will be sent.
2. Click **Create message**.
- Create new - This option allows you to [create a text message template from scratch](/docs/campaign/SMS/creating-SMS-template)
- From template - This option allows you to select a template you already created.
Dynamic sender allocation follows the Brickworks schema, which defines how an SMS account is assigned to each recipient.
The Dynamic sender tab in the Content section of the SMS campaign
1. In the **Schema** field, [select a schema which maps](/docs/campaign/SMS/dynamic-sms-sender#creating-the-schema) a value of a specific profile attribute to the sender account. You can hover over a schema in the list to preview its type, creation date, last update, and usage.
2. Click **Create message**.
- Create new - This option allows you to [create a text message template from scratch](/docs/campaign/SMS/creating-SMS-template)
- From template - This option allows you to select a template you already created.
1. If you want to add more variants:
1. Click the icon.
2. Repeat step 1.
3. Allocate variants to profiles by using the slider.
4. Click **Next**.
### Schedule the date of sending
---
5. In the **Schedule** section, define when your message is to be sent.
This section also allows you to enable silence hours - a time during the day when sending out messages is disabled.
1. You can choose between two options:
- To send your message after clicking the **Send** button on the upper right corner, use the **Immediately** option.
- To plan a message to be sent at a future date, use the **Scheduled** option. Set the start time and the time zone.
Synerise performs best with real-time data. This is why you can't schedule a message for more than 10 days in the future.
To select the best time of sending the message, take a look at the suggestion from the AI engine that calculates the best time (for all recipients). If time optimization is disabled, click [here](/docs/settings/configuration/time-optimizer) to learn more how to enable it and use it.
2. Select the **Silence Hours** setting:
- **Without silence hours** - The communication can be processed and sent out to the recipients at any time during the day.
- **Include silence hours** - With this option, you can set a time of day when the communication can't be sent:
1. In the **From** field, select when the silence hours start.
2. In the **To** field, select when the silence hours end.
The period can't be longer than 12 hours.
When a message can't be sent due to silence hours, an `sms.skipped` event is generated.
- When silence hours are enabled, the **Discard messages** option is always enabled. This means that messages blocked by silence hours are discarded entirely. **The discarded messages are not sent when silence hours end**.
- If the **Start** time of the schedule is in the silence hours, you can't apply the settings.
- If communication is scheduled for sending just before silence hours (for example, silence hours start at 22:00 and sending is scheduled at 21:59:59), the communication may be processed, sent, and logged in the events a short time after the silence hours start.
3. To save the changes, click **Apply**.
## Define UTM and URL parameters
---
You can add UTM and URL parameters to the links provided in the message through the [preparelink insert](/developers/inserts/sms#adding-utm-and-tracking-parameters-to-link). If the links aren't provided in the preparelink insert, the parameters won't be added to the link in the message.
7. To define UTM parameters, in the **UTM & URL parameters** section, click **Define**.
1. Fill in the following fields: **UTM campaign**, **UTM medium**, **UTM source**, and **UTM term**.
2. To add URL parameters, in the **URL parameters** section, click **Add parameter**.
3. Enter the parameter and value pair in the **Parameter** and **Value** fields, respectively.
4. To save the configuration, click **Apply**
### Testing
---
For testing purposes, you can send the message or one of its variants to the recipients you indicate in this section. You can do this regardless of the campaign's current status, except when the campaign is in the **Sending** status.
- You can select profiles from the database (available in the **Behavioral Data Hub > Profiles**) or you can send the message to recipients who are not in the database.
- When you send the test message to the recipients who are not in the database, the customer Jinjava tags will not render if the message contains any. The only Jinjava tags that will be rendered are non-customer Jinjava tags (metrics and catalog references).
- The **View in browser** option is unavailable in the test emails:
- for the recipients who are not in the database
- which are sent through **Automation Hub**
- Test messages are not counted towards capping limits.
- The system doesn't count clicks from test messages. If you click a link in the test message, an event will be not generated.
- If you want to send a test message to a profile from the database, it must have a phone number.
1. In the **Test** section, click **Define**.
2. If your message has more than one variant, select the variant of the message which you would like to use for testing. If not, skip this step.
3. In the **Select the user you want to send the test message to** searchbox:
- To select an existing recipient list:
1. In search results, select the **Saved lists** tab.
2. Select the list or lists.
3. Confirm by clicking **Add**.
- To add recipients from the database to a new list:
1. Search the recipients by name, surname, email address, custom ID, or UUID.
**Result**: A dropdown list with search results appears.
2. From the dropdown list, select the users whom you would like to include in your list of recipients.
3. Confirm your choice by clicking **Add** in the searchbox.
- To add recipients who are not in your database to a new list, add them one-by-one:
1. In the searchbox, enter the phone number.
**Result**: A dropdown list appears.
2. In the dropdown list, click **Add {the phone number you entered}**.
4. Optionally, if you create a new list of recipients, to save it for future use, click **Save list**.
This option lets you create two types of lists: with recipients from the database and with recipients who are not in your database. It's impossible to create a list that combines recipients from both categories.
**Result**: A pop-up appears.
1. In the **List name** field, enter the name of the list of recipients.
2. If your list includes both types of recipients (those from the database and those who are not in the database), select one of the following options:
- **Save profile list** - to save a list with recipients from your database only.
**Result**: Recipients who are not in the database will be removed from the list after you save it.
- **Save custom email list** - to save a list only with recipients who are not in your database.
**Result**: Recipients who are in the database will be removed from the list after you save it.
3. Confirm by clicking **Apply**.
**Result**: The list is available in the **Saved lists** tab of the recipient search result list.
5. To send the message, click **Send test**.
**Result**: The message is sent immediately.
### Adding custom parameters
---
You can add up to 10 custom parameters with constant values. They will be added to the [SMS events](/docs/assets/events/event-reference/sms).
1. To define the custom event parameters, in the **Additional parameters** section, click **Define**.
2. Click **Add parameter**.
3. In the **Parameter** field, enter the name of the parameter.
The following parameters cannot be sent:
- `modifiedBy`
- `apiKey`
- `eventUUID`
- `ip`
- `time`
- `businessProfileId`
- `correlationId`
- `clientId`
- `uuid`
4. In the **Value** field, enter the parameter value.
- The value is always sent as a string when the event's JSON payload is generated. The maximum length of the string is 230 characters.
- You can use Jinjava only in this field with the following restrictions:
- it will be rendered in the `.send`, `.notSent`, `webpush.notRegistered`, and `push.notRegistered` events
- the 230-character limit applies to the **Value** field both before and after Jinjava rendering; if the length exceeds this limit at any stage, the value will be truncated.
- if a Jinjava does not render, a raw code will be visible in the parameter value.
5. If you want to add more parameters, click **Add parameter**, and repeat steps 3-4.
**Result**: the parameters will be added to all events listed above with the values you entered. This is an example event saved in the database. The custom parameter `season` is located in the `params` object:
{
   "action": ...
   ...
   "params": {
    "clientId": 1111111111,
    "season": "autumn",
    "campaignName": "Back to school",
    "time": 1662392318050,
    "title": "Have you prepared for coming back to school?",
    "businessProfileId": "xxx"
   }
   }
6. Confirm the settings by clicking **Apply**.
## Send automatically
---
You can build a [workflow](/docs/automation/creating-automation) that sends out text messages to the recipients in response to their behavior or select an audience and build a dedicated workflow for them.
To do so, use [Automation Hub](/docs/automation) and build the workflow by using the [Send SMS node](/docs/automation/actions/send-sms-node).
Example of an automation process that uses the Send SMS action
The status of SMS communication is available on the list of SMS. In the [Communication statuses](/docs/campaign/statuses) article, you can check the statuses which can be assigned to SMS communication.
If you need an inspiration, you can check the [Personalized SMS with last visited most expensive product](/use-cases/dynamic-sms) use case that combines Automation Hub and the SMS channel.
More use cases with the SMS channel are available [in the Use Case library](/use-cases/?ordering=DESC&sortBy=publishDate&filters=channel%3D%3D"sms+communication").
# Creating web push templates
After implementing a tracking code into your website, integrating Firebase with Synerise, installing service worker and preparing an agreement form, you can create web push templates which you will later use while creating web push notifications.
## Image requirements
---
| | Chrome on Android | Chrome on Windows |
|------------|----------------------------------------------------------------------------------------------------------------------------|------------------------------------------------------------------------------------------------------------------------------|
| Resolution | 2:1 aspect ratio , minimum: `512x256`, balanced:`1024x512`, maximum: `2048x1024` | 2:1 aspect ratio, recommended: `360x180` |
| File type | `jpg`, `png`, `gif`, `webp`, `ico`, `cur`, `bmp`; **not supported**: `svg` or animated gifs (will show the first gif frame only) | `jpg`, `png`, `gif`, `webp`, `ico`, `cur`, `bmp`; **not supported**: `svg` or animated gifs (shows the first gif frame only) |
## Tracking parameters in links
---
No action required. [Tracking parameters](/developers/web/user-identification#recognizing-customers-from-link-parameters) are automatically added to the links (both for static links and those generated by means of Jinjava) whereas [UTM and link parameters](/docs/campaign/Webpush/creating-webpush-campaigns#define-utm-parameters) can be configured in the web push campaign.
## Create a template
---
1. Go to **Experience Hub > Web Push > Templates > New template**.
4. Enter the name of the web push template.
6. In the **Title** field, enter the headline of the notification. It's recommended to not exceed 50 characters, however, the displayed number of characters depends on the browser.
6. In the **Message** field, enter the main text of the notification.
**Recommended**: Up to 100 characters. If the message is too long, the rest of it is replaced with ellipsis (`...`).
How to personalize title and content of the web push
Click the Inserts button.
Select the insert type.
Find an insert and click it to get the code.
Copy the code.
Paste it into the text field (Title or Message).
Examples
Use of customer's first name Requirements: You must have customer names filled in on their profiles in the database. Example: Hey `{% customer name %}`. How are you? Effect: A customer sees their name in the web push notification.
Displaying the product added to the cart Requirements: You must prepare an aggregate that returns the last product added to the cart. Example: Do you want to finish the purchase of this item? `{% aggregate 43b9385d-1a70-3e8d-ae2c-27b1ae0083be %} {% endaggregate %}` Effect: A customer sees in the notification an image of the product left in the cart.
Displaying the number of loyalty points Requirements: You must create the expression that calculates the number of loyalty points. Example: You have `{% expression %} 04d2eeb6-d677-4e3e-913c-3e3633adf906 {% endexpression %}` loyalty points! Thank you for being with us! Effect: A customer sees the number of loyalty point they gathered.
7. In the **Destination URL** field, enter the address to which a customer is redirected after clicking the notification.
8. In the **Icon URL (optional)** field, enter the URL of the icon you uploaded previously to the **Files** section in **Data Modeling Hub**. The selected icon is shown on the right side of the notification.
1. To get the URL of the icon, go to **Data Modeling Hub > Files**.
2. Find the icon on the list.
3. Hover the mouse cursor over the icon on the list.
4. Click **Copy URL**.
5. Paste the URL in the **Icon** field.
Recommended size: 192x192
9. In the **Image URL** field, enter the URL of the image you uploaded previously to the **Files** section in **Data Modeling Hub**. The selected image is shown on the bottom of the notification. [Image requirements](/docs/campaign/Webpush/creating-webpush-templates#image-requirements) are listed at the top of the article.
1. To get the URL of the image, go to **Data Modeling Hub > Files**.
2. Find the image on the list.
3. Hover the mouse cursor over the image on the list.
4. Click **Copy URL**.
5. Paste the URL in the **Image** field.
10. If you want the web push to remain visible until the recipient clicks or closes it, switch the **Require an action** toggle on.
The "requireInteraction" functionality used by this toggle is not supported by some browsers. For more details, go to [https://developer.mozilla.org/en-US/docs/Web/API/Notification/requireInteraction#browser_compatibility](https://developer.mozilla.org/en-US/docs/Web/API/Notification/requireInteraction#browser_compatibility).
11. To configure action buttons for your template, switch the **Action Buttons** toggle on.
1. In the **Button text** field, enter the text that will appear on the button.
2. In the **Button URL** field, enter the address to which a customer is redirected after clicking the button.
3. To add second action button, click **Add button** and follow steps a-b.
Web push notifications support in browsers is provided by service worker - a file downloaded in browsers whenever the customer registers for web push notifications. **Action buttons are supported only in the version 3.0.0 (or higher) of service worker**. Only customers that have version 3.0.0 (or higher) of service worker stored in their browsers will receive notifications with action buttons, while all others will receive notifications without action buttons. The version of service worker that is stored in the browser of the particular customer is accessible in the [webpushToken.update](/docs/assets/events/event-reference/webpush#webpushtokenupdate) event, in `version` parameter. [Learn how to install service worker for your website](/docs/campaign/Webpush/configuring-web-push#install-service-worker).
Action buttons are supported only by Google Chrome, Microsoft Edge and Opera.
How to handle the click events from action button
The information about the customer clicking the button is stored in webpush.click event. This event contains an additional `actionButton` parameter with value `1` or `2`, depending which action button was clicked.
## Preview the template
---
1. To check the preview of the template for a particular customer or a product, click the **Preview context** button on the upper left side.
2. Enter the ID of a customer.
3. Click **Apply**.
**Result**: You see the preview of the template for the particular customer.
4. To test the notification template in your browser, click **Show notification** on the upper right side.
**Result**: You get a browser request to receive notifications.
5. Agree to receive notifications.
**Result**: A web push notification is displayed.
Example web push notification preview for Chrome desktop
## Save the template
---
- If [Service approval](/docs/settings/configuration/service-approval) is not configured:
- To go directly to launching a web push notification, click **Use in communication** and follow the instructions [here](/docs/campaign/Webpush/creating-webpush-campaigns).
- To save the template:
1. Enter the name of the template.
2. Select the folder where the template will be saved.
3. Click **Save this template**.
**Result**: A dropdown appears.
4. Click **Save as**.
**Result**: The template is saved in the selected folder.
- If [Service approval](/docs/settings/configuration/service-approval) is enabled for **Experience Hub**, to complete the work over the template:
- If you are a regular user, to send the template to reviewers and a final approver, click **Send to approval**.
- If you are a reviewer, to send the template to reviewers (including yourself), click **Send to approval**.
**Result**: **Approve** and **Unapprove** button appears.
- If you are a final approver, to let yourself approve the template, click **Send to approval**.
**Result**: **Approve** and **Unapprove** button appears.
If you make changes to the approved template and don't send it to get another approval, the web push notification will use the latest approved version.
# Dynamic SMS sender
The dynamic SMS sender feature lets you send one SMS campaign from different phone numbers, depending on who the recipient is. Instead of using one sender for everyone, the system checks a specific attribute assigned to each recipient and automatically chooses the right SMS account based on that. The selection is based on a [Brickworks](/docs/assets/brickworks) schema, where the mapping between attribute values and sender accounts is defined.
This is designed for multibrand or multilingual operations where each market or brand requires a dedicated sender number. For example, a company that operates in multiple regions can ensure that recipients in each region receive the text message from the correct regional phone number.
If a recipient's profile attribute value does not match any record in the schema, or if the schema has been deleted, the campaign is not sent to that recipient. An [`sms.notSent`](/docs/assets/events/event-reference/sms#smsnotsent) event is generated instead.
## Requirements
---
- At least two [SMS sender accounts](/docs/campaign/SMS/configuring-sms-gateway#create-sms-account) must be configured in the workspace.
- You must have the following user permissions:
- [create and edit schemas](/docs/settings/identity-access-management/permissions/data-management-permissions#create-and-edit-schemas)
- [create and edit records](/docs/settings/identity-access-management/permissions/data-management-permissions#create-and-edit-records)
- if you plan to create versioned schemas, then you need permissions to [publish records](/docs/settings/identity-access-management/permissions/data-management-permissions#publish-records).
- The recipients of the SMS must have a profile attribute whose values correspond to the mappings defined in the Brickworks schema. You choose which attribute to use - any profile attribute can serve as the basis for sender account assignment.
## Creating a Brickworks schema with mapping
---
Before you can use the dynamic sender in a campaign, you must create a Brickworks schema that maps profile attribute values to sender accounts.
### Getting the sender account ID
In further steps, you will need the IDs of the sender accounts. To find the ID of a sender account:
1. Go to **Settings > SMS**.
2. Click the sender account you want to use.
3. Copy the ID from the URL of the page.
### Creating the schema
In this part of the process, you will create a schema with the following fields:
| Field | Type | Constraints | Description |
|---|---|---|---|
| `profile_attribute_name` | String | Required, Constant | The name of the profile attribute used for matching. The value must be identical across all records in the schema. |
| `attribute_value` | String | Required, Unique | The value of the profile attribute that corresponds to this sender account mapping, for example, a region code such as `PL` or `EN`. |
| `sending_account` | Number (Integer) | Required | The ID of the SMS sender account to use for recipients whose attribute matches the `attribute_value`. |
1. Go to **Data Modeling Hub > Brickworks**.
2. Create a new schema. For more information on creating schemas, see:
- [Creating a schema](/docs/assets/brickworks/quick-start/creating-a-schema)
- [Field types](/docs/assets/brickworks/schema-field-types)
3. In the **Fields** tab, add the following fields:
1. Add a **String** field:
- In **API name**, enter `profile_attribute_name`
- Select the following options for this field:
- **Required field**
- **Block record-level overwriting** - This setting requires you to provide a default value for this field in each record — enter the name of the profile attribute used for matching.
2. Add a **String** field:
- In **API name**, enter `attribute_value`
- Select the following options for this field: **Required field** and **Unique values only**.
3. Add a **Number** field:
- Set the type to **Integer**.
- In **API name**, enter `sending_account`
- Select the **Required field** checkbox.
4. Save the schema.
Preview of a schema for dynamic sender allocation
### Adding records
After creating the schema, add a record for each sender account you want to map:
1. Open the schema and go to the **Records** tab.
2. For each mapping, add a record with the following values:
- In `profile_attribute_name`, the value is already provided due to the **Block record-level overwriting** option in the field setting.
- In `attribute_value`, enter the attribute value that identifies this group of recipients (for example, `PL`).
- In `sending_account`, enter the ID of the sender account assigned to this group.
An example record
3. Repeat for each sender account you want to map.
To learn about limits on schemas and records, see [Limits and constraints](/docs/assets/brickworks/limits).
#### Example
In this example, three records are added to the schema:
| Records | `profile_attribute_name` | `attribute_value` | `sending_account` |
|---|---|---|---|
| record1 | `region` | `PL` | `6235` |
| record 2 | `region` | `DE` | `6236` |
| record 3 | `region` | `EN` | `6237` |
In this example, recipients with `region = PL` will receive the text message from account `6235`, recipients with `region = DE` from account `6236`, and so on.
### Selecting the schema in a campaign
Once the schema is ready, select it when creating an SMS campaign:
1. In the **Content** section of the campaign, select **Dynamic sender**.
2. In the **Schema** field, select the schema you created.
For the full SMS setup, see [Sending SMS](/docs/campaign/SMS/sending-sms).
# Creating web push
After configuring the web push feature and the dynamic content that displays the agreement form, you are ready to create and send a web push. In this process, the main steps are: defining the recipients of the notification, selecting a template, and scheduling the web push notification.
## Requirements
---
You must be granted a set of user permissions that allow access to **Experience Hub** and performing actions with regard to messages.
## Creating web push notifications
---
1. Go to **Experience Hub > Web Push > Create new**.
2. Enter the name of the notification (this name is visible only on the list of the web push notifications).
### Select recipients
---
1. To define recipients, in the **Audience** section, click **Define**.
- To select all customers (with the web push marketing agreement on) you have in your database, select the **Everyone** tab.
- To select an existing group of customers, select the **Segment** tab and select the groups. If you select more than one, the customer must belong to at least one of them
- To define a new group of customers, select the **New audience** tab and follow the procedure described [here](/docs/analytics/segmentations/creating-segmentations).
Regardless of the way of selecting the audience, the system limits the audience to those who have agreed to web push marketing.
Advanced options - explanation
Batch delivery - It prevents sending web push notifications to all recipients at once. When to use it? When there is a risk that sending all of messages at once will result in excessive traffic on your website or the target audience is so large that the messaging provider might not be able to process all messages at once.
If you plan to send messages to an audience larger than 15,000 profiles, we recommend this option.
Send without marketing agreement check - To comply with GDPR resolutions, Synerise by default filters out the recipients with marketing agreement off. This option, however, allows to send an email to those whose marketing agreement is off (after ticking this option, the number in the estimated reach don't refresh). When to use it? While sending messages that don't contain marketing content, for example, information about delays in shipping.
Send to all devices - This option lets you send a message to all devices used by a customer. It's selected by default. If you want to send a message to the customer's most recently active device only, unselect this option.
Enable control group - It creates a subgroup of the recipients who won't receive any web push notification variant. When to use it? When you send one or several variants of web push (A/B testing). When a customer is assigned to their control group, the information is available in their Profiles card as an event.
Include audience changes - Available only for scheduled web push notifications. It recalculates the number of recipients right before sending the notification. By default, the size of the customer segment chosen for the notification is the same as in the moment of sending, even if the number of customers in the chosen segment changed between creating the notification and sending. When to use it? When the size of the segments of customers selected as the audience of the notification can change dynamically.
Ignore limits - If you want to make sure that this message is sent to a customer, even it exceeds the global limit of this type of messages for a single customer per day (more information is available here), enable the Ignore limits toggle. You may apply it to system messages such as a transaction confirmation, notifications about order delays, and so on.
1. Confirm the selection by clicking **Apply**.
How to check the number of customers who will receive web push?
A customer receives a web push notification only if they agreed to receive such notifications (through an agreement form) and they must have an active token. To verify the number of customers who will receive the notification, perform the following steps:
Create a segmentation.
In the first condition, use a receive_webpush_messages attribute set to true.
In the second condition, use a snrs_has_webpush_devices attribute set to true.
Define the dependency between two conditions as AND.
Click Save and check the preview.
### Select a template
---
1. To select the web push template or create a new one, in the **Content** section, click **Define**.
2. Click **Create message**.
**Result**: You are redirected to the template library.
3. To create:
- a message from scratch, click **New template**.
The procedure of creating a web push template from scratch is described [here](/docs/campaign/Webpush/creating-webpush-templates).
- a message based on an existing template, select a template from the list.
1. Find the folder the template is saved in.
2. Click the folder.
3. Select the template.
4. If needed, make changes to the template.
4. If the [service approval](/docs/settings/configuration/service-approval) is disabled for your workspace, click **Next**.
5. If the [service approval](/docs/settings/configuration/service-approval) is enabled and you made changes to the template:
- The system uses the approved version of the template if you proceed.
- You can send the template for approval once again.
2. To add more variants of the notification, click the icon.
3. Perform actions described in step 3.
4. Confirm by clicking **Apply**.
### Schedule the notification
---
Schedule section
1. To define when the web push is sent to your customers, in the **Schedule** section, click **Define**.
2. You can choose from two options:
- To send your notification after clicking the **Send** button on the upper right corner, use the **Immediately** option.
- To plan a message to be sent at a future date, use the **Scheduled** option. Set the start time and the time zone.
Synerise performs best with real-time data. This is why you can't schedule a message for more than 10 days in the future.
To select the best time of sending the message, take a look at the suggestion from the AI engine that calculates the best time (for all recipients). If time optimization is disabled, click [here](/docs/settings/configuration/time-optimizer) to learn more how to enable it and use it.
3. In **Time to live**, define the time for how long the push service will keep trying to send the notification to the browser. If the push service can't deliver the notification within that time (for example, due to the user's device being turned off), the notification will be discarded. The notification is only shown to customers whose browsers are running (also in the background) within this time range.
If you leave this field empty, it defaults to `7 days`.
2. Select the **Silence Hours** setting:
- **Without silence hours** - The communication can be processed and sent out to the recipients at any time during the day.
- **Include silence hours** - With this option, you can set a time of day when the communication can't be sent:
1. In the **From** field, select when the silence hours start.
2. In the **To** field, select when the silence hours end.
The period can't be longer than 12 hours.
When a message can't be sent due to silence hours, a `webpush.skipped` event is generated.
- When silence hours are enabled, the **Discard messages** option is always enabled. This means that messages blocked by silence hours are discarded entirely. **The discarded messages are not sent when silence hours end**.
- If the **Start** time of the schedule is in the silence hours, you can't apply the settings.
- If communication is scheduled for sending just before silence hours (for example, silence hours start at 22:00 and sending is scheduled at 21:59:59), the communication may be processed, sent, and logged in the events a short time after the silence hours start.
3. To save the changes, click **Apply**.
### Define UTM parameters
---
You can add UTM and URL parameters to the links provided in the message through the [preparelink insert](/developers/inserts/webpush#adding-utm-and-tracking-parameters-to-link). If the links aren't provided in the preparelink insert, the parameters won't be added to the link in the message.
7. To define UTM parameters, in the **UTM & URL parameters** section, click **Define**.
1. Fill in the following fields: **UTM campaign**, **UTM medium**, **UTM source**, and **UTM term**.
2. To add URL parameters, in the **URL parameters** section, click **Add parameter**.
3. Enter the parameter and value pair in the **Parameter** and **Value** fields, respectively.
4. To save the configuration, click **Apply**
### Testing
---
For testing purposes, you can send the message or one of its variants to the recipients you indicate in this section. You can do this regardless of the campaign's current status, except when the campaign is in the **Sending** status.
- You can send the test message only to the users available in the **Profiles** list and who have the `has_web_push_devices` set to `true`.
- Test messages are not counted towards capping limits.
1. In the **Test** section, click **Define**.
2. If your message has more than one variant, select the variant of the message which you would like to use for testing.
3. In the **Select the user you want to send the test message to** searchbox, search the recipients by name, surname, email address, custom ID, or UUID.
**Result**: A dropdown list with search results appears.
4. On the dropdown list:
- if you have saved list of recipients in the past, click the **Saved lists** tab.
- if you want to define a one-off list of recipients, select the users to include in your list.
5. Confirm your choice by clicking **Add** in the searchbox.
6. Optionally, to save the list of recipients for future use, click **Save list**.
**Result**: A pop-up appears.
1. In the **List name** field, enter the name of the list of recipients.
2. Confirm by clicking **Apply**.
**Result**: The list is available in the **Saved lists** tab on the dropdown of searchbox when it's clicked.
5. To send the message, click **Send test**.
**Result**: The message is sent immediately.
### Adding custom parameters
---
You can add up to 10 parameters which will be added to every event generated by this communication. Their values are the same for every event in the communication. You can use this, for example, to create a common parameter for events from different types of communication that belong to one marketing campaign.
The additional parameters will be added to the [web push events](/docs/assets/events/event-reference/webpush).
1. To define the custom event parameters, in the **Additional parameters** section, click **Define**.
2. Click **Add parameter**.
3. In the **Parameter** field, enter the name of the parameter.
The following parameters cannot be sent:
- `modifiedBy`
- `apiKey`
- `eventUUID`
- `ip`
- `time`
- `businessProfileId`
- `correlationId`
- `clientId`
- `uuid`
4. In the **Value** field, enter the parameter value.
- The value is always sent as a string when the event's JSON payload is generated. The maximum length of the string is 230 characters.
- You can use Jinjava only in this field with the following restrictions:
- it will be rendered in the `.send`, `.notSent`, `webpush.notRegistered`, and `push.notRegistered` events
- the 230-character limit applies to the **Value** field both before and after Jinjava rendering; if the length exceeds this limit at any stage, the value will be truncated.
- if a Jinjava does not render, a raw code will be visible in the parameter value.
5. If you want to add more parameters, click **Add parameter**, and repeat steps 3-4.
**Result**: the parameters will be added to all events listed above with the values you entered. This is an example event saved in the database. The custom parameter `season` is located in the `params` object:
{
   "action": ...
   ...
   "params": {
    "clientId": 1111111111,
    "season": "autumn",
    "campaignName": "Back to school",
    "time": 1662392318050,
    "title": "Have you prepared for coming back to school?",
    "businessProfileId": "xxx"
   }
   }
6. Confirm the settings by clicking **Apply**.
## Send the notification
---
- To send the web push, click **Send**. Depending on your choice in the **Schedule** section, the web push will be sent immediately or at a selected date.
- To save the web push as a draft, click **Finish later**.
The status of web push communication is available on the list of web push notifications. In the [Communication statuses](/docs/campaign/statuses) article, you can check the statuses which can be assigned to web push communication.
## FAQ
---
### Does my website need to support HTTPS to use web push?
Yes. Web push requires your site to fully support HTTPS. All `http://` requests must redirect to `https://`. This is required because the service worker — which manages web push subscriptions — must be served from a secure origin.
### How can I implement web push notifications?
Implement the Synerise JS SDK on your site as described in the [web push configuration guide](/docs/campaign/Webpush/configuring-web-push). The SDK handles the browser subscription flow, FCM token management, and delivery of notifications.
### Is it possible to stop sending a notification by deleting it?
No, once a web push is sent, it’s not possible to stop displaying the web push notification or modify it in any other way. It’s because when a web push is prepared in Synerise and activated, it is passed to Firebase Cloud Messaging. From that place, it is sent to the customers. If the TTL of the notification is 24 hours, during that time the FCM attempts to deliver the notification to a customer’s browser. If the notification is not delivered during that time, it expires.
### What happens if I send a notification to a customer logged in to two browsers?
Customers receive a notification in each browser if they have an active token for each browser.
### What happens if I send another web push notification to a customer who hasn't displayed the previous one?
It depends on the browser.
**Firefox**: If at the moment of sending web push, a browser is open, a customer receives two notifications at once in chronological order. If a browser is closed at the moment of sending the web push, a customer receives only the last web push notification, the one which was sent earlier won't be displayed.
**Chrome**: Notifications are queued - customers receive all of them in chronological order regardless of the browser state (whether it's closed or open).
### When will web push notifications first appear to a new subscriber?
Web push notifications are not displayed on the first visit. They will appear from the second visit onward, once the browser subscription and FCM token are fully established.
### If I have marketing consent from a user, can I automatically send them web push notifications?
No. Web push requires two separate consents: the browser-level subscription (accepted via the browser's native permission prompt) and the Synerise web push marketing agreement (set in the customer's profile). Both must be active, along with a valid FCM token, before notifications are delivered.
### Can I indicate where on the screen a web push notification will be displayed?
No. The position of the notification is controlled by the operating system and browser, not by Synerise. The display area varies depending on the customer's OS and browser settings.
### What's the difference between `webpush.permissionBlock` and `webpush.subscribeBlock` events?
The `webpush.subscribeBlock` event is related to web push communication in Synerise. The event is generated when a customer subscribed for notifications, but the browser is blocked from displaying them.
The `webpush.permissionBlock` event is related to a browser and it is sent to Synerise when a customer denied permission to display notifications from this website. If the customer uses multiple browser, it is possible that only some of them block notifications from the website.
# Testing dynamic content
You can test the display of dynamic content in the following ways:
- [Preview the dynamic content in the wizard](/docs/campaign/dynamiccontent/testing-dynamic-content/previewing-dynamic-content).
The wizard offers two ways of previewing dynamic content:
- Real-time preview window in the template editor - This option is recommended during the initial part of creating a dynamic content. You can select a customer for whom the preview is generated.
- Live Preview - This option lets you generate a link to your website with the dynamic content activated there. This preview option doesn't show already active dynamic content campaigns on your website.
- [Activate dynamic content on your production site for selected users or on your testing sub-page within the monitored domain](/docs/campaign/dynamiccontent/testing-dynamic-content/testing-dynamic-content-on-web).
## Contents
# Experience Hub
**Experience Hub** in Synerise lets you match the form of communication to the customer's preferences. This way you can build strong relations between your customers and your brand. Synerise offers a plenty of communication channels, from the most classic ones such as emails and text messages to web push notifications, mobile applications, and communication through website.
## Required user permissions
See [Experience Hub permissions](/docs/settings/identity-access-management/permissions/campaigns-permissions).
# CSS selector basics
When you create a dynamic content which is an Insert object, you must define its location on the website by using CSS selectors.
CSS selector field
You can define whether the dynamic content will be displayed:
- just before the element you choose (**Before**)
- right after the element you choose (**After**)
- instead of the element you choose (**Inner**)
## Selector usage examples
The HTML fragment above can be targeted by dynamic content by referring to its:
- ID - the ID of the element into which you want to target must be preceded by `#`, for example, `#header-title`
- Class - the class of the element into which you want to target must be preceded by `.`, for example, `.title-and-link`
- Multiple class - for example, `.class1.class2`
- Combination of ID and class - for example, `#header-title.title-and-link`
- Attribute - an attribute of the element you want to target must specify the name of the HTML element, and the attribute's name and value must be enclosed in square brackets, for example, `div[test-attr="A"]`
- HTML elements - for example `
`, `
`; if you want to select h2 element you can do it using:
- An element within an element with a particular ID: `#header-title h2` (`header-title` is the ID of the div and `h2` is the name of the element in the div. The space between them is required.)
- An element within an element with a particular class: `.title-and-link h2`
(`title-and-link` is the class of the div and `h2` is the name of the element in the div. The space between them is required.)
- An element within an element with a particular attribute: `div[test-attr="A"] h2`
(`div[test-attr="A"]` is the element (div) and attribute, and `h2` is the name of the element in the div. The space between them is required.)
### Output
| Config on the interface | Output for selector `.title-and-link h2` |
|-----------------------------|--------|
| Before |
<div class="title-and-link" id="header-title" test-attr="A"> DYNAMIC CONTENT WILL BE INSERTED HERE <h2 class="class1 class2">This Week's Picks</h2> <a href="https://example.com">View all</a> </div>
|
| After |
<div class="title-and-link" id="header-title" test-attr="A"> <h2 class="class1 class2">This Week's Picks</h2> DYNAMIC CONTENT WILL BE INSERTED HERE <a href="https://example.com">View all</a> </div>
|
| Inner |
<div class="title-and-link" id="header-title" test-attr="A"> <h2 class="class1 class2">DYNAMIC CONTENT WILL BE INSERTED HERE</h2> <a href="https://example.com">View all</a> </div>
|
## Tips
- If you want to check if a CSS selector is correct, copy your selector, go to your website and open to browser console, use the keyboard shortcut to open search box (for example `CTRL` and `F`) and paste the copied selector in the search box. If your CSS selector is correct, the search will return at least one element. The inspect properties may differ for each browser.
- Check if your CSS selector is unique. The campaign will be rendered where the selector first occurs.
# Removing dynamic content
## Removing dynamic content campaigns
When you don't need dynamic content, you can remove it from the application.
1. Go to **Experience Hub > Dynamic Content**
2. On the list, find the dynamic content you want to remove.
3. Click the icon next to the name of the dynamic content.
**Result**: A dropdown list shows up.
4. Select **Delete** option.
**Result**: A confirmation pop-up shows up.
5. Click **OK**.
# Custom subdomain for shortened links
Link shortening lets you create short links that are easier to share in messages. Additionally, it opens up a possibility to personalize links by using your own subdomain, which makes the link appear even more trustworthy and professional. Shortened links with your own subdomain enable you to add an opt-out link to a text message or to send links to a website that contains a personalized list of items.
When you use the [link shortening feature](/docs/campaign/SMS/creating-SMS-template#short-links), the default domain of the short link is `snrs.it`. In this article, you will learn how to configure link shortening to use your own subdomain, which is recognizable to customers.
- During this configuration, you will need to contact the Synerise Support team.
- The shortened links don't require HTTPS. If you include a link with `http://` in the message, it will be redirected to HTTPS when opened.
- When you preview an SMS in the template editor, shortened links are always shown with the default domain, but the custom domain will be used in the actual campaign.
Existing campaigns don't need to be updated after the domain changes, their messages will be sent with the new domain.
## Changing the subdomain of shortened links
1. In your hosting, create a subdomain for Synerise URL shortening, for example `short.storename.com`
Only a subdomain can be used. Root domains aren't supported.
1. Configure a CNAME DNS entry for the created subdomain:
// For Azure Cloud deployments:
   NAME                        TYPE   VALUE
   --------------------------------------------------
   short.storename.com.        CNAME  cname.snrs.it.

   // For Azure Cloud USA deployments:
   NAME                        TYPE   VALUE
   --------------------------------------------------
   short.storename.com.        CNAME  cname.azu.snrs.it.

   // For Google Cloud Platform deployments (currently only available in Belgium):
   NAME                    TYPE   VALUE
   --------------------------------------------------
   short.storename.com.        CNAME  cname.geb.snrs.it.
After creating a DNS entry, you may need to wait 24-72 hours before it becomes active.
1. Contact Synerise Support and provide the subdomain name.
Synerise Support updates the configuration of the workspace with the subdomain.
1. **If you want to use your own certificate**:
1. Prepare an X.509-format certificate.
2. Deliver the following files to Synerise Support:
- private key (`key.pem`)
- Fullchain certificate (`fullchain.pem`):
- The leaf certificate **must be the first** in the file.
- Intermediate certificates must follow, from the lowest-level to the highest.
- **Do not** include the root CA.
- When you use your own certificate, it is your responsibility to monitor its expiration time and re-generate it.
- Ensure that the `fullchain.pem` file is complete. Missing certificates or wrong certificate order may cause SSL/TLS errors.
2. **If you want Synerise Support to provide a certificate for you**:
1. Contact Synerise Support to request the certificate.
Synerise Support generates a certificate by using third-party solutions such as letsencrypt.org.
2. If your domain has CAA records, add the following record to the root domain or subdomains used with Synerise:
```
short.storename.com. IN CAA 0 issue “letsencrypt.org”
```
If your subdomain does not use CAA records, **you do not have to add them**.
**Result:** The shortened links change from the Synerise domain to your subdomain. Existing campaigns don't need to be updated.
# List-Unsubscribe header
The List-Unsubscribe header is an email header field that provides a method for recipients to easily unsubscribe from email lists. It's included in the header section of an email and typically contains one or more methods for unsubscribing, such as a URL link or a mailto address. This allows email clients to offer a convenient unsubscribe button or link to the user.
Synerise adds the List-Unsubscribe header to all emails sent through the platform except for the test emails. This solution is supported with all SMTP providers and email senders integrated with Synerise.
Example of the Unsubscribe button next to the sender's name
When a recipient clicks the button:
1. A [`newsletter.unsubscribe`](/docs/assets/events/event-reference/email#newsletterunsubscribe) event is generated with the `method` event parameter set to `ONECLICK_LINK` or `ONECLICK_MAILTO` on their profile card in Synerise. The parameter value depends on which method the post client used to unsubscribe the recipient (link or mailto method).
Example of the newsletter.unsubscribe event with the ONECLICK_LINK method
2. A [`marketingAggreement.turnOff`](/docs/assets/events/event-reference/email#marketingagreementturnoff) event is generated which results in setting the newsletter agreement attribute to disabled.
Email agreement attribute set to disabled on the profile card
**EmailLabs** users only: Prior to July 8, 2024, EmailLabs was responsible for adding the List-Unsubscribe header and adding customers to the blacklist. From July 8, 2024, Synerise automatically adds this header and customers are no longer added to the EmailLabs blacklist.
This practice aligns with most mail clients' requirements, such as Gmail and Yahoo, improving email reputation protection by offering users a direct way to unsubscribe without marking emails as spam. In the email account configuration, you can [customize one-click unsubscribe settings](/docs/campaign/e-mail/configuring-email-account#unsubscribe-configuration).
While the display of the one-click unsubscribe button depends on the mail clients, it is typically reserved for reputable senders. However, the button only appears if the email client's algorithm allows it. **For this reason, we strongly recommend adding the unsubscribe link manually to the email template.**
# Tagging campaigns
[Tags](/docs/assets/tags) are a method of organizing and managing your campaigns. You can assign tags from the predefined **campaigns** folder to every campaign you send, whether you send it manually or use a workflow in Automation Hub.
There is no limit to how many tags you can assign to a single campaign. Keep in mind that tags are case sensitive. For example, `newsletter` and `Newsletter` are considered two different tags. While you cannot remove tags once they are assigned to a campaign, you do have the option to edit them (for example, rename them) even after assignment.
Using tags effectively will help you keep your campaigns organized, improve searching and filtering, and make reporting easier.
## Benefits
- Keeps your campaigns well organized
- Allows you to filter campaigns by tags
- Makes reporting and analysis clearer
- Lets you set [sending limits](/docs/settings/configuration/campaign-limits) based on tags (for example, you can limit campaigns tagged as `newsletter` to send only once a week) - unavailable for dynamic content, in-app messages, and landing pages
### Managing campaign limits
---
Tagging campaigns is also a method for managing sending limits for the following campaign types: email, mobile push, SMS, and web push. You can define how many campaigns with a specific tag assigned can be sent out to a [profile](/docs/crm/crm-profile) within a specific time unit. You can assign multiple tags to a single campaign.
Tag limits work cross-channel, allowing you to set different sending limits based on the type and purpose of communication rather than the specific channel. This means, for example, you can have separate limits for personalized messages and newsletters, customizing the sending rules to fit each communication style independently of the channel used.
The full instruction on imposing limits on tags and complete documentation of managing communication limits is available in [Communication limits](/docs/settings/configuration/campaign-limits)
### Campaigns available for tagging
You can add tags to the following types of campaigns:
- [Dynamic content](/docs/campaign/dynamiccontent)
- [Email](/docs/campaign/e-mail)
- [In-app messages](/docs/campaign/in-app-messages)
- [Landing pages](/docs/campaign/landing-page)
- [Mobile push](/docs/campaign/Mobile)
- [SMS](/docs/campaign/SMS)
- [Web push](/docs/campaign/Webpush)
### Methods of assigning tags
You can assign tags to communication in several places:
- When creating a campaign
Adding a tag while creating a campaign
- On the campaign list page
Adding a tag to a campaign on the list of campaigns
- In the settings of these workflow nodes:
- ["Send Email" node](/docs/automation/actions/send-email)
- ["Send Mobile Push" node](/docs/automation/actions/send-mobile-push)
- ["Send SMS" node](/docs/automation/actions/send-sms-node)
- ["Send Web Push" node](/docs/automation/actions/send-webpush-node)
Adding a tag to a campaign send through a workflow
A tag added in the node will be applied to the campaign generated by that node (it will be visible in the list of the dedicated channel in **Experience Hub**).
Tags created outside **Data Modeling Hub > Tags** will appear in the predefined **campaigns** folder inside in **Data Modeling Hub > Tags**.
## Filtering campaigns by tags
You can filter and search campaigns in the lists (for example, in **Experience Hub > Email**) using tags. When you select multiple tags, the filter uses an **AND** rule, meaning only campaigns with *all* selected tags will show up in the results.
## Creating campaign tags
1. Go to **Data Modeling Hub > Tags**,
2. On the left panel, click the predefined **campaigns** folder.
3. In the upper-right corner, click **Add tag**.
4. Follow the instructions in the ["Adding tags" section](/docs/assets/tags#adding-tags).
The list of tags in the predefined campaigns folder
# Communication statuses
This article describes the statuses the following message types:
- [Email](/docs/campaign/e-mail)
- [SMS](/docs/campaign/SMS)
- [Web push](/docs/campaign/Webpush)
- [Mobile push](/docs/campaign/Mobile)
- [Dynamic content](/docs/campaign/dynamiccontent)
- [In-app messages](/docs/campaign/in-app-messages)
- [Screen views](/docs/campaign/screen-views)
- [Landing page](/docs/campaign/landing-page)
## Statuses
| Status | Description | Message types |
|-----------|----------------------------------------------------------------------------------------------------------------------------------------------------------------------------------------------------------------------------------------------------------------|------------------------------------------------|
| Draft | A communication has been created but not finalized yet. It indicates that it is still being worked on, edited, or reviewed. | All |
| Scheduled | A communication has been created, finalized, and scheduled to automatically start at a specific date and time. This means that the campaign will launch according to the set schedule without requiring manual intervention at the start time. | All, except landing page |
| Sending | A communication is in the process of being distributed to its intended recipients. This status typically means that the communication has been activated and is actively sending out messages, such as emails, SMS, push notifications to the target audience. | Email, SMS, Web push, Mobile push |
| Active | An active status indicates that the communication is currently live and engaging with the target audience; you can monitor and optimize its performance in real-time. Communication in this status can be paused or stopped. | Dynamic content, in-app messages, screen views |
| Paused | A paused status indicates that the communication is temporarily not shown to the recipients, so they can't interact with it and the statistics are not collected. Communication in this status can be resumed. | Dynamic content, in-app messages, screen views |
| Published | A landing page in published status is currently live and engaging with the target audience. | Landing page |
| Finished | The process of queuing messages for sending has finished. Single messages can be still sent out despite this status. | All, except landing page |
| Stopped | The process of sending the messages has been stopped. This status is permanent. | All, except landing page |
| Error | The process of sending the messages has stopped due to an error. | All |
## Stopping active communication
---
You can stop sending out email, SMS, web push and push communication in the following statuses:
- **Sending** - You can stop the process of sending out email, SMS, web push, and push communication on request when the campaign is in this status. This option is useful when you discover errors in the campaign and you want to stop the rest of the messages which haven't been sent yet.
- **Finished** - When a campaign reaches this status, it may still be in the process of sending messages to the provider. To prevent any unintended communication, you have the option to stop campaigns with this status, ensuring control over the messaging process.
This option is not available for messages sent through the [Automation Hub](/docs/automation).
As a result, the following events may be generated for the recipients (it depends on the progress stage of the sending process):
- for emails: [message.notSent](/docs/assets/events/event-reference/email#messagenotsent)
- for SMS: [sms.notSent](/docs/assets/events/event-reference/sms#smsnotsent)
- for push notifications: [push.notSent](/docs/assets/events/event-reference/mobile-push#pushnotsent)
- for web push notifications: [webpush.notSent](/docs/assets/events/event-reference/webpush#webpushnotsent)
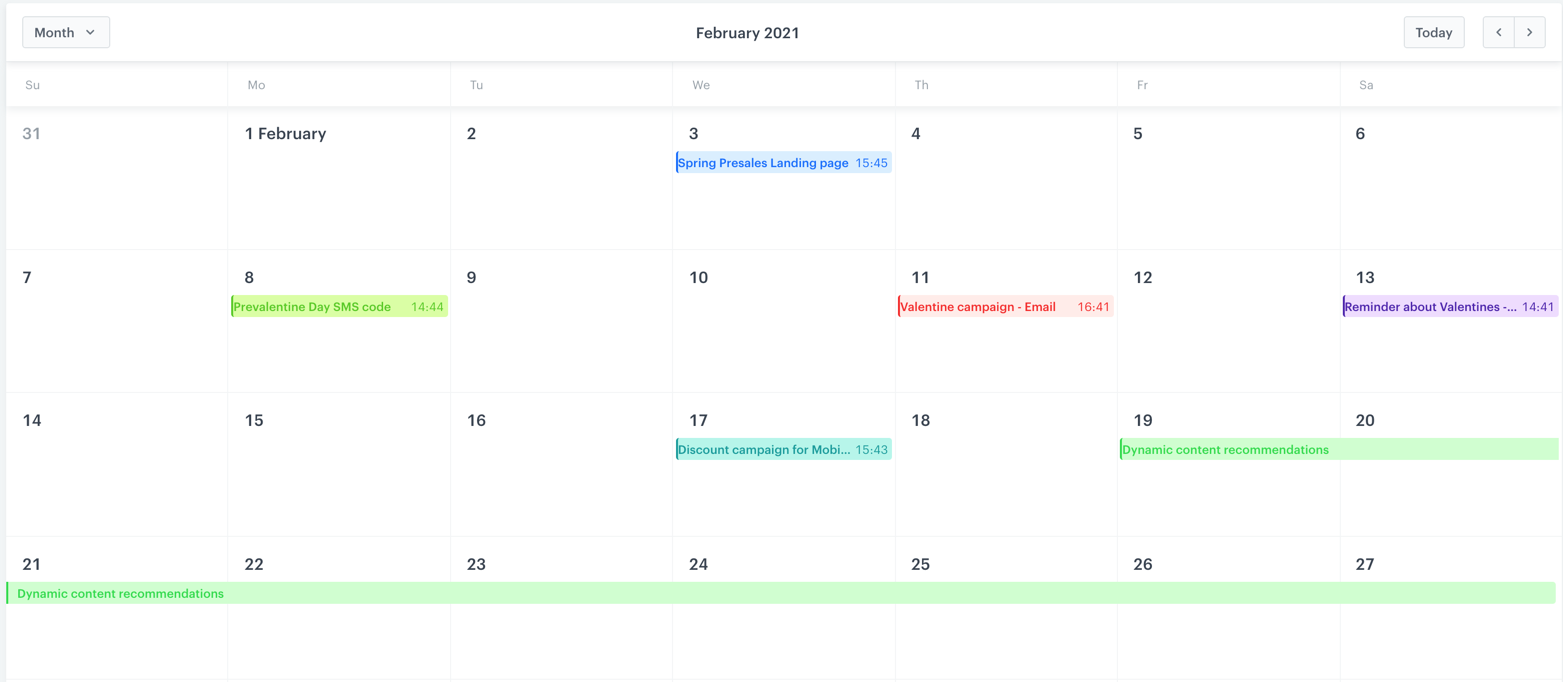
 **Settings > Calendar**.
2. On the right side, click **Import**.
**Result**: A pop-up appears.
3. On the pop-up, enter the name of the imported calendar (the name will be visible only on the list of special calendars).
4. Enter the description of the calendar (the description will be visible only on the list of special calendars).
5. Upload a calendar in the `ics` format.
**Result**: A calendar appears on the list. By default, it is set to be visible on the marketing calendar.
6. To modify the visibility of the calendar on the marketing calendar, switch the **Visibility** toggle on or off.
## Exporting marketing calendars
---
You can export the events from the calendar from a selected time range and import it to your calendar (option available only for calendars that accept the `ics` format).
1. Go to **Experience Hub > Calendar**.
2. On the right side of the screen, click **Export**.
**Result**: A pop-up appears.
3. Click the calendar and select the time range from which you want to export data.
4. Click **Apply**.
**Result**: The pop-up closes.
5. Click **Apply**.
**Result**: A file is downloaded to your device.
# Changes to Screen views
This article contains a summary of the changes to the Screen views feature.
## Terminology
With the release of the new version of the Screen views feature, we introduce new terms:
- **Screen view feed** - It is a category a screen view can be assigned to. For example, it can define a space in a mobile application it is dedicated to.
- **Group** - It functions as a tag/category for organizing [documents](/docs/assets/documents/whats-new).
## Summary
See the comparison below to find out what changed in the feature recently.
| Now | Before |
|-----------------------------------------------------------------------------------------------------------------------------------------------------------------------------------------------------------------------------------------------------------------------------------------------------------------------------------------------------------------------------------------------------------------------|------------------------------------------------------------------------------------------------------------------------------------------------------------------------------------------------------|
| You can display many screen views at a time | You could display only one screen view |
| You can assign a screen view to a feed (category) | No categorization of screen views was available |
| You can manually define the structure of a document | You could manually define the structure of a document |
| You can select single documents to be included
**Settings > Calendar**.
2. On the right side, click **Import**.
**Result**: A pop-up appears.
3. On the pop-up, enter the name of the imported calendar (the name will be visible only on the list of special calendars).
4. Enter the description of the calendar (the description will be visible only on the list of special calendars).
5. Upload a calendar in the `ics` format.
**Result**: A calendar appears on the list. By default, it is set to be visible on the marketing calendar.
6. To modify the visibility of the calendar on the marketing calendar, switch the **Visibility** toggle on or off.
## Exporting marketing calendars
---
You can export the events from the calendar from a selected time range and import it to your calendar (option available only for calendars that accept the `ics` format).
1. Go to **Experience Hub > Calendar**.
2. On the right side of the screen, click **Export**.
**Result**: A pop-up appears.
3. Click the calendar and select the time range from which you want to export data.
4. Click **Apply**.
**Result**: The pop-up closes.
5. Click **Apply**.
**Result**: A file is downloaded to your device.
# Changes to Screen views
This article contains a summary of the changes to the Screen views feature.
## Terminology
With the release of the new version of the Screen views feature, we introduce new terms:
- **Screen view feed** - It is a category a screen view can be assigned to. For example, it can define a space in a mobile application it is dedicated to.
- **Group** - It functions as a tag/category for organizing [documents](/docs/assets/documents/whats-new).
## Summary
See the comparison below to find out what changed in the feature recently.
| Now | Before |
|-----------------------------------------------------------------------------------------------------------------------------------------------------------------------------------------------------------------------------------------------------------------------------------------------------------------------------------------------------------------------------------------------------------------------|------------------------------------------------------------------------------------------------------------------------------------------------------------------------------------------------------|
| You can display many screen views at a time | You could display only one screen view |
| You can assign a screen view to a feed (category) | No categorization of screen views was available |
| You can manually define the structure of a document | You could manually define the structure of a document |
| You can select single documents to be included 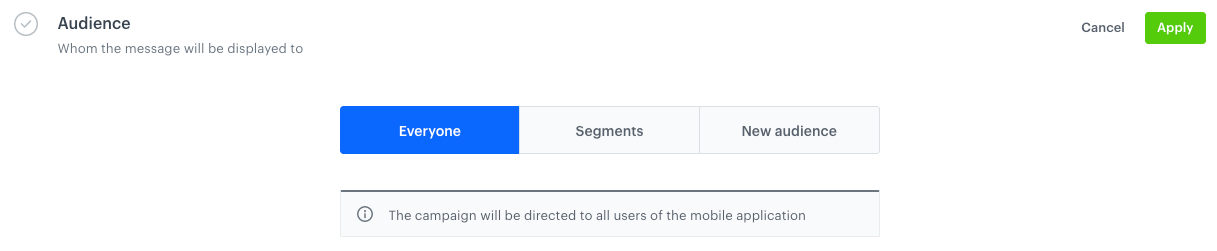 |
| 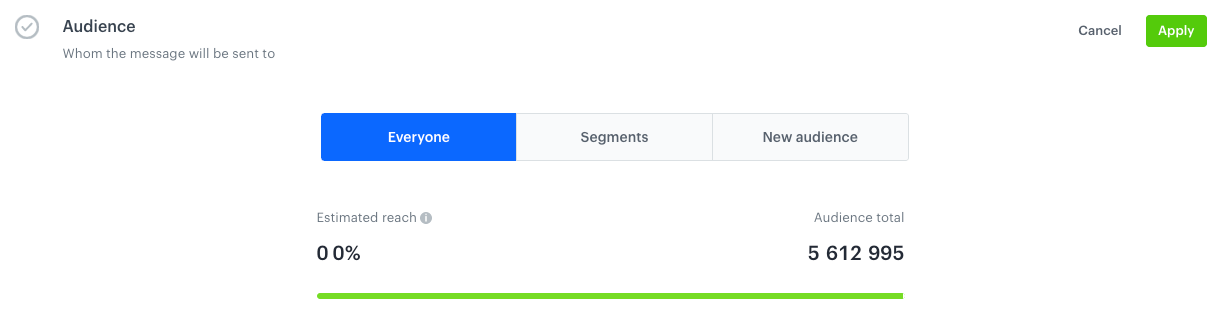 |
| Defining the content |
|
| Defining the content | 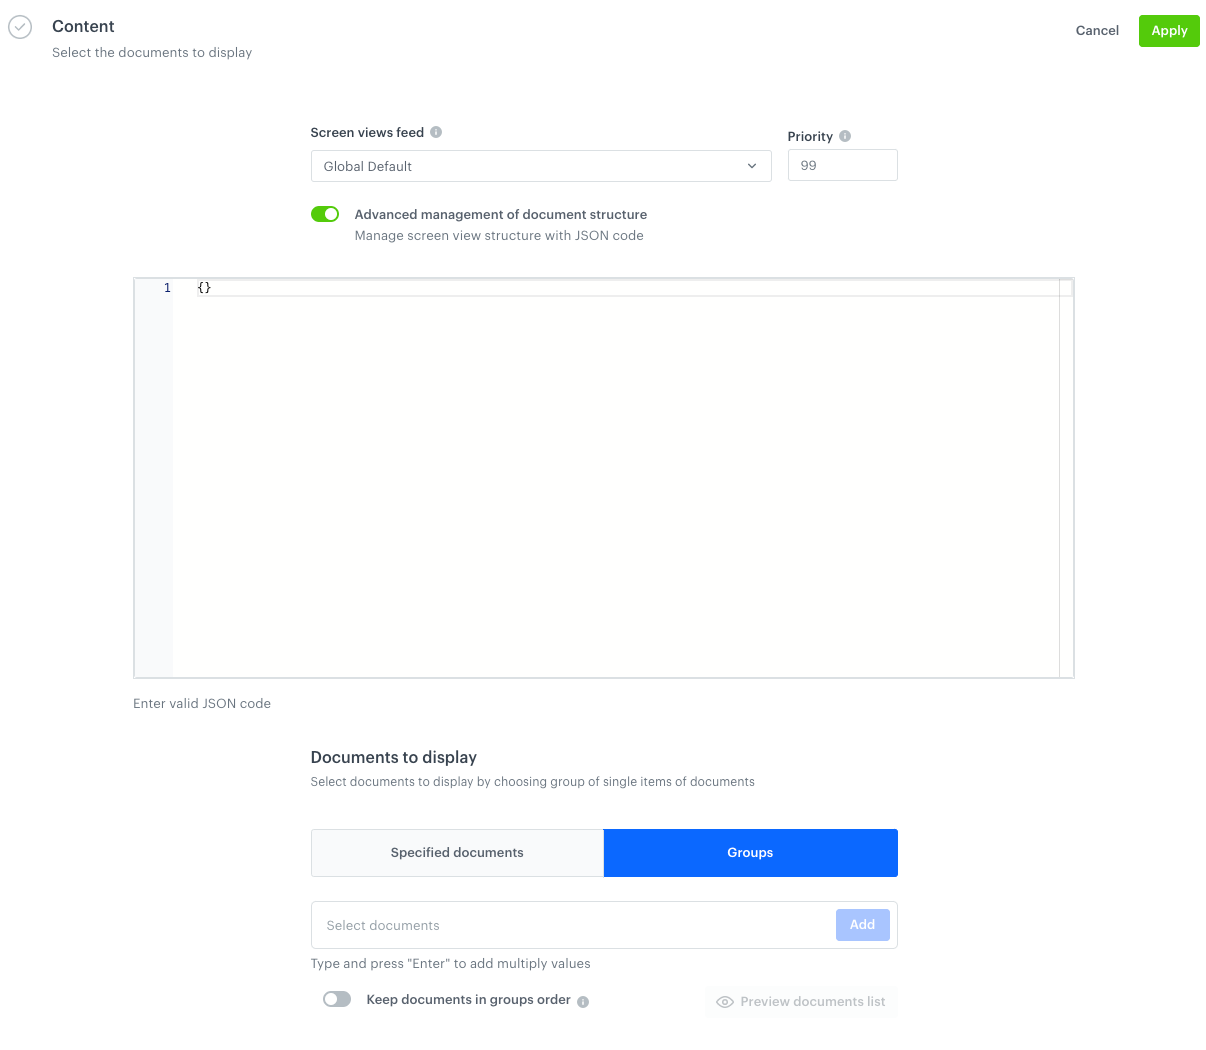 |
| 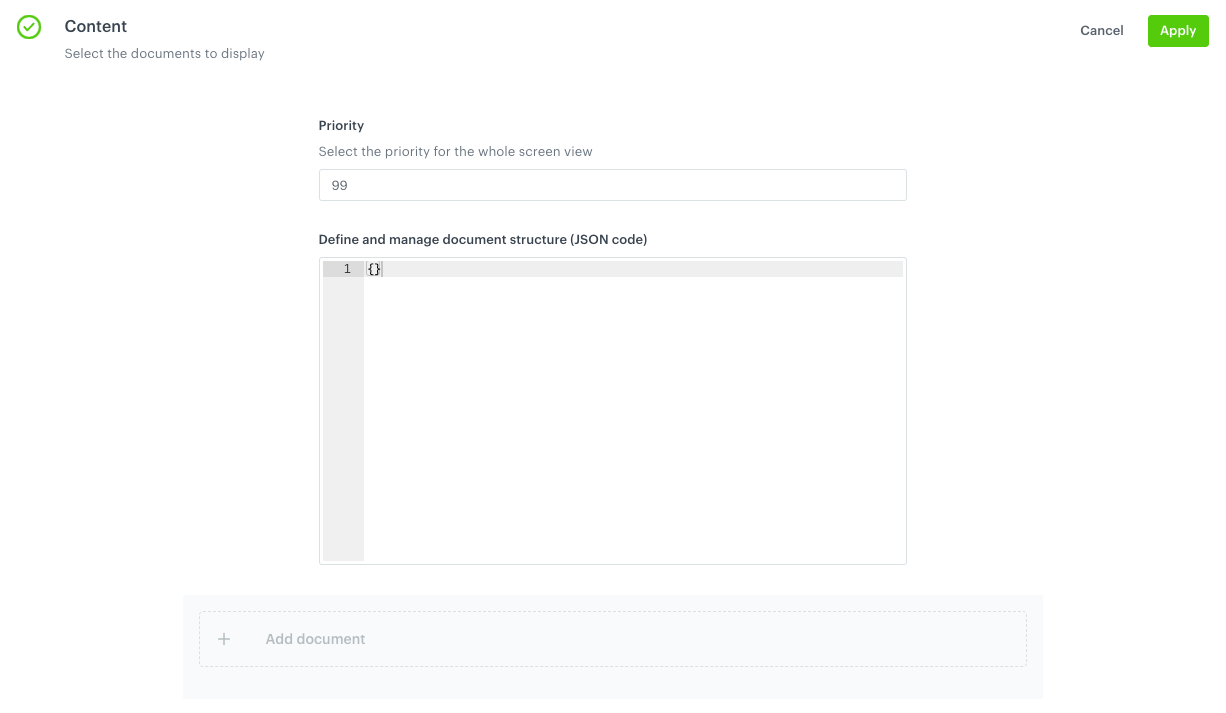 |
| Defining the schedule |
|
| Defining the schedule | 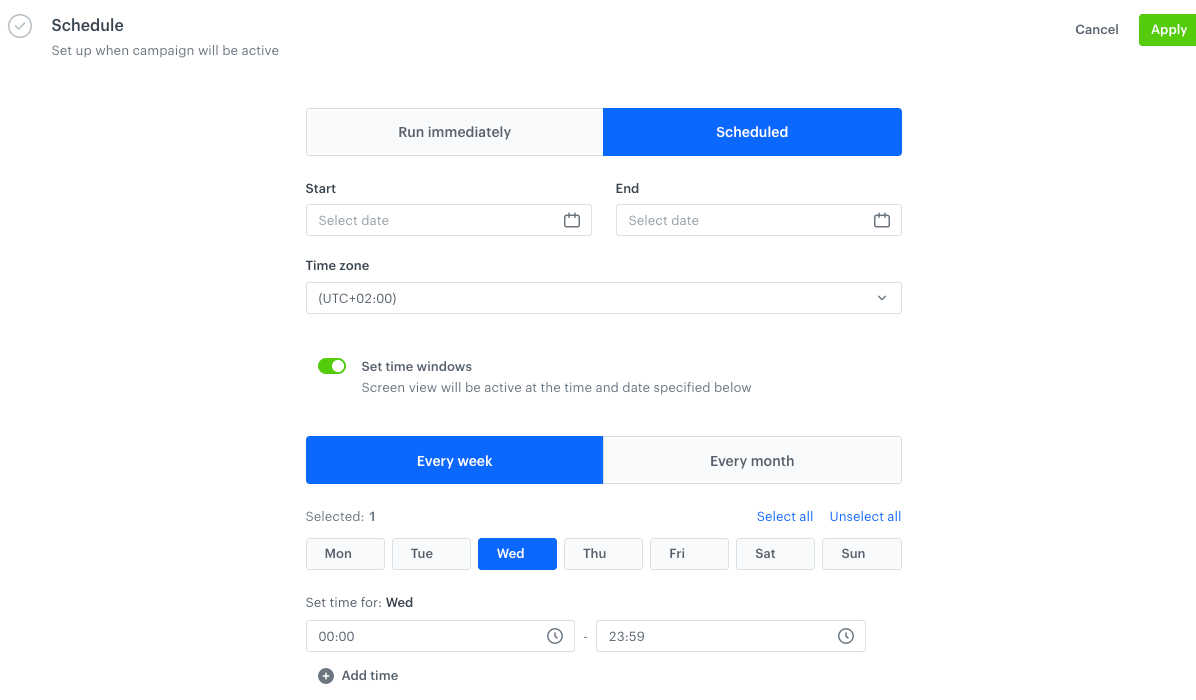 |
| 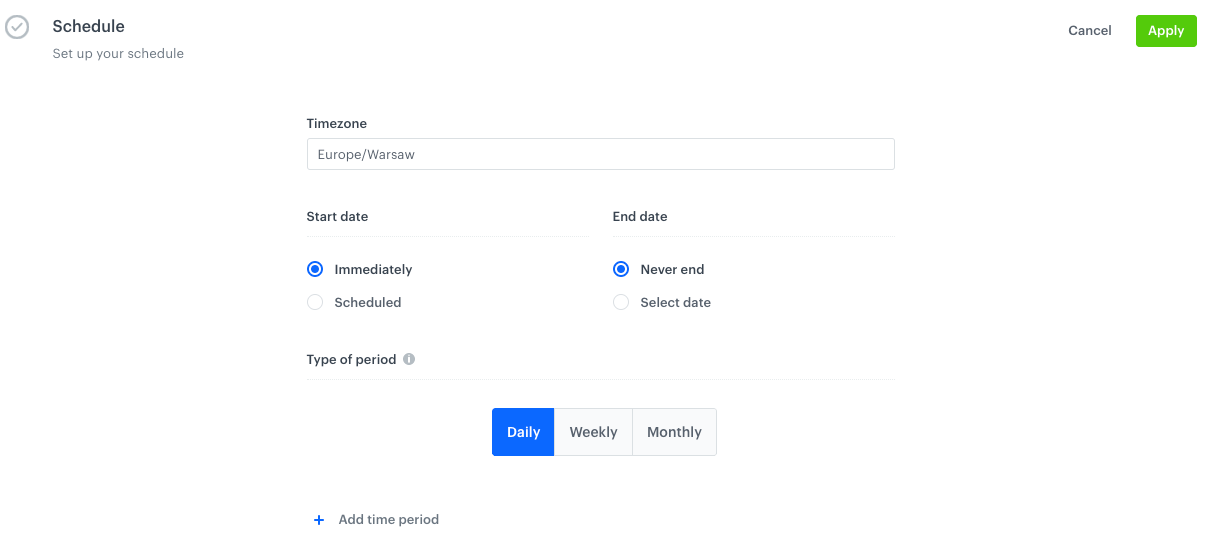 |
| Publishing options |
|
| Publishing options |  |
|  |
## Deprecated endpoints
- [Get screen view - /screenViews/single/{screenViewId}/{screenViewVersion}](https://hub.synerise.com/api-reference/campaigns#operation/getScreenViewByVersion)
- [Get screen view versions - /screenViews/versions/{screenViewId}](https://hub.synerise.com/api-reference/campaigns#operation/getScreenViewByVersion)
- [Generate screen view - /v2/screenViews/generate](https://hub.synerise.com/api-reference/campaigns#operation/generateScreenViewWithAdditionalDataGet)
- [Copy content - /screenViews/content/{screenViewId}/{screenViewVersion}/copyFromExistingScreenView](https://hub.synerise.com/api-reference/campaigns#operation/copyContent)
- [Add content - /screenViews/content/{screenViewId}/{screenViewVersion}](https://hub.synerise.com/api-reference/campaigns#operation/createContent)
- [Add audience - /screenViews/audience/{screenViewId}/{screenViewVersion}](https://hub.synerise.com/api-reference/campaigns#operation/createAudience)
- [Publish screen view - /screenViews/publish/{screenViewId}/{screenViewVersion}](https://hub.synerise.com/api-reference/campaigns#operation/publishScreenView)
- [Update screen view name - /screenViews/single/{screenViewId}/{screenViewVersion}/name](https://hub.synerise.com/api-reference/campaigns#operation/updateNameOfScreenView)
- [Update screen view description - /screenViews/single/{screenViewId}/{screenViewVersion}/description](https://hub.synerise.com/api-reference/campaigns#operation/updateDescriptionOfScreenView)
- [Update screen view priority - /screenViews/single/{screenViewId}/{screenViewVersion}/priority](https://hub.synerise.com/api-reference/campaigns#operation/updatePriorityOfScreenView)
- [Discard changes - /screenViews/discardChanges/{screenViewId}/{screenViewVersion}](https://hub.synerise.com/api-reference/campaigns#operation/discardChanges)
- [Delete screen view version - /screenViews/single/delete/{screenViewId}/{screenViewVersion}](https://hub.synerise.com/api-reference/campaigns#operation/deleteSingleScreenView)
## Q&A
### 1 How to create a screen view?
The only difference in the processes before and now is the possibility of selecting a document group.
If you create a new screen view, you must complete the following steps (these steps are also required when you edit an existing document):
1. Define the recipients of the screen view campaign.
2. Select documents to be included in a screen view campaign and define priority of the screen view.
Instead of selecting documents one by one, you can select a document group to include all documents assigned to a particular group.
3. Schedule the activity time (when this document will be visible) of the document.
### 2 How to make my existing screen views work as previously?
The core logic of screen views remains the same - screen views display the contents of documents you select for the selected recipients at the selected time. If you're happy with the settings of your published screen views, you don't have to do anything.
If you want to edit activated and draft screen views or create new ones, you can't create many versions of a screen view, you must assign a screen view to a category (feed), and you can either select documents for the campaign based on a group (document category) or you can select individual documents.
### 3 What will happen to existing screen views?
- screen views which were previously in a draft state will:
- receive the **Draft** status
- be assigned to the `Global Default` feed
- have the **Schedule** section blank
- the published screen views:
- the latest version of the published screen view will be set to **Active**, previous versions will be deleted
- published screen views will be assigned to the `Global Default` feed
- audience settings, priority, content, and schedule settings will remain unchanged
- screen views which are published with the date at the future will receive the **Paused** status and will be resumed to the **Active** state at the scheduled date.
- expired screen views will be deleted
# Dashboard
In the Dashboard view of **Experience Hub**, you can view the number of sent messages in the following channels: email, SMS, web push, mobile push, and website (dynamic content and landing pages). You can view data for the last 30 days, last 7 days, the current day, and about scheduled messages for the near future.
## Channels
---
In this section, you can view the number of sent messages and activated web content such as dynamic content and landing pages in the last 30 days. This lets you quickly assess the message activity within the last 30 day and identify the most active channels. It also provides insights for scheduling future customer communication for which you can use the [marketing calendar](/docs/campaign/marketing-calendar).
|
## Deprecated endpoints
- [Get screen view - /screenViews/single/{screenViewId}/{screenViewVersion}](https://hub.synerise.com/api-reference/campaigns#operation/getScreenViewByVersion)
- [Get screen view versions - /screenViews/versions/{screenViewId}](https://hub.synerise.com/api-reference/campaigns#operation/getScreenViewByVersion)
- [Generate screen view - /v2/screenViews/generate](https://hub.synerise.com/api-reference/campaigns#operation/generateScreenViewWithAdditionalDataGet)
- [Copy content - /screenViews/content/{screenViewId}/{screenViewVersion}/copyFromExistingScreenView](https://hub.synerise.com/api-reference/campaigns#operation/copyContent)
- [Add content - /screenViews/content/{screenViewId}/{screenViewVersion}](https://hub.synerise.com/api-reference/campaigns#operation/createContent)
- [Add audience - /screenViews/audience/{screenViewId}/{screenViewVersion}](https://hub.synerise.com/api-reference/campaigns#operation/createAudience)
- [Publish screen view - /screenViews/publish/{screenViewId}/{screenViewVersion}](https://hub.synerise.com/api-reference/campaigns#operation/publishScreenView)
- [Update screen view name - /screenViews/single/{screenViewId}/{screenViewVersion}/name](https://hub.synerise.com/api-reference/campaigns#operation/updateNameOfScreenView)
- [Update screen view description - /screenViews/single/{screenViewId}/{screenViewVersion}/description](https://hub.synerise.com/api-reference/campaigns#operation/updateDescriptionOfScreenView)
- [Update screen view priority - /screenViews/single/{screenViewId}/{screenViewVersion}/priority](https://hub.synerise.com/api-reference/campaigns#operation/updatePriorityOfScreenView)
- [Discard changes - /screenViews/discardChanges/{screenViewId}/{screenViewVersion}](https://hub.synerise.com/api-reference/campaigns#operation/discardChanges)
- [Delete screen view version - /screenViews/single/delete/{screenViewId}/{screenViewVersion}](https://hub.synerise.com/api-reference/campaigns#operation/deleteSingleScreenView)
## Q&A
### 1 How to create a screen view?
The only difference in the processes before and now is the possibility of selecting a document group.
If you create a new screen view, you must complete the following steps (these steps are also required when you edit an existing document):
1. Define the recipients of the screen view campaign.
2. Select documents to be included in a screen view campaign and define priority of the screen view.
Instead of selecting documents one by one, you can select a document group to include all documents assigned to a particular group.
3. Schedule the activity time (when this document will be visible) of the document.
### 2 How to make my existing screen views work as previously?
The core logic of screen views remains the same - screen views display the contents of documents you select for the selected recipients at the selected time. If you're happy with the settings of your published screen views, you don't have to do anything.
If you want to edit activated and draft screen views or create new ones, you can't create many versions of a screen view, you must assign a screen view to a category (feed), and you can either select documents for the campaign based on a group (document category) or you can select individual documents.
### 3 What will happen to existing screen views?
- screen views which were previously in a draft state will:
- receive the **Draft** status
- be assigned to the `Global Default` feed
- have the **Schedule** section blank
- the published screen views:
- the latest version of the published screen view will be set to **Active**, previous versions will be deleted
- published screen views will be assigned to the `Global Default` feed
- audience settings, priority, content, and schedule settings will remain unchanged
- screen views which are published with the date at the future will receive the **Paused** status and will be resumed to the **Active** state at the scheduled date.
- expired screen views will be deleted
# Dashboard
In the Dashboard view of **Experience Hub**, you can view the number of sent messages in the following channels: email, SMS, web push, mobile push, and website (dynamic content and landing pages). You can view data for the last 30 days, last 7 days, the current day, and about scheduled messages for the near future.
## Channels
---
In this section, you can view the number of sent messages and activated web content such as dynamic content and landing pages in the last 30 days. This lets you quickly assess the message activity within the last 30 day and identify the most active channels. It also provides insights for scheduling future customer communication for which you can use the [marketing calendar](/docs/campaign/marketing-calendar).

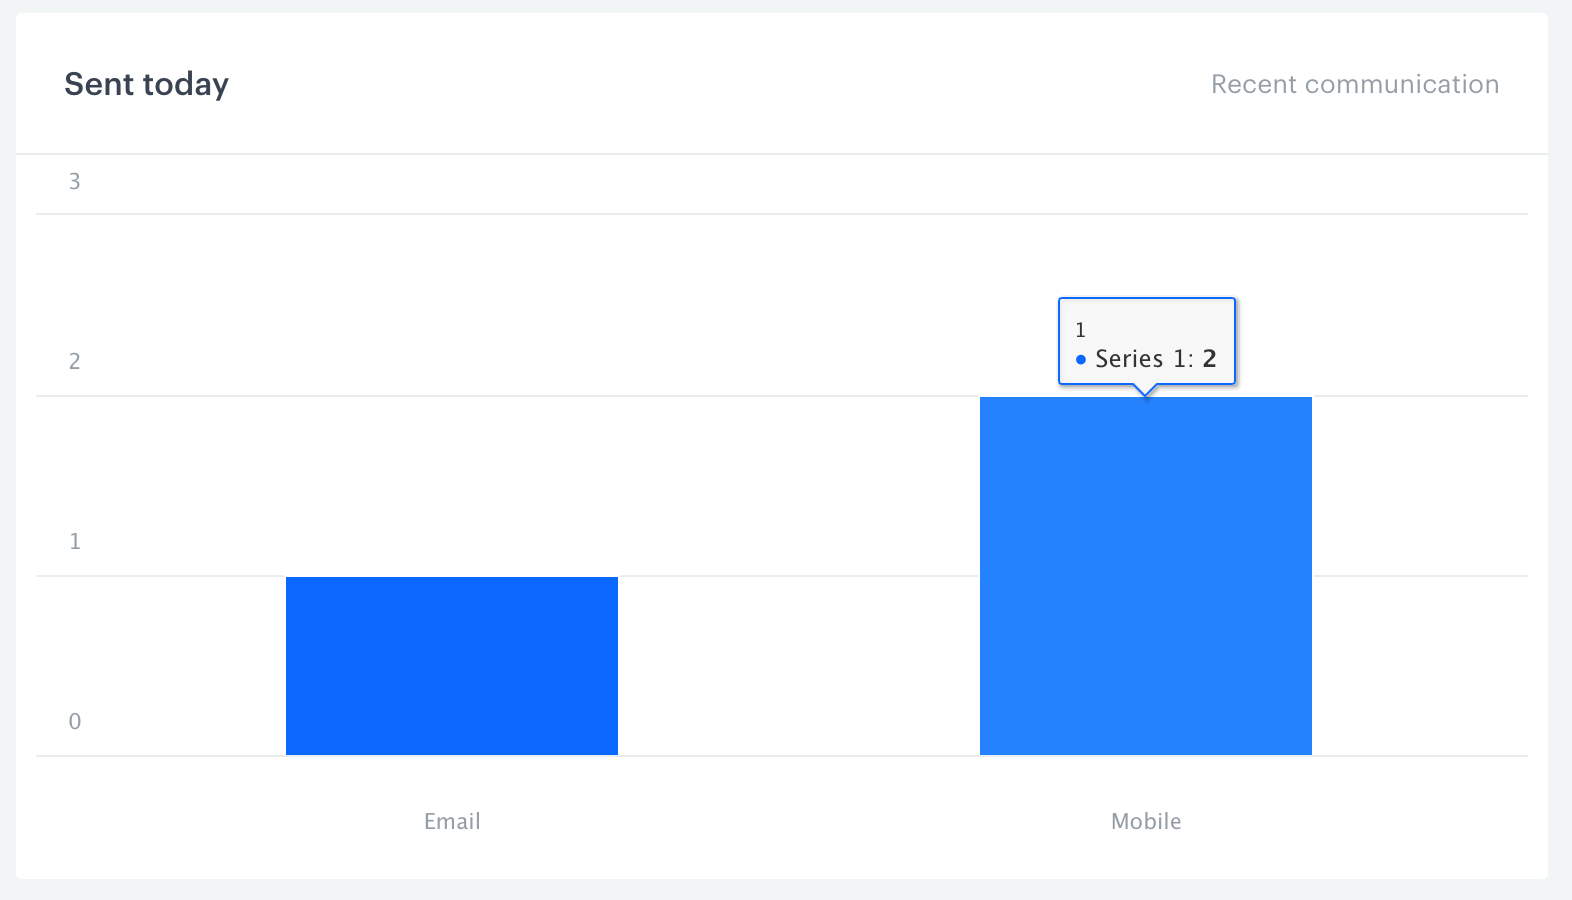
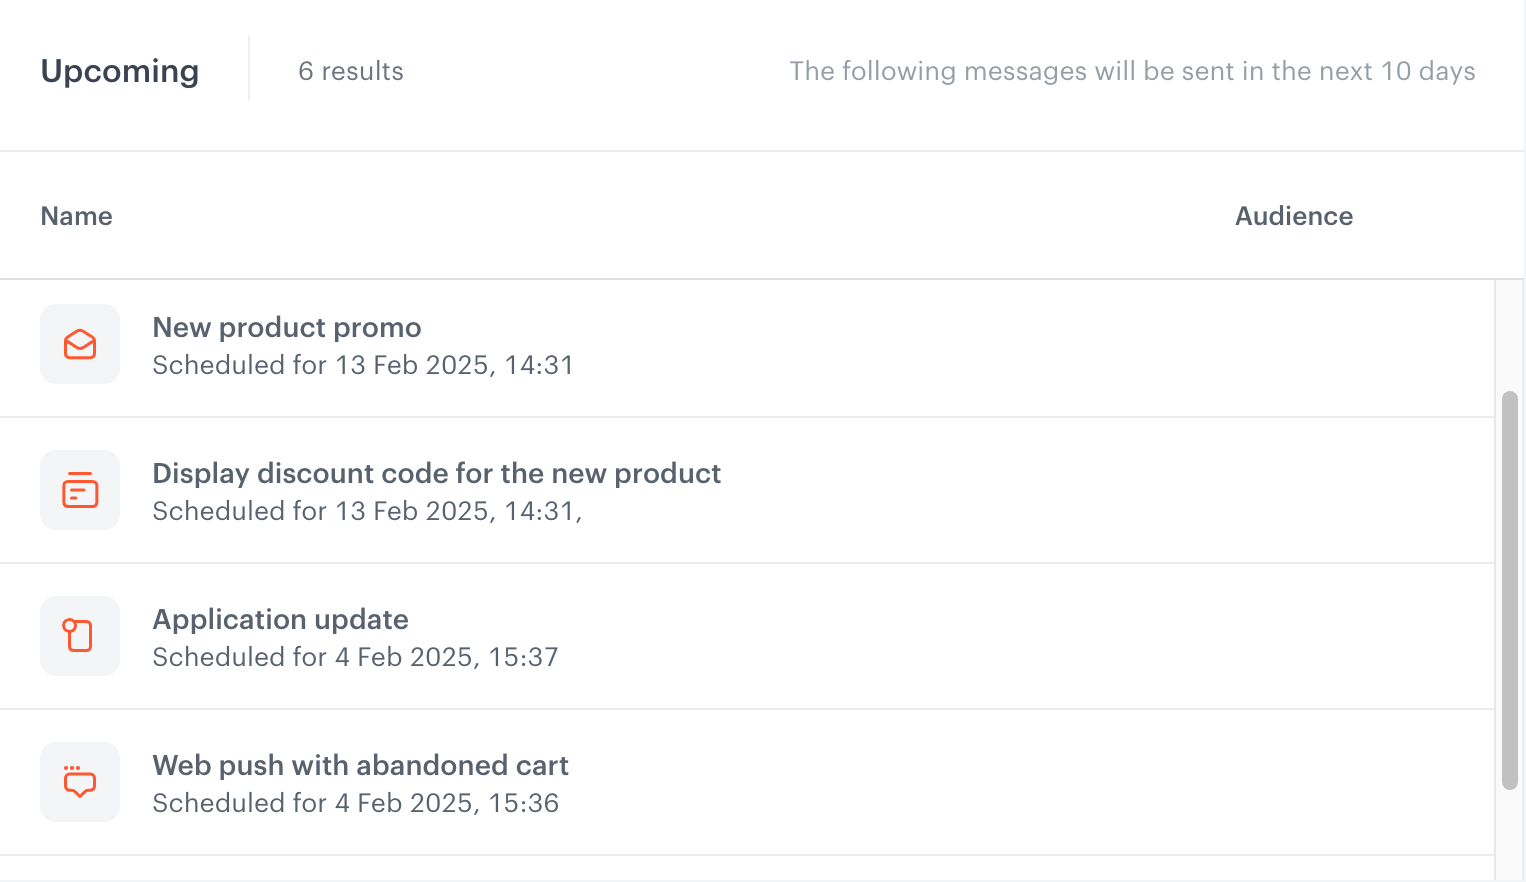
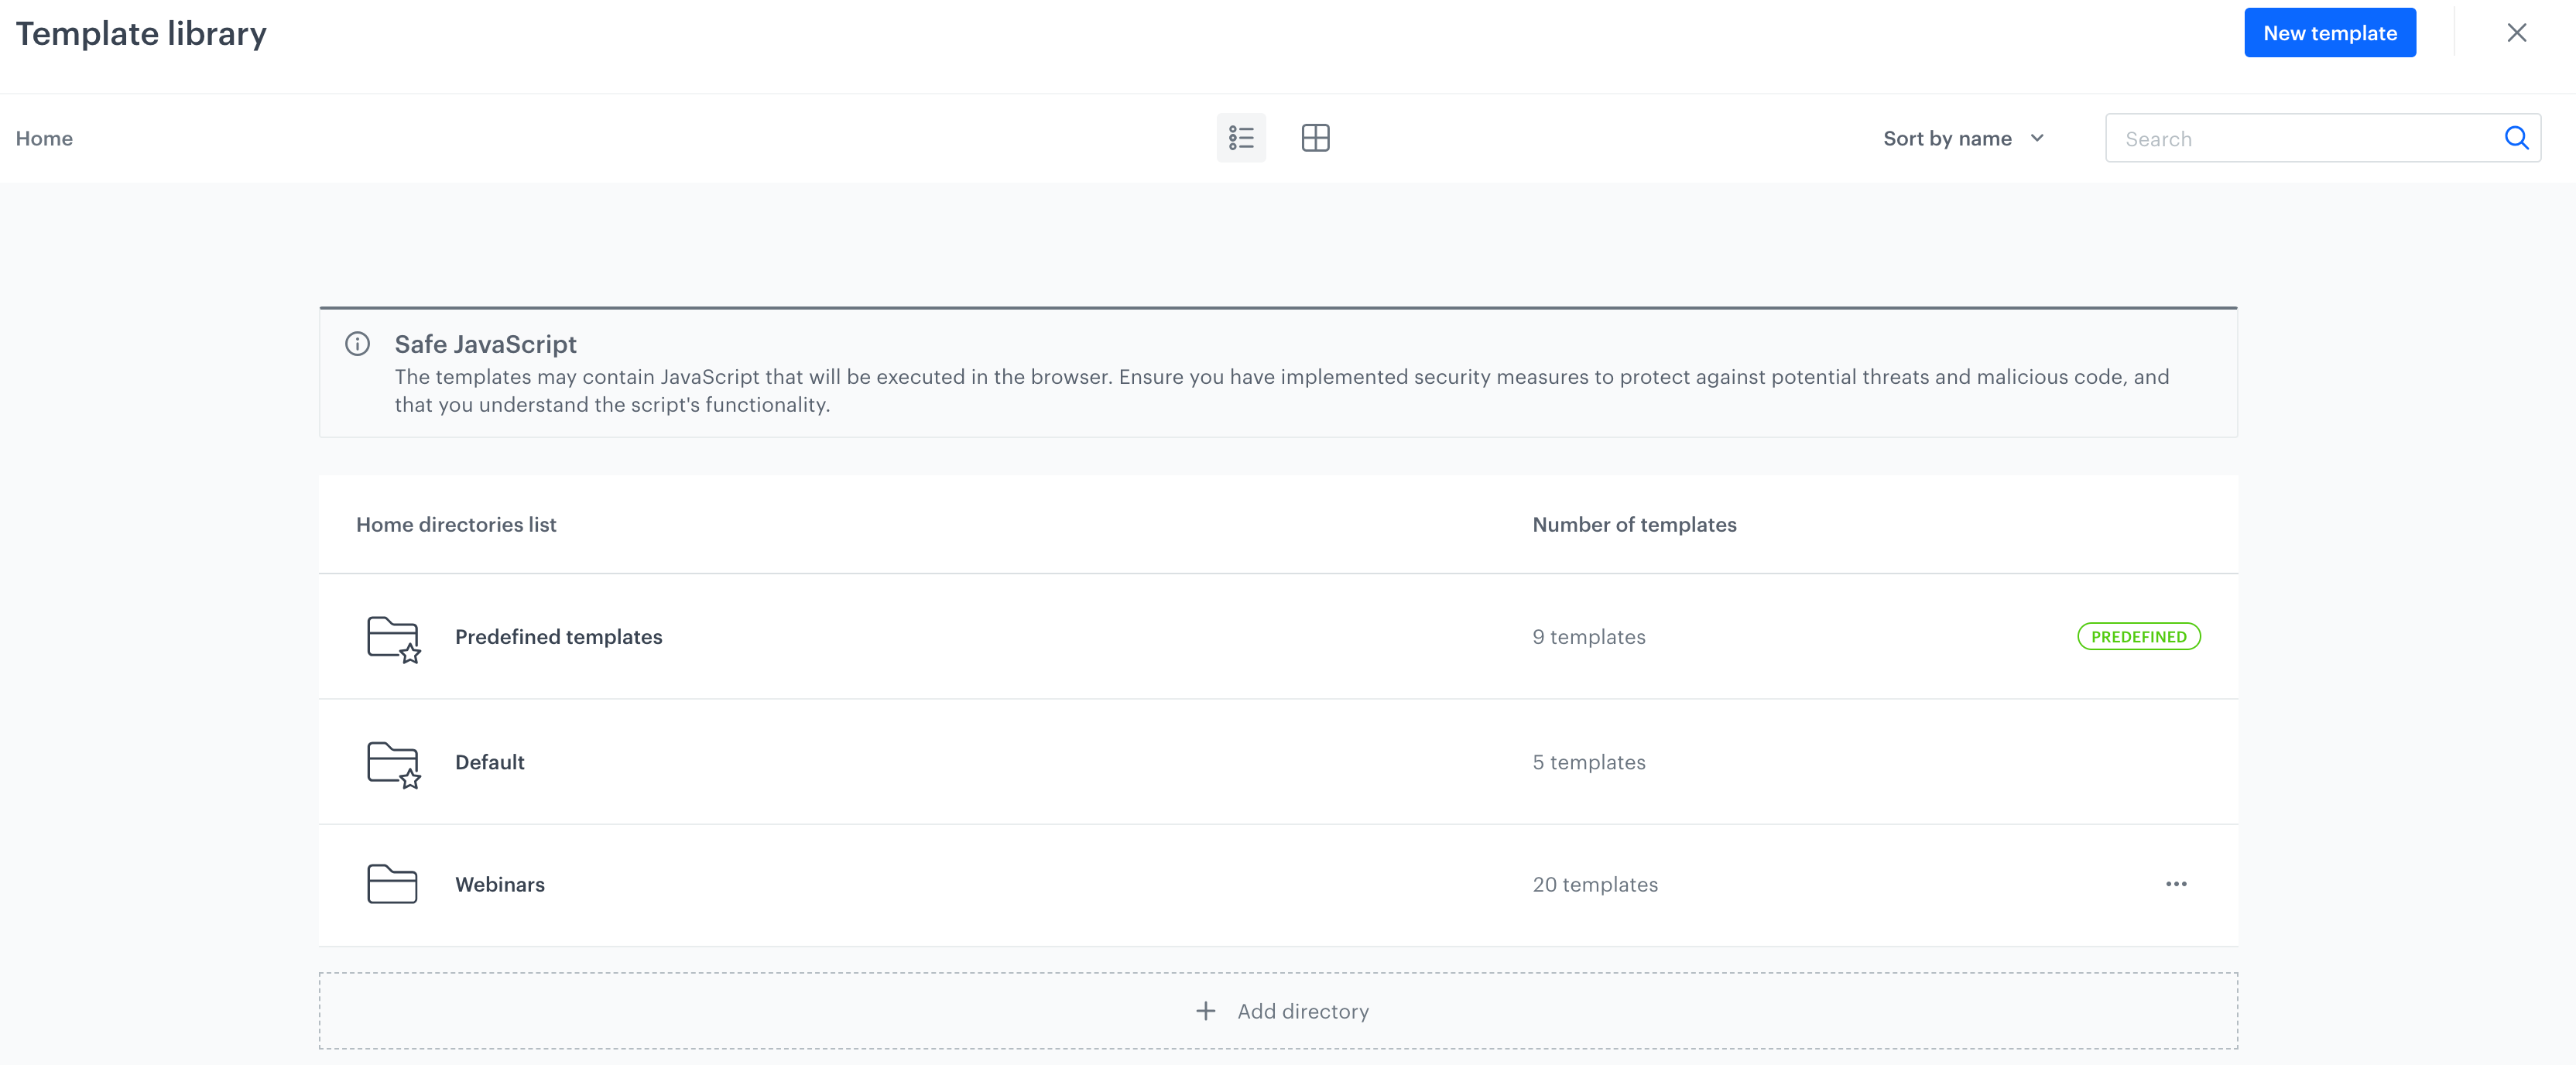
 icon.
2. On the sidebar, find the version which you want to get the preview of.
3. Click
icon.
2. On the sidebar, find the version which you want to get the preview of.
3. Click  .
4. From the dropdown list, select **Preview**.
### Creating new version
1. On the list of landing pages, select a published landing page.
2. On the top bar, click the field with the version.
3. On the list of versions, click
.
4. From the dropdown list, select **Preview**.
### Creating new version
1. On the list of landing pages, select a published landing page.
2. On the top bar, click the field with the version.
3. On the list of versions, click 

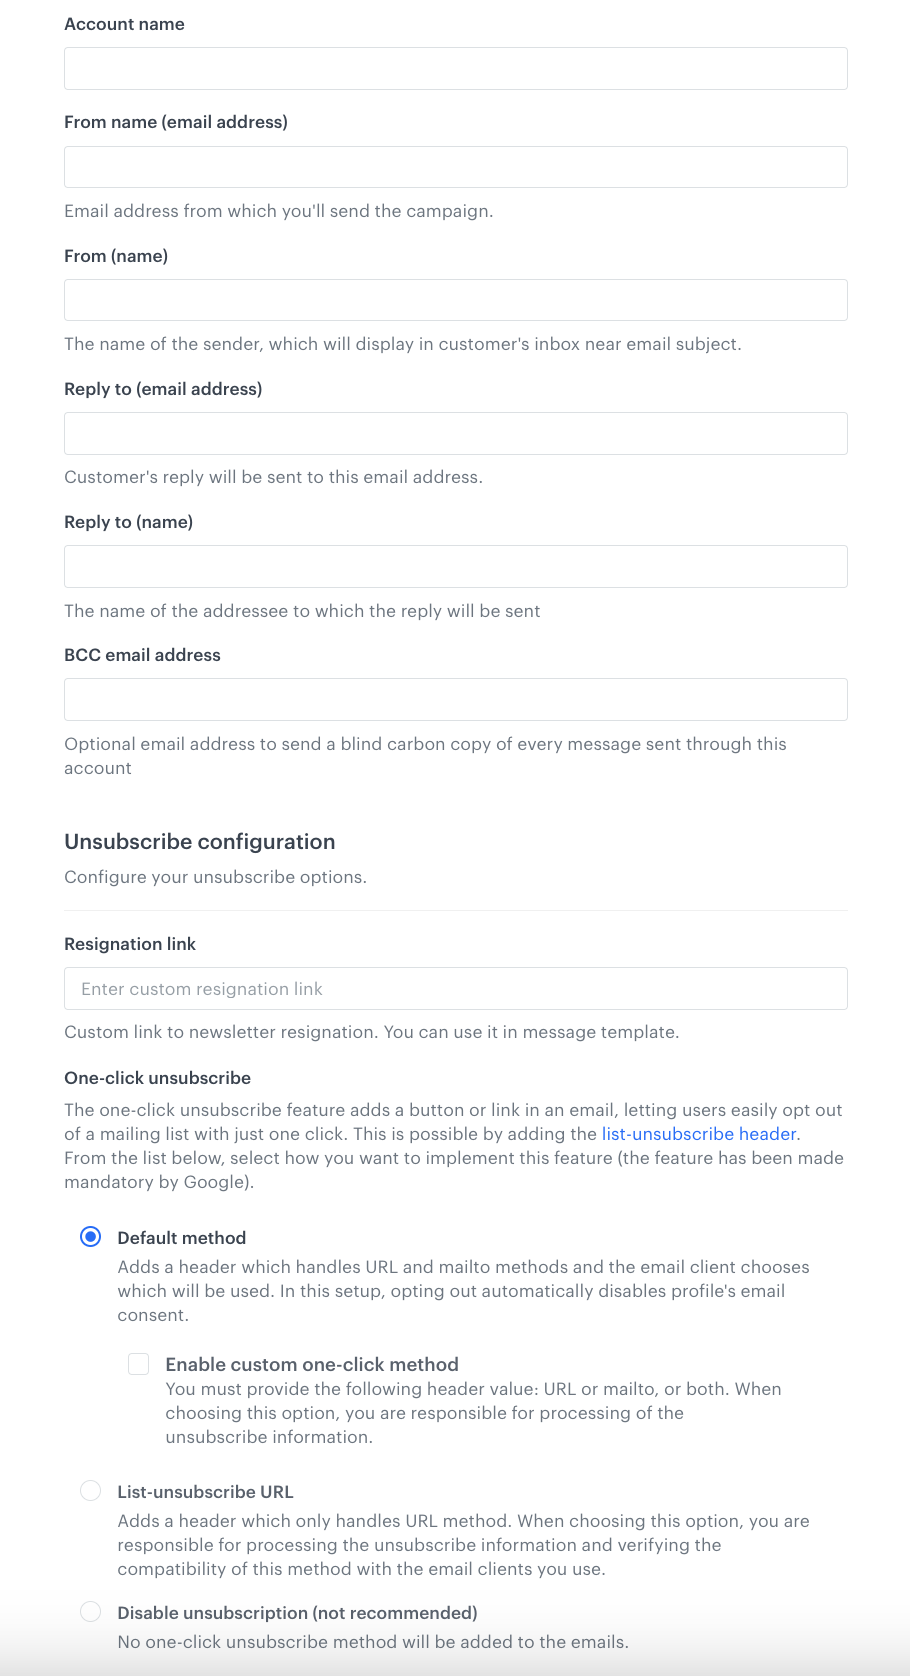
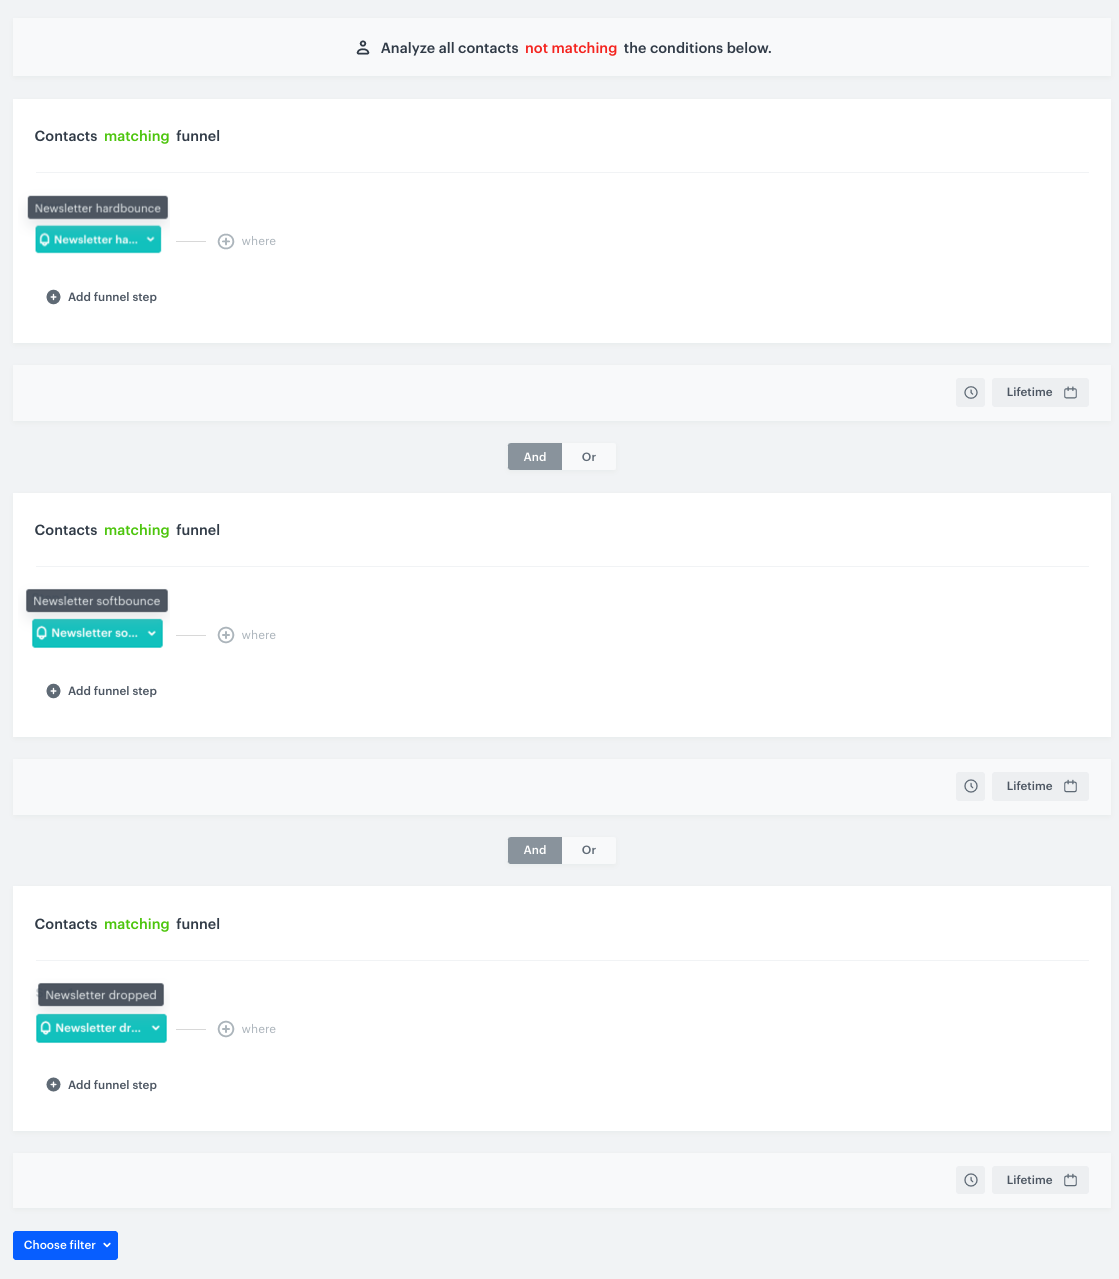
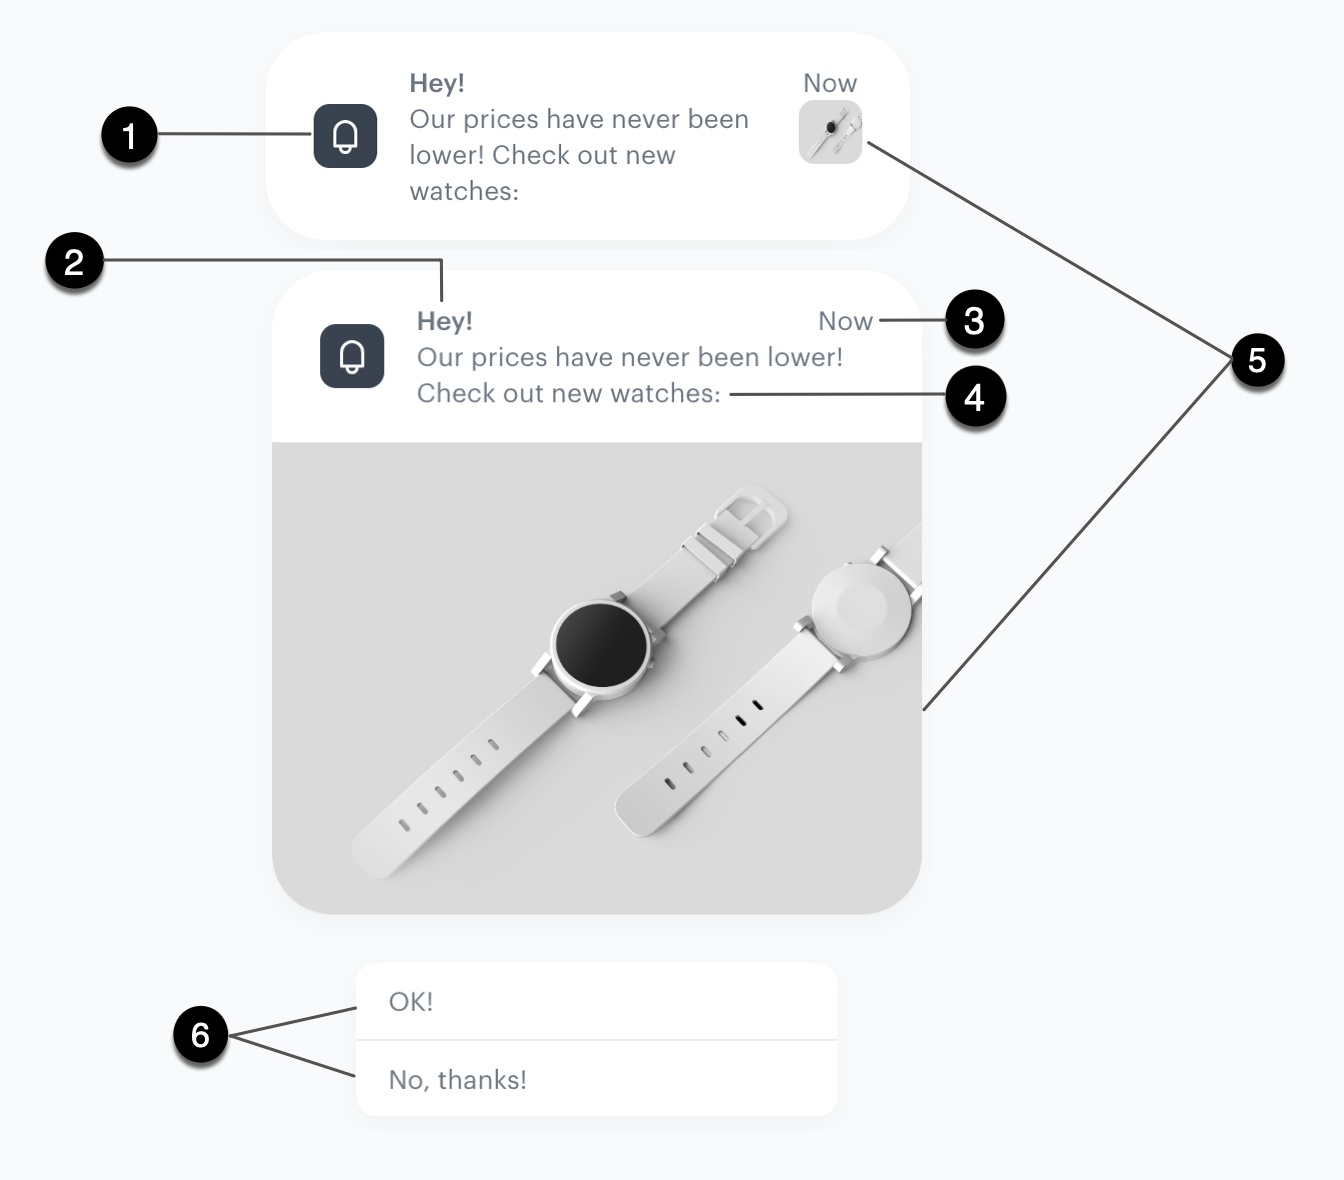

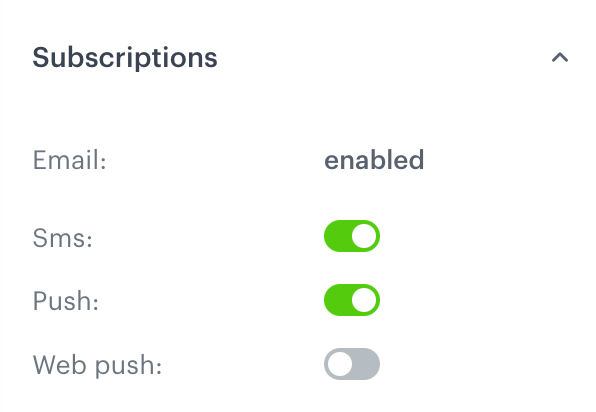
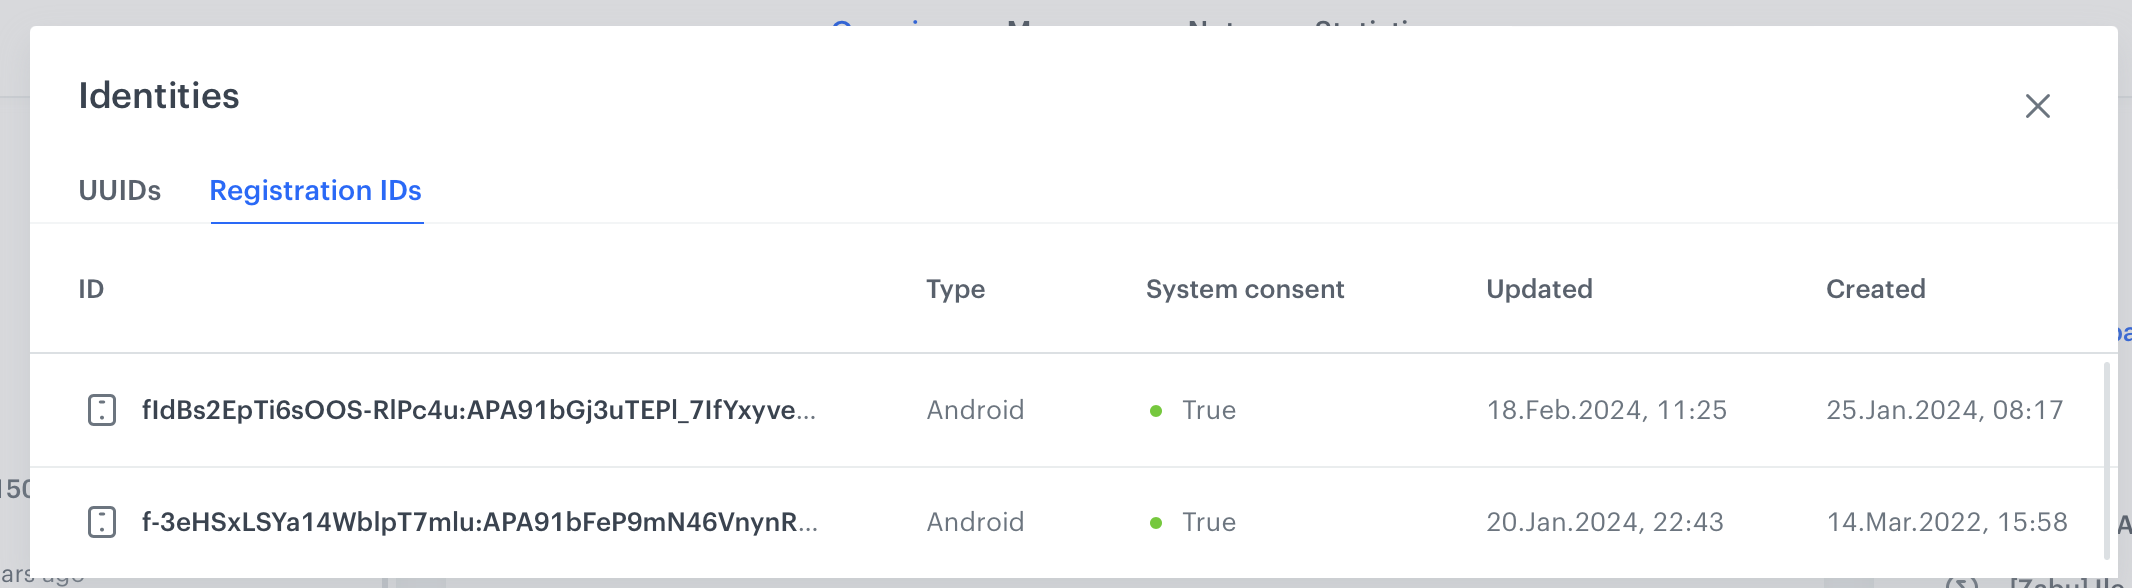
 **Experience Hub > Dynamic Content >**
  **Templates**
2. Select the folder which contains the template you want to see the preview of.
3. Select the template.
4. To check the preview of the dynamic content for a particular customer or a product, on the upper left corner, click the **Preview contexts** button.
1. Enter the ID of a customer or a product.
2. Click **Apply**.
### The Live preview option
You can use the **Live preview** option in the [dynamic content template builder](/docs/campaign/dynamiccontent/creating-dynamic-content-templates/dynamic-content-template-builder) to preview the dynamic content on the target website. You don't have to activate the dynamic content and additionally, you can share the preview with other users.
The **Live preview** option works only for websites which have a [Synerise tracking code](/developers/web/installation-and-configuration#creating-a-tracking-code) implemented into their source code. This preview option generates a link to your website with unique parameters that enable you to see the template. When you access this link, you can only see the dynamic content template you're previewing, other dynamic content campaigns which are active at the time will not be rendered. The link is active for 3 hours during which all the changes applied to the template in the platform will be synchronized. However, any change to the template in the platform requires refreshing the website with the template preview.
1. Go to
**Templates**
2. Select the folder which contains the template you want to see the preview of.
3. Select the template.
4. To check the preview of the dynamic content for a particular customer or a product, on the upper left corner, click the **Preview contexts** button.
1. Enter the ID of a customer or a product.
2. Click **Apply**.
### The Live preview option
You can use the **Live preview** option in the [dynamic content template builder](/docs/campaign/dynamiccontent/creating-dynamic-content-templates/dynamic-content-template-builder) to preview the dynamic content on the target website. You don't have to activate the dynamic content and additionally, you can share the preview with other users.
The **Live preview** option works only for websites which have a [Synerise tracking code](/developers/web/installation-and-configuration#creating-a-tracking-code) implemented into their source code. This preview option generates a link to your website with unique parameters that enable you to see the template. When you access this link, you can only see the dynamic content template you're previewing, other dynamic content campaigns which are active at the time will not be rendered. The link is active for 3 hours during which all the changes applied to the template in the platform will be synchronized. However, any change to the template in the platform requires refreshing the website with the template preview.
1. Go to 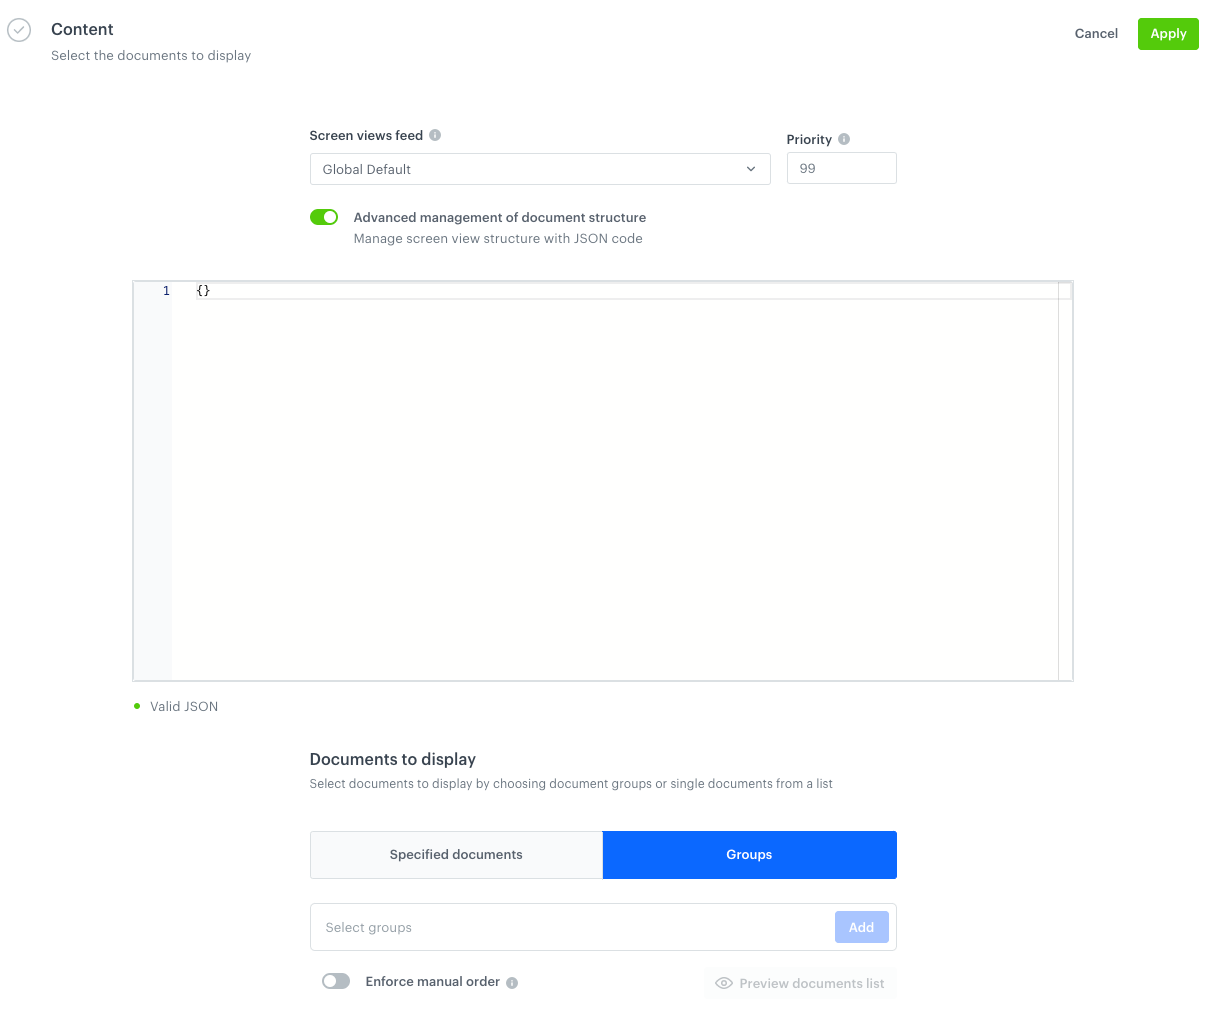
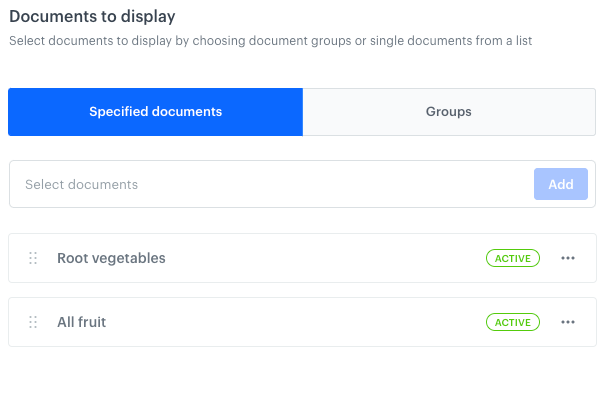
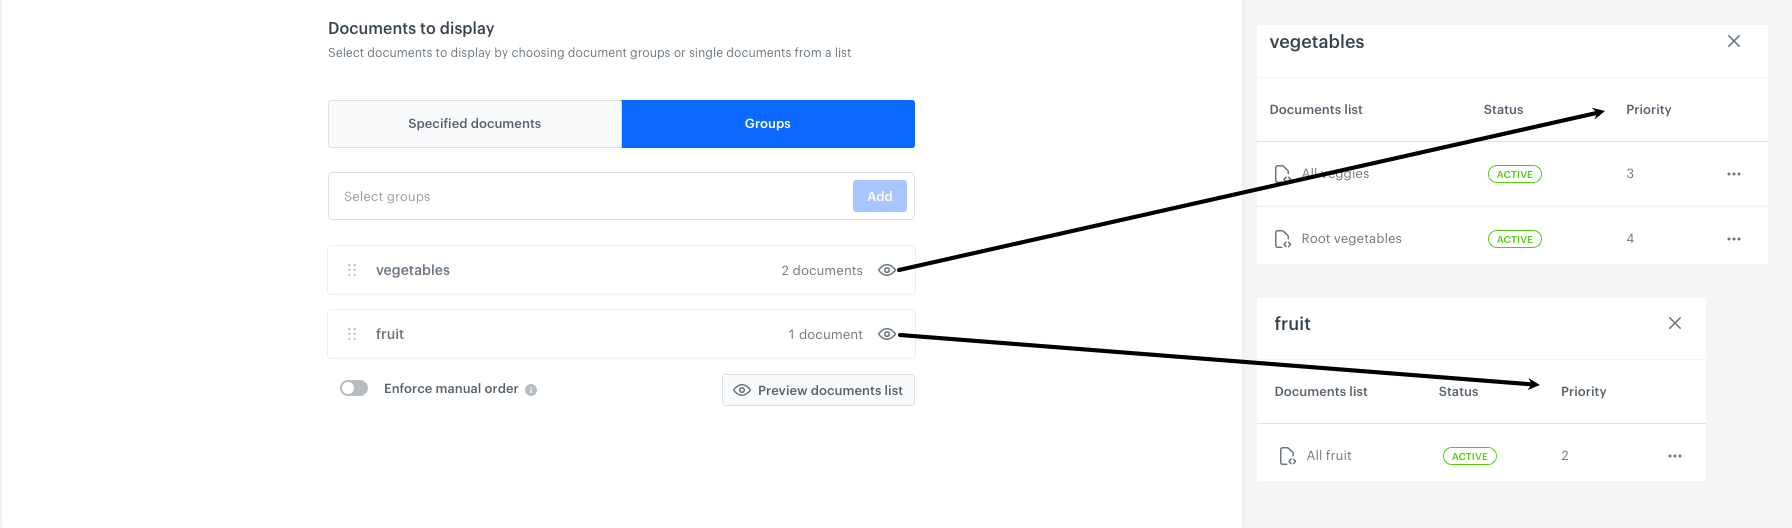
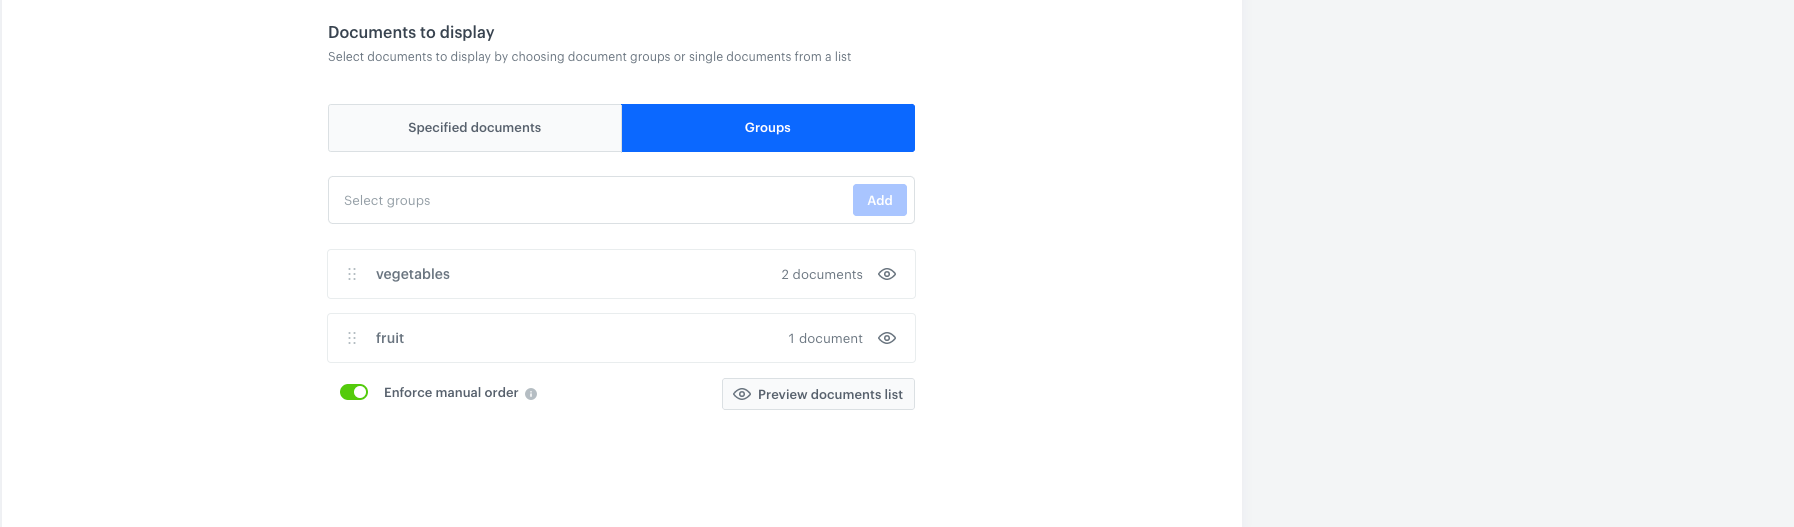


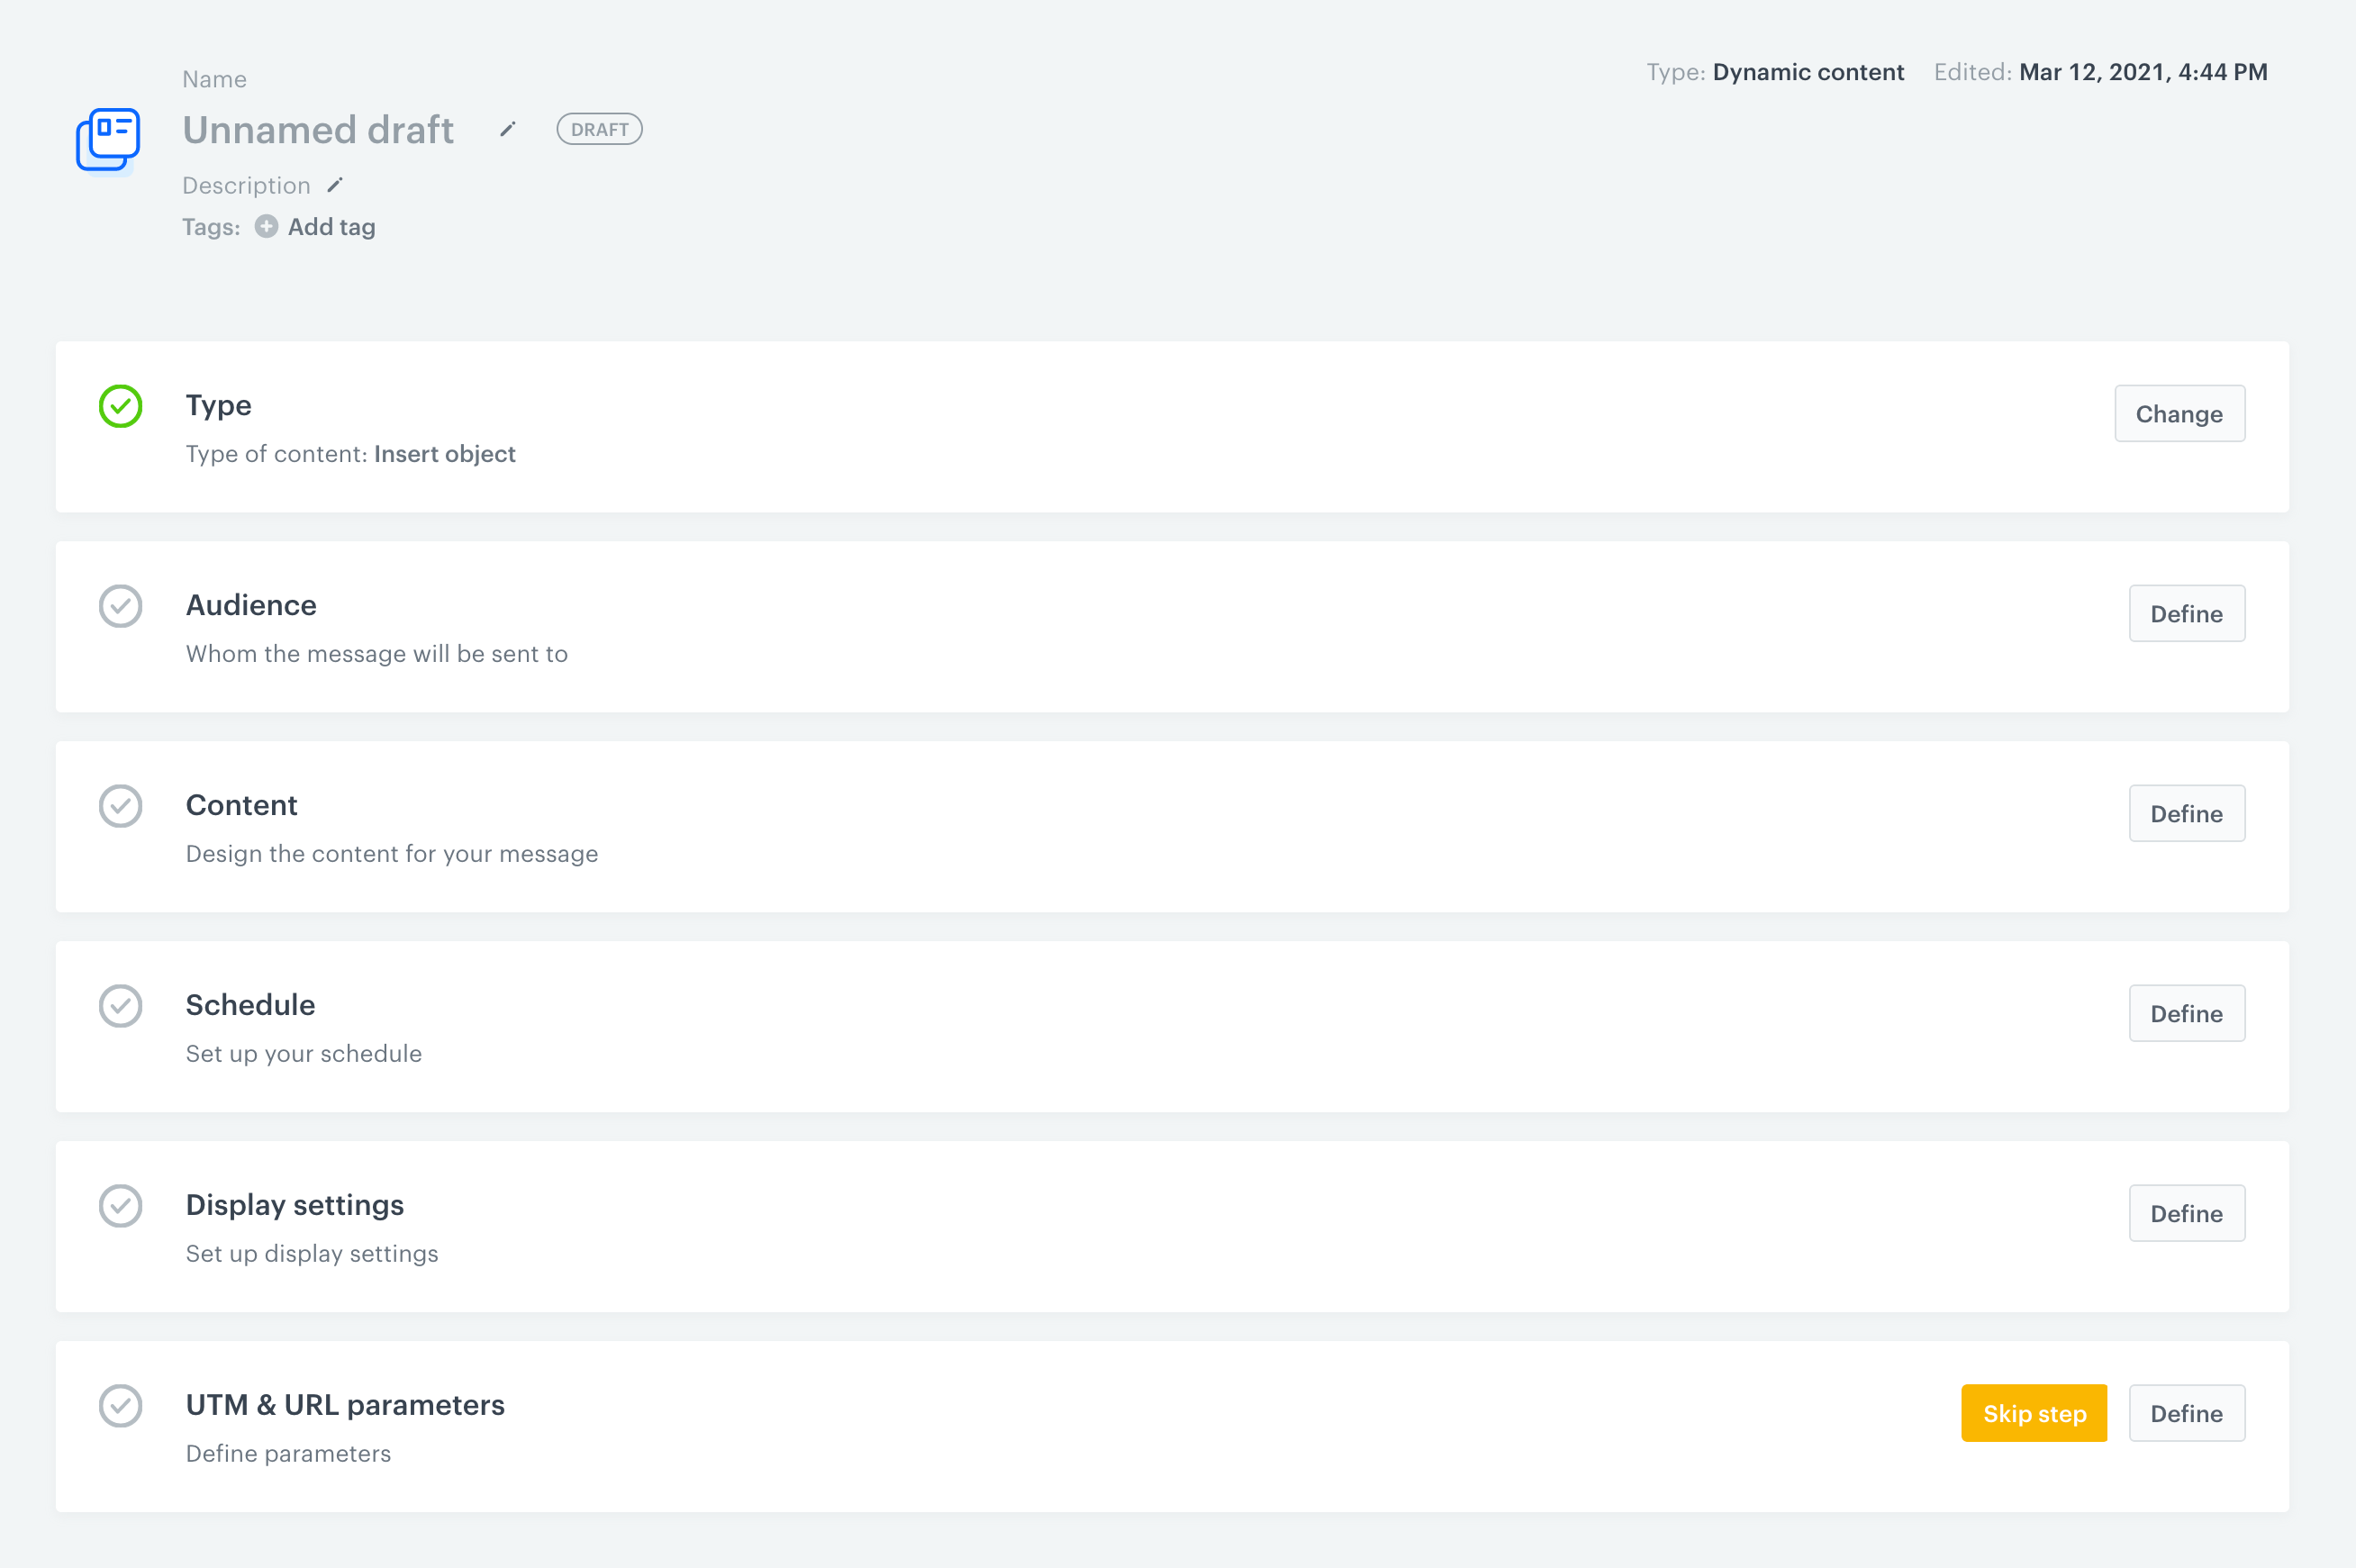

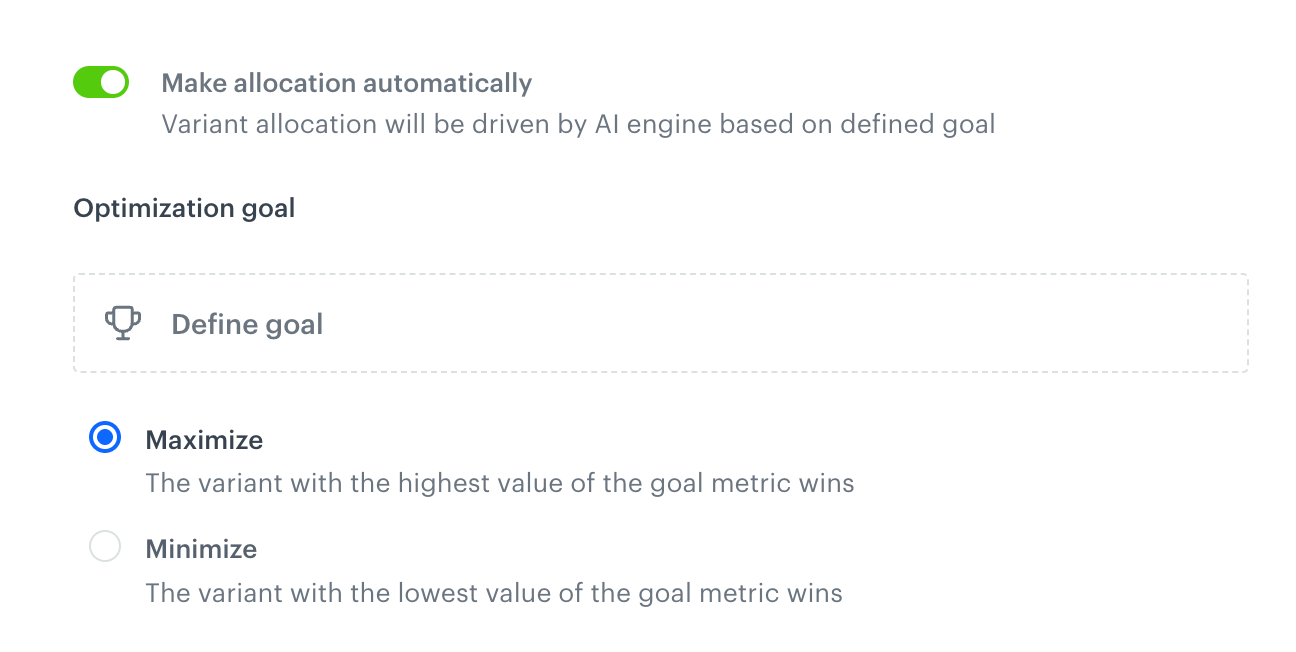
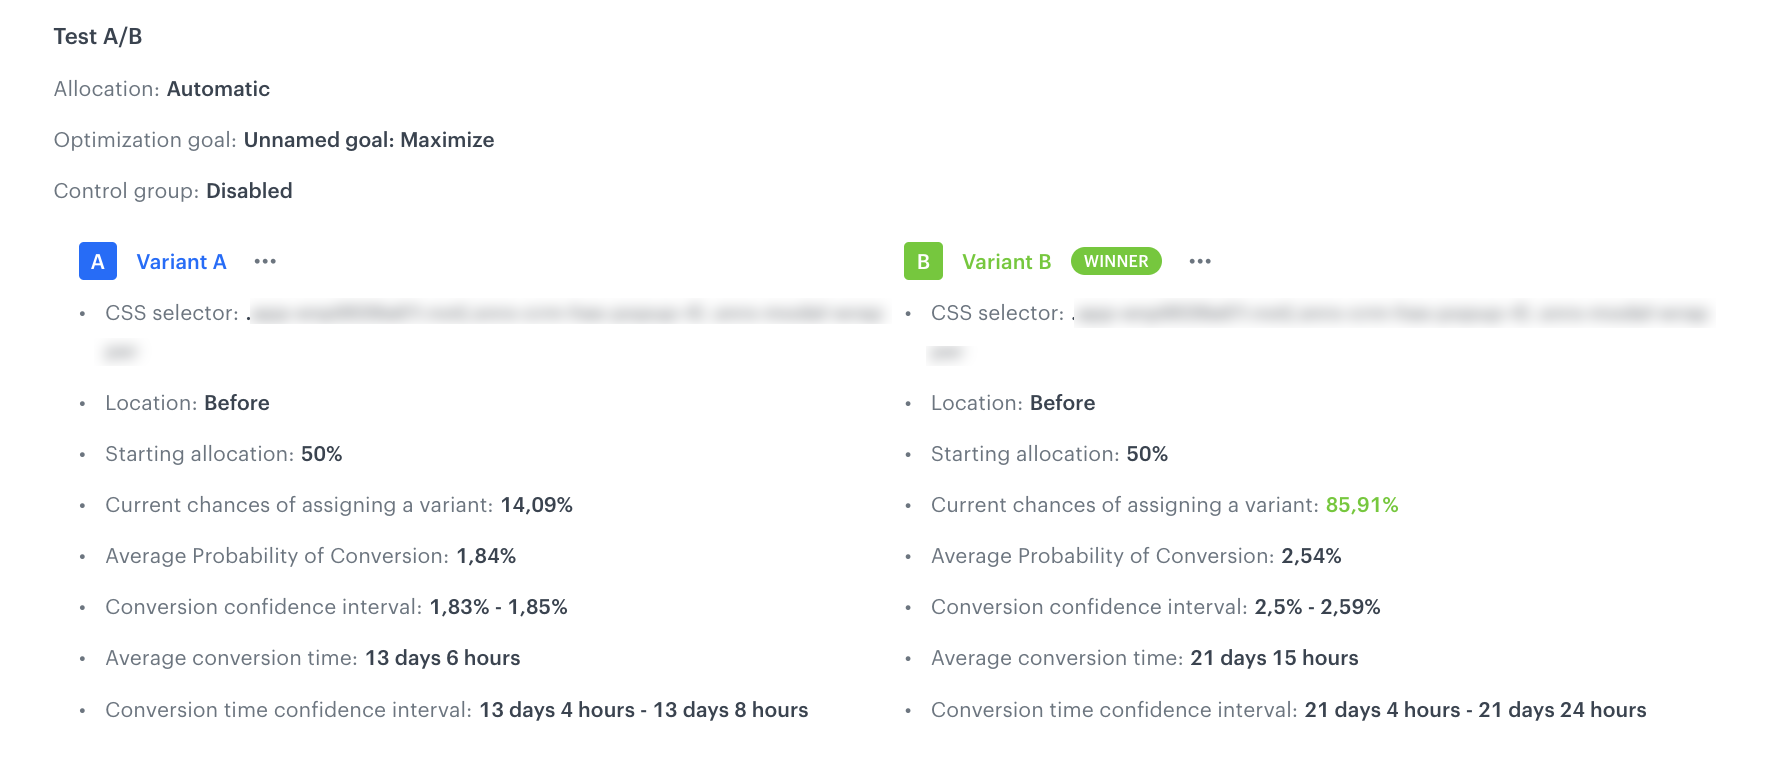
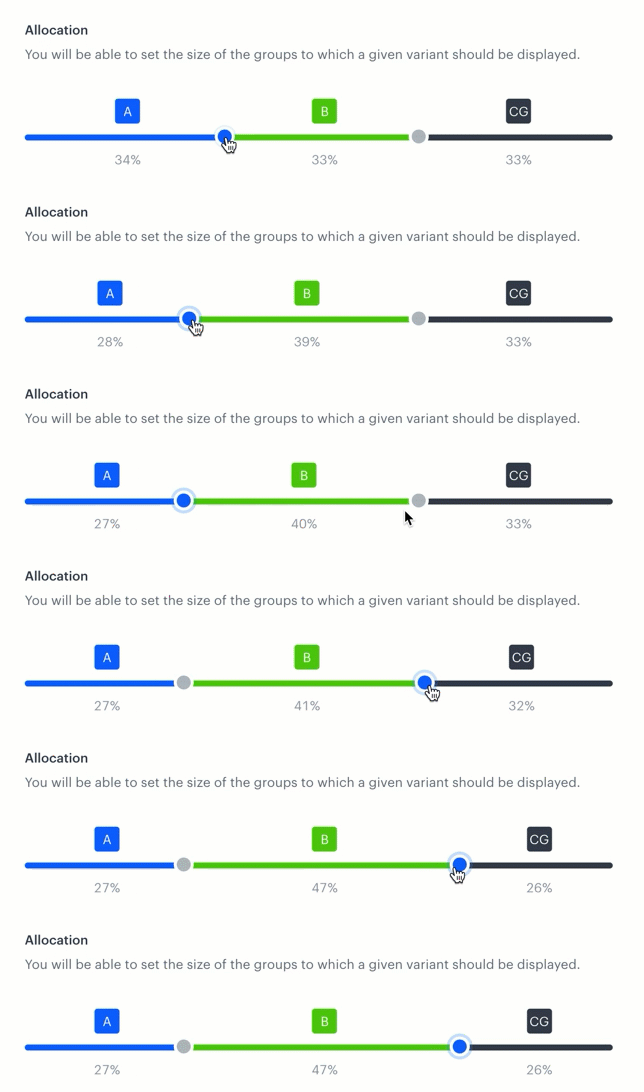
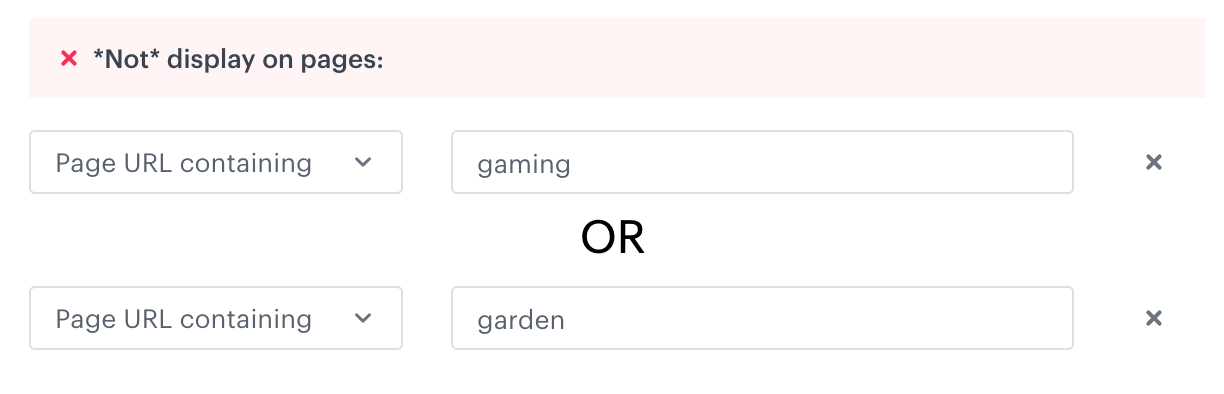
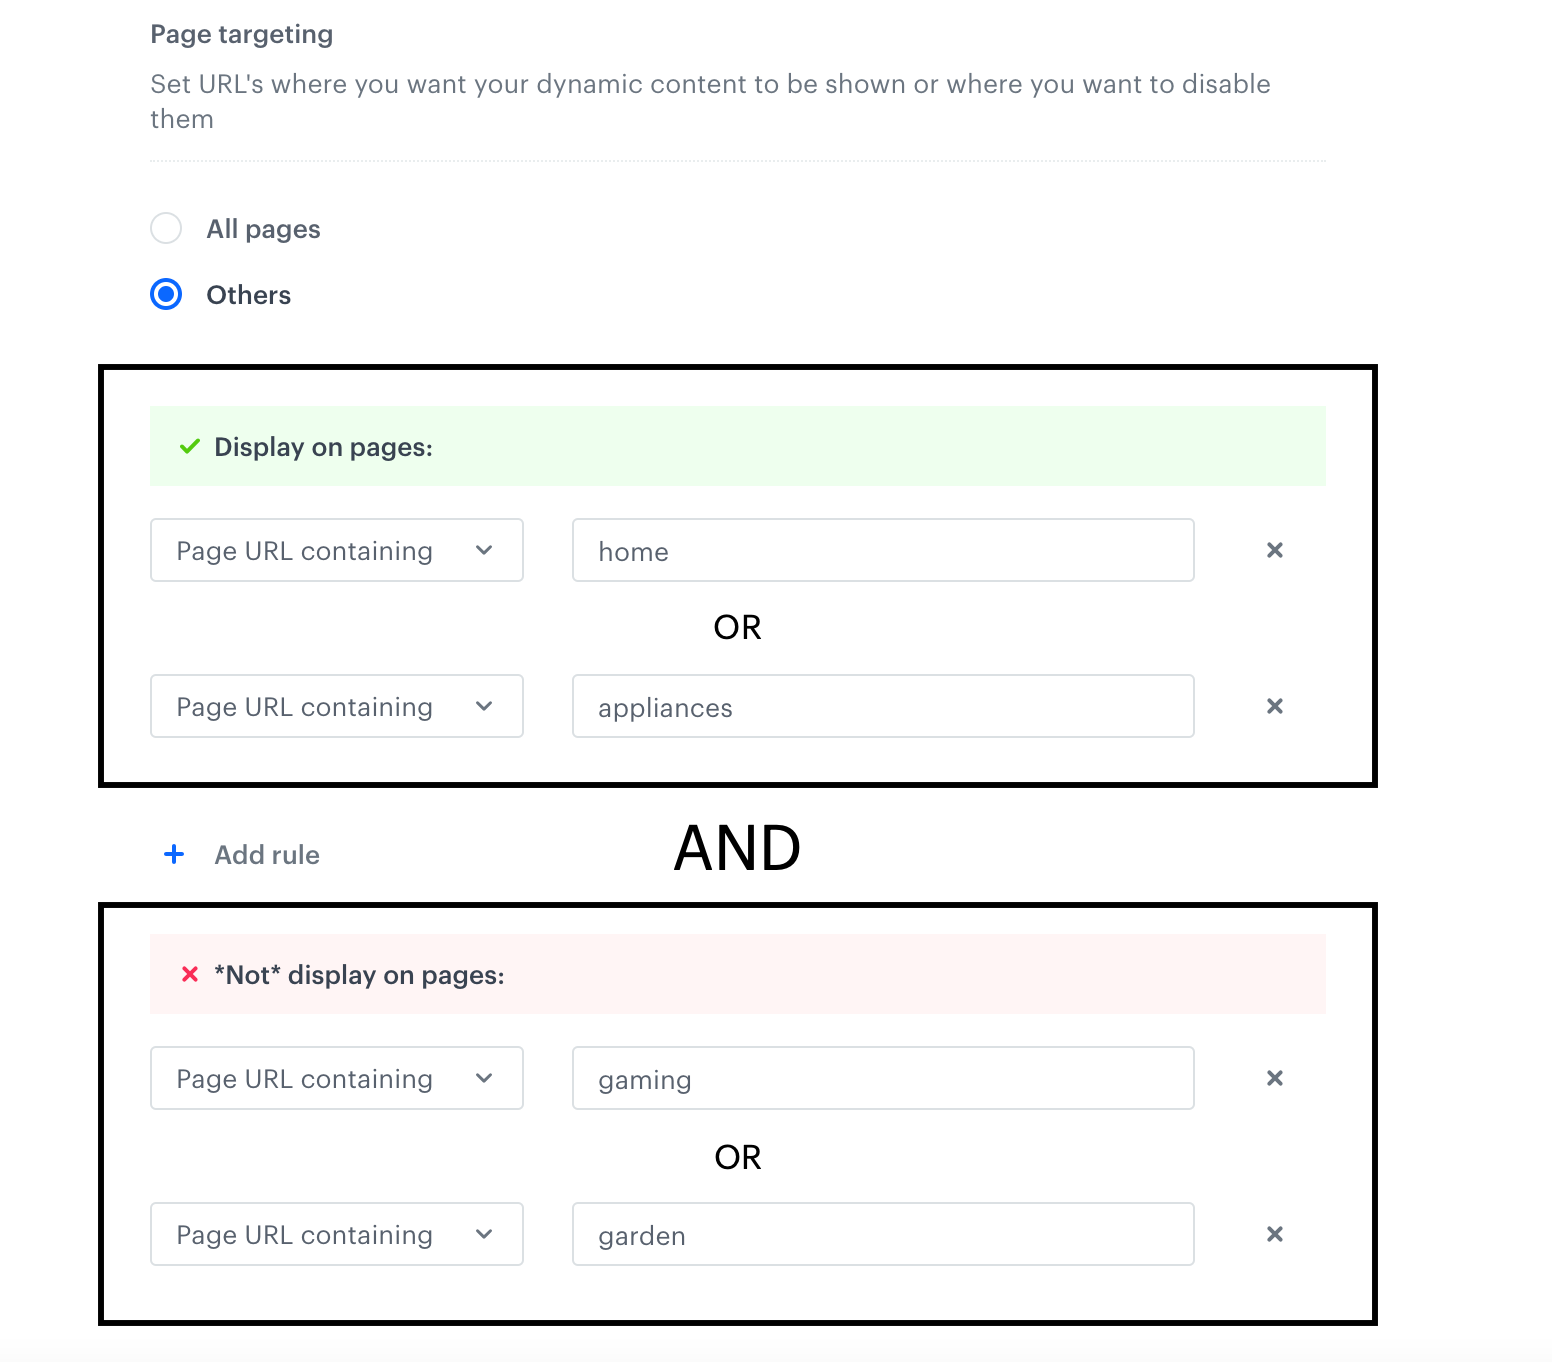
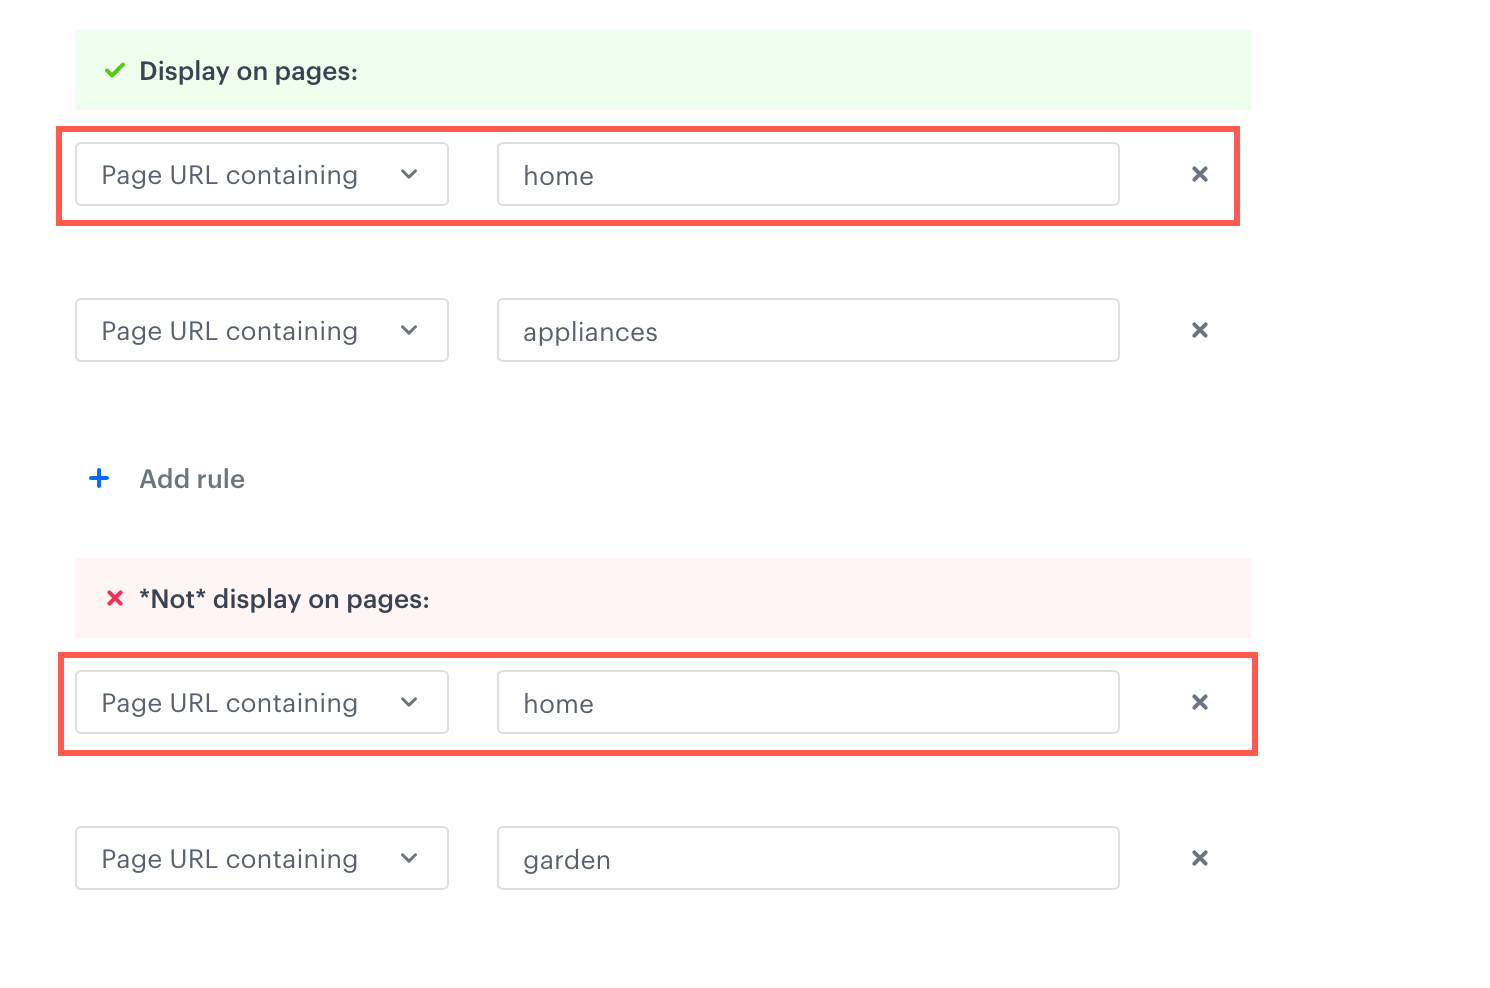
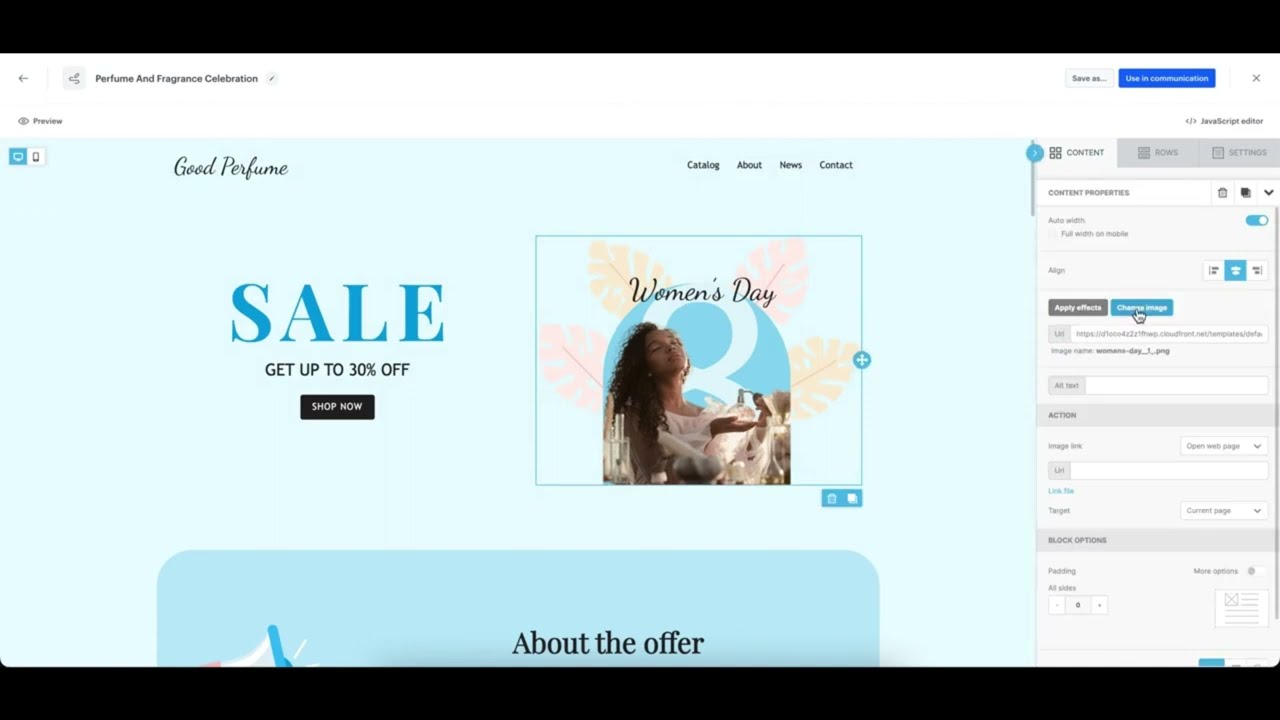
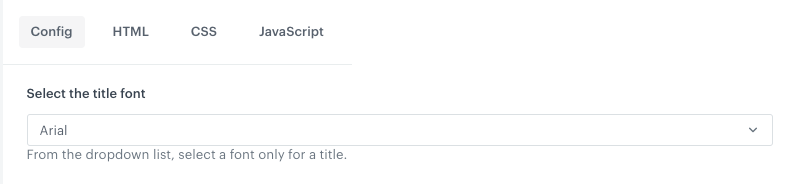
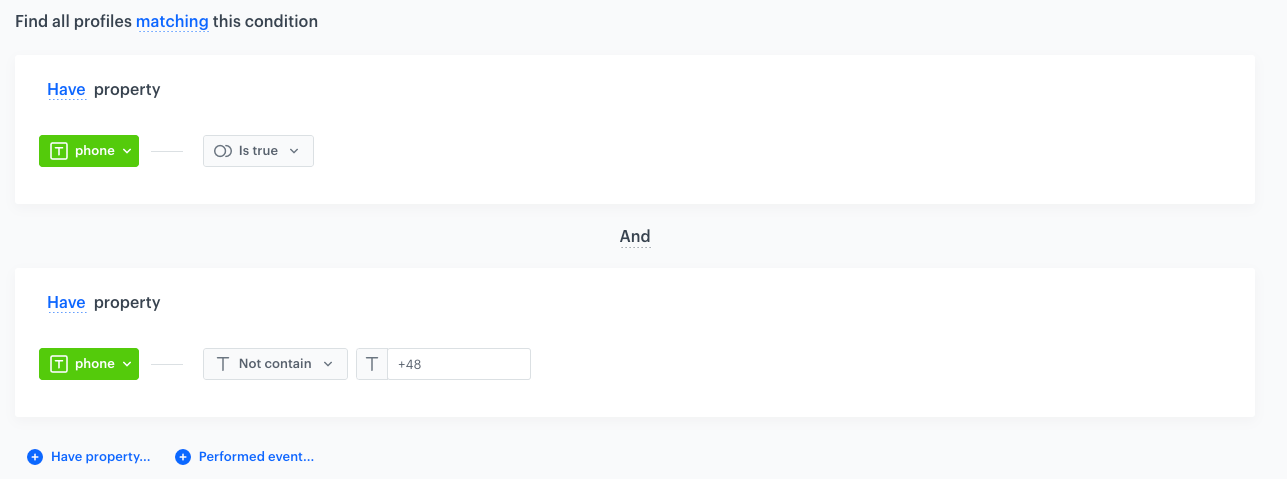


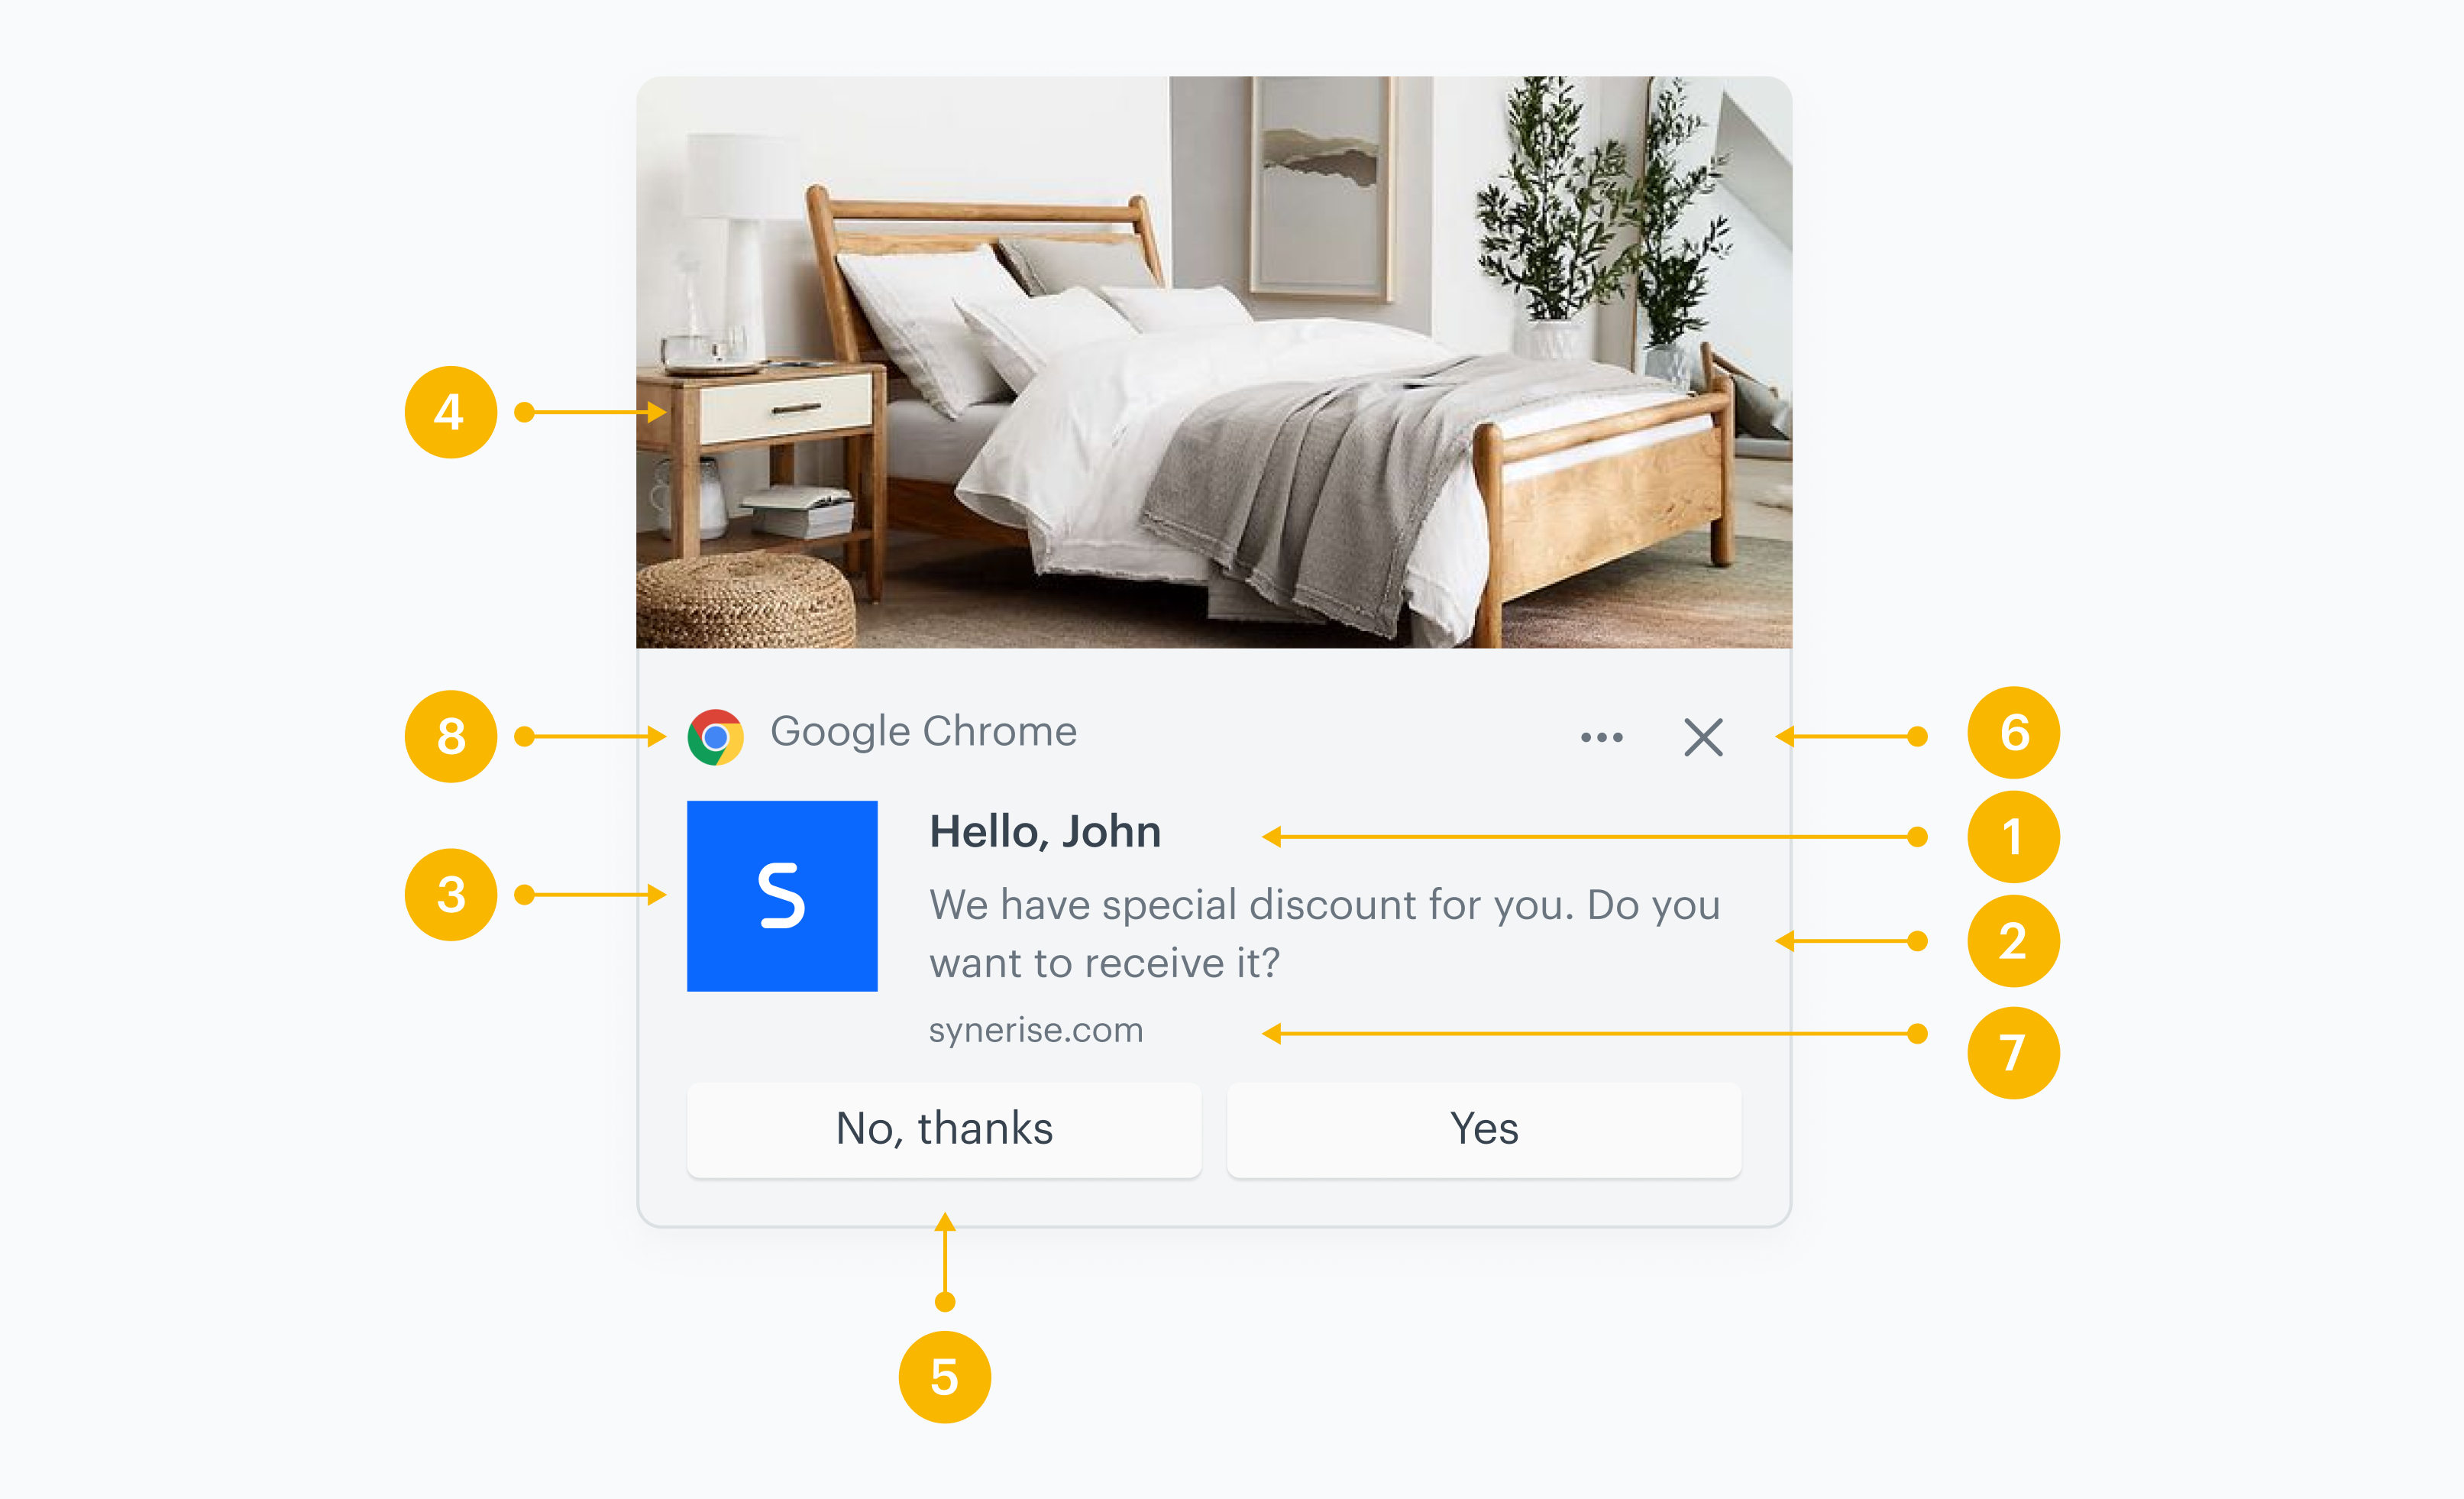

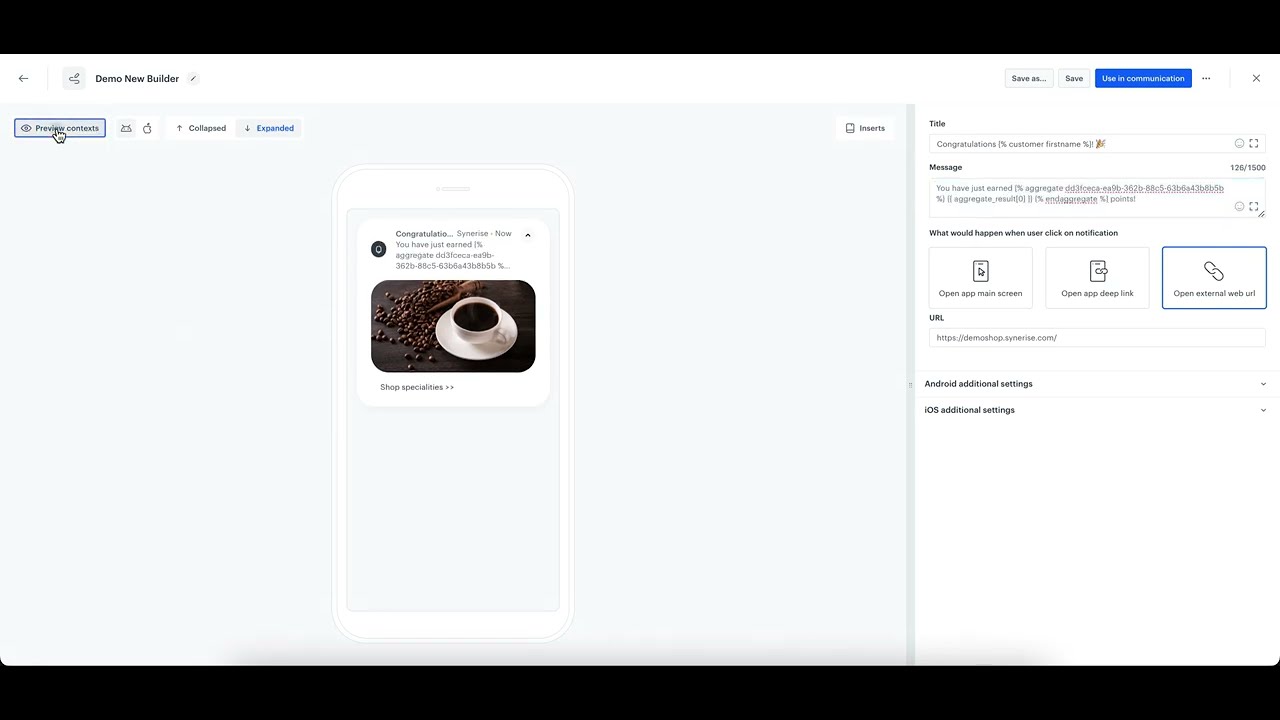
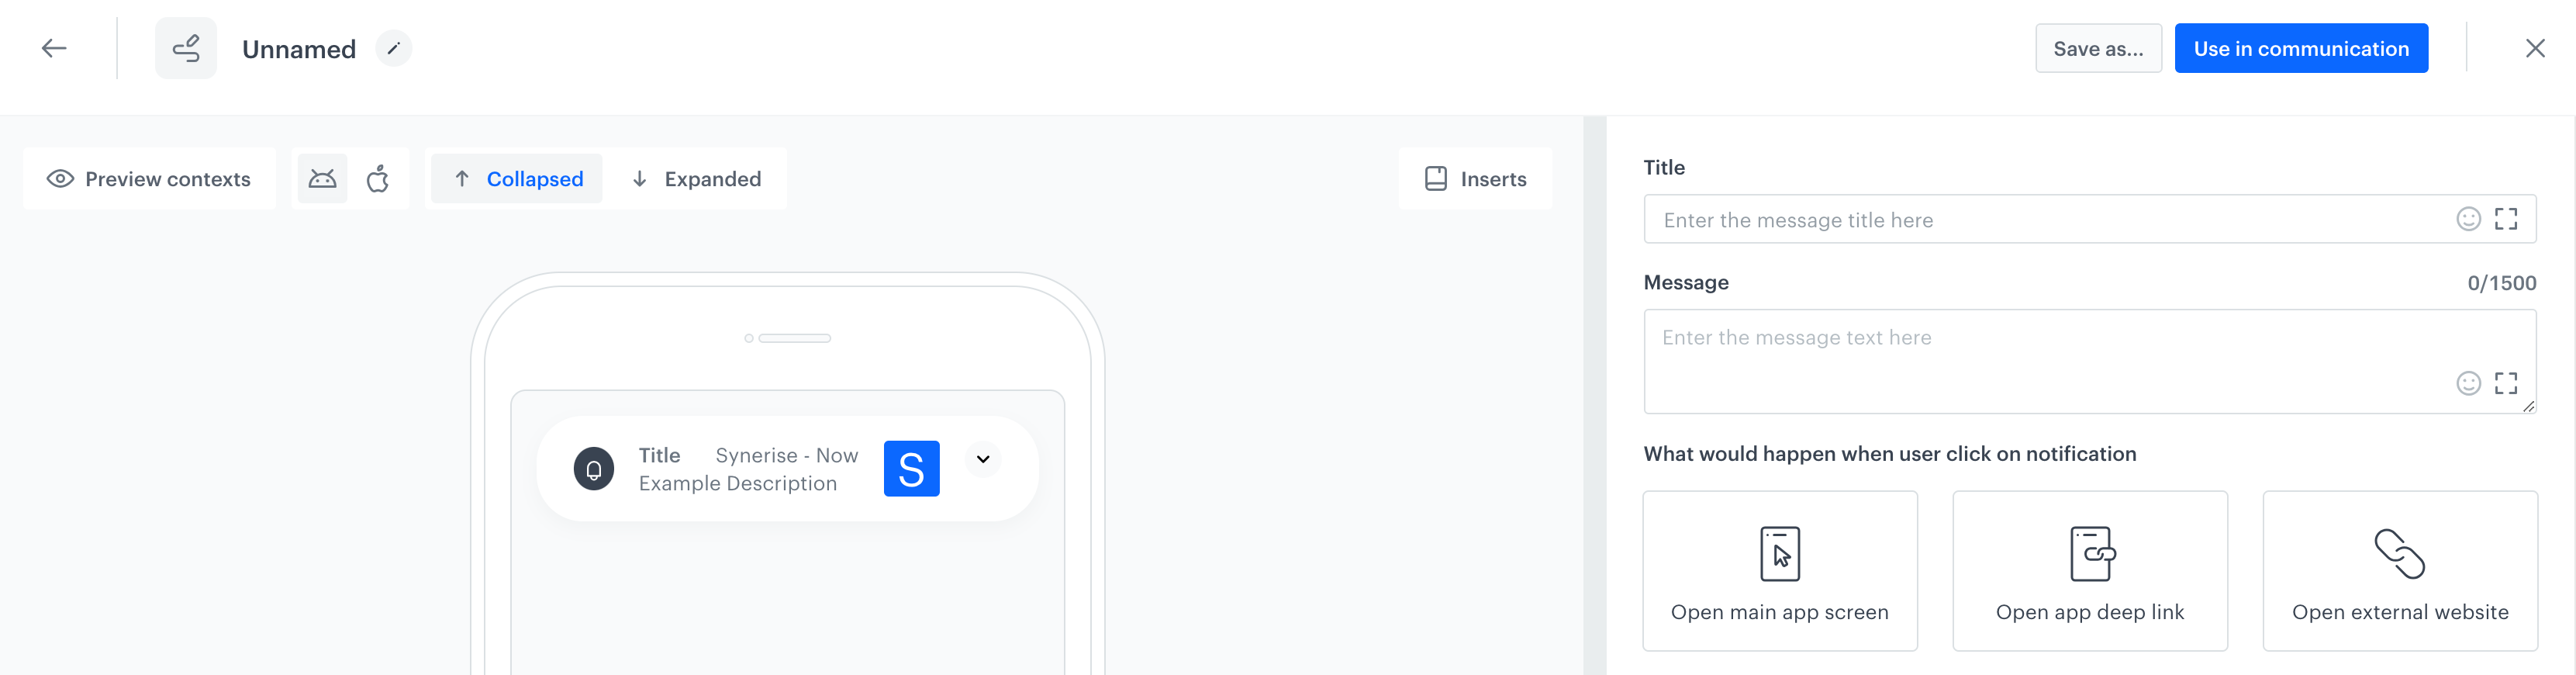
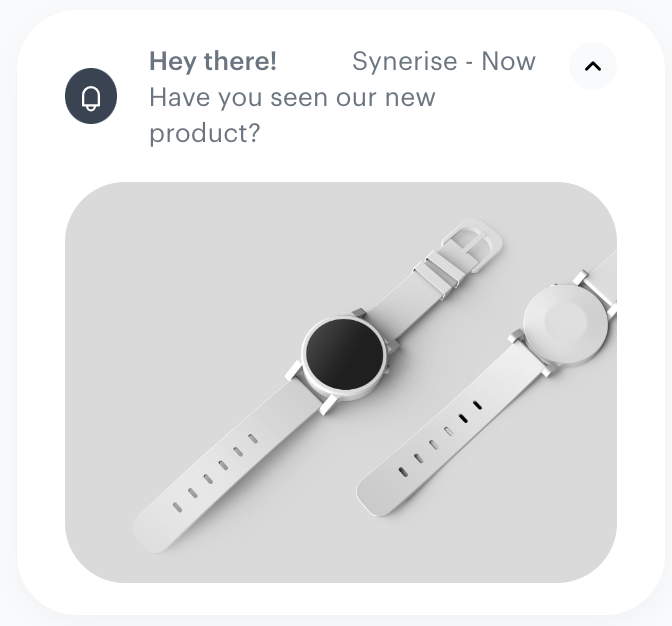
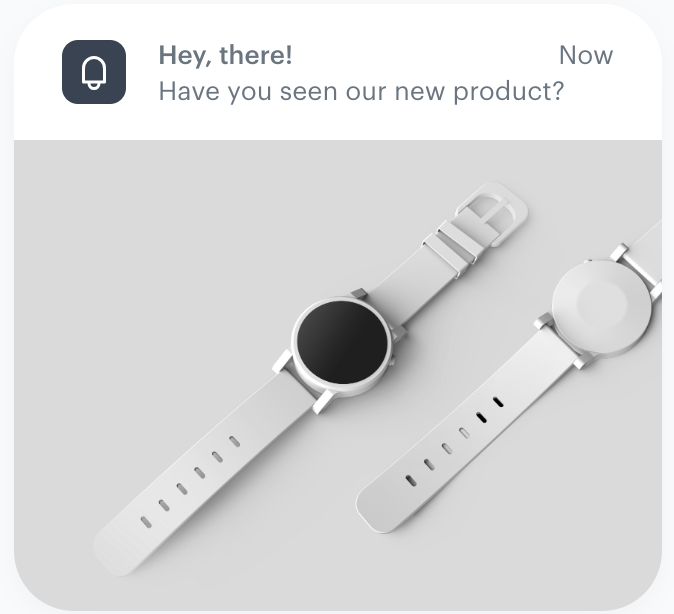
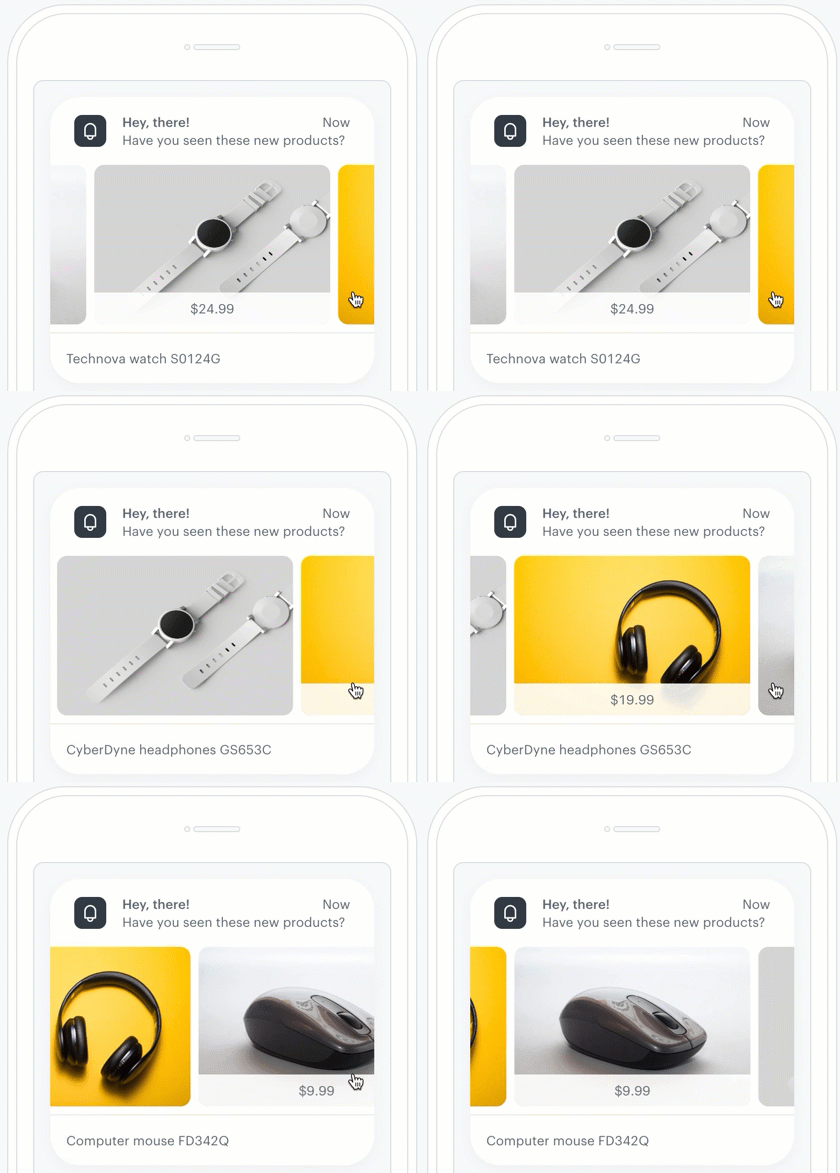
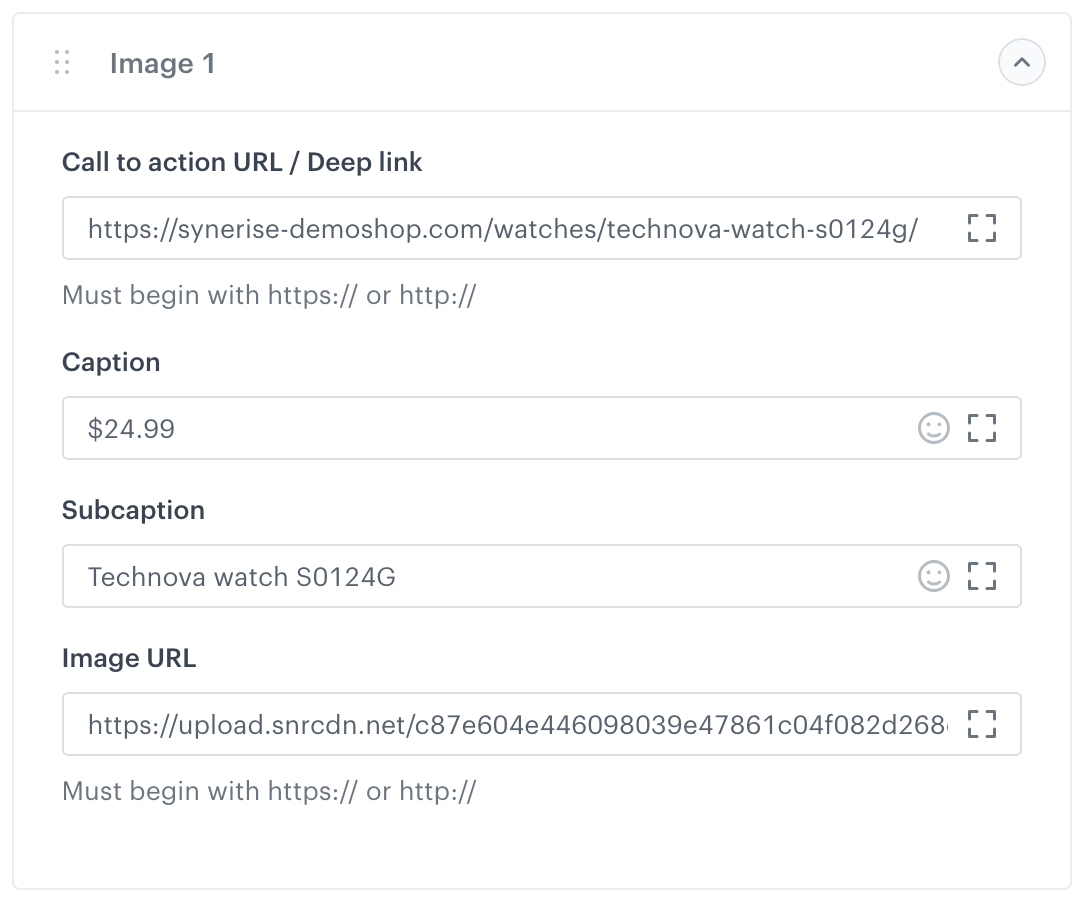
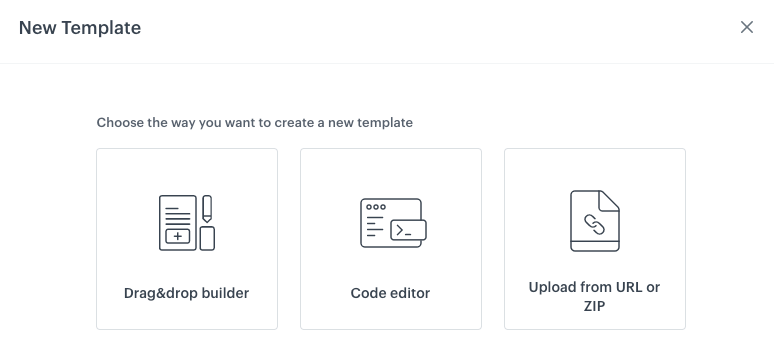
 **Result**: A pop-up appears.
3. On the pop-up, in the **Folder name**, enter the name of the folder.
4. Confirm by clicking **Apply**.
## Creating a template
---
1. Go to
**Result**: A pop-up appears.
3. On the pop-up, in the **Folder name**, enter the name of the folder.
4. Confirm by clicking **Apply**.
## Creating a template
---
1. Go to 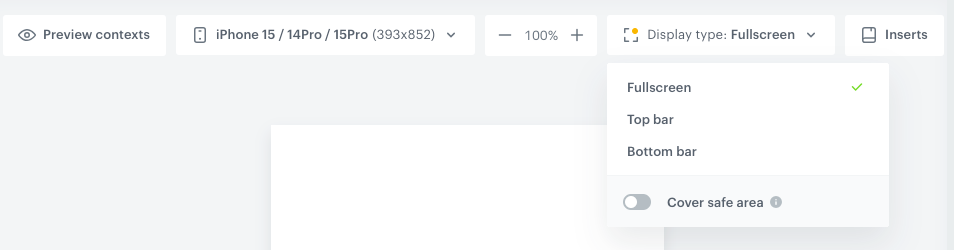

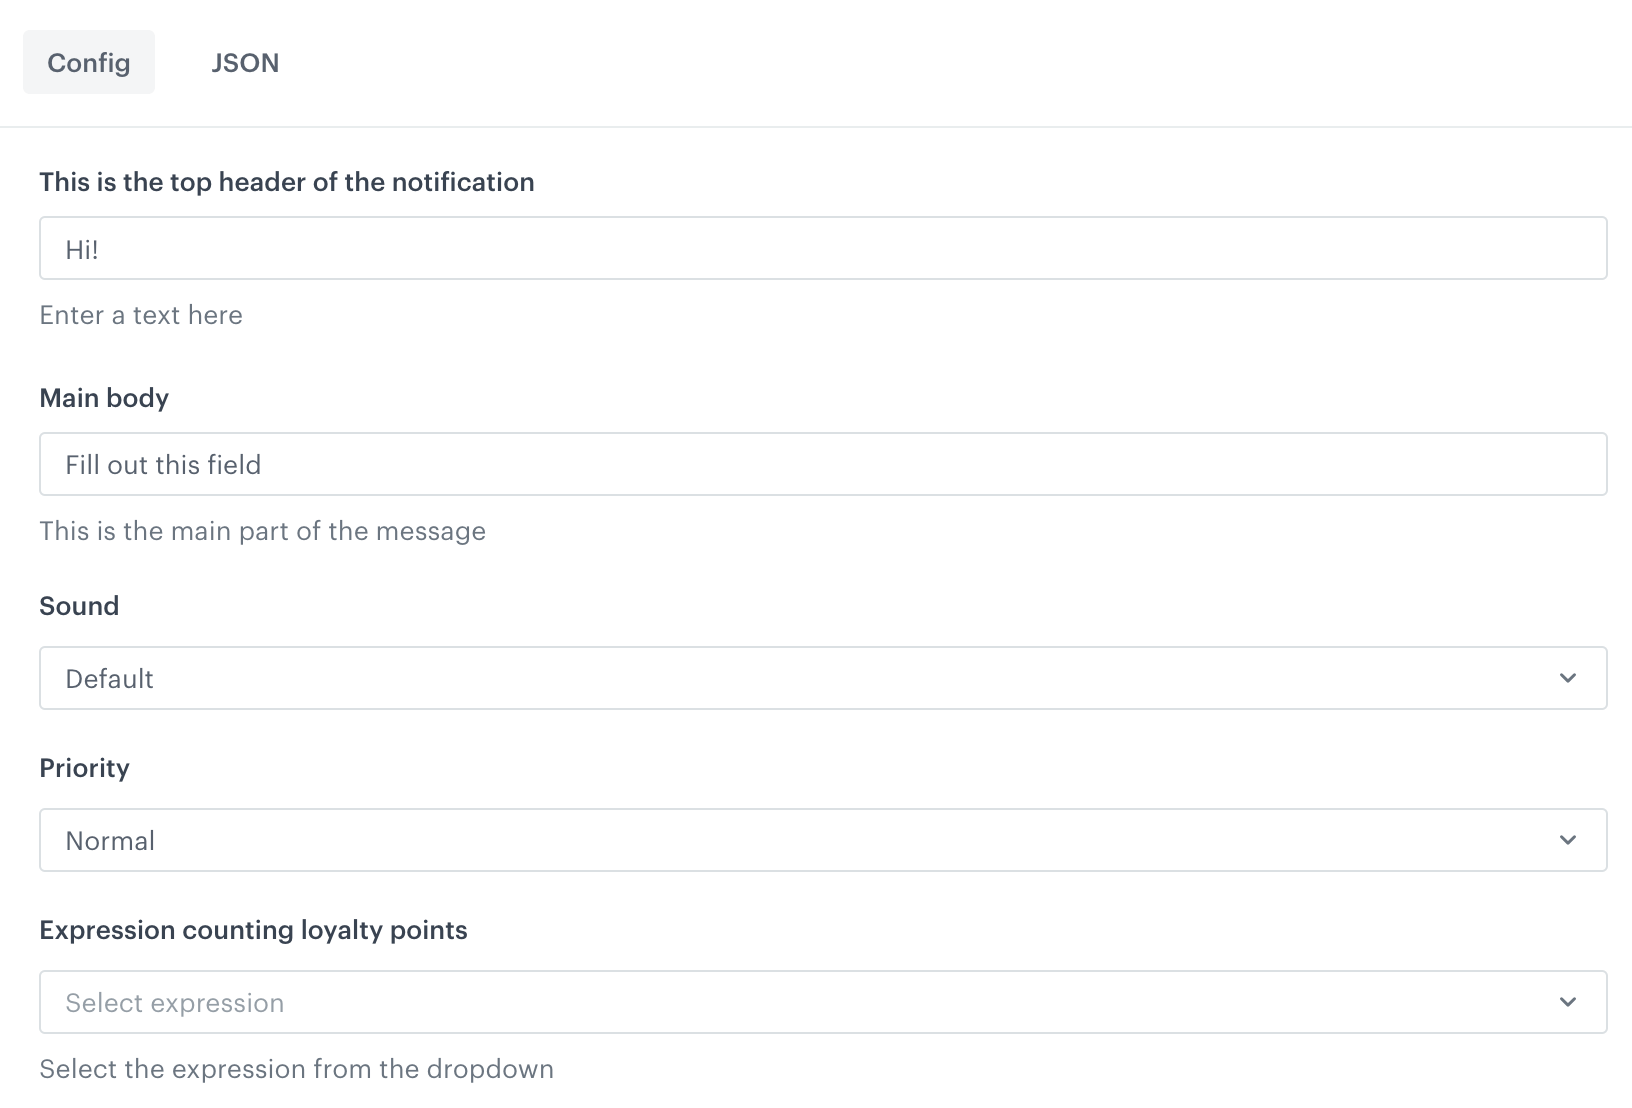


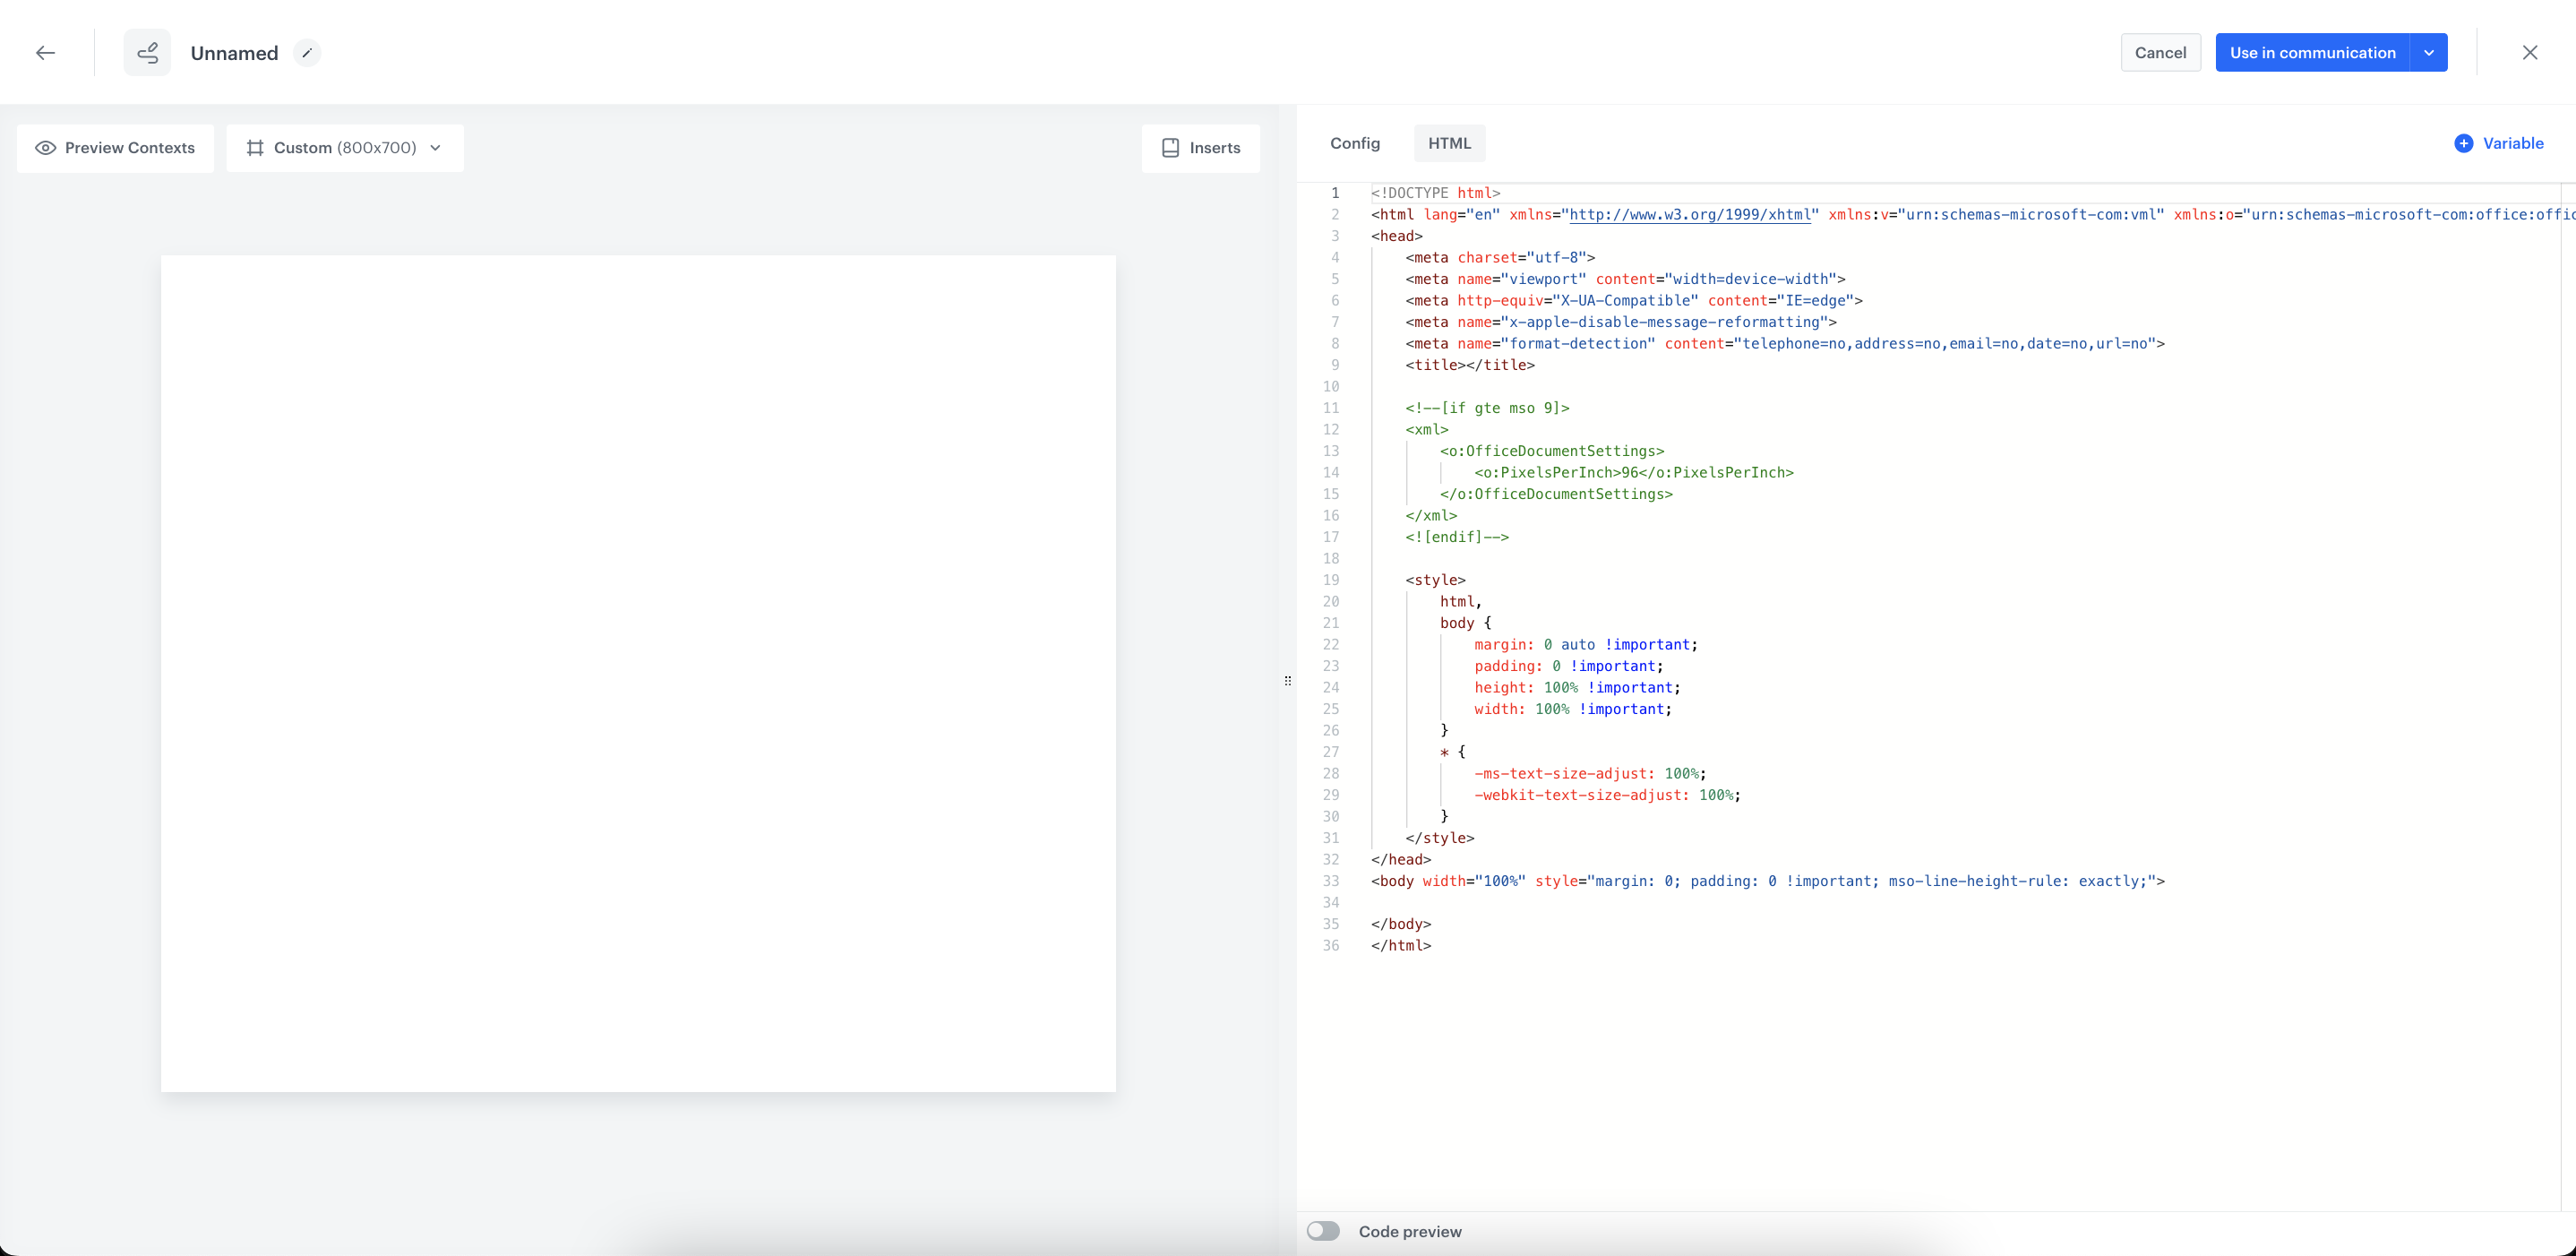

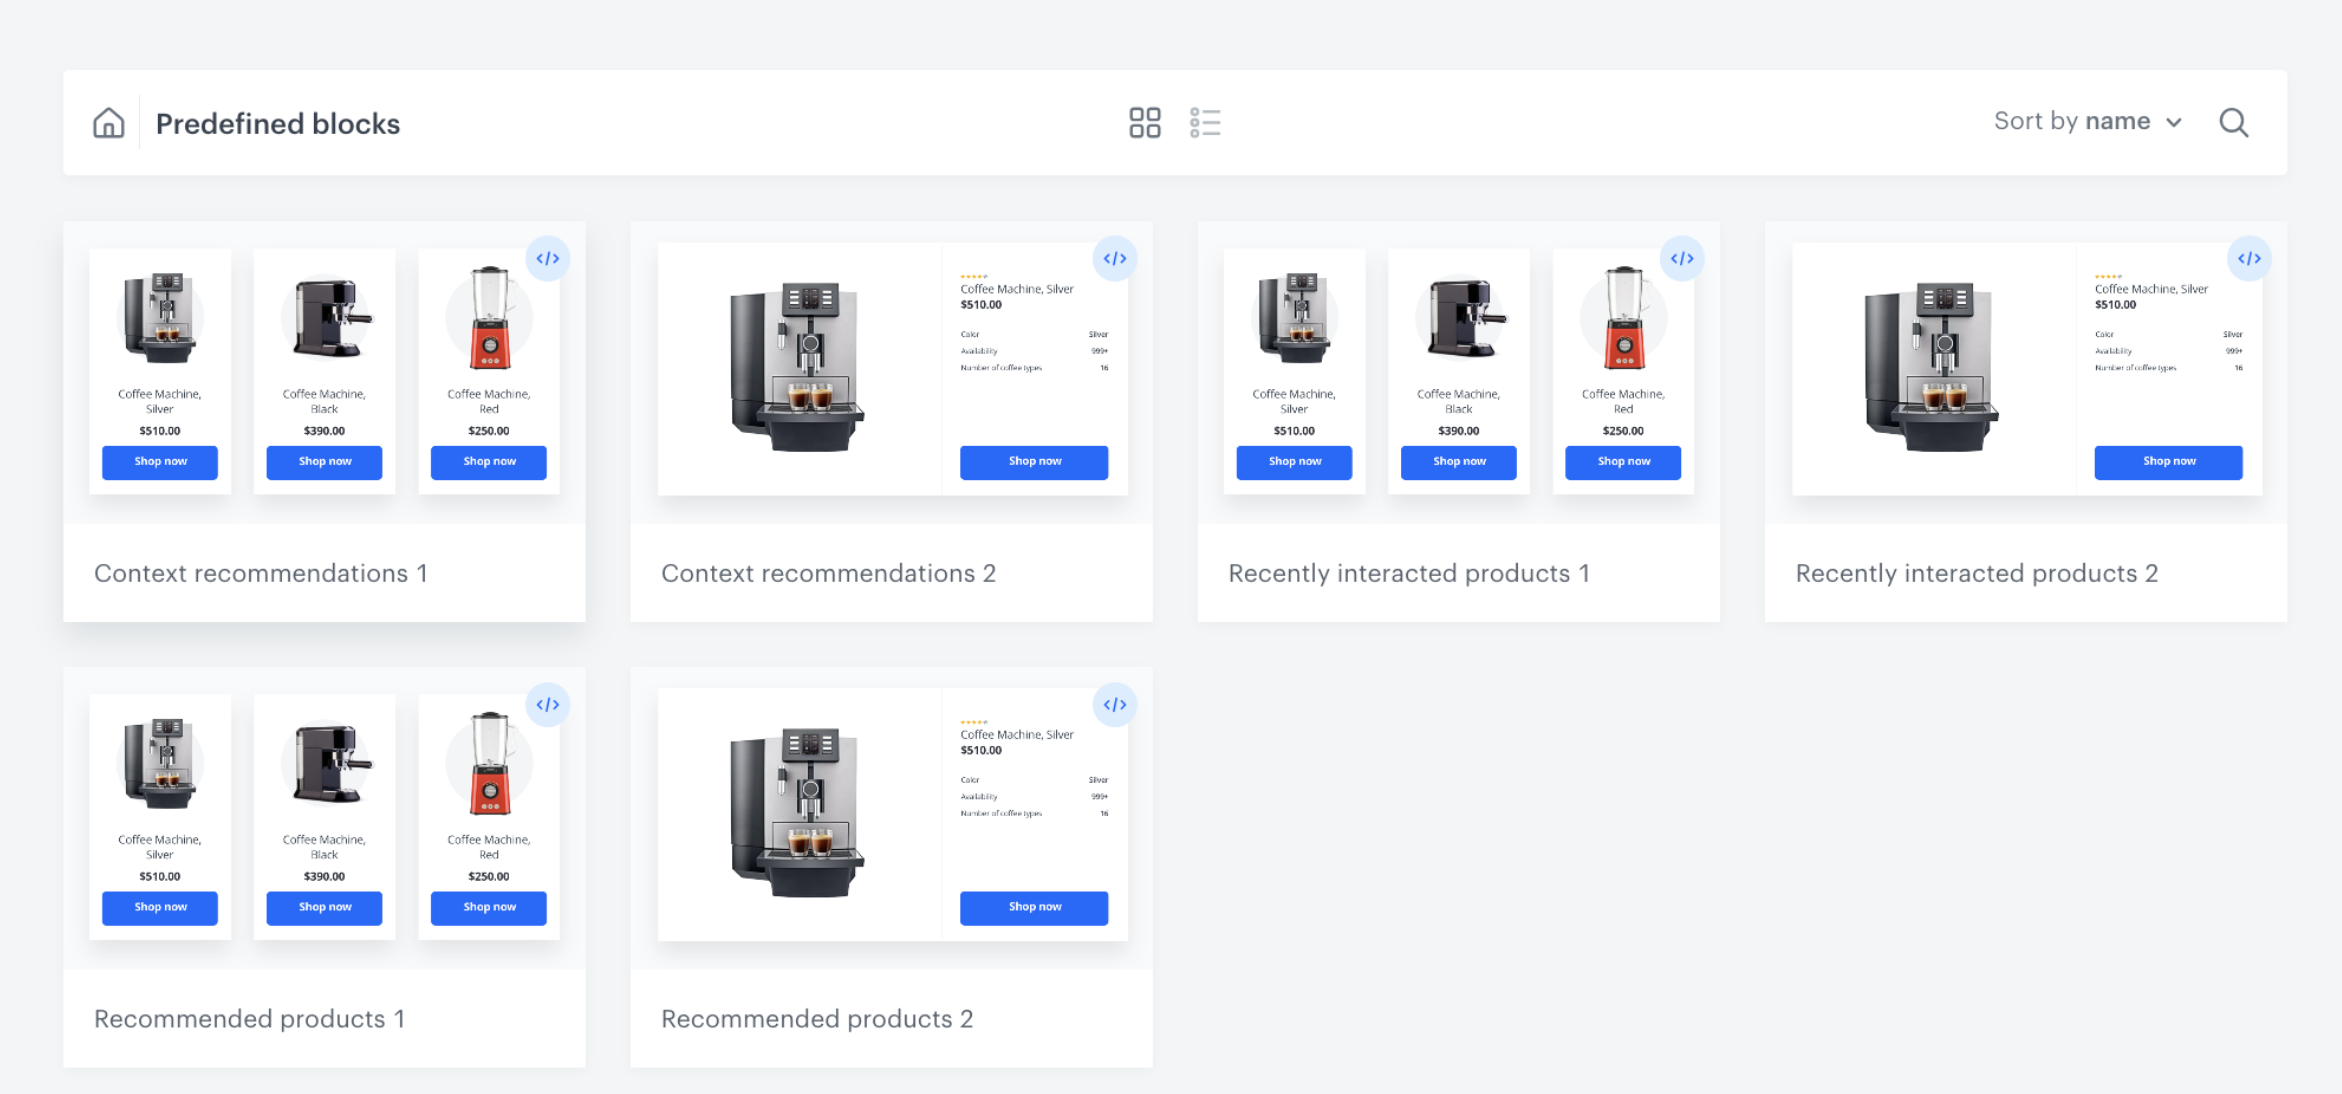
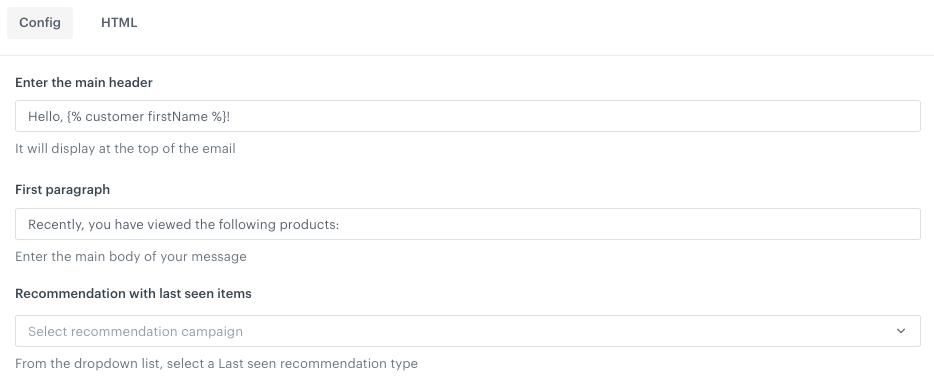
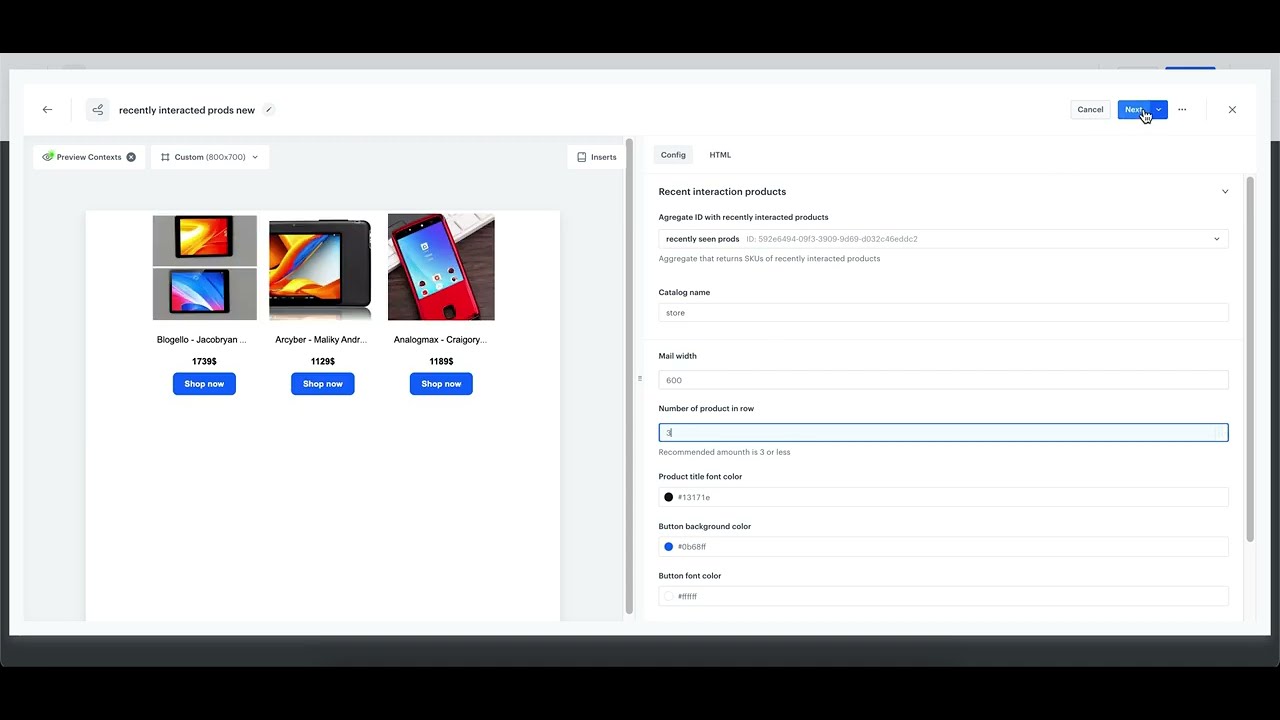
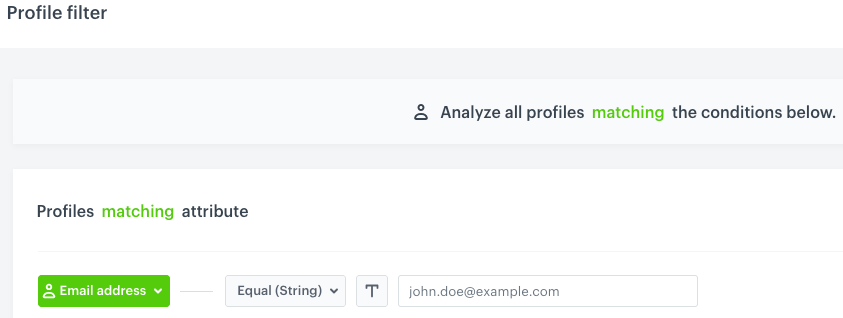
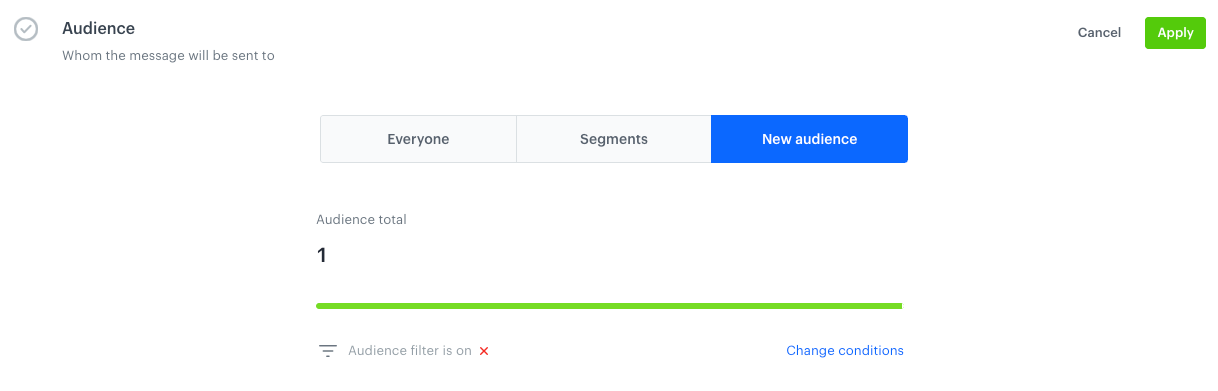
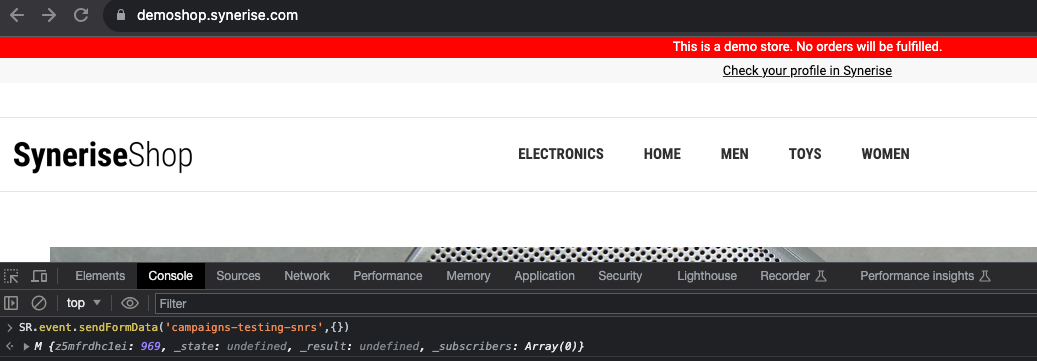
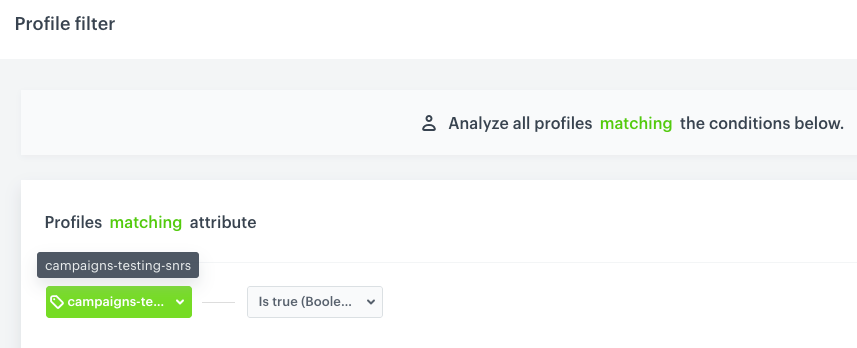
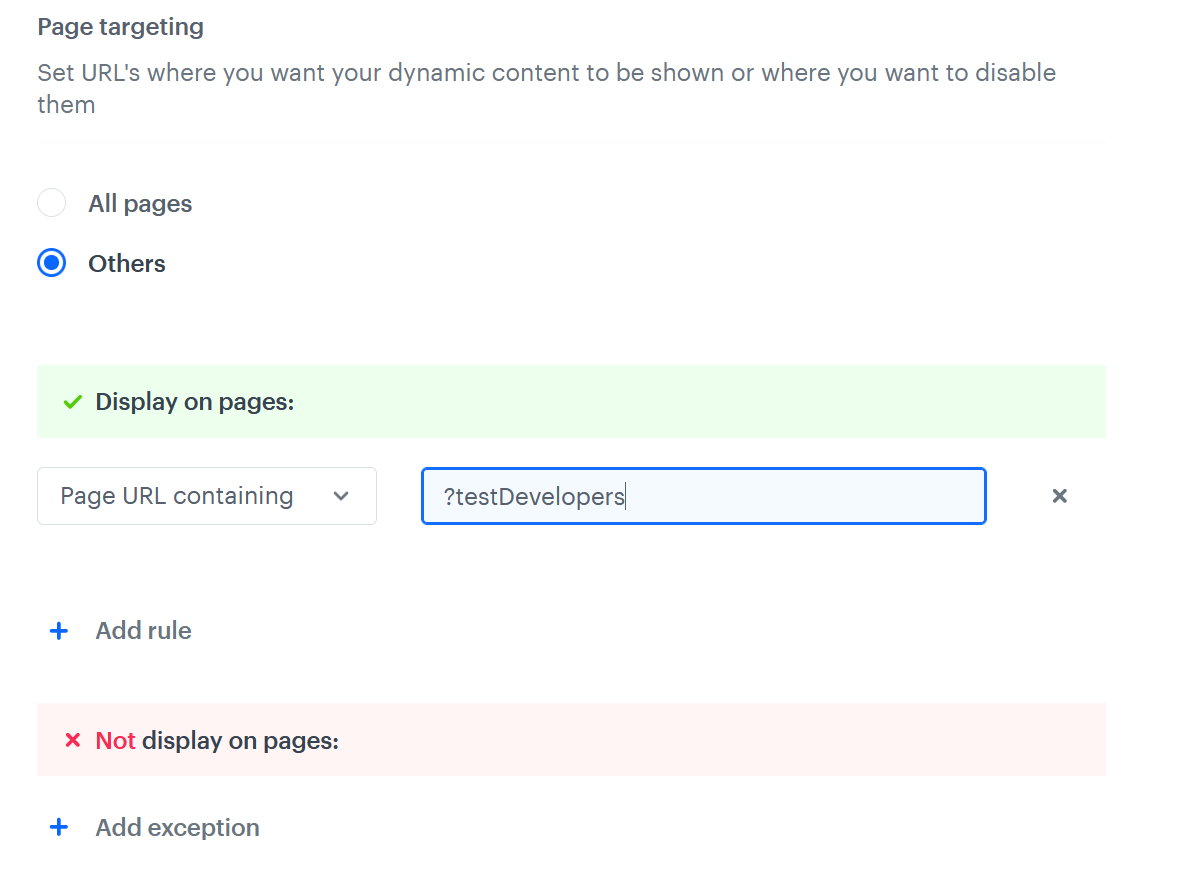
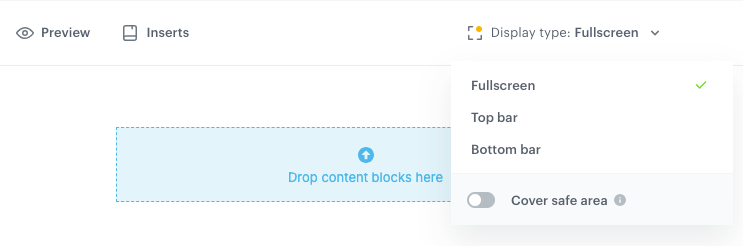
 - You can make use of the folders in the widget library:
- **Basic** - This library offers a collection of basic widgets that provide a starting point for your designs.
| Basic | Description |
|-------------|---------------------------------------------------------------------|
| 1 section | Inserts one box |
| 1/2 section | Inserts one box divided into two smaller spaces |
| 1/3 section | Inserts one box divided into three smaller spaces |
| 3/7 section | Inserts one box divided into two spaces - one smaller, one bigger |
| Button | Inserts a button |
| Divider | Inserts a line that can be used to divide content inside a template |
| Text | Inserts a text box |
| Image | Inserts a box dedicated for image upload to the template |
| Image link | Inserts a container for the link to the image |
| Quote | Inserts a text box with a default setting of italic font |
| Link | Inserts a link |
- **Predefined** - This library offers a collection of pre-designed widgets. Each widget comes with a variety of design options, allowing you to select the most suitable design that aligns with your specific requirements and customize it to match your needs.
| Predefined | Description |
|------------|-------------------------------------|
| Headers | Inserts a header of a landing page |
| Menu | Inserts a top menu of landing page for easy navigation between different content sections |
| Profile | Inserts a box which you can dedicate to introducing people|
| Divider | Inserts a line which lets you separate content sections in a template |
| Gallery | Inserts a section with the boxes in which you can add images |
| Link | Inserts a section dedicated to links, it contains spaces into which you can incorporate short description, icons, and images |
| Module | Inserts a box with a large image, description, and action link |
| Product | Inserts a section dedicated to products, it contains dedicated space for images, product descriptions, and links |
| Footer | Inserts a bottom section of the page that typically appears across all pages of a website. It contains a variety of information such as contact details, links to important pages, social media icons, copyright notices, and legal disclaimers. |
- To add a widget to the canvas, drag it from the library and drop it to the canvas
- You can customize the design of the widget ([widget personalizing options](#widget-personalizing-options)) and define functional options in the Components section available on the right pane by clicking
- You can make use of the folders in the widget library:
- **Basic** - This library offers a collection of basic widgets that provide a starting point for your designs.
| Basic | Description |
|-------------|---------------------------------------------------------------------|
| 1 section | Inserts one box |
| 1/2 section | Inserts one box divided into two smaller spaces |
| 1/3 section | Inserts one box divided into three smaller spaces |
| 3/7 section | Inserts one box divided into two spaces - one smaller, one bigger |
| Button | Inserts a button |
| Divider | Inserts a line that can be used to divide content inside a template |
| Text | Inserts a text box |
| Image | Inserts a box dedicated for image upload to the template |
| Image link | Inserts a container for the link to the image |
| Quote | Inserts a text box with a default setting of italic font |
| Link | Inserts a link |
- **Predefined** - This library offers a collection of pre-designed widgets. Each widget comes with a variety of design options, allowing you to select the most suitable design that aligns with your specific requirements and customize it to match your needs.
| Predefined | Description |
|------------|-------------------------------------|
| Headers | Inserts a header of a landing page |
| Menu | Inserts a top menu of landing page for easy navigation between different content sections |
| Profile | Inserts a box which you can dedicate to introducing people|
| Divider | Inserts a line which lets you separate content sections in a template |
| Gallery | Inserts a section with the boxes in which you can add images |
| Link | Inserts a section dedicated to links, it contains spaces into which you can incorporate short description, icons, and images |
| Module | Inserts a box with a large image, description, and action link |
| Product | Inserts a section dedicated to products, it contains dedicated space for images, product descriptions, and links |
| Footer | Inserts a bottom section of the page that typically appears across all pages of a website. It contains a variety of information such as contact details, links to important pages, social media icons, copyright notices, and legal disclaimers. |
- To add a widget to the canvas, drag it from the library and drop it to the canvas
- You can customize the design of the widget ([widget personalizing options](#widget-personalizing-options)) and define functional options in the Components section available on the right pane by clicking  ### Widget personalizing options
---
To customize the widget design, click the widget on the canvas. On the right pane, the following options will be available:
- **Classes** - This section lets you define a class of the widget you are editing.
- **General** - This section lets you adjust the position of the widget, define the size of the space between the widget and the top, bottom, left and right edges.
- **Dimension** - This section lets you change the size of the widget, its width and height, space between the widgets and padding.
- **Typography** - This section lets you adjust the font-related settings, you can change font type and size, its weight and letter spacing. Such options as text alignment, text shadow and text decoration will help you make the content on the landing page look more attractive.
- **Decorations** - This section lets you change opacity, background color, the rounding corner, the width and border style.
- **Extra** - This section lets you change the dimension of the widgets, by making them look tilted or turned upside down.
- **Flex** - This section lets you create a container of elastic blocks and manipulate those blocks in regard of their parent and children elements.
Additionally, in the components settings tab (
### Widget personalizing options
---
To customize the widget design, click the widget on the canvas. On the right pane, the following options will be available:
- **Classes** - This section lets you define a class of the widget you are editing.
- **General** - This section lets you adjust the position of the widget, define the size of the space between the widget and the top, bottom, left and right edges.
- **Dimension** - This section lets you change the size of the widget, its width and height, space between the widgets and padding.
- **Typography** - This section lets you adjust the font-related settings, you can change font type and size, its weight and letter spacing. Such options as text alignment, text shadow and text decoration will help you make the content on the landing page look more attractive.
- **Decorations** - This section lets you change opacity, background color, the rounding corner, the width and border style.
- **Extra** - This section lets you change the dimension of the widgets, by making them look tilted or turned upside down.
- **Flex** - This section lets you create a container of elastic blocks and manipulate those blocks in regard of their parent and children elements.
Additionally, in the components settings tab (
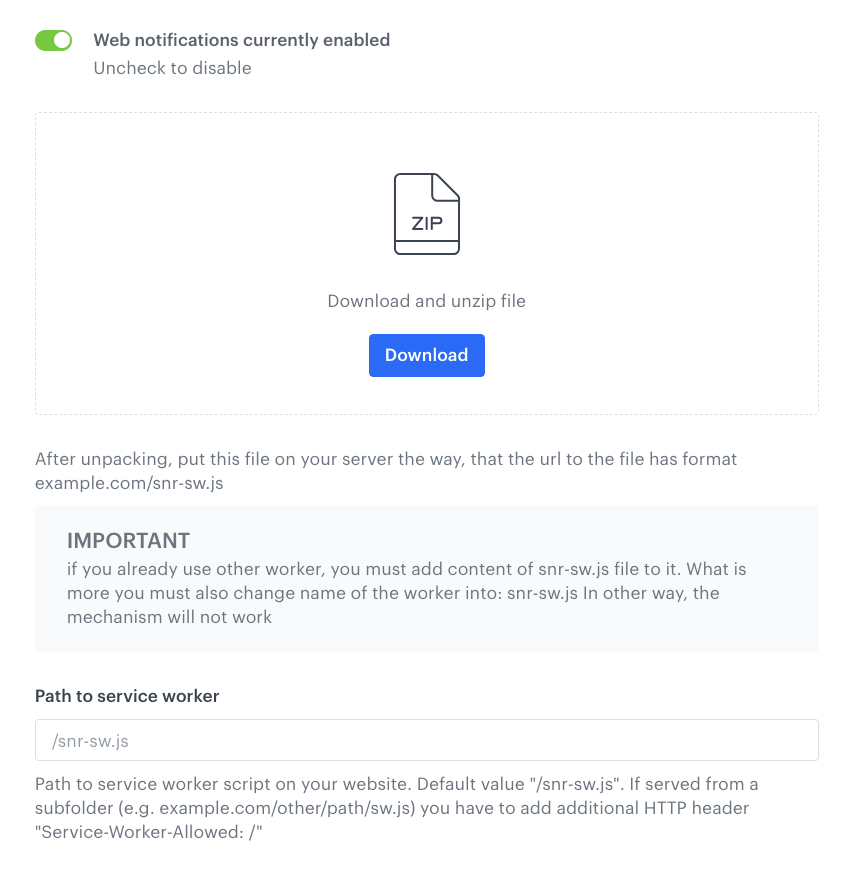
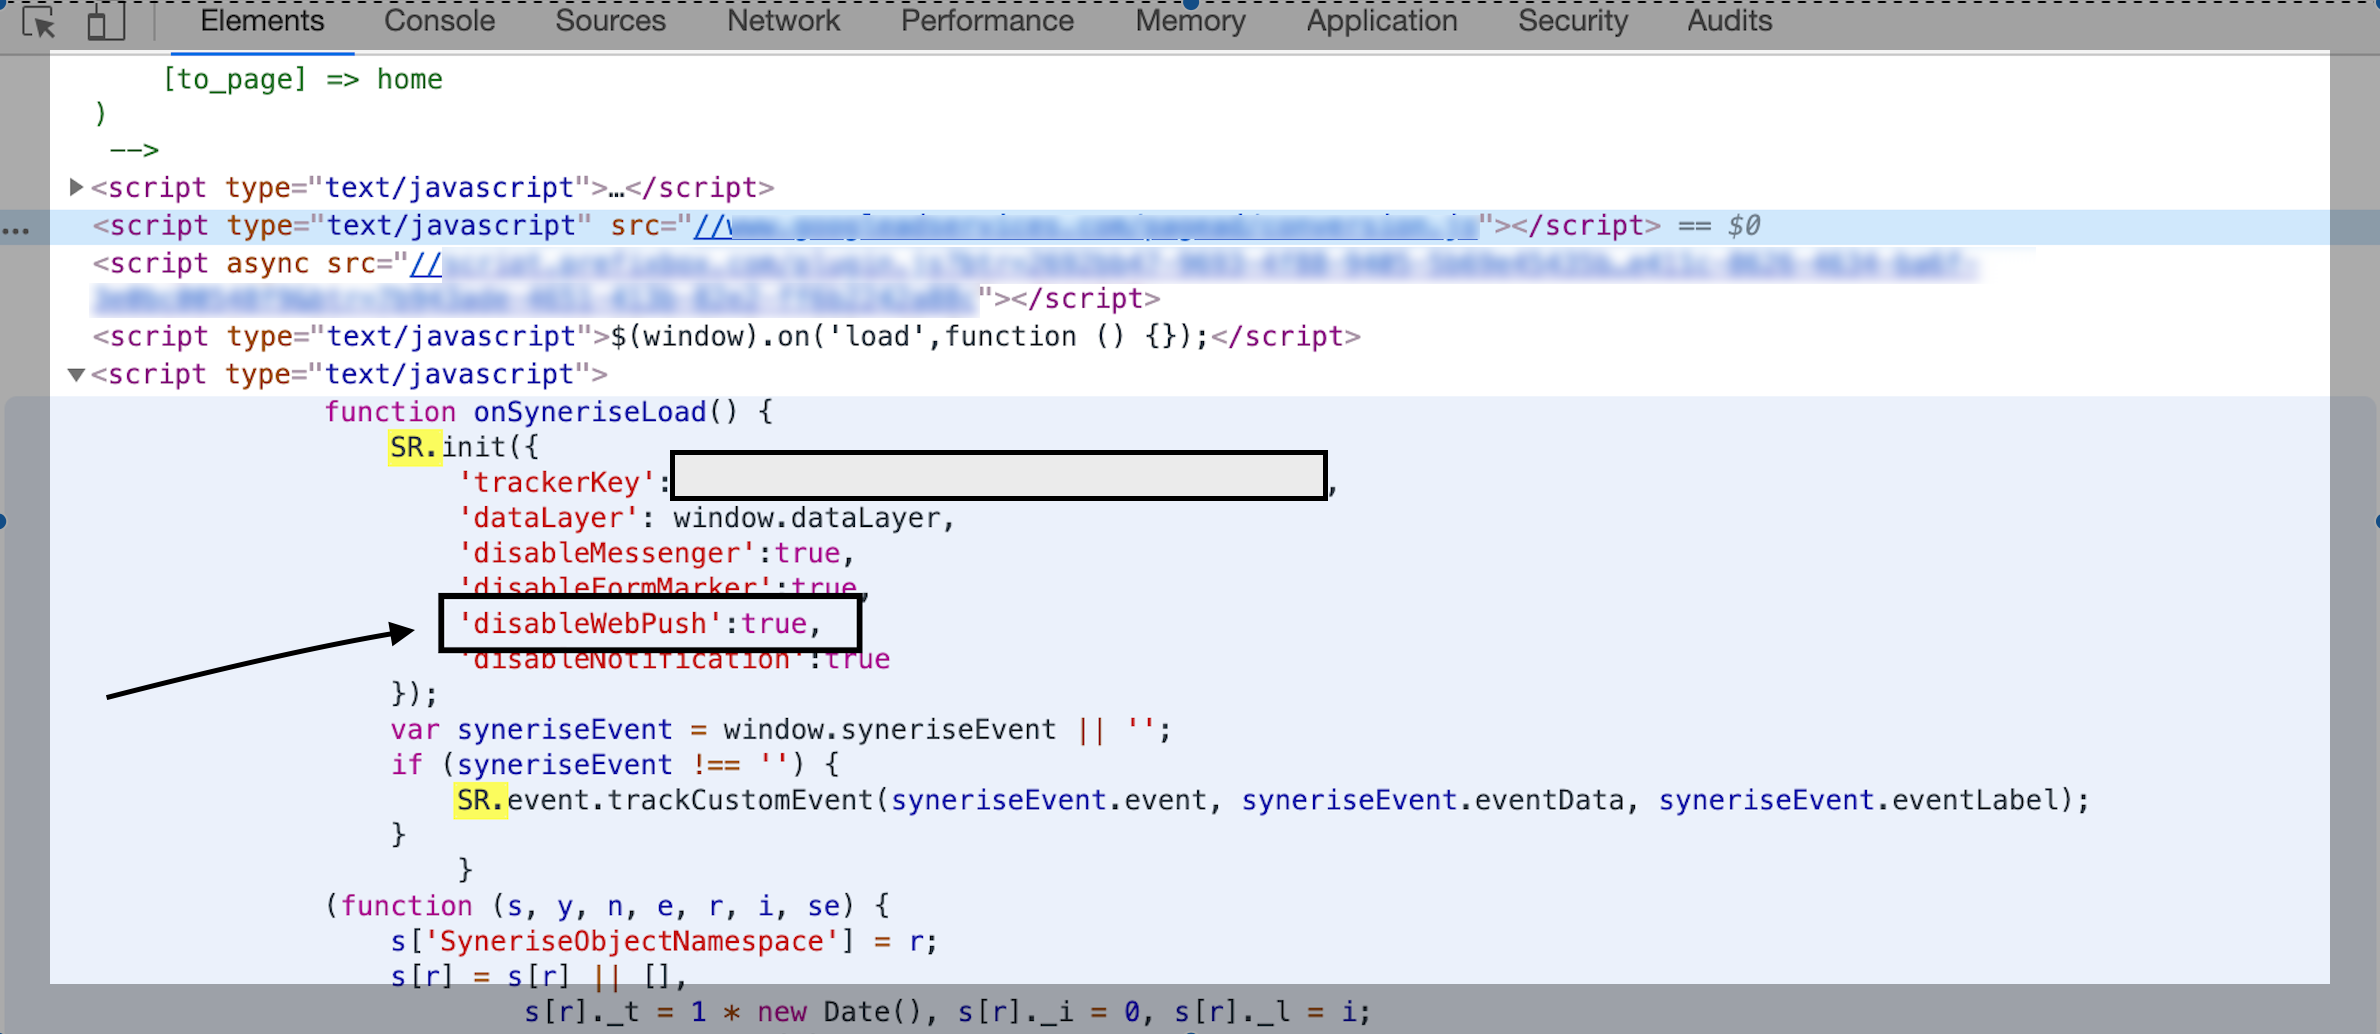
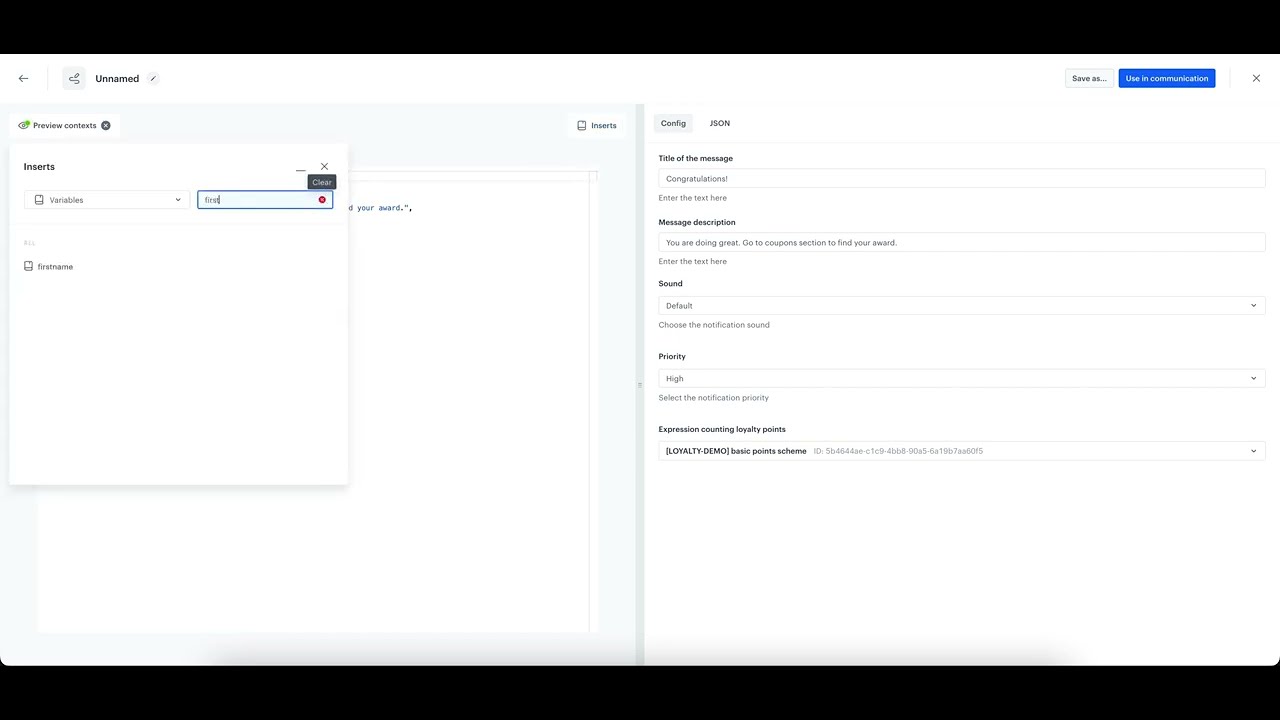
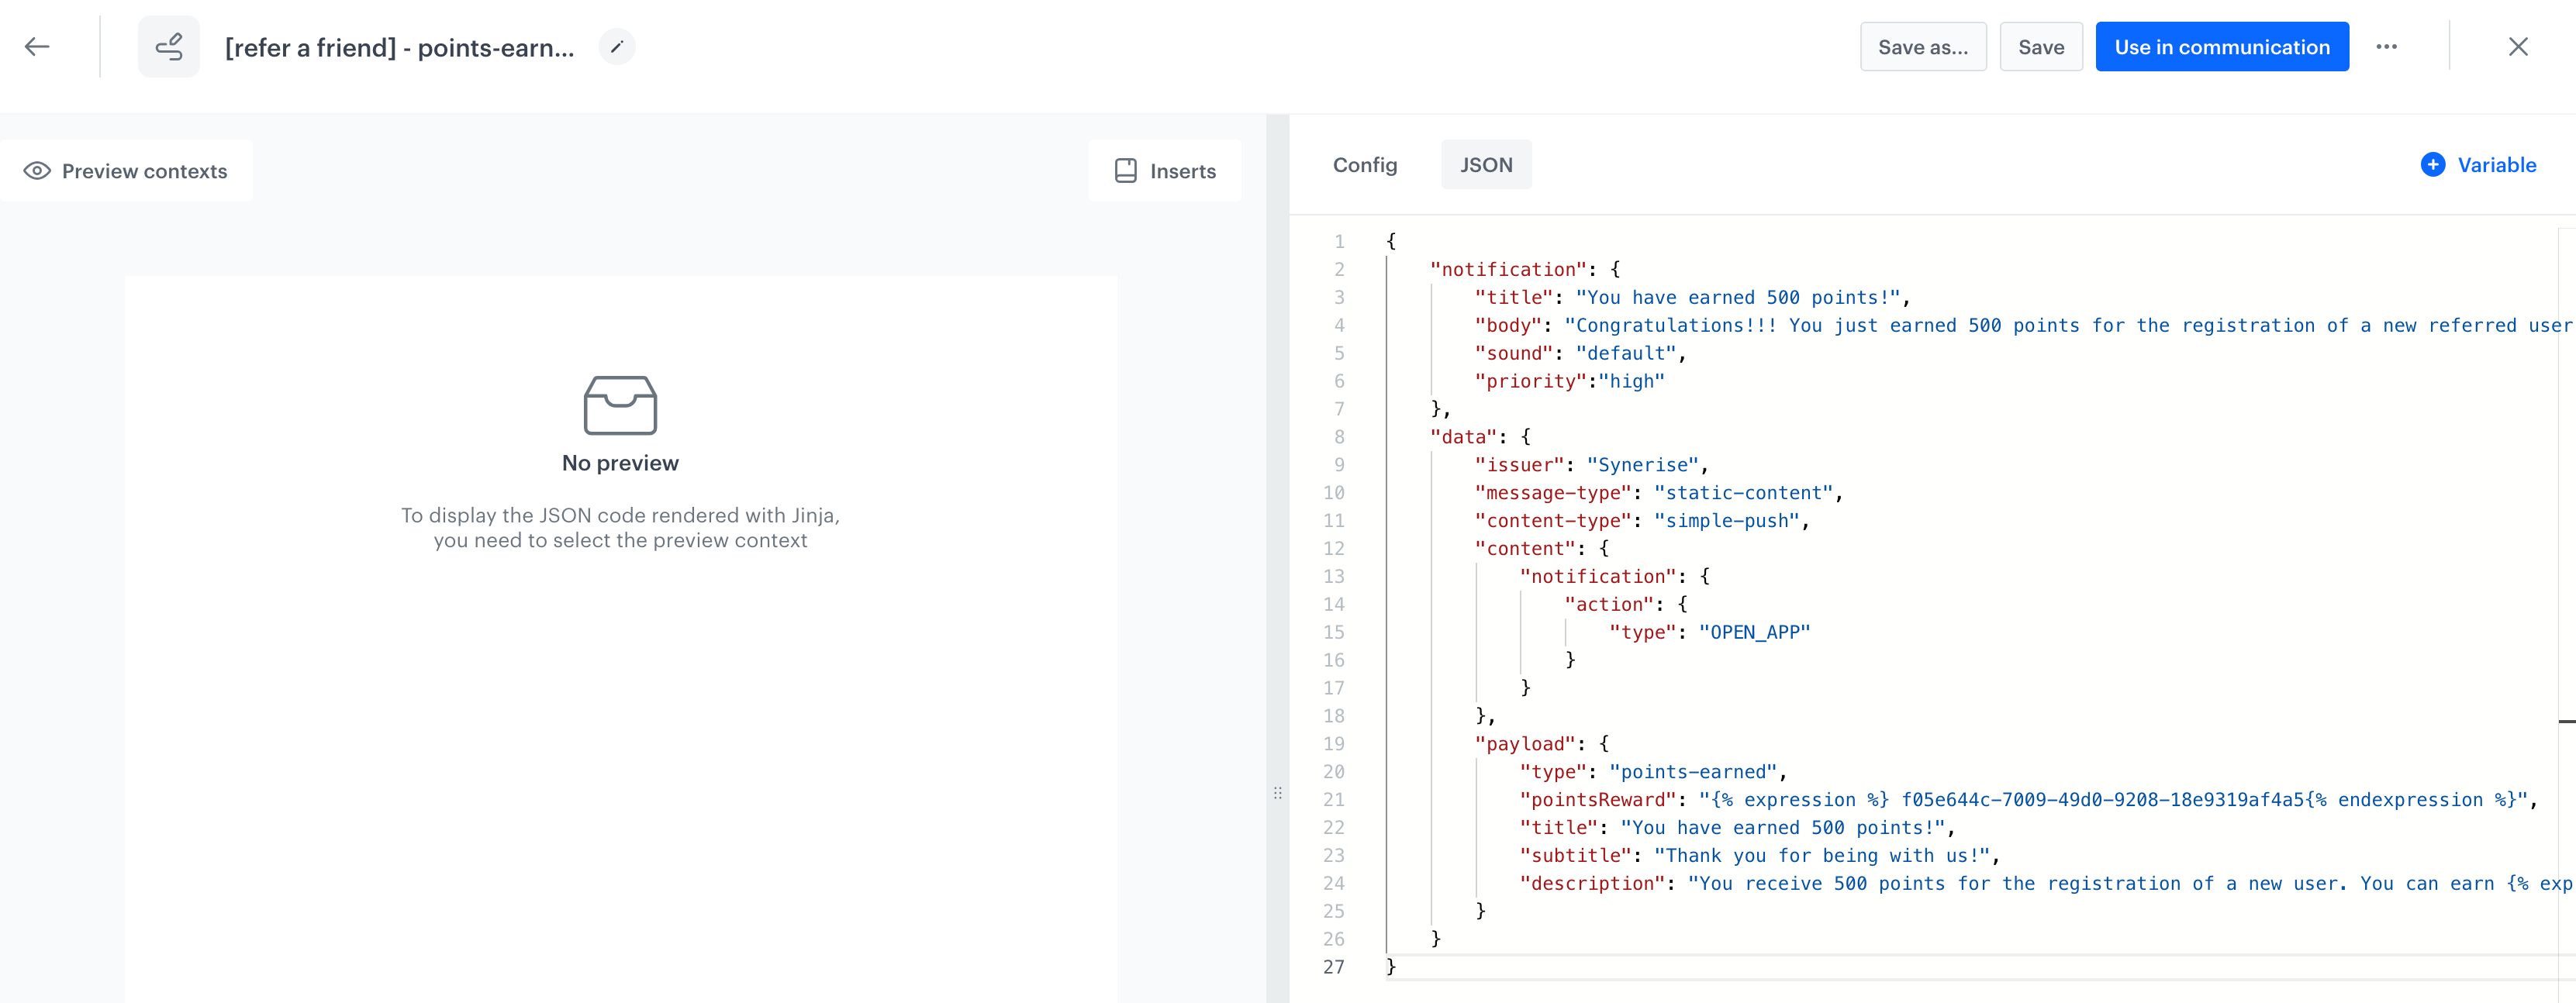
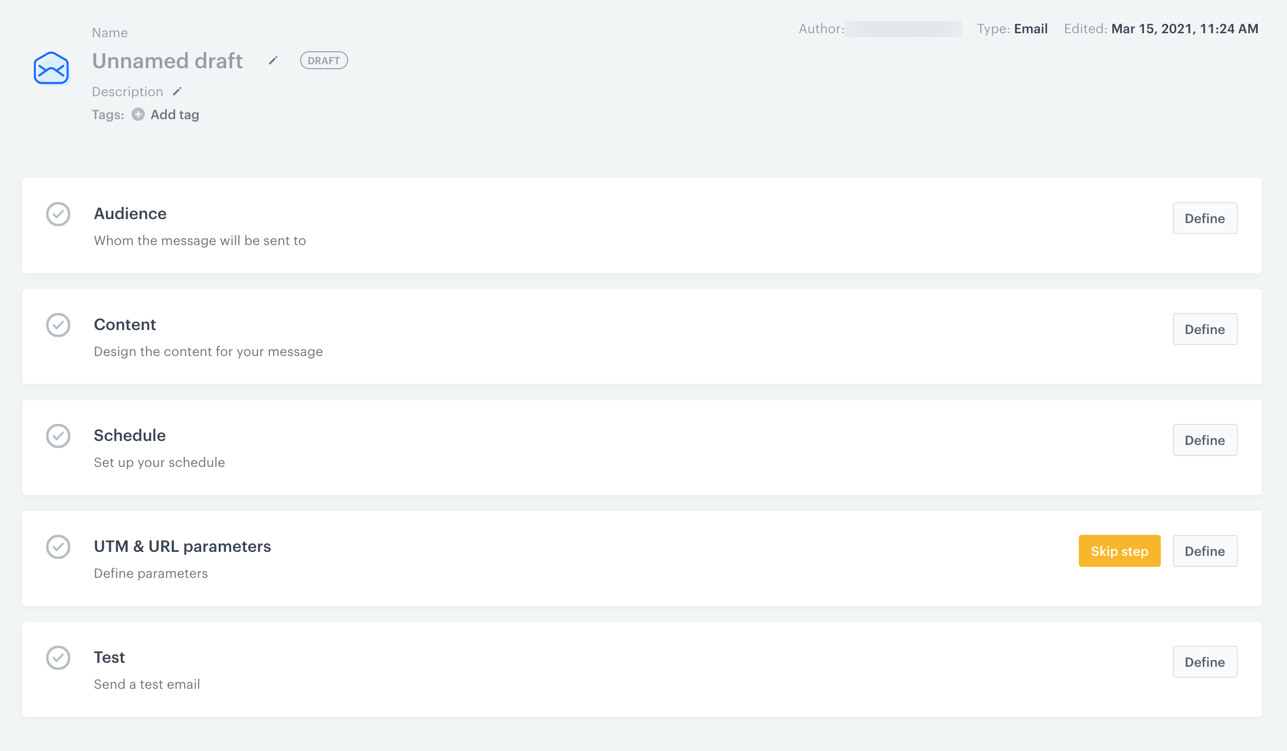
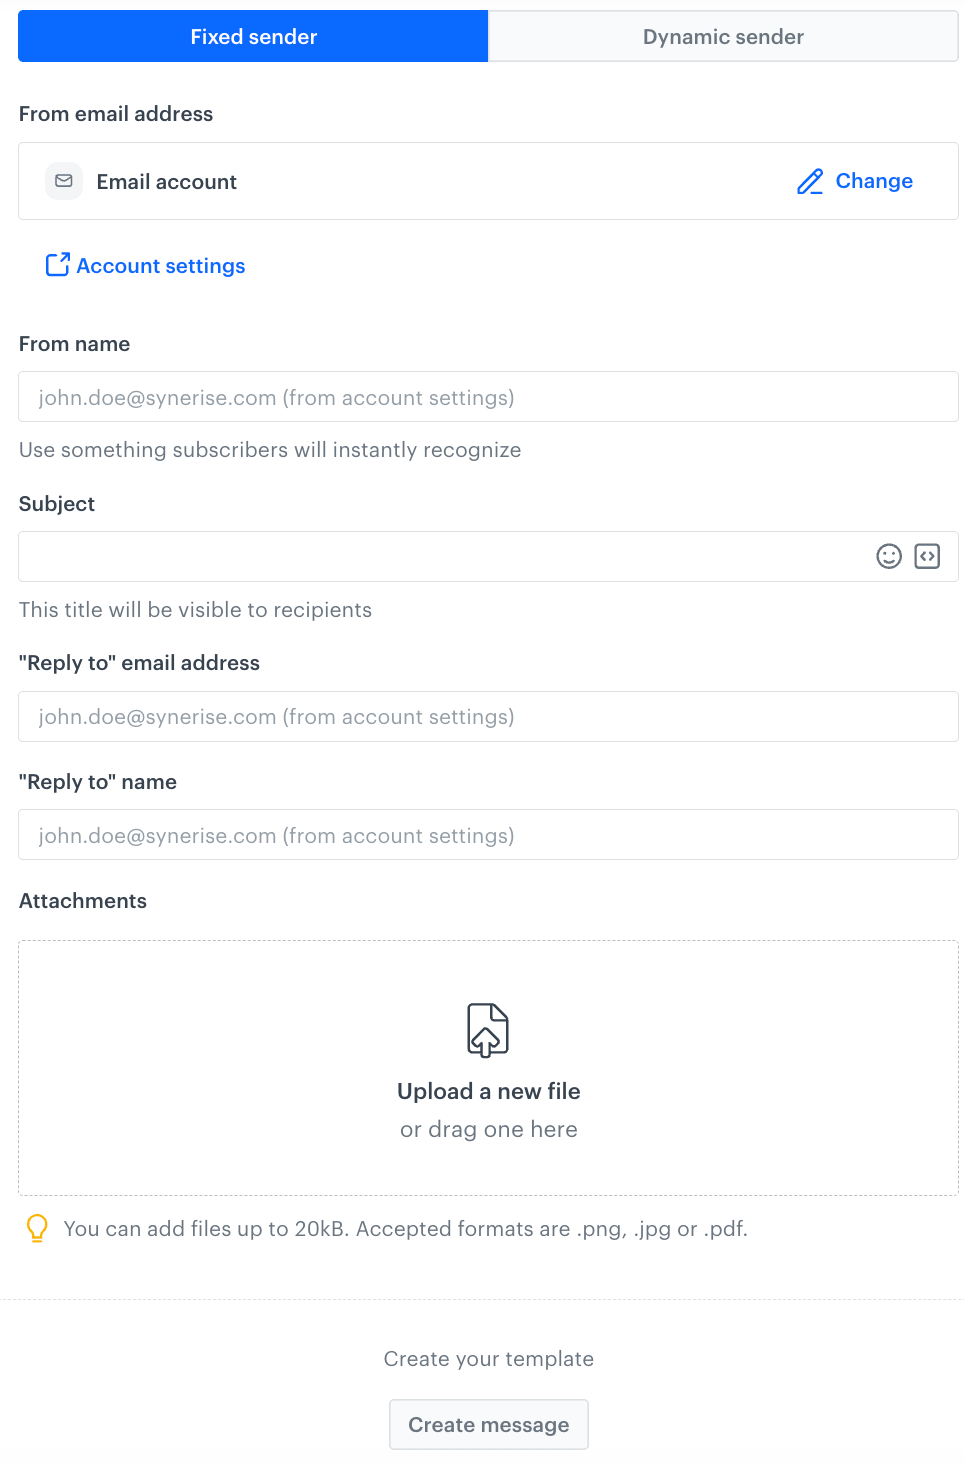
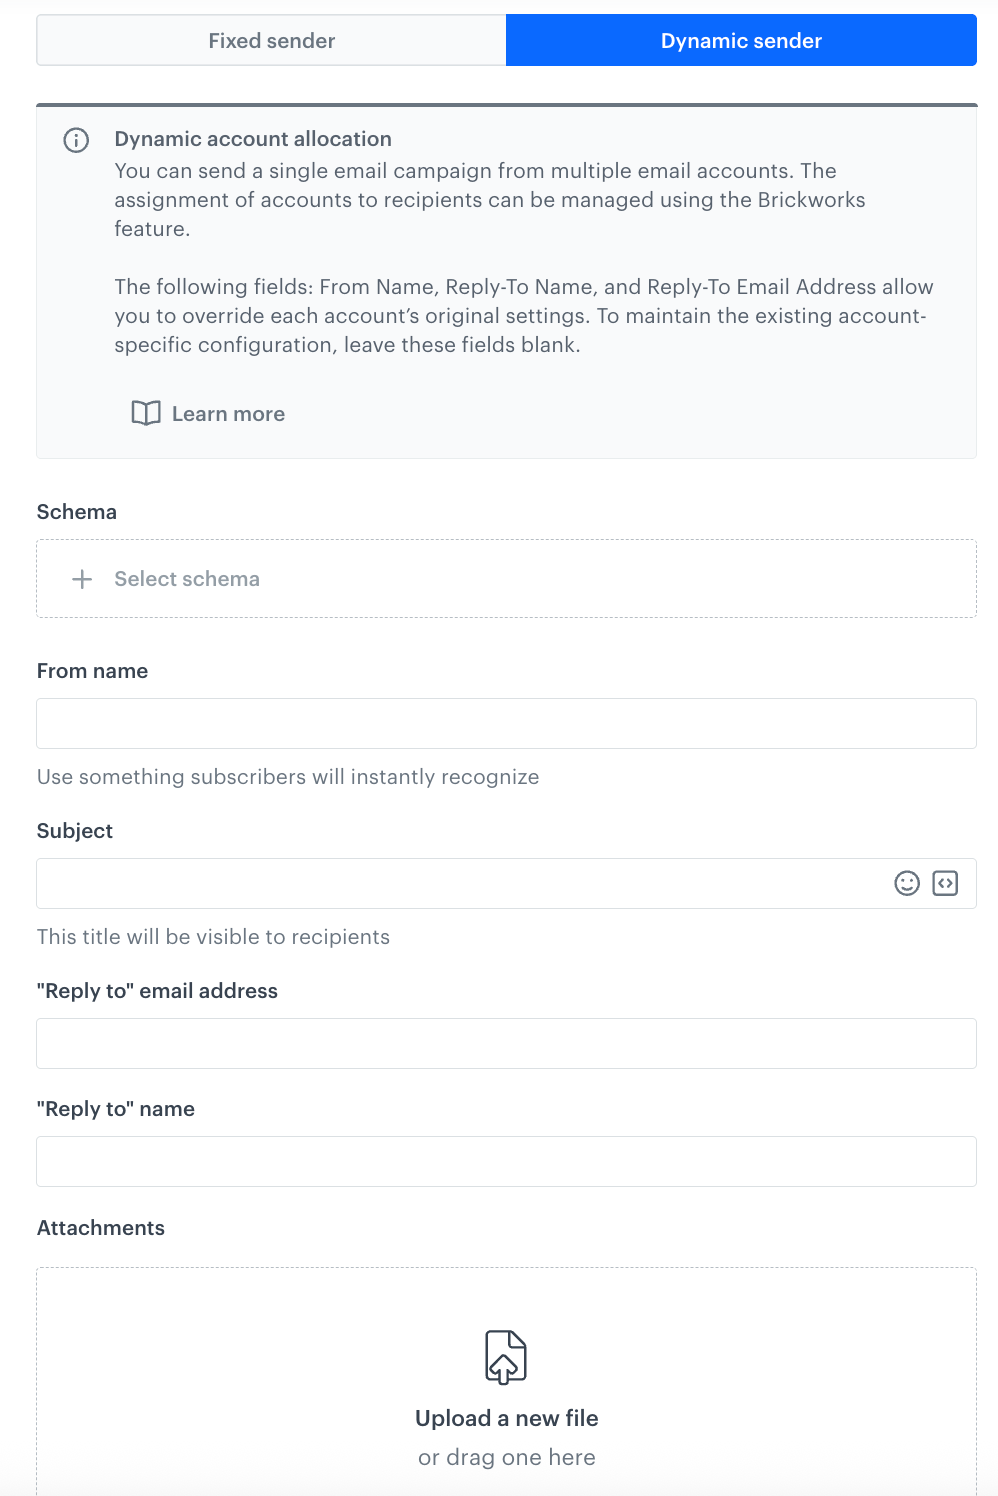
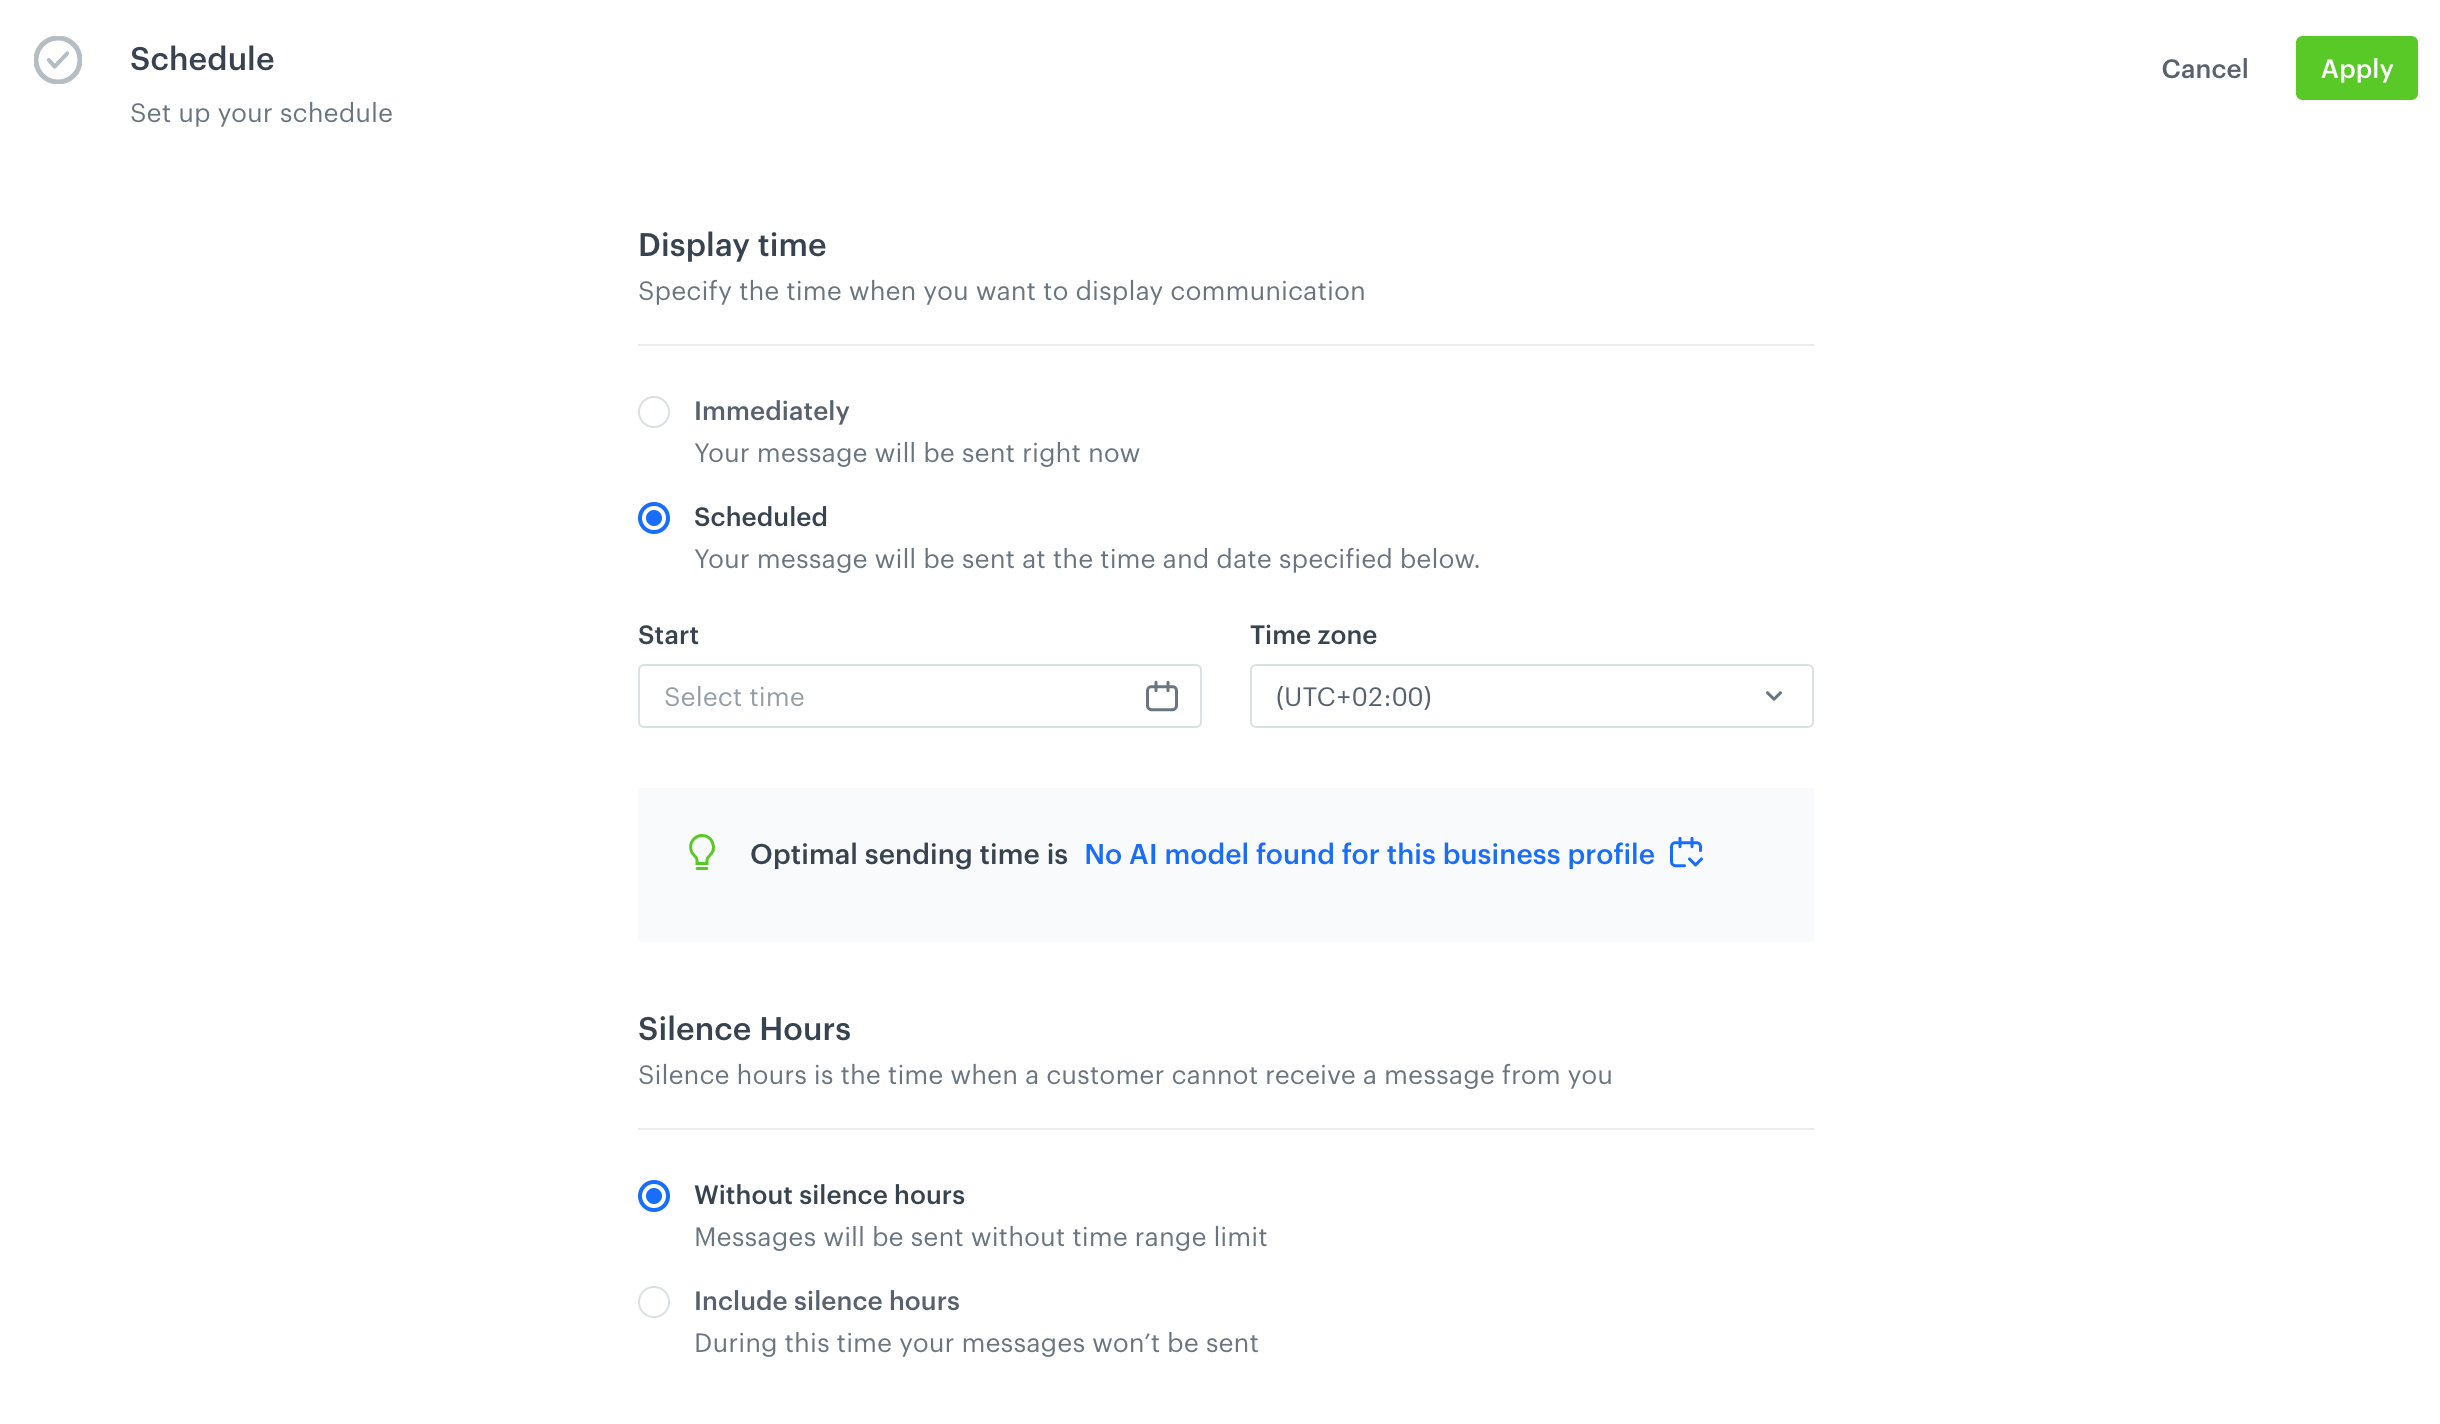

 **Data Modeling Hub > Brickworks**.
2. Create a new schema. For more information on creating schemas, see:
- [Creating a schema](/docs/assets/brickworks/quick-start/creating-a-schema)
- [Field types](/docs/assets/brickworks/schema-field-types)
3. In the **Fields** tab, add the following fields:
1. Add a **String** field:
- In **API name**, enter `profile_attribute_name`
- Select the following options for this field:
- **Required field**
- **Block record-level overwriting** - This setting requires you to provide a default value for this field in each record — enter the name of the profile attribute used for matching.
2. Add a **String** field:
- In **API name**, enter `attribute_value`
- Select the following options for this field: **Required field** and **Unique values only**.
3. Add a **Number** field:
- Set the type to **Integer**.
- In **API name**, enter `sending_account`
- Select the **Required field** checkbox.
4. Save the schema.
**Data Modeling Hub > Brickworks**.
2. Create a new schema. For more information on creating schemas, see:
- [Creating a schema](/docs/assets/brickworks/quick-start/creating-a-schema)
- [Field types](/docs/assets/brickworks/schema-field-types)
3. In the **Fields** tab, add the following fields:
1. Add a **String** field:
- In **API name**, enter `profile_attribute_name`
- Select the following options for this field:
- **Required field**
- **Block record-level overwriting** - This setting requires you to provide a default value for this field in each record — enter the name of the profile attribute used for matching.
2. Add a **String** field:
- In **API name**, enter `attribute_value`
- Select the following options for this field: **Required field** and **Unique values only**.
3. Add a **Number** field:
- Set the type to **Integer**.
- In **API name**, enter `sending_account`
- Select the **Required field** checkbox.
4. Save the schema.
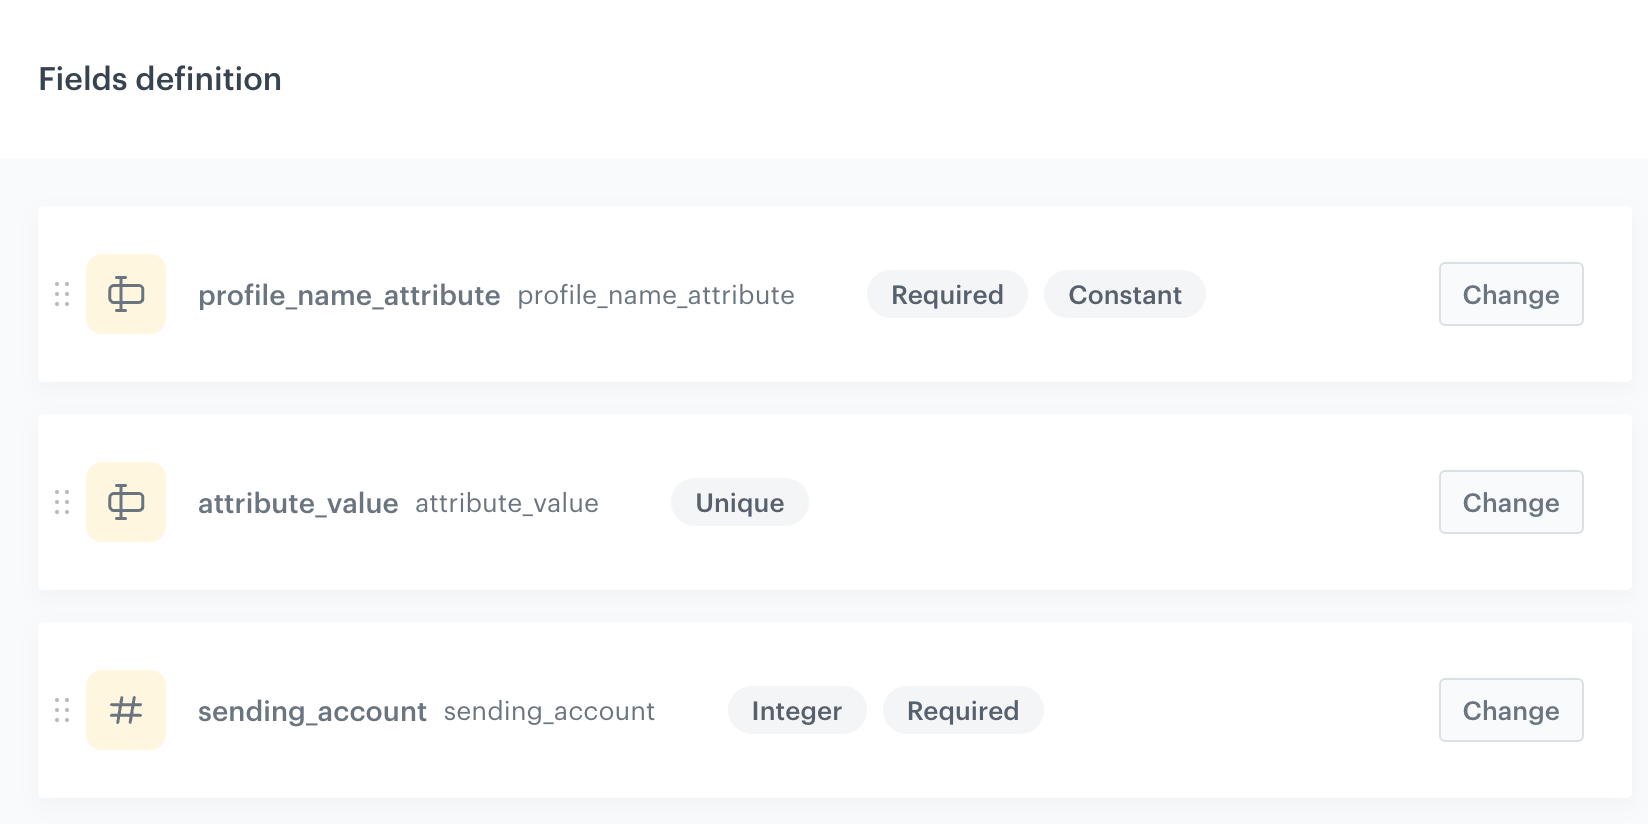
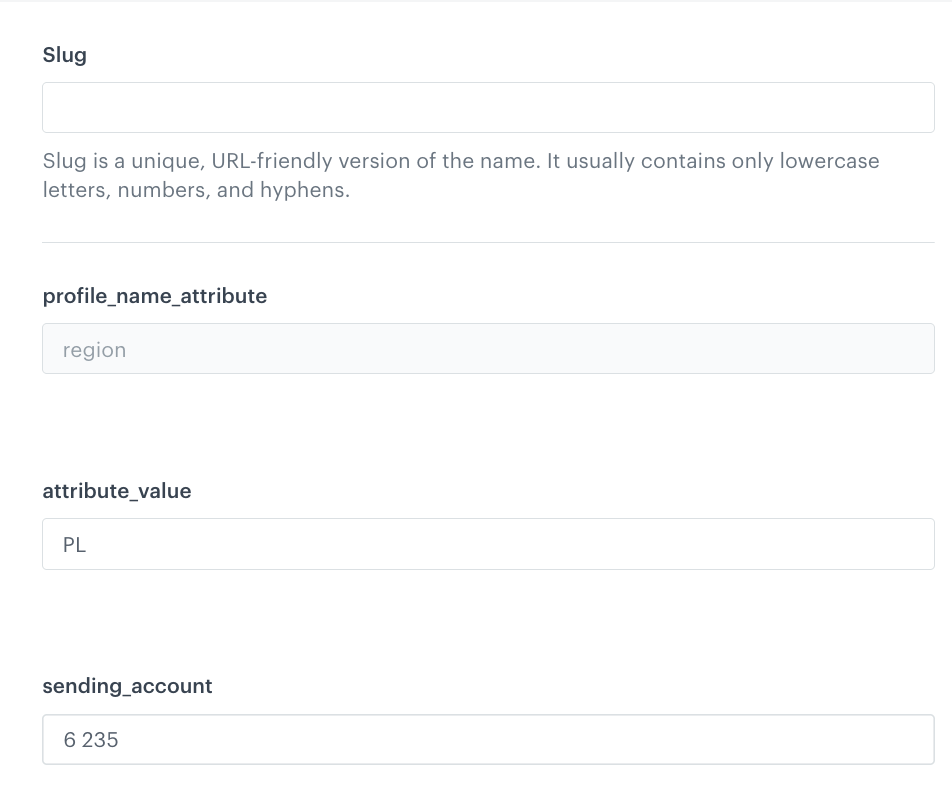
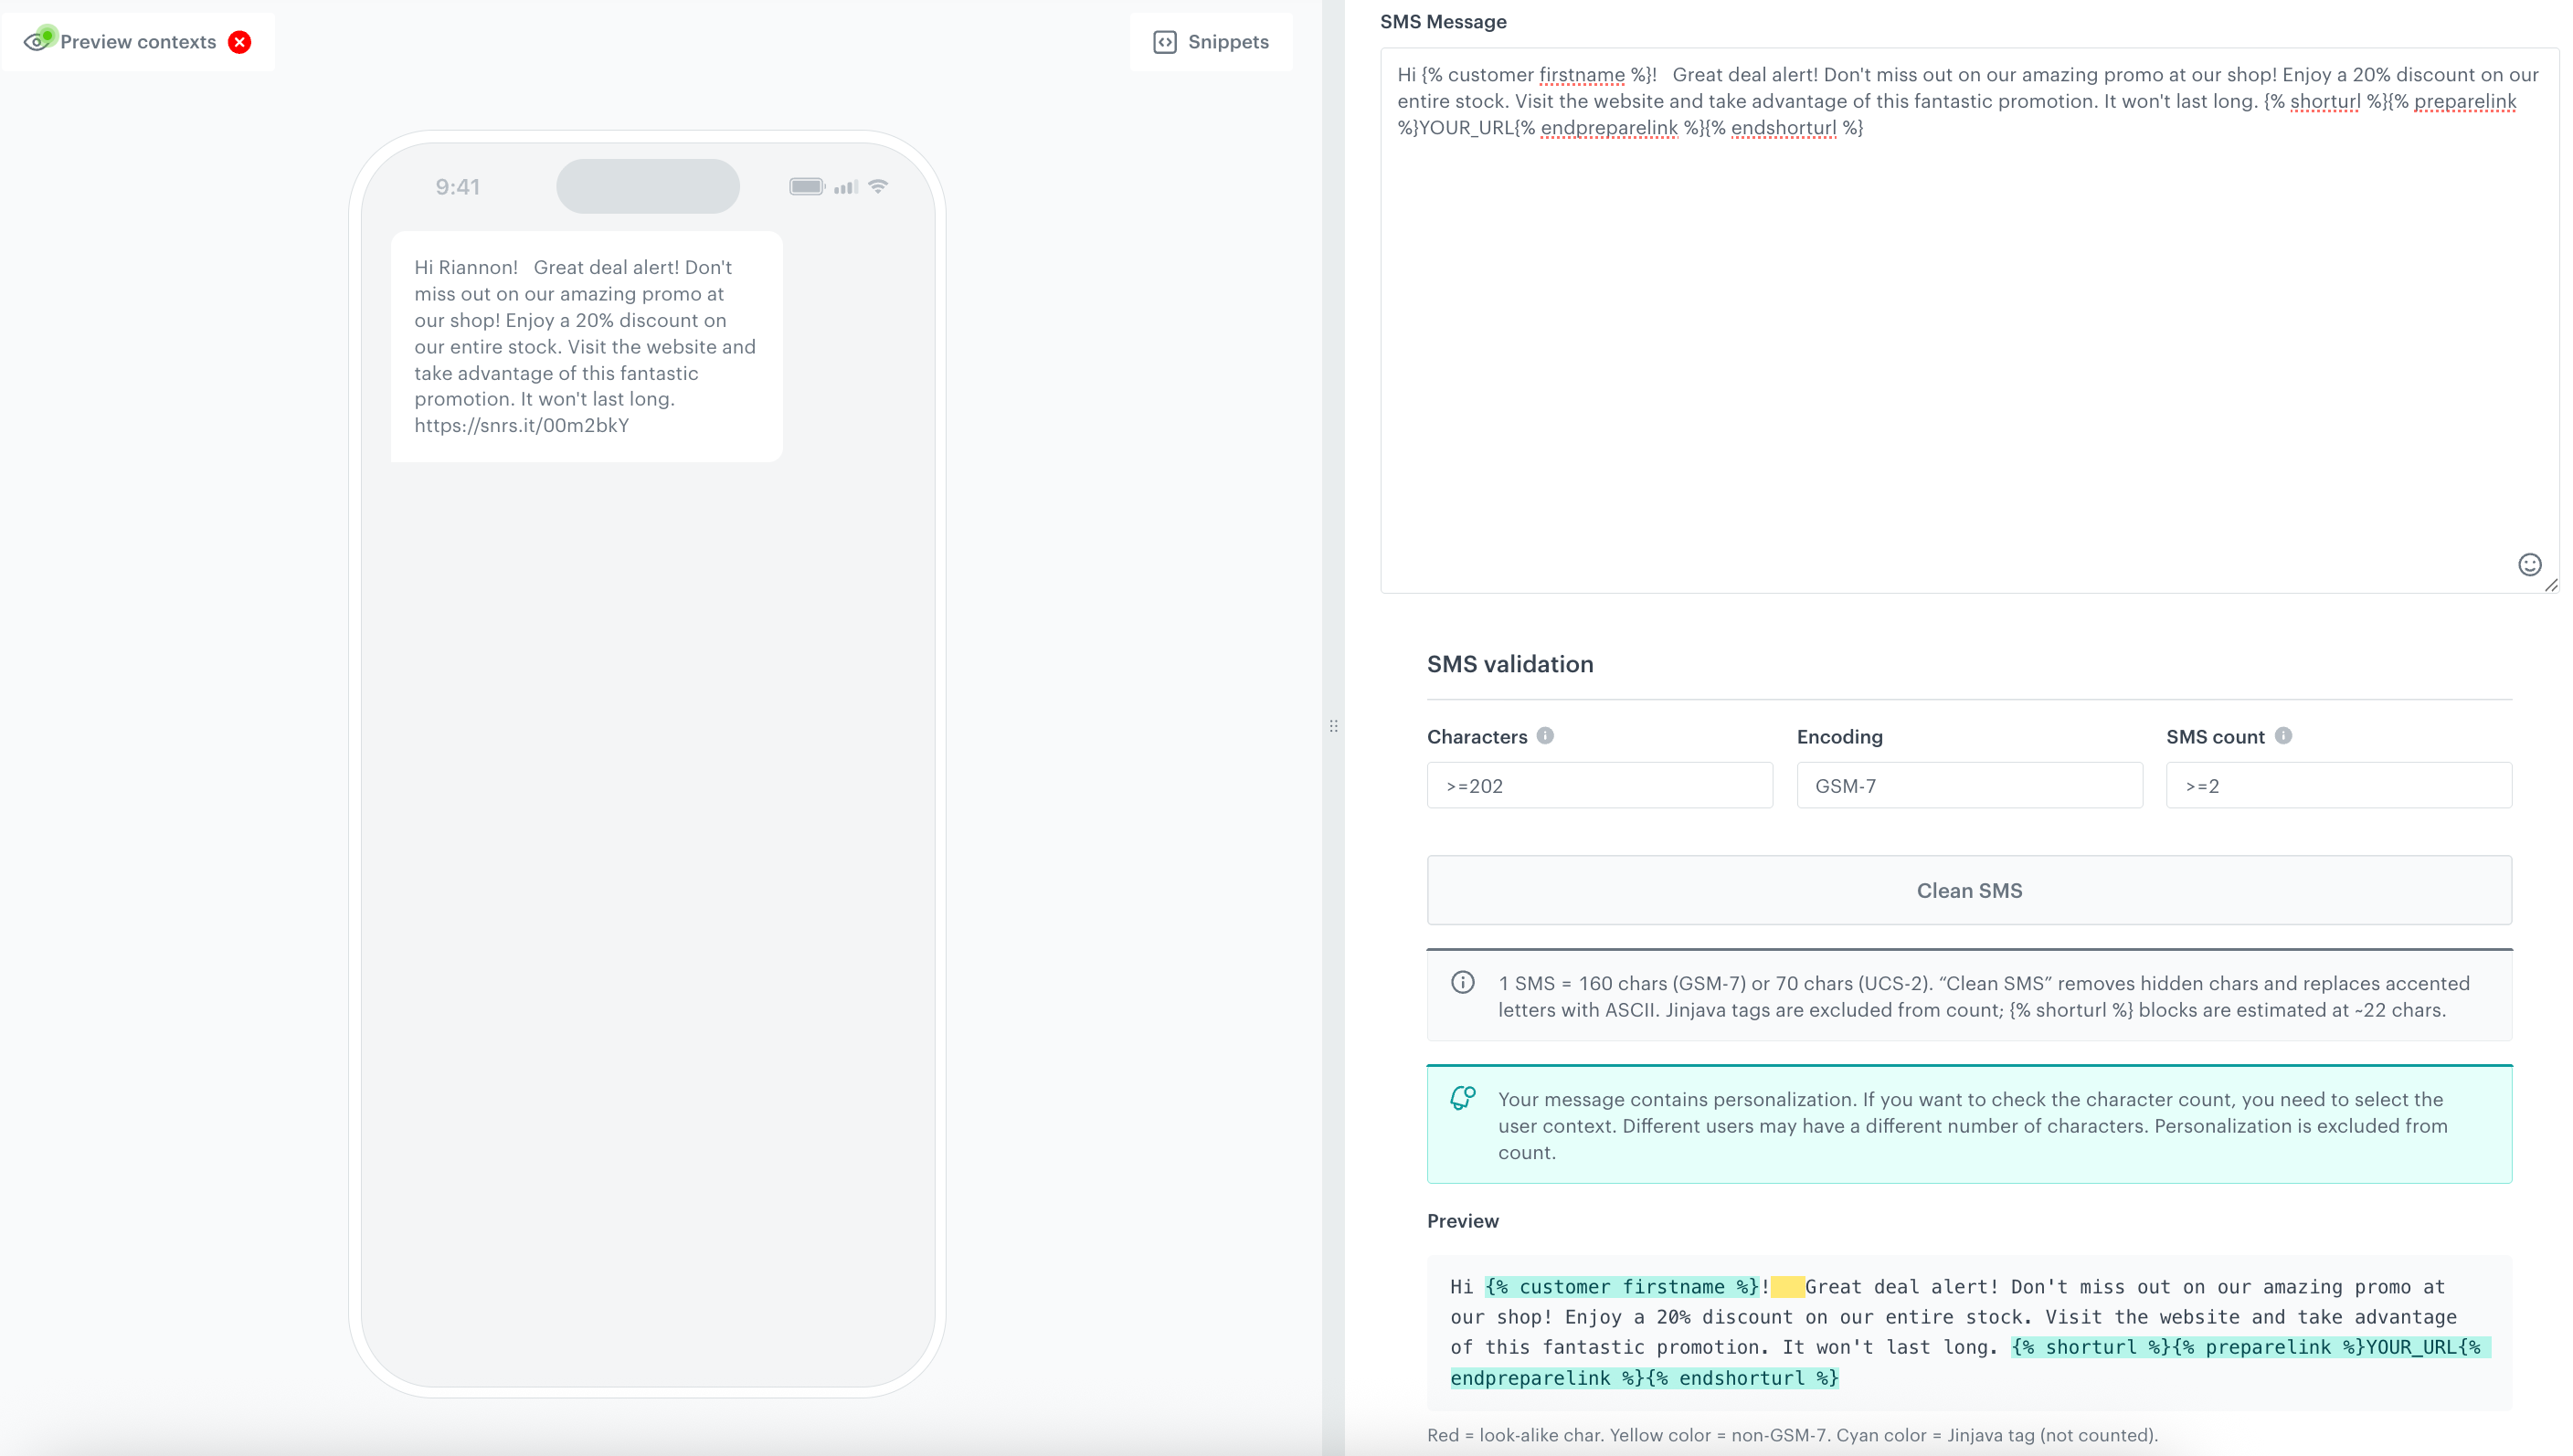
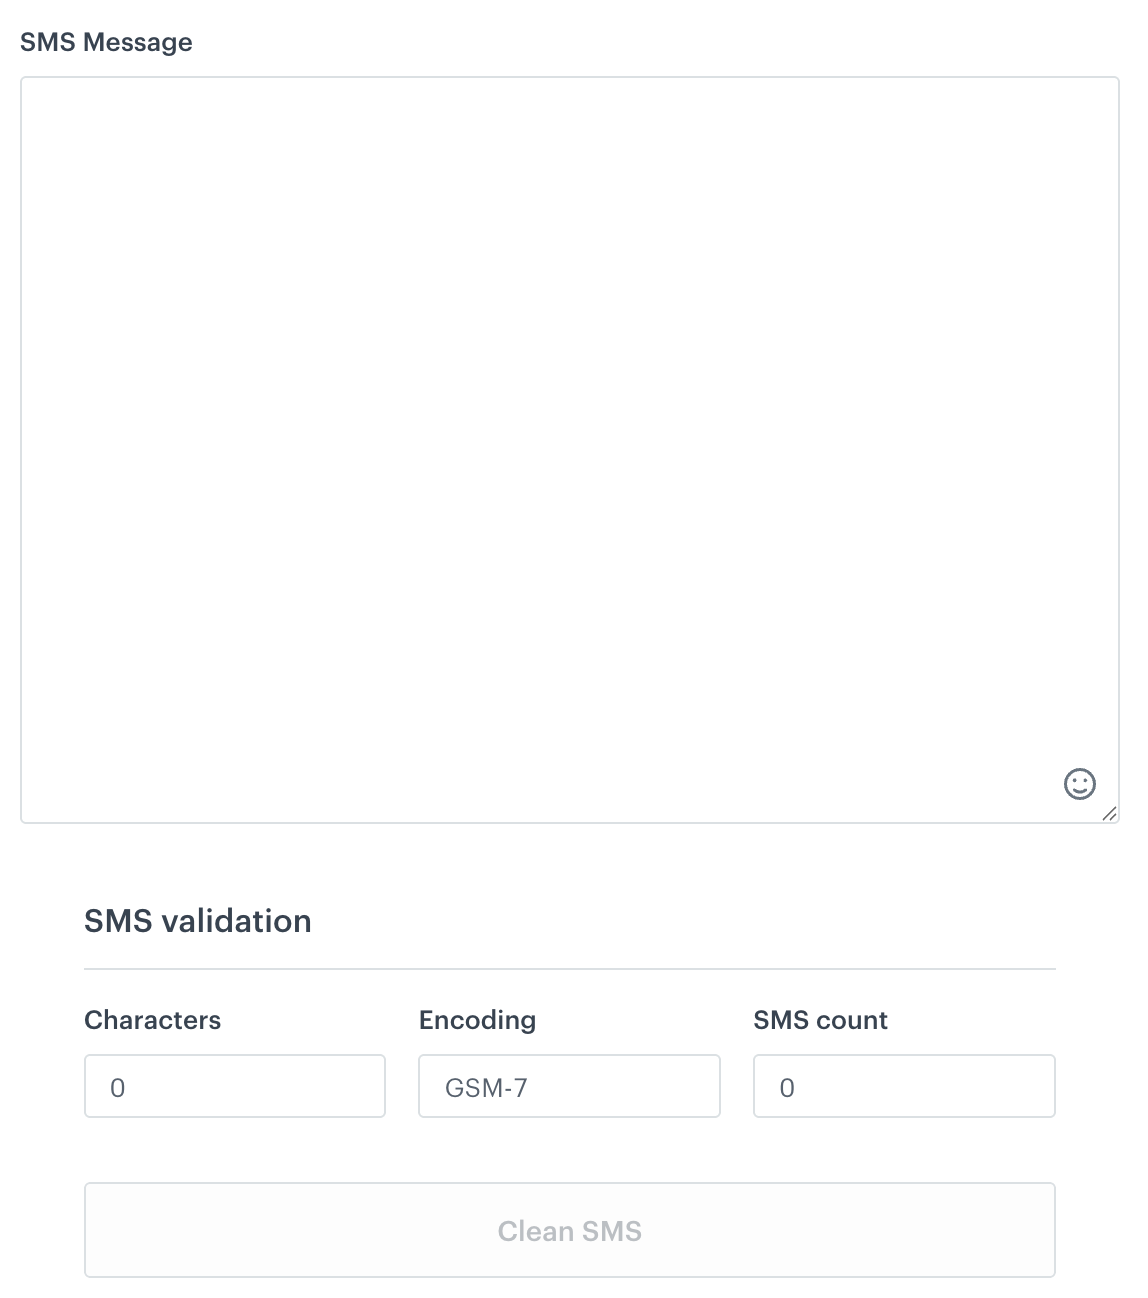
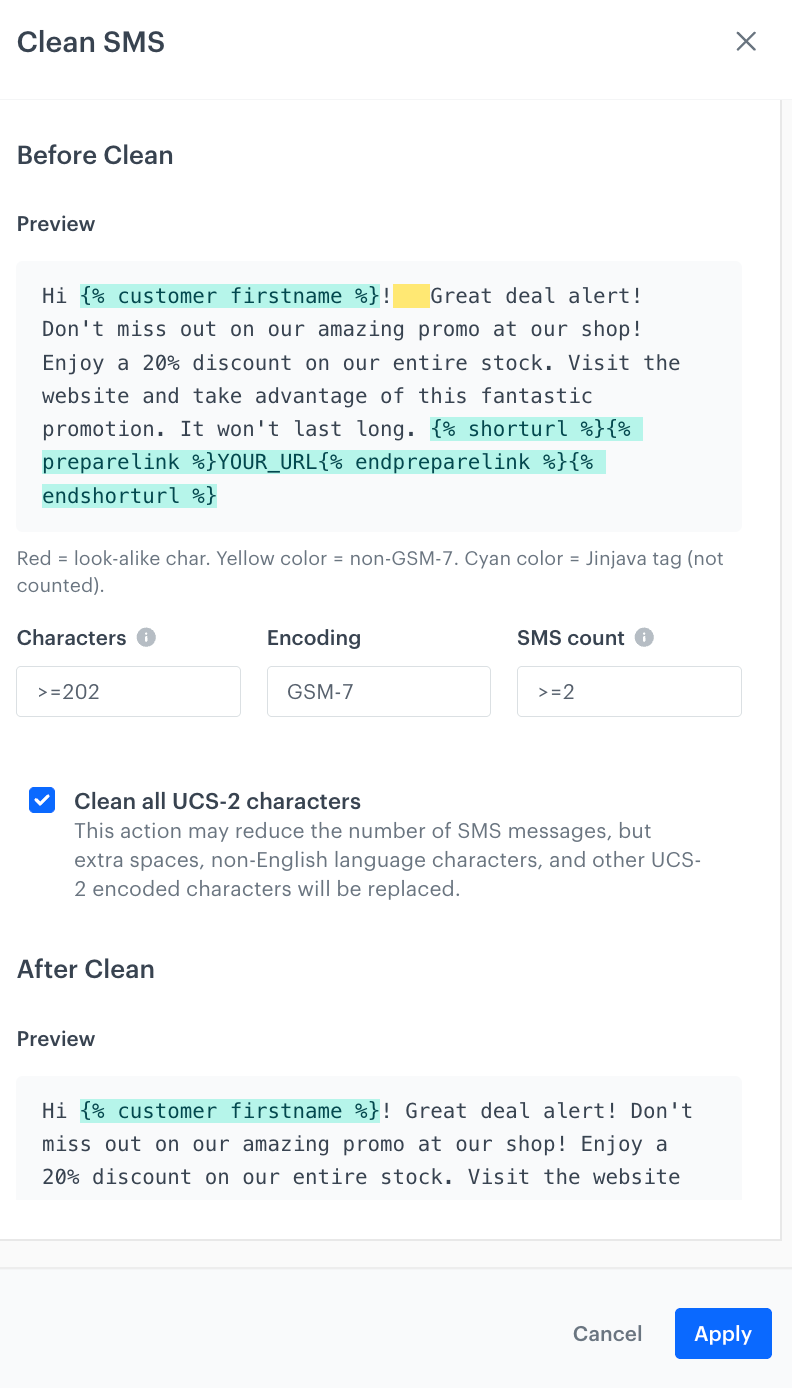

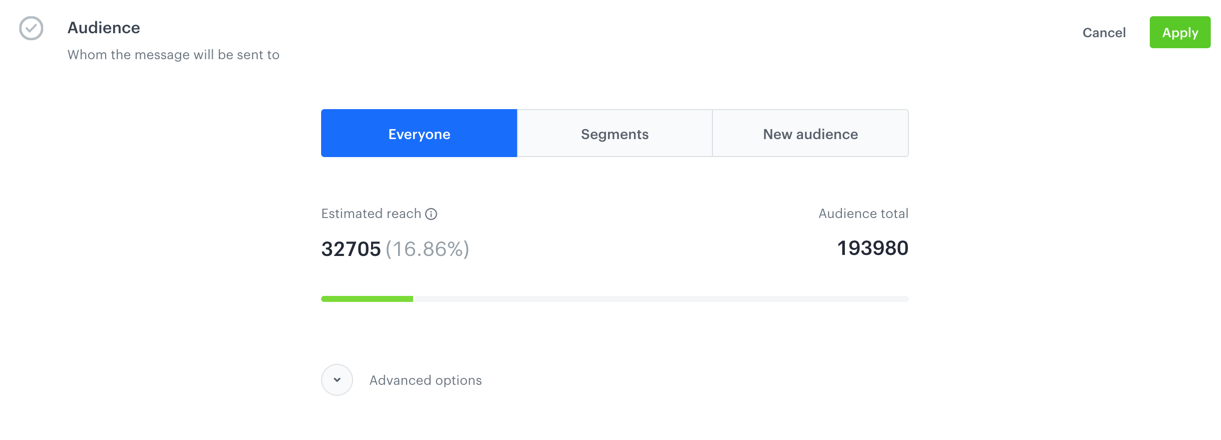
 tab.
5. Select **Is false**.
tab.
5. Select **Is false**.
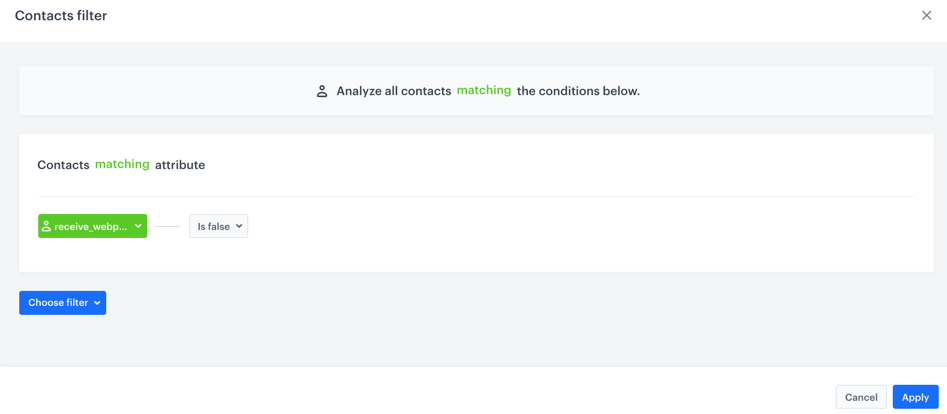
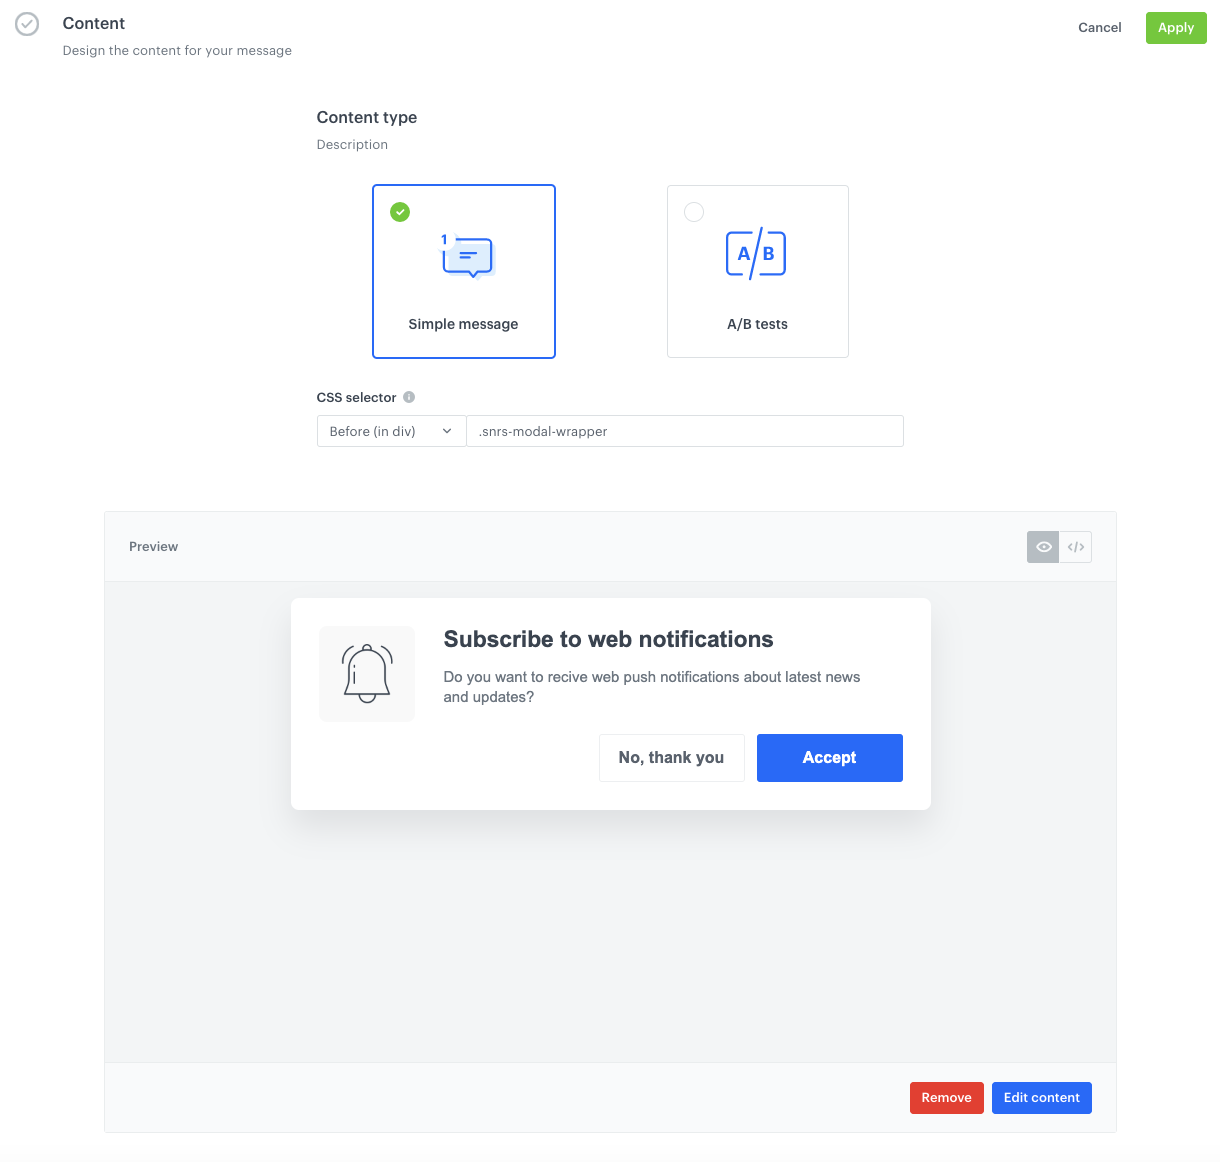
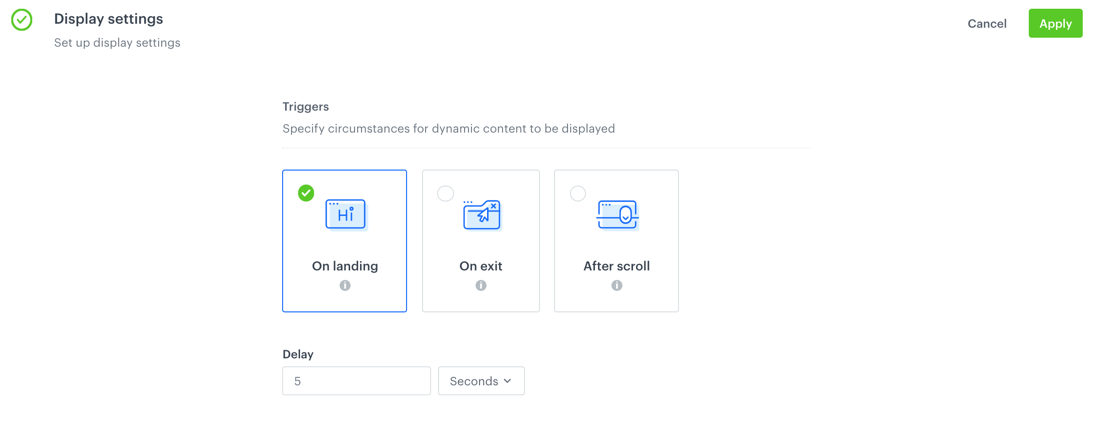
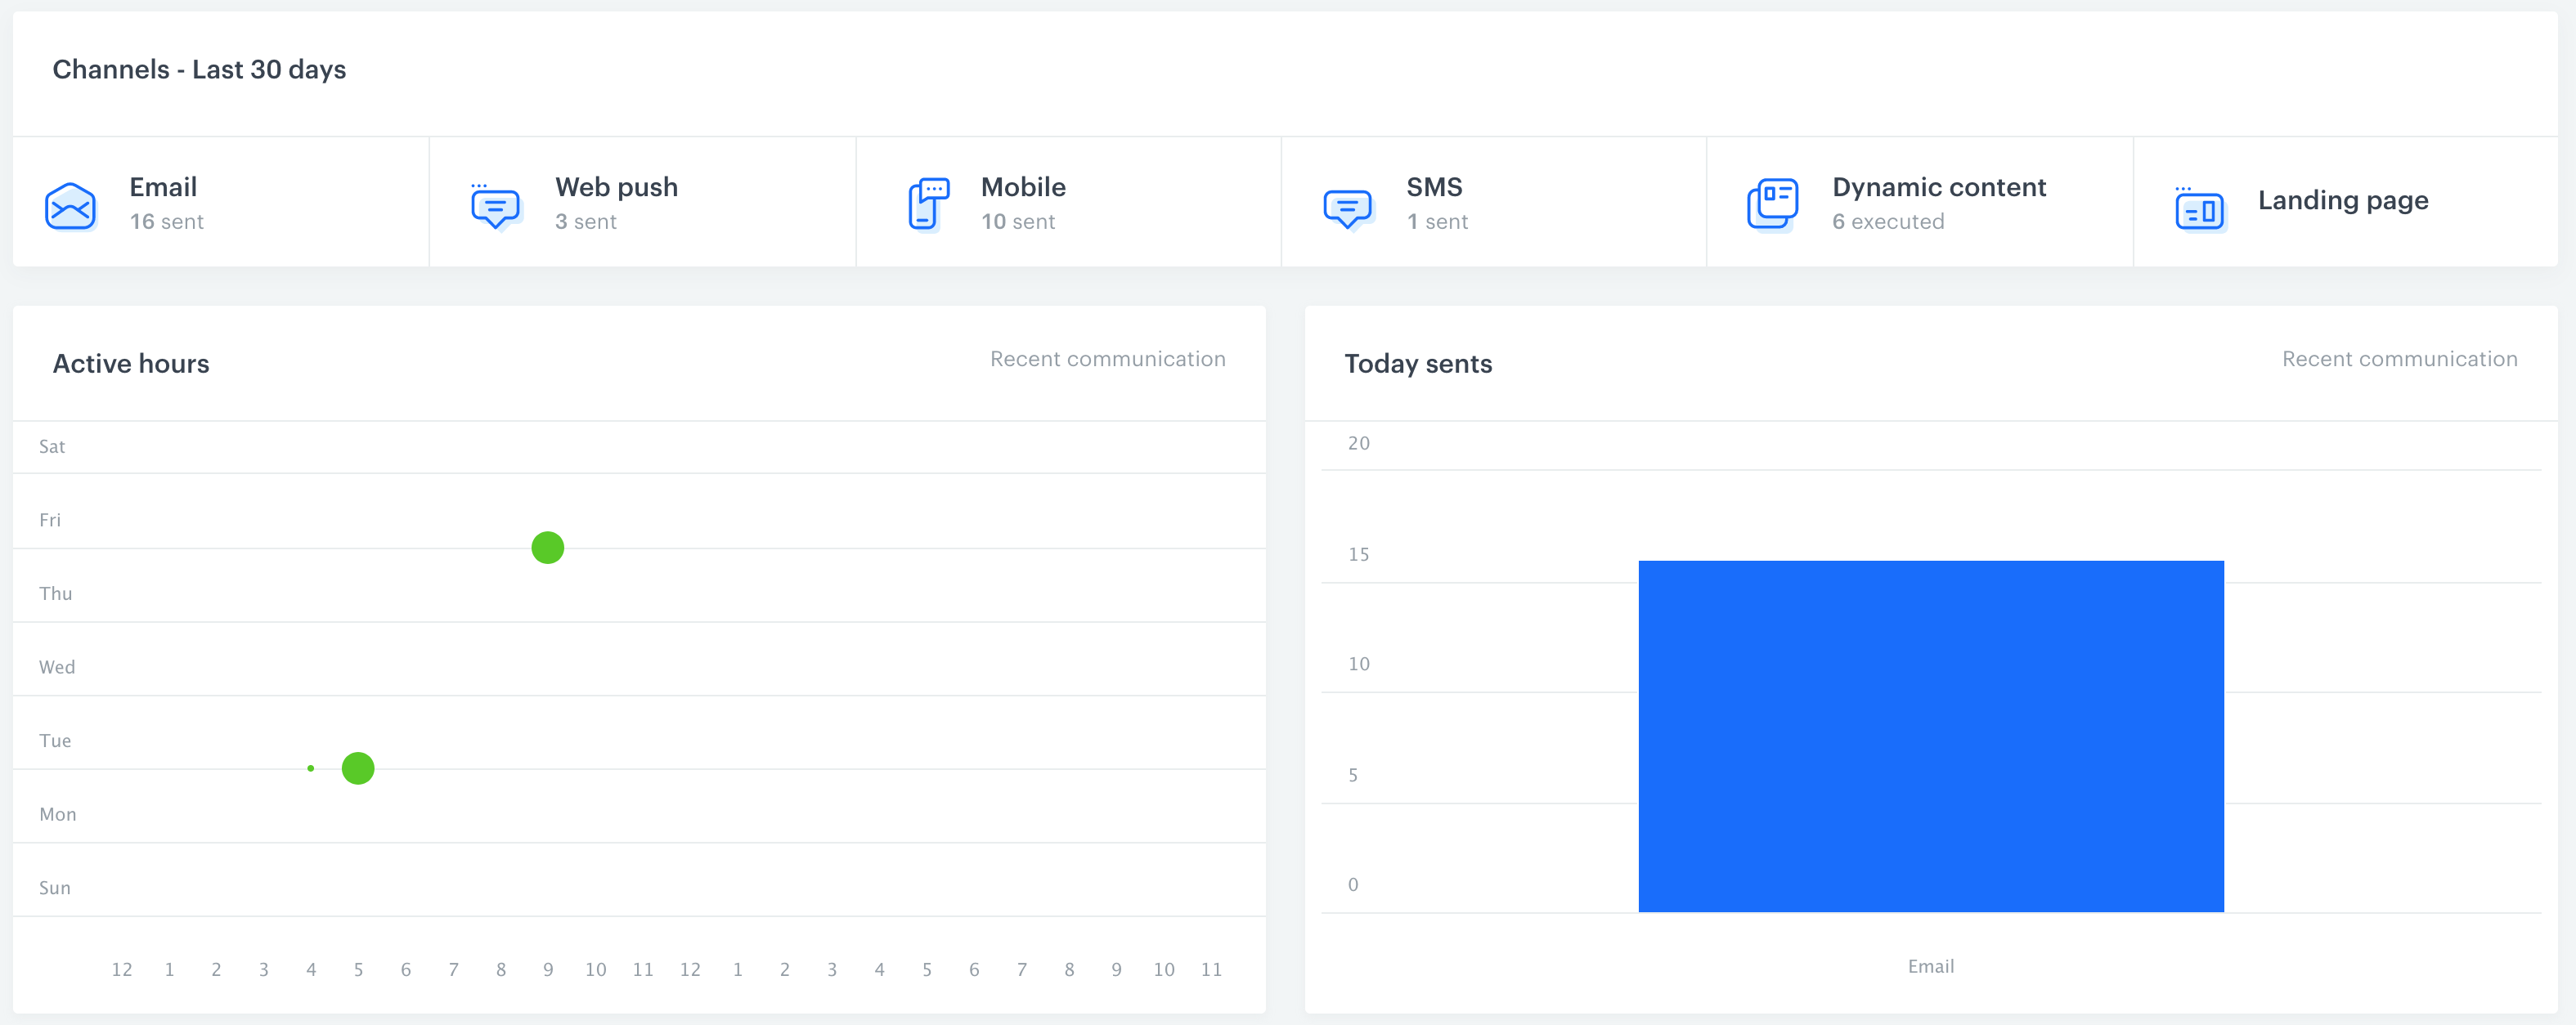
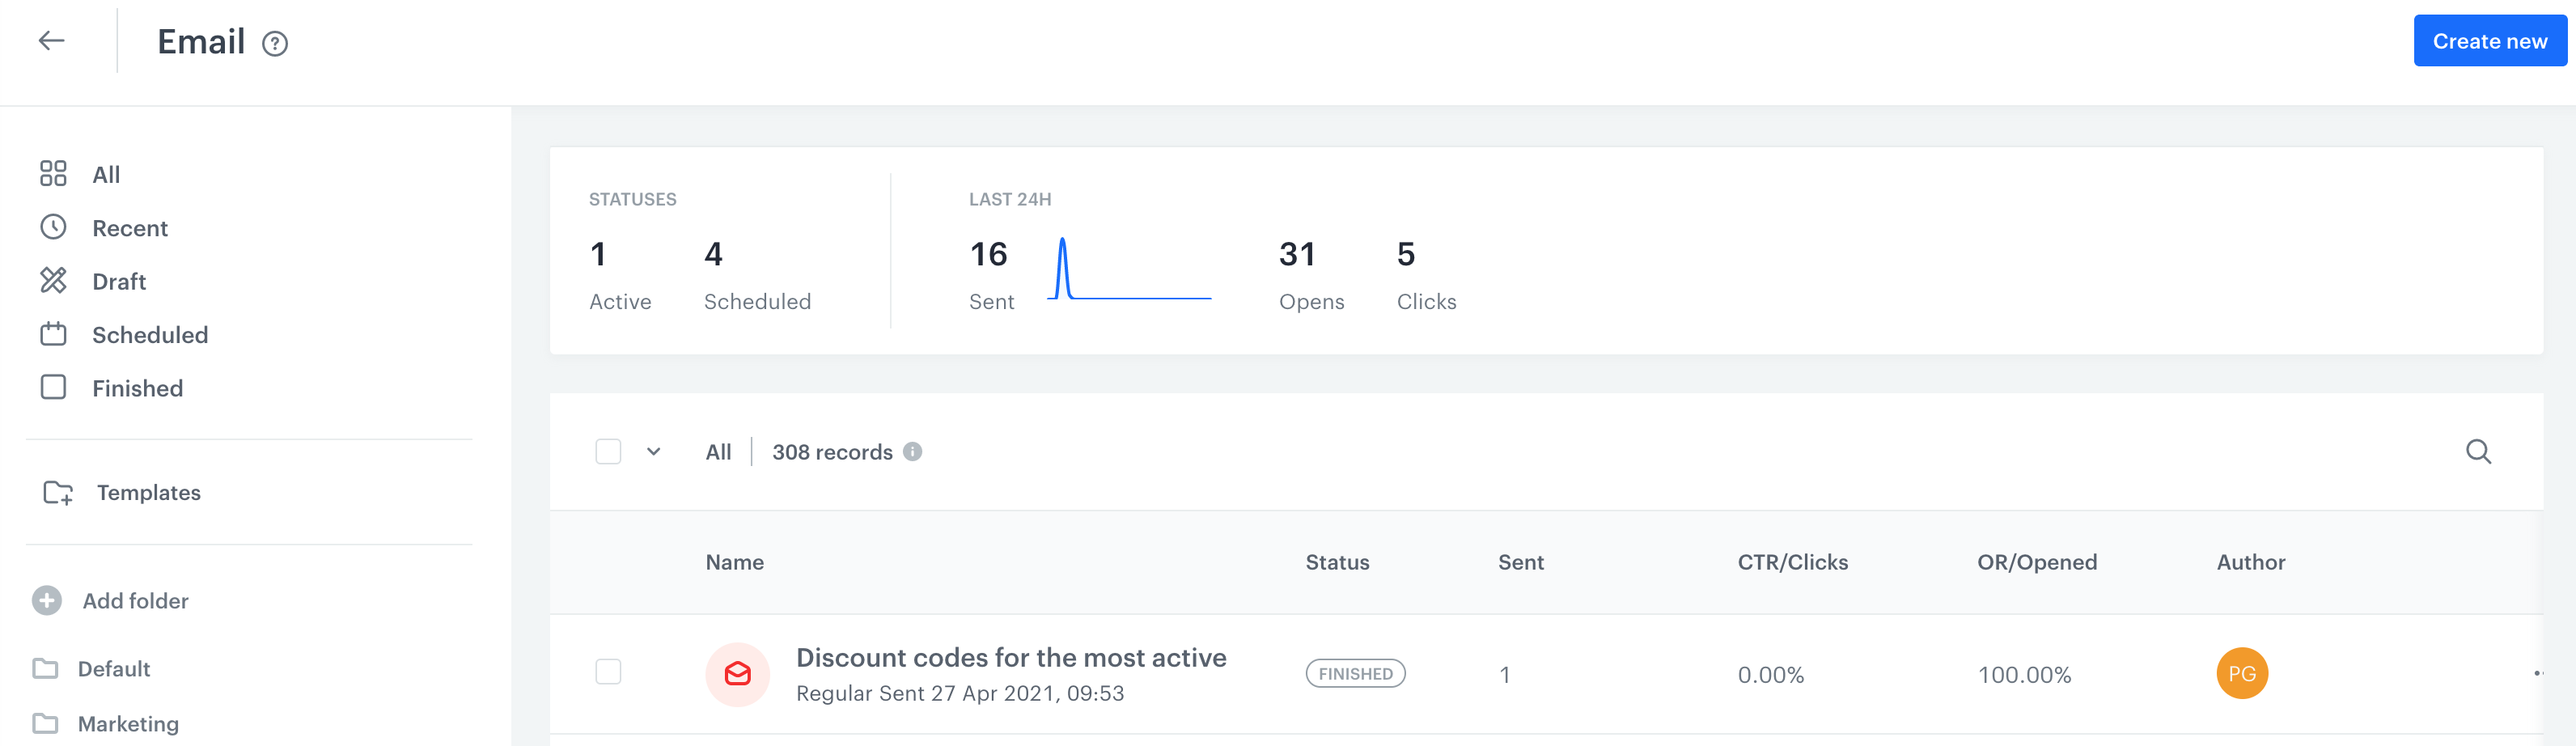
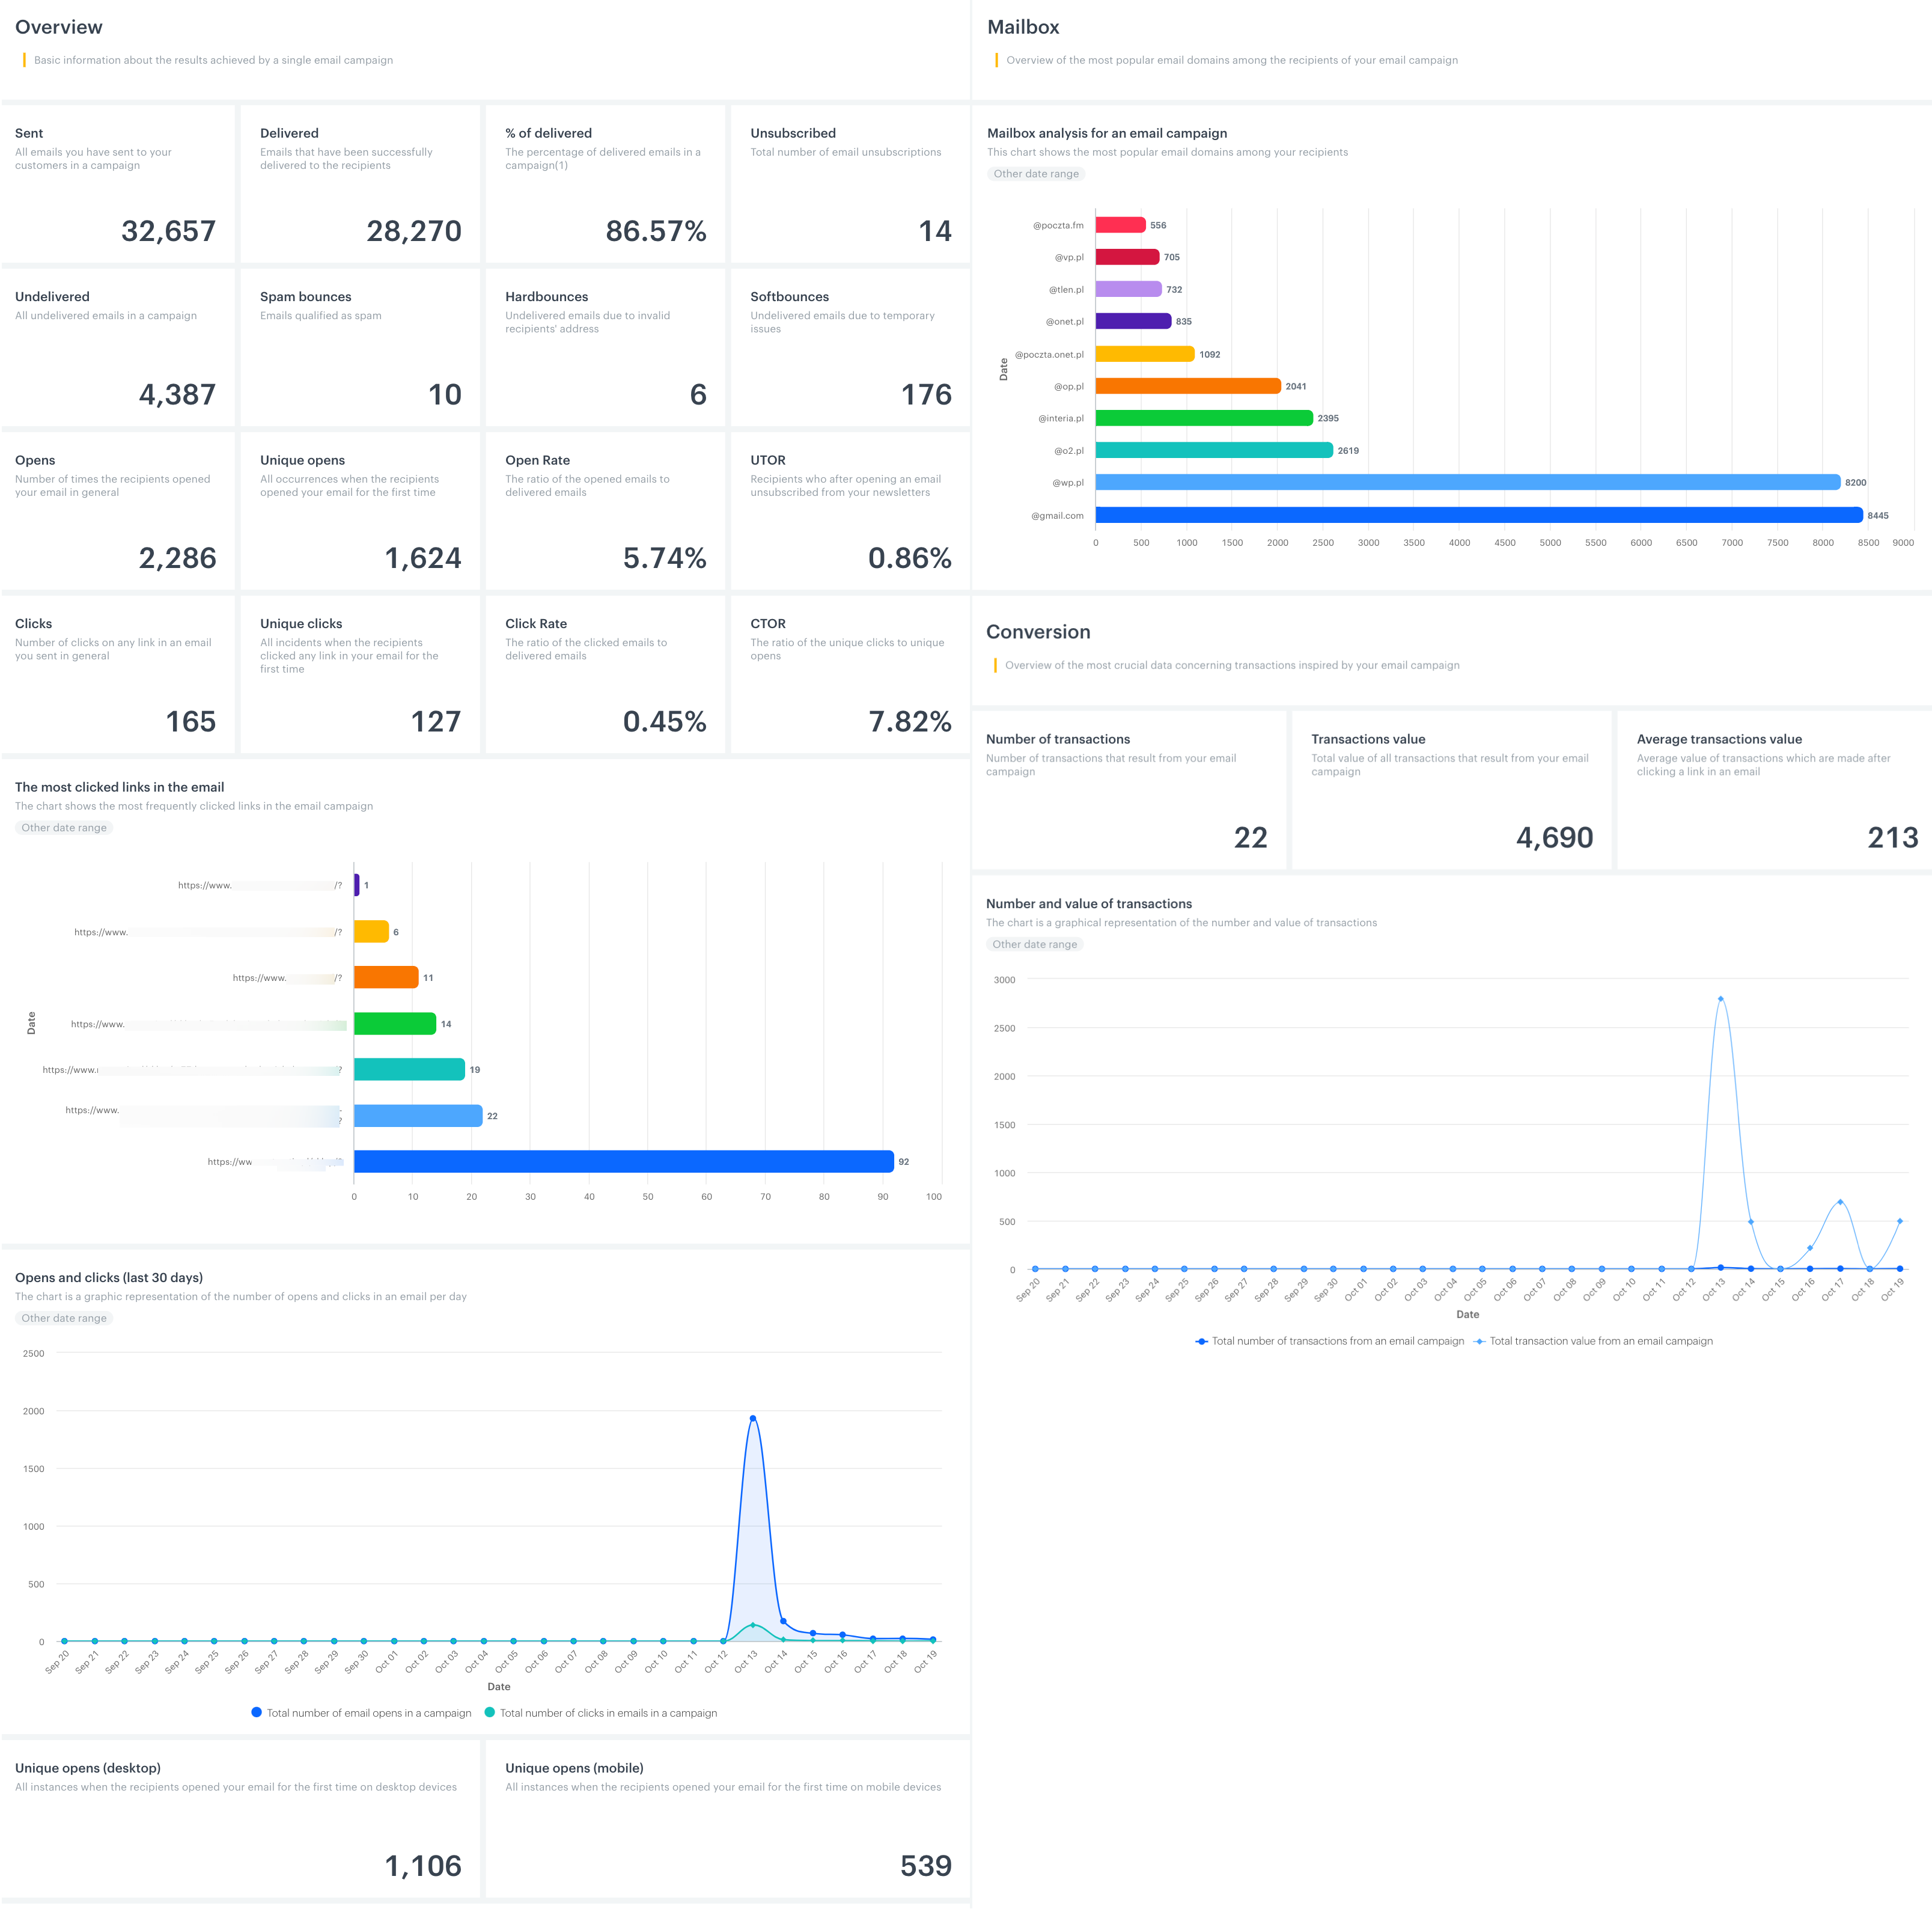
 **Automation Hub > Workflows**.
2. On the list of emails, click the name of the active or stopped workflow that contains the Send Email node.
**Result**: You are directed to the overview of the workflow.
4. Hover a mouse cursor over the Send Email node.
## Events generated by email communication
See [Email event reference](/docs/assets/events/event-reference/email).
# Web Push
Web push notifications allow you to maintain communication with customers through a web browser. The unobtrusive character of web push notifications will keep your message away from spam folders or ad blocking software. The notifications will always be displayed to users who have agreed to receive them.
The following combinations of operating systems and browsers are supported for web push notifications:
- Windows: Chrome, Edge, Firefox, Opera
- macOS: Firefox, Chrome, Edge, Opera
- Android: Chrome, Samsung Internet, Firefox, Brave
**Automation Hub > Workflows**.
2. On the list of emails, click the name of the active or stopped workflow that contains the Send Email node.
**Result**: You are directed to the overview of the workflow.
4. Hover a mouse cursor over the Send Email node.
## Events generated by email communication
See [Email event reference](/docs/assets/events/event-reference/email).
# Web Push
Web push notifications allow you to maintain communication with customers through a web browser. The unobtrusive character of web push notifications will keep your message away from spam folders or ad blocking software. The notifications will always be displayed to users who have agreed to receive them.
The following combinations of operating systems and browsers are supported for web push notifications:
- Windows: Chrome, Edge, Firefox, Opera
- macOS: Firefox, Chrome, Edge, Opera
- Android: Chrome, Samsung Internet, Firefox, Brave
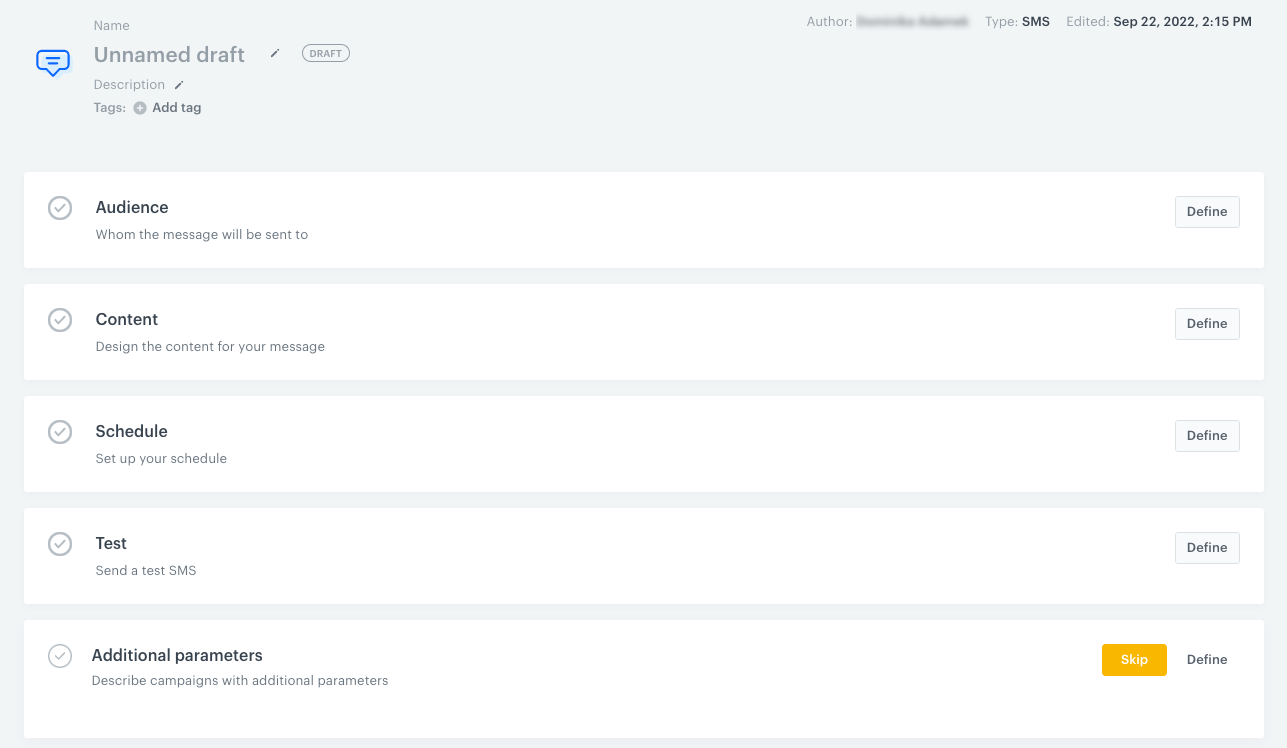
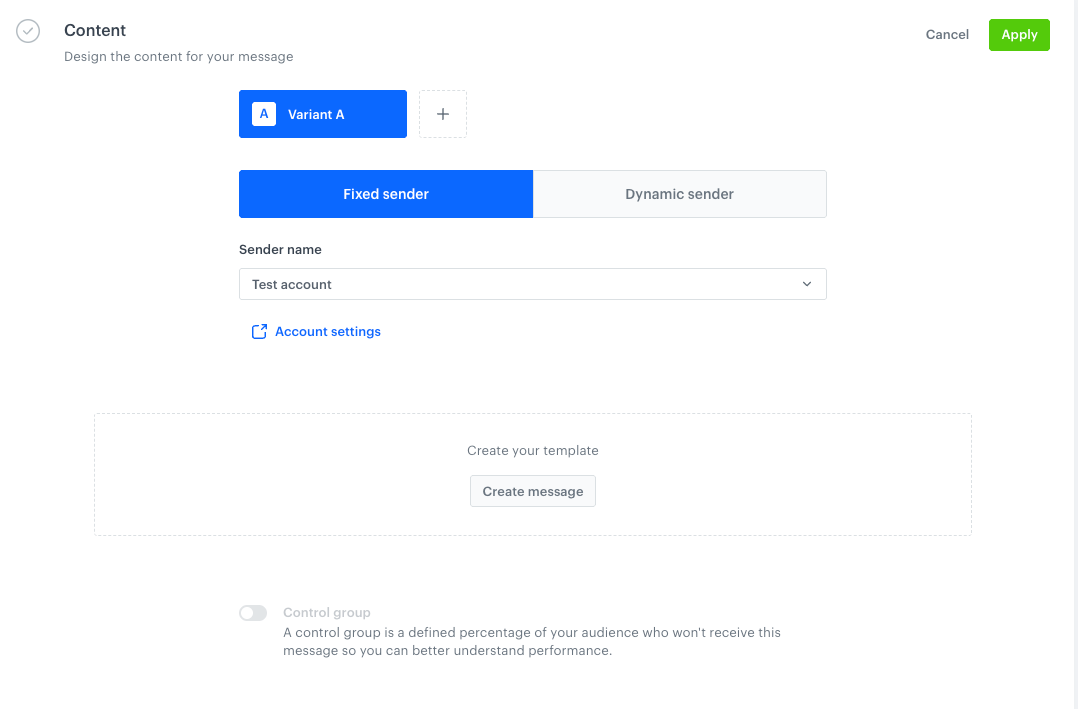
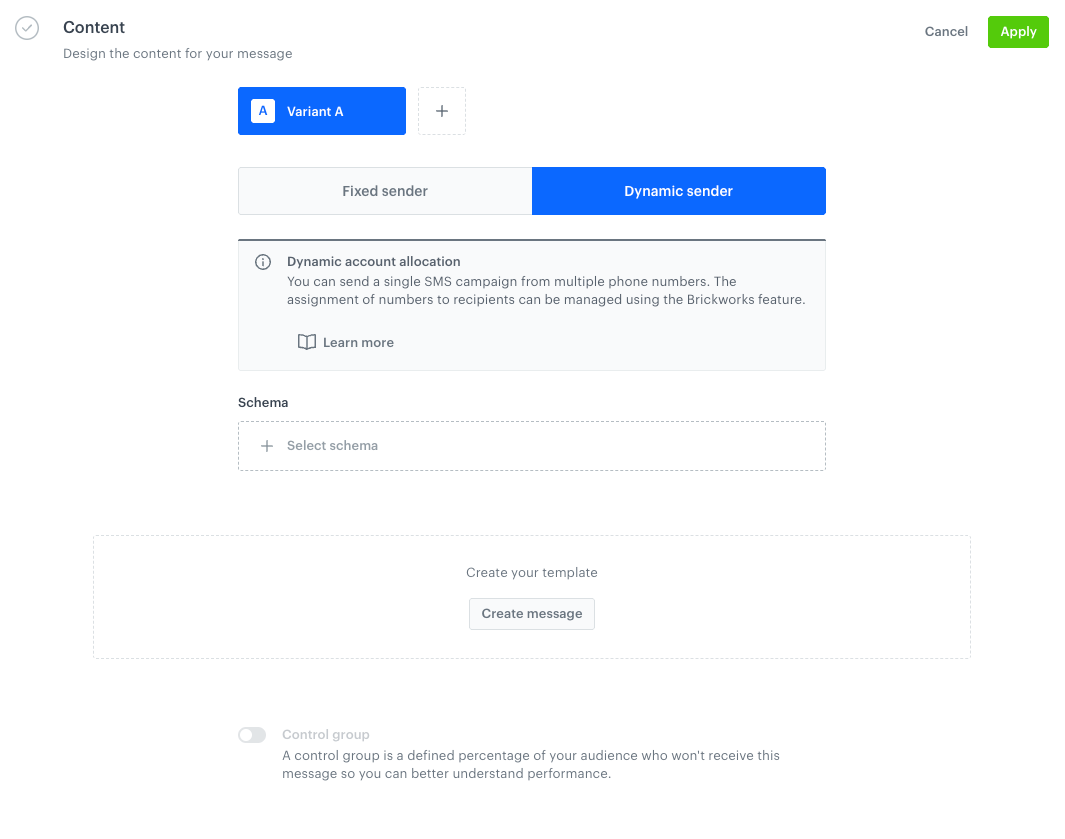
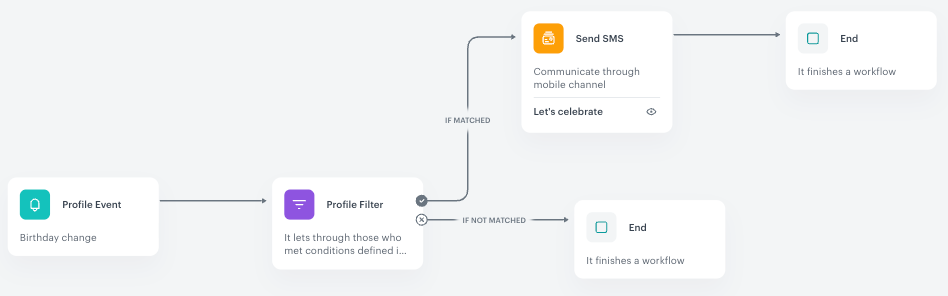
 Inserts button.