Promote a brand in recommendations
You can tweak the results of recommendations by increasing the probability of certain brands appearing in the recommendation frames. Thanks to this, you can offer a brand to promote their items more often than those from their competition.
This can be done by using recommendation boosting to promote items from those brands. Boosting rules are built using the same editor as the filters, but unlike filtering, boosting does not entirely exclude items that do not meet the conditions - it only tells the AI model to assign more weight to the brand parameter when calculating the final recommendation score (relevance to a particular customer) of an item.
This is different from the AI-Powered Personalized Brand Recommendations on Category Pages use case, in which the other brands are completely removed from the recommendation.
In this use case example, items from two brands will be promoted in the recommendation results.
Prerequisites
- Recommended: Become familiar with creating recommendations.
This article does not explain every step of creating a recommendation in detail. - The item catalog must include an attribute that denotes the brand; the brands you want to promote must exist in that attribute’s values.
Creating the recommendation
Choose source, type, and add slots
- Go to
 Communication > Recommendations > Add recommendation.
 - In the Type & Items feed section:
- Select an item catalog.
- Select a recommendation type.
Tip: Boosting can be used with all recommendation types.
- Click Apply.
- In the Items section, configure at least one slot and click Apply.
Build the boosting rule
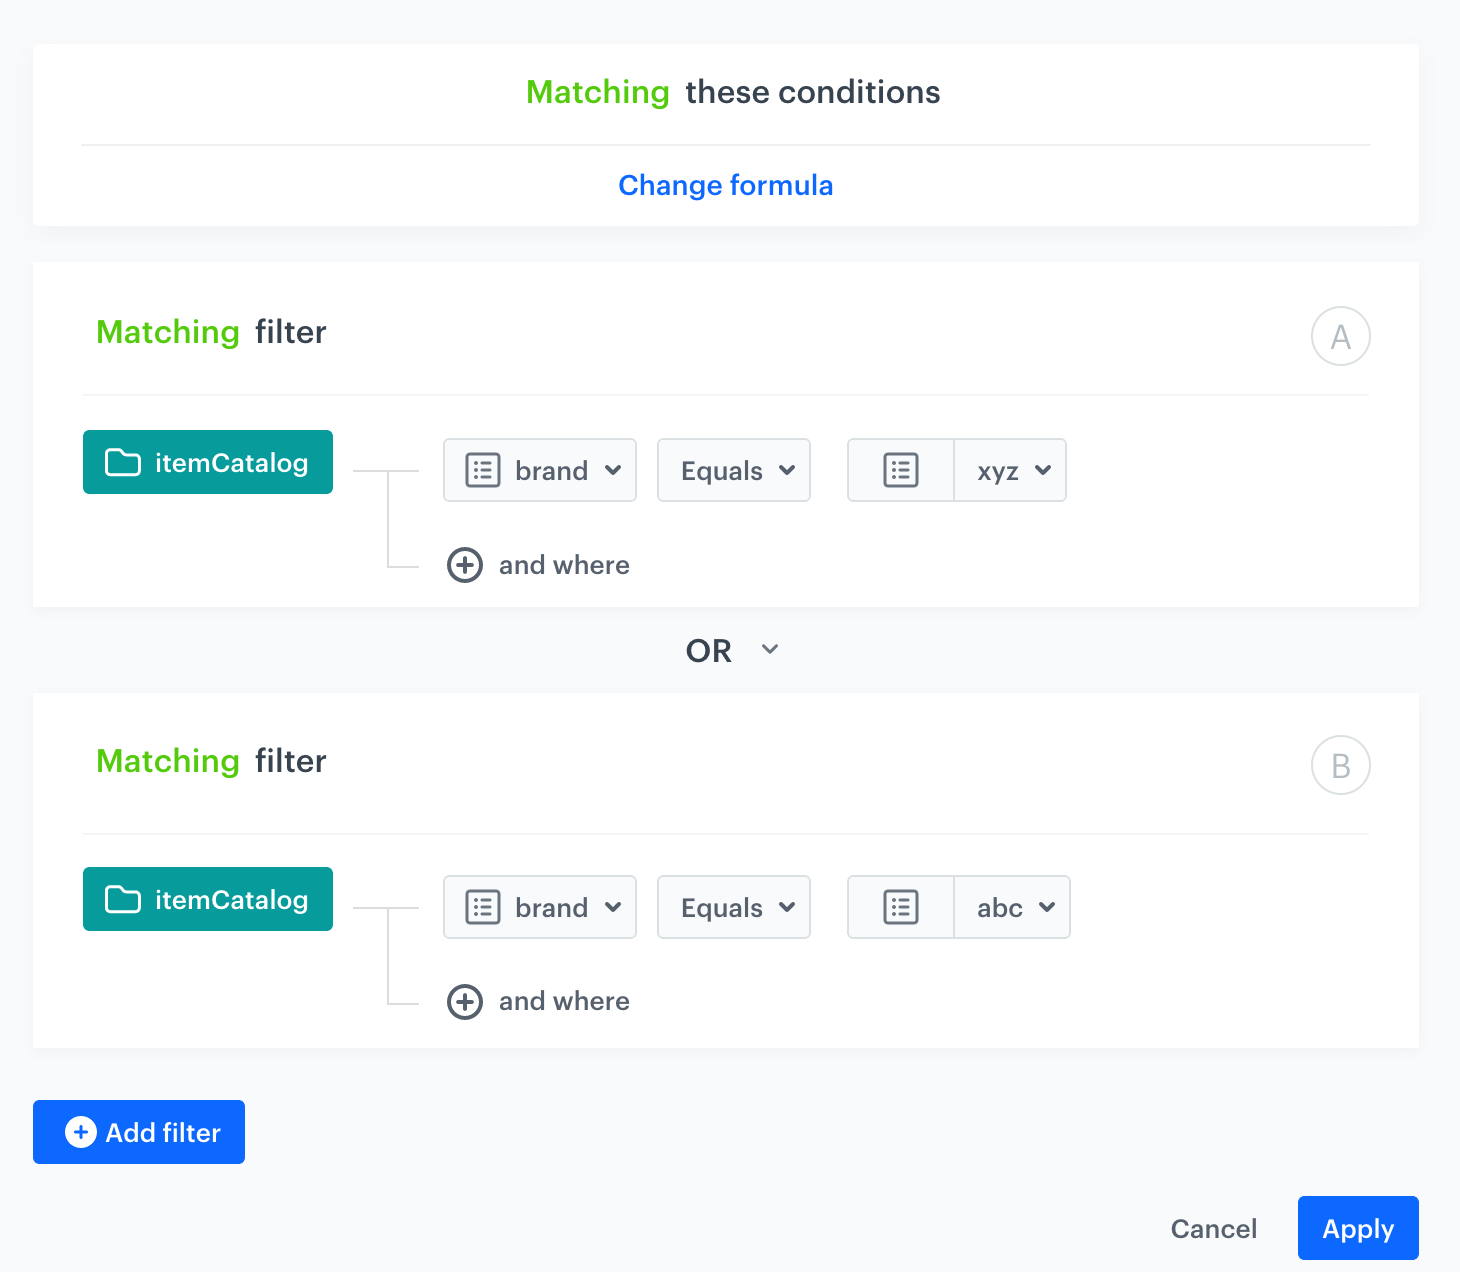
In this part of the process, you build a rule that promotes an item if its brand is XYZ or ABC (brand names in filters are not case-sensitive).
- In the Boosting section, click Define.
- Click Add rule.
- Click Define rule and select Visual Builder.
Result The Visual Builder window opens. - From the Select attribute drop-down list, select the brand attribute.
You can use the search field. - From the Operator drop-down list, select Equals.
- From the Select value drop-down list, select xyz.
- Click Add filter.
- Leave the operator between the filters at default (OR).
- Add the filter for brand abc by repeating steps 4-6 and selecting abc as the value in step 6.
- Click Apply.
- In the Promote/Demote selector, select Promote (default value).
- Use the slider to adjust how much you want the rule to affect the results.

The boosting strength slider - Save the Boosting section settings by clicking Apply.
Tip: After applying the settings, you can use the Preview tab (available in the upper left part of the recommendation creator screen) to see how your rule changed the recommendation result. If necessary, you can return to the settings and adjust the boosting strength to meet your expectations.

Additional settings and saving
- Configure the Additional settings section and click Apply.
- Save the recommendation.
What’s next
You can use the ID of the recommendation and inject it with a snippet in other types of communication, such as:
- dynamic content - this way you can show the recommendations on your website.
- email - this way you can send out recommended items through emails.
- mobile application - you can use documents to build your own mobile app and show the recommended items.
- mobile push - you can send recommendations through notifications in your mobile application.
- web push - this way you can send notifications to your customers through a web browser.
- SMS - this way you can reach your customers with recommendations on their mobile.
Check the use case set up on the Synerise Demo workspace
In the Synerise Demo workspace, you can check:
If you’re our partner or client, you already have automatic access to the Synerise Demo workspace (1590), where you can explore all the configured elements of this use case and copy them to your workspace.
If you’re not a partner or client yet, we encourage you to fill out the contact form to schedule a meeting with our representatives. They’ll be happy to show you how our demo works and discuss how you can apply this use case in your business.
