To create a flexible in-app promotional experience, start by building a promotion layout schema that stores all necessary details for each offer—such as descriptions, expiration dates, images, button text, and target URLs. Each promotion is saved as a separate record, which makes managing and updating promotions simple.
While you can display a single promotion record in an in-app message, the main advantage comes from creating a schema retrieving a list of promotions that acts as a selector to retrieve multiple records from the promotion layout schema. This approach allows your app to present multiple promotion banners in various formats—such as a scrollable list, a carousel, or another layout based on your design and placement needs.
By organizing all promotional content within one schema, you ensure consistent messaging across channels, while still having full control over how many and which promotions are shown and where. Whether you display all promotions or select specific ones, this schema-driven setup offers precise control over promotion visibility and placement across different formats.
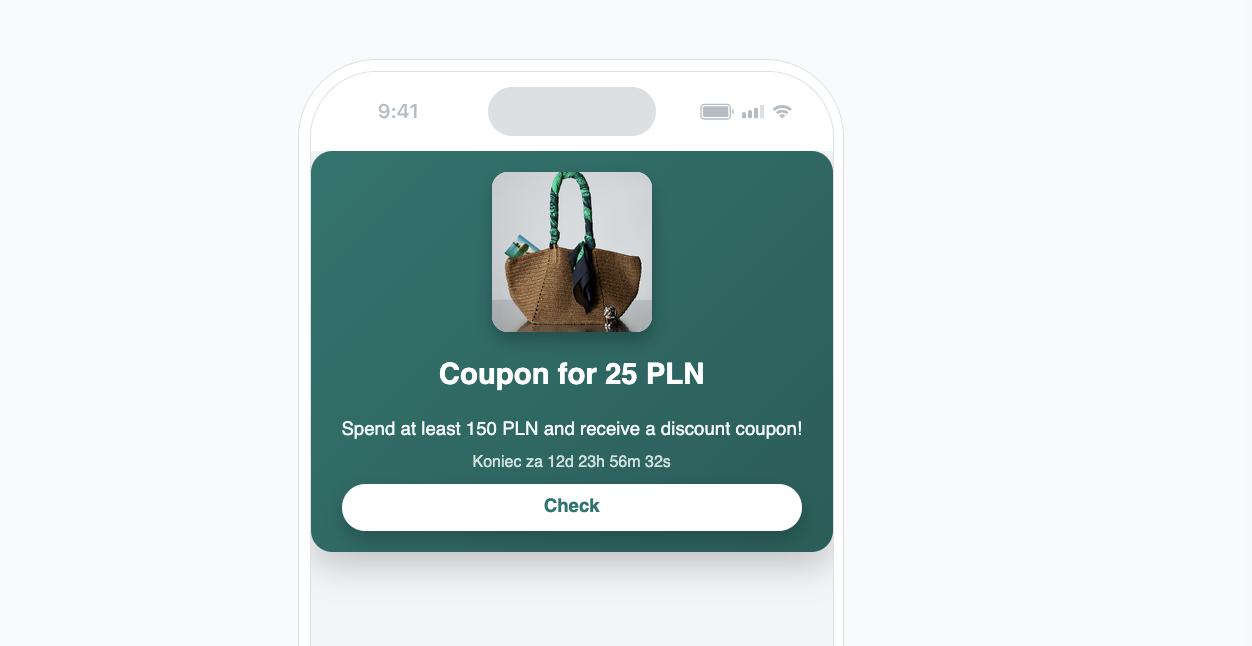
In this setup, a single in-app banner containing promotional information and a countdown timer will be shown when the user enters a specific category related to the promotion. The full list of promotional banners—displayed as a carousel or list—is intended to appear after a product is added to the cart.
Prerequisites
- Implement a tracking code into your website.
- Implement promotions in your mobile application and API.
- In Data Modeling Hub > Files, add an image or images which you will use in promotions.
Process
In this use case, you will go through the following steps:
- Schema with the promotion layout with banners with the end date and a link to the page with promotions.
- Create a record with promotion details.
- In-app campaign that displays a single promotion.
- Schema retrieving a list of promotions from the previous schema.
- Create the second record.
- In-app campaign that displays a list of promotions.
Schema with the promotion layout
In this section, you will create a schema with fields for information about specific promotion, CTA button and counter which counts the minutes till the end of the promotion. By defining fields here, you create a single place where product-related information is stored, updated, and reused across templates, campaigns, and runtime contexts. This schema will serve as a catalog of promotions because each record will be a separate promotion.
- Go to Data Modeling Hub > Schemas > New schema.
- Choose Simple Schema.
- Enter a name for the schema, in Display name for example Banner template. API names value is pre-filled with the value from Display name. The value in this field is the unique identifier used to reference this schema in API requests.
- Optionally, fill in the Description field.
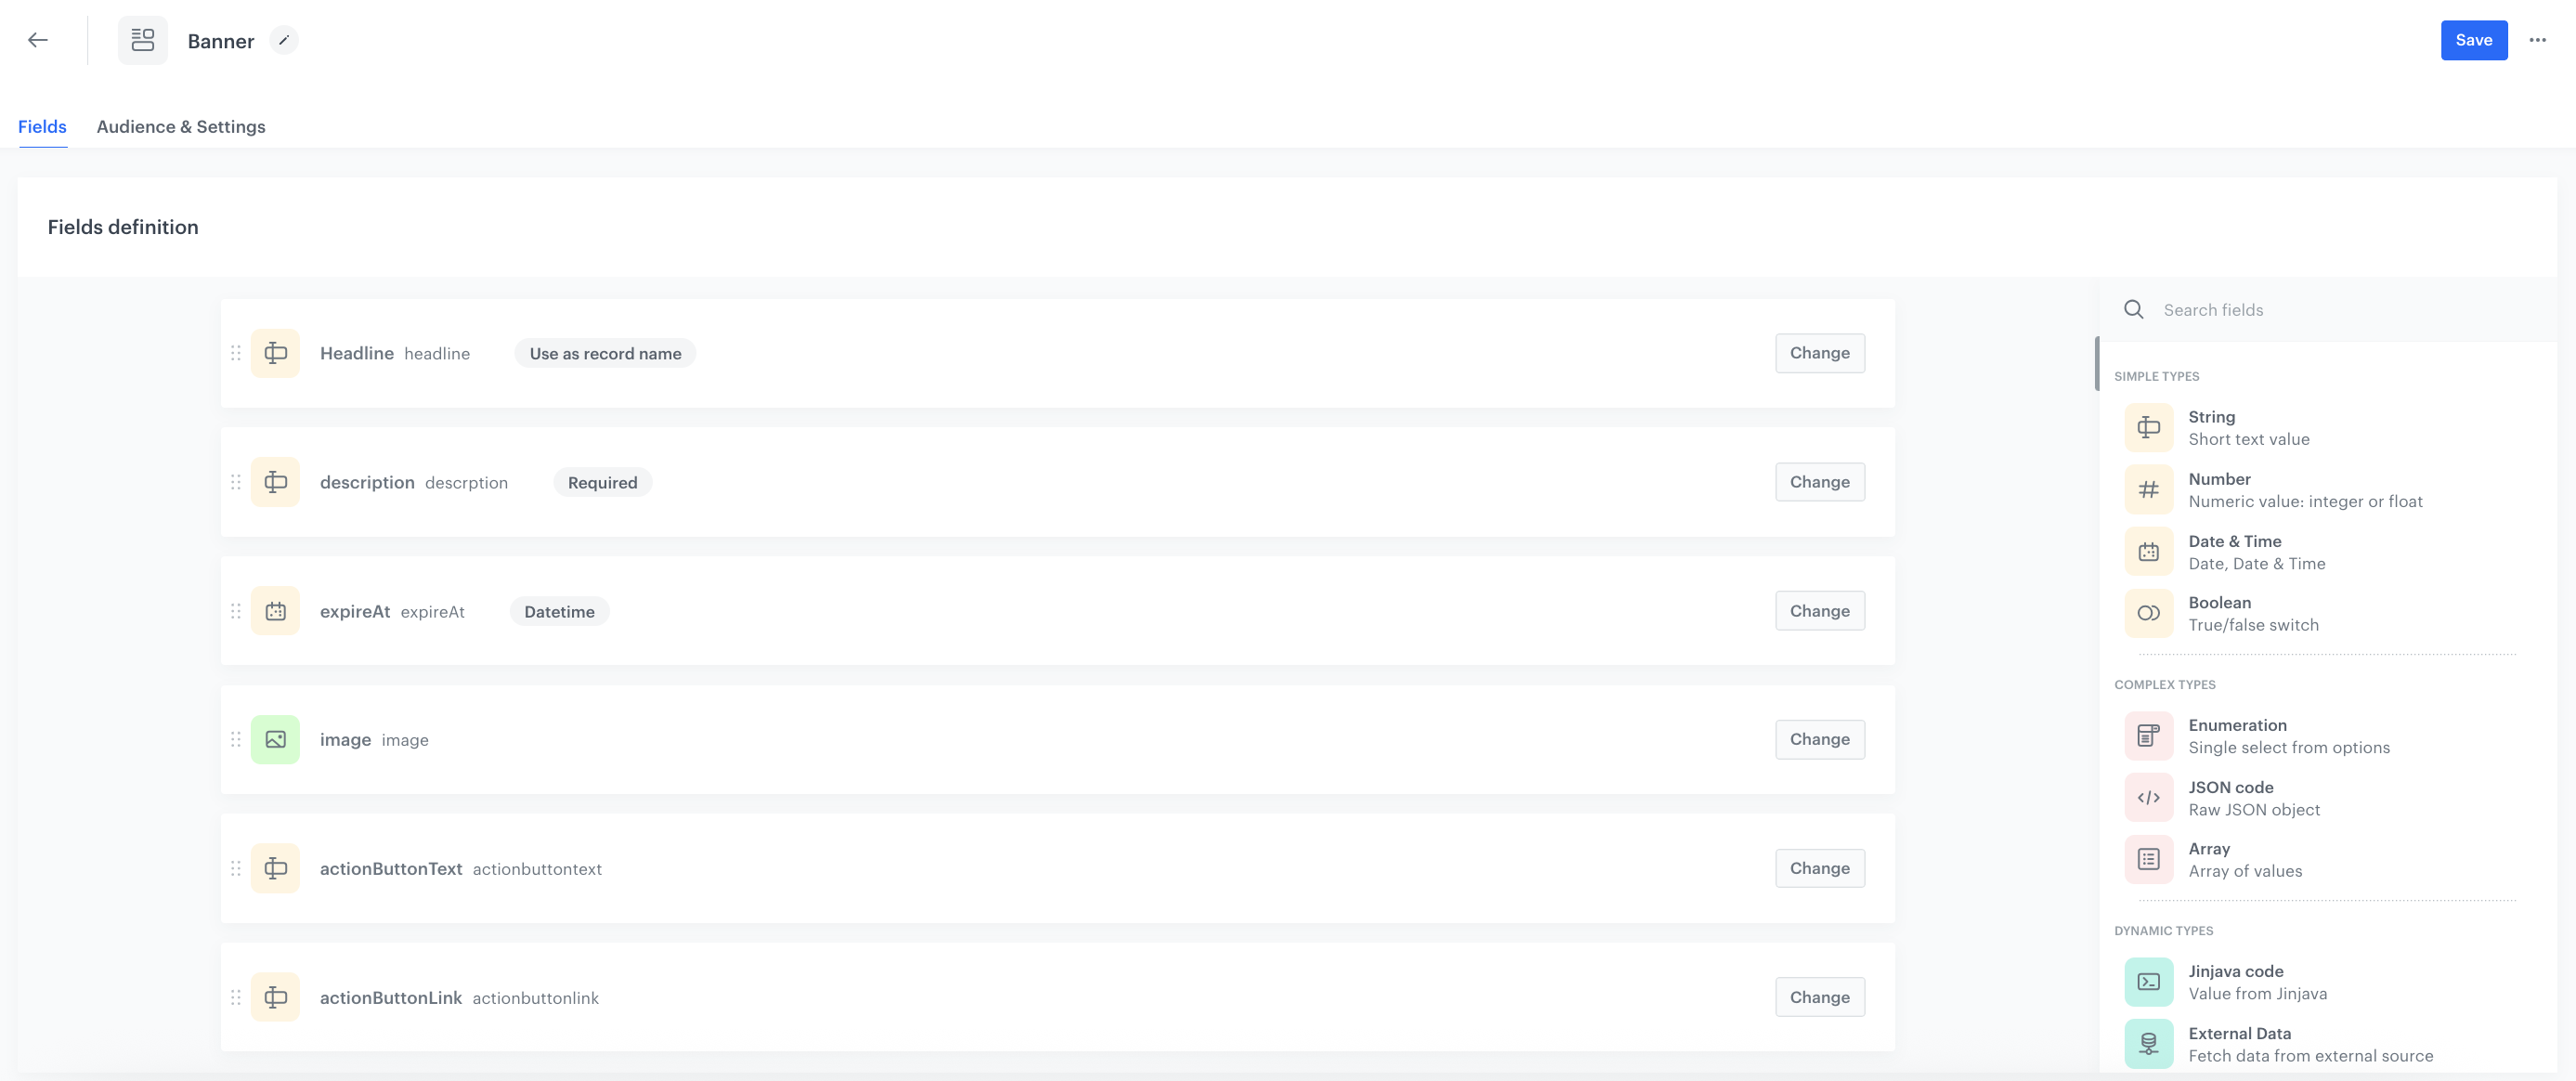
Add Headline
- Click Add new field and choose String.
- Complete the fields:
- In Display name, enter
Headline. - API name will be pre-filled automatically.
- In Display name, enter
- Check the field: Use as record title.
- Check the field: Character limits and set it from 5 to 60.
- To save your changes, click Apply.
Add Description
- Click Add new field and choose String.
- Complete the fields:
- In Display name, enter
Description. - API name will be pre-filled automatically.
- In Display name, enter
- Set the field as Required.
- Check the field: Character limits and set it from 5 to 60.
- To save your changes, click Apply.
Add Expiration date
- Click Add new field and choose Date&time.
- Complete the fields:
- In Display name, enter
expireAt. - API name will be pre-filled automatically.
- In Display name, enter
- Choose the format as a Date.
- To save your changes, click Apply.
Add Image
- Click Add new field and choose Image
- Complete the fields:
- In Display name, enter
image. - API name will be pre-filled automatically.
- In Display name, enter
- To save your changes, click Apply.
Add action button text
- Click Add new field and choose String.
- Complete the fields:
- In Display name, enter
actionButtonText. - API name will be pre-filled automatically.
- In Display name, enter
- To save your changes, click Apply.
Add action button link
- Click Add new field and choose String.
- Complete the fields:
- In Display name, enter
actionButtonLink. - API name will be pre-filled automatically.
- In Display name, enter
- Set the validation patter field as:
^([a-zA-Z]{2,}):\/\/([^\s\/]+)(\/[^\s]*)?$ - To save your changes, click Apply.
Set up the Audience & Settings
- Click the Audience & Settings tab.
- In the Audience section, click Define.
- Choose the schema recipients, in our case, choose Everyone.
- Click Apply.
- In the upper-right corner, click Save.
Create a record with promotion details
Creating a record means adding the data to the schema. It means that you fill out schema fields with the actual values. This step fills the structure you created earlier with real data that will be rendered to the user. Anything you enter here becomes the source of truth for templates. By storing product-specific information inside the record, you ensure that all in-app messages, PDP blocks, or emails referencing this schema always draw from the same, consistent data set. The records are created based on the promotion banner layout schema and each record will be a separate promotional banner.
- Go to Data Modeling Hub > Data collection > Select schema.
- Choose schema created in the previous part of the process.
- Click Add record.
- Add a name for the record.
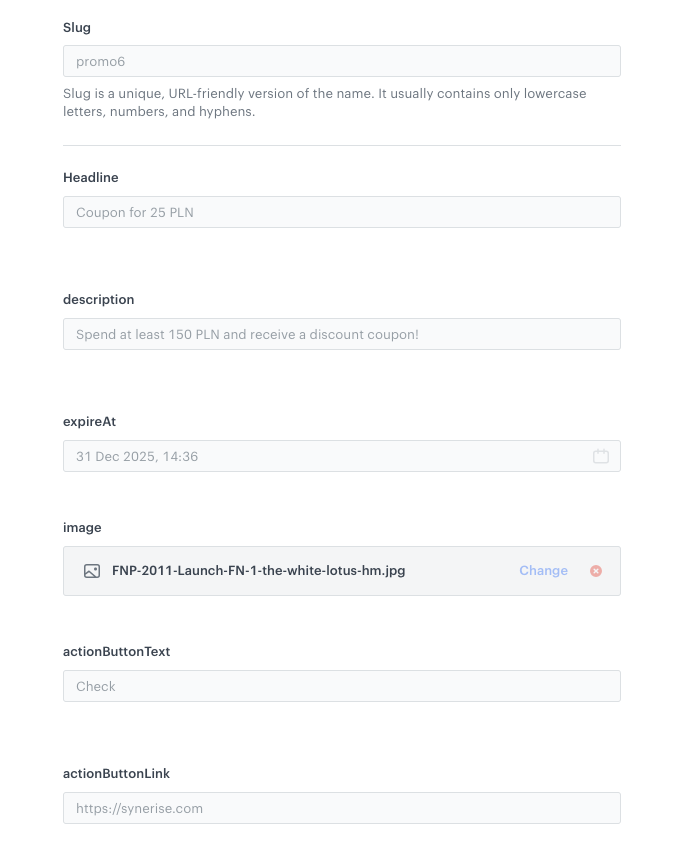
- Add a slug for the record. Slug is a unique, URL-friendly version of the name. It usually contains only lowercase letters, numbers, and hyphens. In our case it will be
promo6. - Fill in the values in the Headline and description fields for the specific promotion.
- From the expireAt field, choose the expiration date of the specific promotional action.
- From the Image dropdown list, select an image to be used in a promotion which you added in Data Modeling Hub > Files as a part of prerequisites.
- Fill the actionButtonText and ActionButtonLink fields.
- To save and publish your record, click Publish.
Brickworks configuration - To create more promotional banners with info about specific action, duplicate the record and add different data to the fields described in schema. They will be important in the further partof the use case.
In-app campaign that displays a single promotion
In this part of the process, you create an in-app campaign triggered by the product.addToCart event. The data used in this in-app will be retrieved from the record with promotion details created in the previous step.
- Go to
 Experience Hub > In-app messages> Create in-app.
 - Enter the name of the in-app.
Define the audience
As the first step, define the target group of customers for the in-app message. Make sure the conditions for in-app and schema audiences are not mutually exclusive.
- In the Audience section, click Define.
- Click Everyone.
- To save the audience, click Apply.
Define content
In this part of the process, you will create the content of the in-app message that will appear in the mobile application with the help of ready-made template.
- In the Content section, click Define.
- Click Create message.
Create your template according to your needs, but make sure it pulls data from the record returned by this schema — the first line of the template should reference to the ID of the schema and ID of the record (in our case:schemaId=banner recordId=promo6)
Check the HTML code
{% brickworksgeneratevar schemaId=banner recordId=promo6 %}{%set data = brickworks_result %} <div class="banner" data-slug="{{ data.__slug }}"> <div class="banner-image"> <img src="{{ data.image.medium | default(data.image.large) }}" alt="{{ data.headline }}" /> </div> <div class="banner-content"> <h1 class="headline">{{ data.headline }}</h1> <p class="description"> {{ data.descrption }} </p> <div id='expiry' class="meta" data-expiry="{{ data.expireAt }}"> <span id="countdown"> </div> <a class="cta" href="{{ data.actionbuttonlink }}" target="_blank"> {{ data.actionbuttontext }} </a> </div> </div> {% endbrickworksgeneratevar %}Select events that trigger the in-app message display
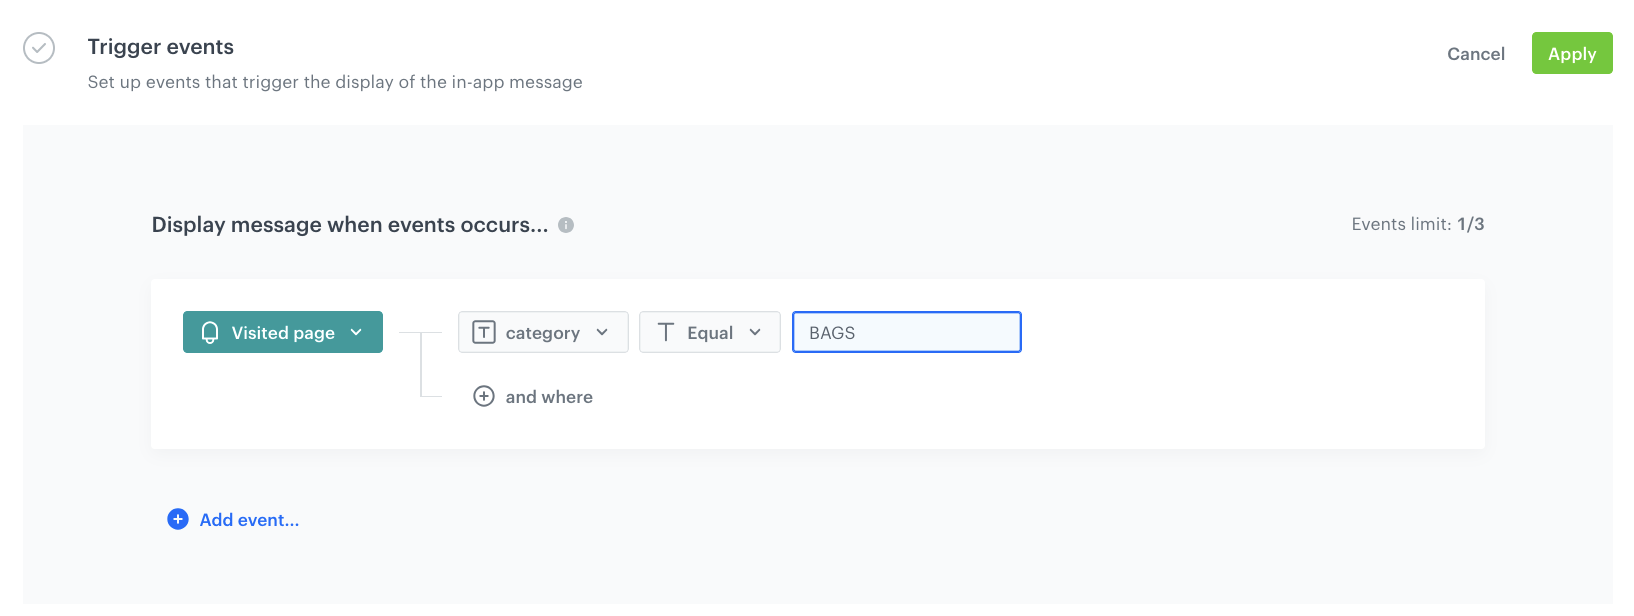
In this part of the process, you will define the event triggering the display of the in-app message.
- In the Trigger events section, click Define.
- Select Add event and from the dropdown list, choose the
page.visitevent. - Click the + where button and select
category. - As the logical operator, select Equal.
- As the value add the name fo the specific category in which this in-app with the information about the specific promotional action should be displayed.
- Click Apply.
Schedule the message and configure display settings
As the final part of the process, you will set the display settings of the in-app message such as schedule, capping, priority of the message among other in-app messages.
- In the Schedule section, click Define and set the time when the message will be active.
- In the Display Settings section, click Change.
- Define the Delay display, Priority index and enable the Frequency limit toggle to manage the frequency of in-app message display in the application. .
You can additionally enable the Capping limit toggle to limit the amount of time the in-app message can be displayed to a user in general.
- Click Apply.
- Optionally, you can define the UTM parameters and additional parameters for your in-app campaign.
- Click Activate.
Schema retrieving a list of promotions
In this step, we will create a schema that retrieves data from the Schema with the promotion layout, collecting all created banners for different promotional actions at once. This aggregated output will be used in the next step to build an in-app view displaying promotional banners as a list or a carousel, depending on business needs. This approach also demonstrates how one Brickworks schema can pull data from another, enabling more flexible content structures. The schema will contain a field which will let you indicate a schema whose records will be retrieved.
- Go to Data Modeling Hub > Schemas > New schema.
- Choose Simple Schema.
- Enter a name for the schema, in Display name for example Banner template. API names value is pre-filled with the value from Display name. The value in this field is the unique identifier used to reference this schema in API requests.
- Optionally, fill in the Description field.
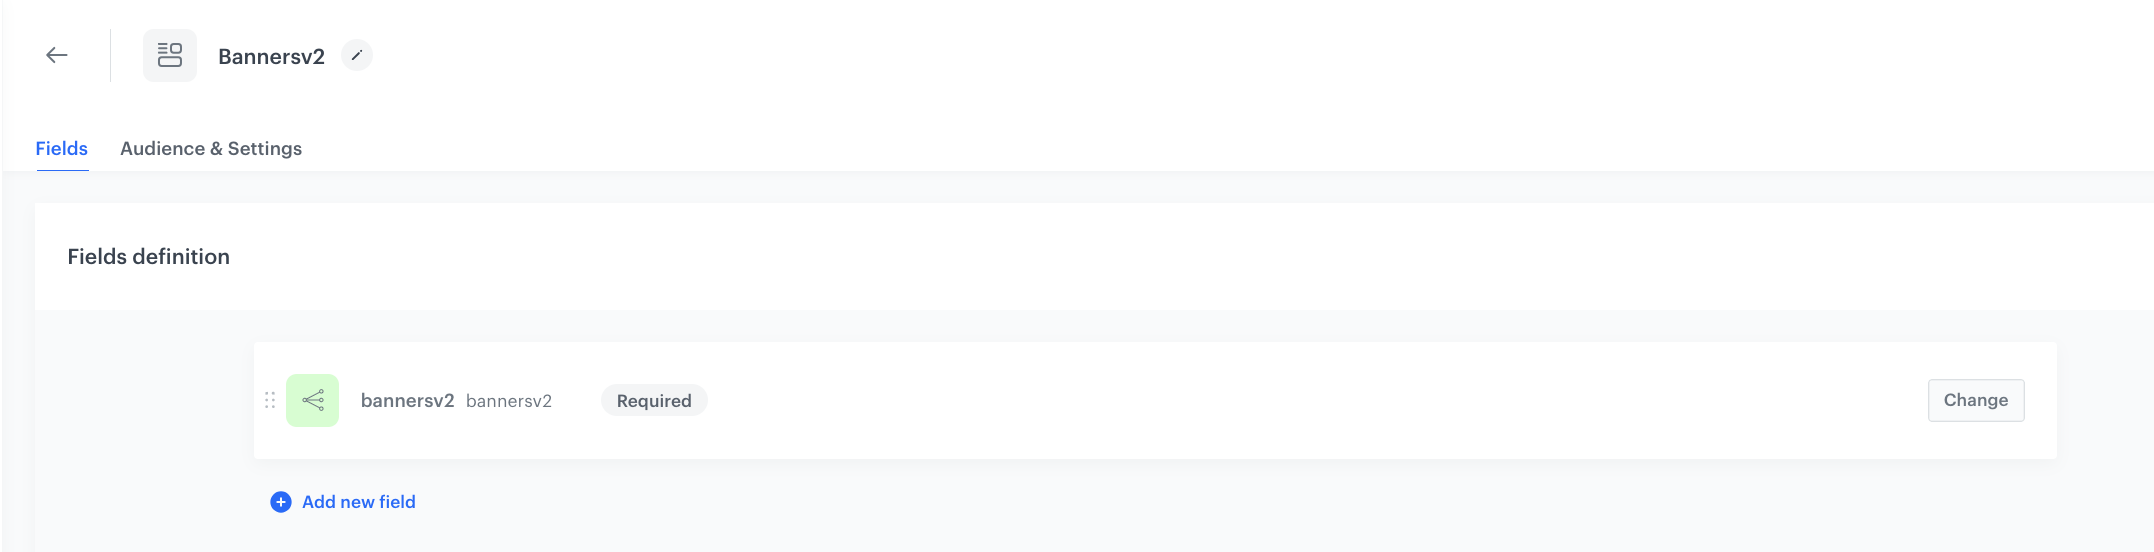
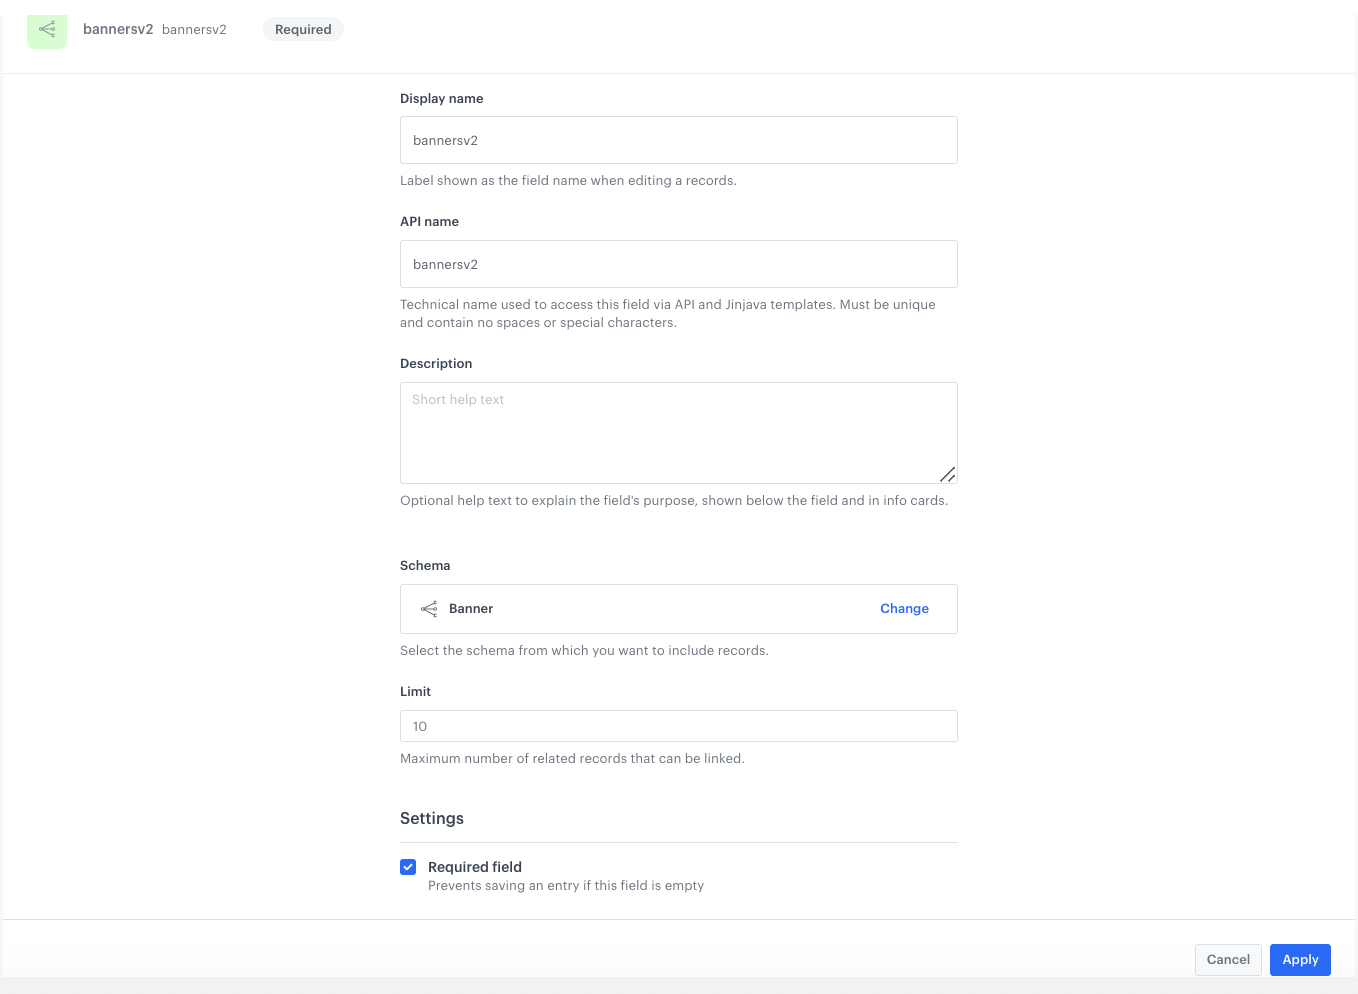
Add the reference to the previous schema
- Click Add new field and choose One to many.
- Complete the fields:
- In Display name, enter
bannersv2. - API name will be pre-filled automatically.
- In Display name, enter
- From the Schema dropdown list, select the schema created in the previous step.
- Select the Required filed checkbox.
- To save your changes, click Apply.
Create the second record
This step fills the structure you created earlier with real data that will be rendered to the user. Anything you enter here becomes the source of truth for templates. In this part of the process, you will create a record based on a schema that references the schema containing the list of promotions. The purpose of this record is to retrieve and consolidate the records with promotions for use within the system.
This created record will play an important role in later stages of the process - it will be referenced in the in-app message template designed to display a list of promotions to users. By linking this record to the template, the system can dynamically present promotion details within the mobile application interface.
While creating a record you will select the promotion banner layout schema created as the first part of the process, this way you can retrieve all records (promotional banners) available in the schema.
- Go to Data Modeling Hub > Data collection > Select schema.
- Choose Schema retrieving a list of promotions.
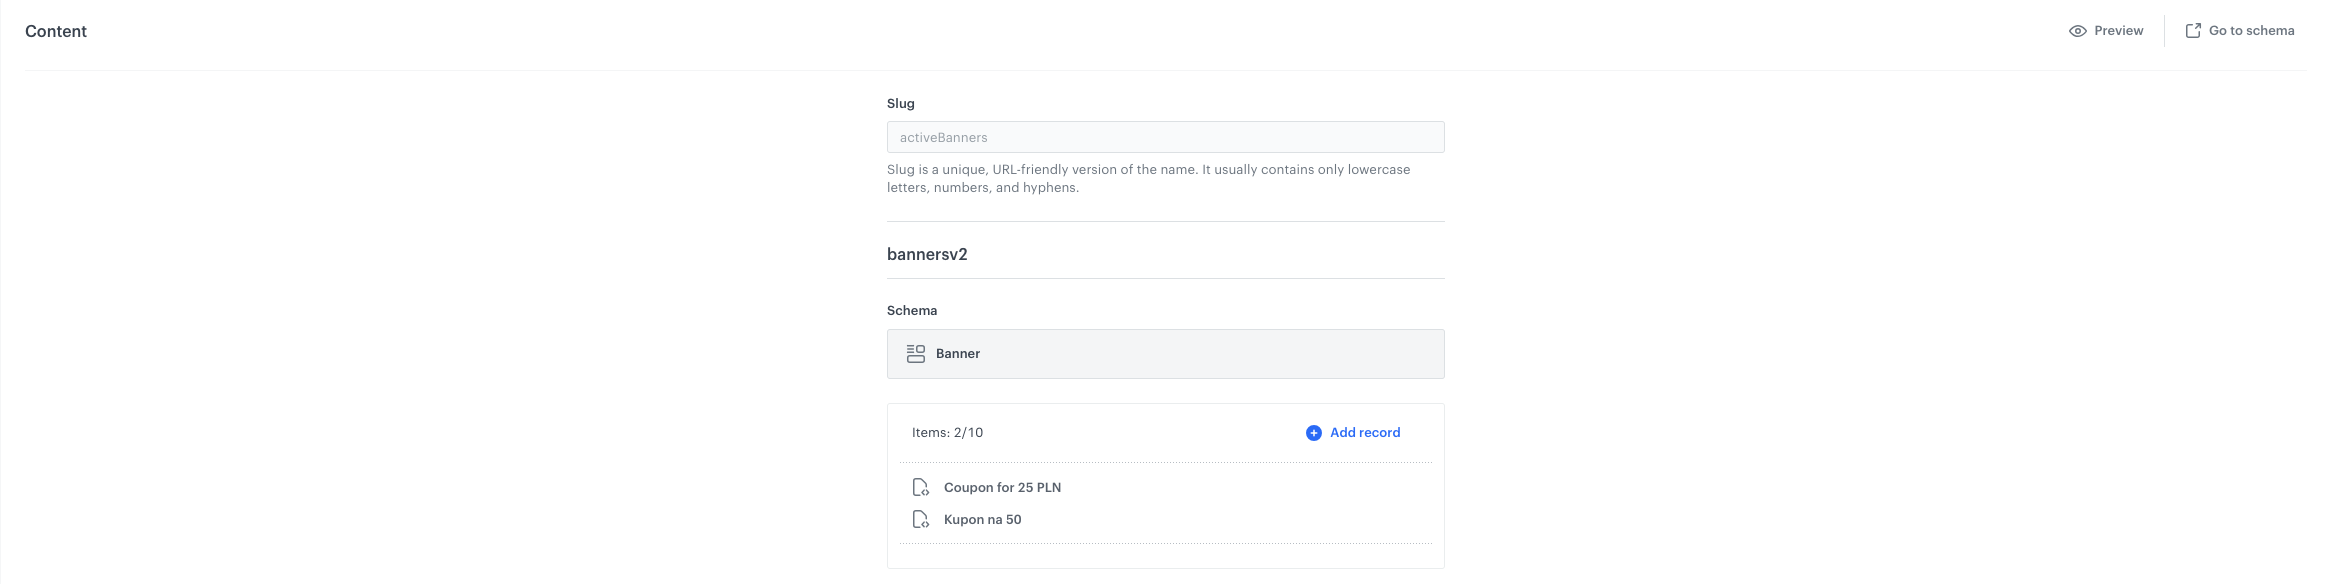
- Click Add record.
- Add a name for the record.
- Add a slug for the record. Slug is a unique, URL-friendly version of the name. It usually contains only lowercase letters, numbers, and hyphens. In our case it will be
activeBanners. - Choose the schema with the promotion layout .
- Click Add record.
- Choose the records (promotions) from the list which will be retrieved from the previous schema.
- To save and publish your record, click Publish.
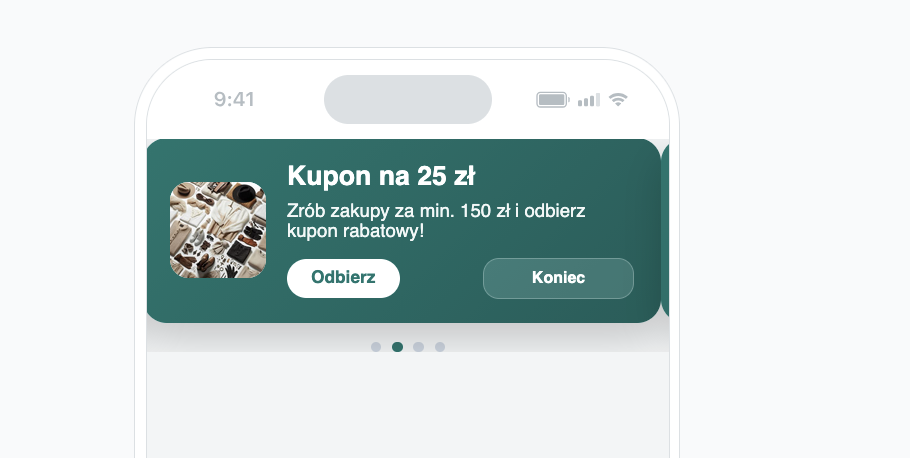
In-app campaign that displays a list of promotions
In this part of the process, you create an in-app campaign triggered by the product.addToCart event. The data used in this in-app is set of banners with the information about promotions retrieved from the schema retrieving a list of promotions, created in the previous step.
- Go to Experience Hub > In-app messages> Create in-app.
- Enter the name of the in-app.
Define the audience
As the first step, define the target group of customers for the in-app message. Make sure the conditions for in-app and schema audiences are not mutually exclusive.
- In the Audience section, click Define.
- Click Everyone.
- To save the audience, click Apply.
Define content
In this part of the process, you will create the content of the in-app message that will appear in the mobile application with the help of ready-made template.
- In the Content section, click Define.
- Click Create message.
Create your template according to your needs, but make sure it pulls data from the record returned by this schema — the first line of the template should reference to the ID of the schema and Id of the record (in our case:schemaId=bannersv2 recordId=activeBanners)
Check the HTML code
{% brickworksgeneratevar schemaId=bannersv2 recordId=activeBanners %}{%set data = brickworks_result.bannersv2 %} <div class="carousel" id="carousel"> <div class="track"> {% for item in data %} <div class="banner"> <div class="image"> <img src="{{ item.image.thumb | default(item.image.large) }}" alt="{{ item.headline }}" /> </div> <div class="content"> <div class="headline">{{ item.headline }}</div> <div class="description">{{ item.descrption }}</div> <div class="footer"> <a class="cta" href="{{ item.actionbuttonlink }}">{{ item.actionbuttontext }}</a> <div class="expiry" data-expiry="{{ item.expireAt }}">—</div> </div> </div> </div> {% endfor %} </div> <div class="dots"></div> </div> {% endbrickworksgeneratevar %} {% endbrickworksgeneratevar %}Select events that trigger the in-app message display
In this part of the process, you will define the event triggering the display of the in-app message.
- In the Trigger events section, click Define.
- Select Add event and from the dropdown list, choose
product.addToCartevent. - Click the + where button and select
mobile. - As the logical operator, select Exists.
- Click Apply.
Schedule the message and configure display settings
As the final part of the process, you will set the display settings of the in-app message such as schedule, capping, priority of the message among other in-app messages.
- In the Schedule section, click Define and set the time when the message will be active.
- In the Display Settings section, click Change.
- Define the Delay display, Priority index and enable the Frequency limit toggle to manage the frequency of in-app message display in the application. .
You can additionally enable the Capping limit toggle to limit the amount of time the in-app message can be displayed to a user in general.
- Click Apply.
- Optionally, you can define the UTM parameters and additional parameters for your in-app campaign.
- Click Activate.
What's next
After defining these schemas, you can reuse the template across other placements as needed. It can be applied not only in PDP blocks, emails, or in-app views, but also in any additional surfaces supported by your setup—for example homepage modules, product carousels, or campaign-specific placements.
What’s more, the values retrieved from these schemas can be used to dynamically display multiple banners—either as a list or in a carousel format—depending on the design and placement requirements. This flexibility allows you to maintain consistency in your content while customizing the layout and volume of displayed items based on the context. Whether you want to show all available banners or just selected, the schema setup gives you full control over what is shown and where—across different channels and placements.
Check the use case set up on the Synerise Demo workspace
In Synerise Demo workspace, you can check the configuration of:
If you’re our partner or client, you already have automatic access to the Synerise Demo workspace (1590), where you can explore all the configured elements of this use case and copy them to your workspace.
If you’re not a partner or client yet, we encourage you to fill out the contact form to schedule a meeting with our representatives. They’ll be happy to show you how our demo works and discuss how you can apply this use case in your business.