Personalized recommendations compliant with the Omnibus Directive

The e-commerce industry is the new frontier of innovation, providing both consumers and companies with a better experience. However, there are some issues that can disrupt the relationship between the two parties. The volatility of pricing information along with promotions and discounts is one of them: it often leads to situations where users have been misled or deceived by a company’s promotional scenarios. That’s why the Omnibuse Directive was introduced to strengthen consumer rights and ensure a better customer experience.
The directive implements a new obligation to regulate price transparency for discounts and promotions. The purpose of this new regulation is to strengthen control over misleading business practices, ensure free access to price information, and guarantee that citizens and businesses can benefit from clear and effective information. To comply with the Omnibus Directive, for discounted products/services, companies must additionally display the lowest price that was applied during the 30-day period before the price reduction.
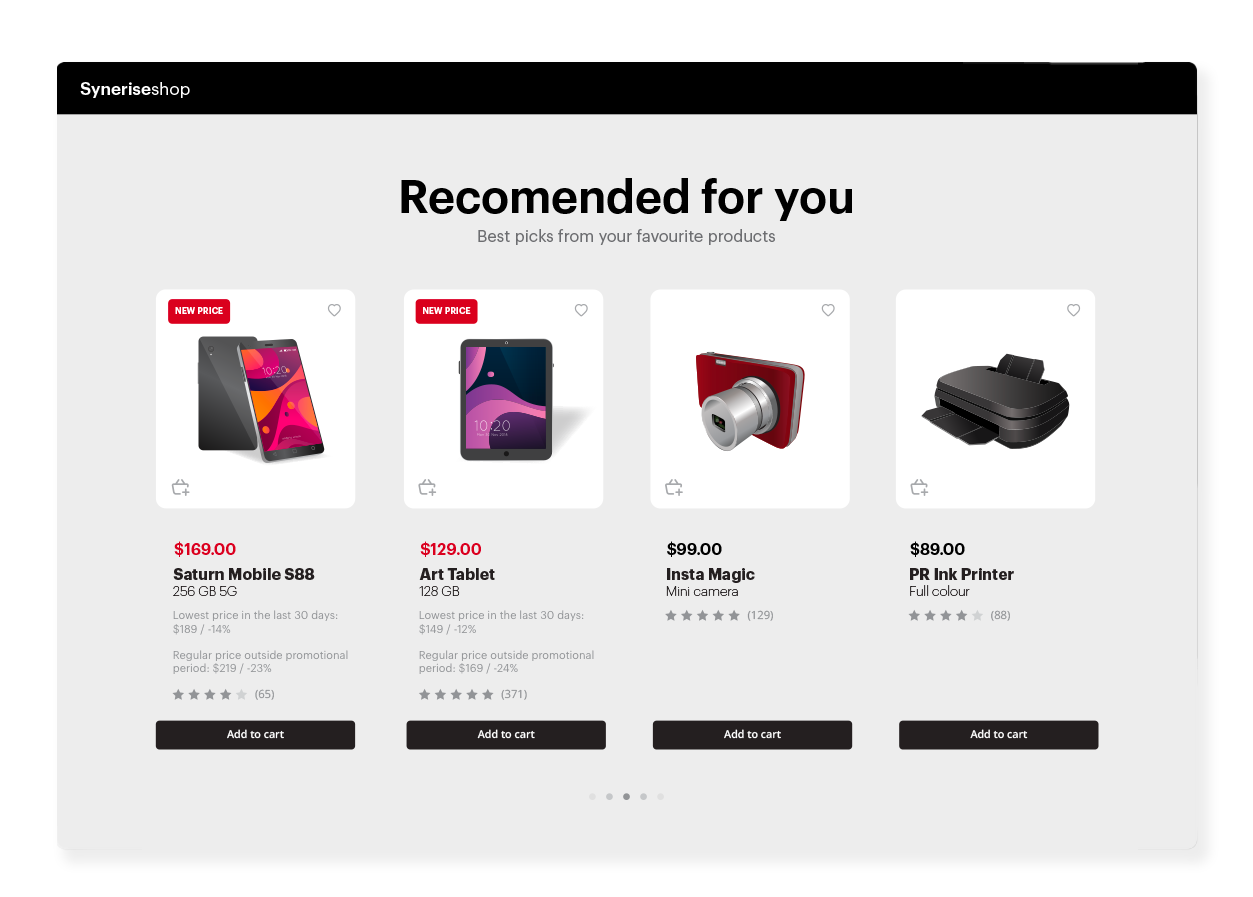
In this case, you will learn how to create personalized recommendations that additionally include the price that must be mandatorily displayed for discounted products using dynamic content. We want customers to know the real deal when they shop, so we’ve got three prices for discounted products:
- The current promotional price,
- The lowest price in the last 30 days (the omnibus price),
- The regular price outside the promotional period.
This way, customers can see all the savings and get even more motivated to grab that sweet promo offer!
Later in the process, you will see a Jinjava code containing a rule that checks if the sale price (g:salePrice.value) of the product is lower than the actual price (g:price.value). If so, this indicates that the product is discounted and the omnibus will be displayed with the discount percentage.
Note that all attribute names shown in this use case are just examples, you can use any naming for your own purposes.
Prerequisites
- Configure an item catalog for recommendations. Enable personalized recommendations.
- Import your product feed to AI engine.
Process
In this use case, you will go through the following steps:
Prepare AI recommendation
-
Go to
 AI Hub > (AI Recommendations) Models > Add recommendation.
 -
Enter the name of the recommendation (it is only visible on the list of recommendations).
-
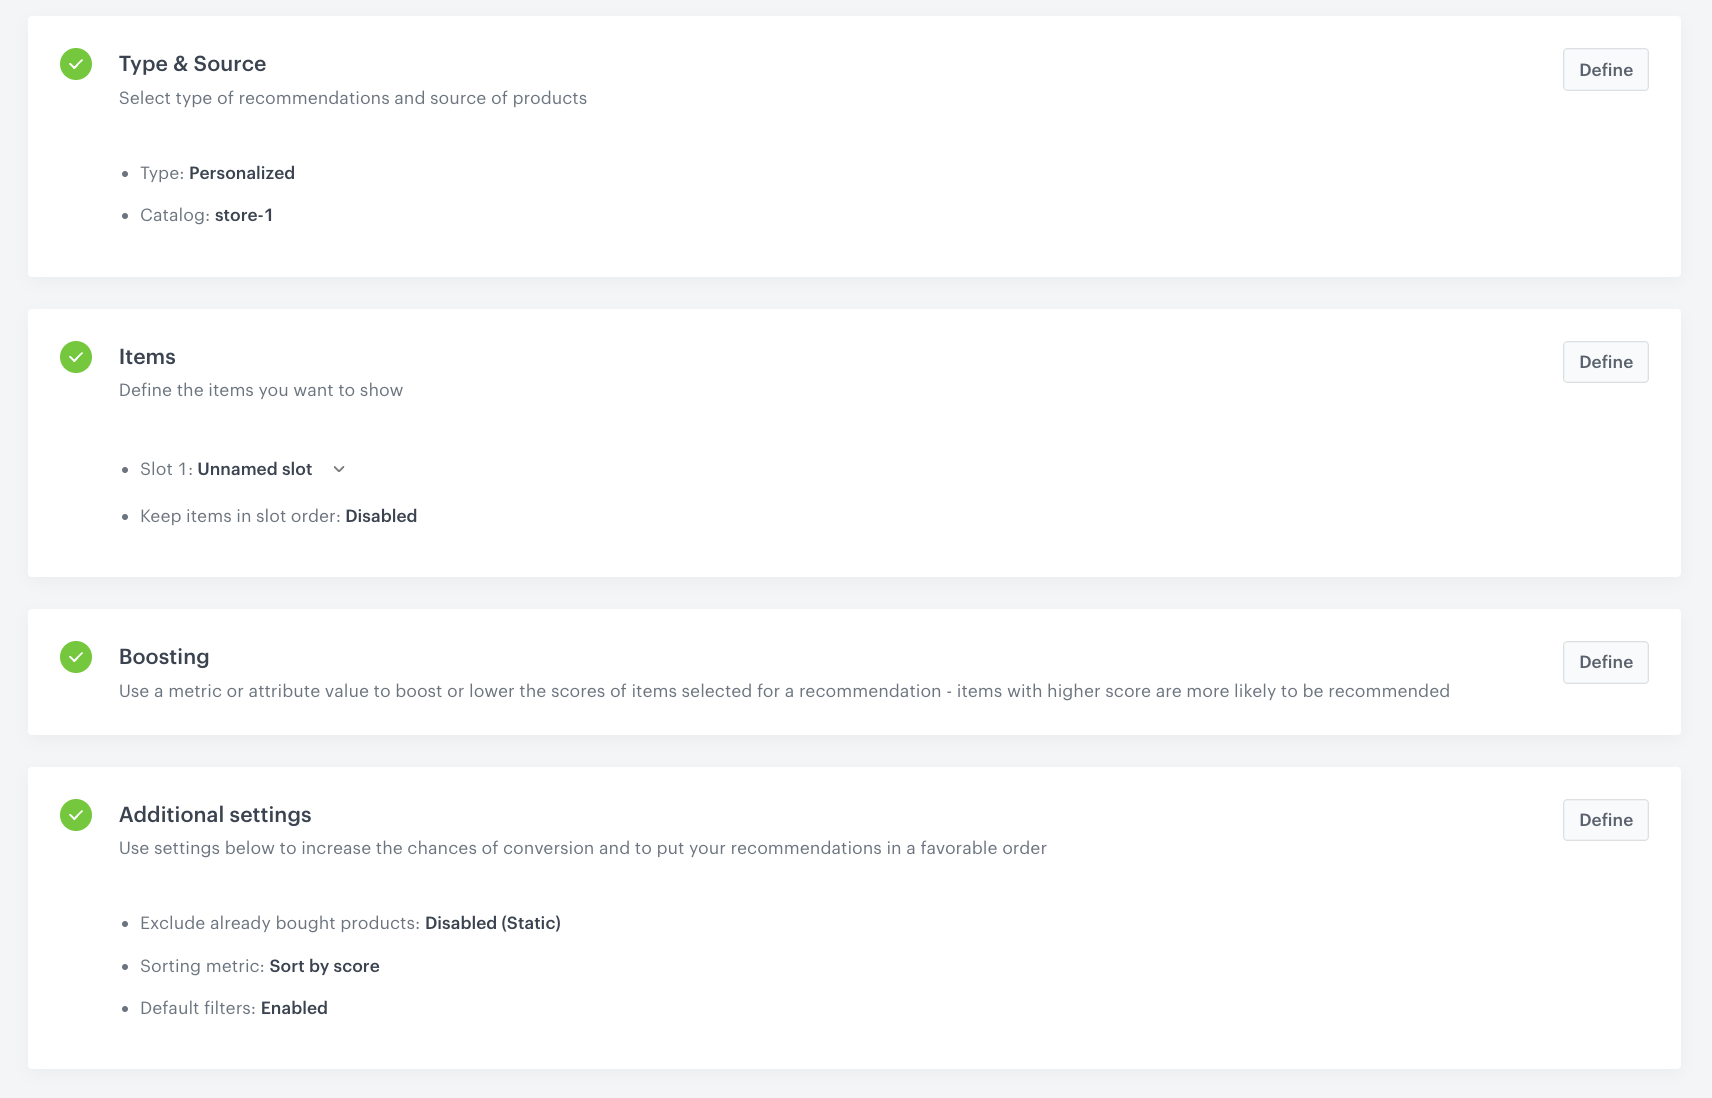
In the Type & Items feed section, click Define.
-
From the Items feed dropdown list, select a product feed that has a trained model.
-
Select the Personalized recommendation type.
-
Confirm the recommendation type by clicking Apply.
-
In the Items section, click Define.
-
Click Add slot.
-
Click the Unnamed slot that was created.
-
Define the minimum and maximum number of products displayed in the frame according to your needs.
-
Optionally, you can use filters to include specific items in the recommendation frame.
-
Confirm the configuration by clicking Apply.
-
Optionally, you can define the settings in the Boosting and Additional settings sections.
-
Click Save.

AI recommendation campaign configuration
Create dynamic content
- Go to
 Experience Hub > Dynamic content > Create new.
 - Enter the name of the dynamic content.
- Choose the Insert Object type.
- As an audience, select the user segment for which you want to display the recommendation.
- In the Content section, select Simple message, and specify the CSS selector where you want to insert the dynamic content with recommendations.
- In the Content tab, click Create Message.
- In the code editor, insert Jinjava with the AI recommendation.
your_campaign_ID with the ID of the AI recommendation. The ID of the AI campaign is contained in the URL of the recommendation.Replace the price attributes used in the jinjava below with price attributes with the nomenclature you have implemented at your site. In this use case, we use g:price.value for the original price of the product, g:salePrice.value for the sale price of the product and c:omnibus_price for the omnibus price.
<!-- Downloading the AI campaign -->
<ul>
 {% recommendations3 campaignId=your_campaign_ID %}
 {% for p in recommended_products3 %}
 <li data-snr-ai-product-id="{{p.itemId}}">
    <a class="snrs-AI--item-link" href="{{p.link}}" title="{{p.title}}">
        <img src="{{ p.imageLink }}"class="products-slider__item-image snrAI-product-image snrAI-product-image-{{p.itemId}}" width="90" alt="{{p.title}}" id="snrAI-image-{{p.itemId}}">
        <h3 class="snrs-AI-product--product-name">
            <span class="snrs-AI-product--name-first">{{p.title}}</span>
        </h3>
        <span class="snrs-AI-product--price">
            {% if p.salePrice.value < p.price.value %}
                <span class="snrs-AI-product--price-sale"> {{ p.salePrice.value }} $</span>
                <span class="snrs-AI-product--price-omnibus">
                    Last lowest price:
                    {{ p.attributes.omnibus_price }} $ /
                    {{ ((p.salePrice.value|float / p.attributes.omnibus_price|float - 1) * 100) | round(0) }}
                </span>
                <span class="snrs-AI-product--price-original">
                    Original price:
                    {{ p.price.value }} $ /
                    {{ ((p.salePrice.value|float / p.price.value|float - 1) * 100) | round(0) }}
                </span>
            {% else %}
                <span class="snrs-AI-product--price-base"> {{ p.price.value }} $</span>
            {% endif %}
        </span>
    </a>
 </li>
{% endfor %} {% endrecommendations3 %}
</ul>- Save the template.
- In the Schedule section, select the date when the dynamic content is activated.
- In Display settings, define the circumstances for displaying the content.
Note: Instructions how to do it are available here.
- Confirm by clicking Apply.
- In the UTM & URL parameters section, click Skip step.
- Activate the dynamic content.
What’s next
You can also use the ID of the recommendation in other types of communication, described here.
Check the use case set up on the Synerise Demo workspace
You can check the configuration of the campaign components directly in Synerise Demo workspace:
If you’re our partner or client, you already have automatic access to the Synerise Demo workspace (1590), where you can explore all the configured elements of this use case and copy them to your workspace.
If you’re not a partner or client yet, we encourage you to fill out the contact form to schedule a meeting with our representatives. They’ll be happy to show you how our demo works and discuss how you can apply this use case in your business.
