Optimize the sending time of a promotional code campaign
A properly designed and executed mobile push campaign can help attract users’ attention and increase the conversion rate. Sending a push notification at the optimal time, when the customer is active in the app, increases the chances that the customer will read the communication, use the promo code, and finalize the purchase.
This use case describes the process of sending a mobile push with a promo code at the best time in the next seven days to customers who have added a product to their cart and have not completed the purchase process.
Prerequisites
- Implement Synerise SDK in your mobile application.
- Implement mobile push notifications in your mobile application: iOS, Android.
- Implement transaction events using API.
- Implement Add to cart event in your mobile application.
- Enable time optimizer.
- Create a Mobile mode for Time Optimizer that will calculate the time when the customer is most active in the mobile application based on the events such as
screen.viewandscreen.interaction. - Create a mobile push template with a promo code.
Create a workflow
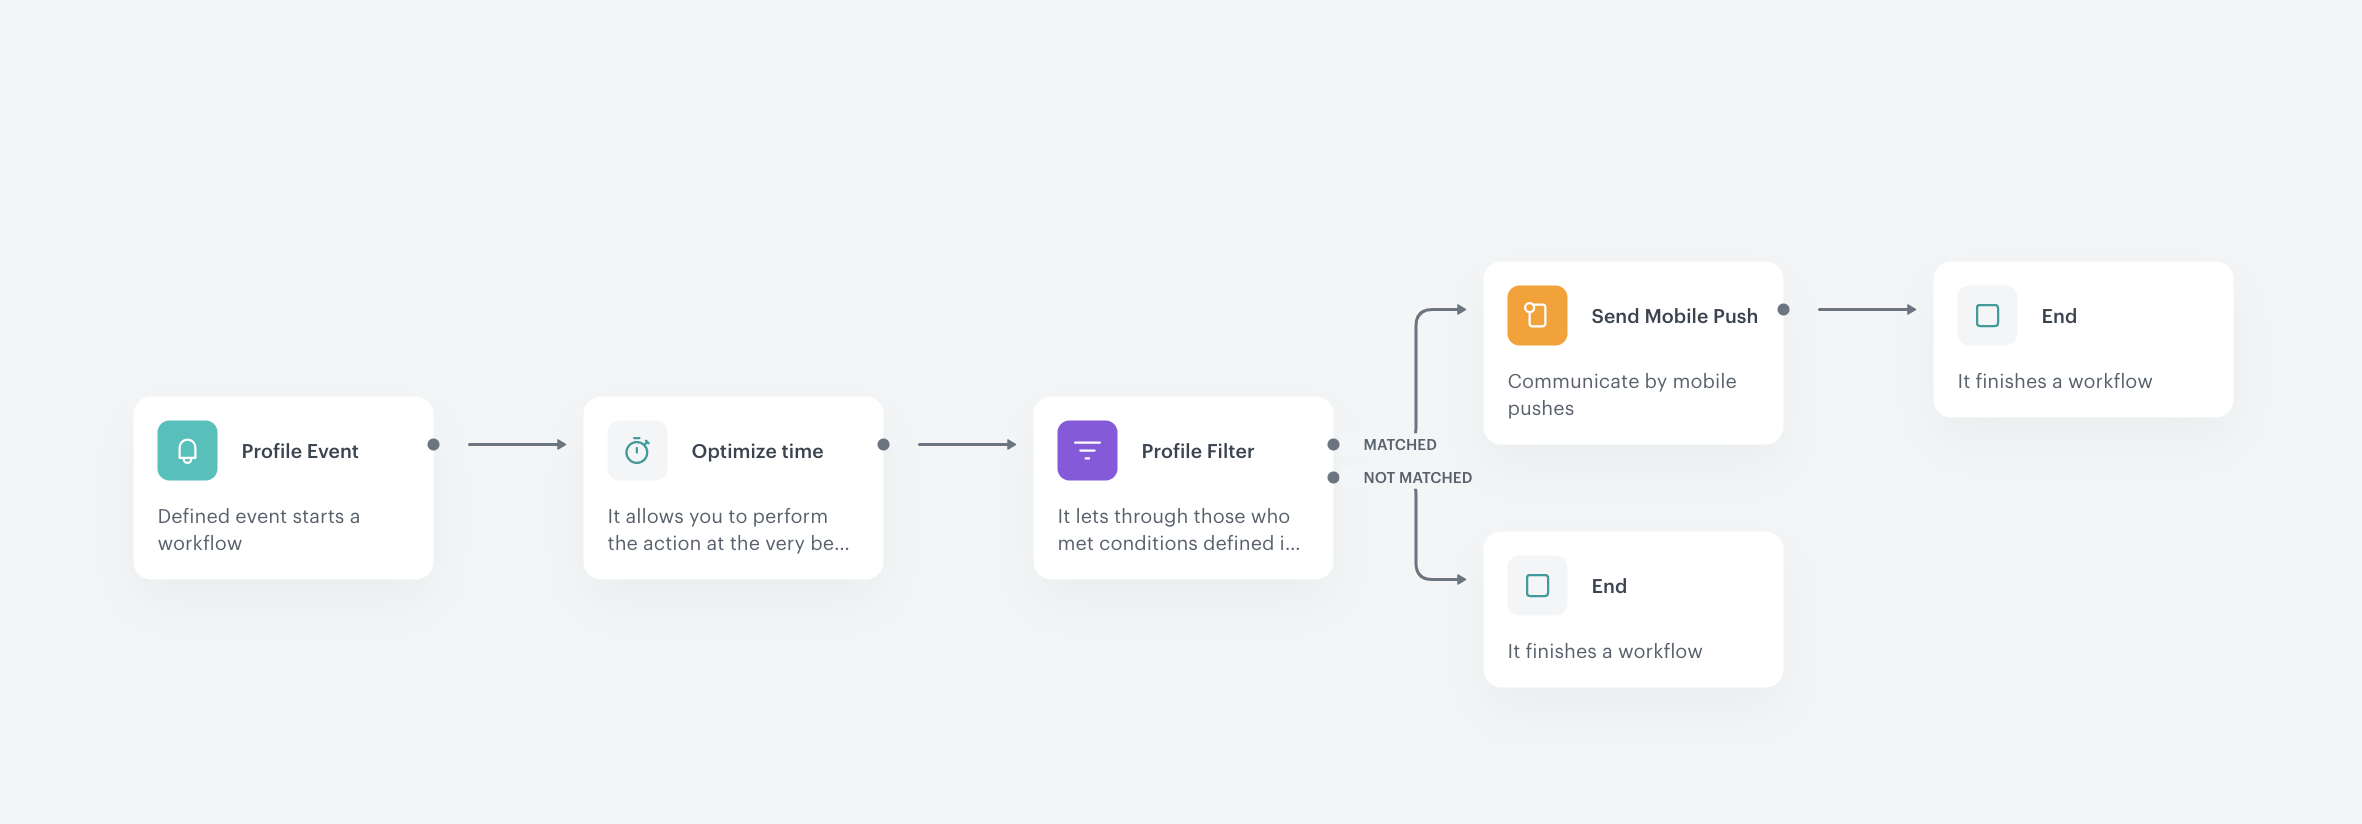
Create a workflow that sends a mobile push notification to customers on the day they are most likely to visit the site and who have previously added products to their shopping cart but have not completed the purchase process.
- Go to Automation > Workflows > New workflow.
- Enter the name of the workflow.
- As the first node of the workflow, add Profile Event. In the node settings:
- In the Choose event field, select the
product.addToCartevent. - Confirm by clicking Apply.
- In the Choose event field, select the
- Add an Optimize Time node. In the configuration of the node:
- Select the Mobile mode.
- Set the time period to analyze to Next 7 days.
- Confirm by clicking Apply.
- Add the Profile Filter node. In the configuration of the node:
- In the Choose filter field, select the
transaction.chargeevent. - Set the time period to the last 7 days.
- Confirm by clicking Apply.
- In the Choose filter field, select the
- To the Matched path, add the End node.
- To the Not matched path, add the Send Mobile Push node. In the node settings:
- In the Template type, select the mobile push type according to your business needs.
- Select proper Push template that you created earlier.
- Confirm by clicking Apply.
- Add the End node.

Check the use case set up on the Synerise Demo workspace
You can check the workflow configuration directly in Synerise Demo workspace.
If you’re our partner or client, you already have automatic access to the Synerise Demo workspace (1590), where you can explore all the configured elements of this use case and copy them to your workspace.
If you’re not a partner or client yet, we encourage you to fill out the contact form to schedule a meeting with our representatives. They’ll be happy to show you how our demo works and discuss how you can apply this use case in your business.