Category recommendations allow you to shorten the conversion path, so customers reach products in fewer steps and are less likely to resign. By presenting top category recommendations, the path to the product is shortened significantly.
This use case illustrates how to dynamically display a recommendations related to the last main category visited by the user — for example, if the customer recently viewed "Electronics" furniture, a banner or content block can highlight top products from that specific category. This approach increases the chance of re-engagement and encourages return visits or immediate conversions by matching promotional content to current user interest.
In this use case, we return top recommendations based on the last visited main category by the user. However, the same configuration logic can be easily adapted to display category-specific recommendations directly on each category page.
To do this, you simply skip the use of segments and aggregates related to browsing history and instead implement static personalization rules per category. For example, on the “Electronics” category page, you display recommendations from electronics category. This approach allows for consistent and relevant recommendatons across the entire website structure.
Prerequisites
- Import your product feed to catalog.
- Configure an item catalog for recommendations. Enable the personalized recommendation model.
- Implement transaction events using SDK or API.
Process
- Create an aggregate for the last visited category.
- Create a recommendation for each category
Create an aggregate
In this part of the process, create an aggregate that will return the category that the user last visited.
- Go to
 Behavioral Data Hub > Live Aggregates > Create aggregate.
 - As the aggregate type, select Profile.
- Enter the name of the aggregate.
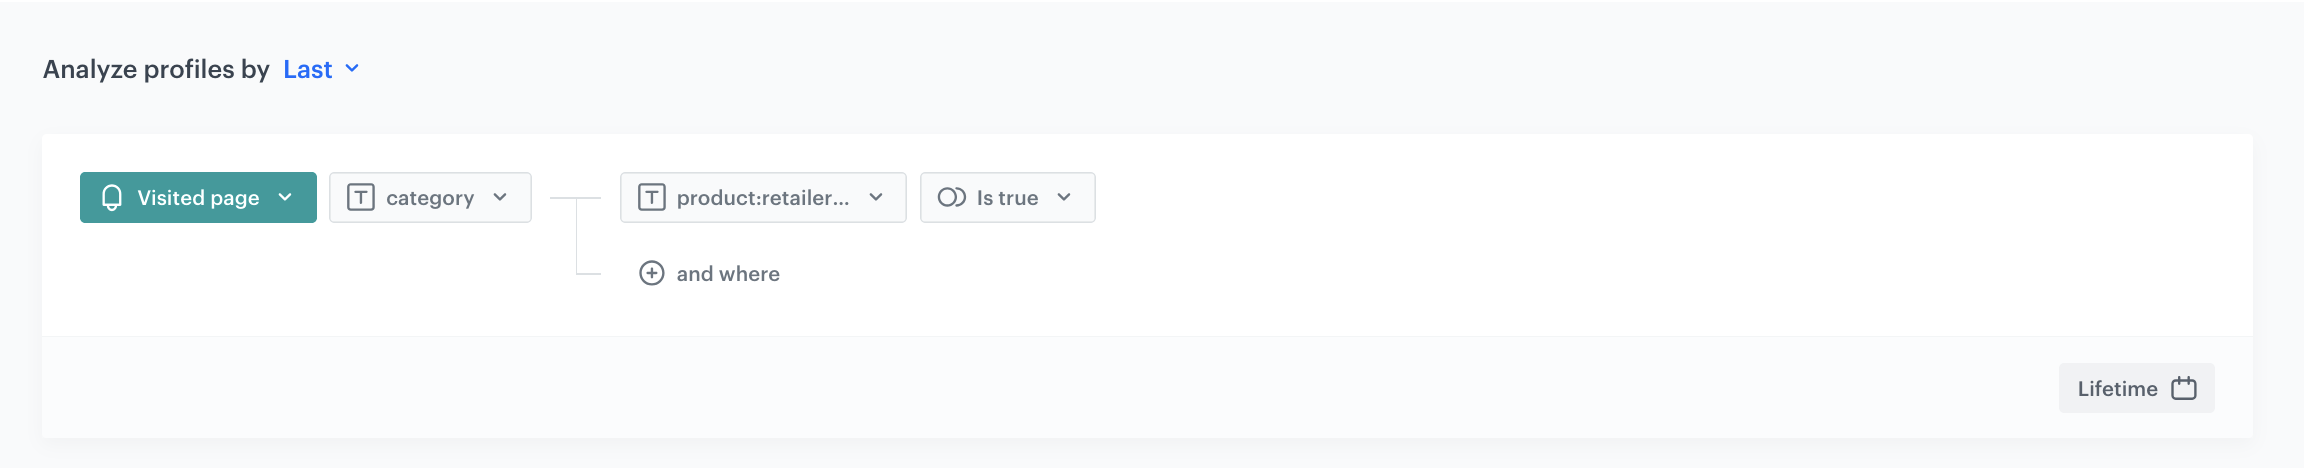
- Click Analyze profiles by and select Last.
- From the Choose event dropdown list, select the
page.visitevent. - As the event parameter, select category.
- Add the value product:retailer_part_no.
- As the value add Is true.
- Set the period from which the aggregate will analyze the results to Lifetime.
- Save the aggregate.
Create a recommendation
- Go to
 AI Hub > (AI Recommendations) Models > Add recommendation.
 - In the top left corner, enter the name of your recommendation.
- In the Type & Items feed section, click Define.
- From the Items feed dropdown menu, choose the provided feed.
- Choose the Top recommendation type.
- From the dropdown menu that appear at the bottom, choose your Metadata catalog.
- Click Apply.
- In the Items section, click Define.
- Define the minimum and maximum number of brands that will be recommended to the user.
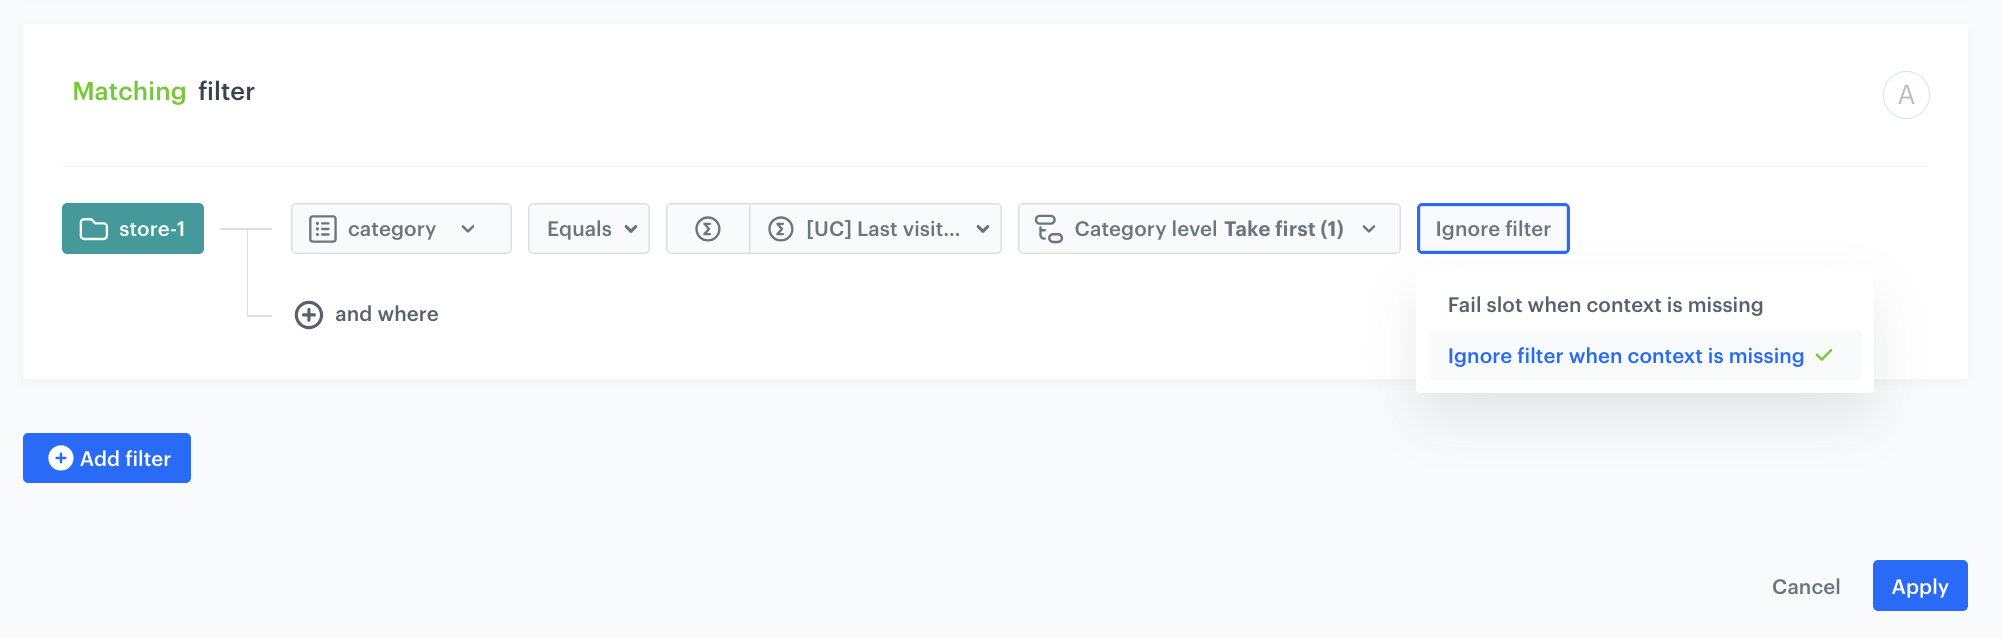
- Define Static filter. Choose Visual builder.
- From the Select value drop-down list, select category.
- As an operator, choose Equals.
- Click the icon which appeared next to the field with operator and from the dropdown list, select Aggregate.
- Choose the aggregate, created in the previous step
- In the Category level input area that appear, define the category level as a numeric value. In our case choose Take first (1).
If your products categories have aX > Y > Zstructure, level 0 will beX > Y > Z. Level 1 will beX > Yand so on. Here, you define how granular the category recommendations will be. For example, if you are selling shoes, you will have aOutdoor > Sport > Runningcategory and aOutdoor > Sport > Footballcategory. If level 0 is provided, both categories can be recommended. If level 1 is providedOutdoor > Sportcategory will be recommended to the user.
- Choose Fail slot - in this case, if the filter is missing the slot of recommendations will not be visible. So if the user does not have any last time visited category because it is his first visit, this slot of recommendations will not be visible for him.
- Click Apply.
- In the Items sorting method within slots section, select your desired item sorting method within slots. In our case choose Items sorting method: Page visit count in the last 30 days.
- In Boosting, you can enable boosting.
- In Additional settings, optionally you can exclude already bought products and set a metric to sort by.
- Save the recommendation by clicking Save.
- In the top right corner, click Save
What's next
You can display the recommendation on your home page by using dynamic content.
- Go to Experience Hub > Dynamic content > New dynamic content.
- In the body of the dynamic content, use the promotion insert.
Read more about how to use promotion in inserts here.
- Add CSS and/or HTML to the dynamic content.
- Define the rest of the settings.
Check the use case set up on the Synerise Demo workspace
You can check the aggregate, and recommendation configuration directly in Synerise Demo workspace.
If you’re our partner or client, you already have automatic access to the Synerise Demo workspace (1590), where you can explore all the configured elements of this use case and copy them to your workspace.
If you’re not a partner or client yet, we encourage you to fill out the contact form to schedule a meeting with our representatives. They’ll be happy to show you how our demo works and discuss how you can apply this use case in your business.