Personalized menu
The navigation menu serves as a roadmap for category discovery, allowing customers to explore important site areas. However, sometimes, if the menu is not personalized, it can highlight items that are not interesting for to them. Optimizing and reorganizing the menu items based on a customer’s previous visits and preferences not only eases the website navigation but also can reduce the time it takes to reach the desired categories and drive conversions more effectively.
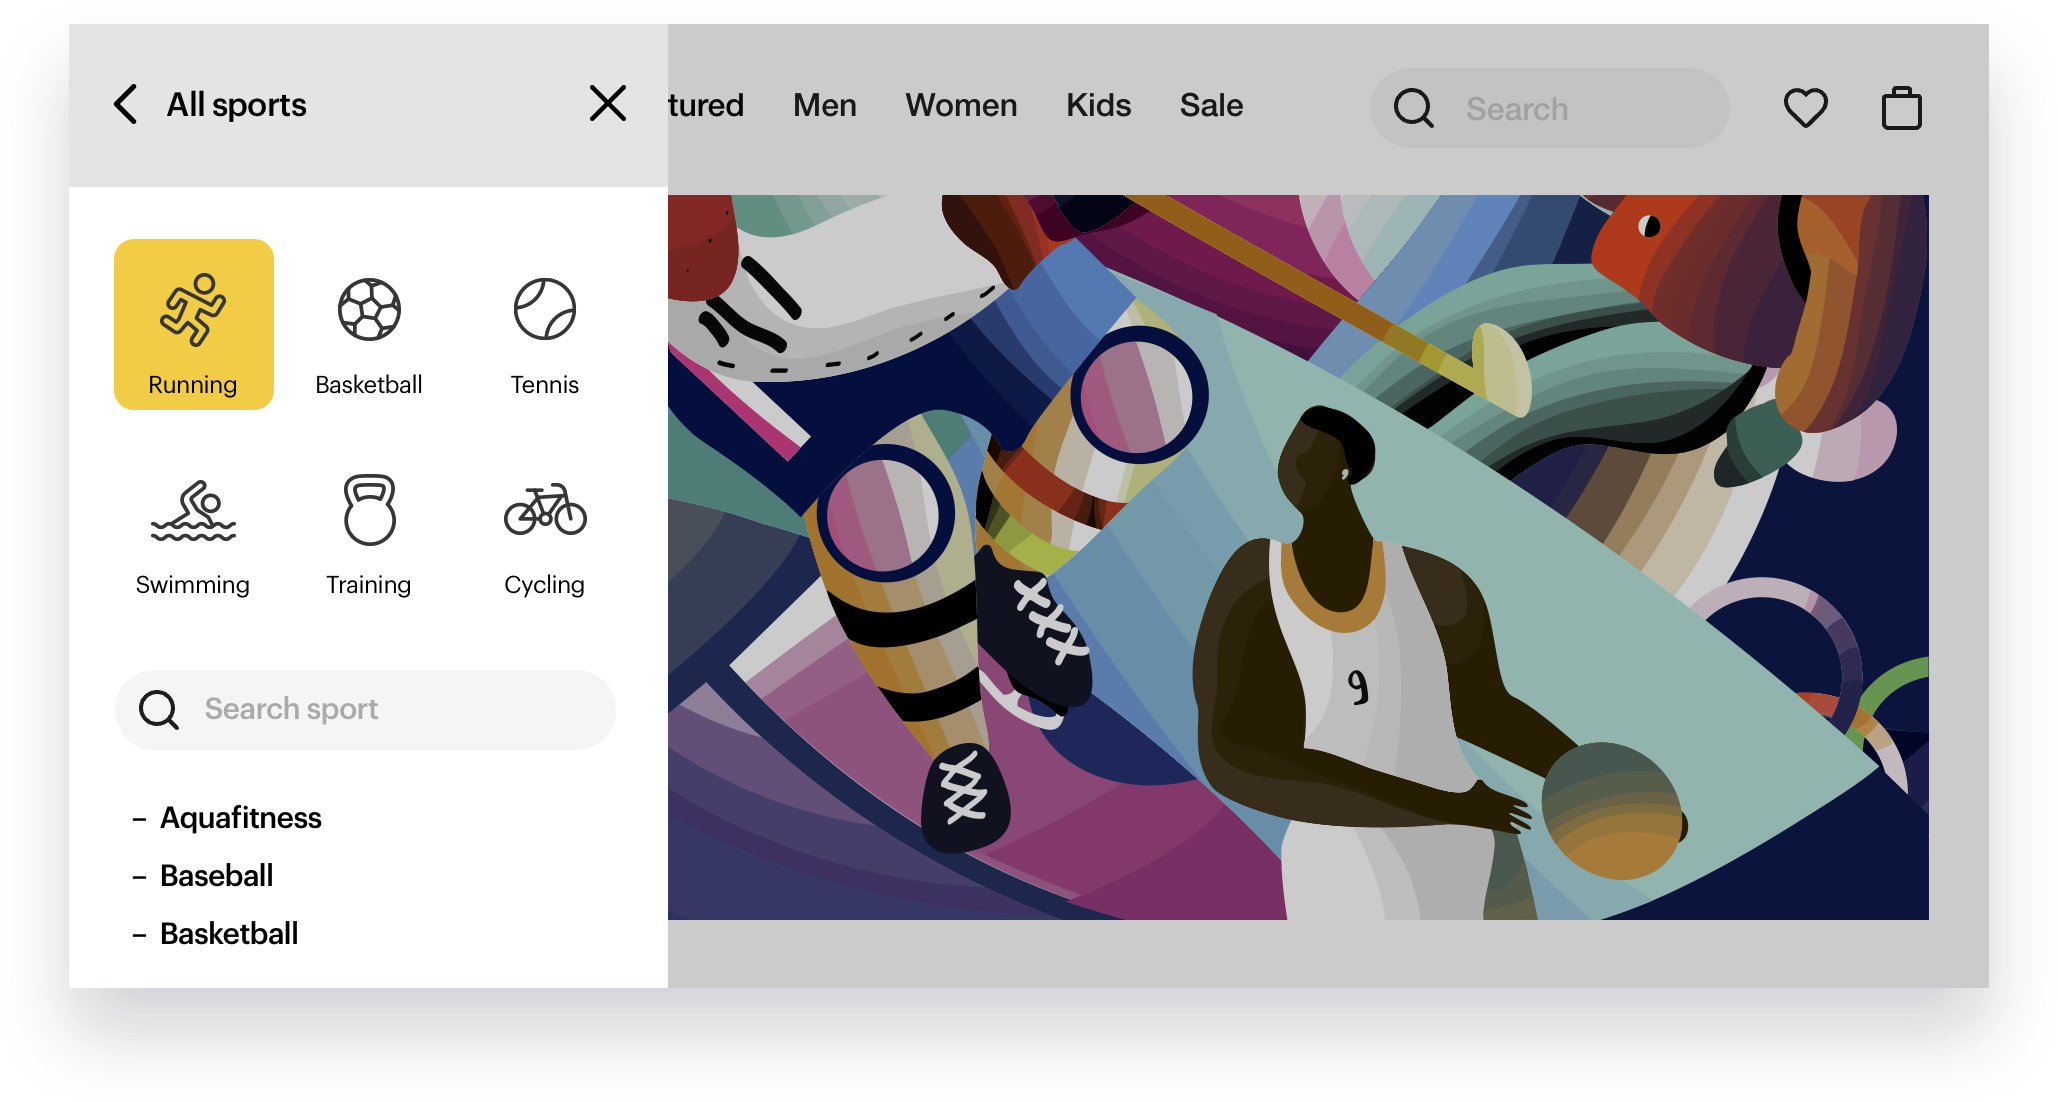
This use case describes an example of menu personalization for a sports company’s website. When the customer clicks the hamburger menu and selects a list of all sports, the list of categories is displayed in an alphabetical order. Above the list, a recommendation with six personalized categories (based on visits and interactions) is added to facilitate navigation and promote the most frequently viewed categories.

Prerequisites
- A tracking code implemented in the source of your website.
- Implement OG Tags on your website.
- Create items feed.
- Activate basic menu with all product categories on your website.
- Enable the Attribute recommendation model.

Process
In this use case, you will go through the following steps:
- Prepare metadata catalog.
- Import metadata of categories to a catalog.
- Create attribute recommendation campaign.
Prepare metadata of categories
-
Go to Data Modeling Hub > Catalogs.
-
Create a new catalog with meaningful name, for example
Metadata catalog. It will be necessary during the import process. -
Prepare a file (CSV, JSON Lines or XML Google Merchant format) with all product categories available in your menu on the website. Include 4 parameters:
itemId,title,linkandimageLink. You can add more additional parameters if you want.Important:itemIdvalues must correspond with the same values of thecategoryattribute in your general product feed. In metadata catalog, all values must start with lower case letter.
Import metadata of categories to a catalog
Create the workflow that imports the metadata of categories into the Synerise catalog.
-
Go to
 Automation > Workflows > New workflow.
 -
Enter the name of the workflow.
-
As the trigger node, add Scheduled Run.
-
In the configuration of the node:
- In the Run trigger dropdown, leave the default option One time.
- Choose option Immediately.
- Confirm by clicking Apply.
-
Add the Local File node.
-
In the configuration of the node, add your file prepared in previous step.
-
Add the Import to Catalog node.
-
In the configuration of the node:
- Select the catalog created in previous step to which the data will be imported.
- As the primary key, enter the name of the file column which contains the unique identifiers of the items (in this case:
itemId). - Confirm by clicking Apply.
-
Add the End node.

The workflow configuration
Create recommendation campaign
Create an attribute recommendation for the 0 level category. Such recommendation will return personalized categories for customers based on their behavior on the website and browsing history.
-
Go to
 Experience Hub > Recommendations > Add recommendations
 -
Enter the meaningful name of the recommendation.
-
In the Type & Items feed section, click Define.
- From the Items feed dropdown list, select the main catalog with all products and categories.
- As the type, select Attribute.
- As the Metada catalog, choose the catalog created in this step that contains additional information about categories.
- Click Apply.

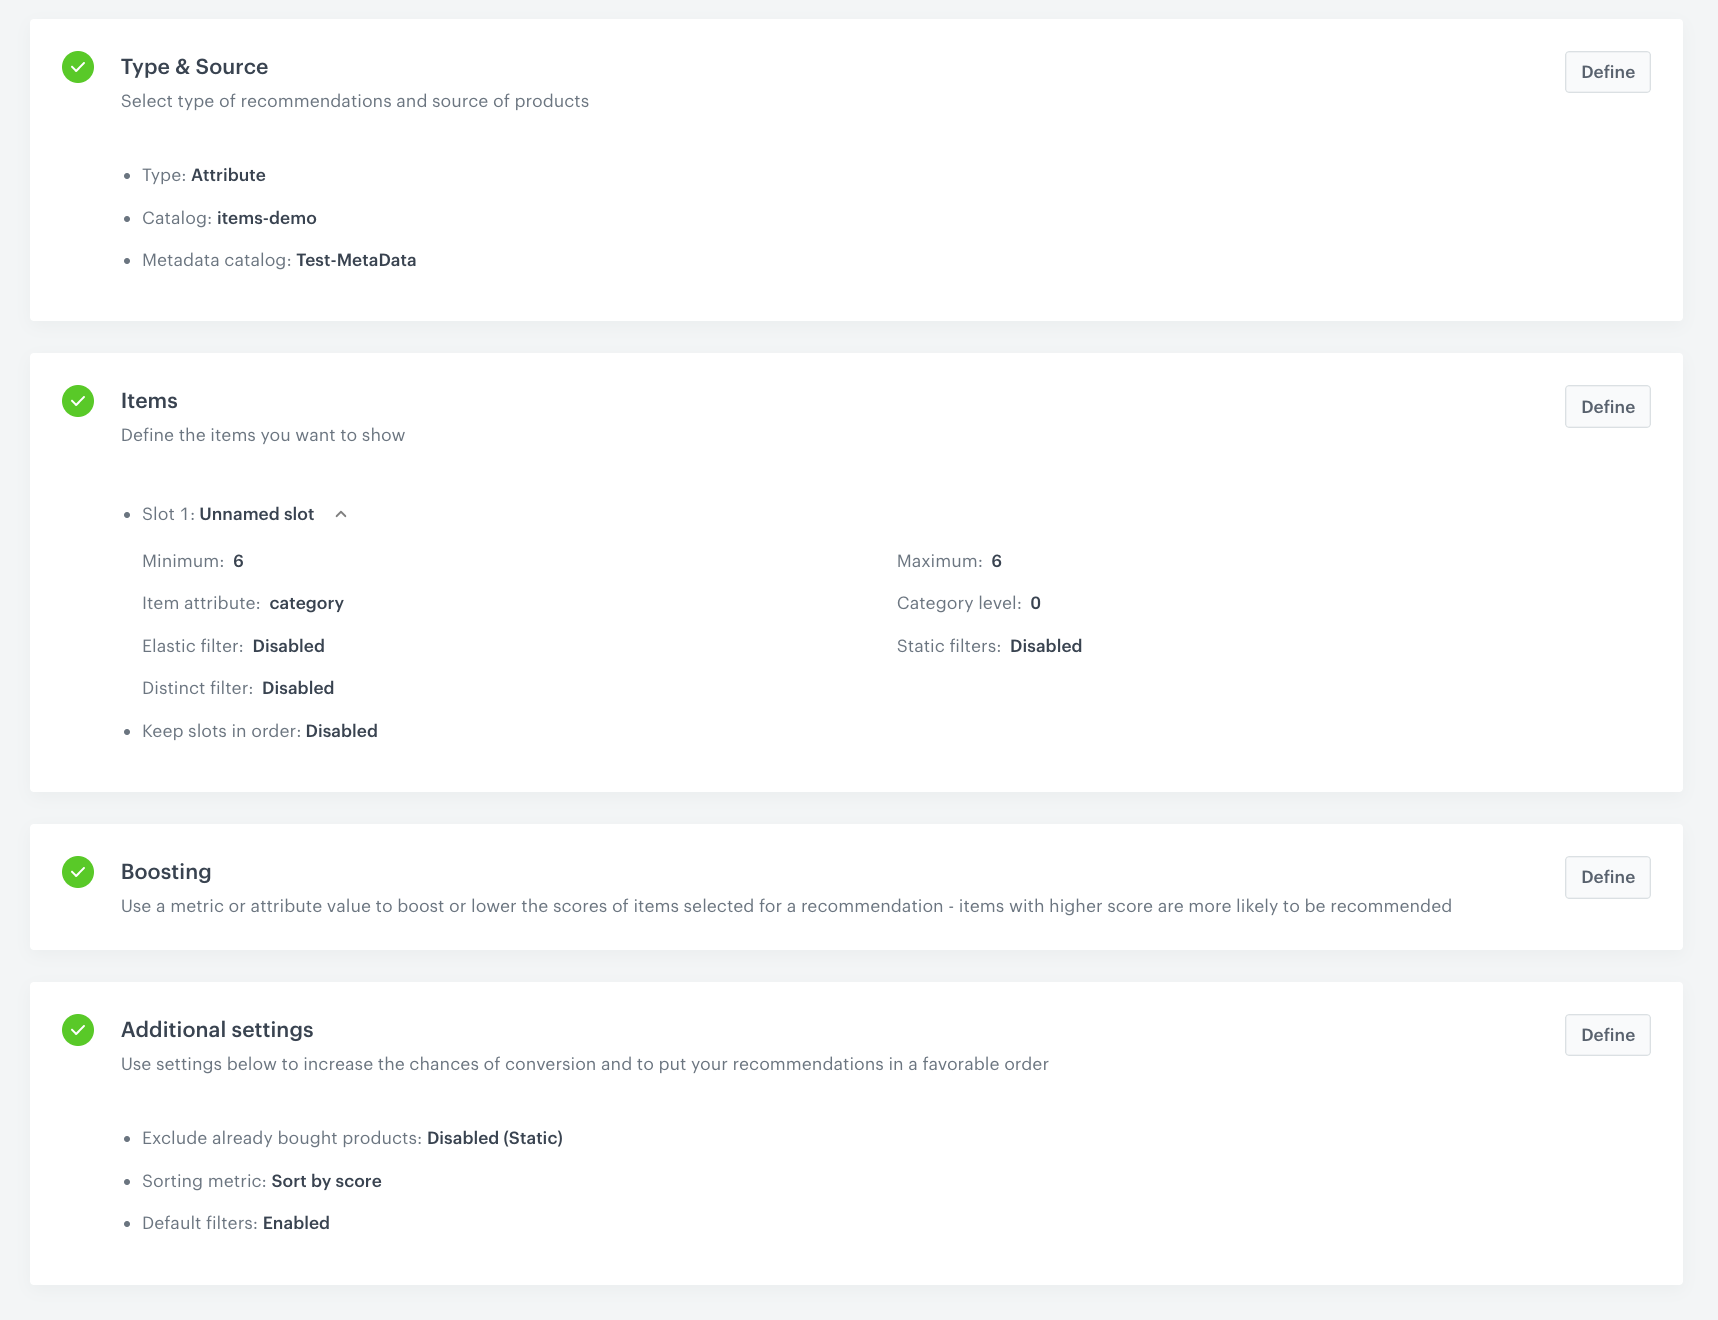
Attribute recommendation - Type&Source settings -
In the Items section, click Define.
-
Click Add slot. You can name the slot for later reference.
-
In the Number of items subsection, set the minimum and maximum number of items to
6.
Tip: Setting the minimum and maximum number of items to the same number ensures that exactly this many items will appear in the slot. -
From the Item attribute dropdown, choose category. Remember, that this attribute must have the same values as itemId in the metadata catalog.
-
Additionally, if you want to, you can use additional filters to make this recommendations more personalized.
-
In the Items section, click Apply.
-
In Boosting, you can enable boosting.
-
In Additional settings, optionally you can add metrics or filters to increase the chances of conversion and to put your recommendations in a favorable order.
-
Save the recommendation by clicking Save.

What’s next
We recommend to implement this recommendation campaign on your website through API.
|
|
However, as an alternative option you can display the recommended categories to your customers using the recommendation insert in dynamic content.
Check the use case set up on the Synerise Demo workspace
You can check the recommendation configuration, and workflow directly in Synerise Demo workspace.
If you’re our partner or client, you already have automatic access to the Synerise Demo workspace (1590), where you can explore all the configured elements of this use case and copy them to your workspace.
If you’re not a partner or client yet, we encourage you to fill out the contact form to schedule a meeting with our representatives. They’ll be happy to show you how our demo works and discuss how you can apply this use case in your business.
