Make use of the built-in Google Cloud Storage integration in Automation Hub and export prediction results of lifetime value (LTV) and customer's loyalty status to your external resources for further analysis.
This use case combines three Synerise hubs:
- Decision Hub - to create analyses required for the prediction configuration, including an expression to calculate the total transaction value over the last 90 days, a segmentation based on website visits in the past 30 days to use it for a prediction, segmentation of customers who participate in a loyalty program, and later on an aggregate that retrieves the prediction result.
- Predictions (from AI Hub) - to create a prediction that forecasts the transaction value in the next 90 days for the customers who visited your website in the last 30 days, and assess the probability of this transaction value.
- Automation Hub - to create a workflow in which you will re-select the segmentation with visits in the last 30 days, select the aggregate with prediction results and the segmentation of customers who are in the loyalty program to export to your Google Cloud Storage.
Prerequisites
- Enable the Custom prediction model.
- Make sure you meet all prerequisites to integrate Synerise with Google Cloud Storage.
- Create a segmentation of customers who are members of the company's loyalty program. The conditions used in the segmentation will vary depending on your loyalty program logic (for example, you may use custom attributes related to loyalty program).
Process
In this use case, you will go through the following steps:
- Create prediction target based on an aggregate and expression.
- Create the segmentation for whom the prediction will be made (users who have visited the website in the past 30 days).
- Create the prediction to predict the transaction value in the next 90 days and determine its likelihood.
- Create an aggregate that retrieves the prediction results.
- Create a workflow that will send results of the prediction and loyalty program status of selected customers.
Create prediction target
In the first part of the process, create an expression that calculates the total value of purchases. This expression will also serve as data input to forecast the total purchase value for the next 90 days. In order to create such expression, you have to start with creating aggregate whose results will be retrieved in the expression. This is because only expressions can be used as prediction goals in the prediction configuration.
- Go to
 Behavioral Data Hub > Live Aggregates > Create aggregate.
 - As the aggregate type, select Profile.
- Enter the name of the aggregate.
- Set the Analyze profiles by option to Sum.
- Click Choose event.
- From the dropdown list, select transaction.charge.
Events may have different labels among workspaces, but you can always find them by their action name (in this step, it's transaction.charge).
- As the parameter of the event, select $totalAmount.
- Using the date picker in the lower-right corner, set the time range to Relative time range > Custom > last 90 days.
- Save the aggregate.

After saving the aggregate, proceed to creating an expression.
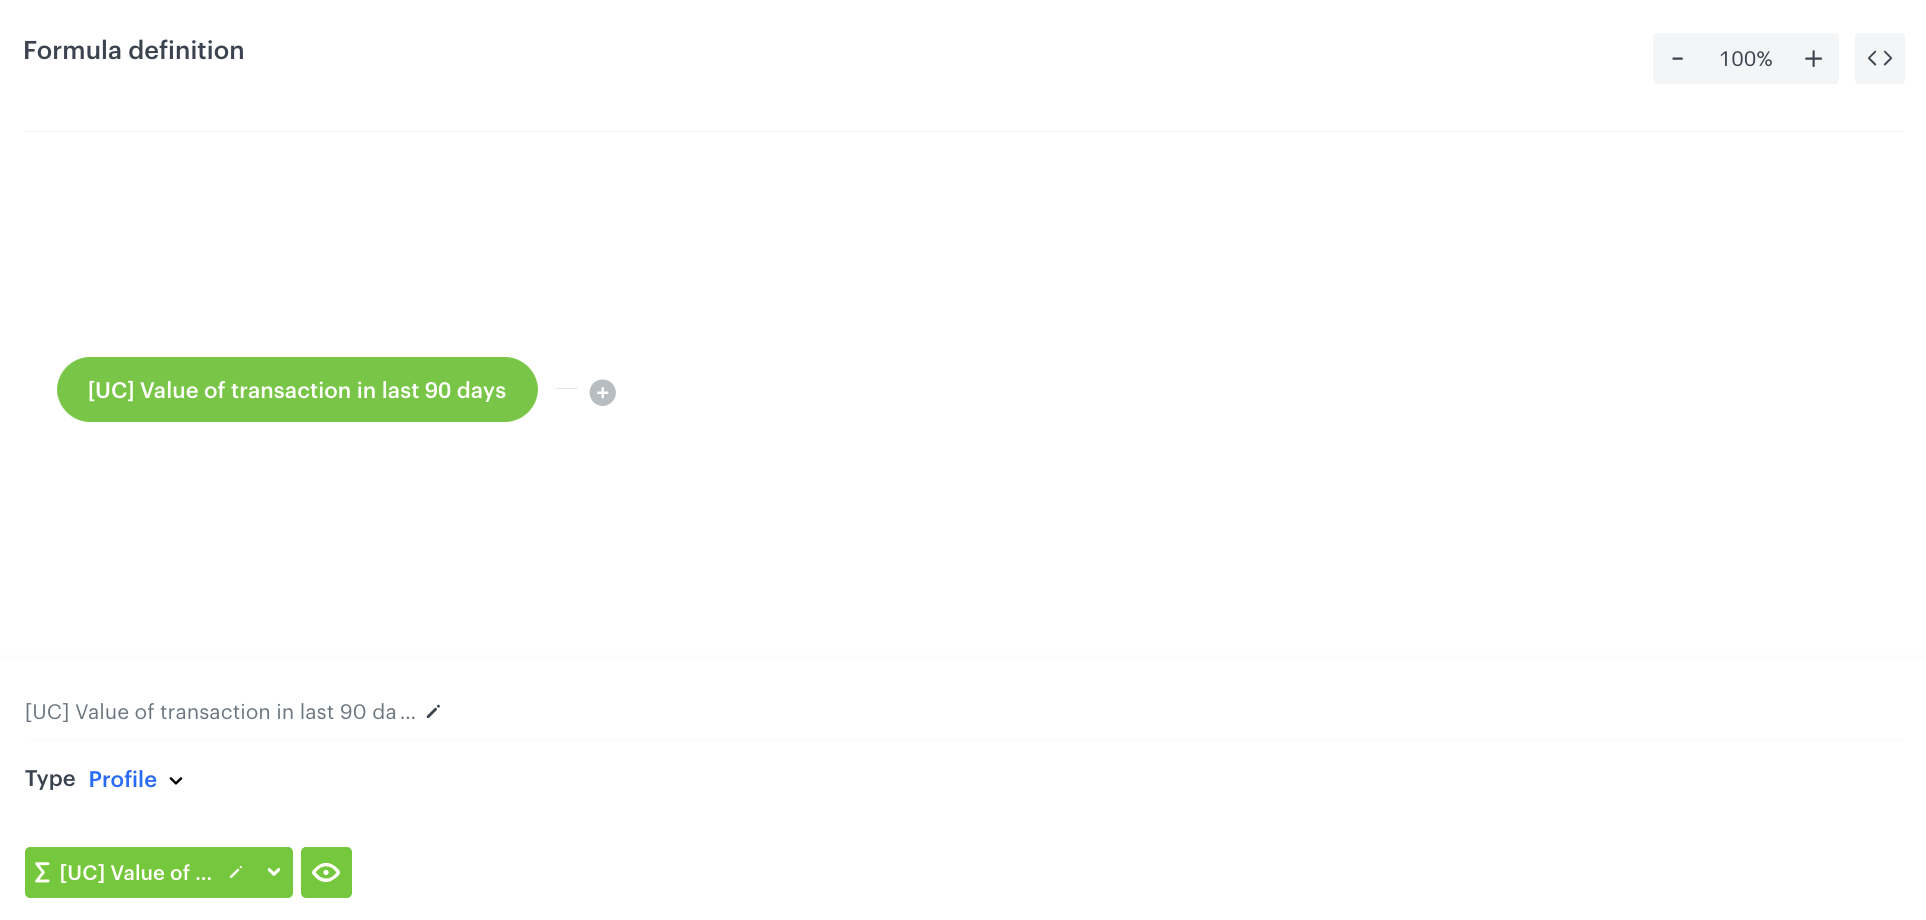
- Go to Behavioral Data Hub > Expressions > New expression.
- Enter the name of the expression.
- Set the Expression to Attribute. Predictions work only with attribute expressions.
- On the canvas, click Select.
- From the dropdown list, select Profile.
- Click the unnamed input that appeared on the canvas.
- From the Choose attribute dropdown list, select the aggregate you have created before.
- Click Save.
Create a segmentation
In this part of the process, create a group of customers for whom the prediction will be made.
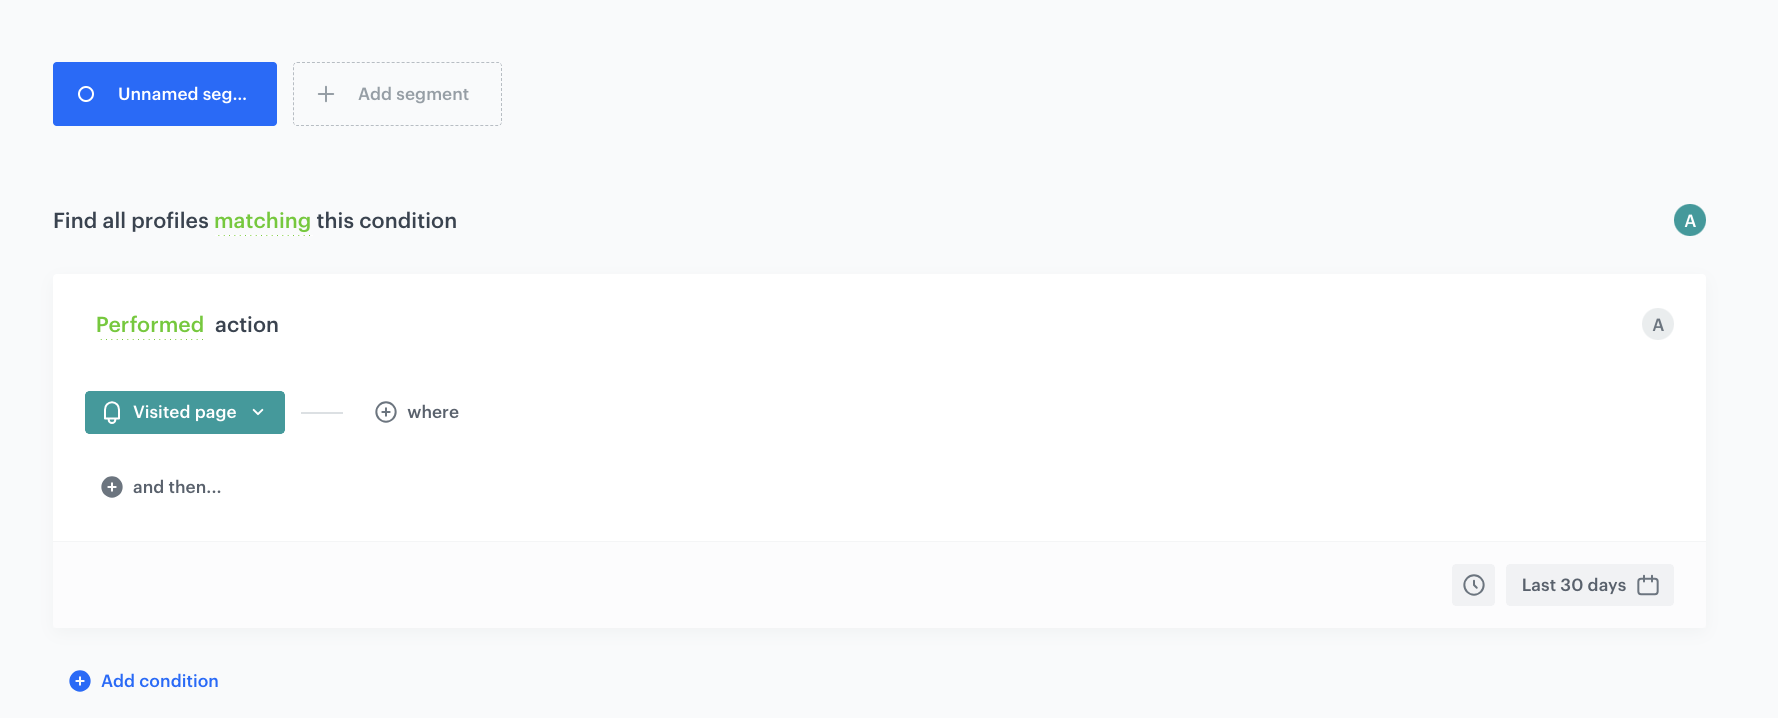
The conditions of the segmentation can be very complex. It usually makes sense to analyze customers with some activities observed, so in this use case, the segmentation contains customers who have at least one page visit during the last 30 days.
- Go to Decision Hub > Segmentation > New segmentation.
- Enter the name of the segmentation.
- Create a segmentation of customers who visited your website in the last 30 days.
You can find the instructions on creating segmentations in the "Creating segmentations" article.
- Click Save.
Create the prediction
In this part of the process, create a prediction for a selected group of customers. The prediction result will be available on the profile cards of these customers as a snr.prediction.score event. This event will contain the forecast result of the expression created in "Create prediction target" and probability of receiving such result expressed in 5-point scale.
- Go to
 (AI Predictions) Models > New prediction.
 - On the pop-up, select Create from scratch, and then select Regression.
Select the audience
In this section, select the group of customers you created in this part of the process.
- In the Audience section, click Define.
- Click Choose segmentation.
- Select the group of customers you created in Create a segmentation part of the process.
- Click Apply.
Select the target
- In the What would you like to predict? section, click Define.
- Click Select expression.
- From the dropdown list, select the expression you created in the Create prediction target part of the process.
Select events
Events are customer activities on the website (visits to a website, adding a product to a shopping cart, and so on) and also your activities towards customers (such as sending messages to them). Select the events that the system will use as input to make a prediction. By default, the list already contains the events recommended for the prediction you are creating. The contents of the list is defined while enabling Custom predictions.
- Leave the Auto-select events option toggle on.
Schedule recalculation and result settings
In this section, define the frequency of recalculating the prediction and settings of the event that is generated for customers for whom the prediction is made.
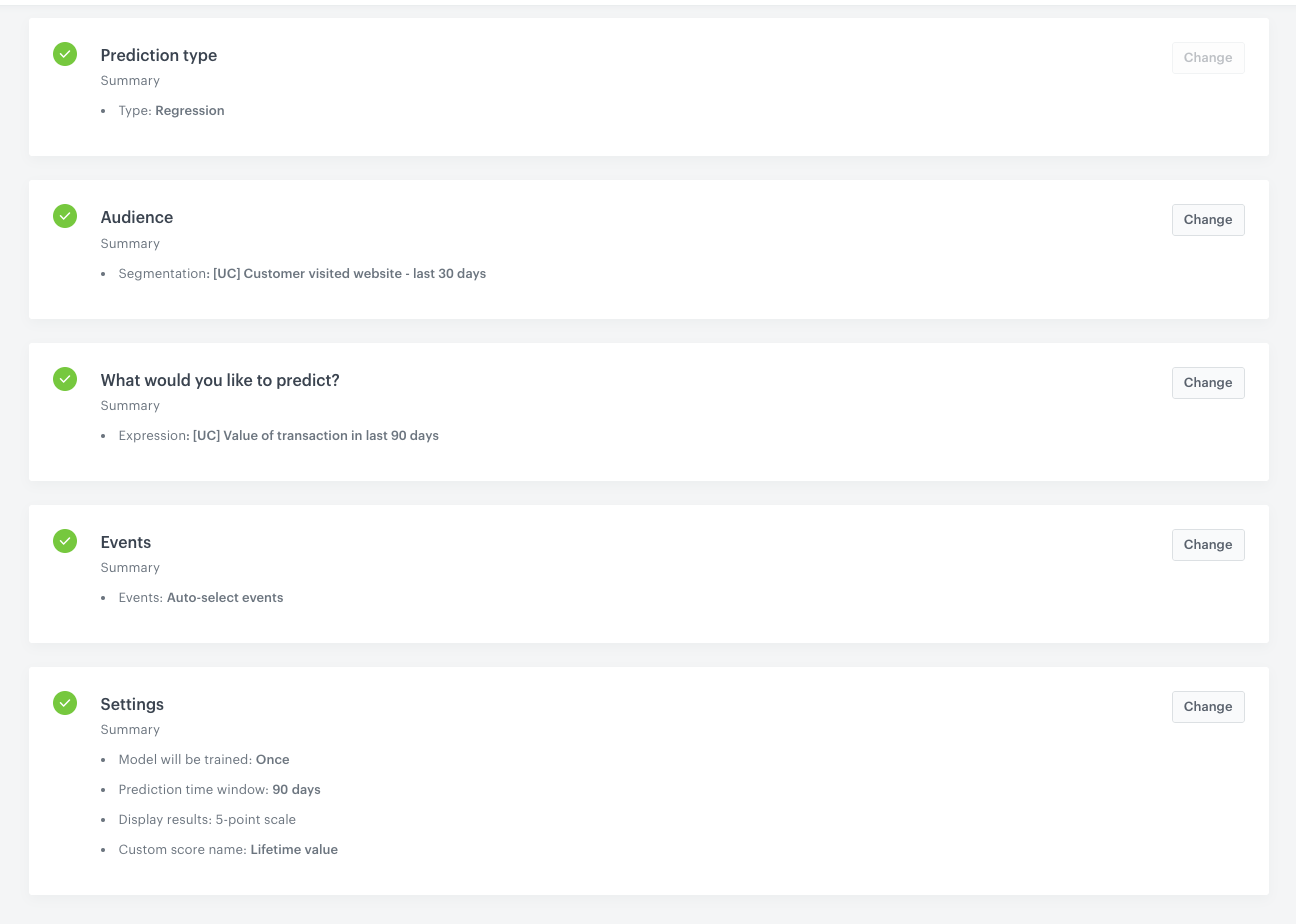
- In the Prediction time window section, from the How many days in advance do you want to make a prediction? dropdown list, select 90 days as the number of days in advance.
The time must correspond to the time range selected earlier in the prediction target. - In the Calculation frequency section, leave the settings at default (One-time calculation). As a result, the prediction is run only one time.
- In the Prediction start section, leave the settings at default (Immediately). As a result, the prediction is calculated immediately after saving.
- In the How would you like to display results? section, leave the settings at default (5-point scale).
- In the Define the value of the score name parameter section, in the Name field, enter the user friendly name of predictions scores. The score name parameter is shown in the
snr.prediction.scoreevent. In our case it isLifetime value. - Click Apply.
- Complete the prediction by clicking Save&Calculate.
Result: The calculation begins. After it completes, an event namedsnr.prediction.scoreis saved to the customer profiles selected in the segmentation. The event will be available in the platform, for instance in Decision Hub, Behavioral Data Hub, and Automation Hub.
Create an aggregate
In this part of the process, create an aggregate that returns the prediction score.
- Go to Behavioral Data Hub > Live Aggregates > Create aggregate.
- As the aggregate type, select Profile.
- Enter the name of the aggregate.
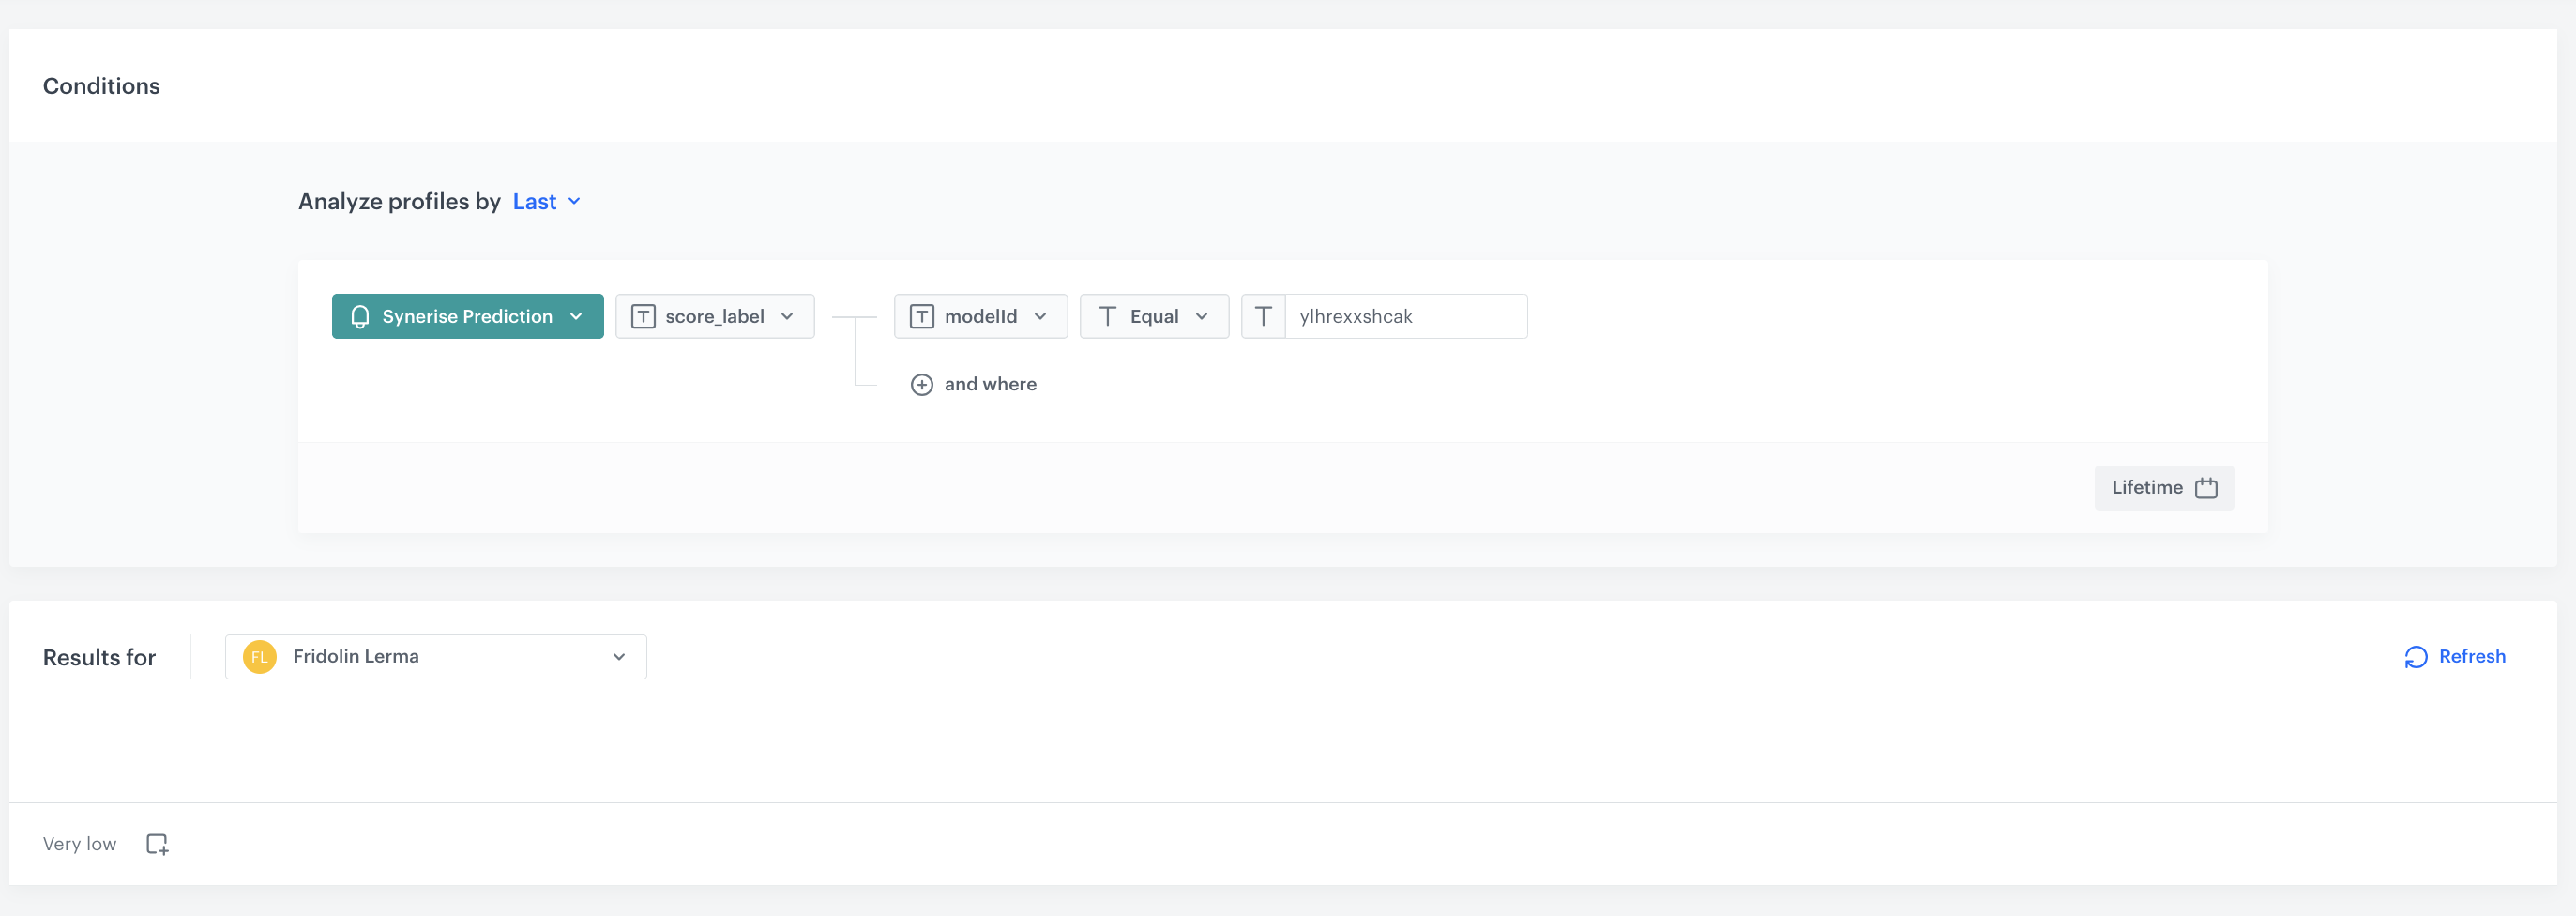
- Click Analyze profiles by and select Last.
- From the Choose event dropdown list, select the
snr.prediction.scoreevent. - As the event parameter, select score_label.
- Click +where and choose modelId.
To find the model ID, simply navigate to the prediction in the Synerise application. The ID is the part of the URL that comes after /prediction/, for example: deoojrhqdkpp in the URLhttps://app.synerise.com/ai-v2/predictions/deoojrhqdkpp. Copy this ID and use it in your code where needed.
- As the operator choose equal and as the value add the ID of the prediction creadted before.
- Set the period from which the aggregate will analyze the results to Lifetime.
- Save the aggregate.
Create a workflow
As the final part of the process, create a workflow which sends the customers' data to Google Cloud Storage.
- Go to
 Automation Hub > Workflows > New workflow.
 - Enter the name of the workflow.
Define the launch date
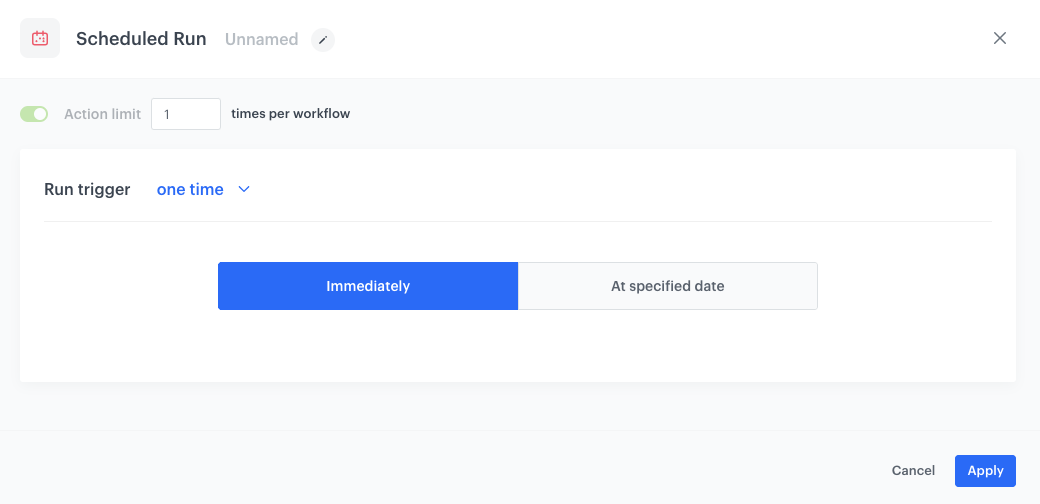
- As the trigger node, add Scheduled Run.
- In the configuration of the node:
- Leave the Run trigger option at default (one time).
- Choose option Immediately.
- Confirm by clicking Apply.
Select customers to export
- Add a Get Profiles node.
In the configuration of the node:
- Select the segmentation you created in the first part of the process.
- In the Attributes section, select name lastname and email. You can also add more attributes based on your business needs.
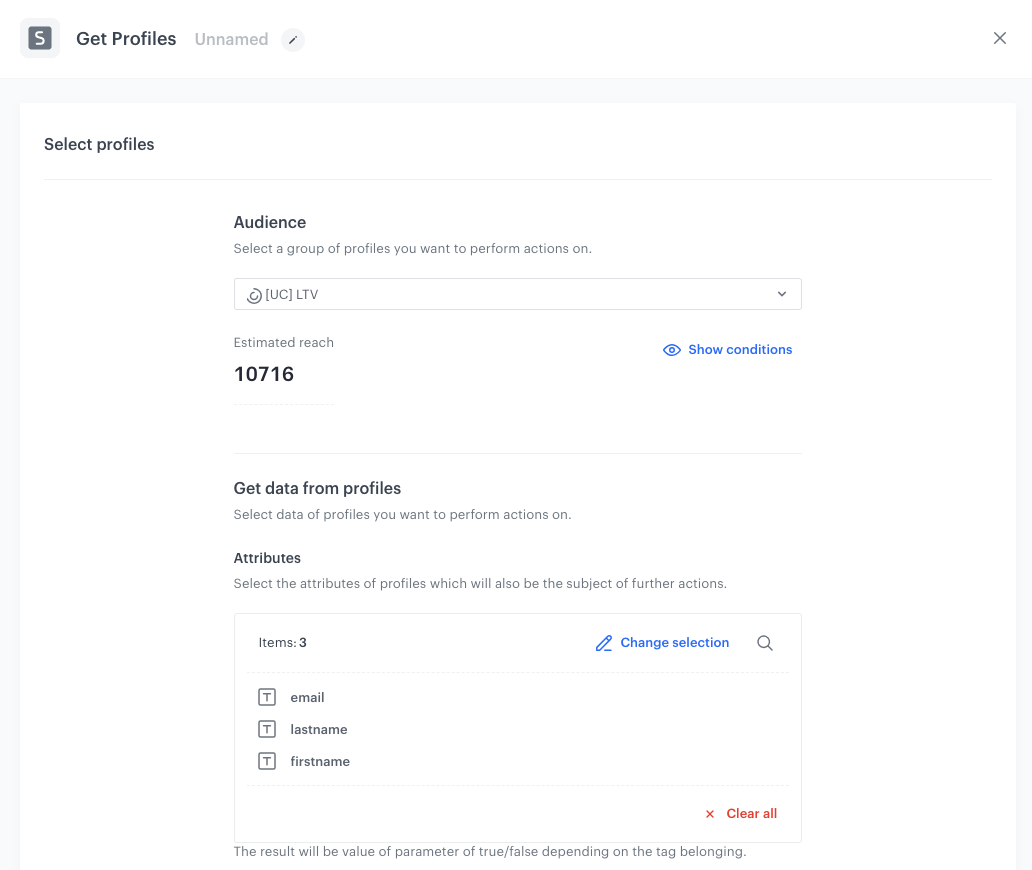
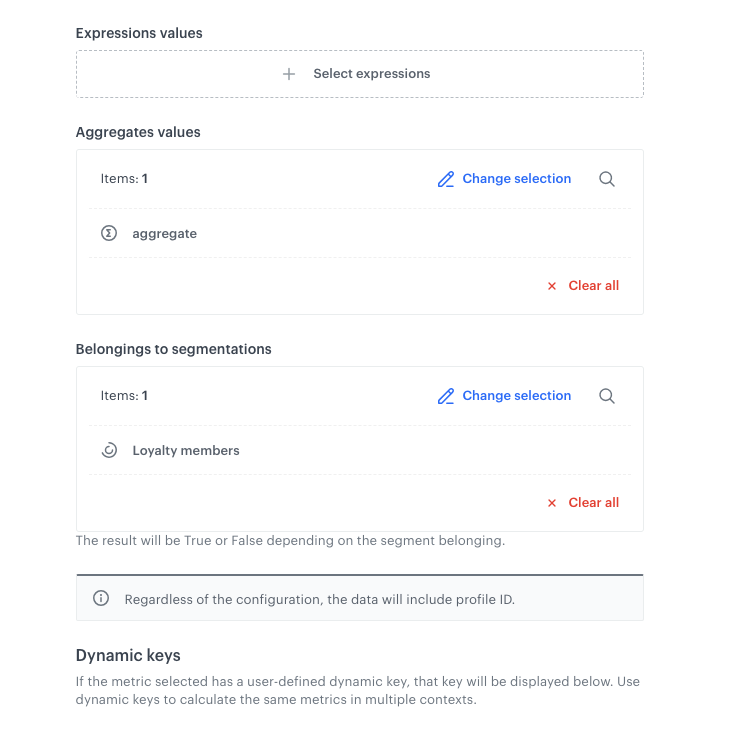
The configuration of the Get Profiles node - In the Aggregate Values section, select the aggregate which retrieves the prediction result.
- In the Belonging to segmentation section, add the segmentation of loyalty members created as the part of the prerequisites.
- Confirm by clicking Apply.
Configure Send File node
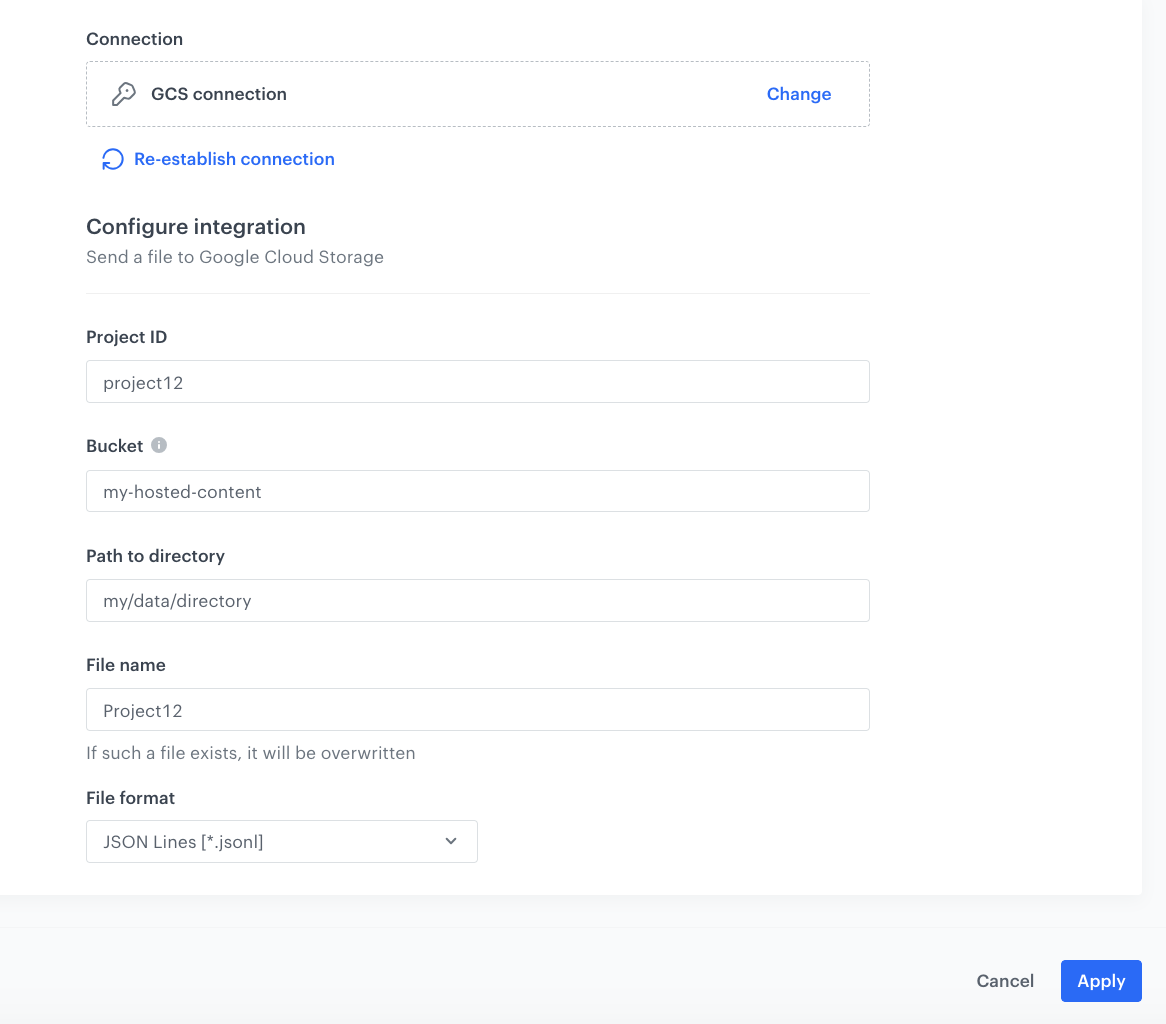
- Add Google Cloud Storage > Send File node.
- Click Select connection.
- From the dropdown list, select the connection.
- If no connections are available or you want to create a new one, see Create a connection.
- If you selected an existing connection, proceed with the integration settings.
- In the Project ID field, enter the unique identifier of your project in Google Cloud.
You can learn how to find the project ID here. - In the Bucket field, enter the name of an existing bucket (container) to which you will send a file with data.
- In the Path to directory field, enter the path to which the file will be saved in the bucket.
- In the File name field, enter the name of the file you want to send to the storage. If the file already exists, the contents of the file will be overwritten.
- From the File format dropdown list, select the format in which the file will be saved in the storage.
- Confirm by clicking Apply.
In this case, we use the Google Cloud Storage export node. However, Synerise offers various built-in integrations for data exports, including Amazon, Facebook, and others. Additionally, by using Outgoing Integration, you can send data as a request to any external tool, providing flexibility and extensive possibilities for data distribution.
Add the finishing node
- Add the End node.
- In the upper right corner, click Save & Run.
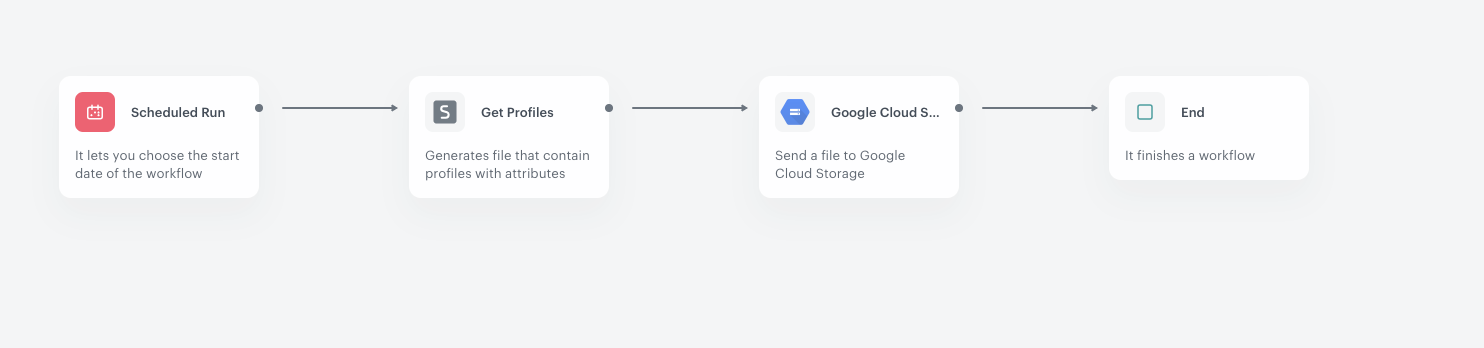
The workflow configuration
Check the use case set up on the Synerise Demo workspace
You can check the configuration of each item created in this use case on our Synerise Demo workspace:
- Aggregate - prediction target
- Expression
- Segmentation
- Prediction
- Aggregate which retrieves the prediction results
- Workflow
If you’re our partner or client, you already have automatic access to the Synerise Demo workspace (1590), where you can explore all the configured elements of this use case and copy them to your workspace.
If you’re not a partner or client yet, we encourage you to fill out the contact form to schedule a meeting with our representatives. They’ll be happy to show you how our demo works and discuss how you can apply this use case in your business.