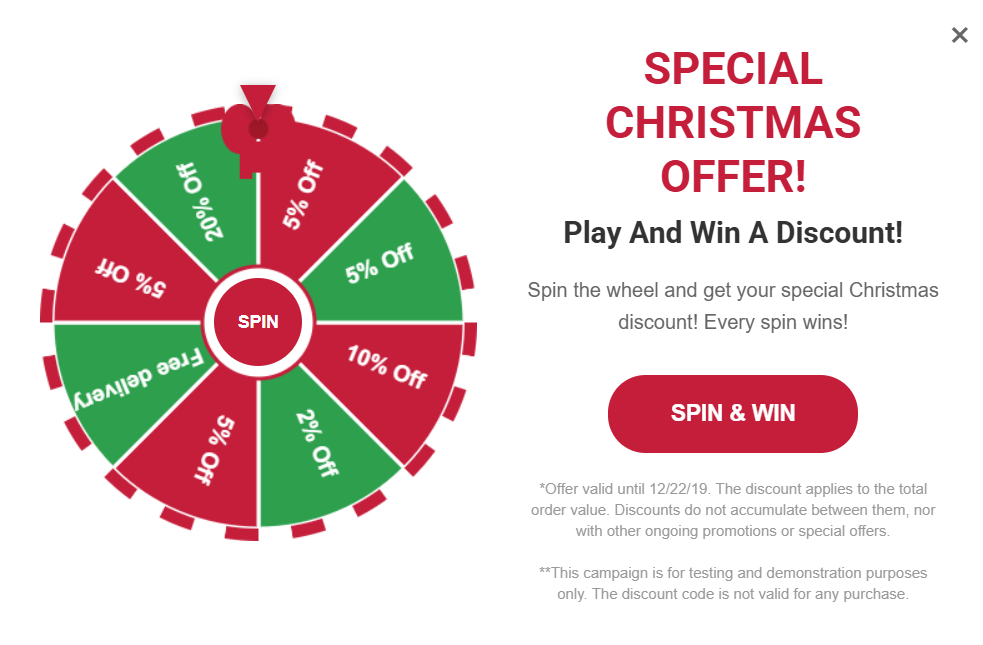
Who doesn’t love winning, especially when the reward is guaranteed? This use case adds a playful moment of suspense to the shopping journey using a “Spin the Wheel” pop-up. It also helps you protect the perceived value of your discounts by requiring user interaction before any reward is revealed. As a result, we increase customer engagement, extend on-site interactions and make promotional experiences more memorable.
The experience starts with a bottom bar displayed on the website. Once the visitor clicks it, the spin to win pop-up appears and invites them to play. This approach ensures the campaign is user-initiated rather than interrupting the browsing session with an automatic pop-up.
Users spin the wheel to receive a discount code that can be used at checkout, allowing you to run a fully gamified experience without relying on a mobile app.
This use case is provided with a predefined template, so you can launch the campaign quickly. The layout and interaction logic are already prepared, and you only need to adjust the content, styling and provide valid discount codes.
Before implementing this use case in a production environment, please review local regulations related to promotional lotteries and games of chance. We recommend consulting your legal or compliance team to confirm all requirements. Any additional formalities, such as preparing terms and conditions or submitting the promotion to the relevant tax or regulatory authorities, remain the responsibility of the implementing company.
Prerequisites
Create a dynamic content
Create a dynamic content campaign that will be displayed to all website visitors. We will use a predefined template for this communication, so there is no need to create a template from scratch.
- Go to
 Experience Hub > Dynamic Content > Create new.
 - Enter the name of the content.
- Choose the Insert object type.
Define audience
- To select the recipients of the dynamic content, on the Audience tab, click Define.
- Select Everyone.
- Click Apply.
Define content
In the next step, you will create the dynamic content with the help of a ready-made template.
- In the Content section, click Define.
- Click Create message and from the list of template folders, select Insert object templates.
- Select the Spin the Wheel template.
Result: You are redirected to the code editor. - Edit the template according to your needs. In the Config tab, you'll find a comprehensive list with descriptions of the core components that make up your dynamic content.
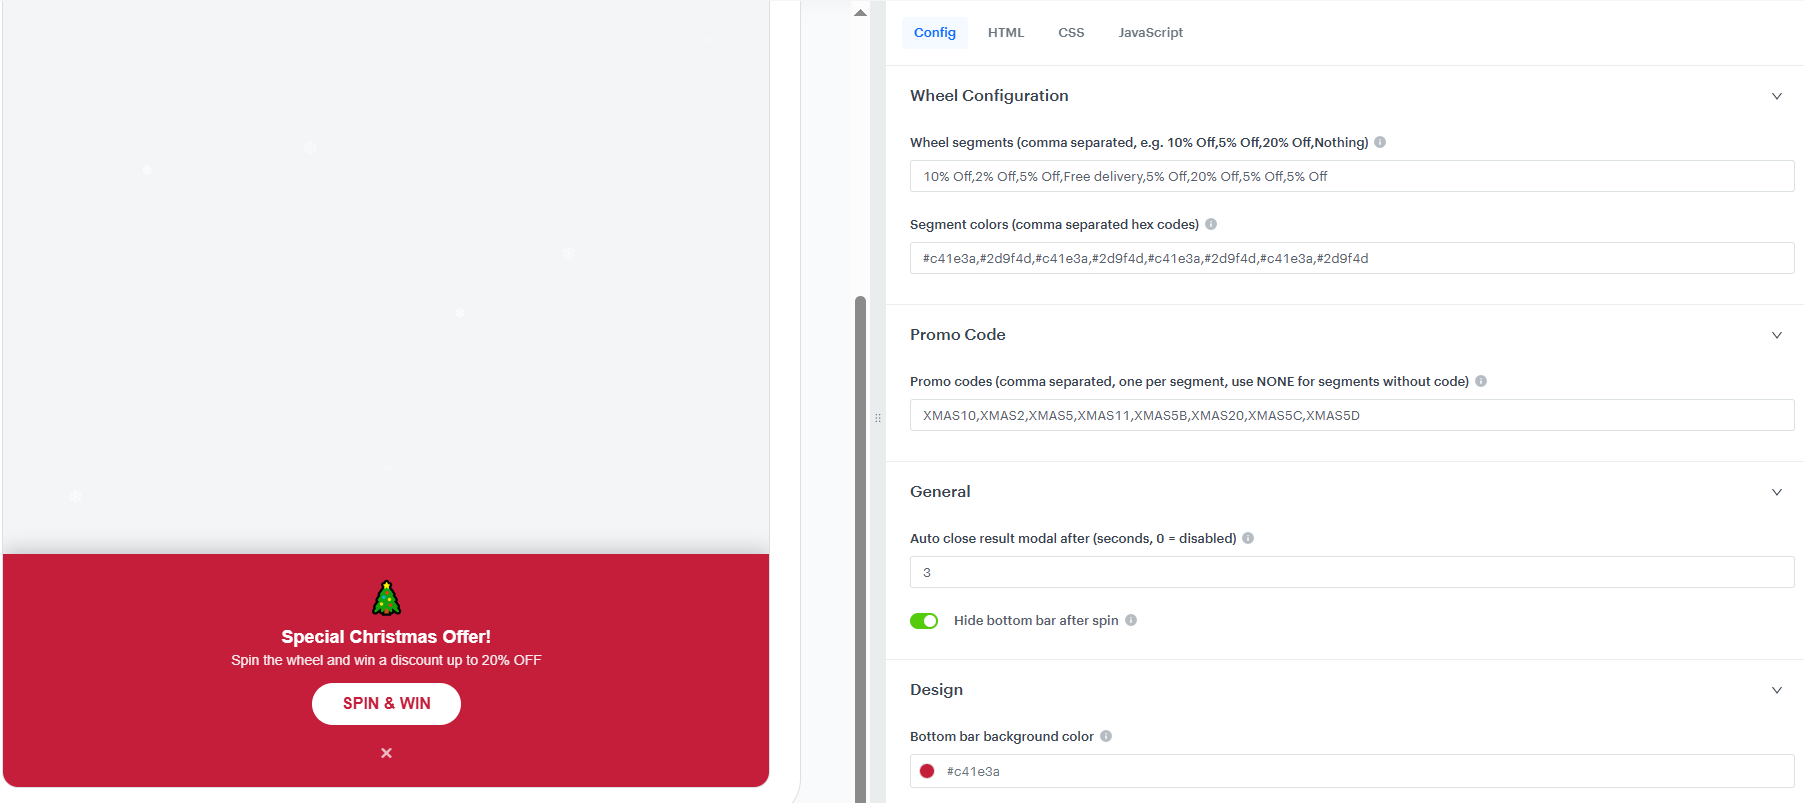
Config panel - After customizing your dynamic content, save the template.
- Set an appropriate CSS selector to define the placement of the banner that releases the pop-up. The correct selector depends on your website’s structure, so make sure to reference an element that ensures the bar is displayed in the intended position.
- Click Apply.
Define schedule and display settings
As the final part of the process, you will define the display settings of the dynamic content such as schedule, triggers, and delay.
- In the Schedule section, click Define and set the time when the campaign will be active.
- Click Apply.
- In the Display Settings section, click Define. If you want the banner to be displayed to all users continuously across the website upon landing, keep the default settings.
- Click Apply.
- Optionally, you can define the UTM parameters and additional parameters for your dynamic content campaign.
- Click Activate.
Check the use case set up on the Synerise Demo workspace
You can check the dynamic content configuration directly in Synerise Demo workspace.
If you’re our partner or client, you already have automatic access to the Synerise Demo workspace (1590), where you can explore all the configured elements of this use case and copy them to your workspace.
If you’re not a partner or client yet, we encourage you to fill out the contact form to schedule a meeting with our representatives. They’ll be happy to show you how our demo works and discuss how you can apply this use case in your business.