Synchronize complaint data as custom events
You can use the Synerise Automation module to synchronize your customers’ events thanks to the HTTPS and SFTP integrations that allow you to import data from your external sources to Synerise.
This use case describes how to prepare an automated workflow that launches every day and imports data about customers’ complaints to Synerise as custom events. The automation connects to an external resource using the SFTP protocol and imports data from a CSV file. One of the challenges addressed in this use case is the data transformation that consists of adding and renaming columns in the CSV file.
Prerequisites
- Host the .csv file with customer complaint data on an SFTP server.
- Prepare sample of data that will be used in data transformation. To do this, you can take the real file and remove rows until about 10 are left.
Process
- Create data transformation rules that will transform data from the .csv file.
- Prepare a workflow that imports events from the SFTP server to Synerise.
Create data transformation rules
In this part of the process, you define the rules of modifying data. Each of the following sub-steps describes the individual changes performed on the file. The data transformation diagram which is the output of this part of the process is used later to automate sending the data.
The sample file is used to configure the data transformation diagram and preview its results. With a library of nodes you can modify the file by adding, renaming, and merging columns as well as editing the values in the rows, and so on.
In this example, we will use the Add column and Rename column nodes to transform a complaint file so it meets Synerise’s import requirements.
- Go to
 Automation > Data Transformation > Create transformation.
 - Enter the name of the transformation.
- Click Add input.
Add file with sample data
This node allows you to add a data sample. In further steps, you define how the data must be modified. Later, when this transformation is used in the Automation workflow, the system uses the rules created with the sample data as a pattern for modifying actual data.
- On the pop-up, click Add example.
- Upload the file with the sample data.
This is the sample used in this article:
reporter,complaint,date
test@test.com,the item is faulty,2022-03-09T10:22:06.305+01:00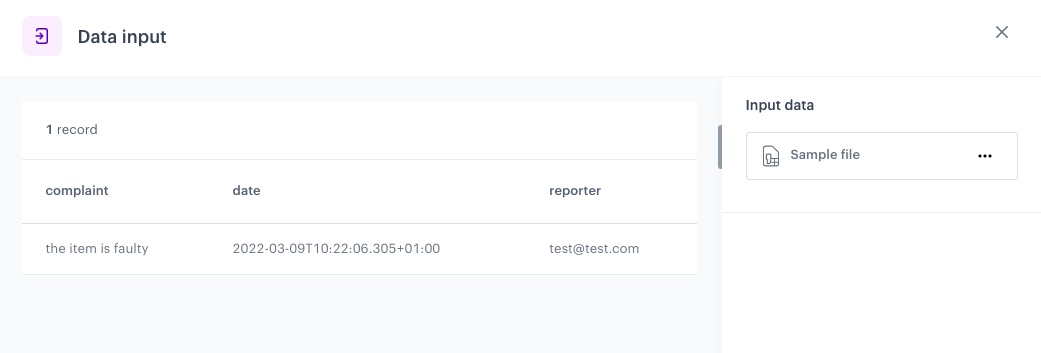
The configuration of the Data input node - Click Generate.
Add column
You can use the Add column node to create a new column to the file, with a defined value. In this example, we need to add following columns: type, label, action.
- On the canvas, click the right mouse button.
- From the dropdown list, select Add column.
- Click the Add column node.
- In the configuration of the node:
-
In the Add column field, enter the unique column name. In our case:
type. -
Select the Defined option.
The rows in the new column will be filled with the value you define. -
As the value, enter
custom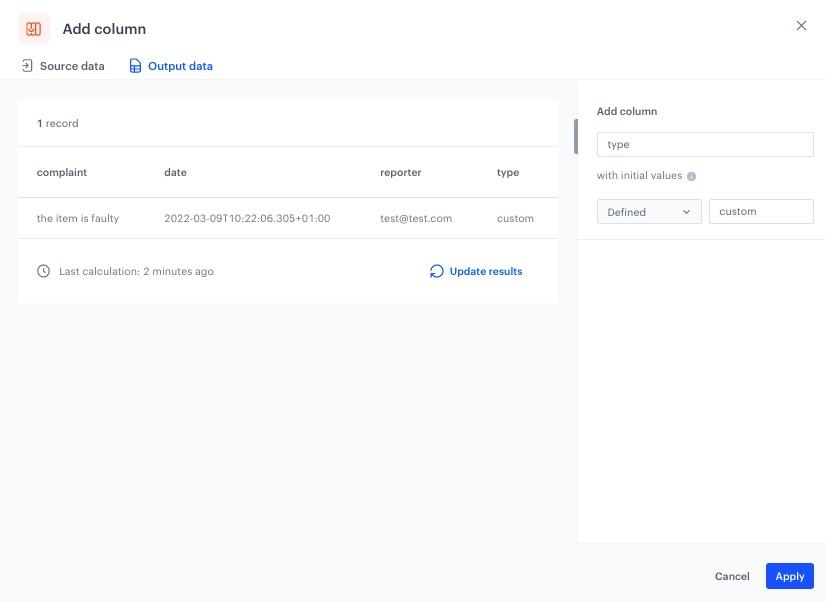
Example of the configuration of the Add column node, type -
Confirm by clicking Apply.
-
Before you save the settings, you can check the preview of the file after changes on the Output data tab.
-
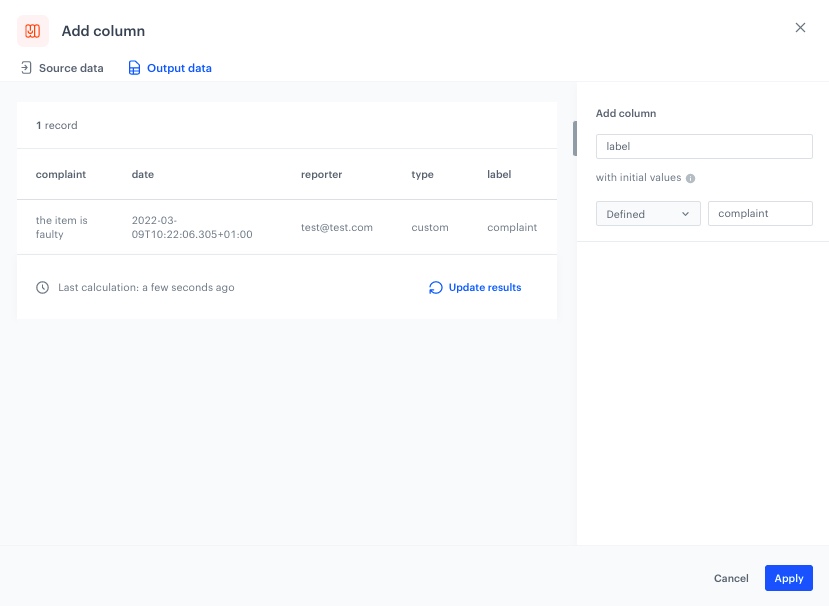
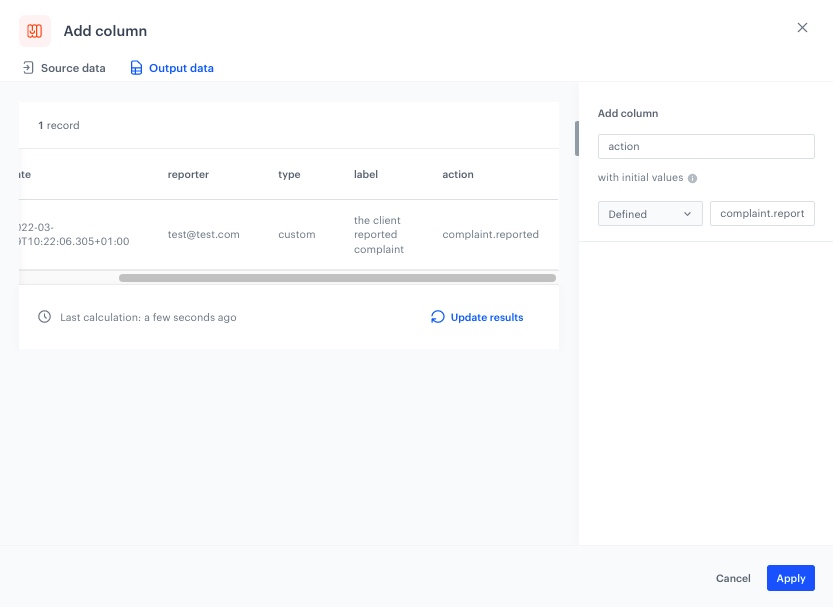
- Add two more Add column nodes by repeating steps 1-4 with the following changes:
- as the first column, add
labeland as the value to insert, entercomplaint - as the second column, add
actionand as the value to insert, entercomplaint.reported
- as the first column, add
Rename column
The column name is the key under which the data will be imported to Synerise and appear in the output file. In this example, we will use the Rename column node to rename the reporter column to client.email.
- On the canvas, click the right mouse button.
- From the dropdown list, select Rename column.
- Click the Rename column node.
- In the configuration of the node:
-
Click Add rule.
-
Select the Include these option.
This is the default option. All column names you select will be changed as you specify in the further configuration. -
Click Add column.
-
From the dropdown list, select the columns you want to rename.
-
Under the Edit values by subheader, select the Replacing option.
This options finds values matching the conditions and replaces them with the value you specify. -
In the right field, enter the name you want to replace the original name with. In our example, it is “client.email”.
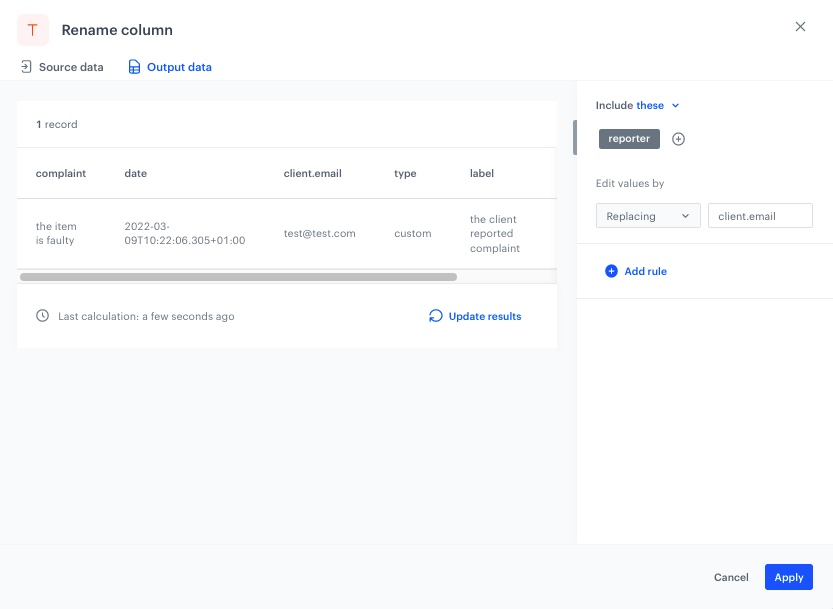
Example of the configuration of the Rename column node -
To add more rules, click Add rule and repeat steps from a to f.
-
- Before you save the settings, you can check the preview of the file after changes in the Output data tab.
- Confirm by clicking Apply.
Add the finishing node
This node ends the transformation and passes the modified data to the automation where the Data Transformation is used.
- On the canvas, click the right mouse button.
- From the dropdown list, select Data output.
- In the upper right corner, click Save and publish.
Result:
The diagram of data transformation
After the data transformation is published, you can use it in the Data Transformation node while preparing a workflow that imports the files.
Prepare a workflow
As the final part of the process, create a workflow which imports the custom events every day to Synerise.
- Go to
 Automation > Workflows > New workflow.
 - Enter the name of the workflow.
Define the launch date
- As the trigger node, add Scheduled Run.
- In the configuration of the node:
- Leave the Run trigger option at default (all time).
- From the Timezone dropdown list, select the time zone consistent with the timezone selected for your workspace.
- Define the frequency of the workflow (for example, everyday at 6.00 A.M.).
The workflow will automatically launch everyday at the specified time.
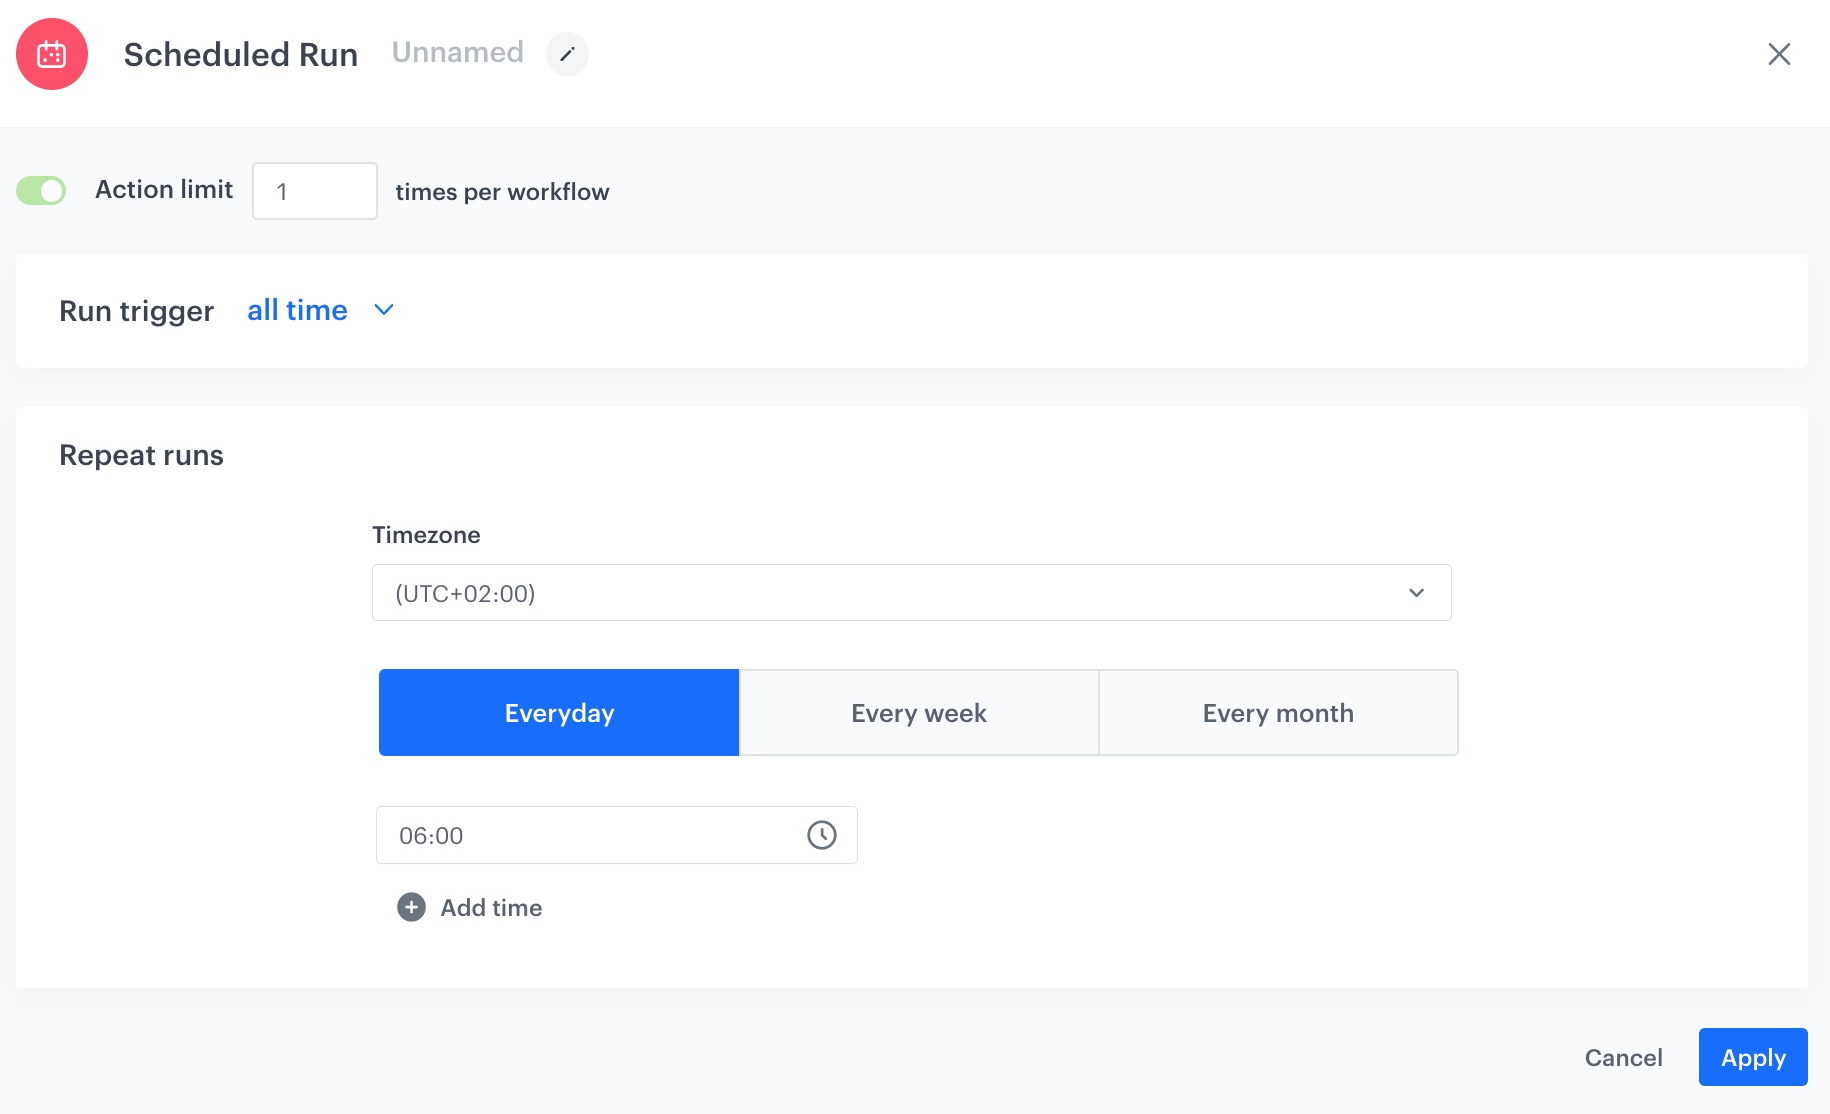
The configuration of the Scheduled Run node - Confirm by clicking Apply.
Configure settings for SFTP protocol
Use Get File node to transfer the files from the workflow to your server using SFTP protocol.
-
Add the Get File node by clicking THEN > SFTP.
-
In the configuration of the node :
- Enter the path to your server.
- Select the port.
- Enter the path to the directory.
- Enter the name of the file where the data will be saved.
- From the File format dropdown list, select the CSV format.
- Verify and modify the delimiters if needed.
- In the Authentication section, select the method of authentication.
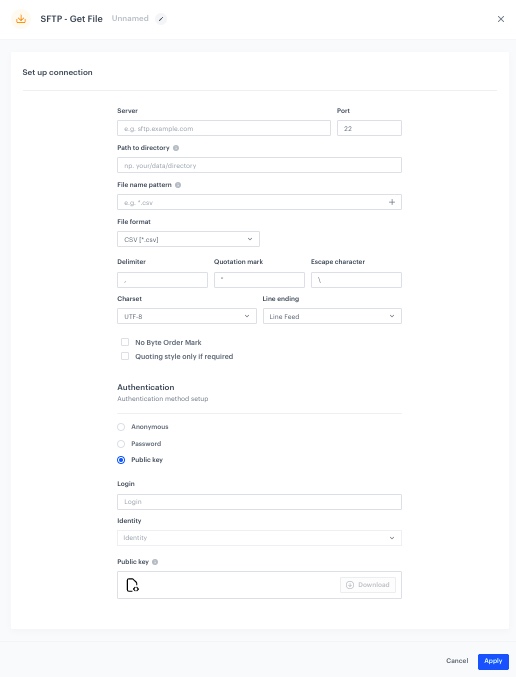
The configuration of the SFTP node -
Confirm by clicking Apply.
Select the data transformation rules
- Add a Data Transformation node.
- In the configuration of the node, select the data transformation you have created before.
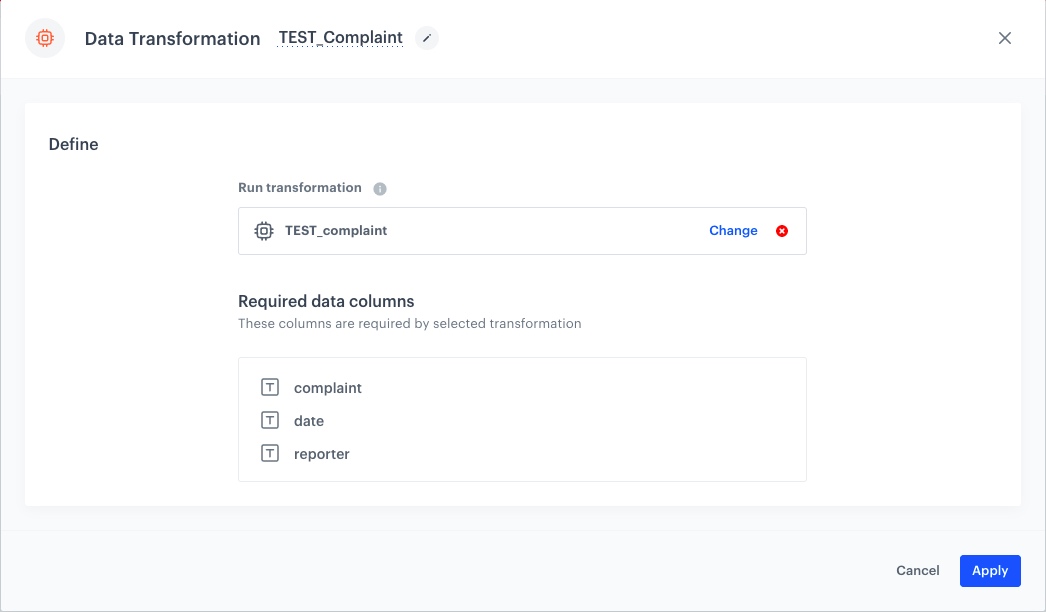
Example of the configuration of the Data Transformation node - Confirm by clicking Apply.
Import events
- Add the Import Events node. In the settings of the node, you can check the list of the required columns.
- Confirm by clicking Apply.
Add the finishing node
- Add the End node.
- In the upper right corner, click Save & Run.
Result:
The workflow configuration
You can monitor the flow of the workflow in the Transformation logs tab. It contains information about each execution of the workflow.

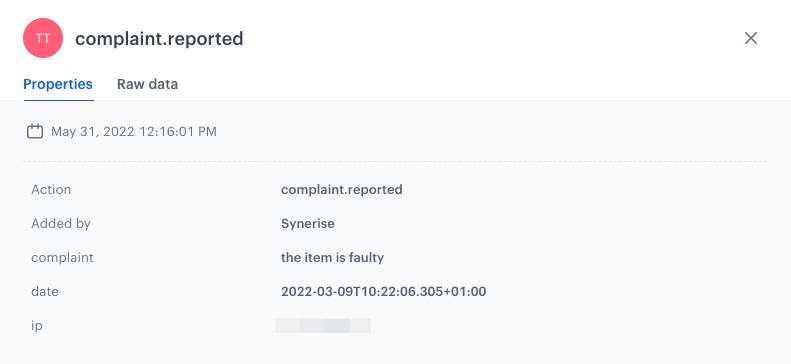
In the customer’s profile you can see the custom event added from the workflow.
Check the use case set up on the Synerise Demo workspace
You can check the data transformation rules directly in Synerise Demo workspace.
Also, you can check there the created workflow.
If you don’t have access to the Synerise Demo workspace, please leave your contact details in this form, and our representative will contact you shortly.
