This transformation step allows you to remove columns that match the rule you define in the configuration of the step. As a result, if you use a transformation that contains this step, the system removes the matching columns as a part of data transformation in the workflow.
Step configuration
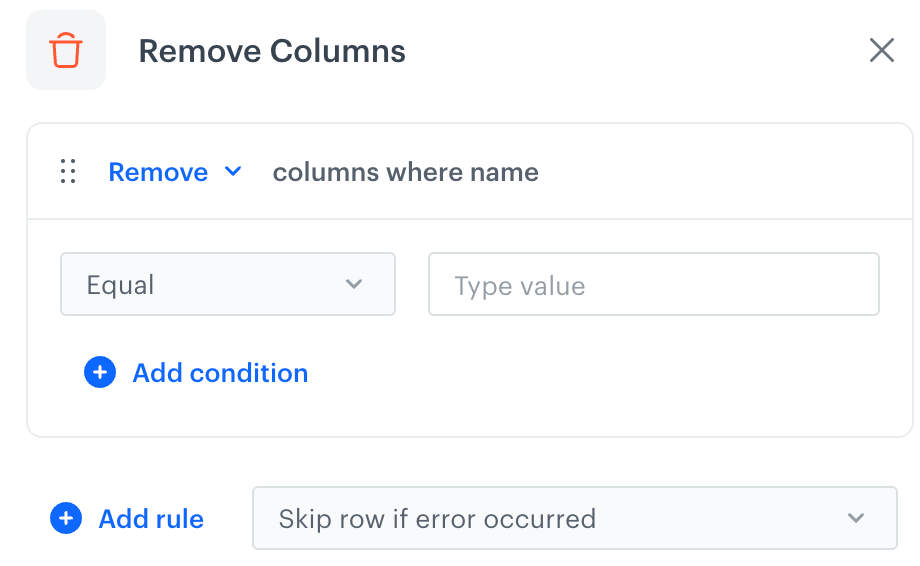
- In the Data Transformation Studio, add the Remove Columns step.
- In the header of the rule, click Remove and select one of the following options:
- Remove - This option deletes columns that match the conditions you define in the further steps.
- Keep - This option keeps only the columns that match the conditions you define in the further steps. The columns that don't match the conditions are removed.
- From the dropdown list, select one of the logical operators that the column name must meet:
- Equal
- Not equal
- Starts with
- Ends with
- Contain
- Not contain
- Regex
- In the text field, enter the value.
- Optionally, to add another condition to the rule, click Add condition and repeat steps 3-4.
The conditions in a rule are joined with the or operator: a column matches the rule if its name meets at least one of the conditions. - To add more rules, click Add rule and repeat steps 2-5.
The rules are performed one after another. Each rule works on the columns that are left after the previous one. - To define what happens if rows contain errors, from the dropdown list next to Add rule, select one of the error handling options.
- Confirm the settings by clicking Apply.
- You can check the result in the Output tab.
Handle errors
You can define what happens with rows in which the step fails (for example, as a result of Jinja rendering). From the dropdown list next to Add rule, select one of the following options:
- Skip row if error occurred - It omits the row when an exception occurs.
- Skip if result is null or empty string - It omits rows with empty strings and
null(which may be the result of rendering Jinja). - Stop further transformation - The transformation stops at the row with an error. The data before the line that caused the error is transformed (and imported if the transformation is used in the Data Transformation Studio node).
- Insert null if error occurred - Wrong values are replaced with
null. If you use such a transformation for the import of profiles, the existing value of an attribute is cleared and replaced with thenullvalue. - Insert empty string if error occurred - Wrong value is removed and the cell remains empty.
Example of use
While importing a list of transactions, you can edit out unnecessary columns. In this example, these are any columns that include an underscore in their name (import_type, payment_info) and columns whose name is exactly customer
Click to see example file
price,customer,orderId,payment_info,date,import_type 10.99,John Doe,123345,cash,12.03.2022,toSynerise 4.99,Dwight Addams,122345,cash,12.03.2022,toSynerise 8.99,Andrew Malone,112345,cash,12.03.2022,toSynerise- In the Data Transformation Studio, add sample data.
- Click Add step and select Remove Columns.
- In the configuration of the step:
- Leave the Remove option selected.
- Select Contain and enter
_ - Click Add rule.
- In the new rule, leave the Remove option selected.
- Select Equal and enter
customer
- Confirm by clicking Apply.
Result: In the Output tab, the data contains only theprice,orderId, anddatecolumns. You can use this transformation in the workflow to import or export files with the structure presented in this example.