The Data Transformation Studio node is useful for the workflows whose purpose is to retrieve the data, structure it to meet requirements, and process them further. Examples of such workflows can be retrieving a file from an external source and importing it to Synerise. The intermediate step between these two actions is converting the data structure, which can be achieved by means of the Data Transformation Studio node.
The Data Transformation Studio node performs the operations on the data according to the transformation defined in this node. When you click the node, the Data Transformation Studio opens. In the Studio, you can:
- create a new transformation directly in the workflow. The Studio can use the data from the preceding node as sample data, so you can build and check the transformation in the context of the workflow.
- use a transformation saved in the transformations library as a template.
How does it work
When you create a workflow which includes the Data Transformation Studio node, you must add a node that provides the data to be transformed (see Prerequisites) right before the Data Transformation Studio node.
When a launched workflow arrives at the Data Transformation Studio node, the system modifies the data according to the transformation used in the node. For the transformation to be successful, the transformation must be designed for the structure of the data the node receives.
What if the data does not fully comply with the transformation?
Transformation will be performed but may not always be successful. The Data Transformation Studio node accepts uneven data (for example, when a file contains a column that keeps information about the resolution of a product, which is required for items such as computers but not necessary for home appliances) but may not always transform them correctly.
Example 1: A transformation was based on sample data with columns: A, B, and C. The Data Transformation Studio node receives the actual file with only B and C columns. The transformation of such a file will be performed.
Example 2: A transformation was based on sample data with columns: A, B, and C, but the Data Transformation Studio node receives the actual file with A, B and D columns.
If the transformation contains a condition a column D qualifies to (for example, a specific value is added to columns whose names start with A, B, C, and D), then the transformation will be performed, even if the D column wasn't present in the sample data.
However, if column D doesn't qualify for any condition, the column will be imported as delivered in the file.
Prerequisites
The workflow which includes the Data Transformation Studio node must contain one of the following nodes right before the Data Transformation Studio node:
- Local File
- Get File (HTTPS)
- Get File (SFTP)
- Get File (Google Cloud Storage)
- Get File (Azure Blob Storage)
- Get file (Amazon S3)
- Get Profiles
- Get Statistic
- Get Catalog Data
- Get Analytics Report
- Get Metrics
- Get Data (Google BigQuery)
- Get Data (Snowflake)
- Get Data (Databricks)
Node configuration
NOTE: The Data Transformation Studio node transforms the entire file before the workflow proceeds to the next node. Depending on the size of the data and the complexity of the transformation, this may take some time.
- Click the Data Transformation Studio node.
Result: The Data Transformation Studio opens. - Optionally, to start from a transformation saved in the transformations library, click Templates library and select the transformation.
- Add the sample data. If the Data Transformation Studio node is directly preceded by a node that provides data, on the From workflow context tab, next to that node, click Get sample data.
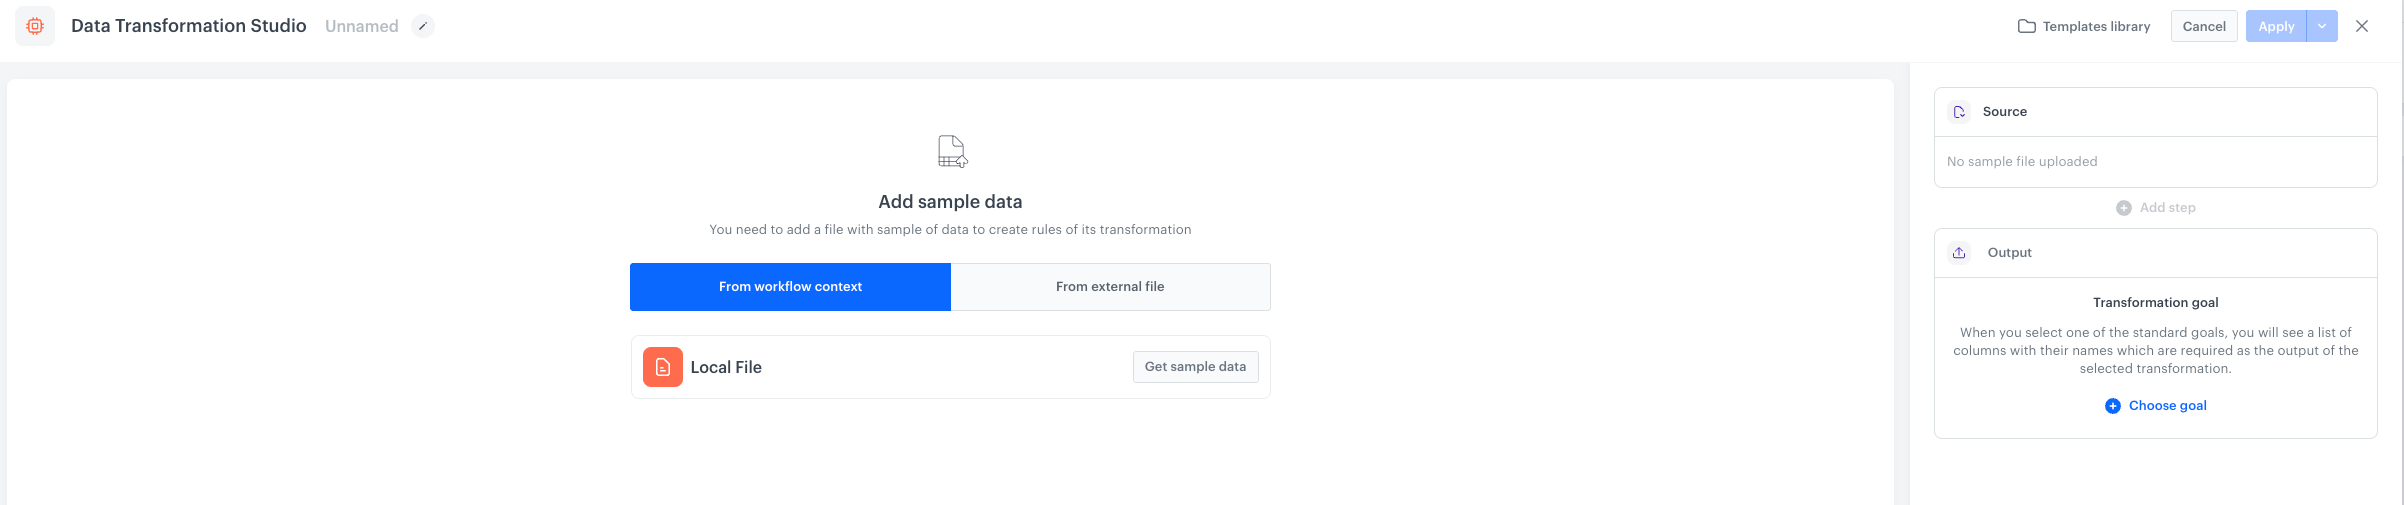
Adding sample data from the preceding node - Add transformation steps.
- Select one of the options:
- To use the transformation only in this node, click Apply. The transformation isn't added to the transformations library.
- To also save the transformation as a template in the transformations library, so you can reuse it in other workflows, click the arrow next to Apply and select Save as template.
For details, see Creating transformations.
Transformations in copied workflows and templates
- The transformation is stored in the node. When you duplicate the workflow, the copy contains the same transformation.
- When you use a template from the transformations library, the transformation is copied to the node. Changes you make in the node don't affect the template, and later changes in the template don't affect the node.
- When you save a transformation as a template, a new transformation is always created in the library, even if you use the name of an existing transformation.
Example of use
This example describes a procedure of creating a workflow that performs a single import of a file with transactions uploaded from the device. The workflow transforms the file with transactions so it complies with the Synerise requirements. After the transformation, the transactions are imported to Synerise.
Click here to see the example file
client.id,orderId,paymentInfo.method,products.finalUnitPrice.amount,products.sku,products.quantity,revenue.amount,revenue.currency,value.amount,value.currency,products.finalUnitPrice.currency 21052,ORD12345,Credit Card,29.99,SKU001,2,59.98,USD,60,USD,USD 21052,ORD12346,PayPal,15.50,SKU002,1,15.50,USD,15.50,USD,USDIn this example, the file doesn't contain the source column. The transformation adds this column with the WEB value for all transactions.
- Learn about the requirements for import of transactional data.
- Create a new workflow and start it with the Scheduled Run node.
- In the configuration of the node, set it to be scheduled immediately.
- Add the Local File node. In the configuration of the node, upload the file with transactions.
- Add the Data Transformation Studio node.
- Click the node.
Result: The Data Transformation Studio opens. - On the From workflow context tab, next to Local File, click Get sample data.
- In the Output section, click Choose goal.
- Select Import transactions and click Apply.
- Click Add step.
- From the list, select Add column.
In the configuration of the step:
- In the Type column name field, enter
source - From the With initial values dropdown list, leave Static value selected.
- In the field next to the dropdown list, enter
WEB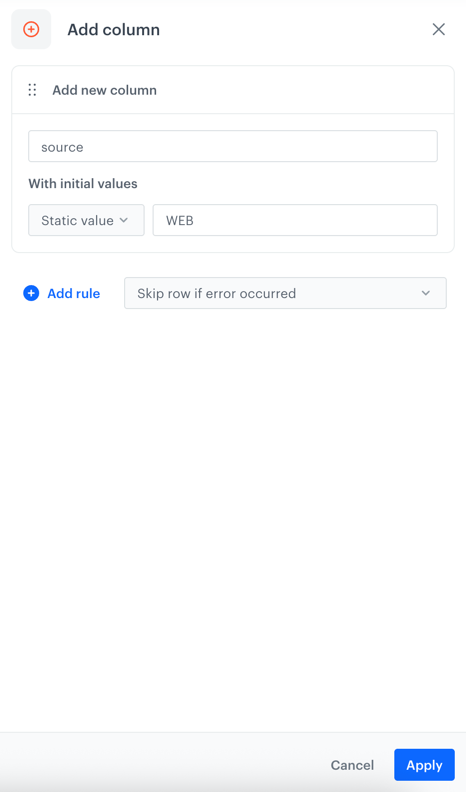
Configuration of the Add column step
- In the Type column name field, enter
- Click Apply.
Result: On the Output tab, thesourcecolumn contains theWEBvalue in all rows, and the Output section shows that the output contains all columns required for the import of transactions.
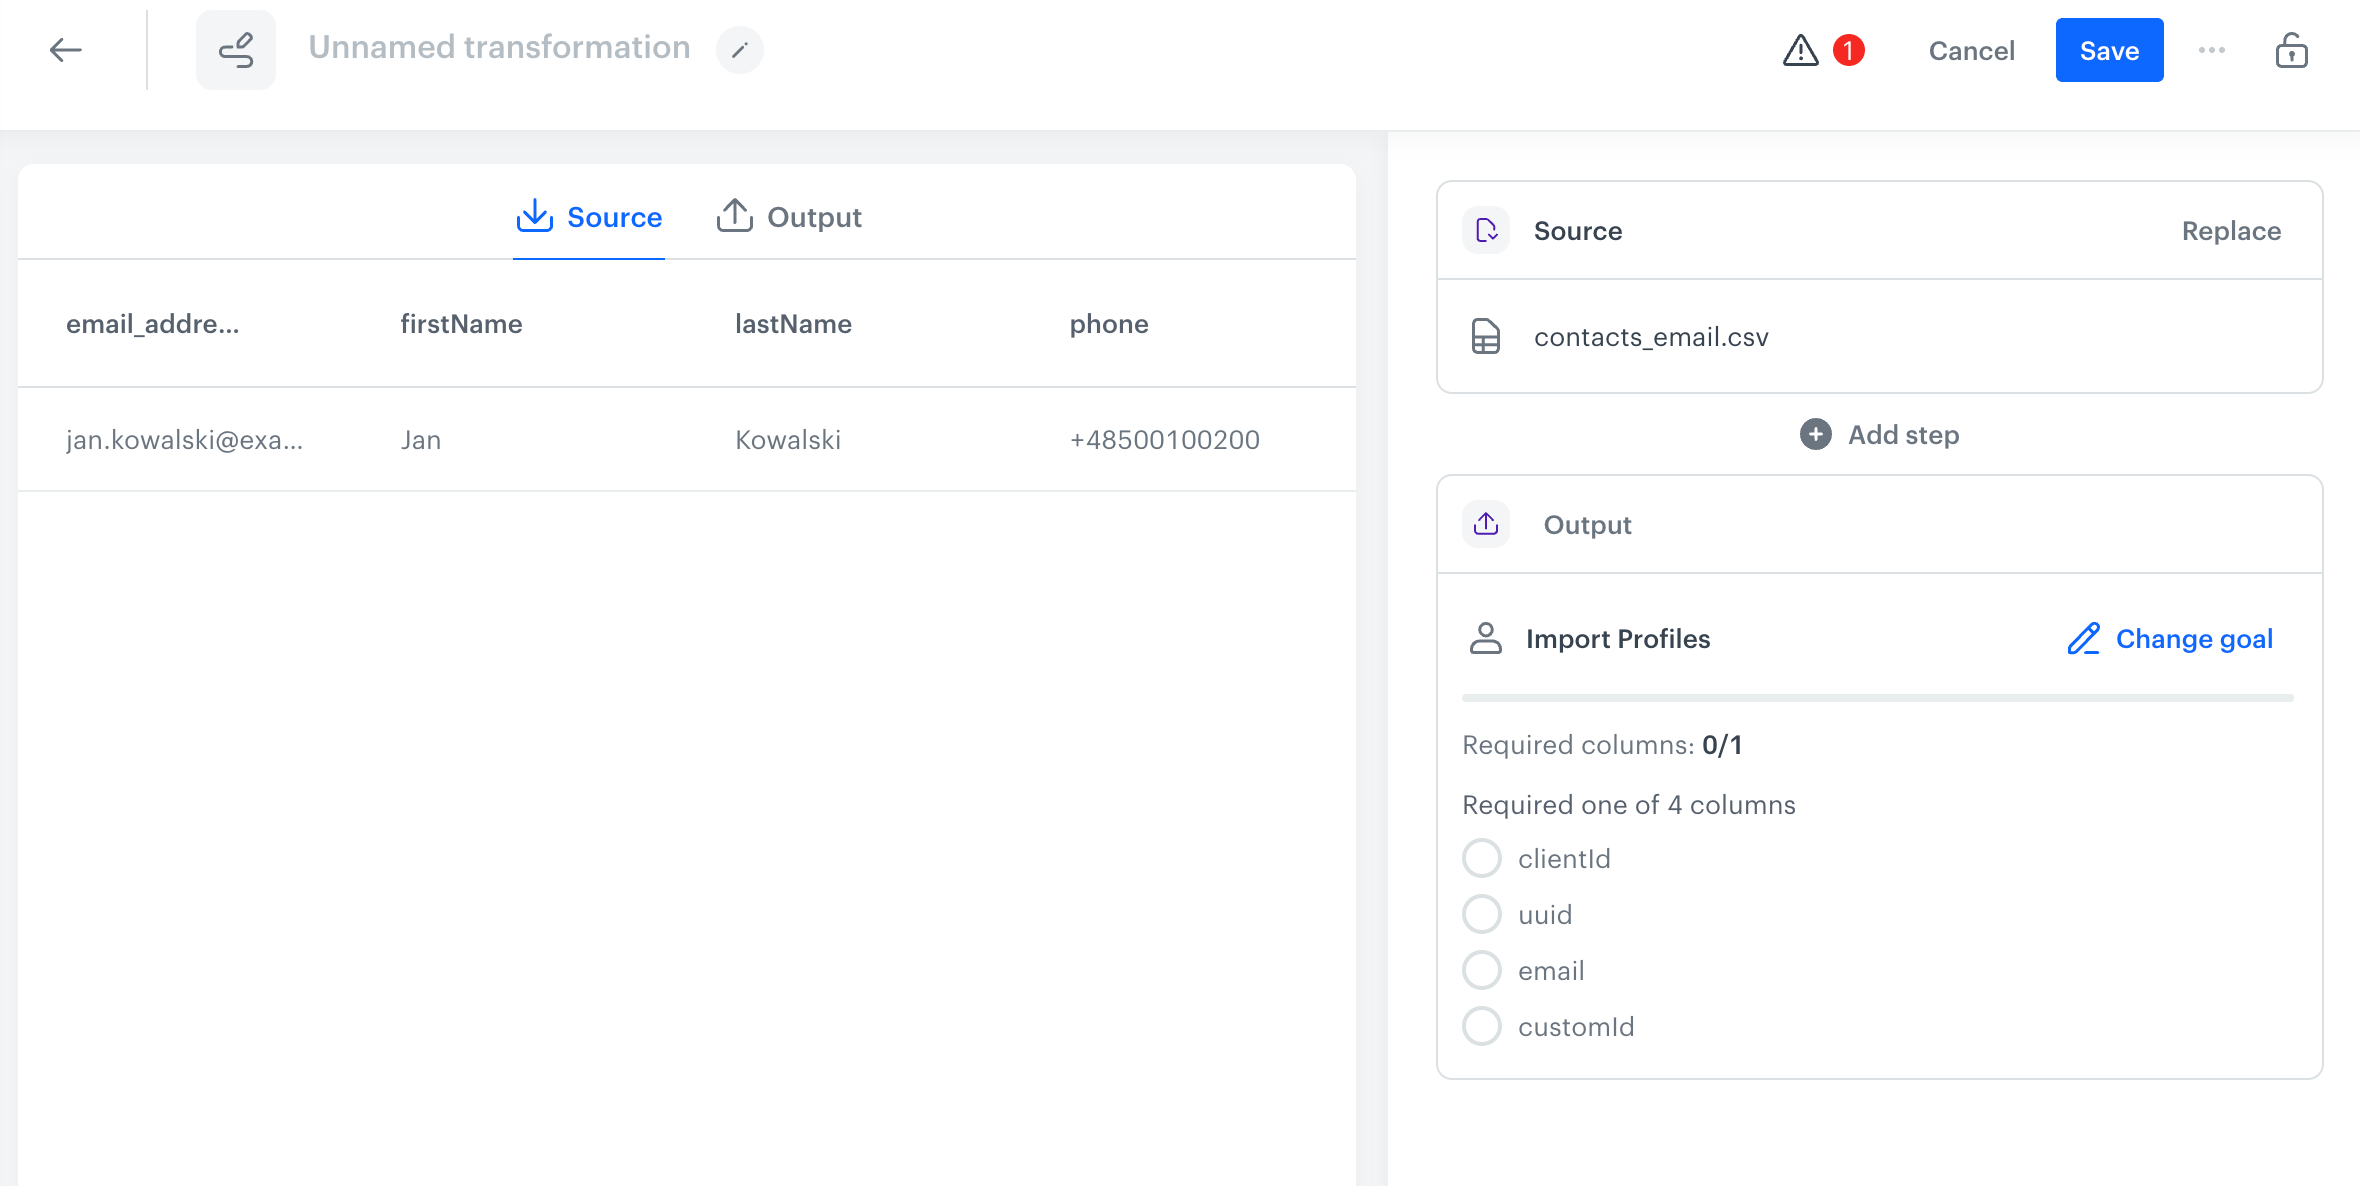
Result of the transformation - In the upper-right corner of the Studio, click Apply.
- Add the Import Transactions node.
- Add the End node.

Single import of transactions to Synerise - Click Save & Run.