Similar and cross-sell item recommendations are both powerful tools for online retailers, helping guide customers toward products that align with their interests or complement their intended purchases. But which approach performs better in a specific context? With Variant optimizer, you can run real-time tests to compare dynamic content variations and automatically prioritize the version that drives the most engagement.
This use case explores the scenario of creating a dynamic content (DC) campaign featuring two types of product recommendations to users who have added items to their favorites. One variant shows similar product recommendations and the other features cross-sell ones. By running both variants in a single Dynamic Content campaign with a goal set to maximize performance based on a metric, AI engine allocates the best preforming content variant to more customers.
Prerequisites
- Implement SDK to a website
- Configure the feed for recommendations. Enable Similar and Cross-sell recommendations.
- Implement a custom event for adding a product to favorites, which will be available in the customer profile.
In this example, the event is called
product.addToFavorite.
Implement custom events in your mobile application or website.
Process
In this use case, you will go through the following steps:
- Create an aggregate that returns products added to favorites.
- Prepare similar AI recommendations.
- Prepare cross-sell AI recommendations.
- Create two variants of the dynamic content campaign with two item recommendation variants (similar and cross-sell) using the predefined dynamic content web layer template.
Create an aggregate
In this part of the process, create an aggregate that will return the products customers added to favorites.
- Go to
 Behavioral Data Hub > Live Aggregates > Create aggregate.
 - As the aggregate type, select Profile.
- Enter the name of the aggregate.
- Click Analyze profiles by and select Last.
- Select the product.addToFavorite event.
- Select the sku parameter.
- Define the period from which the aggregate will return products from the event.
- Save the aggregate.

Configuration of the aggregate
Prepare similar AI recommendations
In this part of the process, you will configure a similar items recommendation with context of items that customers added to their favorites. This recommendation will be later used in the dynamic content.
- Go to
 AI Hub > (AI Recommendations) Models > Add recommendation.
 - Enter the name of the recommendation (it is only visible on the list of recommendation).
- In the Type & Items feed section, click Define.
- From the Items feed dropdown list, select an item feed.
- In the Type section, choose the Similar items recommendation type.
- Confirm the settings by clicking Apply.
- In the Items section, click Define.
- Click Add slot.
- Define the minimum and maximum number of items that will be recommended to the customer in each slot.
- Optionally, define Static filters, Elastic filters and Distinct filters
- Confirm by clicking Apply.
- Optionally, you can define settings in the Slots and items ordering and Boosting sections.
- In the Additional settings section click Define.
- Enable the Item context from analytics (aggregate, expression) switch.
- From the dropdown list, select the aggregate you created in this part of the process.
- Click Apply.
- In the right upper corner, click Save.
- Copy the recommendation ID from its URL and save it in the notepad. It will be needed in the further part of the process.
Prepare cross-sell AI recommendations
In this part of the process, you will configure a cros-sell recommendation with context of items that customers added to their favorites. This recommendation will be later used in the dynamic content.
- Go to AI Hub > (AI Recommendations) Models > Add recommendation.
- Enter the name of the recommendation (it is only visible on the list of recommendation).
- In the Type & Items feed section, click Define.
- From the Items feed dropdown list, select an item feed.
- In the Type section, choose the Cross-sell recommendation type.
- Confirm the settings by clicking Apply.
- In the Items section, click Define.
- Click Add slot.
- Define the minimum and maximum number of items that will be recommended to the customer in each slot.
- Optionally, define Static filters, Elastic filters and Distinct filters
- Confirm by clicking Apply.
- Optionally, you can define settings in the Slots and items ordering and Boosting sections.
- In the Additional settings section click Define.
- Enable the Item context from analytics (aggregate, expression) switch.
- From the dropdown list, select the aggregate you created in this part of the process.
- Click Apply.
- In the right upper corner, click Save.
- Copy the recommendation ID from its URL and save it in the notepad. It will be needed in the further part of the process.
Create two variants of the dynamic content campaign
Create two variants of a dynamic content campaign (each must be a web layer type). Every variant must reference a recommendation generated earlier in the process. The dynamic content campaigns will be displayed as a pop-up on your site for the customers who have added products to their favorites.
- Go to
 Experience Hub > Dynamic content > Create new.
 - Enter the name of the dynamic content.
- Choose the Web layer type.
- In the Audience section, click Define.
- In the New Audience section, click Define conditions.
- From Choose filter dropdown menu, choose product.addToFavorite event.
- Define the period from which the segmentation will return customers.
- Confirm the settings by clicking Apply.
- Confirm the settings by clicking Apply.
Define the first variant content
- In the Content section, click Define.
- In the Content tab, click Create Message.
- From the list of template folders, select a folder with the predefined Web layer templates.
Result: You are redirected to the list of predefined templates.
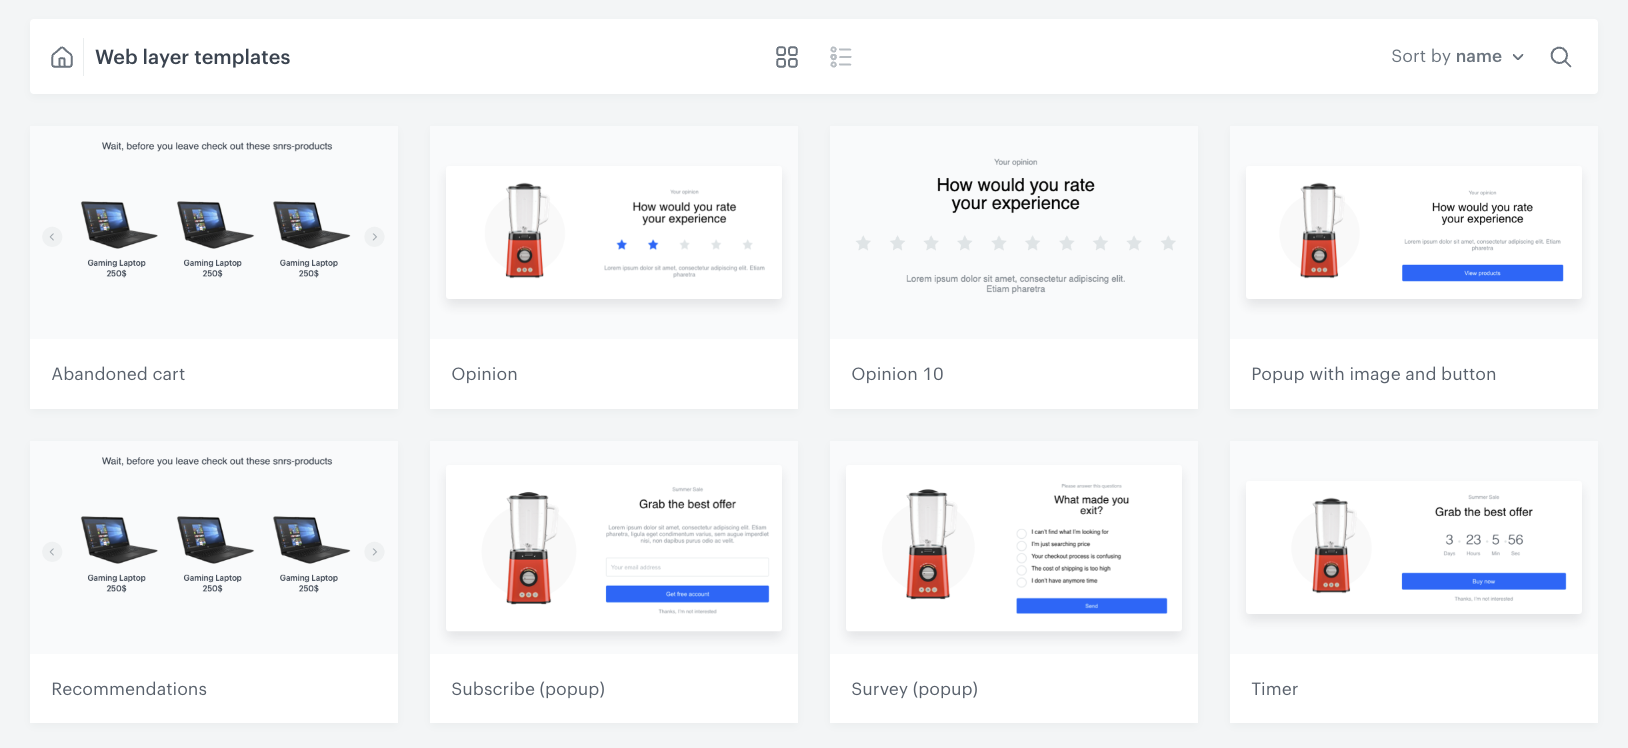
Web layer templates folder - Select the Recommendations template.
Result: You are redirected to the template builder.
You can edit the template in two ways, by editing the code of the template (add inserts, add variables) and/or by filling out the form in the Config tab. In this use case, we will use the capabilities of the predefined Config tab.
Edit the form in the Config tab
The form in the Config tab is already filled in with default values. You can keep them or change them to fit your business needs.
- From the Recommendation campaign dropdown list, select the ID of the similar recommendation campaign you created in the previous step. You can find it by typing its name or ID in the search box.
- In the Header text field, define the header text to appear in the pop-up.
- In the Currency field, specify the currency in which you want to display the prices of the recommended products.
- In the Bottom text field, define the copy you want to appear in this section.
- In the Font field, define the font of all text displayed in the dynamic content.
- Define the colors in the Bottom bar background and Bottom bar text color fields.
Choose the most suitable carousel scrolling method for you by enabling one or all toggles at the same time:
- Carousel autoplay: activation of this toggle allows automatic scrolling of items in the carousel;
- Carousel loop: activation of this toggle allows users to navigate to the first item in the carousel by clicking the arrow after the last item displayed in the carousel;
- Enabling these two options at the same time will combine these functionalities. In this case, the recommendation carousel will scroll automatically and return to the first item automatically after displaying the last one.
- If you don't activate any of the toggles, users will have to scroll through the carousel on their own, and when they get to the last item, it won't automatically redirect them to the beginning of the carousel.
- In the following fields, define the item amount that you would like to display in small, medium, large and extra large screens.
After you make changes to the template, you can check the preview.
- Click the Preview Contexts button on the upper left side.
- Enter the ID of a customer and define the product context.
- Click Apply.
If you are using custom attributes in your product feed, you need to replace the names of the standard attributes used in the template code with the names of the attributes used in your feed. In our case, we changed the names of following attributes (according to the custom attribute names used in our product feed):
link->productUrlimageLing->imagetitle->nameitem.price.value->item.priceitem.salePrice.value->item.salePrice
- If the template is ready, in the upper right corner click Save this template > Save as.
On the popup:
- In the Template name field, enter the name of the template.
- From the Template folder dropdown list, select the folder where the template will be saved.
- Confirm by clicking Apply.
- To continue the process of configuring the dynamic content campaign, click Next.
- To save your content changes, click Apply.
Define the second variant content
- In the Content section, duplicate the Variant A tile.
- On the template preview, click Edit content.
Edit the form in the Config tab
- From the Recommendation campaign dropdown list, select the ID of the cross-sell recommendation campaign you created in the previous step. You can find it by typing its name or ID in the search box.
- Make changes to the template according to your needs.
- If the template is ready, in the upper right corner click Save this template > Save as.
- On the popup:
- In the Template name field, enter the name of the template.
- From the Template folder dropdown list, select the folder where the template will be saved.
- Confirm by clicking Apply.
- To continue the process of configuring the dynamic content campaign, click Next.
- To save your content changes, click Apply.
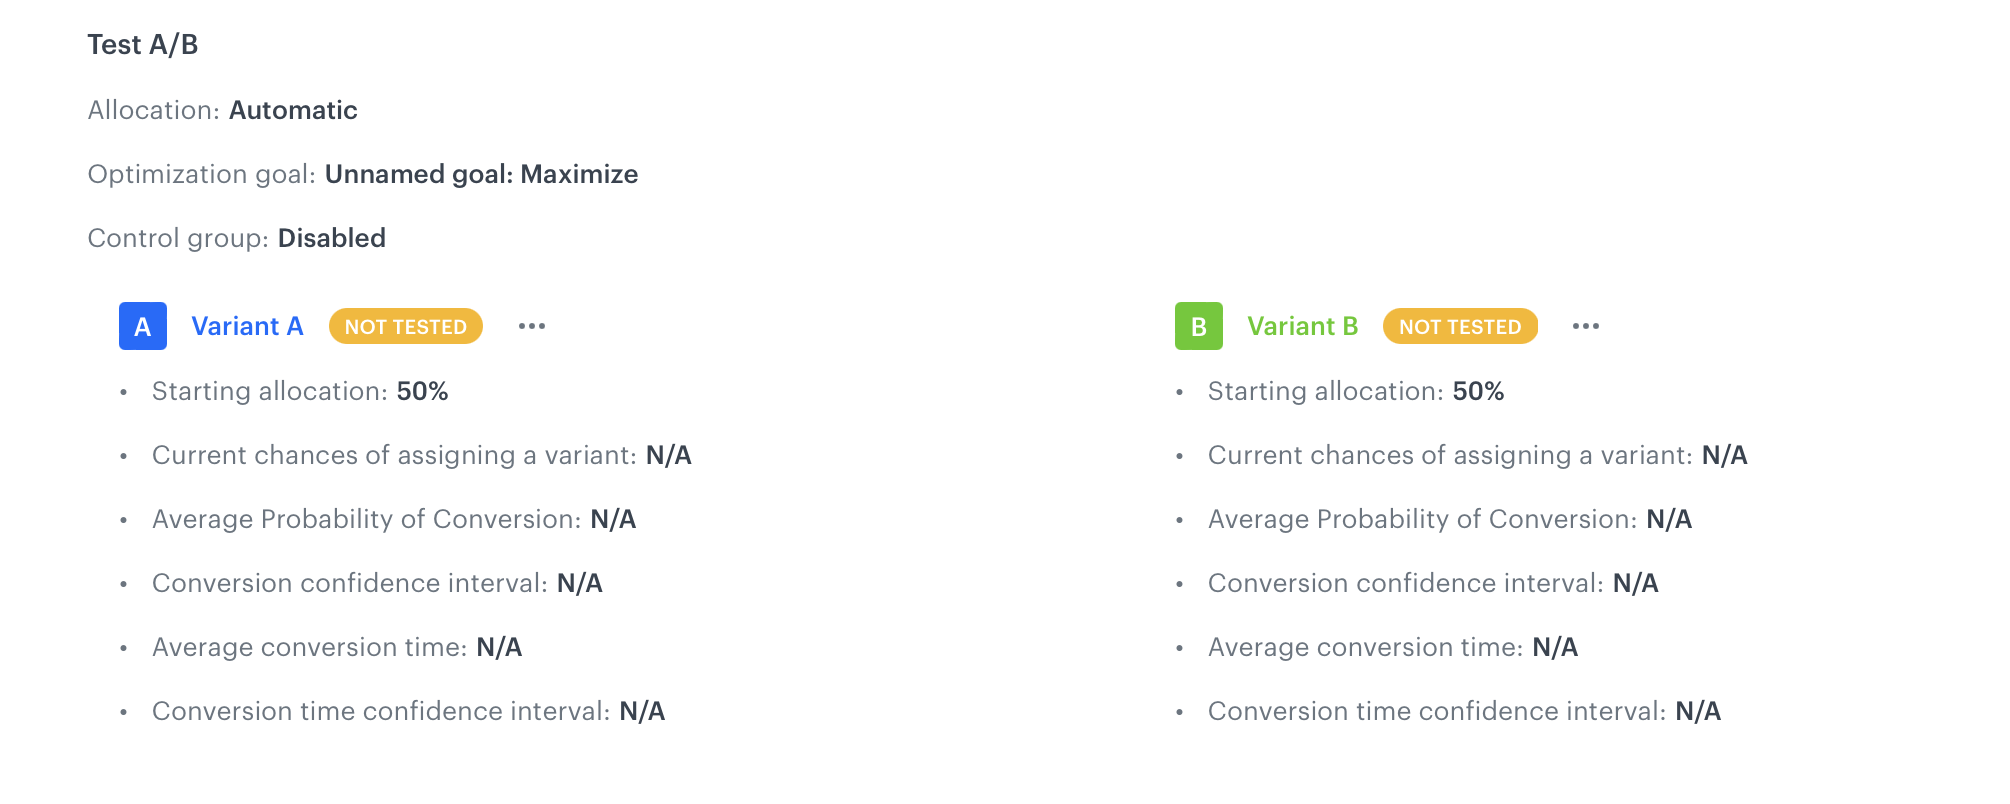
Configure the content variants AI engine allocation
- Enable the Make allocation automatically toggle to let the AI engine allocate the content variants to customers.
- In the Optimization goal section that appears, define the goal of dynamic content to Maximize.
To define the metrics of the goal, click Define goal.
- To select an event, click Choose event. In our case we want the AI engine to consider the Clicked dynamic content event.
- Confirm the settings by clicking Apply.
- Click Apply.
You can find more information about AI-driven variant allocation and how to check its performance in the "Enabling AI-driven variant allocation" section.
Define schedule and display settings
- In the Schedule section, click Define and set the time when the message will be active.
- In the Display Settings section, click Define.
- Specify circumstances for dynamic content to be displayed. Optionally, you can also define the Advanced options.
- Click Apply.
- Optionally, you can define the UTM parameters and additional parameters for your dynamic content campaign.
- Click Activate.
What's next
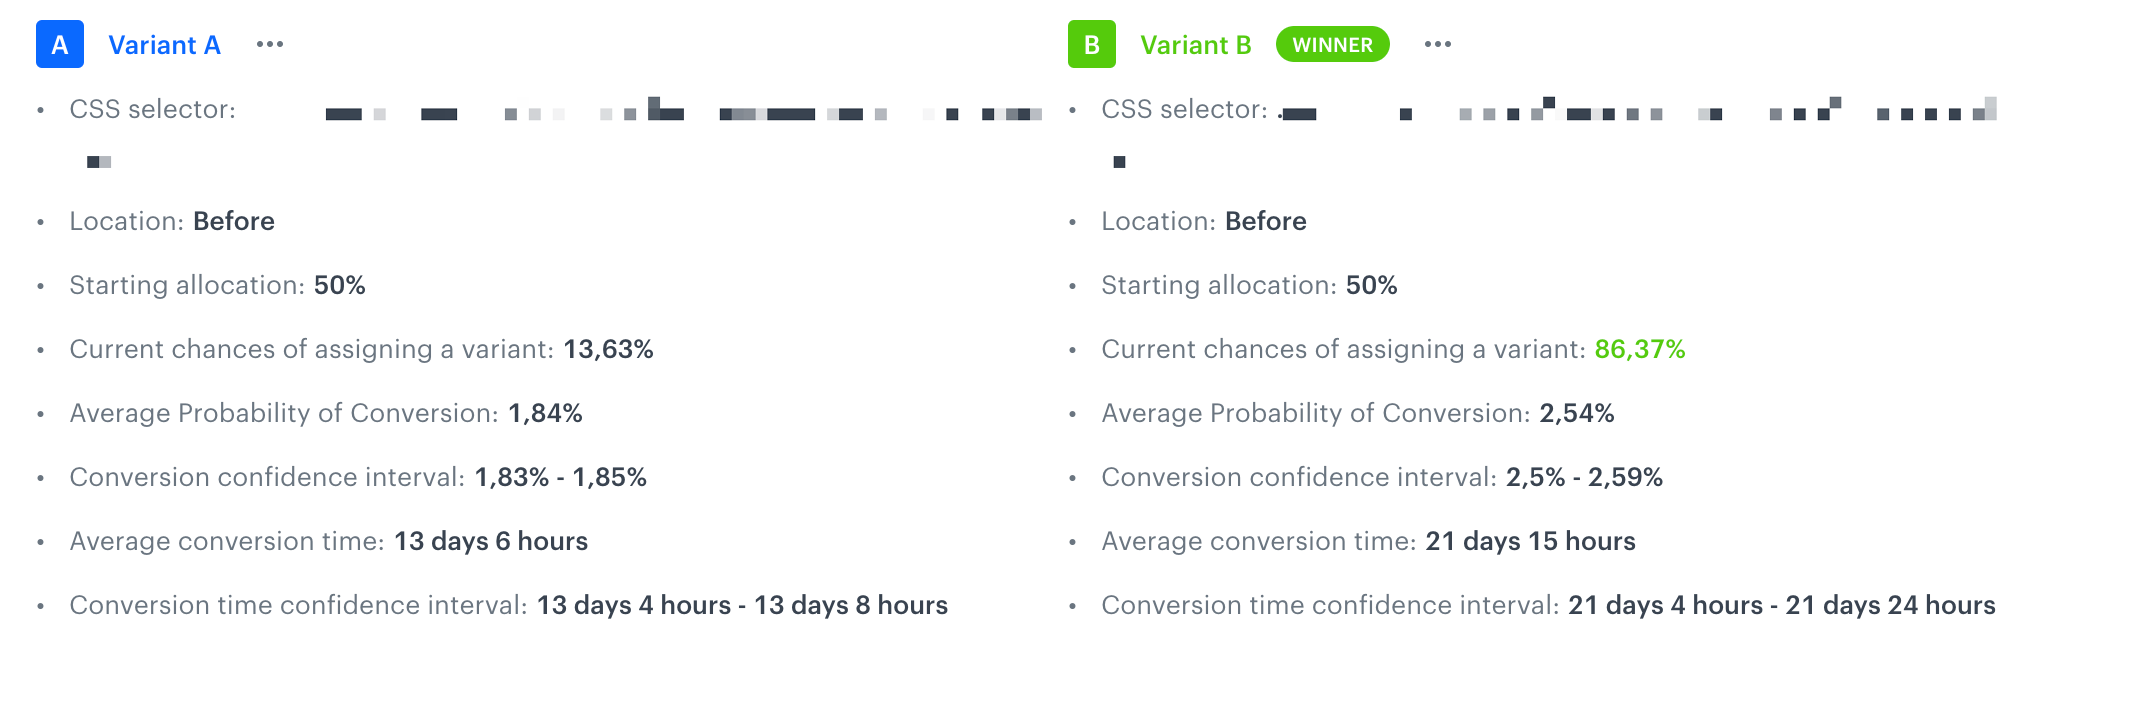
After launching the campaign, you can check and export the results — see which variant won, view the conversion probability, and more. In addition, Variant optimizer generates a variant.assign event, which can be used to create your own analytics or dashboards.
Check the use case set up on the Synerise Demo workspace
You can check the configuration of each step from this use case in our Synerise Demo workspace:
If you’re our partner or client, you already have automatic access to the Synerise Demo workspace (1590), where you can explore all the configured elements of this use case and copy them to your workspace.
If you’re not a partner or client yet, we encourage you to fill out the contact form to schedule a meeting with our representatives. They’ll be happy to show you how our demo works and discuss how you can apply this use case in your business.