By default, a search index can be managed by all users with the required permissions. You can limit access per index to a selection of users or roles.
Considerations for access settings
- All users with "read" permissions to the module have at least read-only access to all indexes, regardless of per-index access settings.
- The PROFILE_ADMIN role always has unlimited access, regardless of per-index access settings.
- To edit query rules in an index, the Analytics > Segmentations:
readpermission is required. You must grant it separately. - If you configure different permissions for a user than for their roles, all granted permissions are combined.
For example:- You grant only the "edit" permission to a user.
- You grant only the "delete" permission to a role where this user belongs.
- In result, the user has both "edit" and "delete" permissions.
- Changing the access settings doesn't grant module permissions to users or roles.
For example:- A user role only has "read" access to the AI search feature.
- You edit the settings of an index to give "edit" permissions to that role.
- In result, users with the role can't edit the index, because per-index access settings only restrict permissions - they don't grant permissions beyond what the role already has.
Changing access settings
To change the access settings:
- Go to
 AI Hub > Indexes.
 - In the list of indexes, find the index you want to manage and click the padlock icon.
Result: The access management panel opens. - From the Permission in this object dropdown list, select an option:
- Public: everyone with the required permissions can access and manage the index.
- Read only: everyone with module permissions can access the index, but only the creator and administrators can edit or delete it.
- Restricted: you can manage edit and delete permissions separately for different users and roles.
- If:
- you selected Public or Read only, click Apply to save and start enforcing the settings.
- you selected Restricted, proceed to configuring the details (next step).
- Configure the settings for Users and Roles:
- Expand the options and configure them:
- For Users:
- To add a user to the list of managed users, enter their name or email address in the search box and click their name.
- Repeat to add more users.
- Confirm by clicking Add user.
- Use the checkboxes to set the permissions for each added user.
- To remove a user from the list of permission settings, click
 next to their name and click Remove user.
- For Roles:
- Expand the list.
- Use the checkboxes to set the permissions for each role.
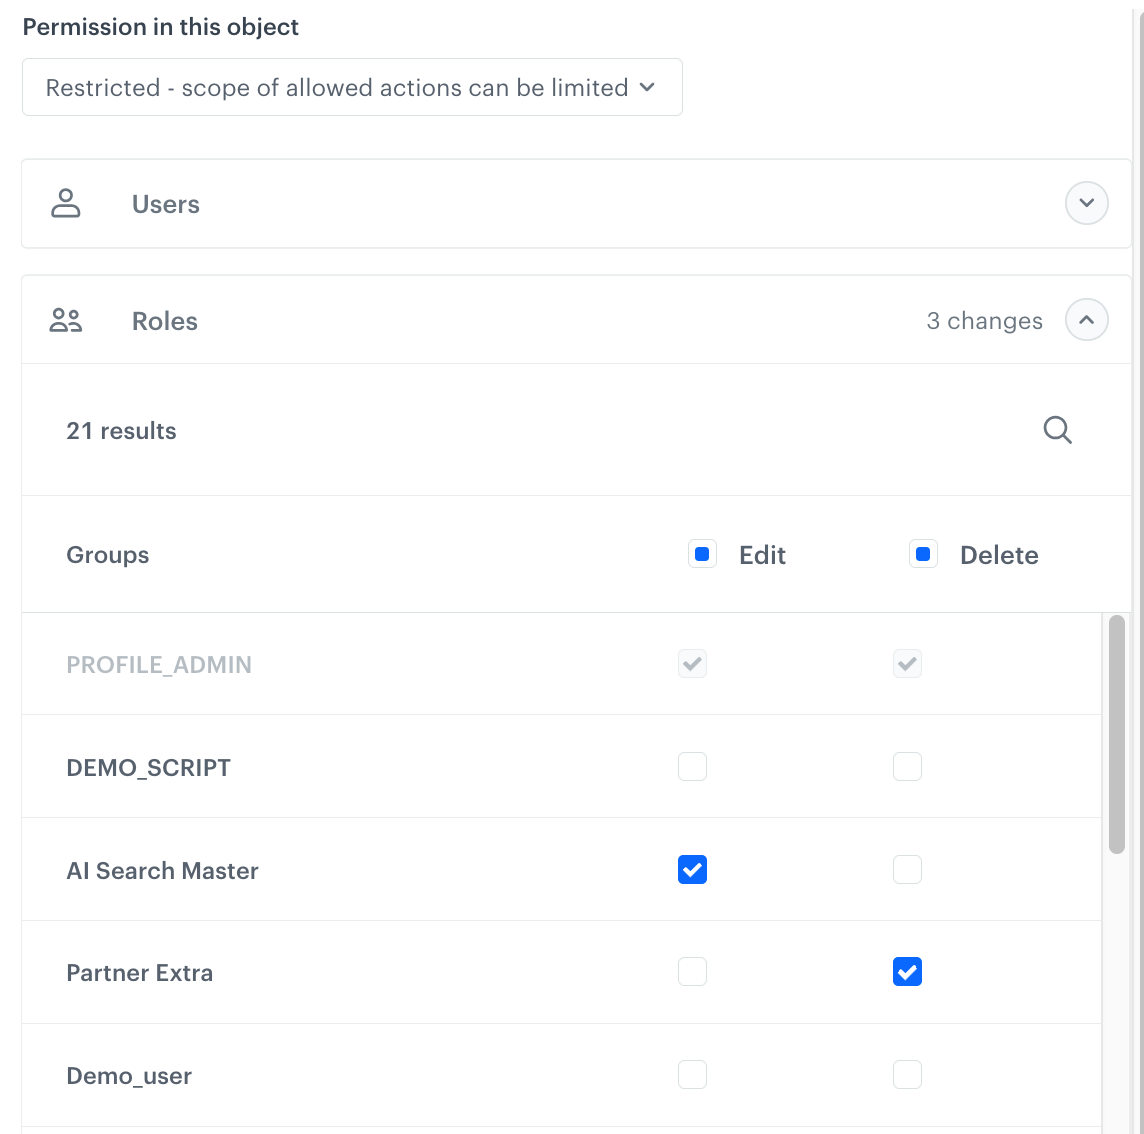
Selecting permissions for roles; an example with unsaved changes
- For Users:
- Expand the options and configure them:
- To save and start enforcing the settings, click Apply in the lower-right corner.