Roles and permissions
A user is a person with access to a workspace and its features. However, due to security reasons, each Synerise feature is only accessible to users who are assigned with a particular user role. Synerise has a role-based permission system, which means that you can assign roles to users and set permissions for roles.
Roles
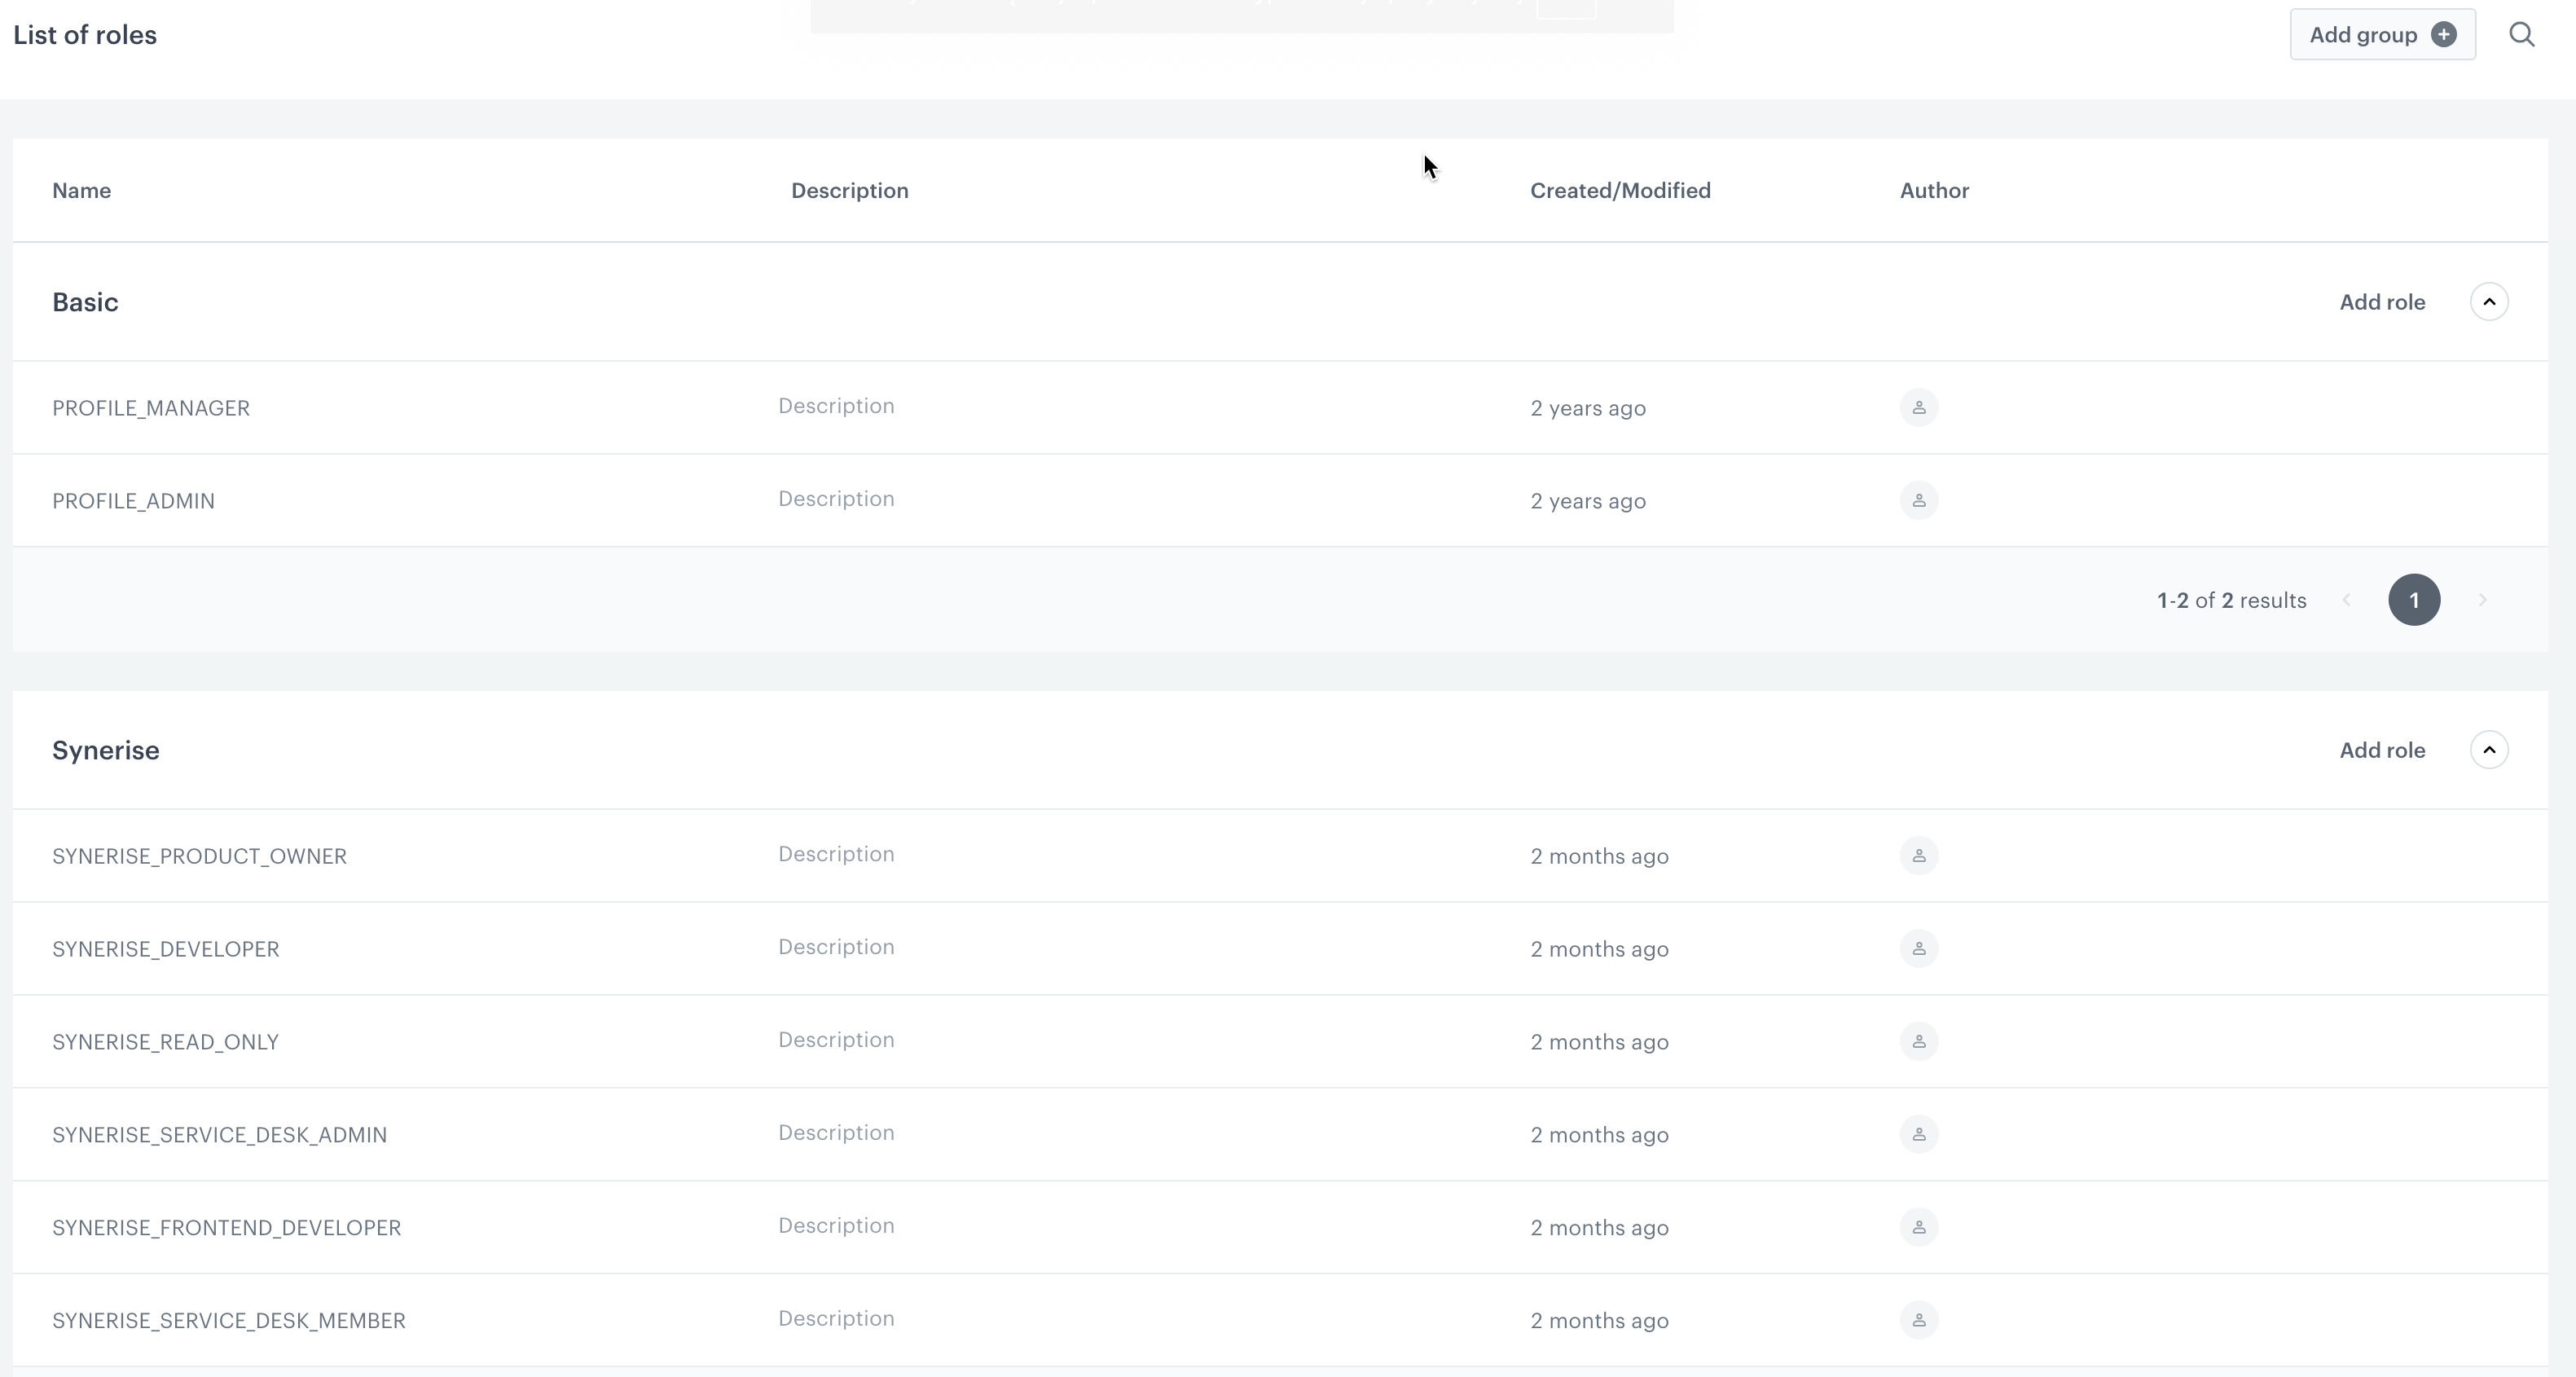
You can create roles by combining permission groups, and then assign specific sets of permission groups to each role. Each workspace contains 2 default role groups with predefined roles and permissions that you can use:
- Basic roles that can be assigned to people in your organization.
- Predefined Synerise roles that can be assigned to Synerise employees who need access to your workspace.

Basic roles
Users assigned with these roles can invite other users to a workspace.
| Role | Scope of permissions |
|---|---|
| PROFILE_ADMIN | This role has all permissions. Admins have access to every hub and feature within the hub. They have possibility to preview, create, edit, delete, and execute all actions in the application. |
| PROFILE_MANAGER | This role grants the access to all modules, however, advanced workflow configuration settings are not accessible. Managers can create, edit and preview some communication channels types, execute all analytic types, have access to Behavioral Data Hub, and Data Modeling Hub. |
Predefined Synerise roles
By default, each workspace includes a predefined role group specifically designed for Synerise employees who can only access your workspace through invitation. When inviting Synerise employees, you can assign one of the default roles within this group as well as access duration. Users assigned with these roles cannot invite other users to a workspace.
These default roles have editable permissions, allowing you to determine the final permission scope for these roles. Also, you can add custom roles to this group.
| Role name | Description |
|---|---|
| SYNERISE_PRODUCT_OWNER | This role is assigned to the Synerise product owners. Users with this role can create and delete analyses and have read-only access to most other features, including API keys. |
| SYNERISE_FRONTEND_DEVELOPER | This role is assigned to Synerise frontend developers responsible for campaigns such as email and dynamic content. Users with this role have restricted access to the workspace, read-only access to API keys, and they can’t manage roles and permissions nor access the Access Control section in Settings. |
| SYNERISE_DEVELOPER | This role is assigned to third-line support members. Users with this role have read-only access to every feature (including API keys) within the workspace. They can create and delete analyses. |
| SYNERISE_SERVICE_DESK_ADMIN | This role is assigned to the market leaders, service desk leaders, and project managers and it provides access to all features with extensive permissions. Users with this role can manage roles and permissions as well as create, edit, and delete API keys. |
| SYNERISE_SERVICE_DESK_MEMBER | This role is granted to service desk members and second-line support members. Users with this role have access to most features, but they can’t manage roles and permissions or access the Access Control section in Settings. They are granted read-only access to API keys. |
| SYNERISE_READ_ONLY | This role is designated for Synerise employees who need occasional access to specific solutions and use cases for review. It provides read-only access to all modules except for the list of profiles, workspace users, API keys, data export, and audit log. |
Permissions
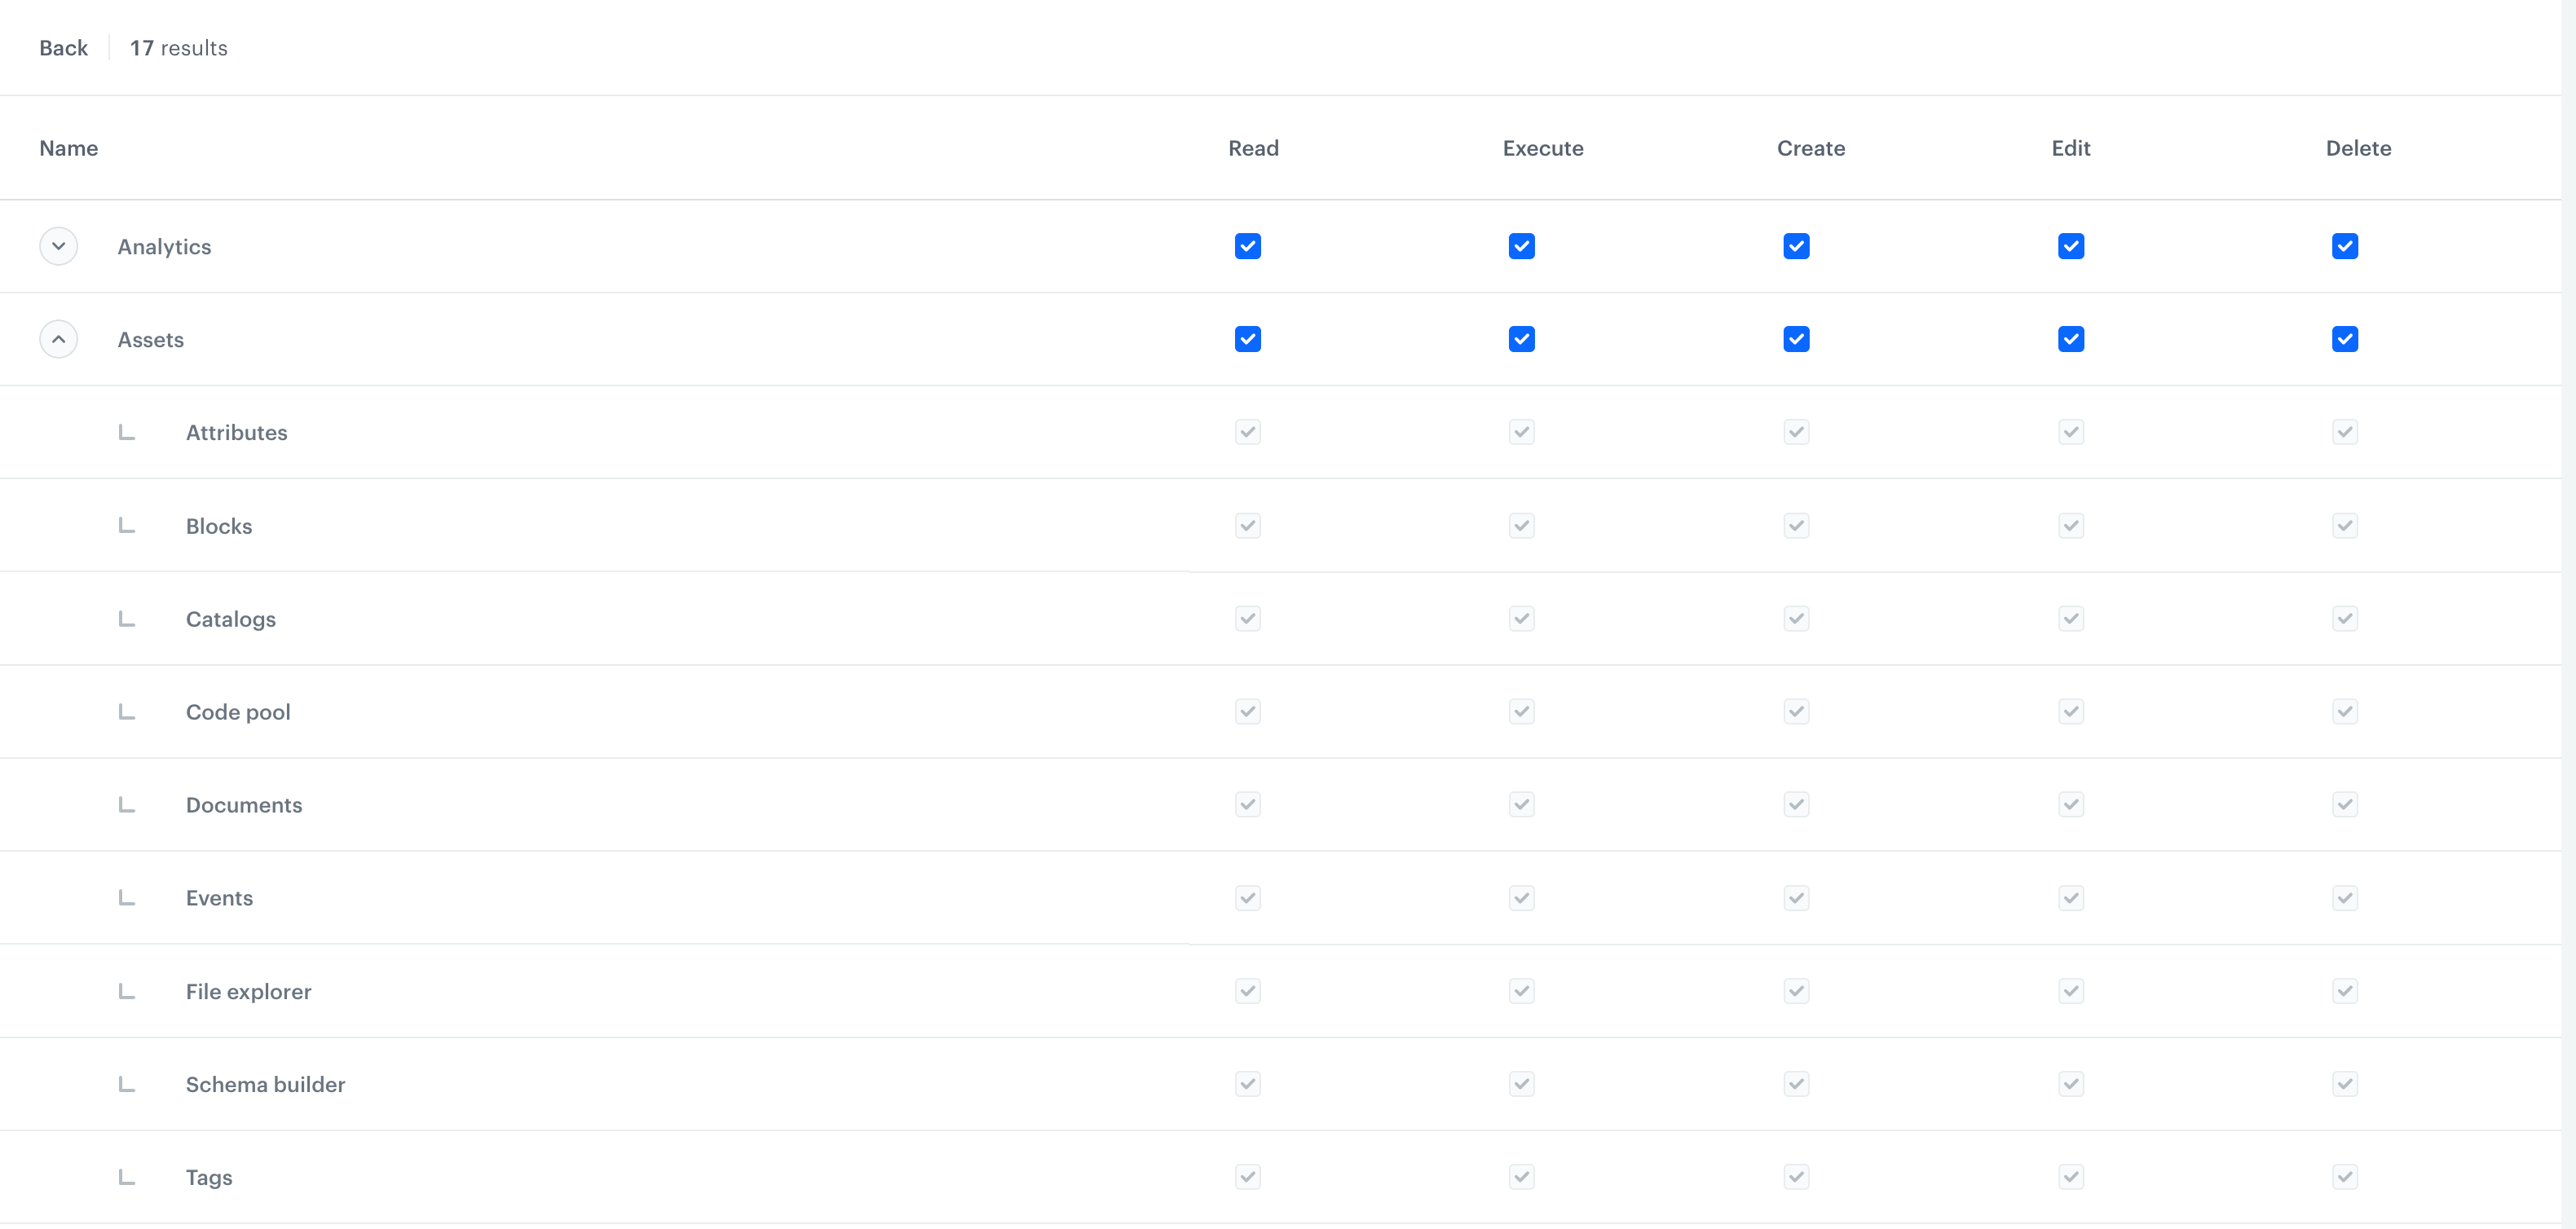
Permission list is divided into hubs (for example, Decision Hub, Experience Hub or Behavioral Hub) and each hub is divided into features (for example, Emails, Landing page or Tags ). Due to this arrangement, you can grant access to particular features or whole modules and define the scope of actions possible to take for a specific role.

Creating role groups
You can create your own custom role groups to which you can add roles for your own purposes.
- Go to
 Settings > Roles.
 - Click the Add group button.
Result: A pop-up appears. - On the pop-up, in the Name field, enter the name of the group.
- Optionally, in the Description field, write a short description to let other users know the purpose of the group.
- Confirm by clicking Apply.
Result: The group is created and you can assign permissions to it.
Adding roles and assigning permissions
You can add a role or roles to a default user group or your own custom role group. Later, you can assign roles to users when adding them to a workspace.
- On the role group to which you want add a role, click Add role.
Result: A pop-up appears. - On the pop-up, in the Name field, enter the name of the role.
- Leave the value in the Group field at default.
- Optionally, in the Description field, provide a brief role explanation which will help your team understand the purpose of the role and how it will be used.
- Confirm by clicking Create & define permissions.
- To add or edit permissions for a particular role, hover the mouse cursor over the role on the list and click the Permissions button.
- The list of permissions is divided into features and you can define the scope of actions for each feature by ticking the box under the appropriate action.
- To complete the process, click the Save button.
Which permissions do I need?
The other articles in this section list a number of scenarios and the permissions you need to perform them.
The scenarios are sorted into modules, but a scenario may require permissions from a few modules. For example - multiple features use analysis results and require access to Analytics.