Best Fit prediction model returns the best item attribute value for the each customer in the analyzed group. It can be either color, brand, category or any other attribute value you would like to recommend.
In this use case, the goal is to reach customers with a personalized newsletter featuring products from their "Favorite Brand," based on predictions made by Synerise's AI. By leveraging the Best Fit model, products presented in the email campaign can be customized to match the preferences of individual customers and display products from their favorite brand to make it more personalized.
By offering personalized content to each customer, focusing on products from the brand most likely to resonate with their preferences, you can increase engagement and conversion rates.

Prerequisites
- Create item catalog that contain
brandattribute. - Enable the best fit predictions. It usually takes several hours to initialize Predictions and perform necessary calculations.
- The attributes that you want to use for best fit predictions must be configured as filterable attributes.
- Implement transaction events using SDK or API to track customer transaction-related interactions.
Process
- Create a segmentation of people who made minimum 1 purchase during last year to be sure that we generate brand prediction for users based on their previous choices.
- Create a best fit prediction to return the brand which a customer is most likely to purchase from.
- Create an aggregate that retrieves the result of the prediction.
- Create AI recommendations with personalized products from specific brand.
- Create an email campaign template with AI recommendations.
Create a segmentation
In this part of the process, we will create a group of customers who have made transaction during last year. This group will be the selected as the subject of prediction analysis in further part of the process.
- Go to
 Decision Hub > Segmentations > New segmentation.
 - Enter the name of the segmentation.
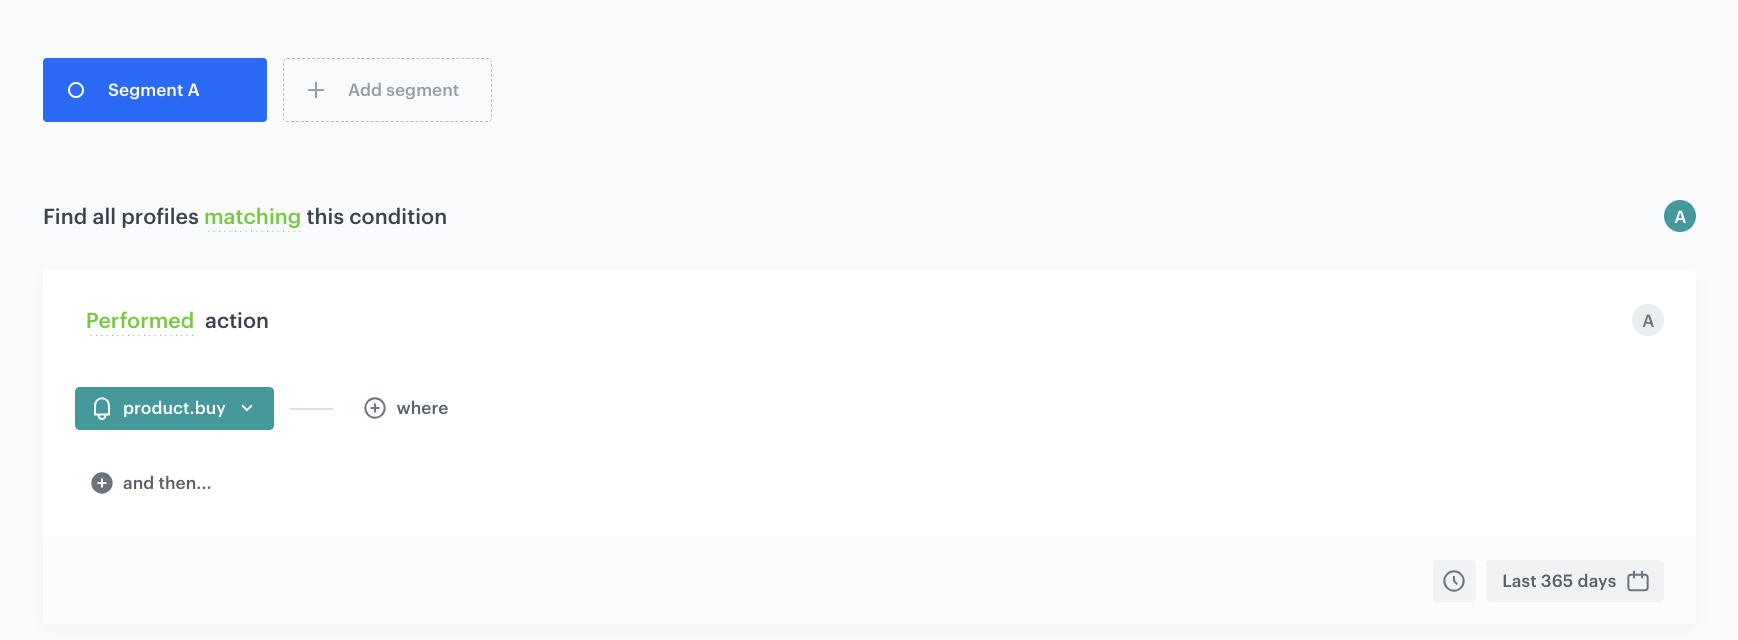
- Click Add condition.
- From the dropdown list, select the
product.buyevent. - From the Choose operator dropdown, choose Boolean, and then select Is true.
- Using the date picker in the lower-right corner, set the time range to Relative time range > Last 365 days. Confirm by clicking Apply.
- Save the segmentation.
Create a best fit prediction
In this part of the process, you will create a prediction that analyzes the group of customers you created in the previous part of the process. The prediction will predict which brand each customer in your selected group is most likely to buy from. The prediction results will be available on the profile card of each customer from the segmentation in the form of a snr.bestfit.score event. The attribute parameter will contain the name of the brand.
- Go to
 AI Hub > (AI Predictions) Models > New prediction.
 - On the pop-up select one Create from scratch, and then select Best Fit.
Go to Audience section
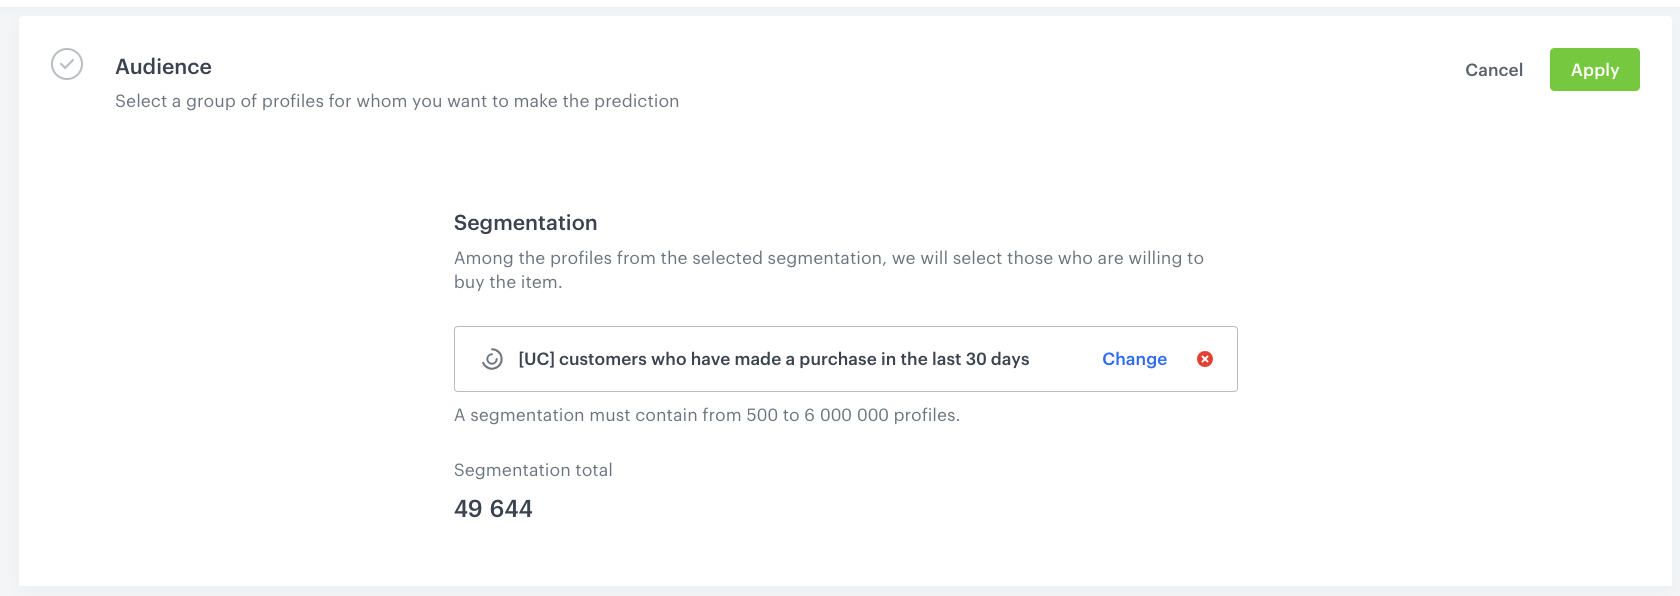
- In the Audience section, click Define.
- Click Choose segmentation and select the segmentation created in the previous step.
- Confirm by clicking Apply.
Result: The result of this prediction will be saved on the activity list on the profile of each customer from the segmentation as the snr.bestfit.score event.
Select items
- In the Item selection section, click Define.
- Click Choose item feed.
- From the list of available catalogs, select the item feed which you created as a part of prerequisites.
- From the Choose item attribute dropdown list, select brand.
- Optionally, from the Define item filter dropdown list, you can define the filters to include the item or items that you want to include in the analysis.
- Click Apply.
Launch the Prediction
- If you want to leave the settings as default, the prediction is ready to calculate.
- If you want to change the settings, in the Settings section, click Change.
- To schedule a recurring calculation:
- Select the Set up recurring prediction calculation checkbox.
- In the input field, enter the number of days between calculations.
- To change the start date of the prediction, in the Settings section, click Change.
- Select the Scheduled checkbox.
- In the Select start date and time field, specify the date and time for launching the calculation of the prediction.
- Click Apply.
Results will be saved in the form of an event: snr.bestfit.score.
Create an aggregate
Create an aggregate which will return the latest value from the topValue parameter of the snr.bestfit.score event. This aggregate will be referenced in the filters of AI recommendation configuration.
- Go to
 Behavioral Data Hub > Live Aggregates > Create aggregate.
 - As the aggregate type, select Profile.
- Enter the name of the aggregate.
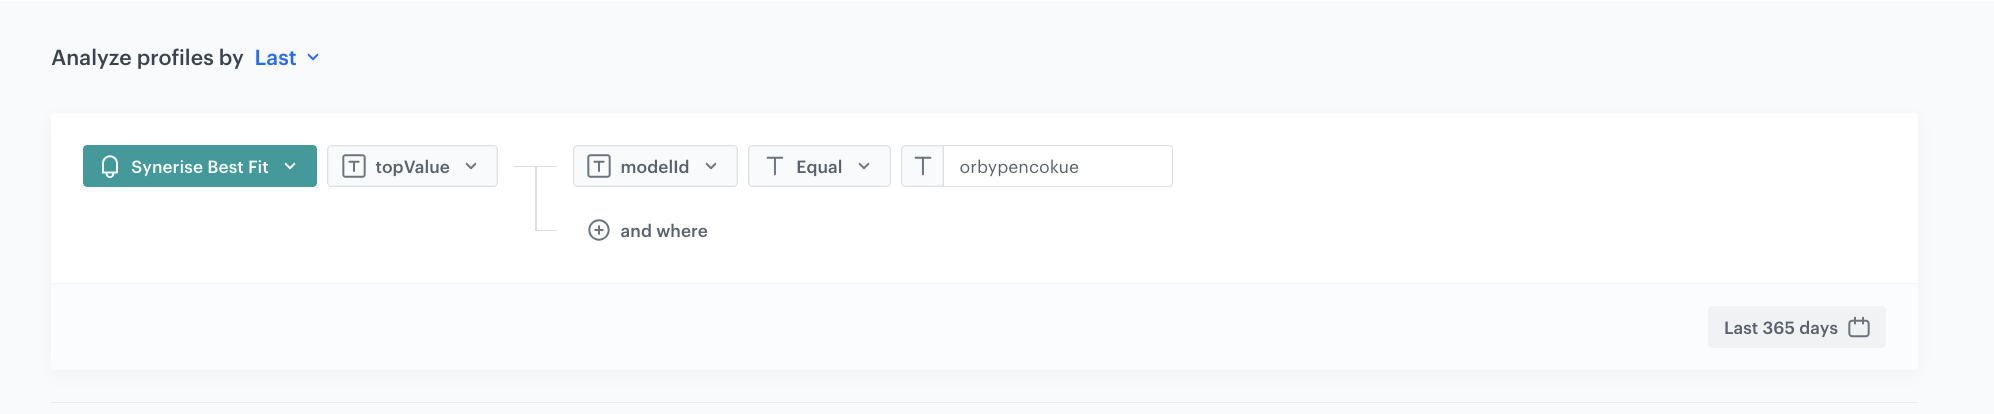
- Click Analyze profiles by and select Last.
- From the Choose event dropdown list, select the snr.bestfit.score event.
- As the event parameter, select topValue*.
- Click + where button.
- From the Choose parameter dropdown list, select the modelID parameter.
- From the Choose operator dropdown list, select Equal (string).
- Enter the ID of the created prediction.
You can find the ID in the URL of the Prediction, it is the last string of characters.
- Set the period from which the aggregate will analyze the results to the last 365 days.
- Save the aggregate.
Create AI recommendations
In this part of the process, you will create an AI recommendation that will display items from the customer's brand returned in the prediction results.
- Go to AI Hub > (AI Recommendations) Models > Add recommendation.
- Enter the name of the recommendation (it is only visible on the list of recommendations).
- In the Type & Items feed section, click Define.
- From the Items feed dropdown list, select a product feed.
- Select the Personalized recommendation type.
- Confirm the recommendation type by clicking Apply.
- In the Items section, click Define.
- Define the minimum and maximum number of products displayed in the frame according to your needs.
- Use filters to include specific items in the recommendation frame.
- Click Elastic filter.
- From the dropdown list, choose Visual Builder.
- Click Select attribute.
- From the dropdown list, choose the brand attribute.
- Click Operator.
- From the dropdown menu, choose Equals.
- Click the icon next to Select value.
- Select Aggregate
- Click Select value.
- From the dropdown list, choose the aggregate created in the previous step.
- At the bottom of the elastic filter pop-up, click Apply.
- In the Items section, click Apply.
- In Boosting, you can enable boosting.
- In Additional settings, optionally you can exclude already bought products and set a metric to sort by. Remember that you can define the order of slots if you have created more than one.
- Save the recommendation by clicking Save.
Create an email campaign
To distribute the product recommendations based on the results from the best fit prediction, prepare an email template that contains the recommendation you created in the previous part of the process.
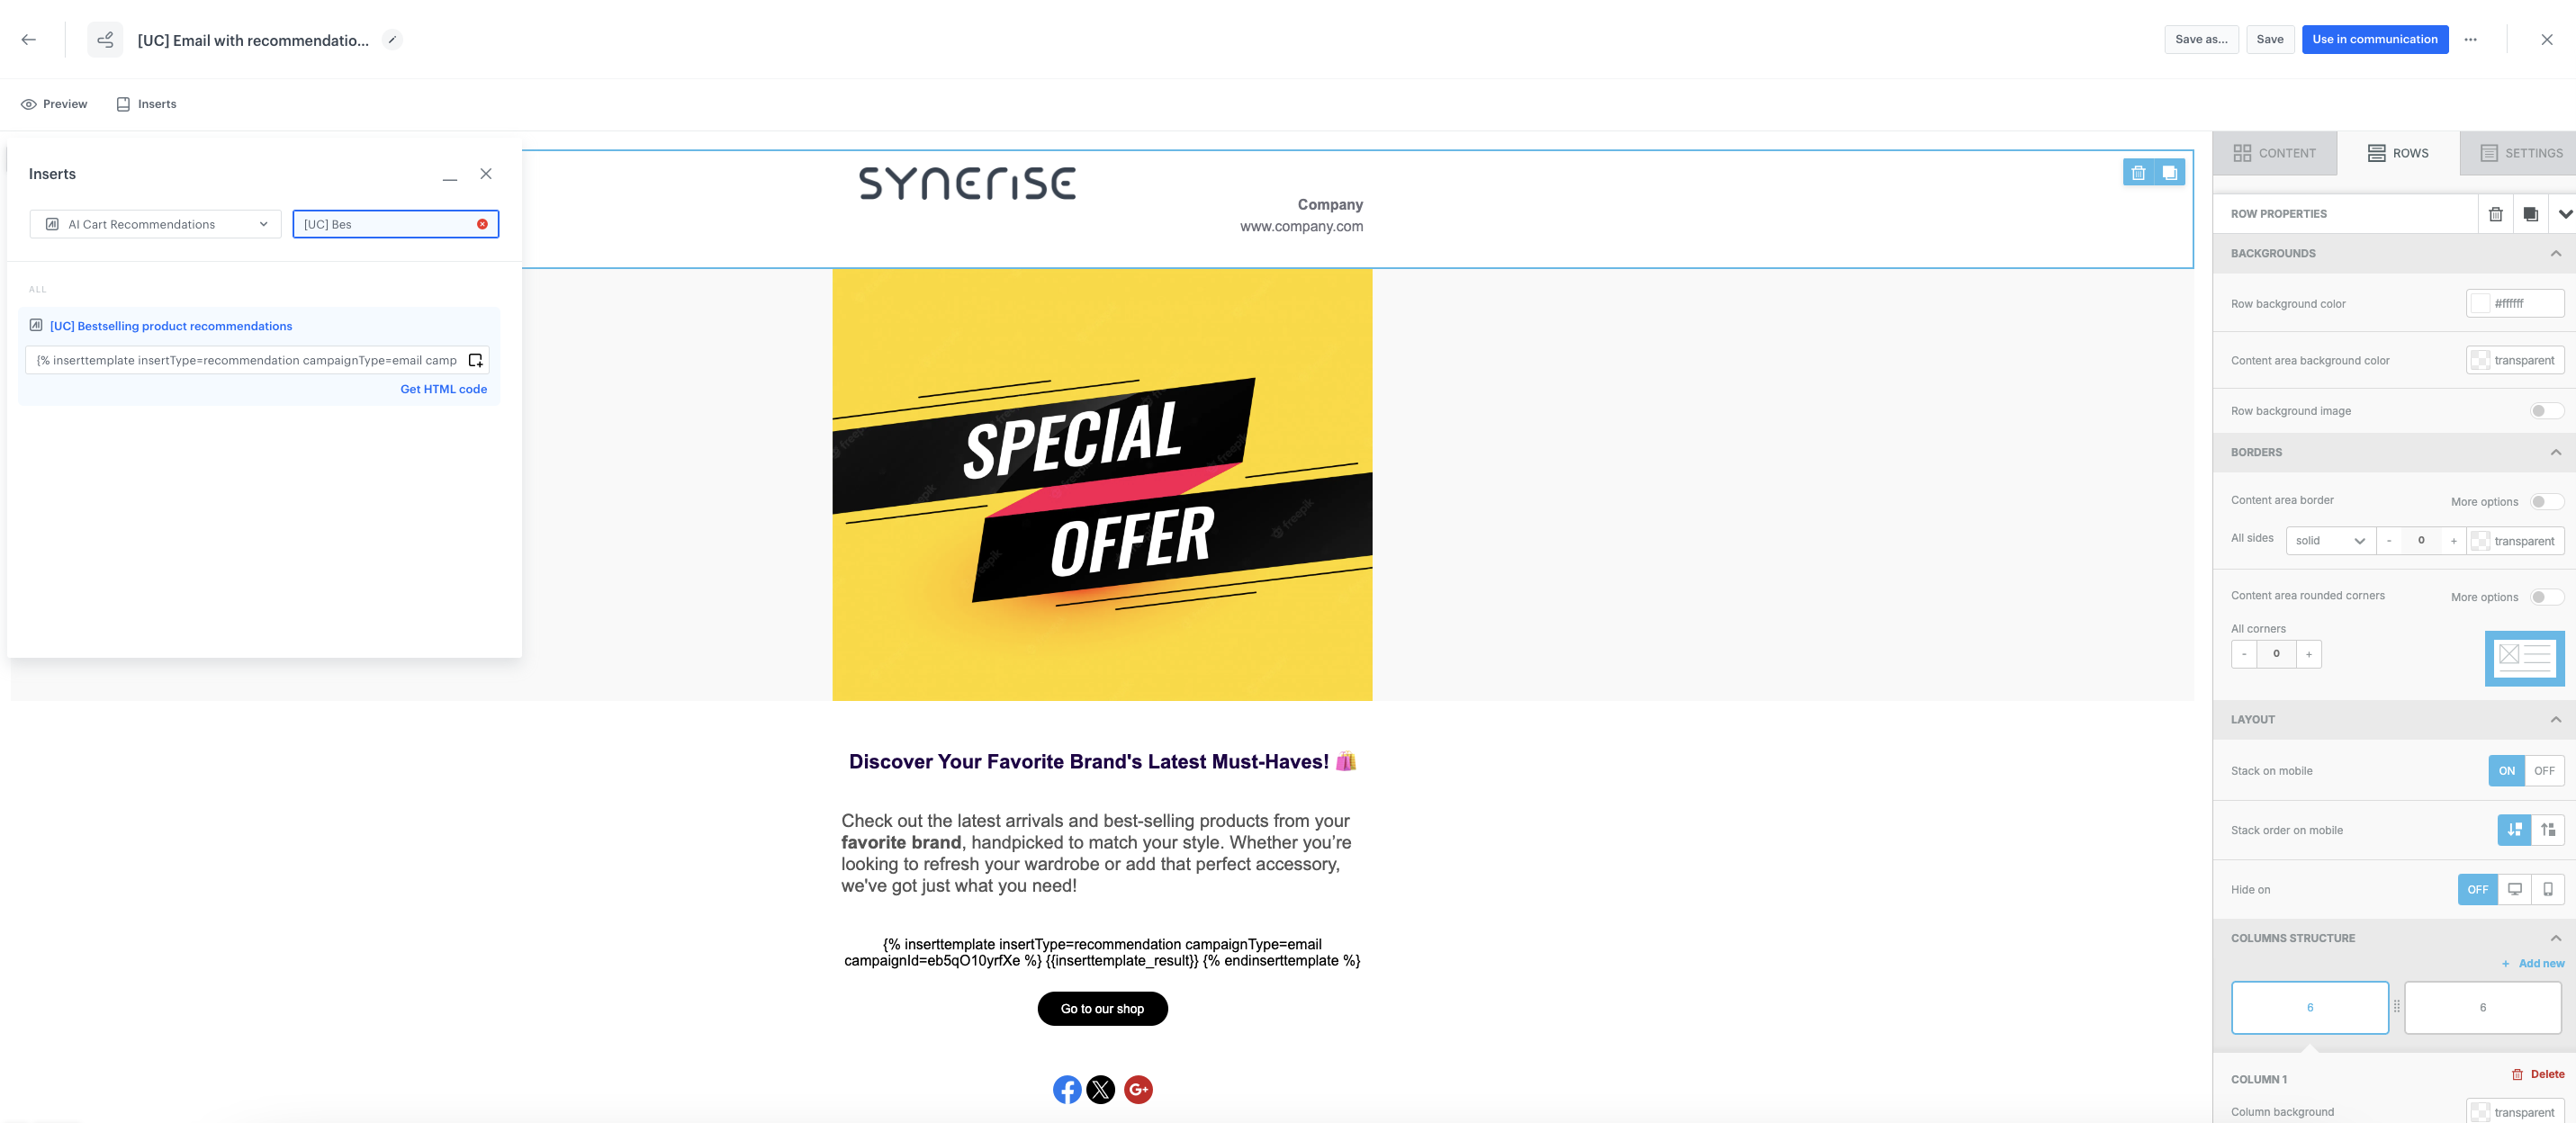
- Go to Experience Hub > Emails > Templates > Drag&drop builder or Code editor to create an email template..
- Click Inserts in the upper right corner, find AI Recommendations on the list of inserts, then choose the recommendation you prepared in the previous step.
- Save the template.
Use the template in an email campaign which you can send to the group of customers created at the beginning of the process to encourage them to make another purchase from their favorite brand.
Check the use case set up on the Synerise Demo workspace
You can also check on our demo account the:
If you’re our partner or client, you already have automatic access to the Synerise Demo workspace (1590), where you can explore all the configured elements of this use case and copy them to your workspace.
If you’re not a partner or client yet, we encourage you to fill out the contact form to schedule a meeting with our representatives. They’ll be happy to show you how our demo works and discuss how you can apply this use case in your business.
Check our latest Case Study
Check our Case Study with Modivo and discover how they leveraged Synerise BaseModel.AI to send personalized mailing with customers's favourite brand.