Delivering personalized and context-aware communication often requires combining behavioral insights with dynamically evaluated logic.
Brickworks allows you to define a communication template that can dynamically assign the most relevant loyalty offer for each customer based on their browsing behavior.
In this use case, you will create a schema that enables an email template to return a specific loyalty offer based on an evaluated expression. This supports a next best offer (NBO) approach, where each customer receives the most relevant promotion determined by their behavior. The expression analyzes the price range of the products they viewed and assigns them to one of three predefined tiers. Based on the tier result, customers can automatically receive an email containing the loyalty offer that best matches their browsing behavior.
Prerequisites
- Implement a tracking code into your website.
- Implement the transaction events using SDK or API.
- Prepare a tier-based loyalty offer.
Process
In this use case, you will go through the following steps:
- Create an aggregate that will return last visited product price.
- Create segmentations of customers qualifying for one of the three offer tiers.
- Create an expression that returns information on tier which the customer qualifies for.
- Create a schema with offer based on the expression result.
- Create records.
- Create an email campaign based on the brickworks schema, using our predefined email template.
Create an aggregate
In this step, create an aggregate that returns the price of the last visited product. The result of the aggregate will be used in segmentations determining tiers in the offer.
- Go to
 Behavioral Data Hub > Live Aggregates > Create aggregate.
 - As the aggregate type, select Profile.
- Enter the name of the aggregate.
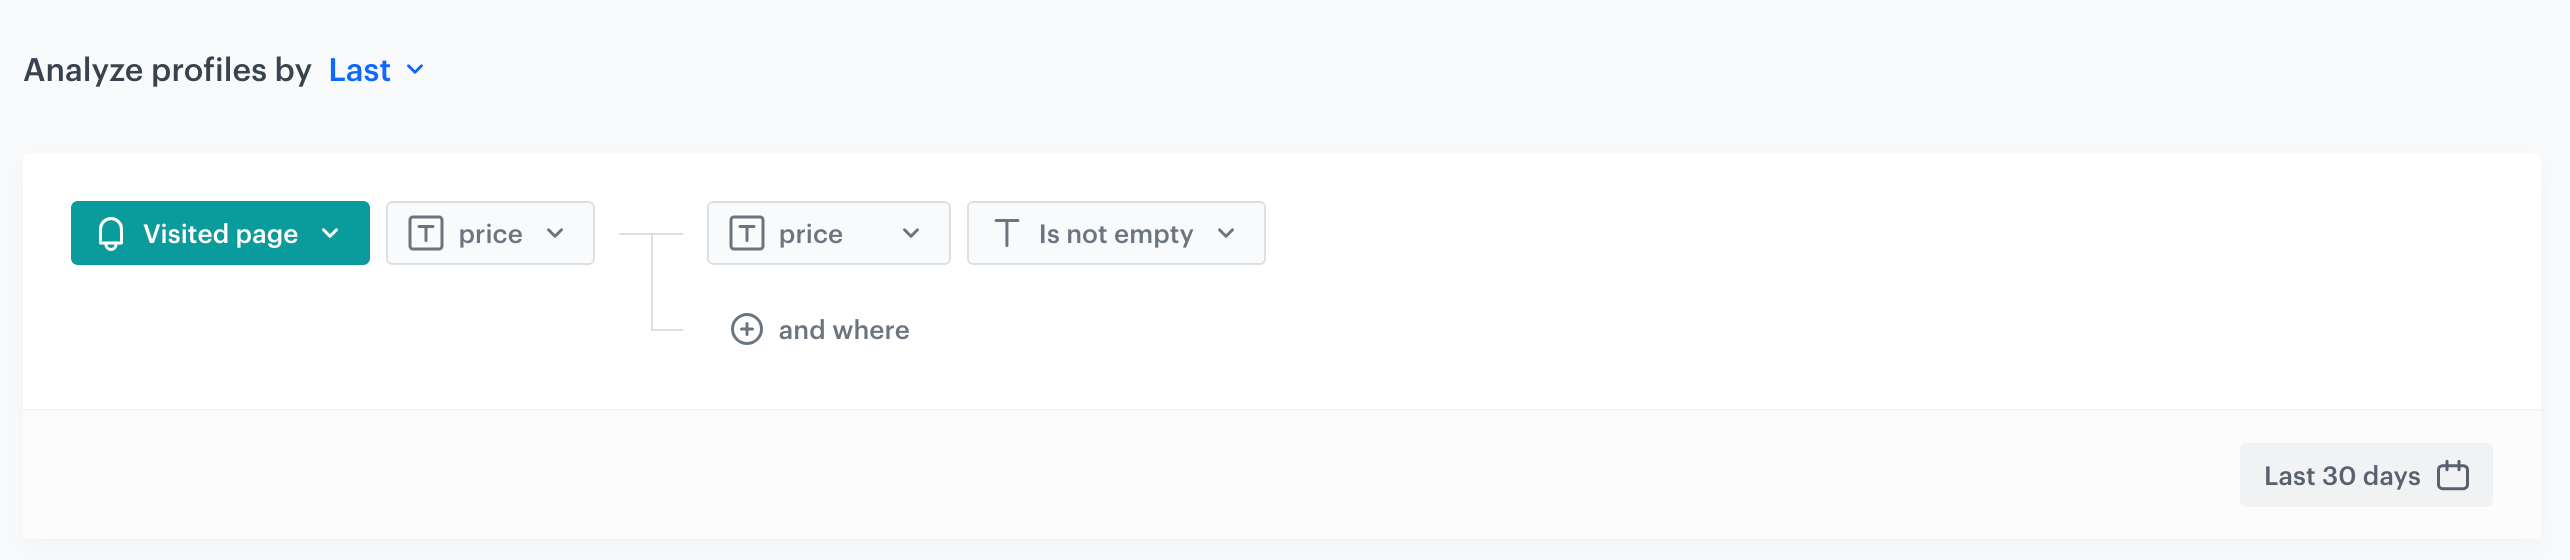
- Click Analyze profiles by and select Last.
- From the Choose event dropdown list, select the
page.visitevent. - As the event parameter, select price.
- Click the + where button.
- From the Choose parameter dropdown list, select price once again.
- From the Choose dropdown list, select String and the Is not empty operator.
- Set the period from which the aggregate will analyze the results, in our case Last 30 days.
- Save the aggregate.
Create segmentations
Based on the aggregate created in the previous step, create three segmentations of customers qualifying for one of the three next best offer tiers - Low Cost, Advantage, or All Inclusive.
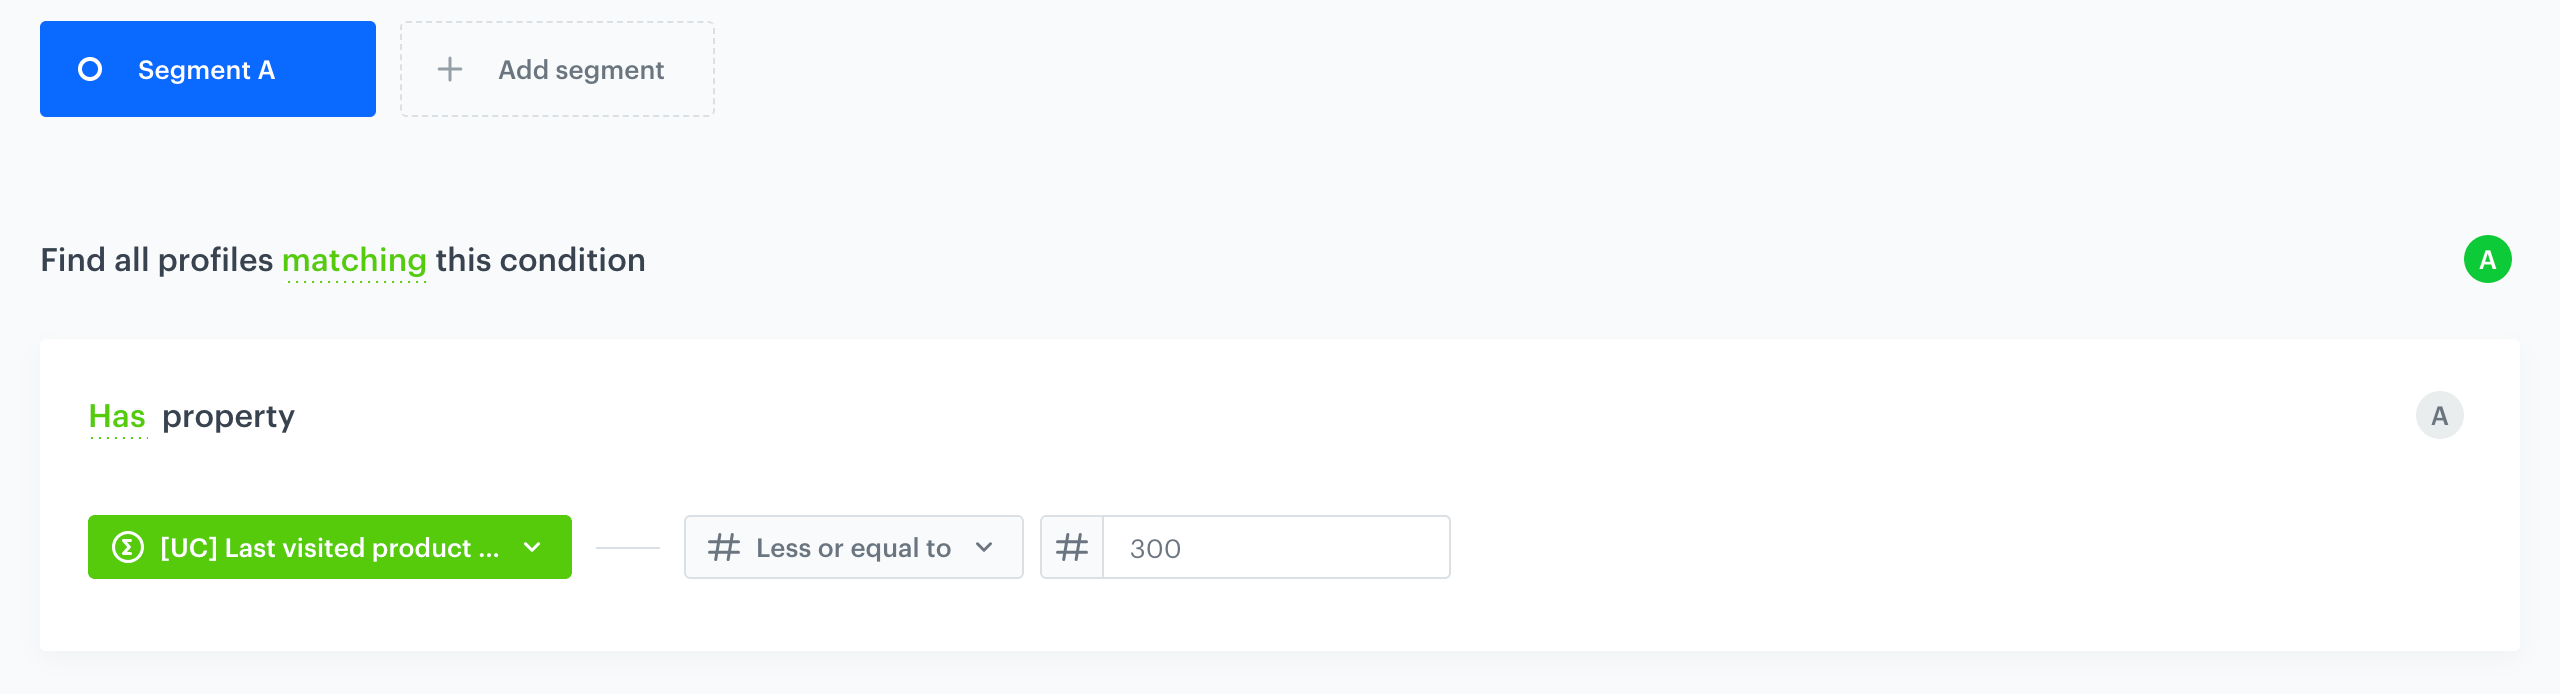
Low cost tier segmentation
- Go to
 Decision Hub > Segmentations > New segmentation.
 - Enter the name of the segmentation.
- Click Add condition.
- Select the aggregate created in the previous step.
- From the Choose dropdown list, select Number and the Less or equal to operator.
- In the text field, enter
300as the upper limit of this tier. - Click Save.
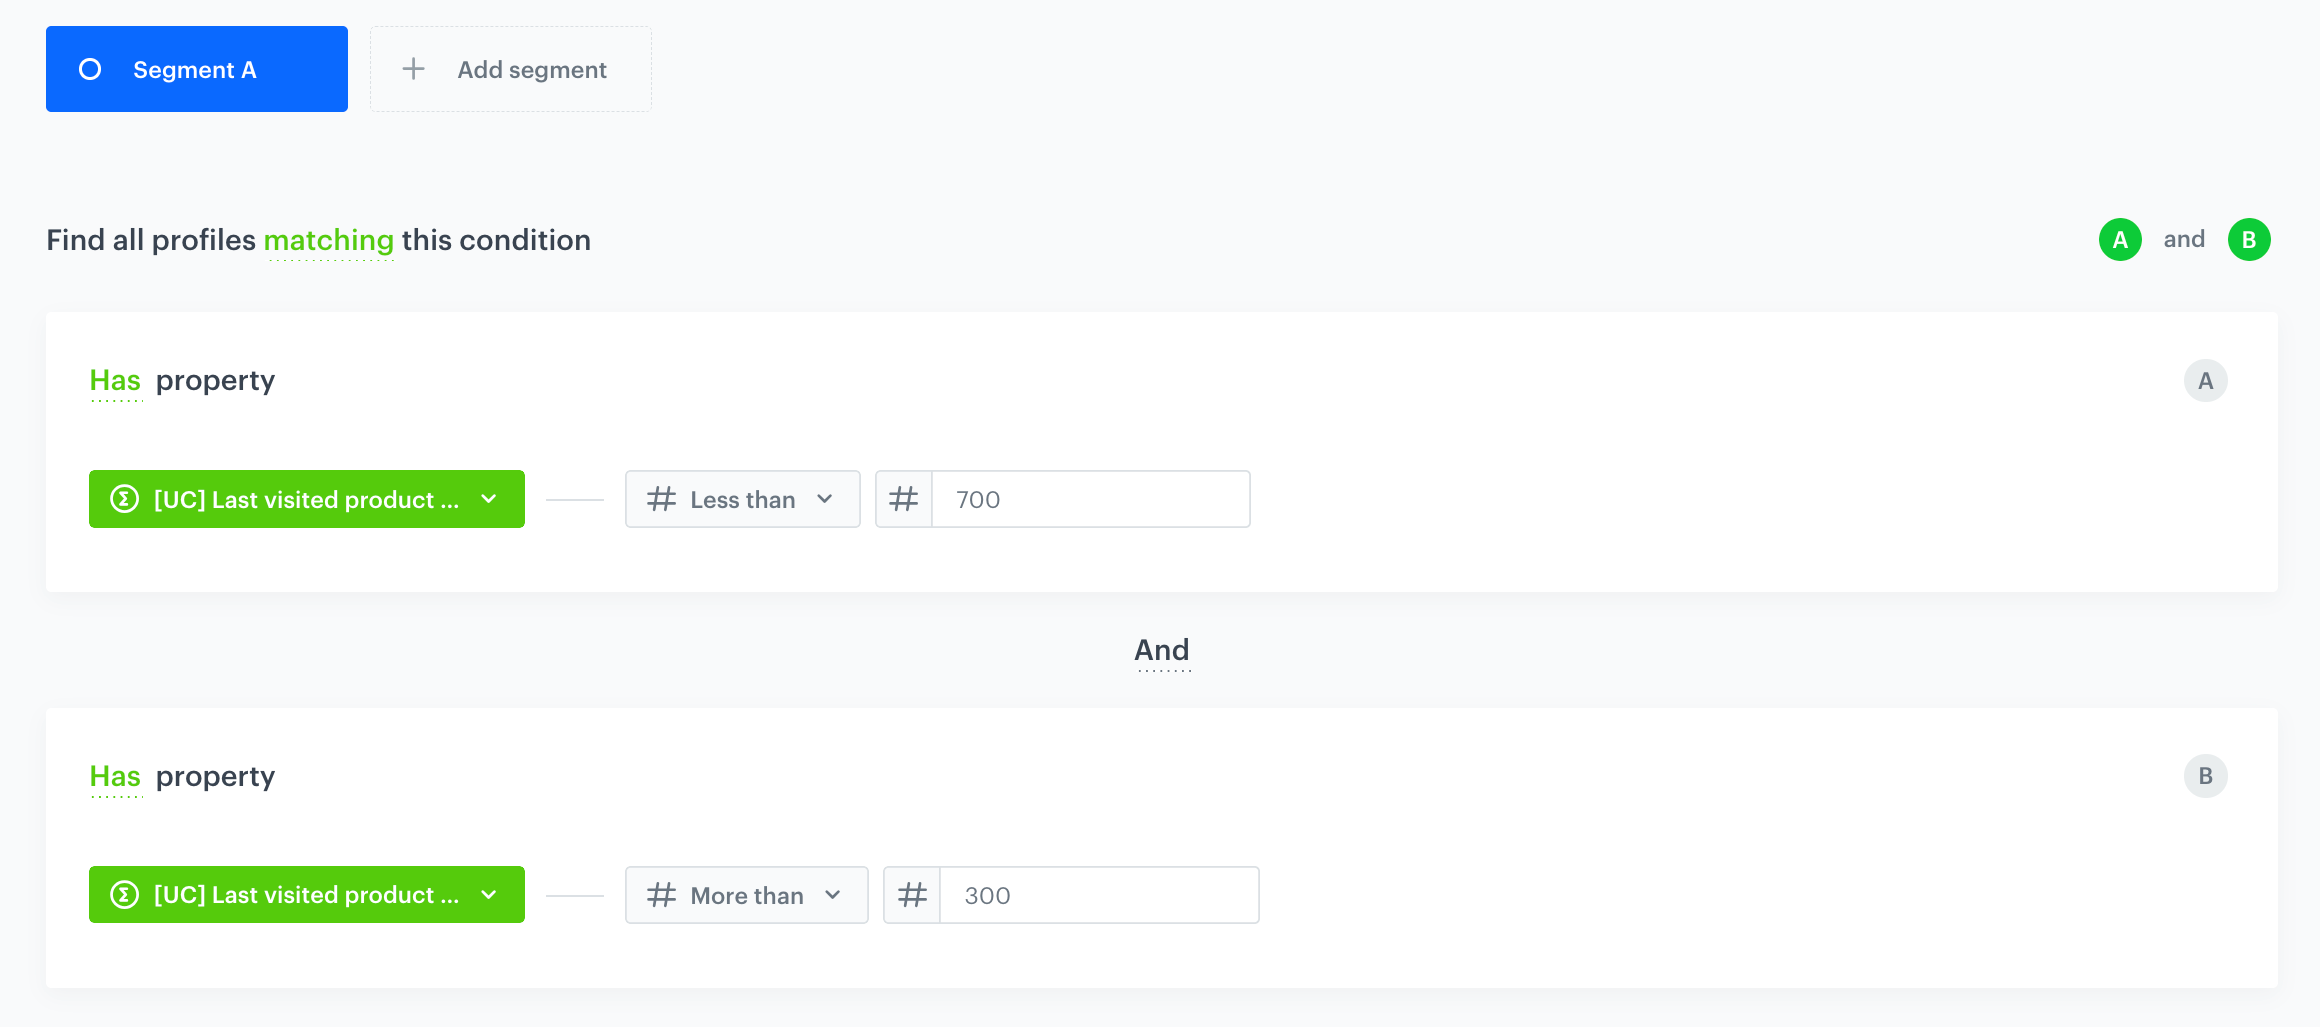
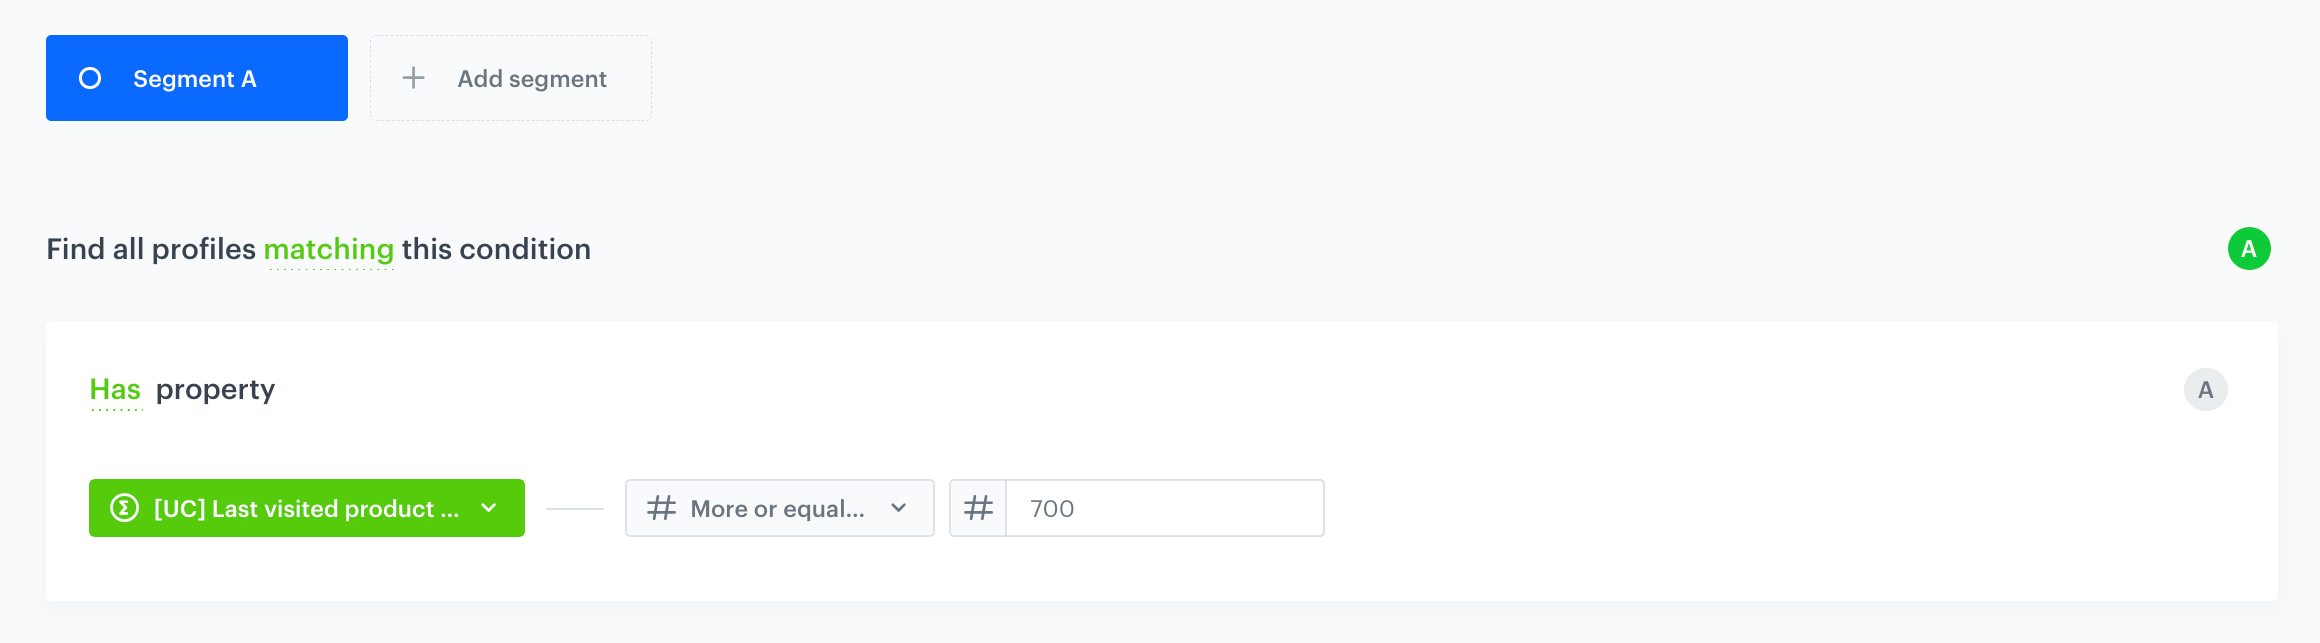
Advantage tier segmentation
- Go to Decision Hub > Segmentations > New segmentation.
- Enter the name of the segmentation.
- Click Add condition.
- Select the aggregate created in the previous step.
- From the Choose dropdown list, select Number and the Less than operator.
- In the text field, enter
700as the upper limit of this tier. - Click Add condition.
- Select the aggregate created in the previous step.
- From the Choose dropdown list, select Number and the More than operator.
- In the text field, enter
300as the lower limit of this tier. - Click Save.
All inclusive tier segmentation
- Go to Decision Hub > Segmentations > New segmentation.
- Enter the name of the segmentation.
- Click Add condition.
- Select the aggregate created in the previous step.
- From the Choose dropdown list, select Number and the More or equal to operator.
- In the text field, enter
700as the upper limit of this tier. - Click Save.
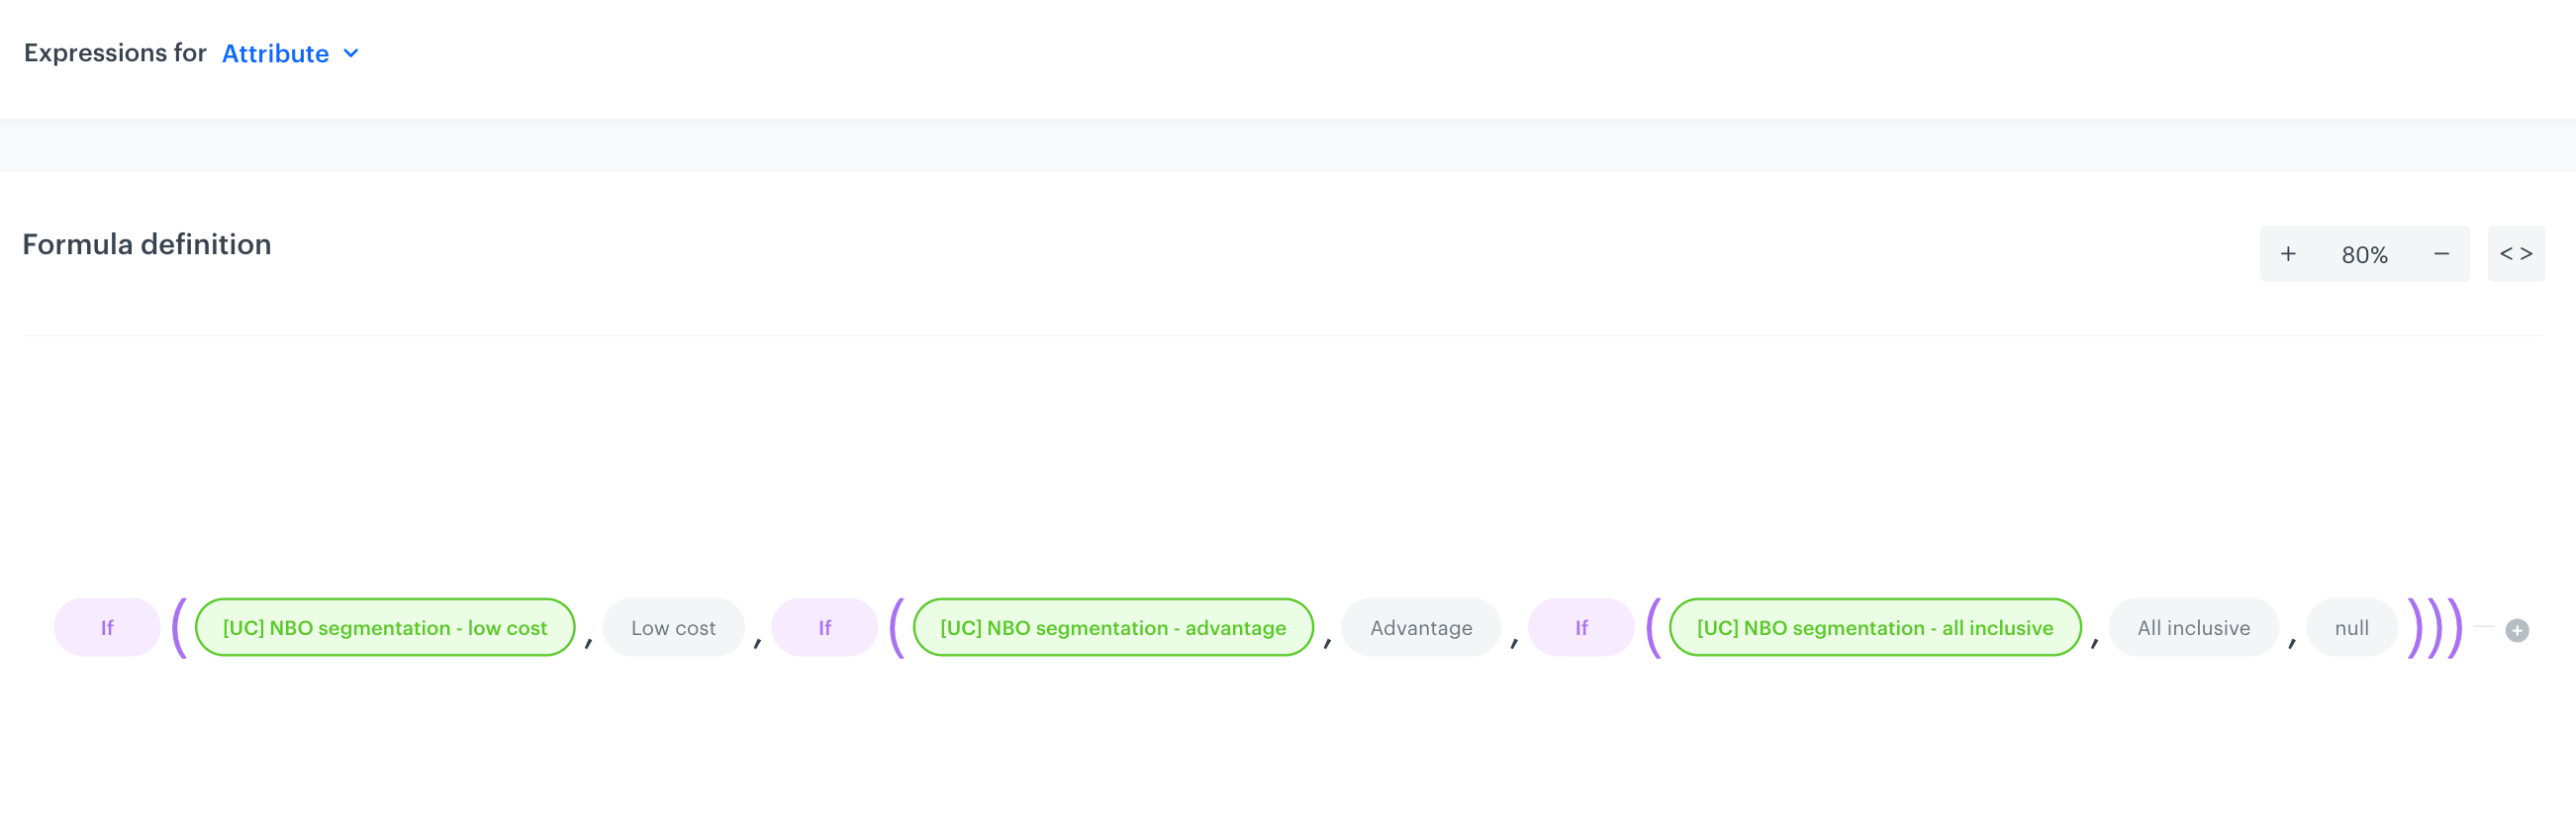
Create an expression
In this step, create an attribute expression that evaluates the customer's last visited product price and assigns it to the appropriate offer segment. The expression checks whether the profile meets the criteria for the Low Cost, Advantage, or All Inclusive NBO segmentation categories and returns the corresponding offer label. This expression will be later used in the schema.
- Go to Behavioral Data Hub > Expressions > New expression.
- Enter the name of the expression.
- Set the Expression for option to Atribute.
- Click Select and from the Function dropdown list, choose To string.
- Click Select in the brackets, and from the Function dropdown list, choose If.
- Click the first Select in the brackets, and pick Profile.
- Click the 0 node that appeared on the canvas.
- Scroll down the page and click Choose attribute.
- From the dropdown list, select the low cost tier segmentation you created earlier.
- Click the second Select in the brackets, and pick Constant.
- Click the 0 node that appeared on the canvas.
- Scroll down the page and type
Low Cost Offerin the field.
- Click the third Select in the brackets, and from the Function dropdown list, choose If.
- Click the first Select in the brackets, and pick Profile.
- Click the 0 node that appeared on the canvas.
- Scroll down the page and click Choose attribute.
- From the dropdown list, select the advantage tier segmentation you created earlier.
- Click the second Select in the brackets, and pick Constant.
- Click the 0 node that appeared on the canvas.
- Scroll down the page and type
Advantagein the field.
- Click the third Select in the brackets, and from the Function dropdown list, choose If.
- Click the first Select in the brackets, and pick Profile.
- Click the 0 node that appeared on the canvas.
- Scroll down the page and click Choose attribute.
- From the dropdown list, select the all inclusive tier segmentation you created earlier.
- Click the second Select in the brackets, and pick Constant.
- Click the 0 node that appeared on the canvas.
- Scroll down the page and type
All inclusivein the field.
- Click the thirds Select in the brackets, and pick Constant.
- Click the 0 node that appeared on the canvas.
- Scroll down the page and type
nullin the field.
- Click Save.
Create a schema
In this section, you will configure a Brickworks schema with fields for offer information.
- Go to
 Data Modeling Hub > Schemas > New schema.
 - Choose Simple Schema.
- In Display name, enter a name for the schema, for example Telco offers. API names value is pre-filled with the value from Display name. The value in this field is the unique identifier used to reference this schema in API requests.
- Optionally, add the Description.
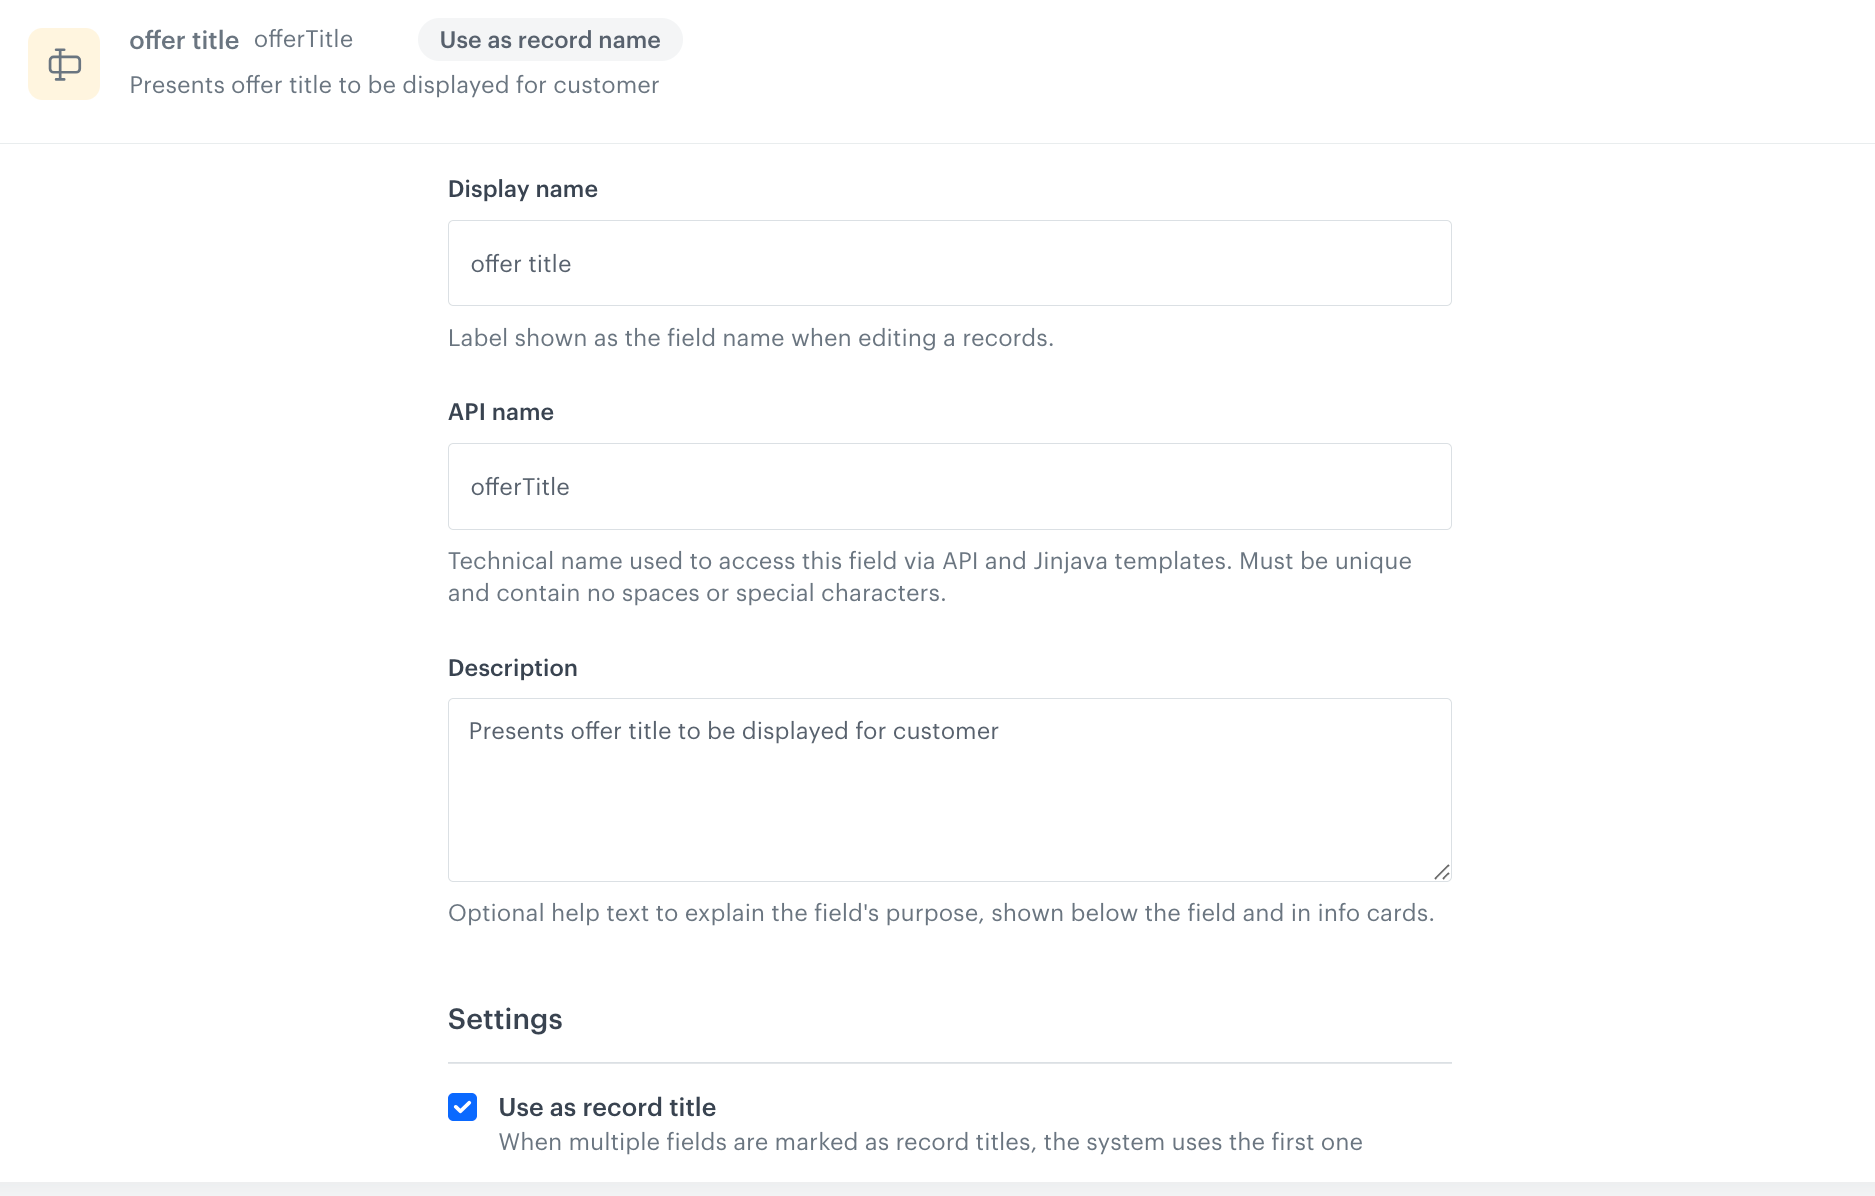
Add the Offer title
- Click Add new field and choose String.
- Complete the fileds:
- Add the Display name for the field in our case
Offer title. - The API name will be pre-filled automatically.
- Description is optional, in our case
Presents offer title to be displayed for customer.
- Add the Display name for the field in our case
- In Settings, select Use as record title.
- Click Apply to save your changes.
Add the Offer image
- Click Add new field and choose Image.
- Complete the fileds:
- Add the Display name for the field in our case
Offer image. - The API name will be pre-filled automatically.
- Description is optional, in our case
image of the offer.
- Add the Display name for the field in our case
- To save your changes, Click Apply.
Add other descriptive fields
- Click Add new field and choose String.
- Complete the fileds:
- Add the Display name for the field.
- The API name will be pre-filled automatically.
- Description is optional.
- To save your changes, click Apply.
In this use case, we add the following String fields:
Offer short description- describes the purpose of the offer,Package conditions- minutes, internet packages description,Promotion for new subscribers- new subscribers only - promotion information.
Add the Price
- Click Add new field and choose Number.
- Choose Float to let users type real numbers, also numbers which contain fractional or decimal parts.
- Complete the fileds:
- Add the Display name for the field in our case
Price. - The API name will be pre-filled automatically.
- Description is optional, in our case
monthly price for offer in Euro.
- Add the Display name for the field in our case
- To save your changes, click Apply.
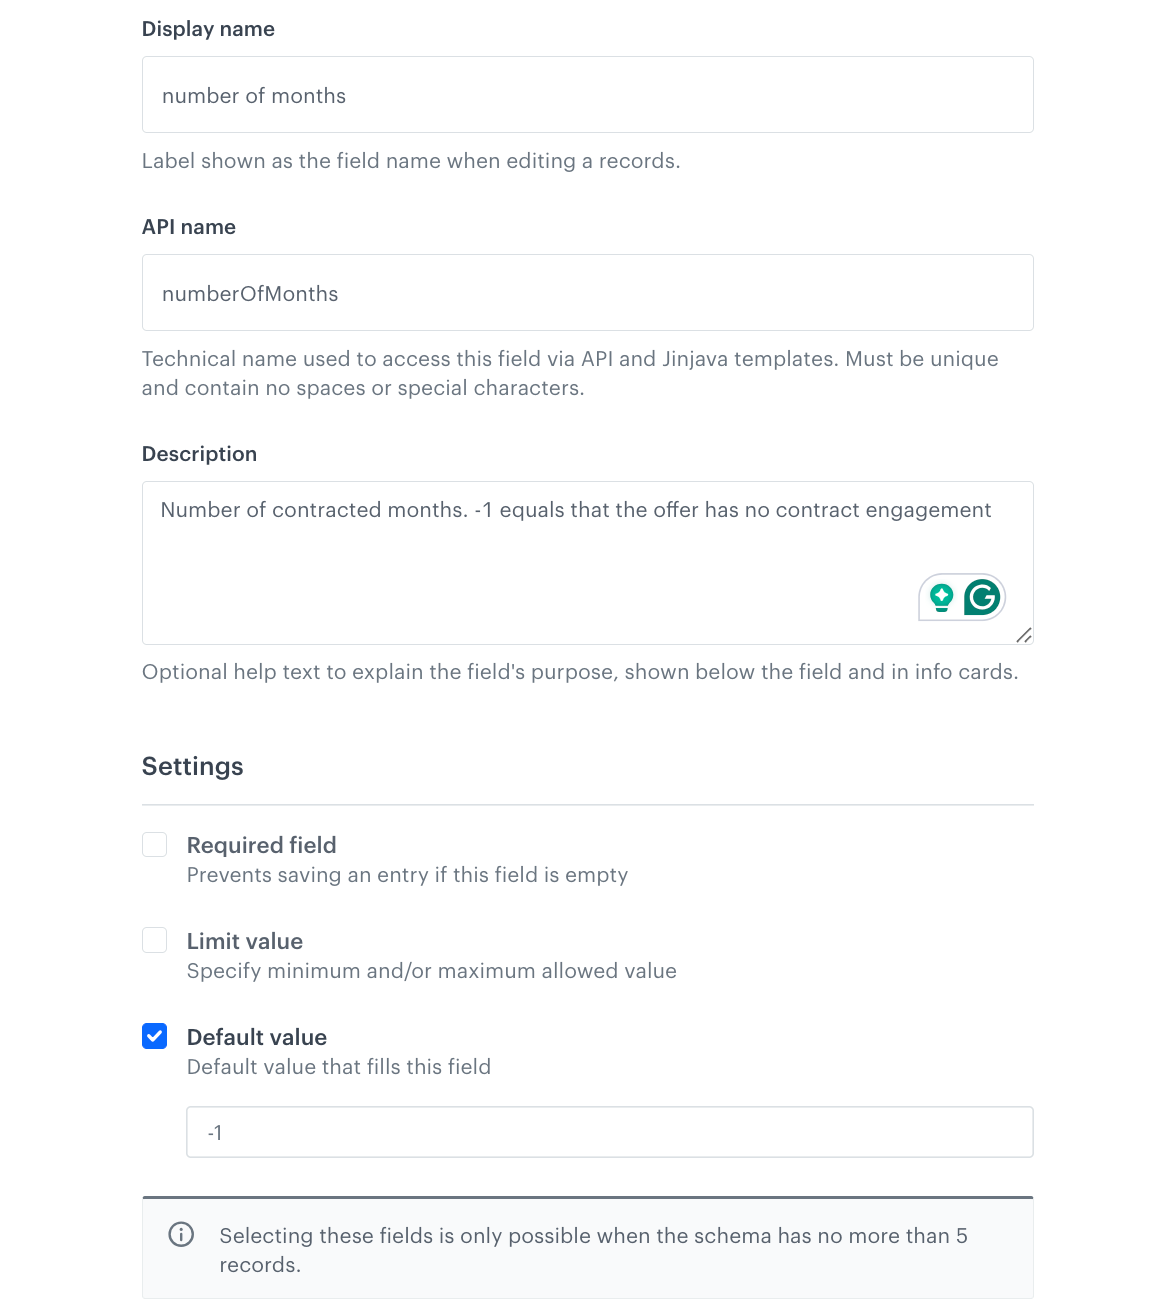
Add the Number of months
- Click Add new field and choose Number
- Choose Integer to let users type in a whole number that can be positive, negative, or zero, but does not include any fractional or decimal part.
- Complete the fileds:
- Add the Display name for the field in our case
number of months. the API name will be pre-filled automatically. Description is optional, in our caseNumber of contracted months. -1 equals that the offer has no contract engagement.
- Add the Display name for the field in our case
- In Settings, check Dafault value and type
-1 - To save your changes, click Apply.
Add the Expression
- Click Add new field and choose Expression.
- Complete the fileds:
- Add the Display name for the field in our case
qualified offer. - The API name will be pre-filled automatically.
- Description is optional, in our case
informs about offer which qualifies for client.
- Add the Display name for the field in our case
- Choose the expression created in the previous part of the process from the list.
- To save your changes, click Apply.
Add the Jinjava code
- Click Add new field and choose Jinjava code
Complete the fileds:
- Add the Display name for the field in our case
display offer. - The API name will be pre-filled automatically.
- Description is optional, in our case
informs if offer should be displayed.
- Add the Display name for the field in our case
- Use jinjava code:
{% if record.offerTitle == record.qualifiedOffer %}true{% else %}false{% endif %} - To save your changes, click Apply.
Set up the Audience & Settings
- Click the Audience & Settings tab.
- In the Audience section, click Define.
- Choose the schema recipients according to your needs, in our case choose Everyone.
- Click Apply.
- In the upper-right corner, click Save
Create records
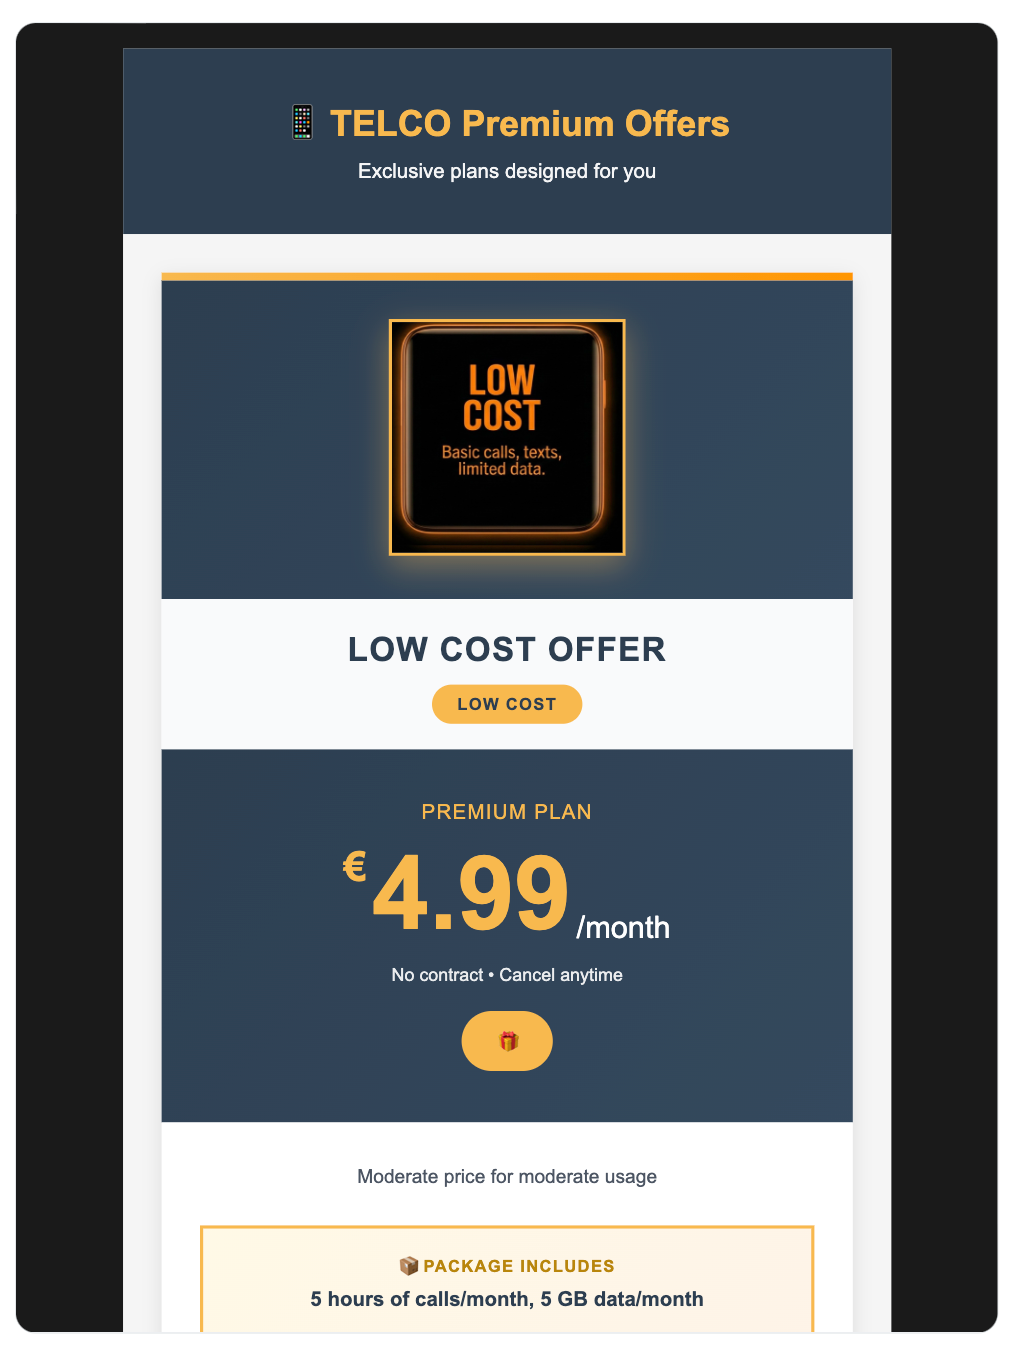
Creating a record means adding the data to the schema. It means that you fill out schema fields. In this case, these are examples of telecommunications offers - one of the three next best offer tiers - Low Cost, Advantage, or All Inclusive.
- Go to Data Modeling Hub > Data collections > Select schema.
- Choose schema created in the previous step.
- In the upper-right corner, click New record. We will create three records in total, for each of the tiers.
- Add a name for the record.
- Add a slug for the record. Slug is a unique, URL-friendly version of the name. It usually contains only lowercase letters, numbers, and hyphens.
- Add Offer title.
- Add coresponding Offer image, Offer short description, Package conditions, Price, Number of months, Promotion for new subscribers.
- Everything in Qualified offer section shouold be pre-filled with data provided in the schema.
- In the upper-right corner, click Publish to publish your record.
- Repeat steps 3-9 for two remaining tiers.
Previewing records
After saving the record either as a draft (in case of records created based on versioned schemas) or publishing it (in case of both schema types), you can preview the record for the context of a selected user. This context-driven approach enables your records to adapt dynamically based on the requesting application, user session, or any external factors you define.
- In Data Modeling Hub > Data collections.
- In the header, from Select schema dropdown list, select the schema created in the previous step.
- Find the record which you want to preview.
- Enter the record configuration.
- Click Preview.
- Click Preview contexts.
- From the dropdown list, find a profile for which you want to generate record preview. This means the same record can render completely differently depending on the context you provide.
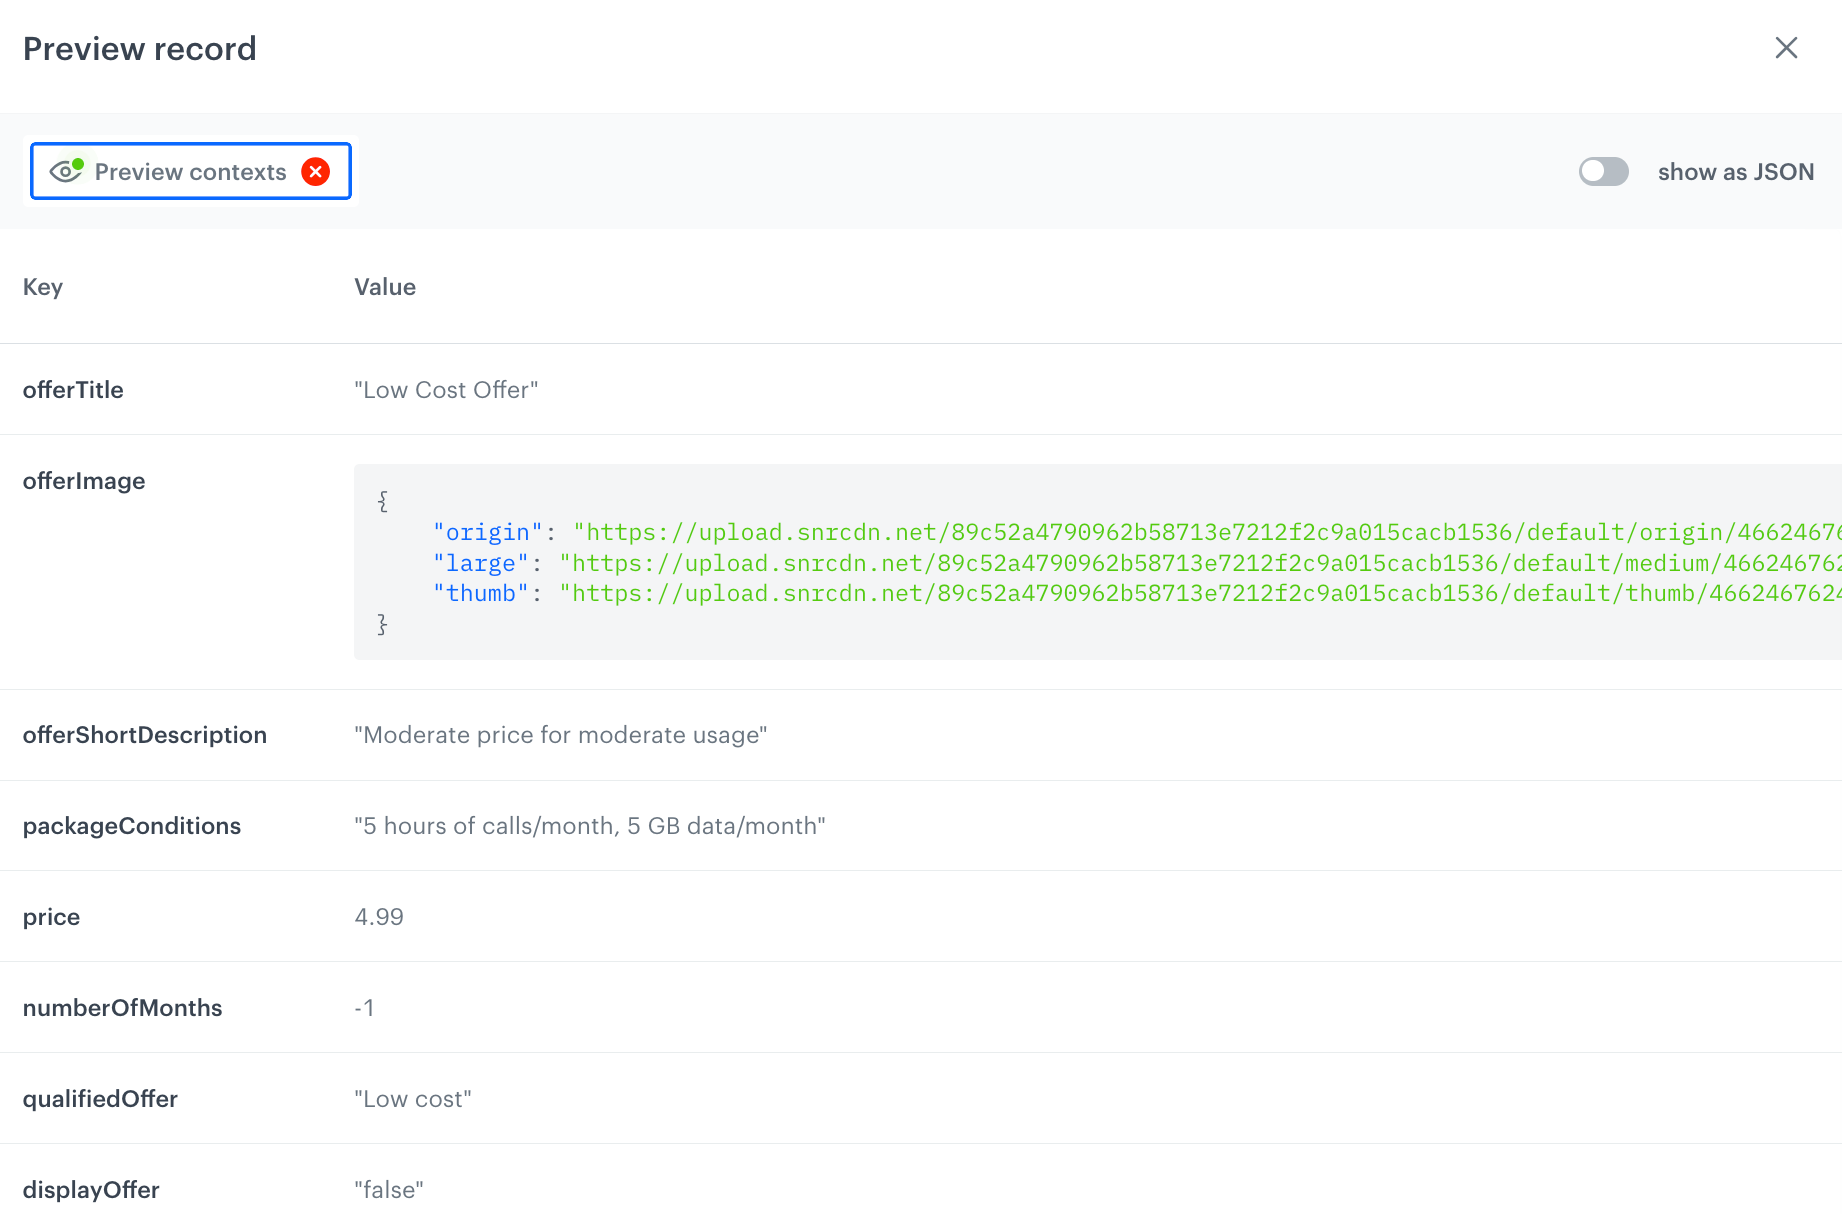
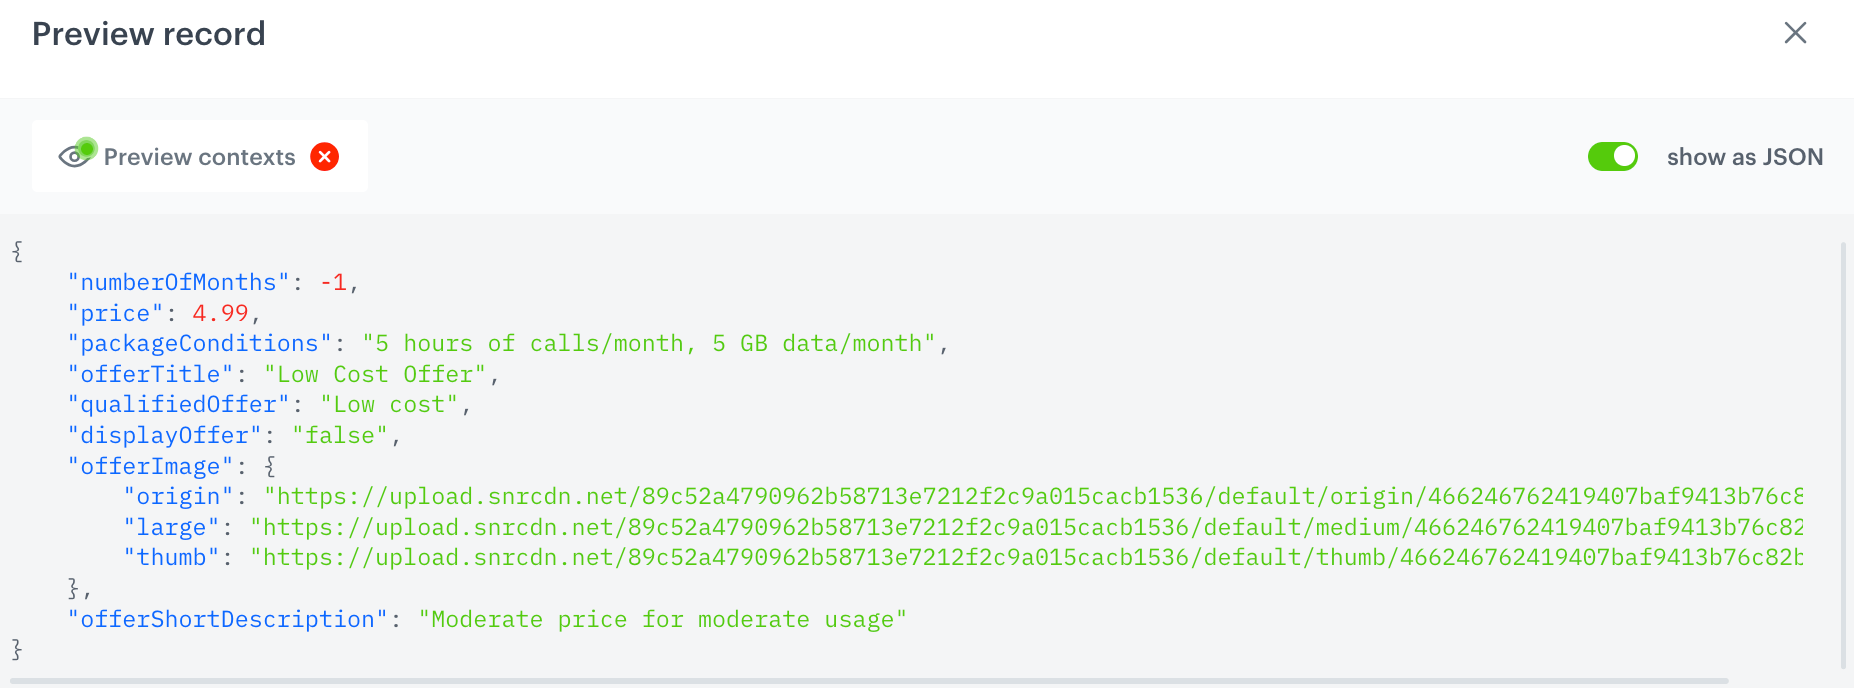
Record results for an example profile - You can also see the preview as JSON.
Create an email campaign
In this part of the process, you create an email campaign. We will use a predefined template, so there is no need to create a template from scratch.
- Go to
 Experience Hub > Email campaign > Create new.
 - Enter the name of the email campaign.
- In the Audience section, define the recipents of your campaign according to your business needs.
Define content
In this part of the process, you will create the content of the email message that returns information on tier which the customer qualifies for, with the help of ready-made template.
- Click Define in the Content section.
- From the dropdown in the From email address section, select the email account from which the email will be sent.
- In Subject, provide the subject of the email.
- Click Create message and from the list of template folders, select Predefined templates.
- Select the Brickworks: Telco offer template.
Result: You are redirected to the code editor.
You can edit the template in two ways, by editing the code of the template add snippets, add variables and/or by filling out the form in the Config tab. In this use case, we will use the capabilities of the predefined Config tab.
Edit form in the Config tab
The form in the Config tab is already filled in with default values. You can keep them or change them to fit your business needs.
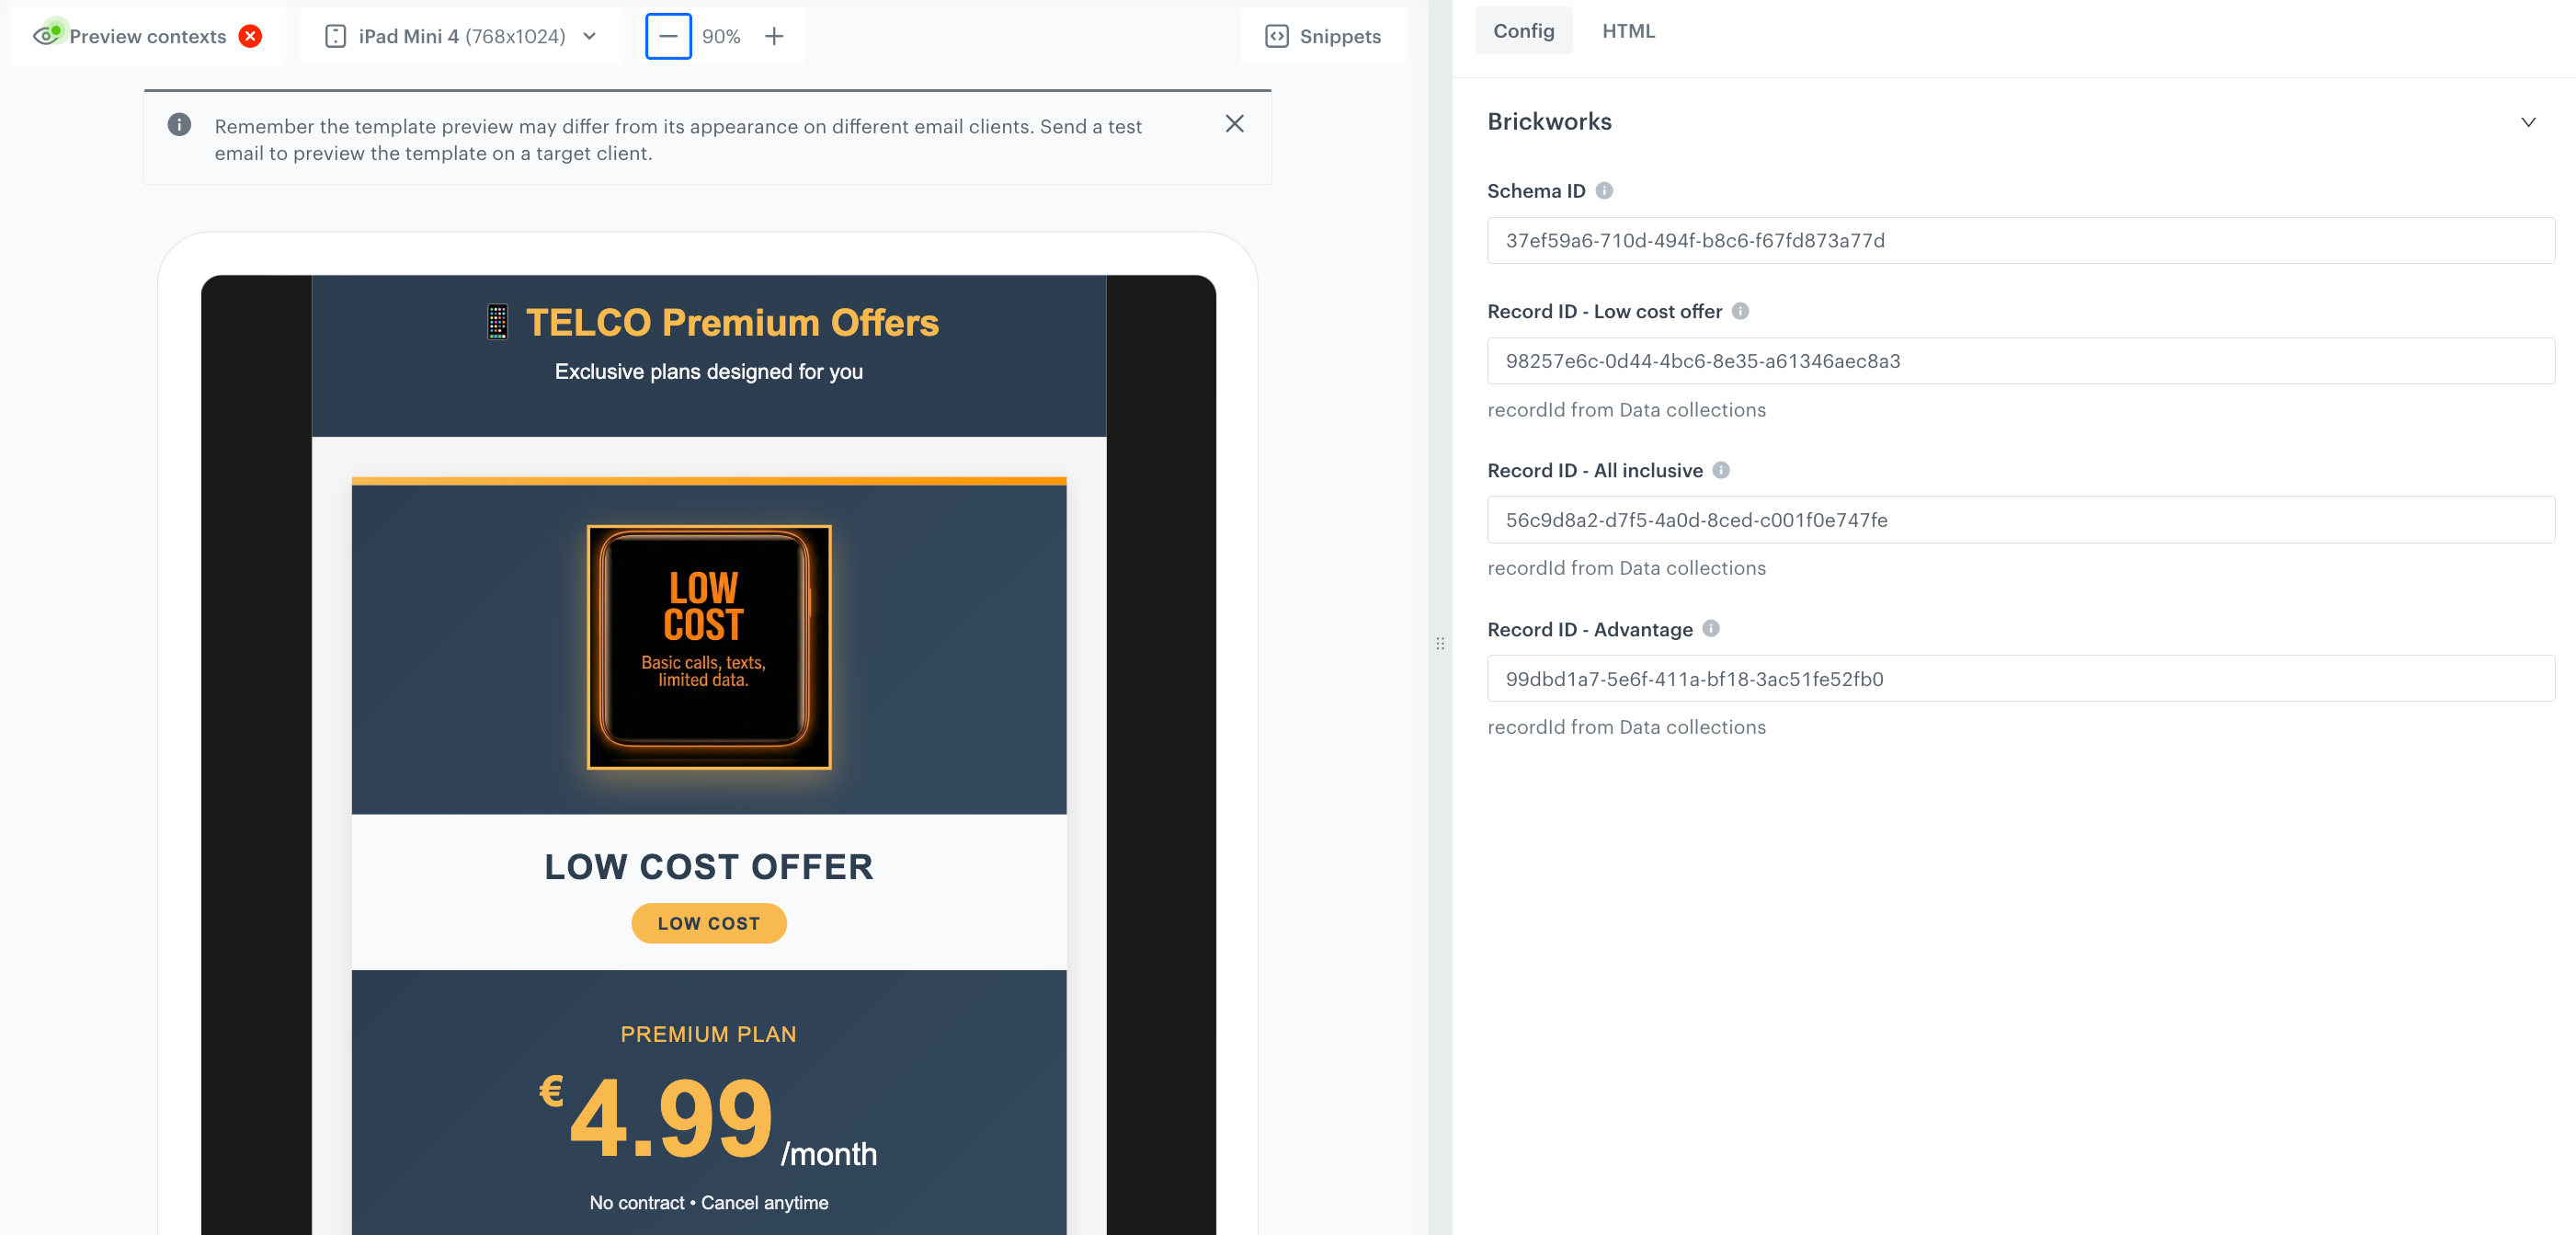
- To the Schema ID field, add the ID of the schema created in the previous part of the process.
- To the following fields, add the ID of the records created in the previous part of the process. You can find the ID of the record in the record URL:
- Record ID - Low cost offer,
- Record ID - All inclusive,
- Record ID - Advantage fields**,
- Optionally, you can edit the copy and design of the template.
- After you make changes to the template, you can check the preview.
- Click the Preview button on the upper left side.
- Enter the ID of a customer.
- Click Apply.
- If the template is ready, in the upper right corner click Save as....
- On the pop-up:
- In the Template name field, enter the name of the template.
- From the Template directory dropdown list, select the folder where the template will be saved.
- Confirm by clicking Save.
- To continue the process of configuring the email campaign, click Next.
- To save your content changes, click Apply.
Prepare the final settings
- In the Schedule tab, decide when your email is sent.
- Optionally:
- In the UTM & URL parameters section, add the parameters to track the email performance.
- In the Additional parameters section, add the custom event parameters with constant values to the automatically generated events in the email channel.
- In the Test section, you can send a test email of your message to verify if the content of the email is displayed correctly.
- If everything is ready, click Send.
What's next
After defining this schema, you can reuse the template across other placements as needed. It can be applied in emails, in-apps, or any additional surfaces supported by your setup.
Check the use case set up on the Synerise Demo workspace
In Synerise Demo workspace, you can check the configuration of:
- Aggregate
- Low cost tier segment
- Advantage tier segment
- All inclusive tier segment
- Expression
- Brickwork schema
- Email campaign
If you’re our partner or client, you already have automatic access to the Synerise Demo workspace (1590), where you can explore all the configured elements of this use case and copy them to your workspace.
If you’re not a partner or client yet, we encourage you to fill out the contact form to schedule a meeting with our representatives. They’ll be happy to show you how our demo works and discuss how you can apply this use case in your business.