Email with the products most frequently visited by a customer
It is worth remembering how important it is to analyze what users view on the website, what subpages they visit and how much time they spend there. Behavioral data is the basis for creating a specific marketing strategy and appropriate personalization.
Remember that even if the users do not add anything to the basket, they can be reminded of the products they most often visited by sending them a personalized email.
Example of use - Electronic industry
A client from the electronics industry decided to make use of information about the products customers viewed. However, instead of sending them the products they viewed recently, they were sent most viewed products in general.
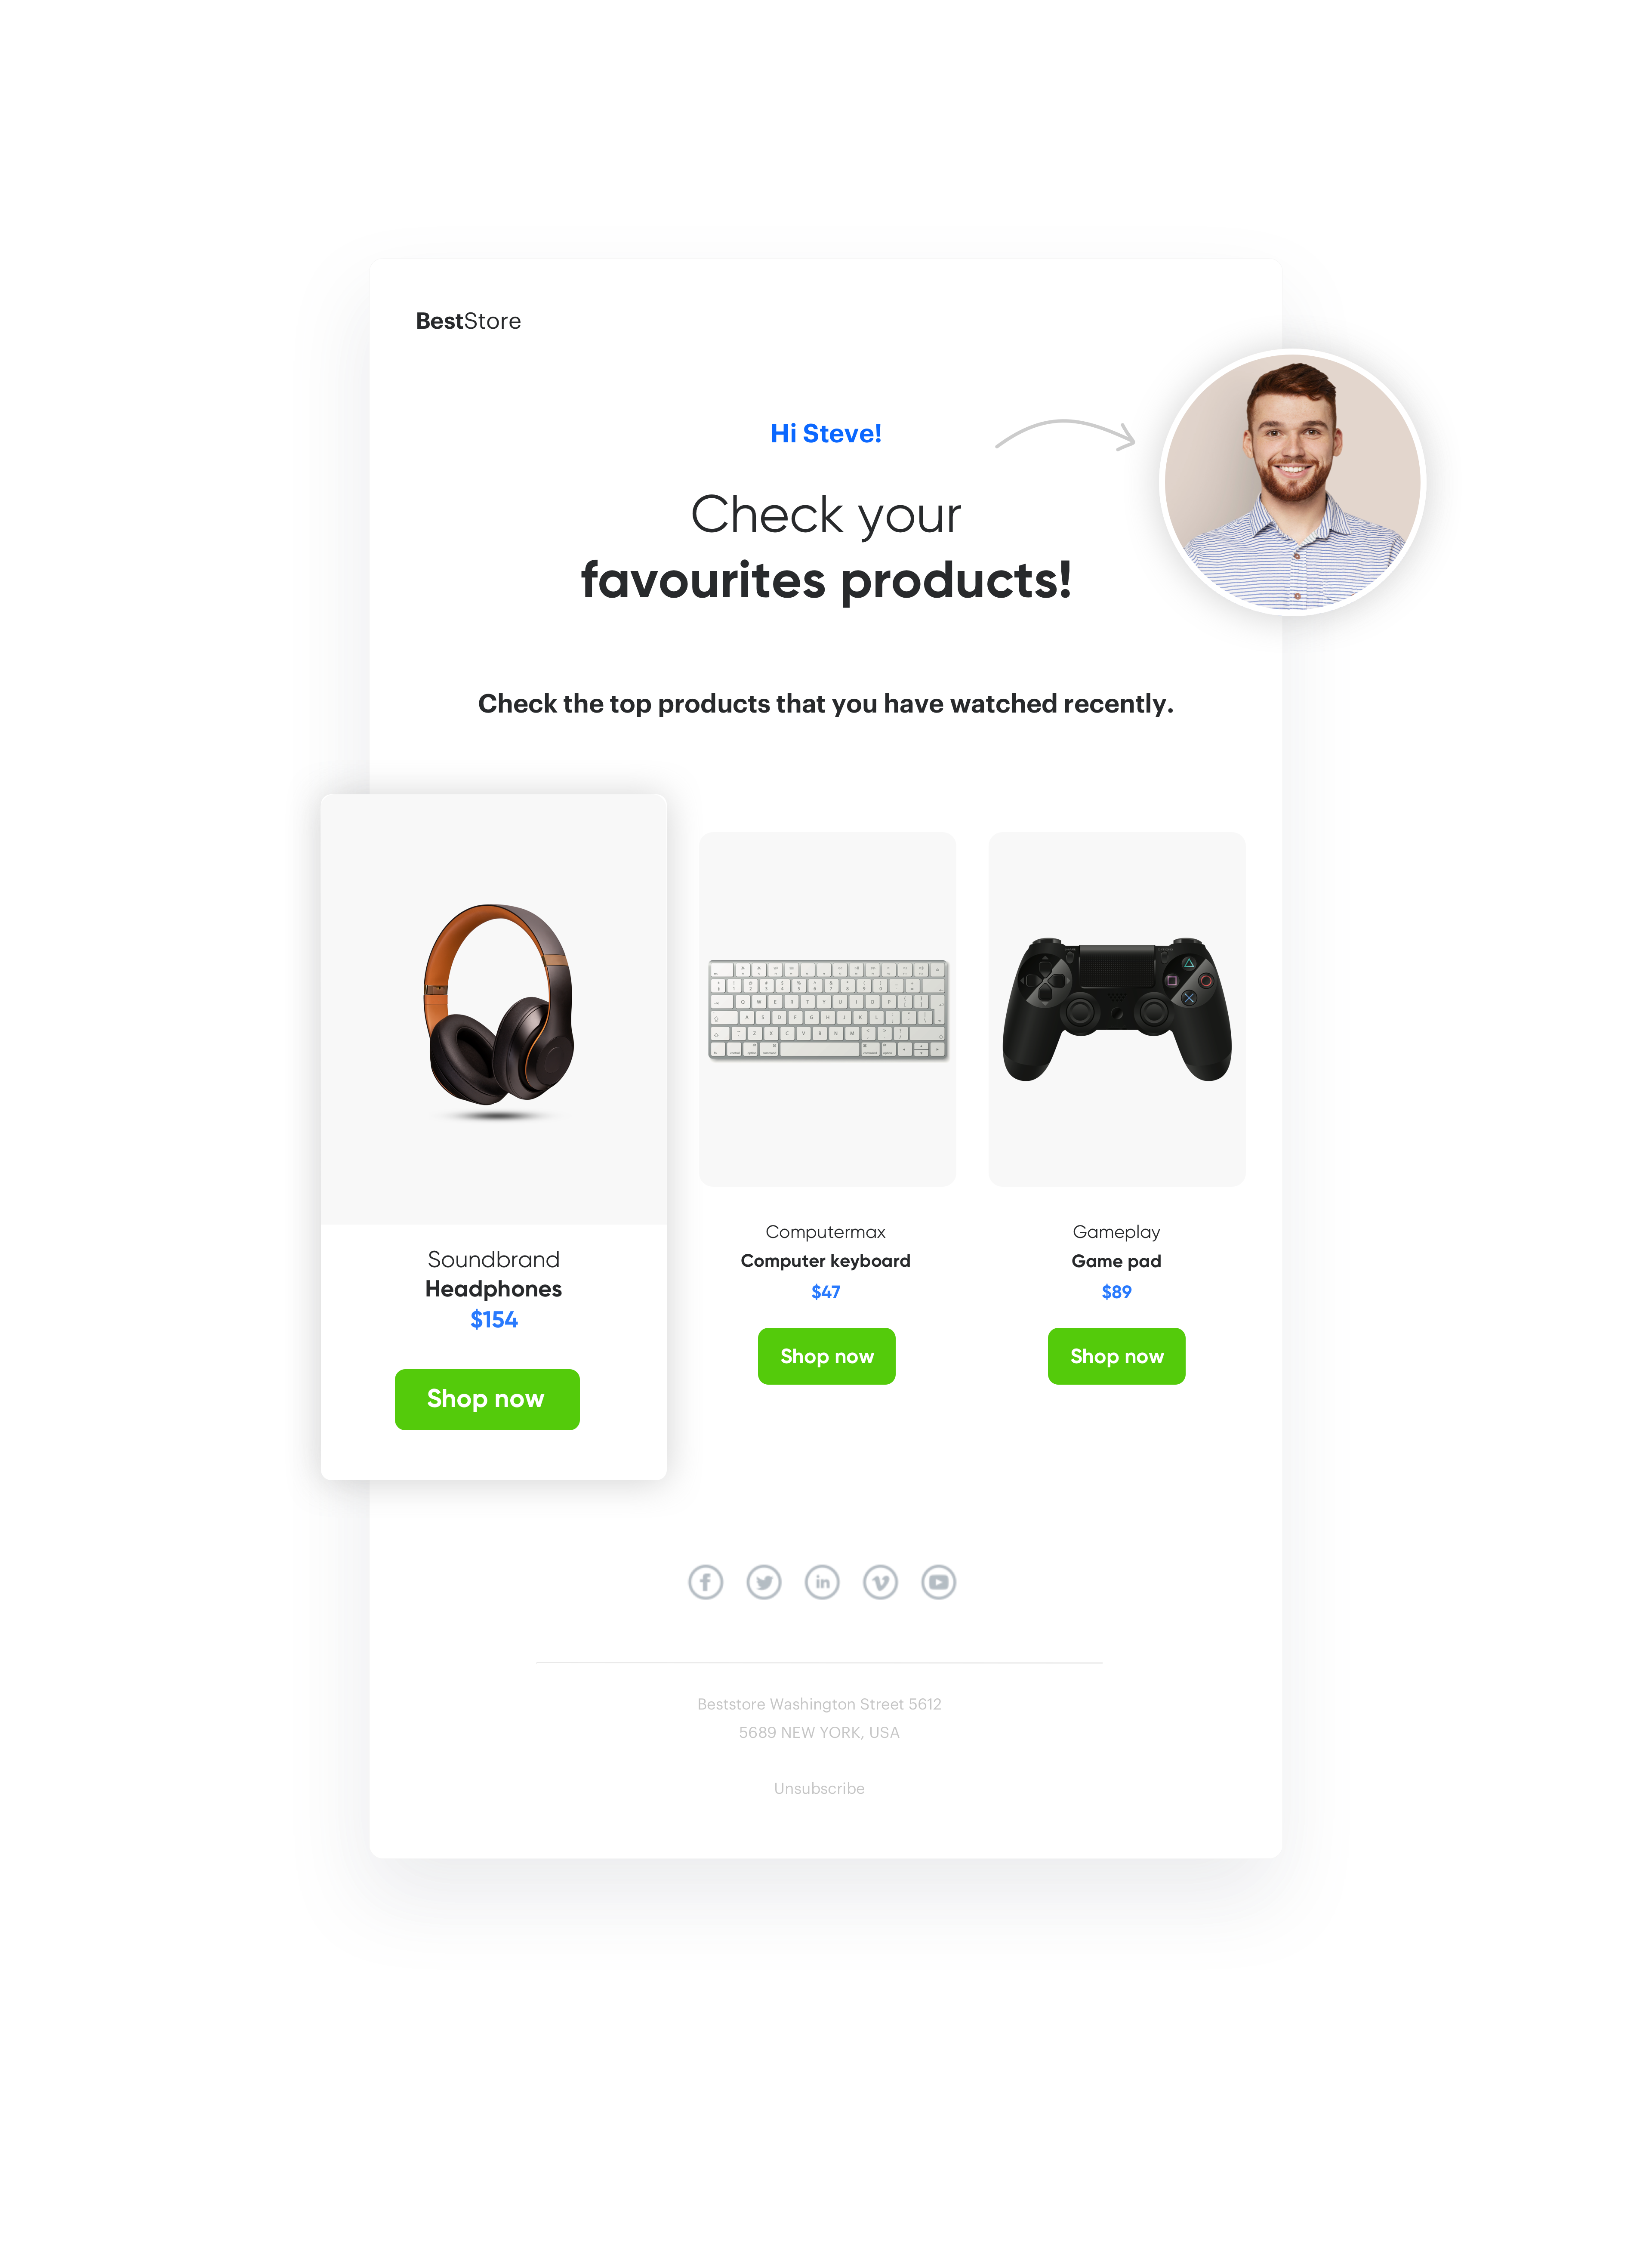
If the customers were on the site but did not add anything to the cart, after the session ended, they would receive an email with the products they visited more than once - ordered from the most to the least frequently visited.
Prerequisites
To implement this use case, you have to:
- Implement tracking code on your website.
- Implement OG Tags.
- Import product feed.
- Create product catalog.
- Integrate transaction events.
- Have add to cart event.
- Create and set up your email account.
- Import your subscriber’s database to Synerise.
Process
To create an email with products most frequently visited, perform the steps in the following order:
Prepare the aggregate
Build an aggregate that collects the SKUs of the most frequently visited products.
- Go to
 Behavioral Data Hub > Aggregates > Create aggregate.
 - As the aggregate type, select TOP MULTI.
- In the Size field, enter the number of recent events (for example, 10).
- Select the event
page.visitand theretailer_part_no. - Click button + where and add the condition that the
product:retailer_part_noparameter is true. This will give us confidence that we only take into account the visited product pages. - Save your aggregate.

Prepare a product catalog
The event page.visit contains the most important information about the product - its ID in the product:retailer_part_no parameter. To add additional information about the product in the email template, such as a photo, price, link, you need a product catalog. You can import your feed following these instructions or you can use Snrs-product-ogTag catalog which is automatically built from the product page og tags.
Prepare the workflow
-
Go to
 Automation Hub > Workflows > New workflow.
 -
Add an Profile Event as a trigger node.
-
Select the session.end event.
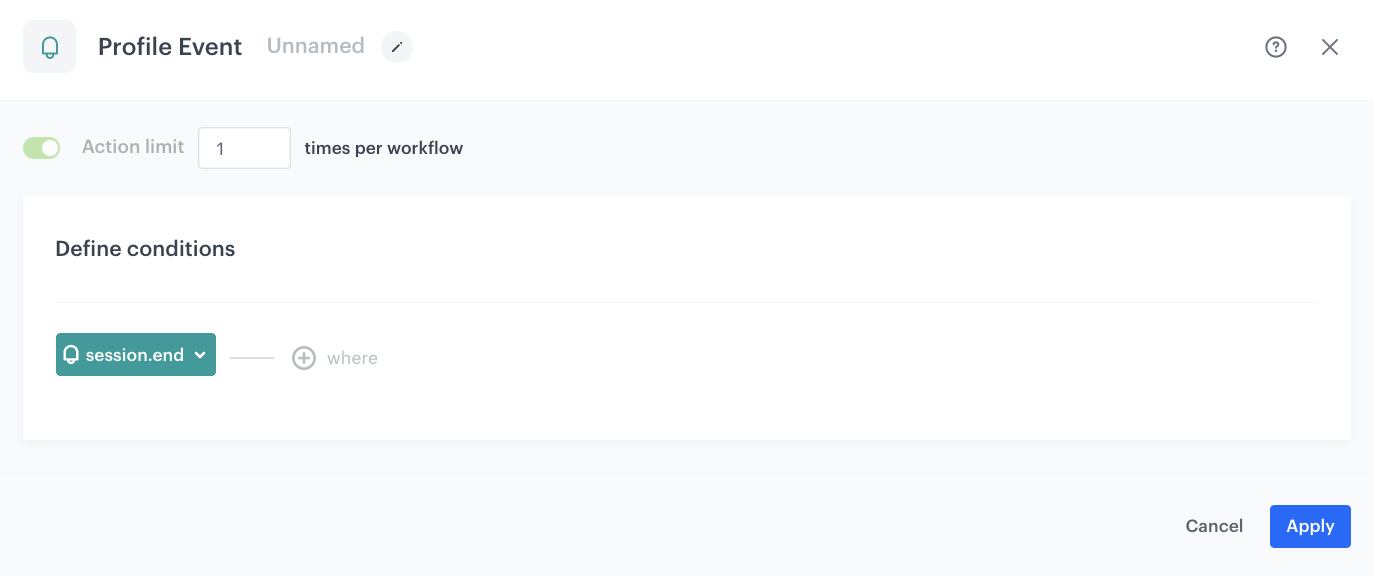
Configuration of the Profile Event node -
Click Delay to define the duration of delay - after the session ends, the system waits for the time defined in the Delay node before the email is sent.
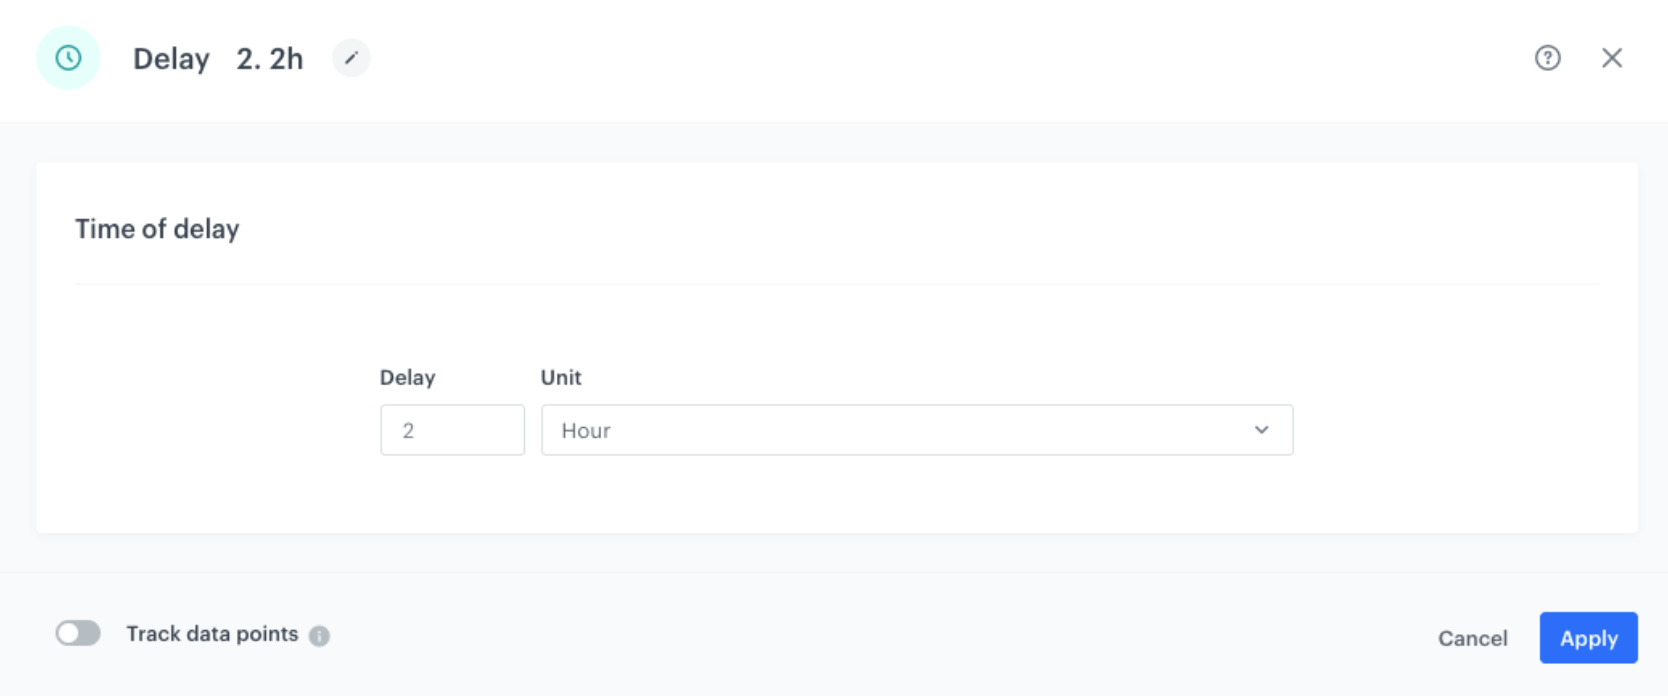
Configuration of the Delay node Note: Remember that event session.end appears 30 minutes after the last user activity on the website. -
Add the Generate Event node. It generates an event on the customer’s profile. In this case, the event will contain ID of the most frequently viewed products by a customer.
- In the Event name, enter the name, for example
topvisited.products. - In the Body, enter the Jinjava code available below. Replace AGGREGATE_HASH with the hash of the aggregate you in the previous step. As a result you will analyze the products that the user has viewed, sort them in order of the most frequently viewed to the least viewed (products that have been viewed at least two times) and return them to the user’s card in this event.
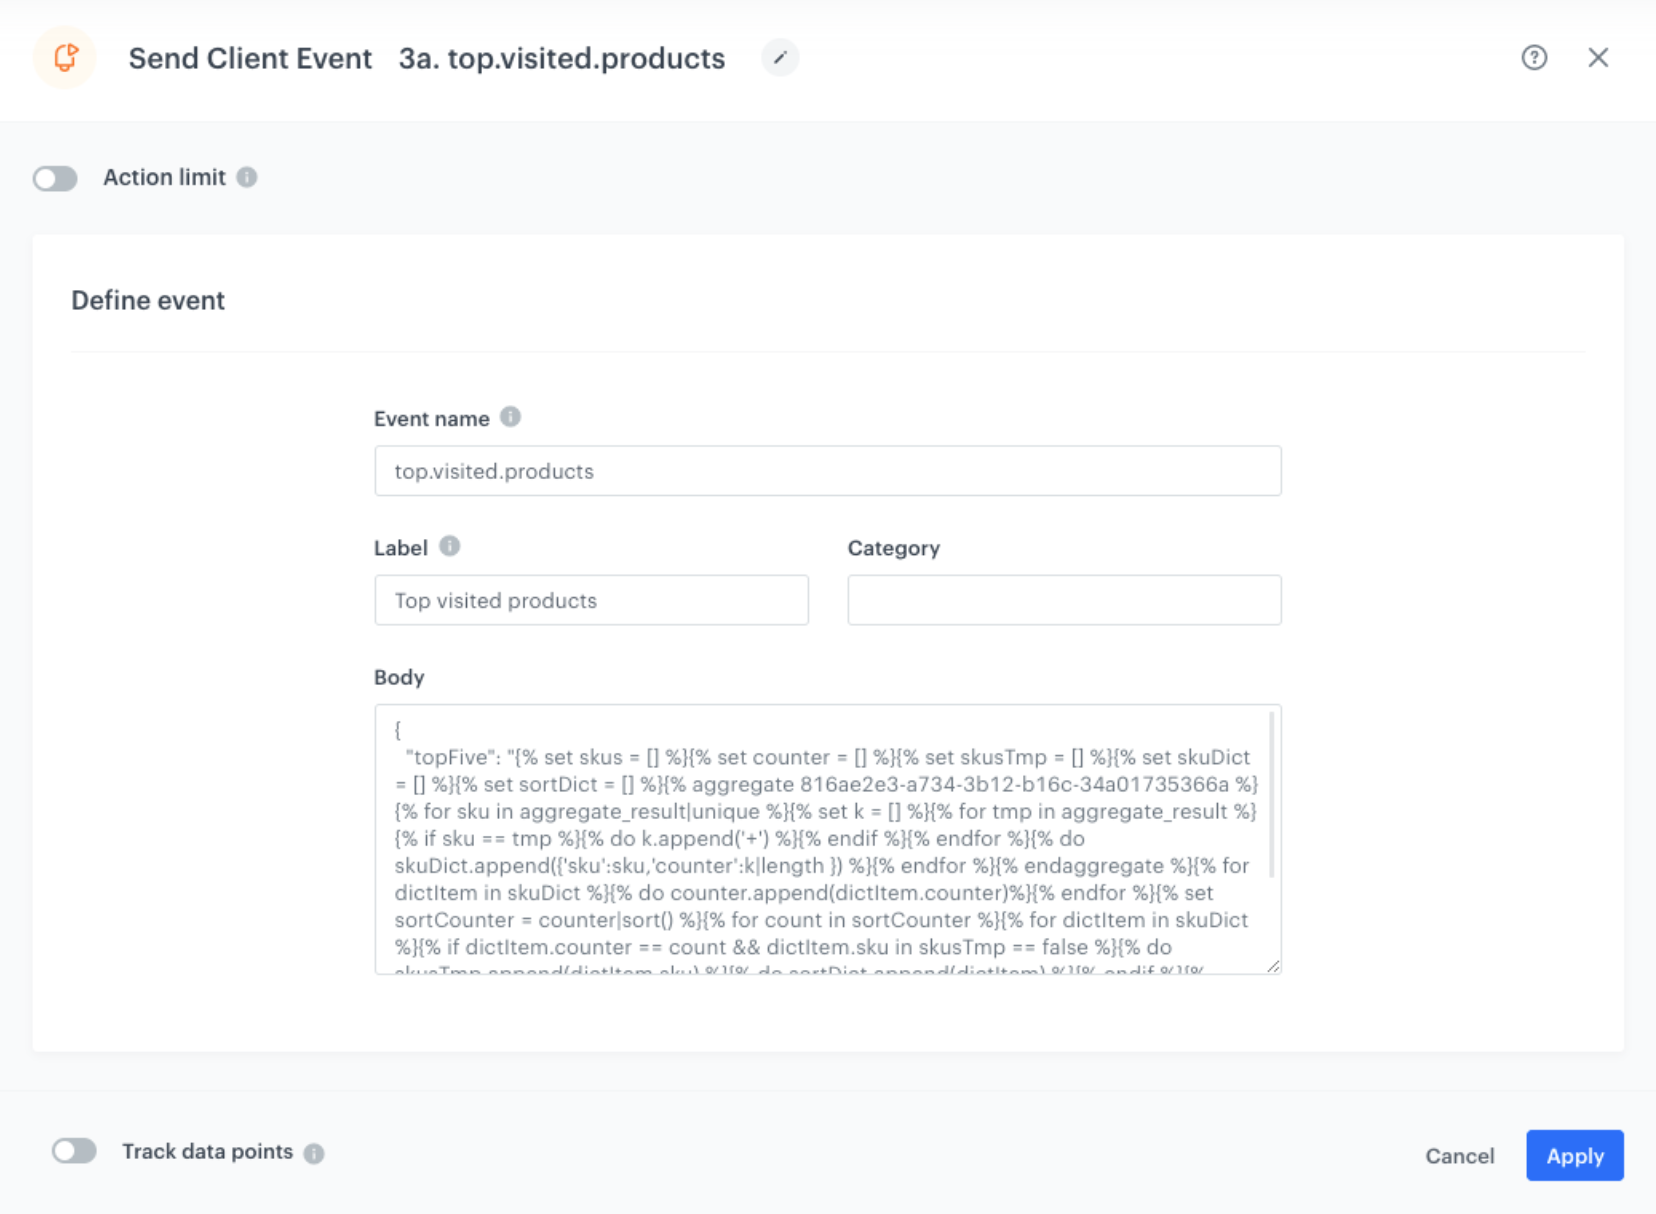
Generate Event Note: An event created in this way will return all the products that the user saw at least twice within the time specified in your aggregate. The event with parameter will be returned in the form of the sku listed after the decimal point, e.g.: top: sku1, sku2, sku3.CHECK JINJA CODE{ "top": "{% set skus = [] %} {% set counter = [] %} {% set skusTmp = [] %} {% set skuDict = [] %} {% set sortDict = [] %} {% aggregate AGGREGATE_HASH %} {% for sku in aggregate_result|unique %}{% set k = [] %}{% for tmp in aggregate_result %}{% if sku == tmp %}{% do k.append('+') %}{% endif %}{% endfor %}{% do skuDict.append({'sku':sku,'counter':k|length }) %}{% endfor %}{% endaggregate %}{% for dictItem in skuDict %}{% do counter.append(dictItem.counter)%}{% endfor %}{% set sortCounter = counter|sort() %}{% for count in sortCounter %}{% for dictItem in skuDict %}{% if dictItem.counter == count && dictItem.sku in skusTmp == false %}{% do skusTmp.append(dictItem.sku) %}{% do sortDict.append(dictItem) %}{% endif %}{% endfor %}{% endfor %}{% set top = [] %}{% set len = sortDict|length + 1 %} {% for i in range(len) %}{% set ind = sortDict|length - i %}{% set item = sortDict[ind] %}{% if sortDict[ind].counter > 1 %}{% do top.append(sortDict[ind].sku) %}{% endif %}{% endfor %}{{ top|join(',')|trim }}" }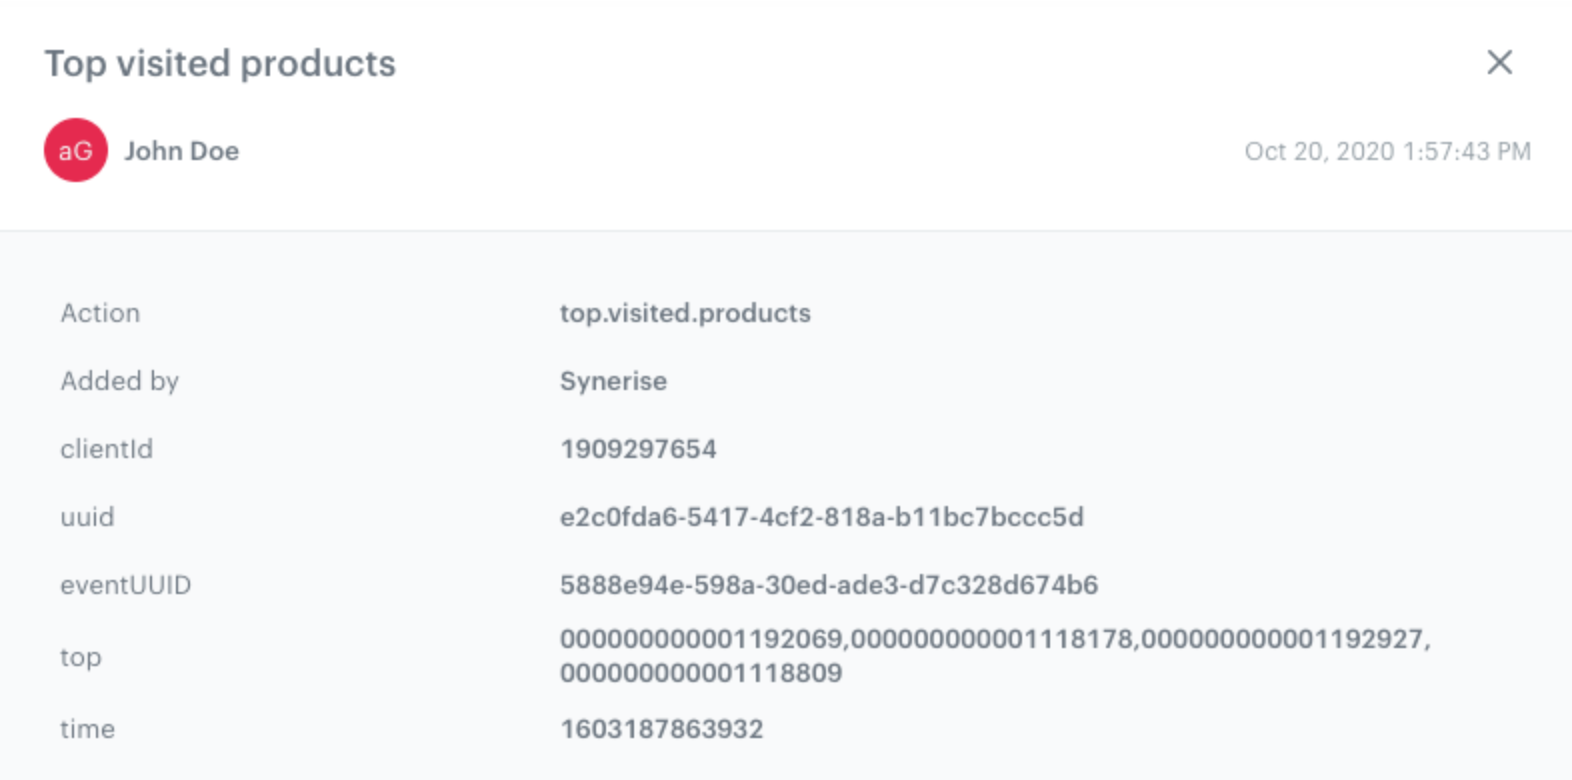
Effect after implementing jinjava - In the Event name, enter the name, for example
-
Add Profile Event Filter. This node allows you to wait for the event sent in the previous node. When the event appears on the customer’s profile, it will be possible to refer to its parameters in the next node - here in send.email, you will refer to the “Top” parameter via
{{event.params.top}}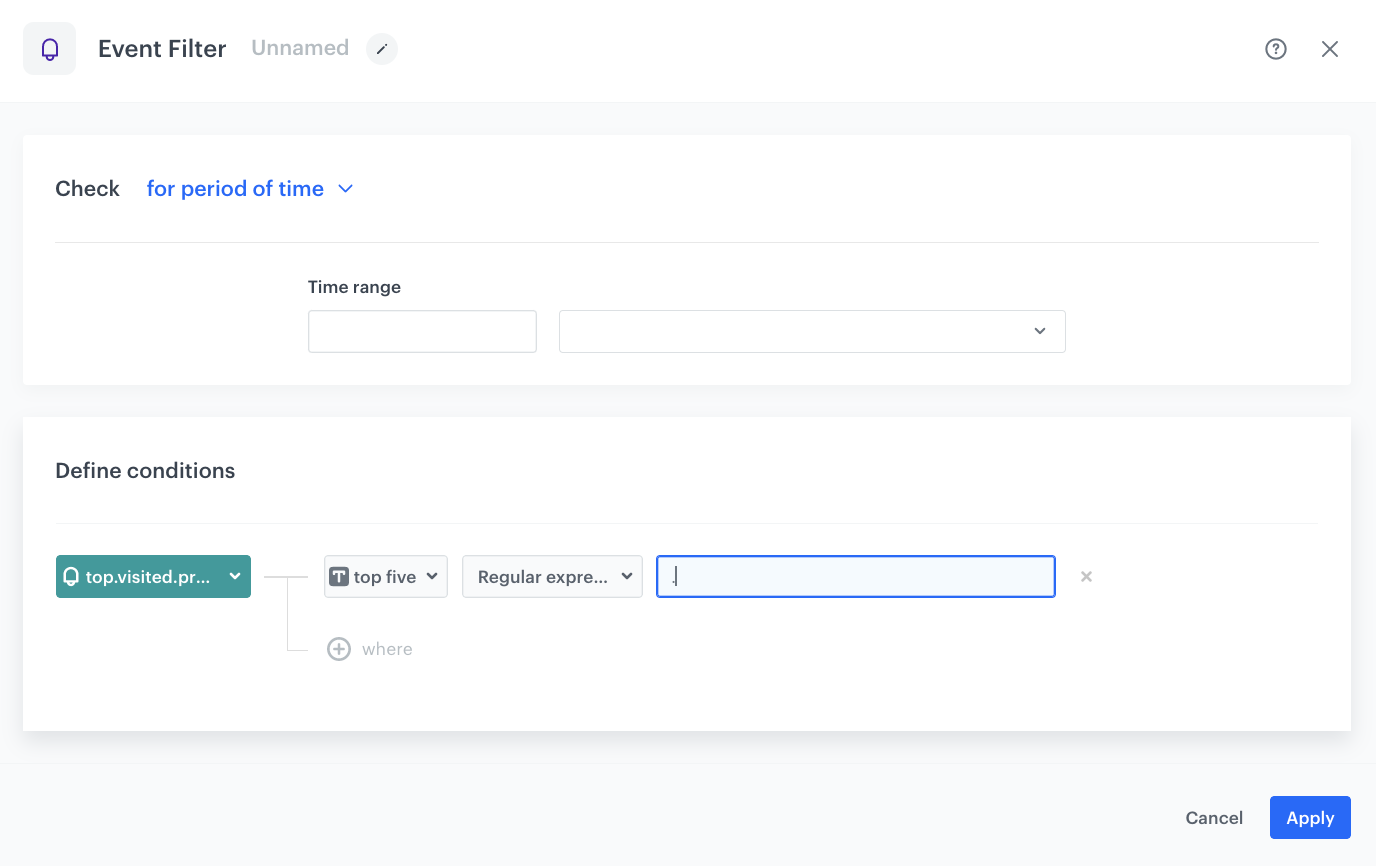
Configuration of the Profile Event Filter node -
Add the Send Email node. In the message template, we can use {{event.params.top}} which will return the “top” parameter of the last event we sent. For example, sku1, sku2, sku3 which can then be converted into an array using the | split (’,’) function and use in the template structure.
   {% set topProducts = event.params.top %}
   {% set skus = topProducts|split(',') %}
Additionally - to add the most visited products , you will have to use Jinjava and add your own CSS. If you want to display all objects that are under the key products, follow the instruction:
<!-- Opening the tag that retrieves the value from the aggregate prepared in point 1 -->
{% aggregate XXXXXXXXXXX %}
<!-- In the section {% for r in aggregate_result %} ... {% endfor %} there is access to product:retailer_part_no of the 10 most visited products -->
{% for r in aggregate_result %}
next item:
{{r}}
<!-- r is a single product:retailer_part_no and can be used as the key: {% catalog.Snrs-produktu-ogTag(r).og:XXX %} downloads additional data from a catalog built on the basis of og tags - which information about the product you want to add in the template depends on you. If you want to add the product name, photo, link, price in the e-mail - you can take it from the catalog -->
{% catalog.Snrs-produktu-ogTag(r).og:image %}
{% catalog.Snrs-produktu-ogTag(r).og:title %}
{% catalog.Snrs-produktu-ogTag(r).product:price:amount %}
{% catalog.Snrs-produktu-ogTag(r).og:url %}
{% endfor %}
<!-- Closing of the tag that gets the value from the aggregate prepared in point 1 -->
{% endaggregate %}
https://app.synerise.com/analytics-v2/aggregates/bfba46b4-e0d6-3ea9-8ae6-c7a2495c54c7. Copy this ID and use it in your code where needed.- Add final settings:
- Add the End nodes where the workflow should finish for users.
- Specify capping (here 1 for 1 day).
- Optionally add titles to each node so the workflow will be more understandable for your colleagues.
- Name the automation and Save it or Save & Run.
- Save your workflow.
Results:

It will result in an array:
skus = [sku1, sku2, sku3] which we can then use to build a template - we can, for example, download items from the product catalog and simply display them in our email or download similiar recommendations for the most viewed item (skus [0])
Check the use case set up on the Synerise Demo workspace
You can check the configuration of each step directly in the Synerise Demo workspace:
If you’re our partner or client, you already have automatic access to the Synerise Demo workspace (1590), where you can explore all the configured elements of this use case and copy them to your workspace.
If you’re not a partner or client yet, we encourage you to fill out the contact form to schedule a meeting with our representatives. They’ll be happy to show you how our demo works and discuss how you can apply this use case in your business.