Event parameters are additional pieces of information about a customer activity the event describes. For example, a page.visit event can be described by parameters such as:
IP(IP address from which a user visited the website)UTM source(the UTM source from which a user was referred to the website)device(the device from which a user accessed the website)- and more
For a product.buy (an event that describes a purchase of a product) the list of parameters can be long and include:
name(name of the product)finalUnitPrice(the final price of the product)currency(the currency of the product)quantity(the quantity of a product)og:url(a page address towards which all shares, likes, and so on, will be counted)- and more
Events and their parameters can be used to prepare analyses of various kinds, for example, users can create a metric that counts visits to particular subdomains or they can create an aggregate that calculates the value of abandoned cart for a specific customer.
Become familiar with the event parameters which are denylisted by default for every workspace. These parameters are still available on the Raw data tab in event details, if the data is available.
Creating event parameters
If you send an event by using the SDK/API, its parameters (the params object) are saved to the database and added to the event's definition automatically. By default, they are visible in analytics. In such a case, you don't need to add the parameters according to the instructions in this article. If needed, you can edit the parameters to add names, descriptions, or enable event enrichment.
- Go to
 Data Modeling Hub > Event parameters > Create event parameter.
Result: A pop-up appears.
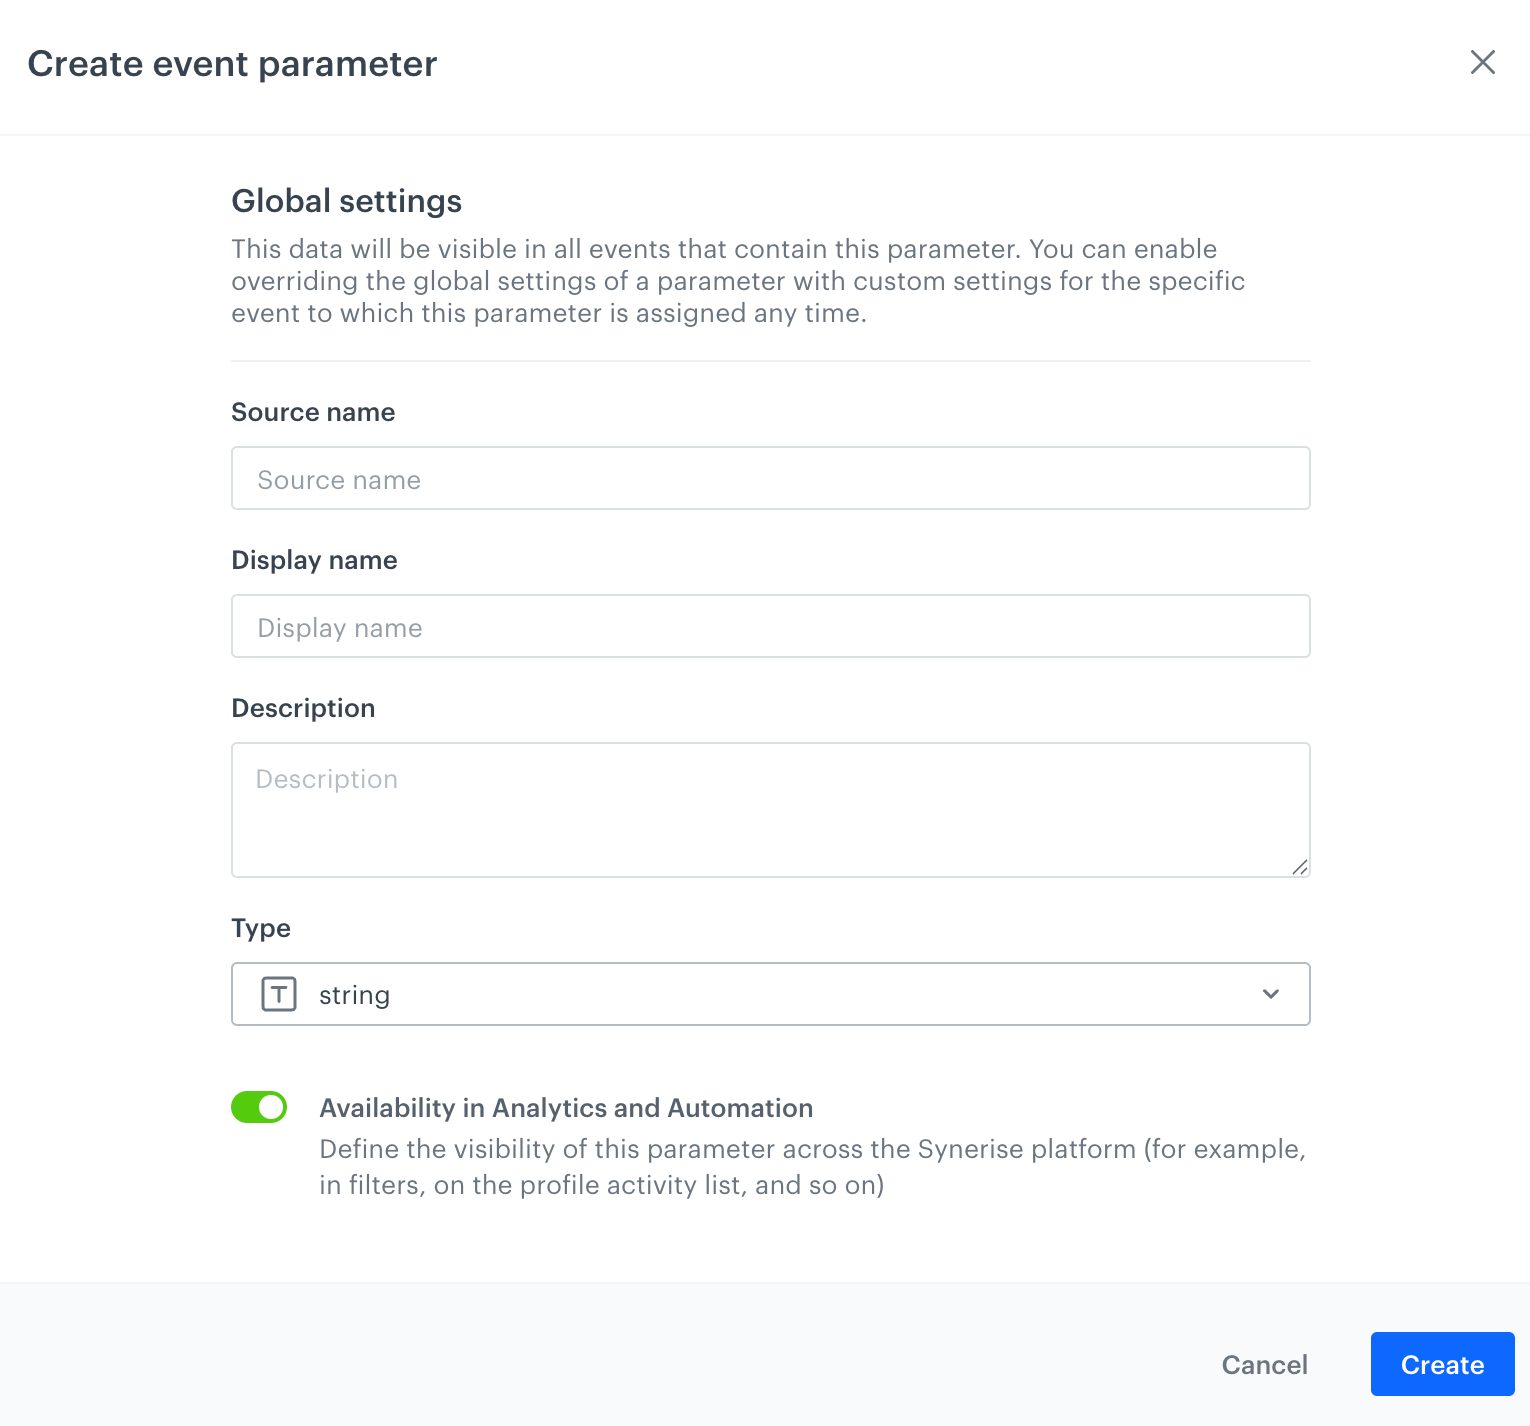
Form for creating an event parameter - In the Source parameter field, enter the name of the parameter as it is sent by the SDKs/API.
- In the Display name field, enter a human-readable label for display in the Synerise portal.
- Optionally, in the Description field, you can add an explanation about the purpose of this parameter.
- From the Type dropdown list, select the format of the property value as sent by the SDKs/API.
- To show this parameter in filters in Decision and Automation Hubs, leave the Availability in Analytics and Automation toggle enabled.
- To complete the process, click Create.
Result: The parameter is saved on the list of event parameters.
Managing event parameters
Event parameters can be used across multiple events within Synerise, and you can manage them centrally from a single location. This centralized management lets you view all events where a parameter appears and configure global settings such as its display name, description, and visibility in filter lists throughout the Synerise platform.
Additionally, you can customize a parameter’s title and visibility in analytics specifically for each event it is associated with by using the event parameter override feature. This ensures precise control over how parameters are presented and filtered based on their context.
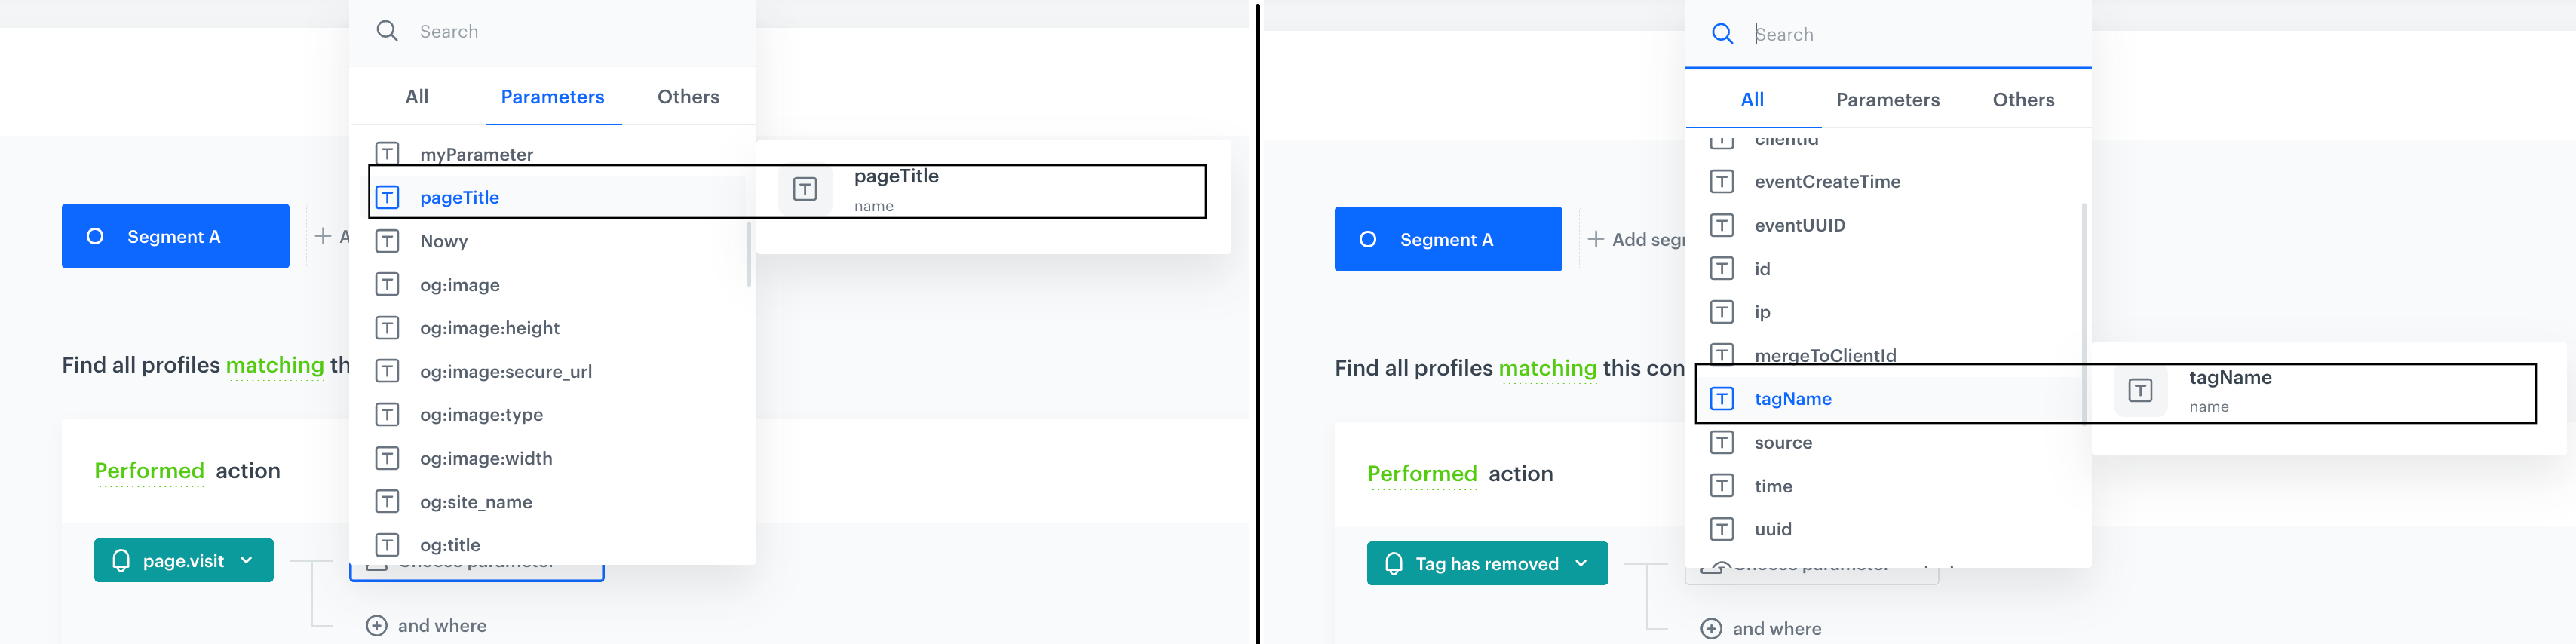
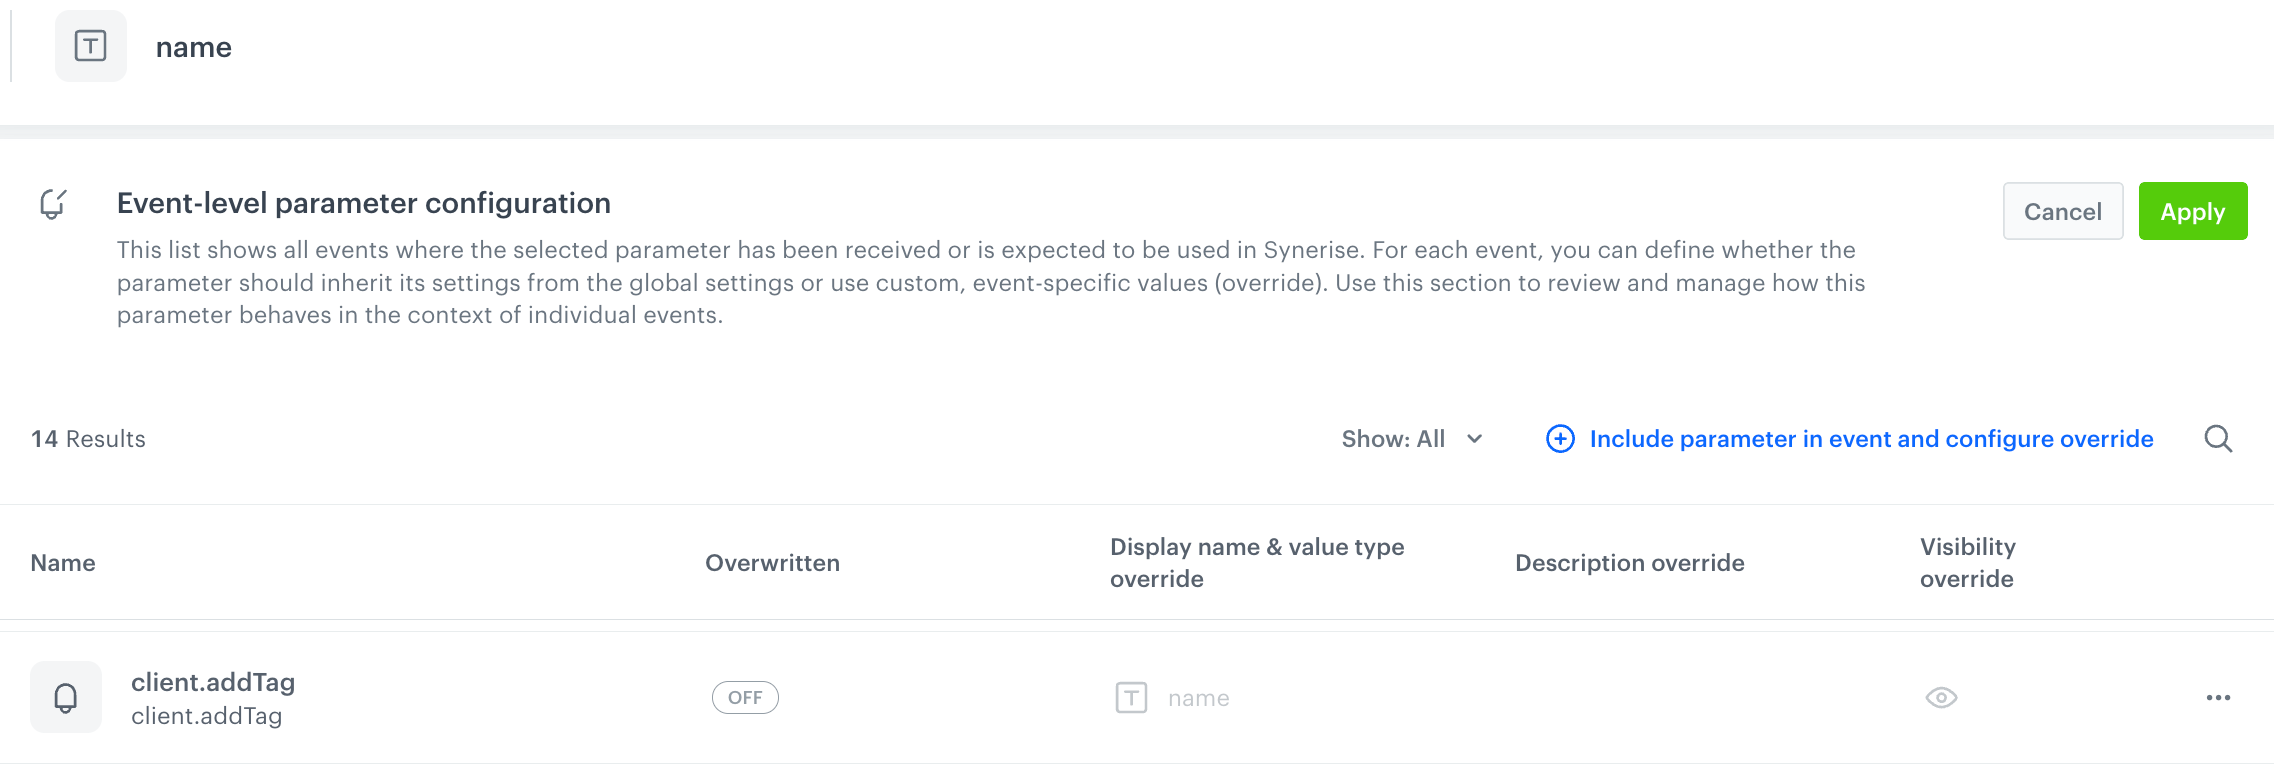
In the filters, when you hover a mouse cursor over the event parameter name for which overwriting is enabled, you can see the source name (original name) of that parameter (as presented on the screen below).
- Go to Data Modeling Hub > Event parameters.
- Open the details of a parameter.
- In the Event-level parameter configuration section, click Define.
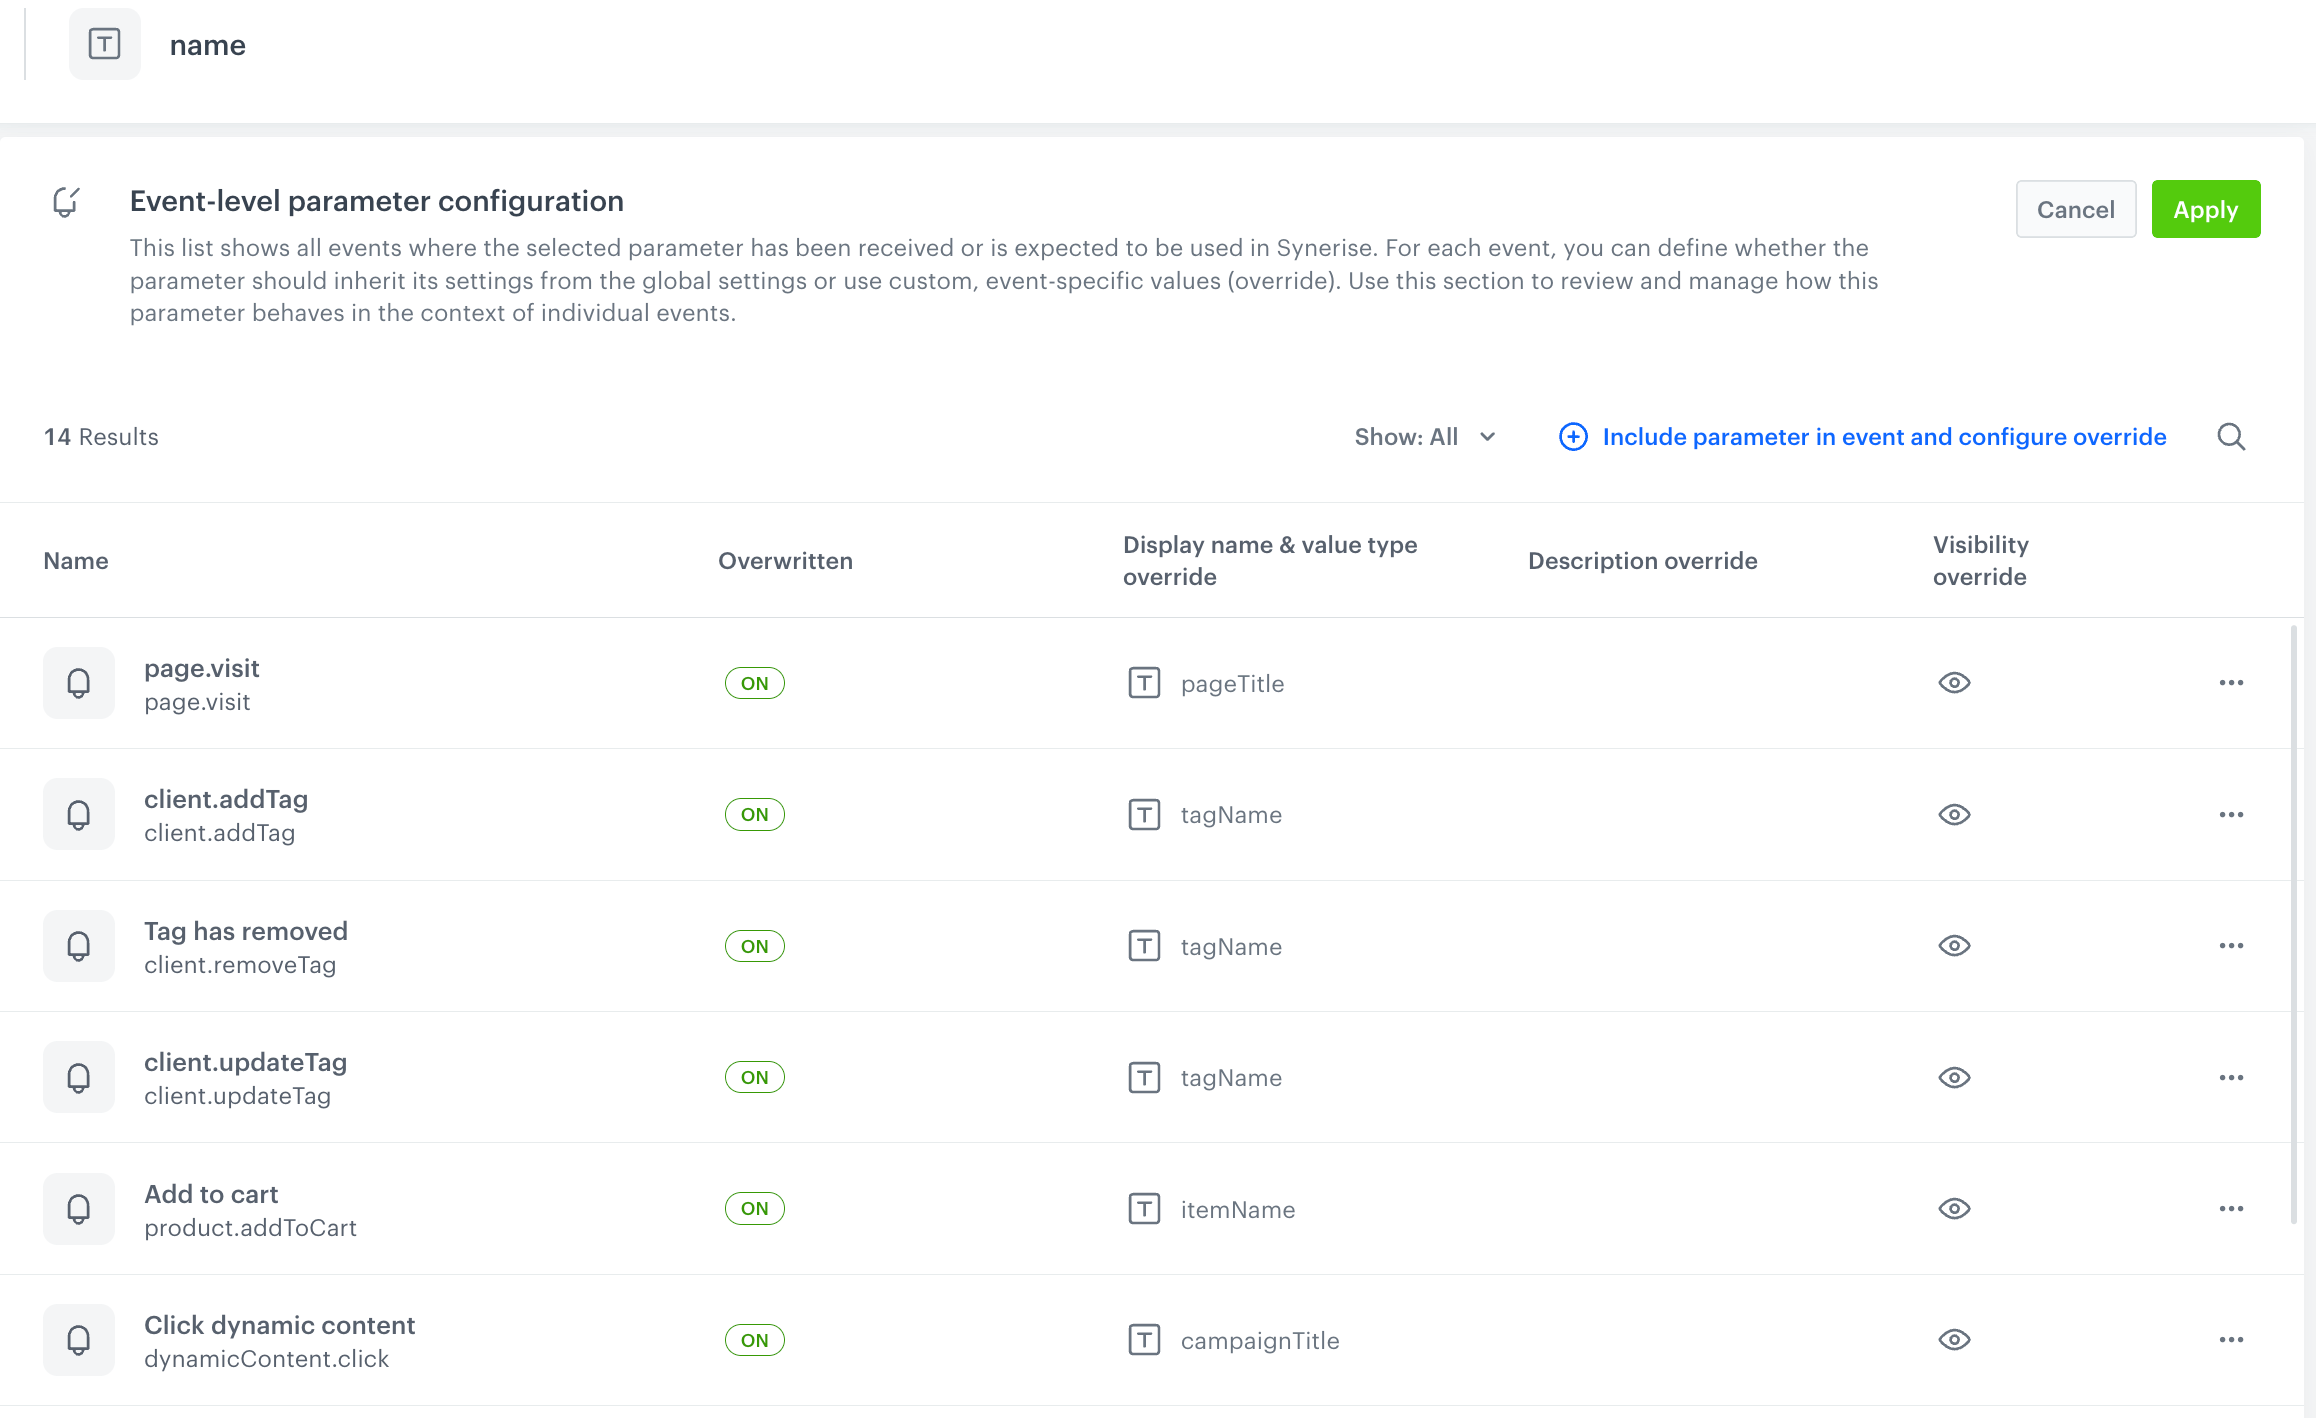
Result: A list of events to which this event parameter is attached appears. - To add this parameter to an event, click Include event parameter and configure override.
Result: A pop-up appears.
Adding parameters to events
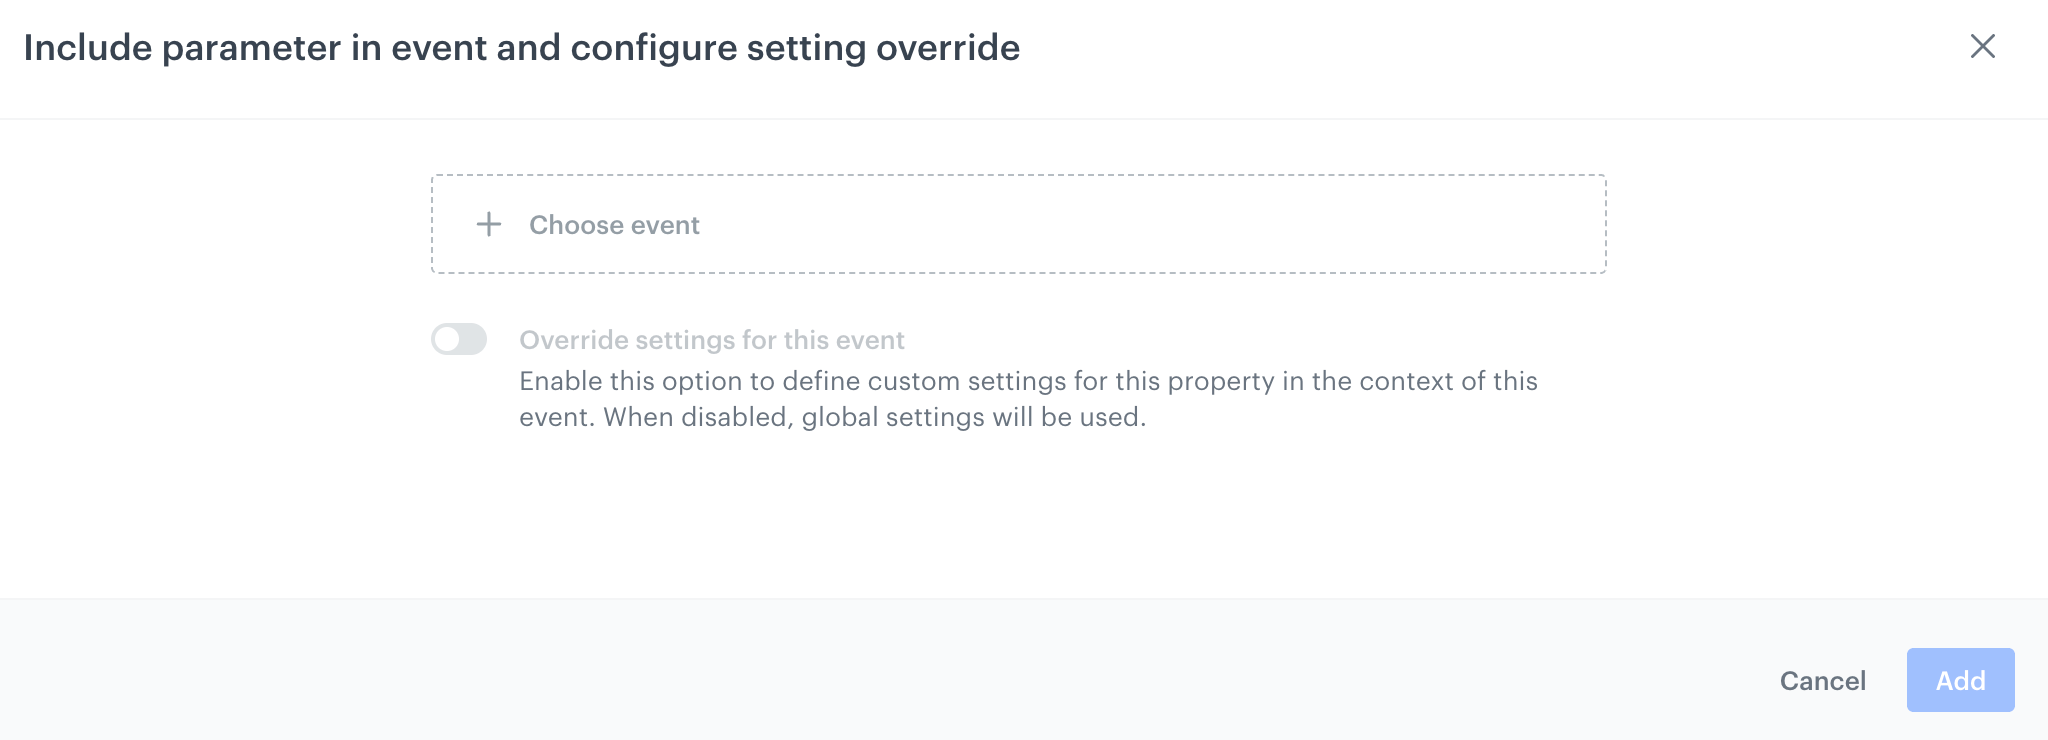
- From the Choose event dropdown list, select the event to which you want to attach the event parameter. If this event is not on the list, you must create its definition in the Synerise platform.
- If you want to:
- use the parameter's original settings, click Add.
- apply custom settings for the event parameter in the context of the selected event, proceed to Overriding parameter settings.
Overriding parameter settings
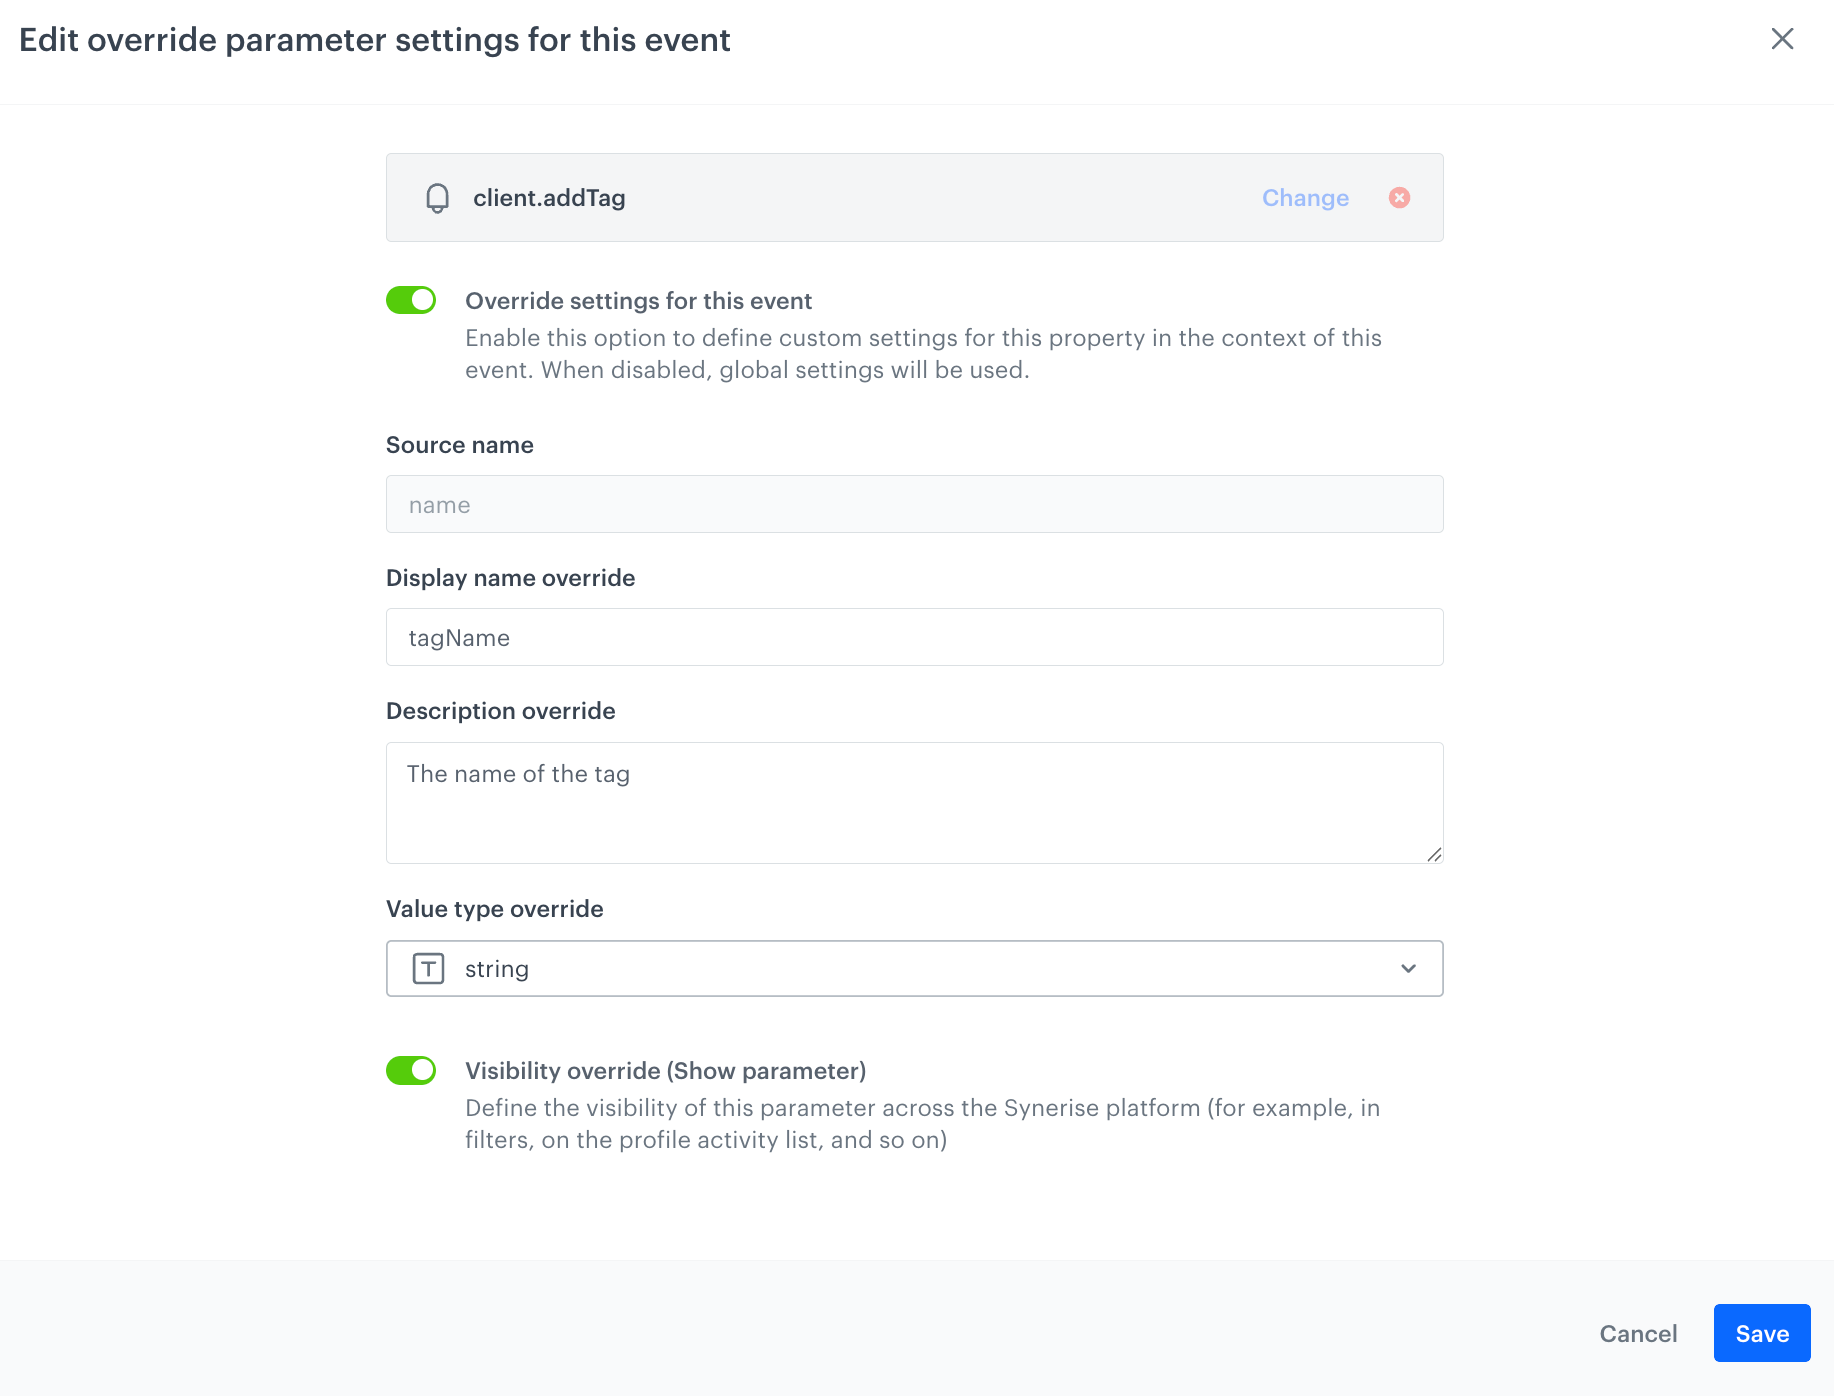
- Enable Override settings for this event.
- In the Display name field, define the name of the parameter which will appear on the filter list across the Synerise platform for the selected event.
- In the Description override field, provide the description for this overridden parameter version. You can provide an explanation or purpose of the override, providing context for other workspace users. This helps collaborators understand what changes have been made and why.
- From the Value type override dropdown list, select the value type of the overridden parameter version.
- Use the Visibility override (Show parameter) toggle to define the visibility of the overridden parameter version in the filter lists for the selected event.
- Confirm the choice by clicking Apply.
See the explanation of the table in the event parameter details.
Defining parameter visibility in filters
By default, each event parameter is visible in across the filters in the Synerise platform.
An event parameter can be used across multiple events, with custom settings — including visibility — assigned for each event. We recommend reviewing the Event-level parameter configuration section in the event parameter details to verify its visibility in the events where it is assigned.
- Go to Data Modeling Hub > Event parameters.
- Open the details of a parameter.
- In the Overview tab, enable or disable the Availability in Analytics and Automation toggle.
- Confirm your choice by clicking Apply.
User interface of the parameter manager
Table in the list of event parameters
This section explains the event parameter list. The list is available in Data Modeling Hub > Event parameters.

| Column name | Description |
|---|---|
| Name | Lists the event(s) that include the event parameter. For each event, it shows two versions of the event name: the Display Name (shown at the top) which is user-friendly, and the Source Name (shown below) which is the original technical identifier used internally. |
| Description | Contains a description explaining the purpose of the event parameters, providing context for other workspace users. |
| PII status | If you enabled protection of personally identifiable information for your workspace, you can mark the parameter as containing personal data. If yo do, the |
| Visibility | Shows you the visibility of the event parameter in the filter lists across the Synerise platform. An event parameter can be used across multiple events, with custom settings— including visibility—assigned for each event. We recommend reviewing the Event-level parameter configuration section in the event parameter details to verify its visibility in the events where it is assigned. |
Table in the event parameter details
This section explains the tables in Event-level parameter configuration section within the details of the event parameter.

| Column name | Description |
|---|---|
| Name | Lists the event(s) that include the event parameter. For each event, it shows two versions of the event name: the Display Name (shown at the top) which is user-friendly, and the Source Name (shown below) which is the original technical identifier used internally. |
| Overwritten | Indicates whether the event parameter uses the default settings inherited from its global settings (OFF), or if custom settings are applied specifically for this parameter within the selected event context (ON). For example, in the screenshot, the name parameter of the client.addTag event is overwritten to appear as the tagName parameter. You can change state of this setting by clicking 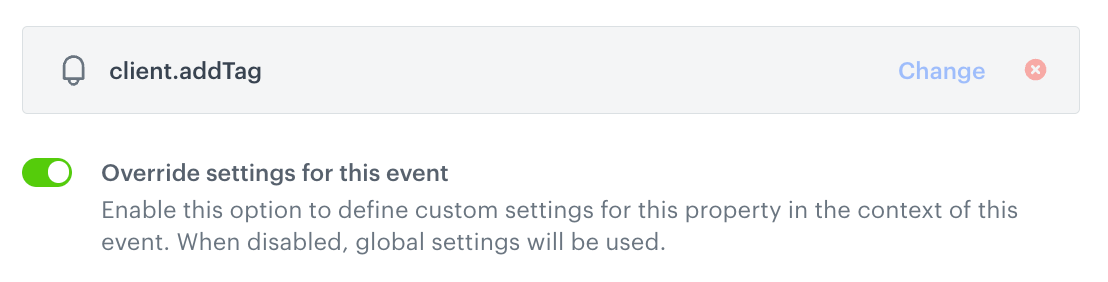 |
| Display name & value type override | Shows the custom name and data type used to replace the original event parameter name. For example, the original parameter name is overwritten and displayed as tagName; this column also specifies the data type (e.g., string, number) assigned to the overwritten parameter. |
| Description override | Contains a custom description explaining the reason or purpose of the overwrite, providing context for other workspace users. This helps collaborators understand what changes have been made and why. |
| Visibility override | Displays the current visibility status of the event parameter within filter lists across the Synerise platform. The status is expressed by the eye icon. The color reflects the parameter's overwriting state: greyed-out means disabled, active means enabled 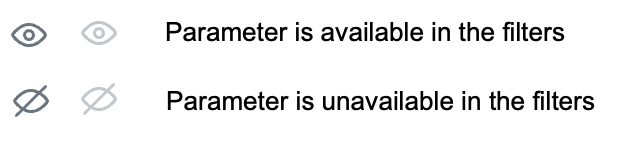 When overwriting is enabled for a specific event parameter, you can manage its visibility using the Visibility override (Show parameter) toggle. To access this option, click the |
Enriching events with data from catalogs
You can add data from catalogs to an event automatically. This can be used, for example, to automatically add product data to a product-related event without sending that data with the event every time.
The data is added to an event from a catalog when the value of the source parameter matches a value in the catalog's key. The data of the object identified by that key is added to the event.
The name of the property linked to the catalog does not need to be related to the name of the column that stores the keys. Only one such column exists and the enrichment mechanism detects it automatically.
While defining the trigger of an in-app message, you must use only the original parameters of the event which is selected as the trigger. Parameters that are added by enrichment aren't supported.
Due to the caching, you may need to wait up to one hour until the parameter you want to enrich the event with is added.
Requirements
- Before enriching an event with a parameter, ensure the parameter is not on the workspace’s denylist. If it is, the enrichment will not work.
- Create a definition of an event whose information you will enrich. This event must have at least one event parameter.
To see if the event definition exists, go to Data Modeling Hub > Events. - Create a catalog which contains data you want to enrich event information with. You can include as many columns as you need, but for the enrichment process, you'll be limited to using only 5 columns.
Enrichment limits
- You can enrich up to 8 events per workspace.
- You can enrich an event with data from maximum 2 catalogs.
See the "Conflict resolution" section in this article to see what happens when the parameter names from 2 catalogs overlap. - You can use up to 10 parameters from a catalog to enrich events.
- Event parameters included on the denylist cannot be used for enrichment.
Procedure
- Go to Data Modeling Hub > Events.
- On the list of events, find an event you want to enrich with data from a catalog.
- Click
 .
.

An example event on the list of events - From the dropdown list, select the Manage enrichment button.
Result: A pop-up with enrichment settings appears.
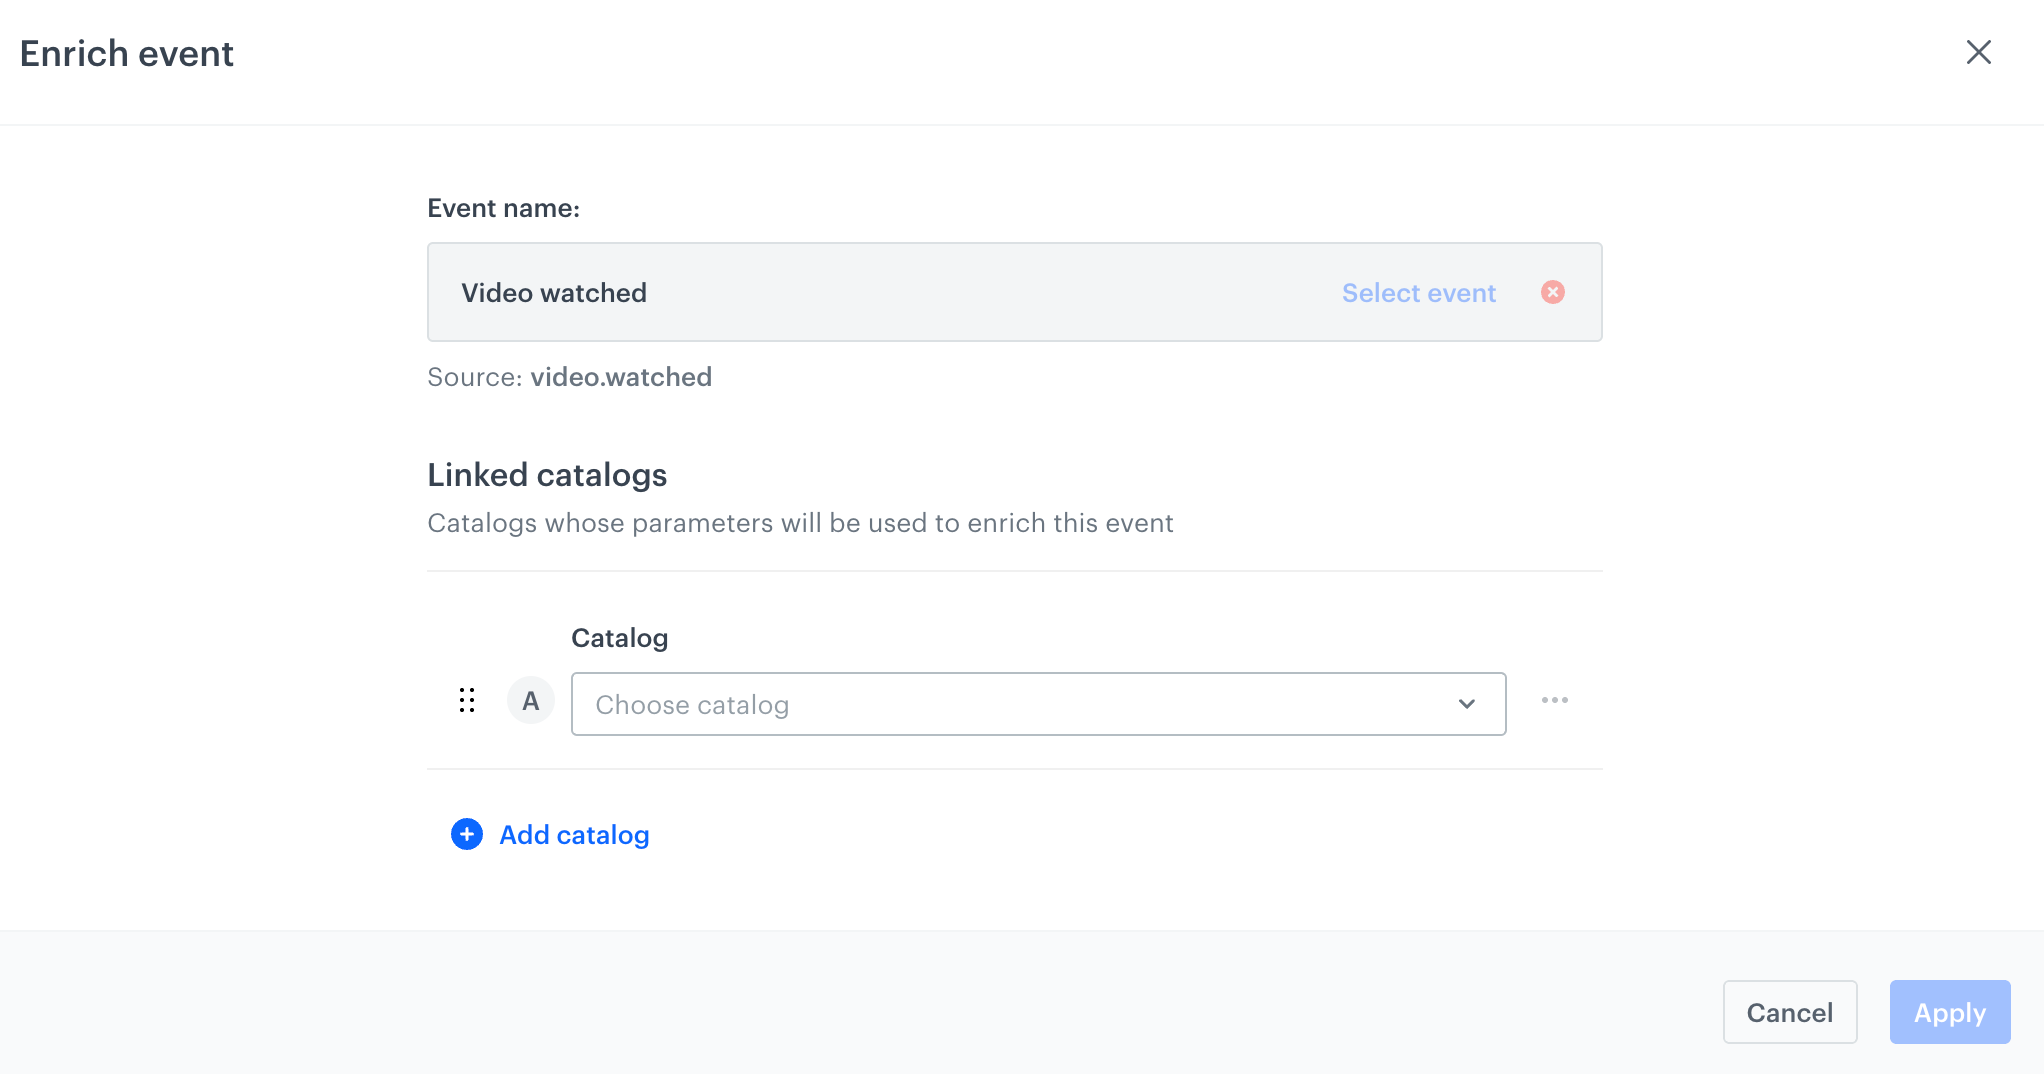
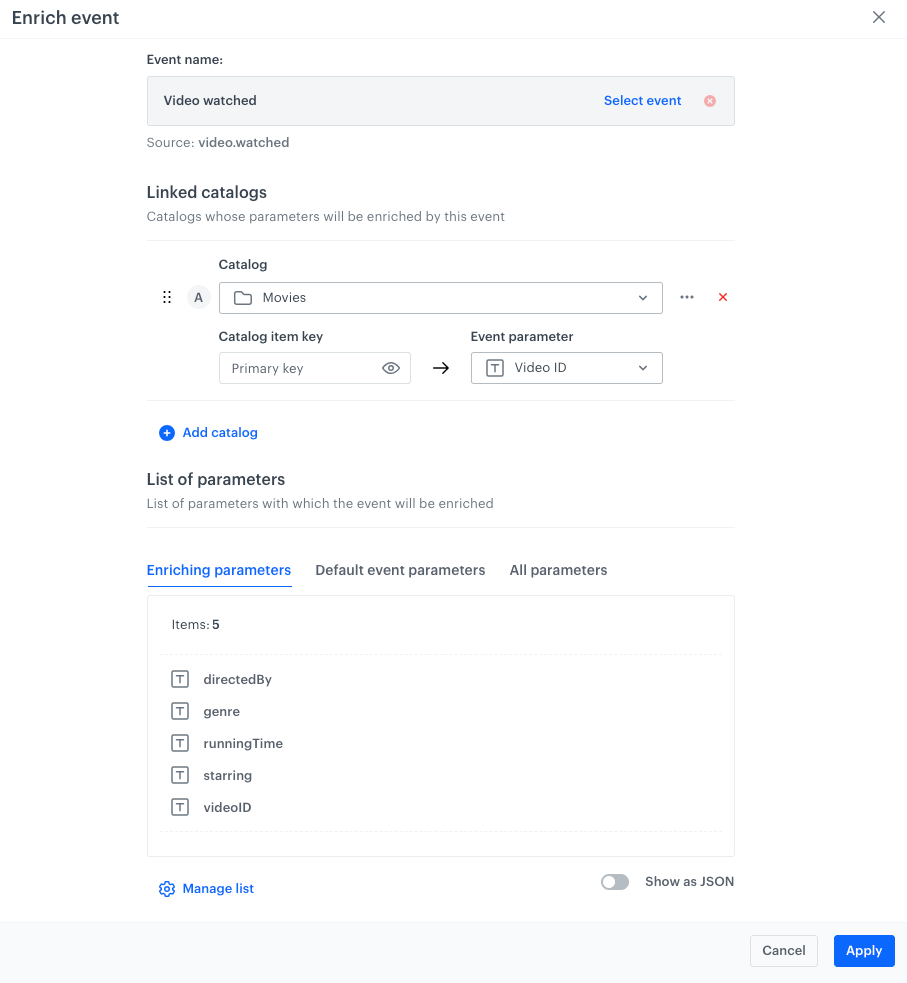
A blank form for enriching an event - In the Linked catalogs section, from the Catalog list, select a catalog whose data you want to use to enrich event information.
Result: The Catalog item key and Event parameter fields appear.
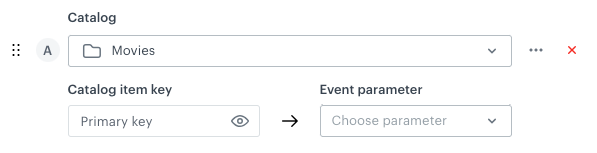
Catalog item key and Event parameter fields - In this step, from the Event parameter dropdown list, match the event parameter with the primary key of the catalog. By clicking the eye icon next to Primary key, you can preview values from the primary key column.
When the value of the selected parameter is the same as the value in the primary key column of the catalog, the event will be enriched with data available in the corresponding row of the catalog. Result: The List of parameters section appears. - To add the next catalog for data enrichment, click Add catalog and repeat steps 5 and 6.
If you want to enrich an event with information from two catalogs at the same time, the event must include the event parameters linked to the primary key of each catalog if the catalogs don't have the same primary key. In the List of parameters and Show as JSON sections, you can see the lists:
- Enriching parameters tab: event parameters with which the event will be enriched,
- Default event parameters tab: event parameters before enriching,
- All parameters tab: all event parameters after enriching.
Complete Manage enrichment configuration form If you want to:
- add a prefix to the event parameters coming from enrichment,
- select or exclude catalog parameters from enriching,
- rename the enriched event parameters,
click Manage list.
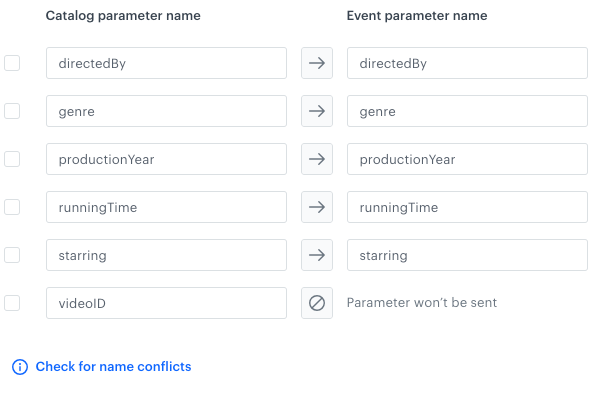
- If you want to differentiate event parameters added through enrichment in the event information, you can add a prefix to them. To do so, select the Add a prefix to the name option and provide the prefix.
As a result, the system adds[prefix value].to the name of the event parameters from enrichment in the event information. For example, you definemoviesas the prefix and the catalog with which you enrich the event information contains thegenrecolumn. As a result of enrichment, the event information will contain themovies.genreparameter. - In the List of catalog properties section, you are shown the list of available parameters in the catalog. By default, the first 5 parameters are sent to enrich the event.
To change the selection of attributes which will enrich the event:
- Enable Show bulk actions.
- To select a catalog parameter for enrichment, next to the parameter name in the Catalog parameter name column, select the checkbox.
- Set the icon between the columns to
 ; this way, this parameter will be used for event enrichment.
 - To exclude the parameter from enrichment, set the icon between columns to

- To change the name under which the parameter will be displayed in the event information, in the Event parameter name column, replace the name of the parameter with a new one.
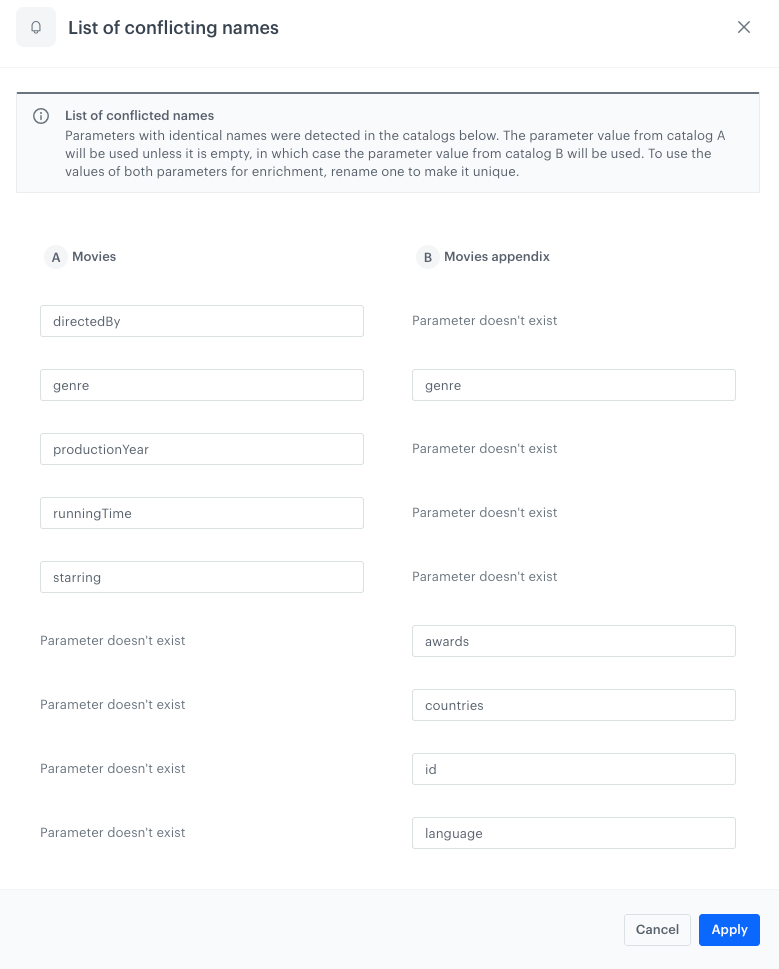
The name in the catalog will remain the same. - To resolve parameter name conflicts, click Check for name conflicts and follow the instructions on the interface.
- Confirm the changes by clicking Save in the upper right corner.
- Save the enrichment settings for the event by clicking Apply.
Example result
When the event parameter value mapped to the catalog's primary key column matches a value in this catalog column, the event information will be enriched with values from the corresponding row in the catalog. The enriched parameters will be available in the params object.
For example, if you want to enrich a video.watched event (which is a custom event) with data about the video that a customer watched, you can send the following event when that video is played, using the data from the example catalog below.
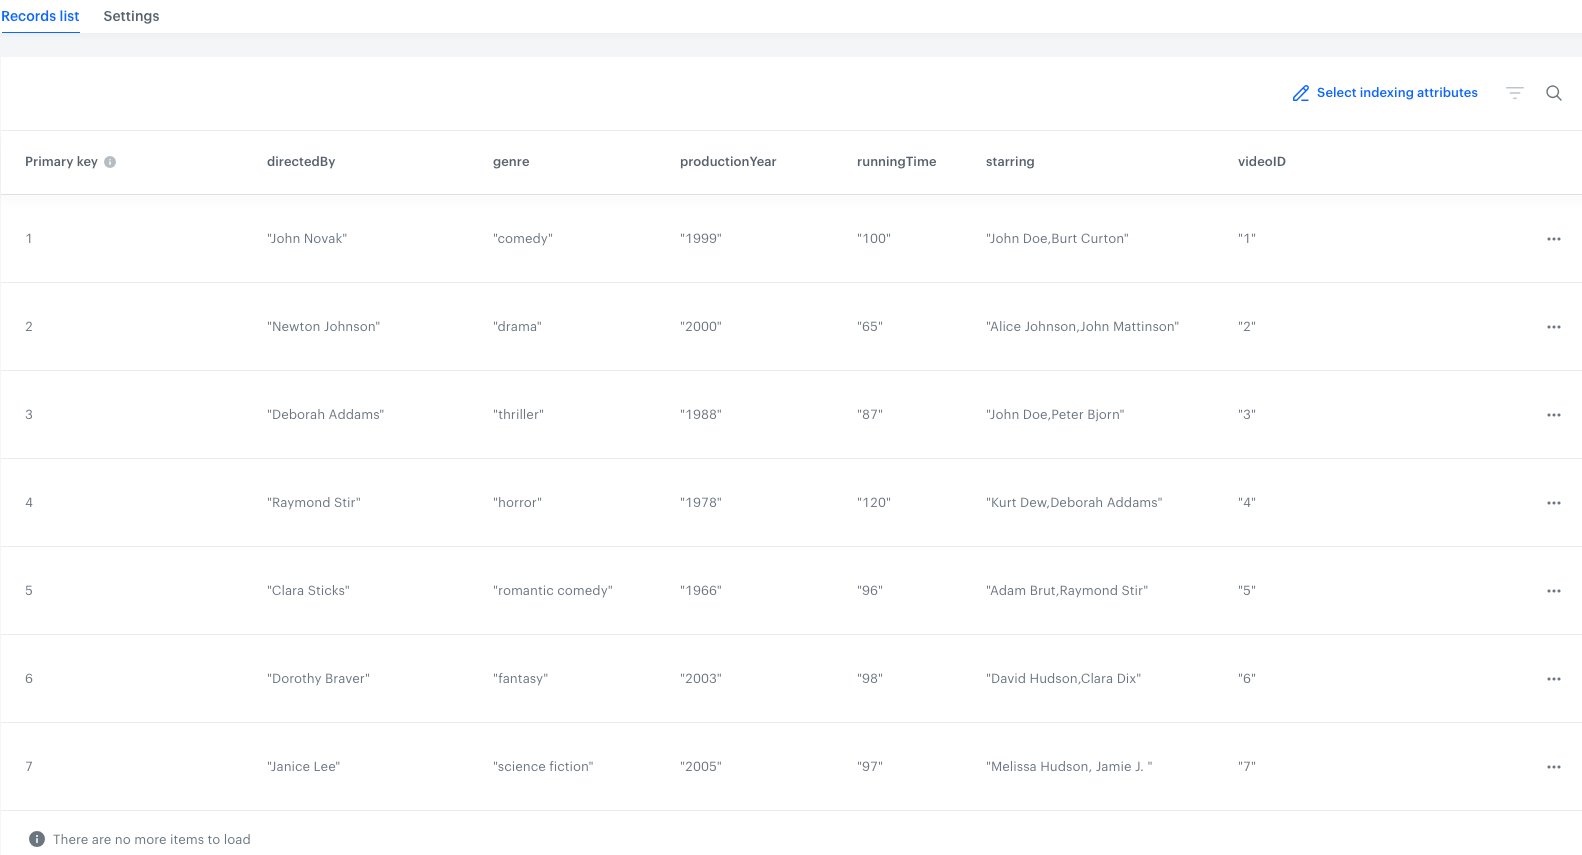
Using the below tabs, check the event before and after enriching with data from the example catalog. The parameters added as a result of enrichment are prefixed by a string defined in the the Add a prefix to the name option in enrichment settings or . if you left this option unconfigured.
{
  "action": "video.watched",
  ...
  "params": {
    "videoID": "2"
  }
}
{
"action": "video.watched",
...
"params": {
"productionYear": "2000",
"clientId": 0123456789,
"starring": "Alice Johnson,John Mattinson",
"uuid": "ce0b66d3-6807-4308-838f-60e29ab2d931",
"videoID": "2",
"eventUUID": "9ade0d29-89f7-432b-87f3-6cd87cebdf88",
"directedBy": "Newton Johnson",
"runningTime": "65",
"genre": "drama",
}
}Conflict resolution
Conflicts may appear while using two catalogs for event enrichment and both of them contain columns with the same name. You can resolve the conflicts by clicking the Check for name conflicts option and replacing the overlapping catalog's column name.
If you don't rename the overlapping parameters, then the names from the catalog in the A tab will be applied during event enrichment. If the parameter from the catalog A is empty, then the value from catalog B for the corresponding parameter is used.