Relations are defined between schemas, but applied in practice to records of these schemas.
For example, you can create a list of people and a list of projects where these people are involved.
To do this, you need to:
Create two schemas and define relations between them OR update existing schemas with relations.
Connect employee records with project records.
When you create a relation in a schema, the other schema is updated automatically.
For a practical example of creating a relation, continue reading this article.
A schema can include multiple relation definitions. Relations are not mutually exclusive - at the same time, you can have a relation that allows each person to be assigned to only one project and another, where a person can belong to many projects. An example is creating one relation to assign project leaders (a person can only lead one project at a time) and another relation to assign all project stakeholders (a project leader can be involved in the workflows of many other projects).
Relation types
In the explanations below, the following terms are used:
Source schema is the schema where you add the relation. In the example, this is the employee schema.
Target schema is the schema that is updated automatically when you save the source schema. In the example, this is the project schema.
Icon
Name
Description
One to one
A record in the source schema can be related to only one record in the target schema; a record in the target schema can be related to only one record in the source schema.
One to multiple
A record in the source schema can be related to multiple records in the target schema; a record in the target schema can be related to only one record in the source schema.
Multiple to one
A record in the source schema can be related to only one record in the target schema; a record in the target schema can be related to multiple records in the source schema.
Multiple to multiple
Records in both schemas can be related to multiple records.
Defining relations in schemas
Create a new schema or start editing an existing one.
From the Relation to drop-down list, select the target schema.
Optional: From the Displayed field drop-down list, select the field whose value will be displayed from the target record when browsing records. For an example of the result, see the relation example.
The example shows how to create a project-employee relation, in which an employee can only be associated with one project and a project can have many employees assigned.
The example assumes that you create new schemas, but you can add relations to existing schemas in the same way by updating the schemas.
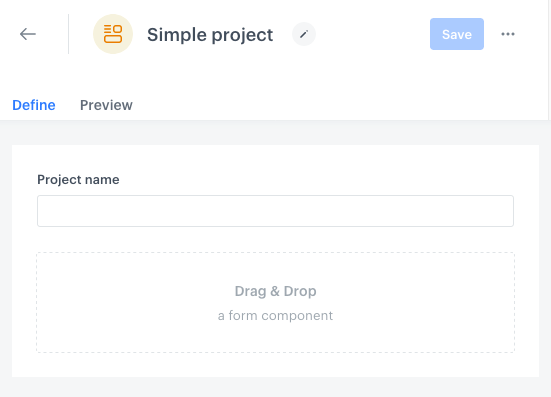
Project schema
This schema only stores one value: the name of the project.
It does not have any relation defined, because the employee schema does not yet exist in this example, so a relation cannot be created.
A simple project schema
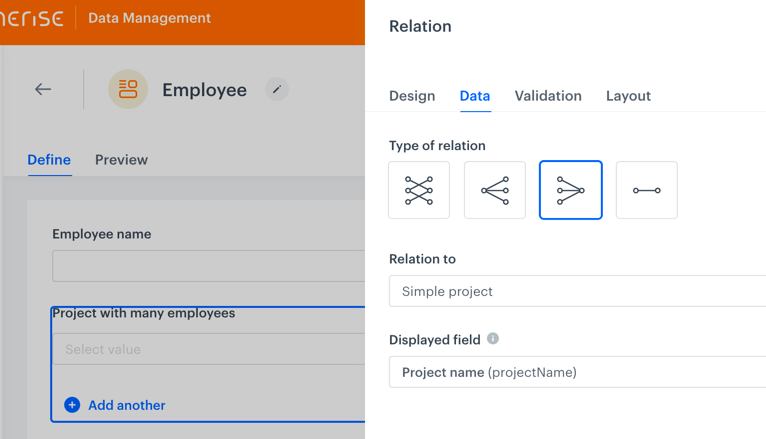
Employee schema
The schema has two fields:
the name of the employee
the definition of a relation; with the Displayed field set to Project name.
The employee schema with a relation to the project schema. The Data tab of the relation field is open for editing.
When you save this schema, the project schema is updated automatically with a field for defining the relation.
Connecting records
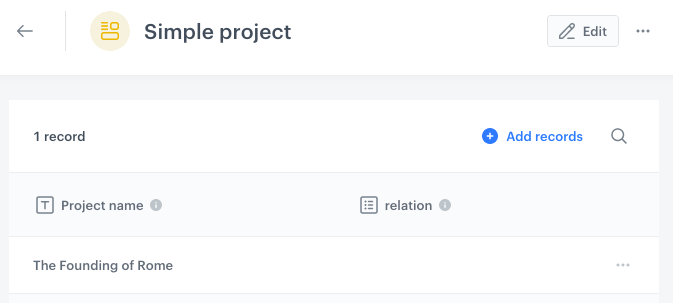
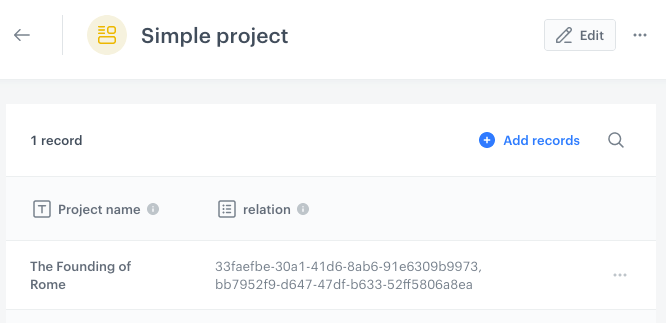
Create a project record. Employee records do not exist, so you can't connect anything yet. The relation field has the default label "relation", because it was created automatically. A single project record, no relation
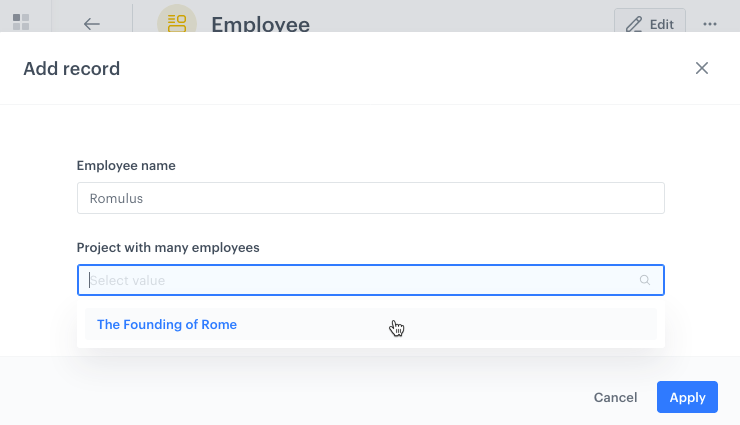
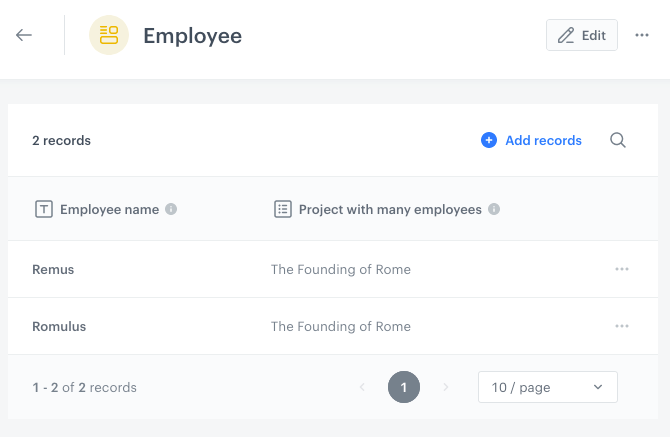
Create some employee records with a relation to the project record you created.
If you're editing an existing record, open it and add the relation drop-down by clicking the Add another button. This is also used to add more than one relation to a record.
Creating a new record with a relationResult: You can see the relation in the employee records and the project record. Screenshot of two employee records related to the same project
The project record is updated automatically:
Project record before updating the relation with human-readable labels
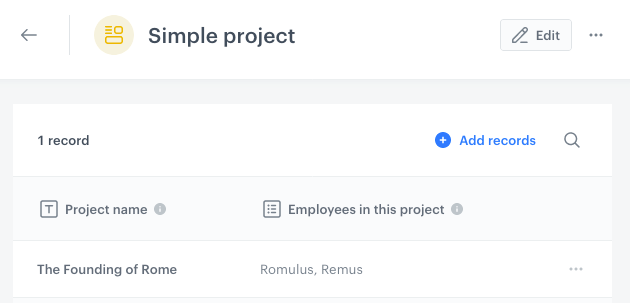
If you want the project record to display the names of the employees and the name of the relation:
Open the project schema for editing.
Open the relation field for editing.
On the Design tab, in the Label field, enter a name for the relation, for example Employees in this project.
On the Data tab, in the Displayed field, select Employee name (<field ID>). The field ID depends on the ID you assigned when creating the schema. If you didn't assign any, it receives a default value.
Apply the changes and save the schema. Result:
The project record displays employee names and the relation name.
Project record after updating the relation with human-readable labels