Tags let you mark objects in the Synerise platform and you can use them for filtering. Tags can't be deleted.
For tagging profiles, use profile tags.
Use of tags
- Tagging campaigns
You can use tags from the predefined campaigns folder for tagging specific campaign types - Tagging promotions
You can use tags from the predefined promotions folder for:- filtering promotions on the promotion list
- filtering promotions in API responses
- creating promotion filters.
- Tagging workflows
You can use tags from the predefined automations folder for tagging workflows. - Managing communication limits based on tags
Adding tags
- Go to
 Data Modeling Hub > Tags > Add tag.
Result:
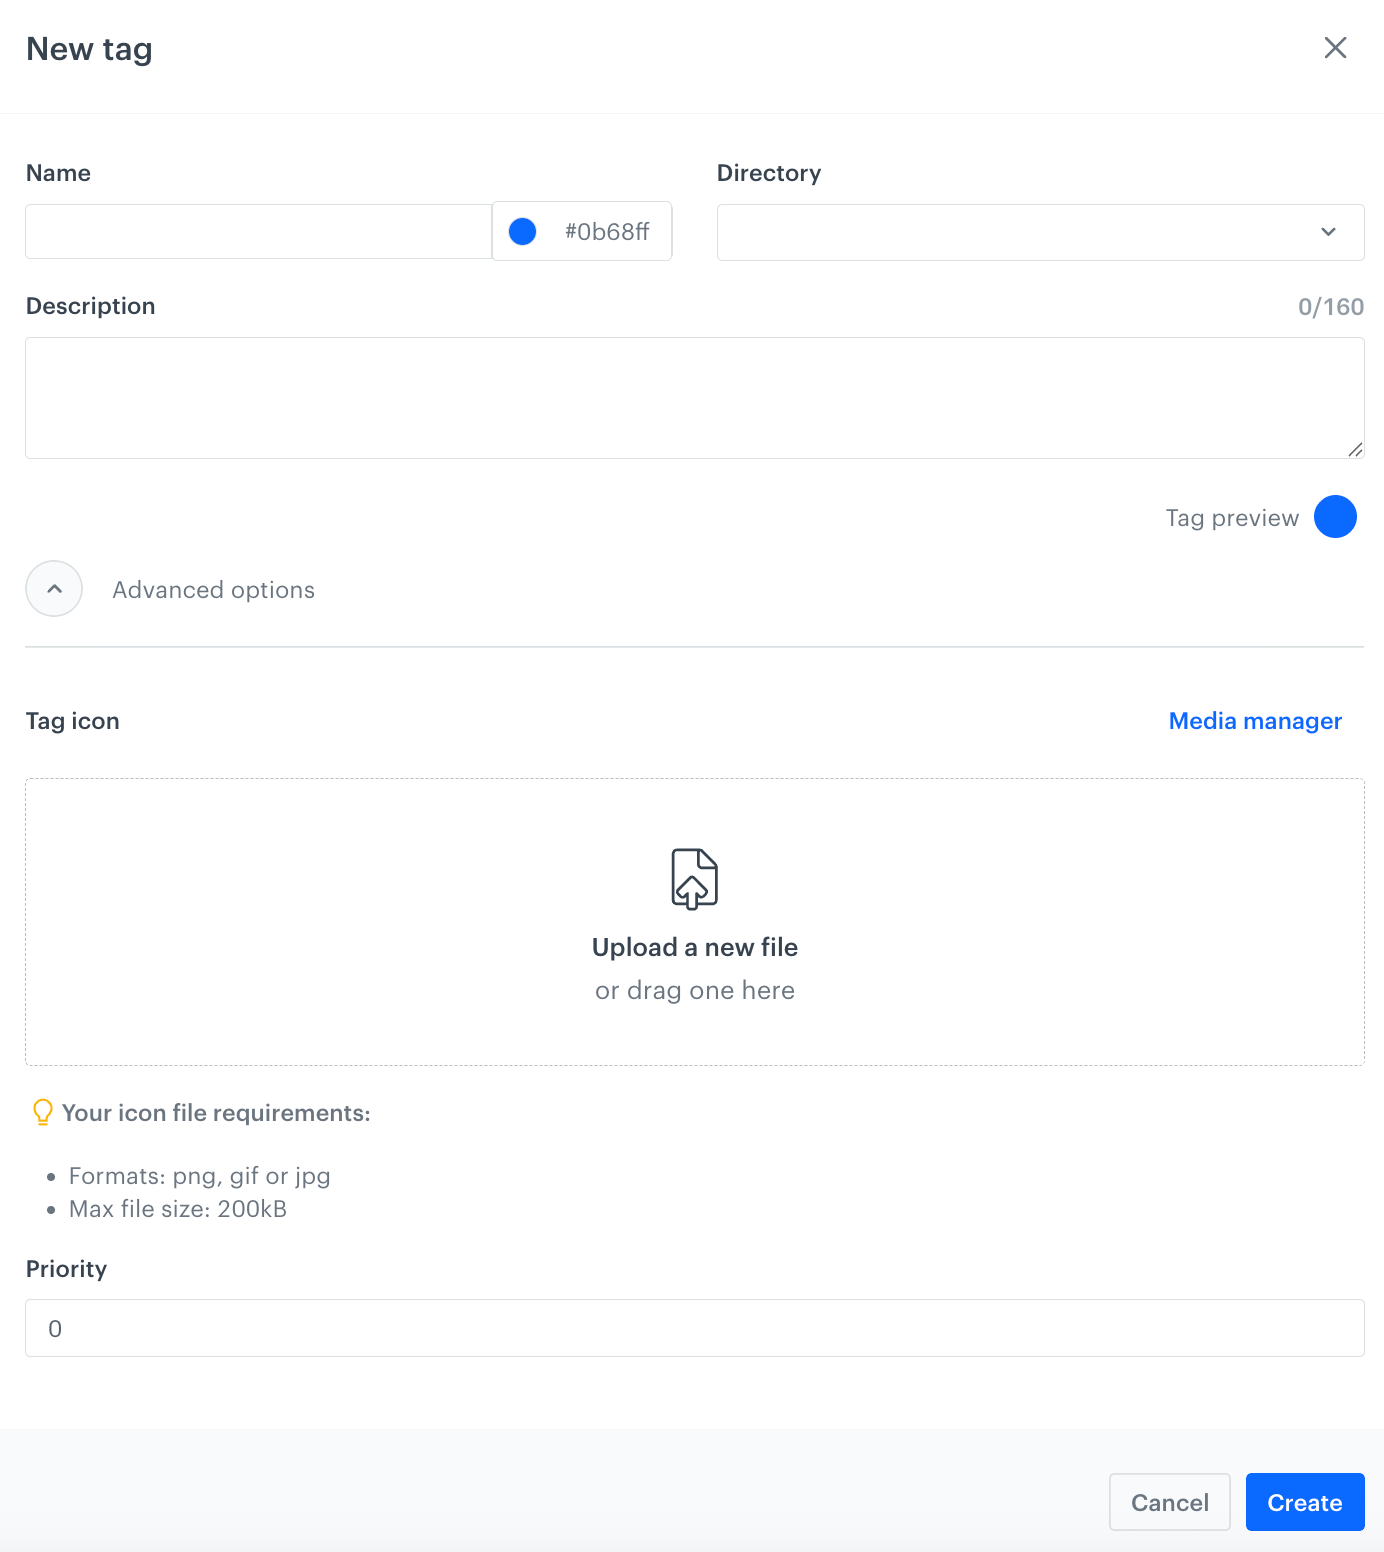
A blank tag configuration form - In the Name field, enter the tag name.
You can use up to 20 characters. - From the Directory dropdown list, select the folder to which the tag will be added.
To assign a tag to campaigns or use it for managing communication limits, you must add it to the campaigns folder.
- In the Description field, you can provide the purpose of the tag.
- By using the color picker under the Description field, you can change the tag's background color.
- By clicking Advanced options and uploading a tag icon in the Tag icon section, you can add the icon to the tag.
- In the Priority field (available after clicking Advanced options), you can also assign priority to the tag. Values from 1-100 is accepted (1 being the highest).
This feature is used for filtering promotions based on tags. - Save the tag by clicking Create.
Editing tags
Once you have added tags, you can edit them in the system at any time.
Be cautious when changing tag names, especially if these tags are used in your integrations.
- Go to Data Modeling Hub > Tags.
- Search for a tag you want to edit using the search box marked above the tag list.
- Next to the tag author, click

- From the dropdown list, select Edit.
Result: A pop-up appears. - Make changes to the tag settings; field descriptions are available in the "Adding tags" section.
- Confirm changes by clicking Save.
Adding tag folders
Tag folders help you group and organize tags within your workspace.
When you create a workspace, predefined tag folders are available by default. These predefined tag folders are also accessible in already existing workspaces, ensuring consistency across your projects.
Predefined tag folders include:
- automation - for tags assigned to workflows
- campaigns - for tags assigned to communication
- promotions - for tags assigned to promotions
To add a new tag folder, follow these steps:
- Go to Data Modeling Hub > Tags.
- On the left panel, click Add folder.
Result: Below the Add folder button a text field appears. - Provide the name of the folder.
- Confirm the name by clicking Enter.
Result:
The folder is created. To change its settings, for example set the folder type, see "Edit folder settings".
Editing folder settings
- In the list of tag folders, hover over the folder you want to edit.
Result: The folder management icons appear. - To open the folder settings, click the
 icon.
icon. - From the Type dropdown list, assign a type to the folder.
If you want to edit free-form parameters of the folder:
- Expand Advanced options.
- Add or remove parameters.
- Save the settings by clicking Save.
If you have assigned tags with a different value to the folder, they will be recalculated according to the value of the folder (as the folder is the parent).
Removing tag folders
- In the list of tag folders, hover over the folder you want to edit.
Result: The folder management icons appear. - Click the
 icon.
icon. - Confirm by clicking OK.