The Get Weather Information node allows you to retrieve information about weather at a specific location. This kind of information can be a great basis for communication with customers. You can use it to recommend winter accessories on your website when cold season approaches or send a push notification to your customers on a hot day with a promotion code for cold beverages and ice cream.
Weather information can be stored in Synerise in multiple ways. By default, it is saved on the profile of the customer as a weatherapi.getWeatherInfo event. The parameters of this event contain the weather details. You may also choose to store this information in a catalog for particular locations as presented in this use case.
While configuring the integration settings, you can decide about the time range you want to get weather forecast:
- at the moment
- for the next 14 days
- for the next 300 days (counting from the 14th day in advance to the current date)
- historical weather data
Accepted location formats
While configuring the integration settings, you need to define the location you want to get weather information about. This field accepts the following formats:
| Accepted format | Example |
|---|---|
| Latitude and longitude | 48.8567,2.3508 |
| City name (in English) | Paris, Barcelona |
| US zip code | 85001, 96162 |
| UK postcode | PO1, SW1 |
| Canada postal code | G2J, G2G |
| metar: | metar:EGLL, metar:KLAX |
| iata:<3 digit airport code> | iata:DXB, iata:LAX |
| auto:ip IP lookup | auto:ip |
| IP address (IPv4 and IPv6 supported) | 100.0.0.1 |
*- Enter the English equivalent of the city name
Prerequisites
A Weather API API key is required.
- If you're not sure if a key is already added to Synerise, you will be able to check it while configuring the node.
- If you want to create a WeatherAPI API key, go to https://www.weatherapi.com/.
Node configuration
- Click the node.
- Click Select connection.
- From the dropdown list, select the connection.
- If no connections are available or you want to create a new one, see Create a connection.
- If you selected an existing connection proceed to defining the integration settings.
Create a connection
If you want to use an existing connection, you can proceed to defining the integration settings. To allow the data exchange, establish the connection between Synerise and Weather API.
- At the bottom of the Select connection dropdown list, click Add connection.
- In the API key field, enter the API key (you can find it in your WeatherAPI account).
- Click Next.
- In the Connection name field, enter the name for the connection.
- Click Apply.
Result: A connection is created and selected.
Define the integration settings
In this part of the process, fill in the configuration form so that Synerise can retrieve weather information from Weather API.
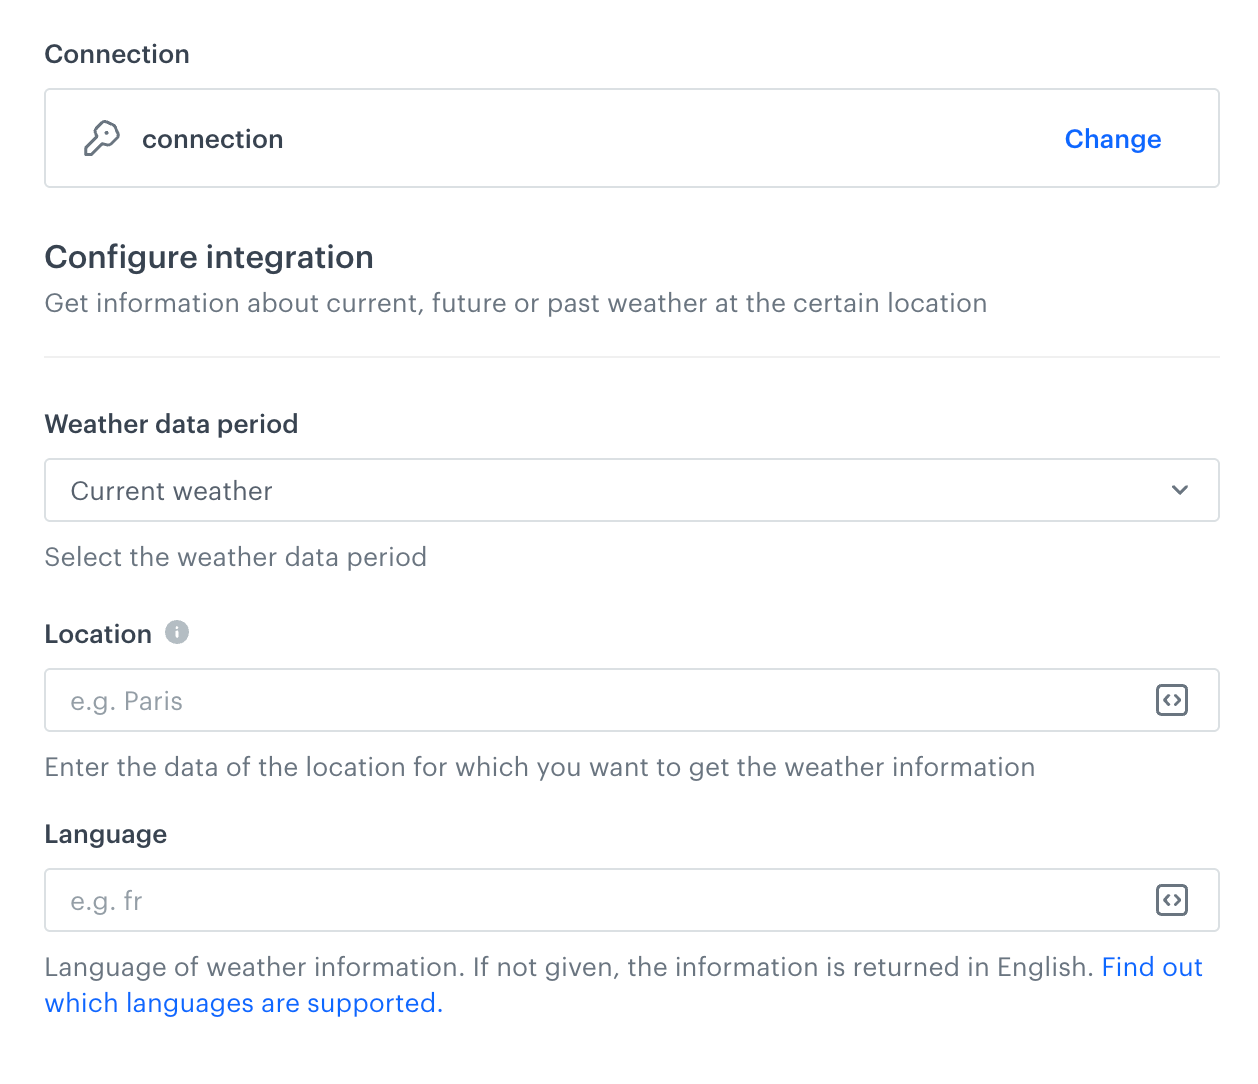
In the Weather data period field, select one of time ranges from which you want to receive weather information:
- Current weather
- Past weather - Allows you to enter a date in the past to receive historical weather data.
- Forecast for the next 14 days - Allows you to receive weather forecast for 14 days in advance (from the current day).
- Forecast for the next 300 days - Allows you to receive weather forecast for between 14 and 300 days in advance (counted from the current day).
Follow the instructions according to the option you selected in step 1.
- In the Location field, enter the details of location you want to get weather information (accepted formats of location) for.
- Optionally, in the Language field, you can enter the language the weather information will be returned in. See full list of supported languages.
- Confirm by clicking Apply.
- In the Location field, enter the details of location you want to get weather information (accepted formats of location).
- Optionally, in the Language field, you can enter the language the weather information will be returned in. See full list of supported languages.
- In the Date field, enter the date for which weather information will be returned, in the
YYYY-MM-DDformat. The earliest date you can enter is2010-01-01. - Confirm by clicking Apply.
- In the Location field, enter the details of location you want to get weather information (accepted formats of location).
- Optionally, in the Language field, you can enter the language the weather information will be returned in. See full list of supported languages.
- In the Time range of the forecast field, enter the number of days (values between 1 to 14) for which you want to receive weather information. For example, if you enter 3, you will get weather for the next 3 days (including current day).
- Confirm by clicking Apply.
- In the Location field, enter the details of location you want to get weather information (accepted formats of location).
- Optionally, in the Language field, you can enter the language the weather information will be returned in. See full list of supported languages.
- In the Date field, enter the date in the
YYYY-MM-DDformat. The allowed range of dates is between 14 to 300 days from today. - Confirm by clicking Apply.
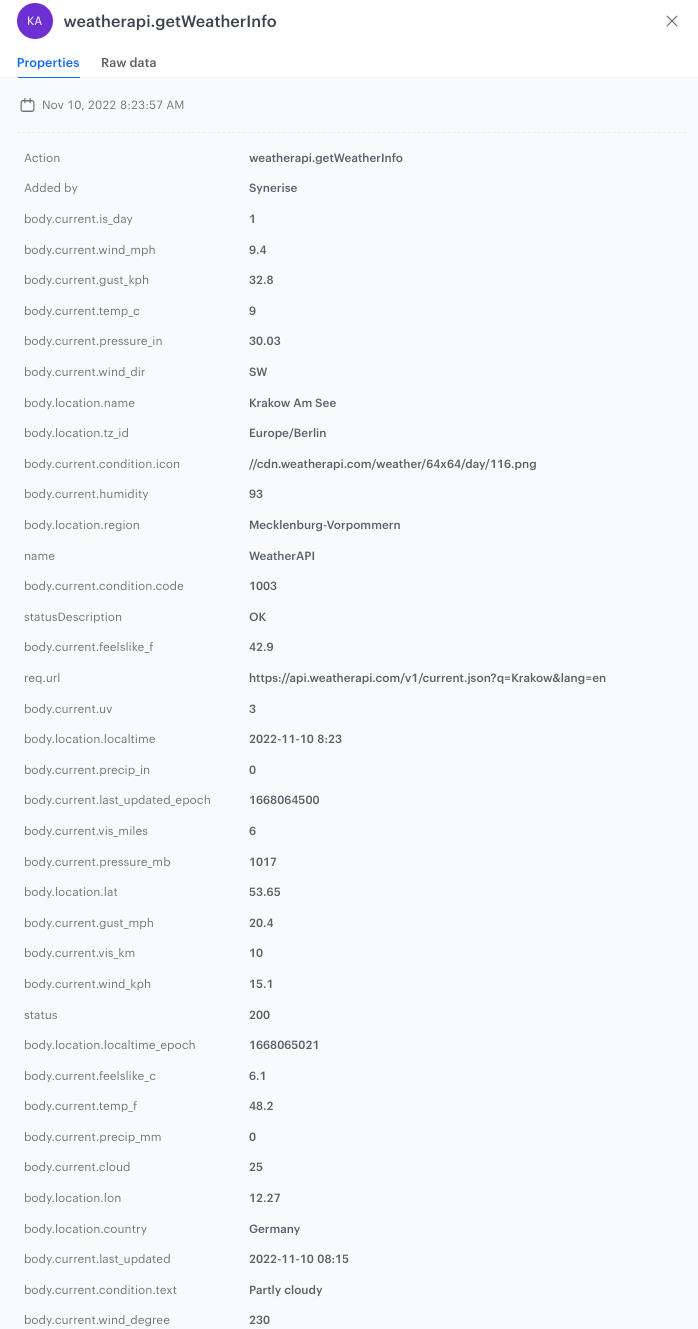
Result: After a profile completes the Get Weather Information node, the weatherapi.getWeatherInfo event is generated on the activity list on the profile in Behavioral Data Hub > Profiles. The event contains weather information in its parameters in accordance with the node configuration.
Test integration
You can run a test request. If the request body contains a dynamic reference to a profile attribute and/or an event data from preceding nodes, then you can define the context using test profile data.
Complete description of the feature is available in Testing outgoing integrations.
- In the Test integration section, click Send test request.
Result: A test request builder opens. If:- a request body contains dynamic references, the request preview appears after you select the context of test profiles and events.
- a request body contains static data, the preview of the body request appears immediately.
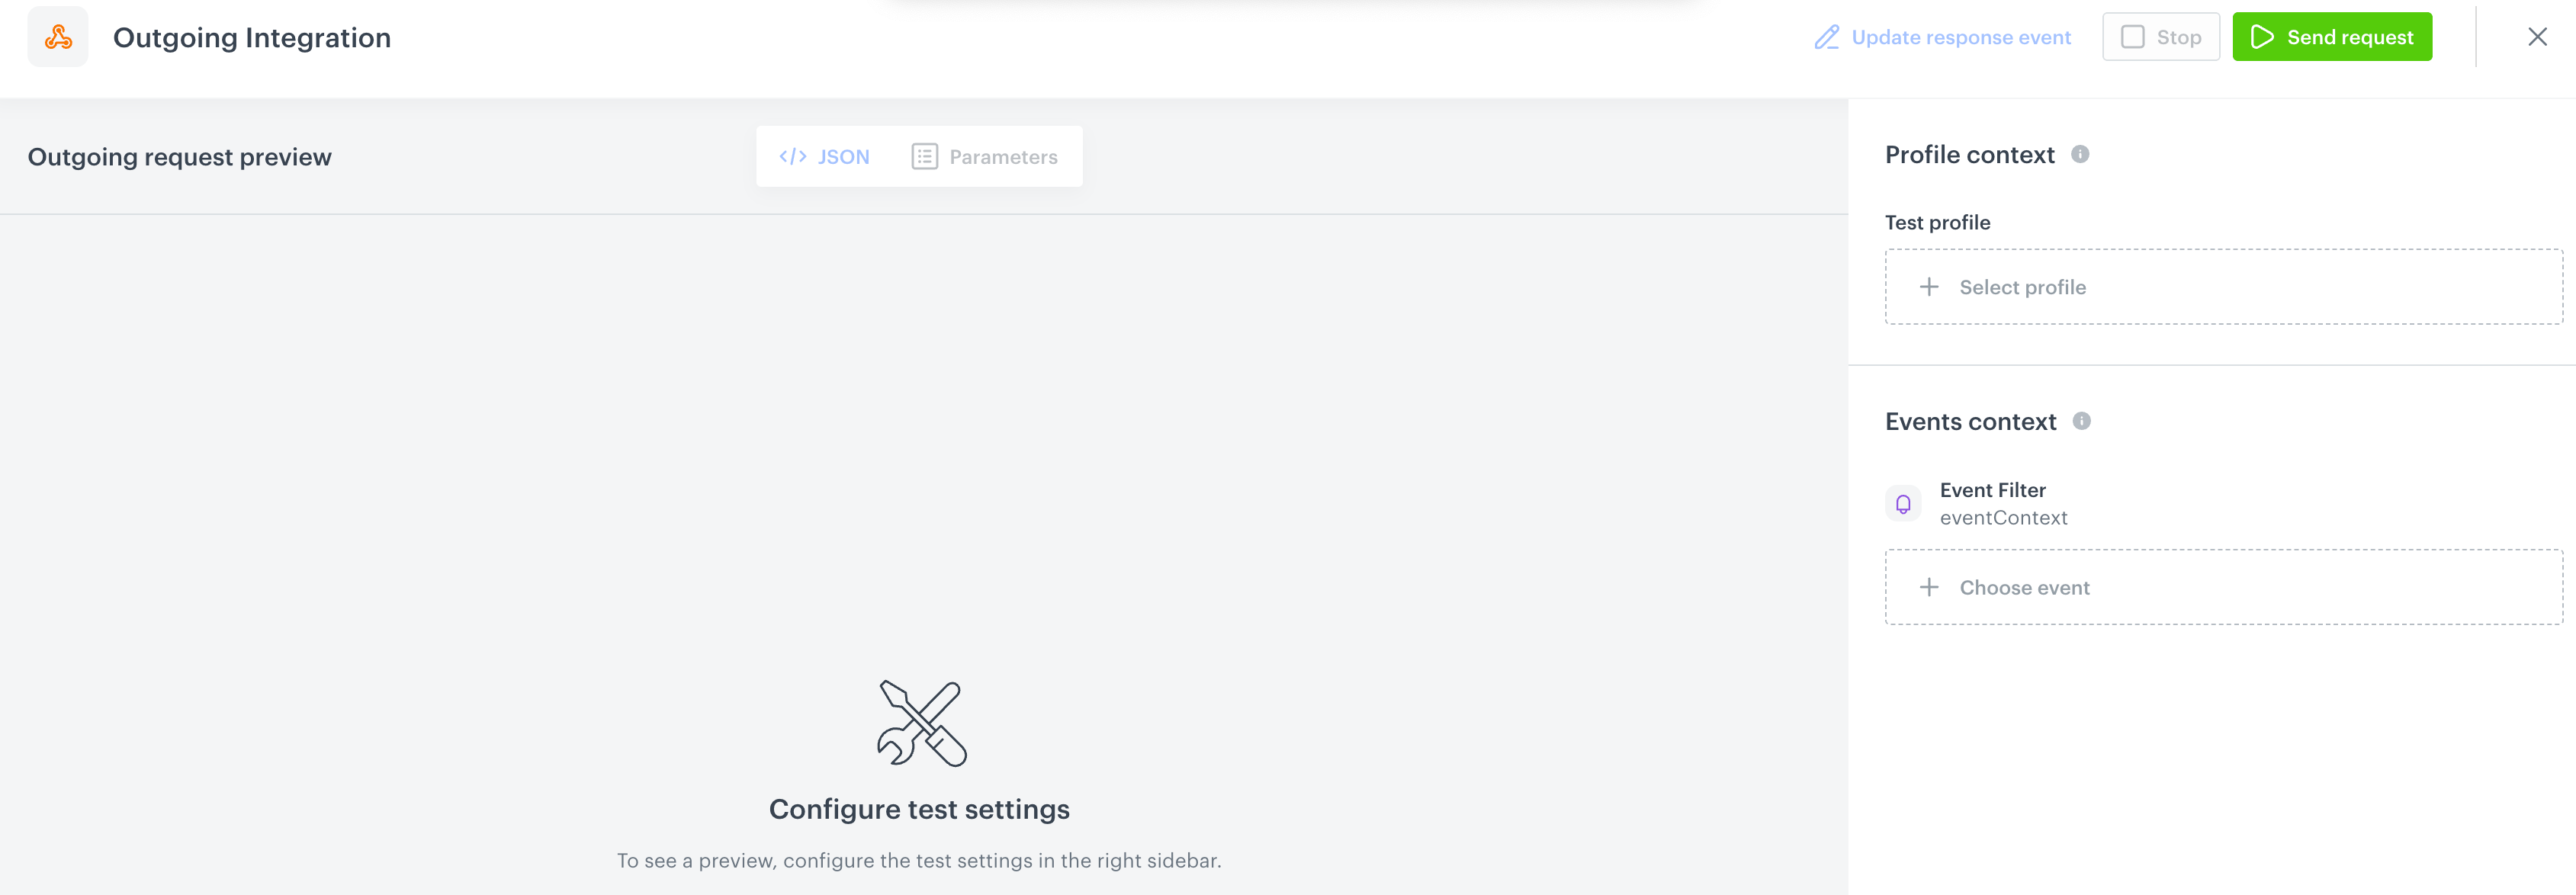
An empty test request builder - If your request contains dynamic references (otherwise, the options aren't available):
- From the Test profile dropdown, select a test profile in the context of whom the test request will be performed.
- From the Event context dropdown list, you can select a particular occurrence of an event whose values/information will be used for the test request.
- Select a test profile.
Result: A history of test profile events appears.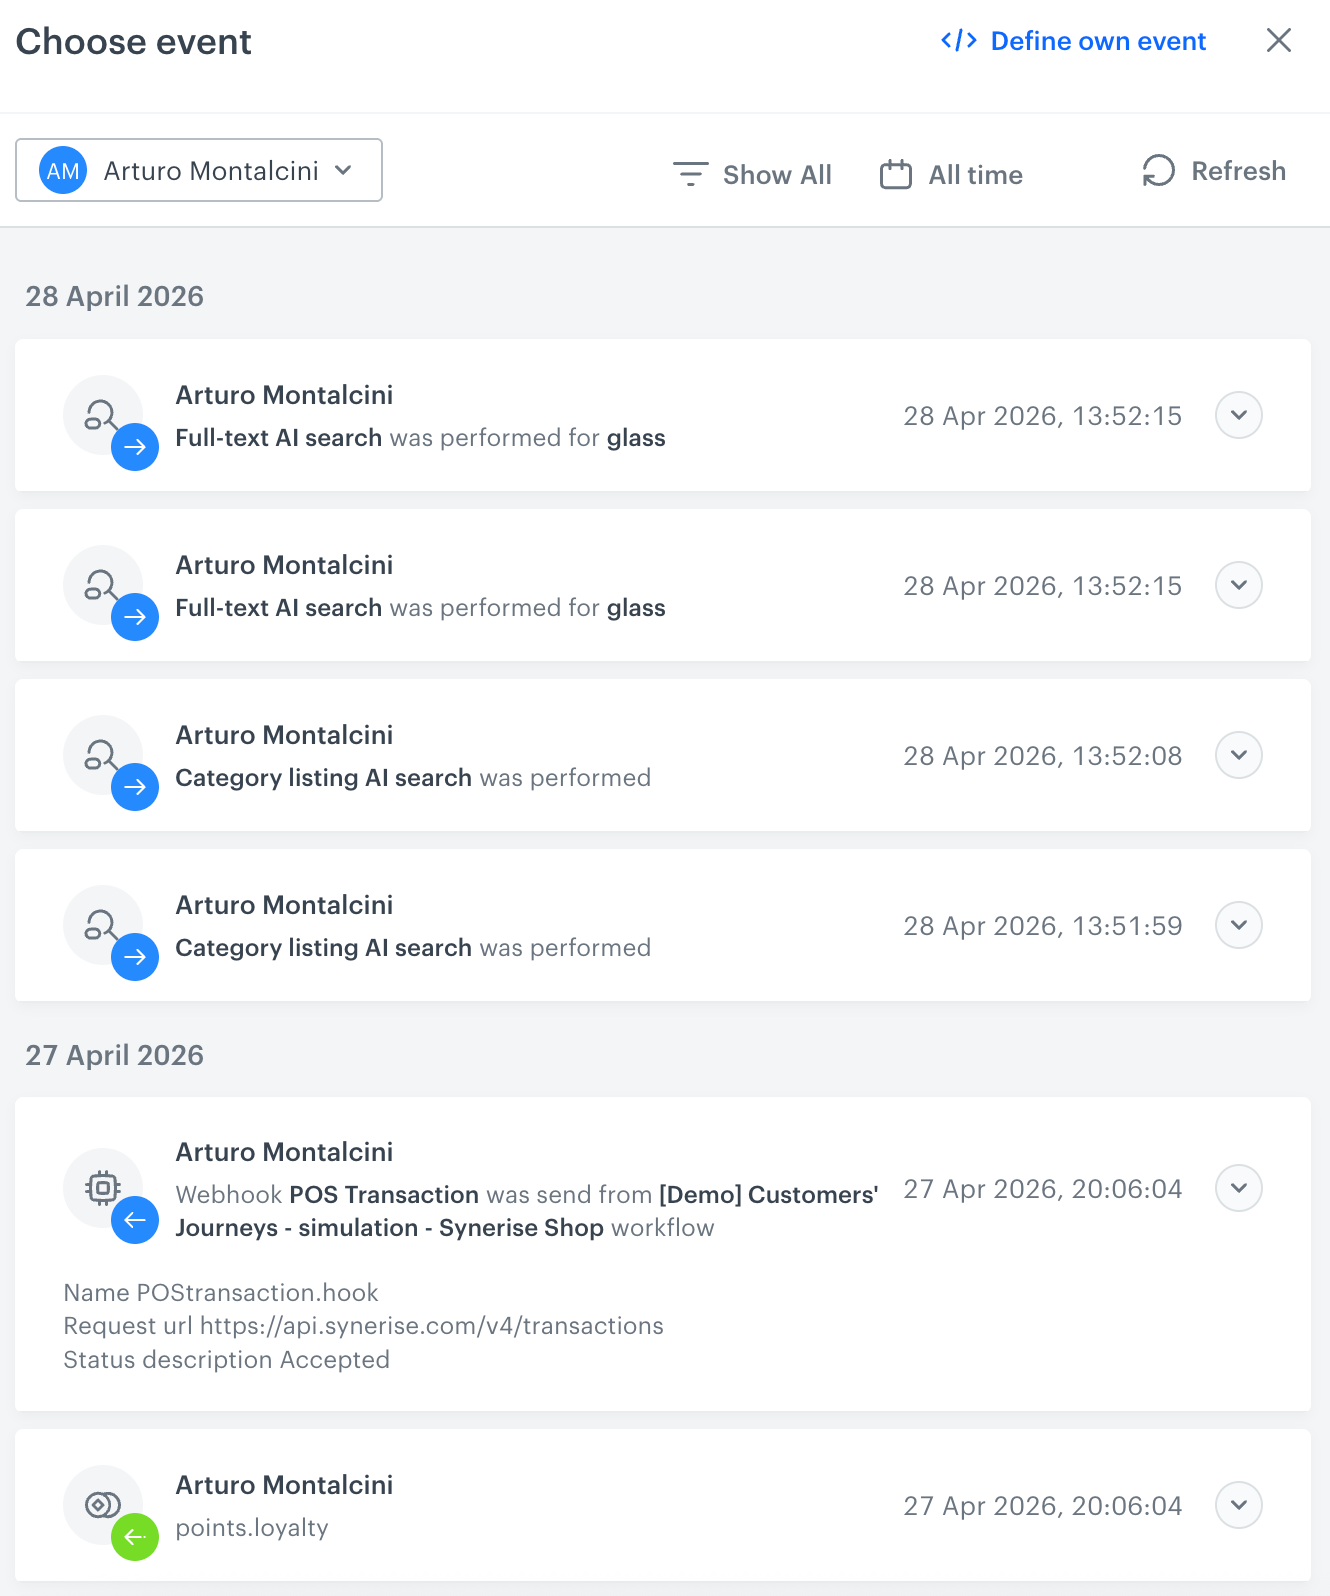
A stream of events of a test profile - From the list of events, select one whose data you want use as a context. If there is no event you can use, in the upper-right corner of the pop-up, click Define own event and provide the body of the event.
- Confirm by clicking Apply.
- Select a test profile.
- Verify the request body. If there is something you want to change, come back to the node settings from previous steps.
- If the request body is ready to test, in the upper-right corner, click Send request.
Result: The response section appears and the Update response event button becomes active. - Optionally, you can update response event with new parameters by clicking Update response event in the upper-right corner.
Example of use
For example of use, refer to the use case that describes updating weather information in a catalog.