The dynamic SMS sender feature lets you send one SMS campaign from different phone numbers, depending on who the recipient is. Instead of using one sender for everyone, the system checks a specific attribute assigned to each recipient and automatically chooses the right SMS account based on that. The selection is based on a Brickworks schema, where the mapping between attribute values and sender accounts is defined.
This is designed for multibrand or multilingual operations where each market or brand requires a dedicated sender number. For example, a company that operates in multiple regions can ensure that recipients in each region receive the text message from the correct regional phone number.
NOTE: If a recipient's profile attribute value does not match any record in the schema, or if the schema has been deleted, the campaign is not sent to that recipient. An sms.notSent event is generated instead.
Requirements
- At least two SMS sender accounts must be configured in the workspace.
- You must have the following user permissions:
- create and edit schemas
- create and edit records
- if you plan to create versioned schemas, then you need permissions to publish records.
- The recipients of the SMS must have a profile attribute whose values correspond to the mappings defined in the Brickworks schema. You choose which attribute to use - any profile attribute can serve as the basis for sender account assignment.
Creating a Brickworks schema with mapping
Before you can use the dynamic sender in a campaign, you must create a Brickworks schema that maps profile attribute values to sender accounts.
Getting the sender account ID
In further steps, you will need the IDs of the sender accounts. To find the ID of a sender account:
- Go to
 Settings > SMS.
 - Click the sender account you want to use.
- Copy the ID from the URL of the page.
Creating the schema
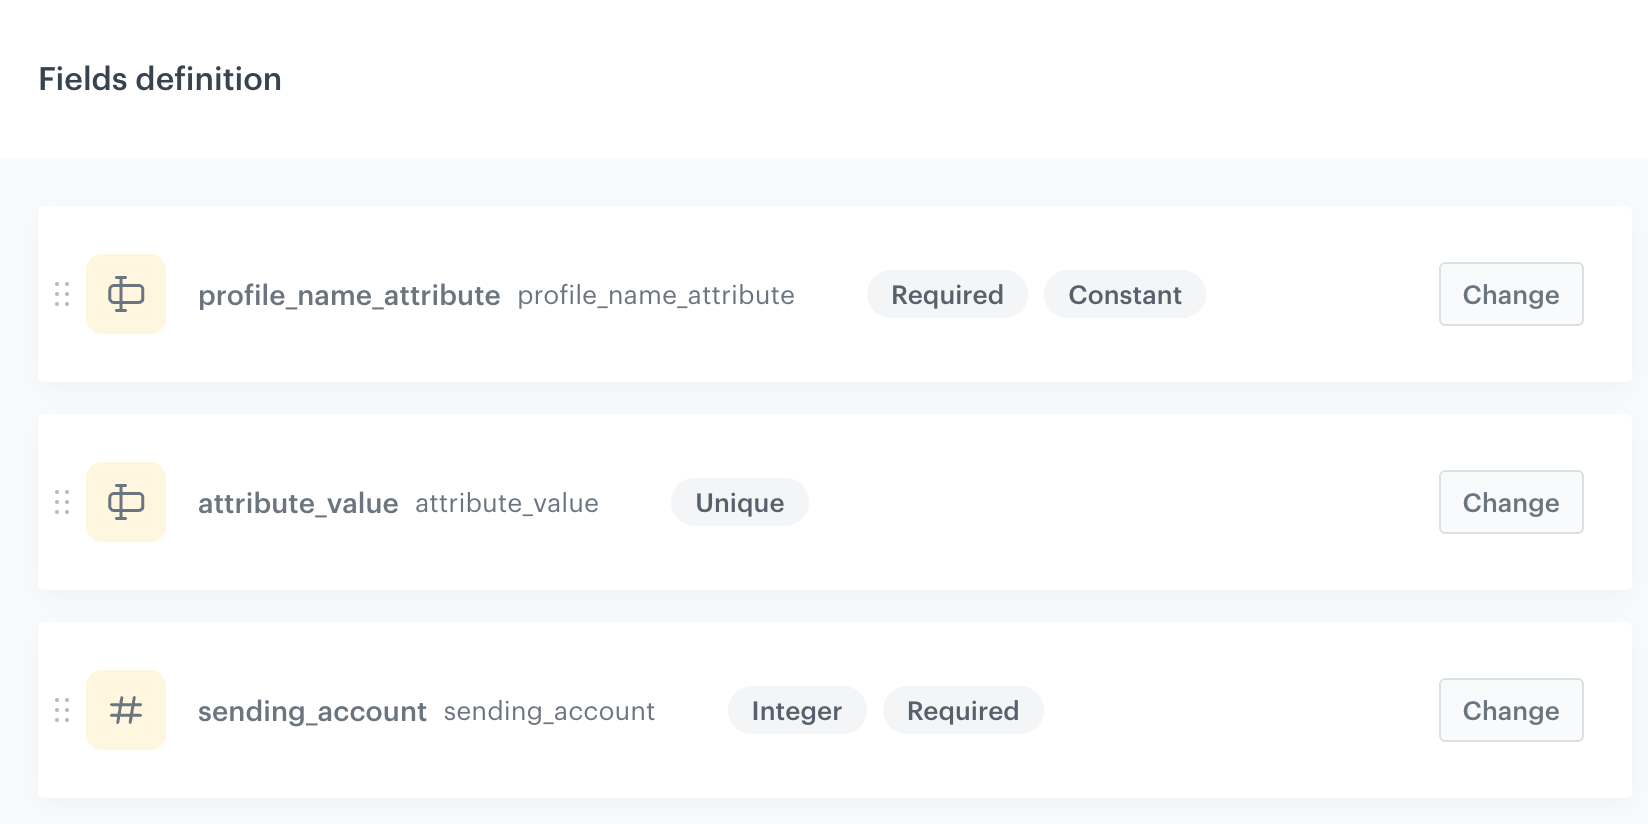
In this part of the process, you will create a schema with the following fields:
| Field | Type | Constraints | Description |
|---|---|---|---|
profile_attribute_name |
String | Required, Constant | The name of the profile attribute used for matching. The value must be identical across all records in the schema. |
attribute_value |
String | Required, Unique | The value of the profile attribute that corresponds to this sender account mapping, for example, a region code such as PL or EN. |
sending_account |
Number (Integer) | Required | The ID of the SMS sender account to use for recipients whose attribute matches the attribute_value. |
- Go to
 Data Modeling Hub > Brickworks.
 - Create a new schema. For more information on creating schemas, see:
- In the Fields tab, add the following fields:
- Add a String field:
- In API name, enter
profile_attribute_name - Select the following options for this field:
- Required field
- Block record-level overwriting - This setting requires you to provide a default value for this field in each record — enter the name of the profile attribute used for matching.
- In API name, enter
- Add a String field:
- In API name, enter
attribute_value - Select the following options for this field: Required field and Unique values only.
- Add a Number field:
- Set the type to Integer.
- In API name, enter
sending_account - Select the Required field checkbox.
- Add a String field:
- Save the schema.
Adding records
After creating the schema, add a record for each sender account you want to map:
- Open the schema and go to the Records tab.
- For each mapping, add a record with the following values:
- In
profile_attribute_name, the value is already provided due to the Block record-level overwriting option in the field setting. - In
attribute_value, enter the attribute value that identifies this group of recipients (for example,PL). - In
sending_account, enter the ID of the sender account assigned to this group.
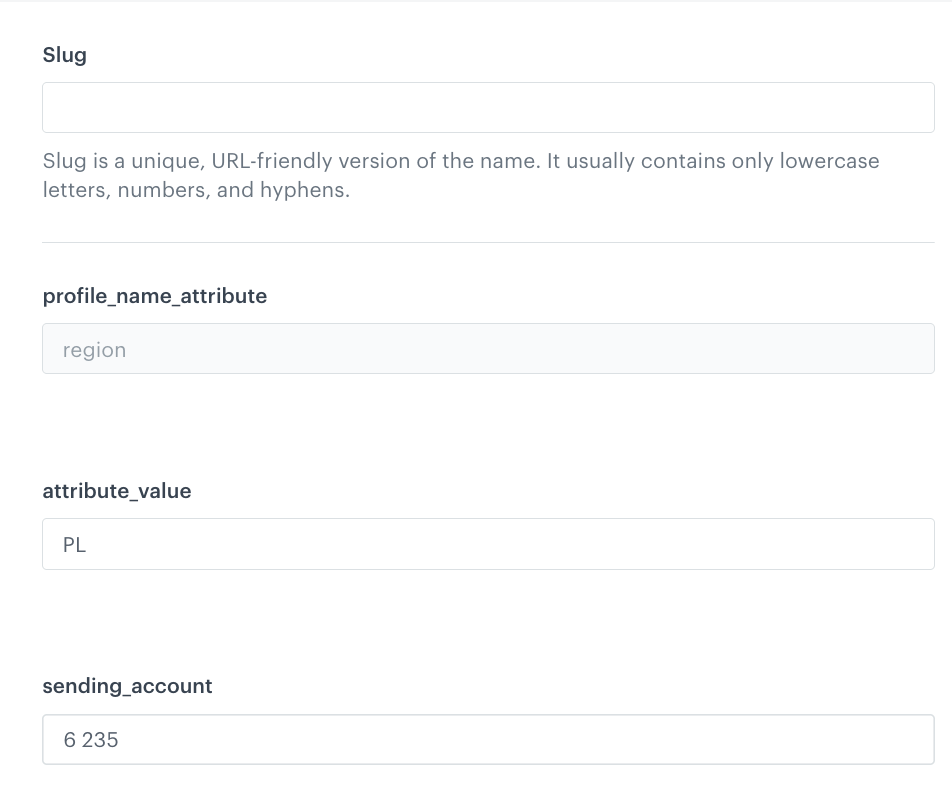
An example record - In
- Repeat for each sender account you want to map.
To learn about limits on schemas and records, see Limits and constraints.
Example
In this example, three records are added to the schema:
| Records | profile_attribute_name |
attribute_value |
sending_account |
|---|---|---|---|
| record1 | region |
PL |
6235 |
| record 2 | region |
DE |
6236 |
| record 3 | region |
EN |
6237 |
In this example, recipients with region = PL will receive the text message from account 6235, recipients with region = DE from account 6236, and so on.
Selecting the schema in a campaign
Once the schema is ready, select it when creating an SMS campaign:
- In the Content section of the campaign, select Dynamic sender.
- In the Schema field, select the schema you created.
For the full SMS setup, see Sending SMS.