A schema acts as a template for creating and organizing records, ensuring consistency and structure across your data sets.
In this article, you will walk through the process of creating a schema (Products) that includes the following fields:
- the name of the item
- the ID of the item
- information about the item
- recommendations which will return similar items to the defined item
The details of the item will be provided while creating a record.
This example demonstrates how Synerise objects, specifically a catalog and an AI recommendation, can be utilized within a schema. While creating a record you will specify the item and will be able to preview recommendation results.
Before creating a schema for your business scenario, we recommend you become familiar Limits and constraints as it may affect implementation of the scenario.
Procedure
- Go to
 Data Modeling Hub > Schemas > New schema.
 - Select one of the following schema options:
- Managed schema
- Simple schema
- Singleton schema See the "Schema types" section for an explanation for each type.
- On the pop-up, provide the following data:
- In Display name, enter
Products
In this field, you must provide the schema name; value in this field is displayed on the list of schemas only ( Data Modeling Hub > Schemas). - In API name, the value is pre-filled (
products), if you want to change it, provide your own API name variant.
The value in this field is the unique identifier used to reference this schema in API requests. - In Description, describe the schema’s purpose to help workspace users understand its function, for example,
Products with Synerise recommendations
This description will display on the list of schemas only.
- In Display name, enter
- Confirm by clicking Apply.
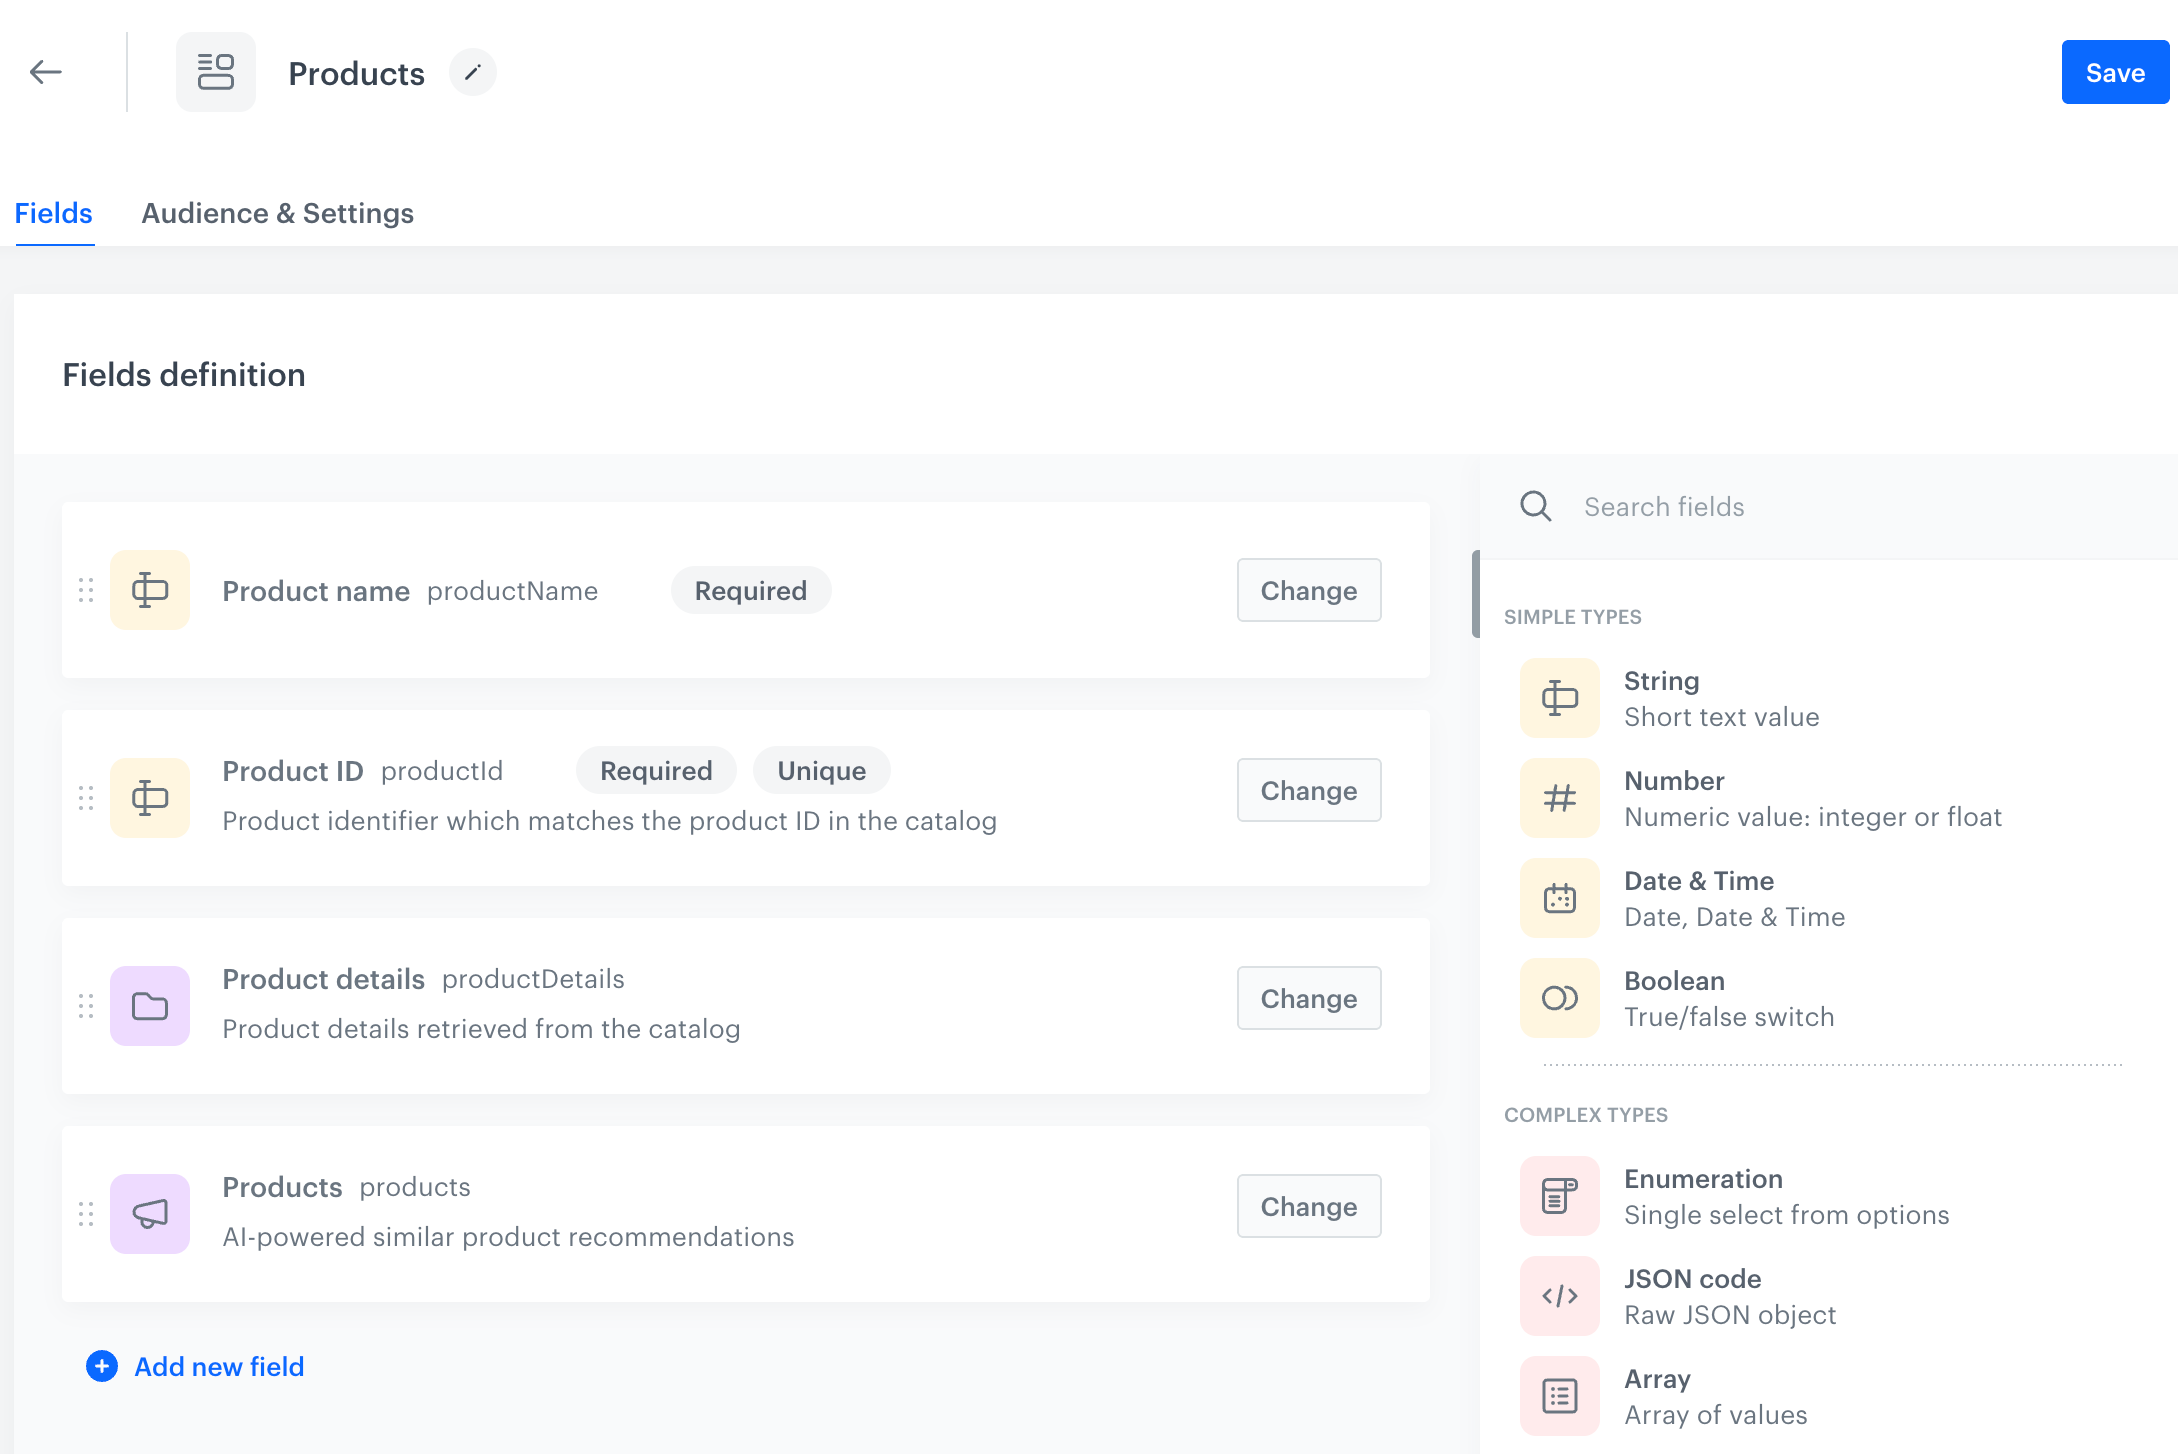
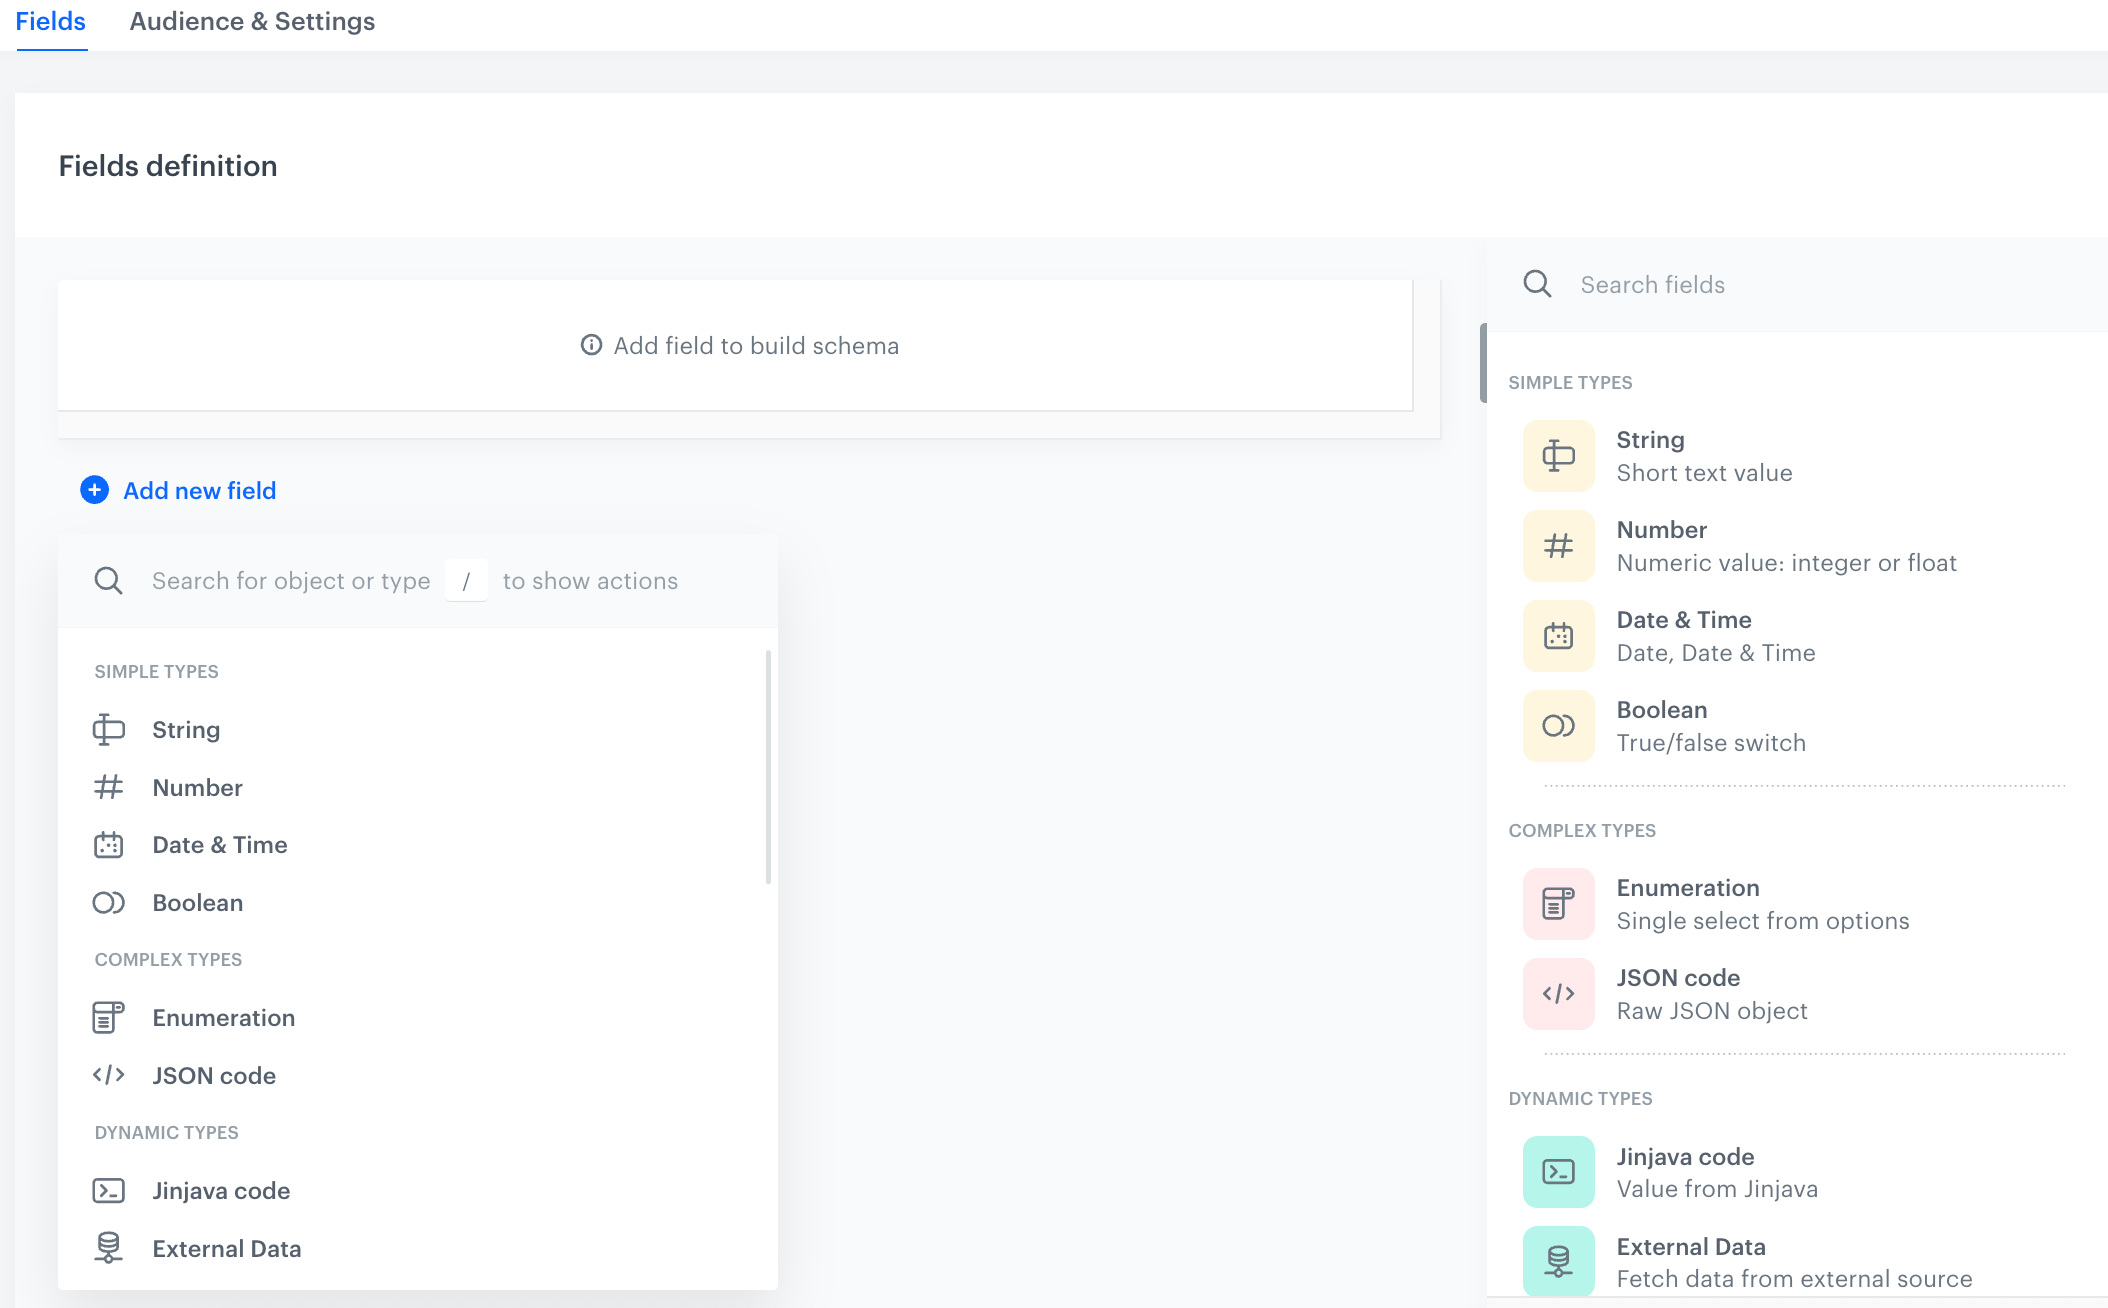
Adding schema fields
In this part of the process, you will add fields to the schema. The schema will contain various field types: strings and Synerise objects (a catalog and AI recommendation based on the similar item model).
This procedure focuses on the configuration of the fields. Later on, you will fill out the schema fields with the actual values, which is described in the Creating a record article.
Field with the product name
Add the string field which will contain the product name.
- Click Add new field.
- From the dropdown list, select String.
- Fill out the following fields:
- Display name, enter the title of the field (
Product name) which will display in the record. - Description, optionally provide a purpose of the field to help other workspace coworkers understand the purpose of the field.
- Display name, enter the title of the field (
- Select the Required field checkbox.
- Confirm by clicking Apply.
Field with the product ID
Add the string field which will contain the product identifier.
- Click Add new field.
- From the dropdown list, select String.
- Fill out the following fields:
- Display name, enter the title of the field (
Product ID) which will display in the record. - Description, optionally provide a purpose of the field to help other workspace coworkers understand the purpose of the field.
- Display name, enter the title of the field (
- Select the Required field checkbox.
- Select the Unique value checkbox.
- Confirm by clicking Apply.
Field with product information
Add the catalog field - it will let you select a catalog which will be the source of product information.
When creating a catalog, you select a primary key column whose values serve as unique identifiers for the catalog entries. In the catalog field settings, you can specify how to provide the primary key value: either statically (by manually entering the value) or dynamically, by using Brickwork Jinjava {{ context }} insert. In the scenario described in this article, we will use a dynamic primary key value.
- Click Add new field.
- From the dropdown list, select Catalog.
- Fill out the following fields:
- Display name, enter the title of the field (
Product details) which will display in the record. - Description, optionally provide a purpose of the field to help other workspace coworkers understand the purpose of the field.
- Display name, enter the title of the field (
- From the Primary key format dropdown list, select Jinjava.
- Confirm by clicking Apply.
Field with recommendations
Add the AI recommendation field and select the AI recommendation campaign whose results will be returned in the record.
Some recommendation models based on which you can create AI recommendation campaigns require item context based on which the results are generated. In the AI recommendation field type settings, you can specify how to provide the item context (item identifier): either manually (by entering the item identifier) or dynamically by using Brickwork Jinjava {{ context }} insert. In the scenario described in this article, we will use a dynamic item context value.
- Click Add new field.
- From the dropdown list, select AI Recommendation.
- Fill out the following fields:
- Display name, enter the title of the field (
Products) which will display in the record. - Description, optionally provide a purpose of the field to help other workspace coworkers understand the purpose of the field.
- Display name, enter the title of the field (
- From the Item context format dropdown list, select Jinjava.
- Confirm by clicking Apply.
Defining schema audience
Defining an audience for a schema ensures that the schema’s structure and data apply meaningfully and securely to the intended group of users.
This part of the process is optional. If skipped, the schema audience defaults to everyone.
- Click the Audience & Settings tab.
Result:
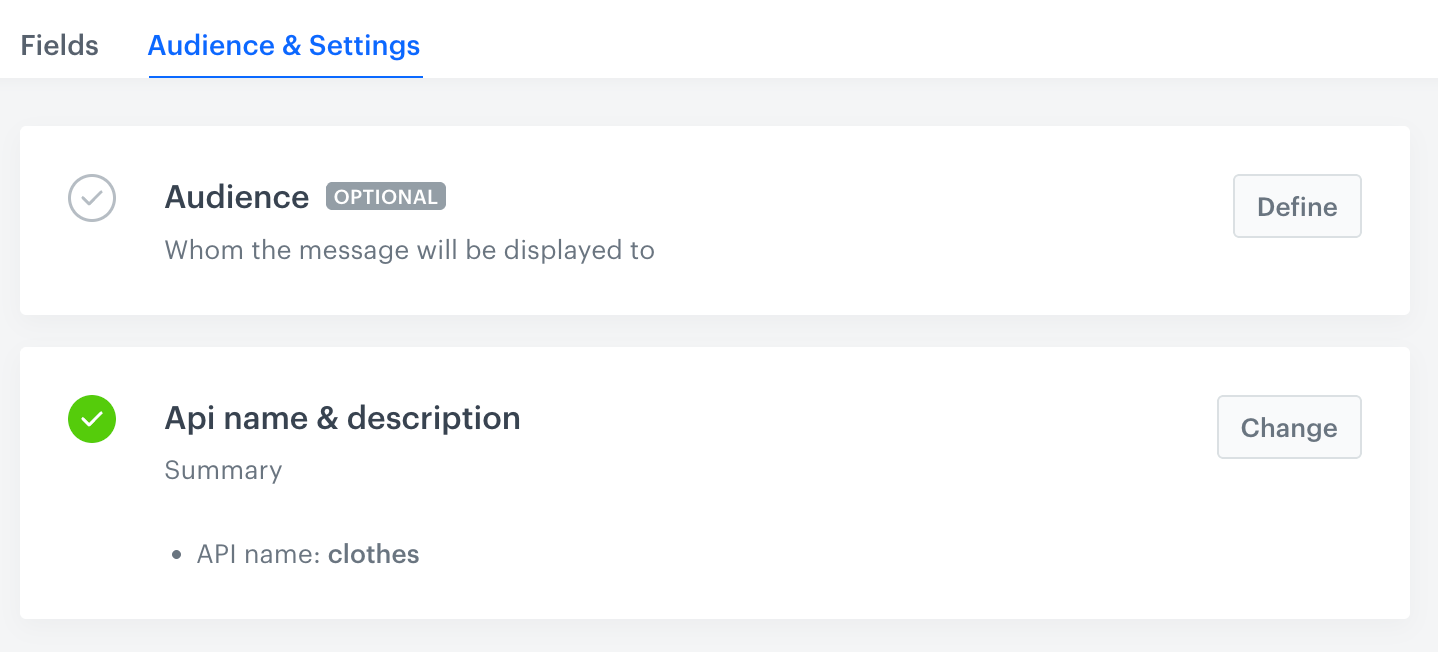
The Audience & Settings section - On the Audience section, click Define.
Choose the schema recipients:
- Everyone - Everyone you have in Profiles.
- Segmentations - Profiles in selected segmentations will be schema recipients.
- Click Segmentations.
- On the pop-up, select the segmentations.
- Confirm by clicking Apply.
- New audience - Create audience by defining the conditions profiles must meet to be recipients of selected schema.
- In the Audience section, click Apply.
Reviewing schema settings
In the Audience & Settings tab, you can preview the API name and schema description you defined at the beginning of the process. You can only edit the description at this stage.
Saving schema
In the upper-right corner, click Save.
Next steps
As the next step, you will create a record out of the created schema.
Editing schemas
When editing existing schemas, keep the following points in mind:
- Modifying schema does NOT affect existing records. If the field has a default value, that value will be applied when content is generated from the record.
- Removing a field from a schema does NOT remove it from existing records; but when content is generated from such a record, that value is ignored.
- You can't open and view unpublished records created from a previous version of a schema.