Landing page with personalized listing and brand-focused product recommendations
In today’s competitive e-commerce landscape, personalization plays a crucial role in improving customer engagement and increasing conversion rates. By leveraging customer data such as purchase history, browsing patterns, and product preferences, businesses can provide a tailored shopping experience. This is especially critical during high-stakes sales events like Black Friday, when customers are bombarded with a vast range of products and deals. A well-executed personalized approach not only enhances user experience but also helps in reducing decision fatigue and boosting conversion rates.
This use case demonstrates how a dynamically personalized product listing can be integrated into a landing page. The listing presents products that are relevant to each customer’s interests, based on their past purchases and browsing activities. With the use of Synerise Predictions, presented results will be even more accurate.
Here’s how it works:
- Customers with a high propensity to purchase from a particular brand will receive an email that guides them to a personalized landing page.
- The page features an automatically filtered product listing that spotlights items from their preferred brand.
- Customers can further refine their browsing experience by applying additional filters, such as product category or price, for an even more tailored shopping journey.
For special occasions such as Black Friday or Power Monday, you can enrich this scenario and apply additional settings, such as showcasing only offers with a specific “black-friday” tag.
In this use case, we will guide you through every step of the scenario. We will prepare the email campaign as well as the landing page which will be created based on a predefined template that makes the scenario easy to prepare by adapting the ready project to your business needs.
Prerequisites
To be able to implement this use case, you must:
- Create a sender account
- Configure AI Engine for:
- Create and configure search index and add the desired filterable attributes
- Predict propensity to buy items from specific brand
- If you plan to publish a landing page within your own domain, follow instructions from “Requirements for custom domains” section; if you choose to publish it on the Synerise domain, no additional requirements are necessary
- Optionally you can configure AI engine to be able to add personalized AI recommendations to your landing.
- Optionally create AI recommendations which you can add to your landing page.
Process
Perform the steps in the following order:
Create a landing page
In this part of the process, you will create a landing page with personalized product listing. The listing will have filtering options (such as filters by brand, by category or price) as well as sorting. We will use a predefined template so there is no need to create a template from scratch. In this example we will use a landing page approach, but you can implement the same scenario in any other structure or flow that fits your project.
- Go to
 Experience Hub > Landing Page > Create new.
 - Enter the name of the campaign.
Define content
-
In the Content section, click Create message.
-
From the list of template folders, select the Predefined templates folder.
Result: You are redirected to the list of predefined templates. -
Select the Personalized Listing template.
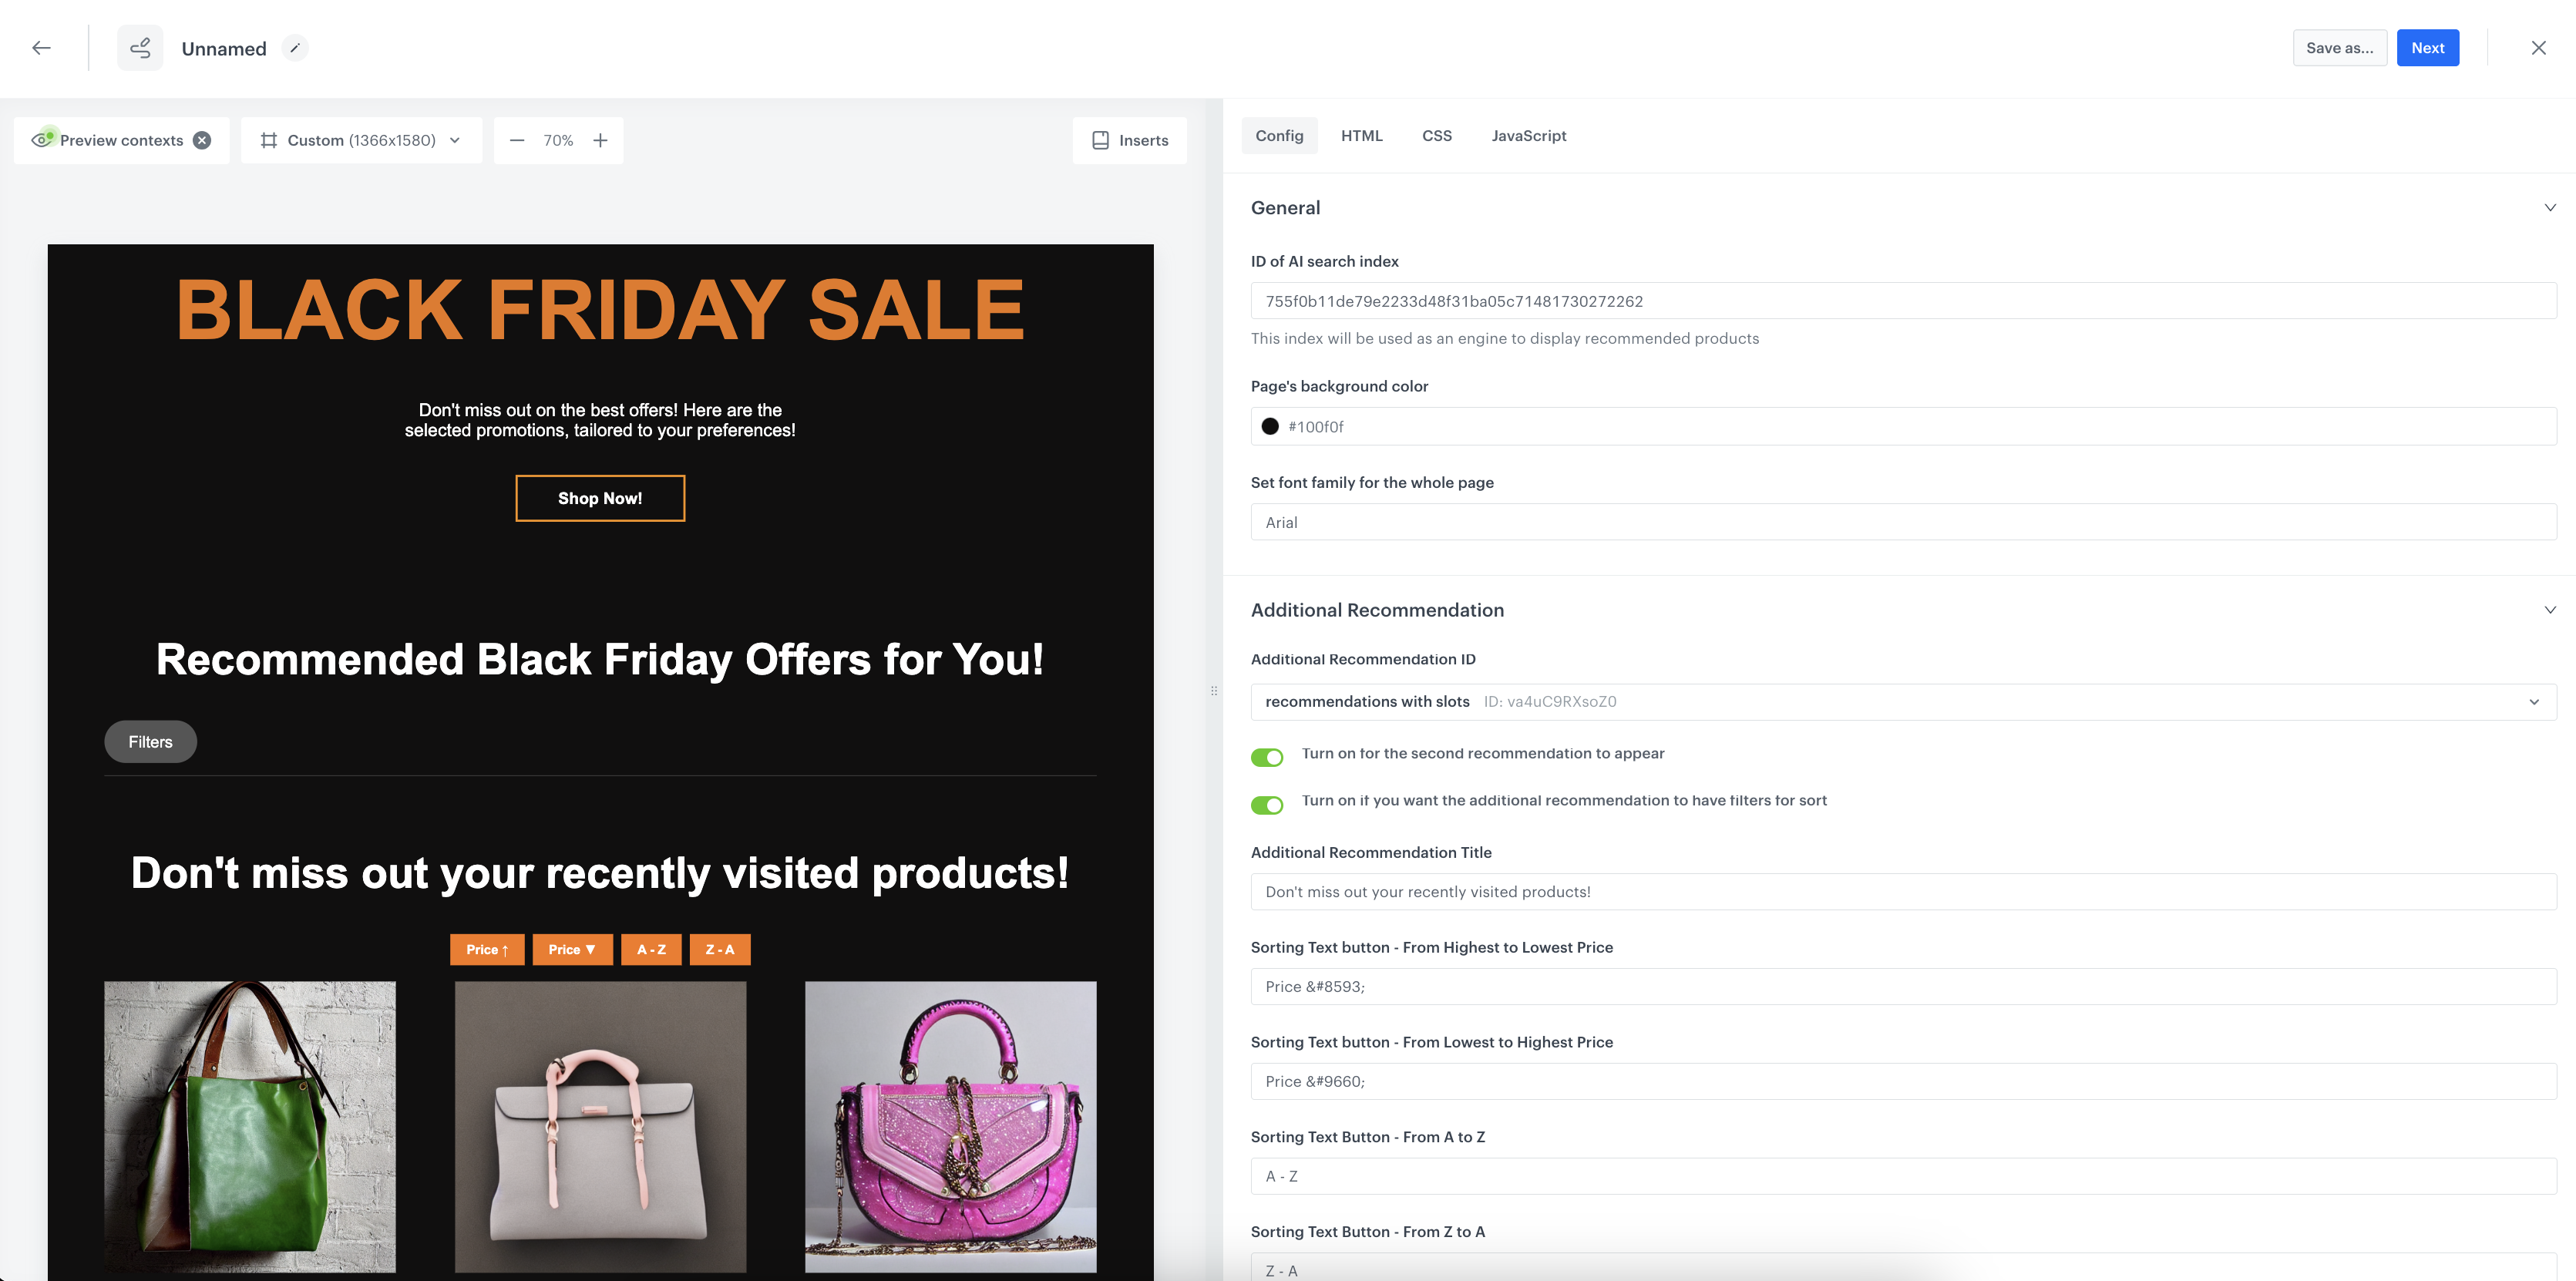
Result: You are redirected to the code editor. The form in the Config tab is pre-filled with default values, which you can modify to suit your business needs. -
In the General section:
- In the ID of AI search index field, enter the ID of search index you created as a part of prerequisites.
-
In Additional Recommendation, you can select an AI recommendation that will be used to present additional product offers, if switched on. In this section, apart from selecting the recommendation, define the header for the recommendation frame, and the number of items to display in the recommendation frame.
-
In the Buttons, Hero, Footer sections, you can configure the layout and appearance of your landing page, including fonts, colors, and backgrounds, to ensure it matches your branding.
-
After you make changes to the template, you can check the preview.
- Click the Preview Contexts button on the upper left side.
- Enter the ID of a customer.
- Click Apply.

Edit form in the Config tab -
If the template is ready, click Use in communication in the upper right corner.
Define schedule settings
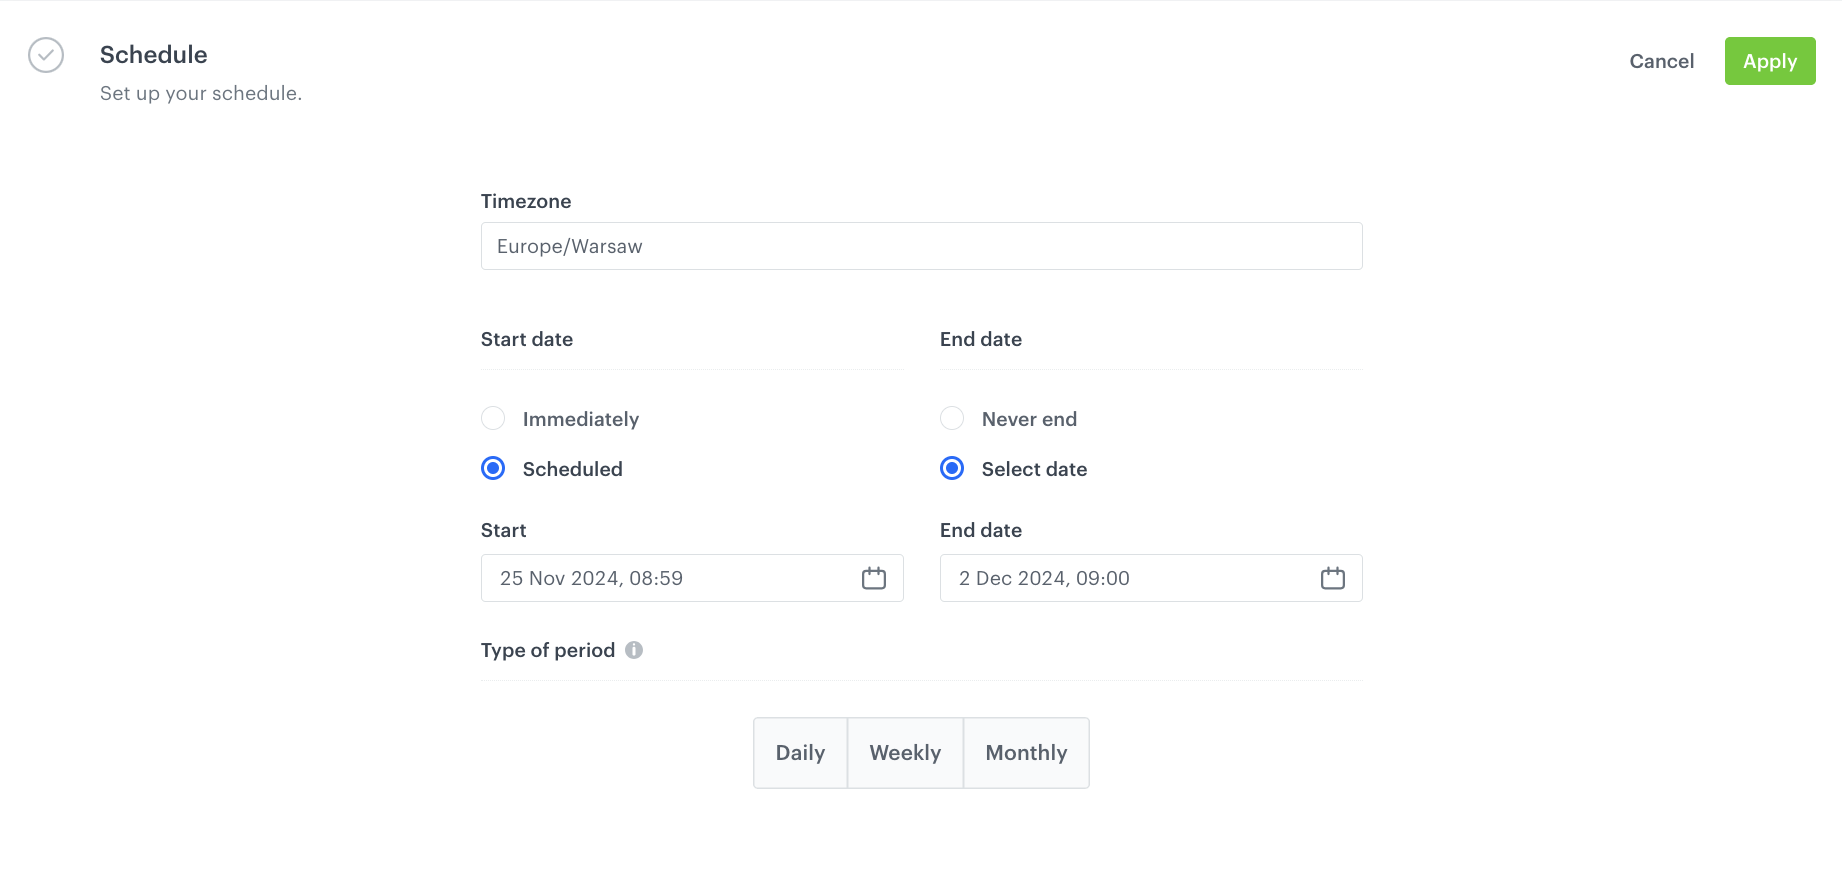
- In the Schedule section, click Define.
- Select the timezone.
- Select the time when the landing page will be active - in this case, choose the start and end date, so they overlap the period before and after Black Friday.
- Click Apply

Define the SEO settings
In this part of the process you may define technical details concerning search engine optimization and increase the chances of placing high in search results.
Set up the URL
In this part of the process, you will define the URL to your landing page.
- From the Domain dropdown list, select the address of your landing page.
- Optionally, if you want to add a part to the address after the domain, in Nice URL provide this part, for example,
black-friday(don’t use a slash, it is added automatically). - In URL for redirecting users when the landing expires (optional), enter the URL to which you will redirect users after the landing page expires.
- Optionally, in Fallback URL, enter the URL to which users will be redirected if your landing page is unavailable due to errors (for example, when it can’t be rendered due to Jinjava syntax error). If you leave this field empty, users will be redirected to a generic error page.
- In URL preview, you are provided with a final link to your landing page. The preview is in real time, so if you fill a domain or URL, you get the preview of the address simultaneously.
- Confirm the settings by clicking Apply.
Adjust optional settings
- In the HTTP headers section, you can add custom HTTP headers to your landing page. In the Key and Value fields, enter a header and its value, respectively.
- In the Customize section:
- you can add CSS and scripts to your landing page
- you can define the URLs to external sources or paste the snippets
- in the JS section under the Advanced options option, to enable additional tracking on your landing page, you can paste the tracking code.
Save your campaign
- After you make changes to the campaign, you can check the preview. Click the Preview button on the upper right side.
- When your landing page is ready you can Save it as a draft or directly click Publish.
Create an email campaign
In this part of the process, you will create an email campaign with the link to the landing page with personalized listing, automatically filtered to the brand you specified while building prediction. The campaign will be directed to all customers with high propensity to buy items from that brand.
-
Go to
 Experience Hub > Email campaign > Create new.
 -
In the Audience section, choose the New audience.
-
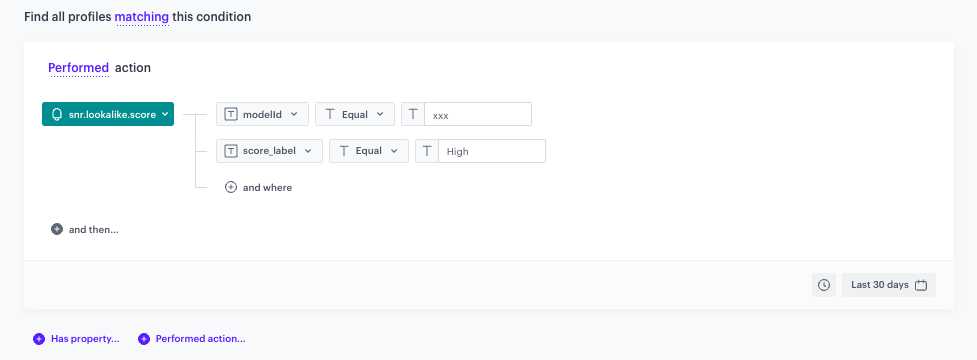
Define the conditions:
-
Choose event
snr.propensity.score. -
As the parameter, choose modelId.
-
As the operator, choose Equal.
-
In the text field, enter the ID of the prediction you created as a part of prerequisites.
-
Click + where.
-
From the dropdown list, select source_label.
-
As the operator, choose Equal.
-
Depending on the scale selected in the prediction, please enter the highest possible value that can be achieved here. In our case, in the text field, enter
high.
The conditions for the audience of the email -
Apply and save your changes.
-
-
Configure the Content section.
-
Choose the email account from which you want to send your message.
-
In the Subject field, enter your message subject.
-
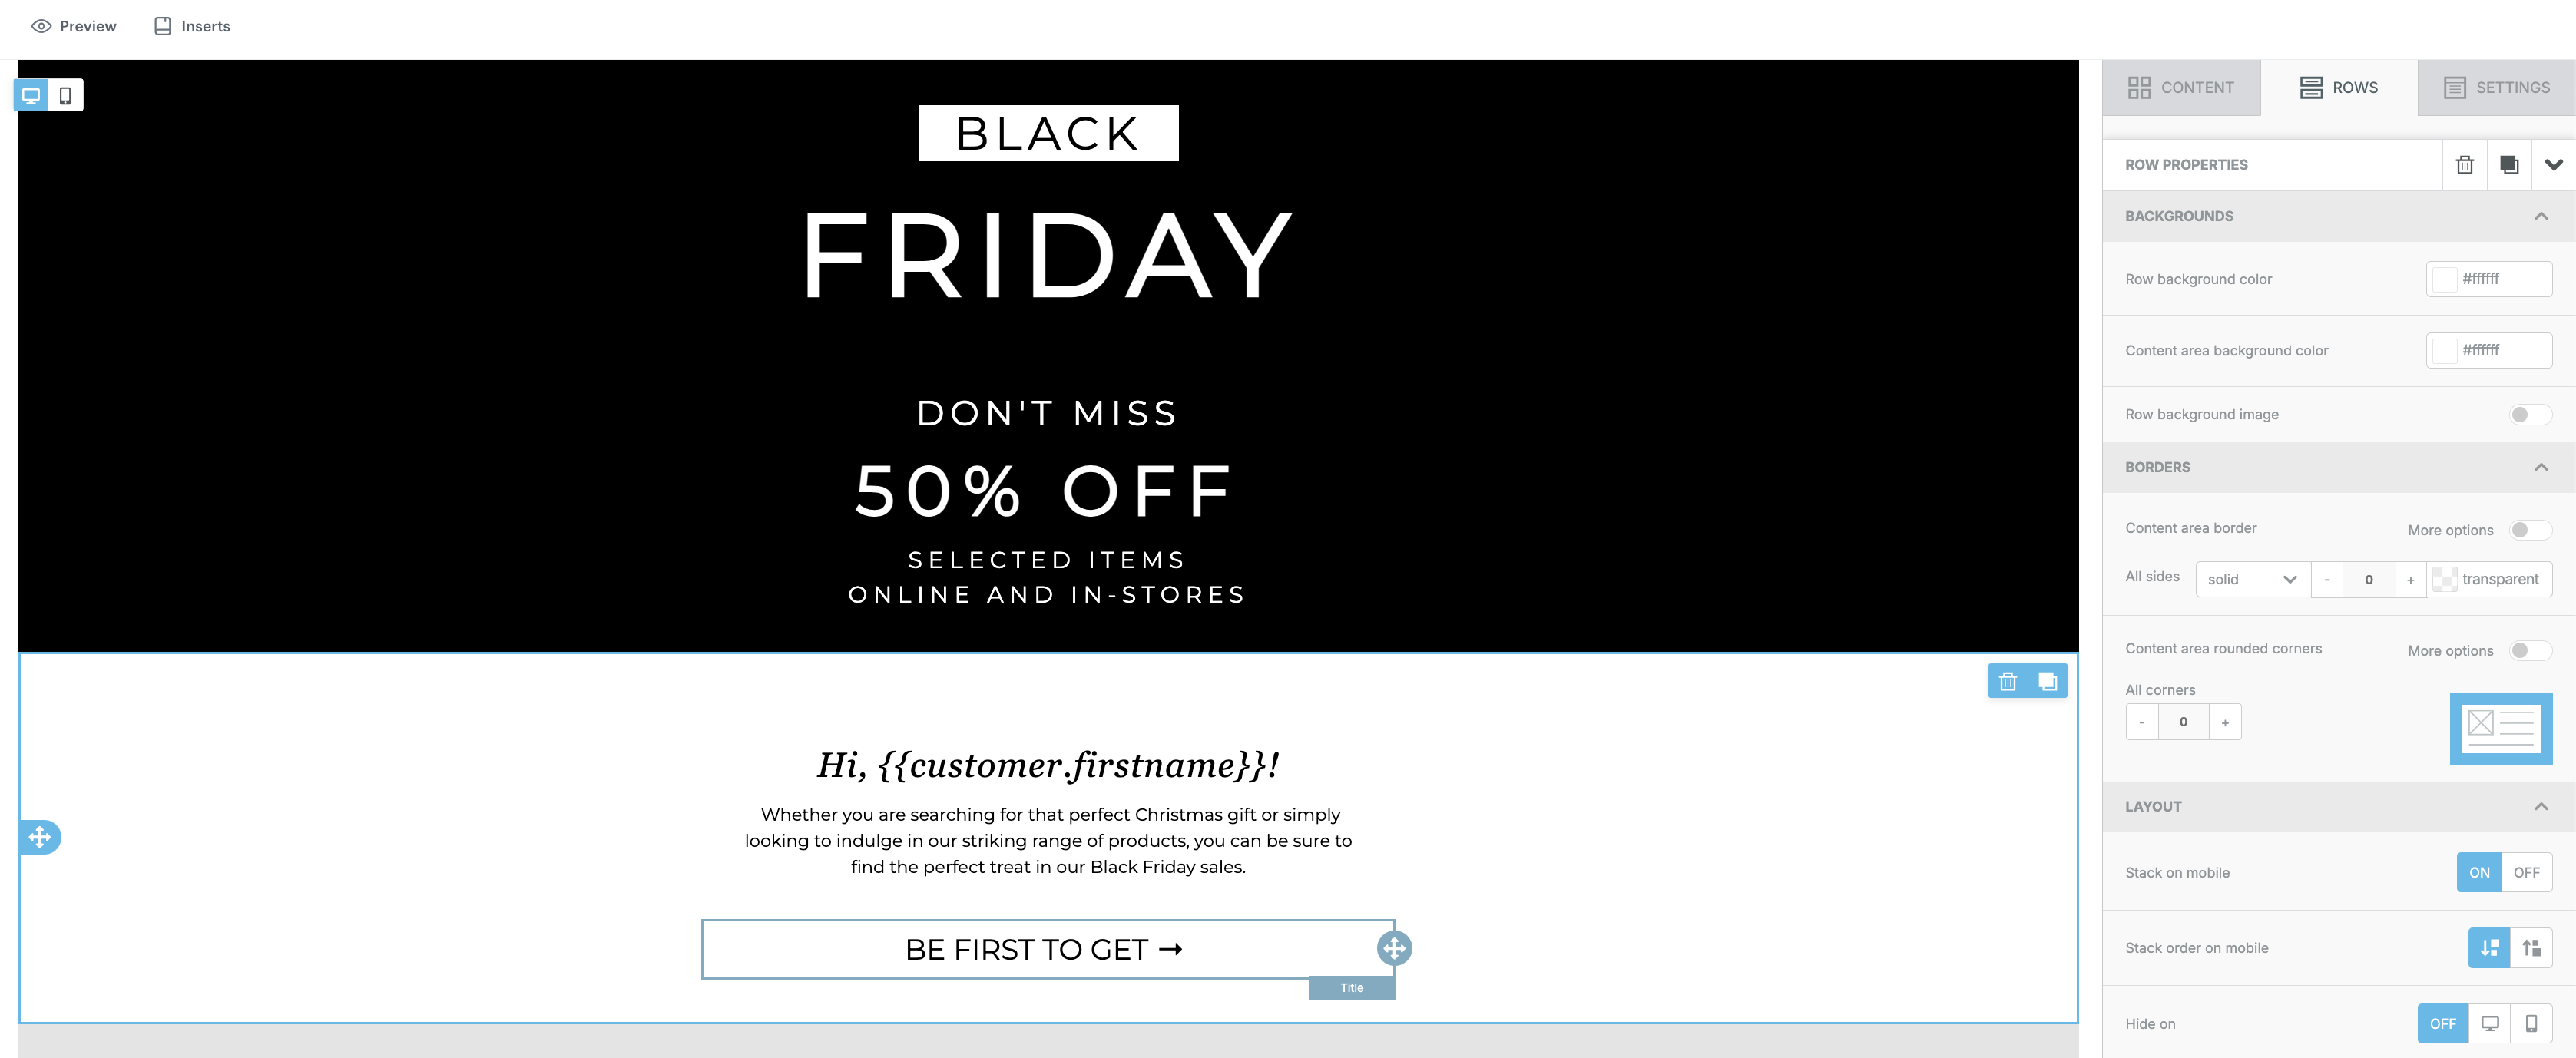
Click Create message.
You can create a template out of scratch or use the ready-made templates in the Predefined dynamic templates and Predefined simple templates folders.Note:An email template must contain a link to the landing page with brand filter passed in the link. Based on the personalized listing on our predefined template, the link would look in the following way:
https://your.landingpage.com/black-friday?brand=xyz.To ensure that the landing page content is personalized and rendered specifically for the customer who is being redirected, you must also pass the UUID of the customer in the link. This can be done by adding
snrs_clparameter in the URL in the following ways:- by adding manually the Jinjava insert that retrieves UUID to the link, for example:
https://your.landingpage.com?snrs_cl={{customer.uuid}} - by inserting the link using
{% preparelink %}YOUR_LANDING_PAGE_URL{% endpreparelink %}tags which automatically adds thesnrs_clparameter to the link.
Taking the above into consideration, the final link that must be embedded in email template will look in the following way:
{% preparelink %}https://your.landingpage.com/black-friday?brand=xyz{% endpreparelink %}. You can read more about customer context in landing pages in “Establishing customer context” section. - by adding manually the Jinjava insert that retrieves UUID to the link, for example:
-
After finishing email template, click Use in communication.
-
In the Content section, to confirm the settings, click Apply
-
In the Schedule section, specify the time when you want to send your communication.
-
You can optionally define UTM & URL parameters.
-
To send the email, click Send.

Check the use case set up on the Synerise Demo workspace
You can check the configuration of the landing page with personalized product listing directly in Synerise Demo workspace.
If you’re our partner or client, you already have automatic access to the Synerise Demo workspace (1590), where you can explore all the configured elements of this use case and copy them to your workspace.
If you’re not a partner or client yet, we encourage you to fill out the contact form to schedule a meeting with our representatives. They’ll be happy to show you how our demo works and discuss how you can apply this use case in your business.