Response transformers let you change the output while generating an object.
You can use this to manipulate the results of object generation. For example:
- Maintain compatibility between an updated schema and your mobile app by changing the content while it's generated - for example, if the name or data type of a field in the schema changes, you can use the transformer to keep generating content with the old name/data type without changing your mobile app.
- Simplify responses from external sources to limit the amount of data returned when generating a record.
- Modify the result of record generation depending on the result of another field in the record (for example, an analysis result).
How it works
The transformer is a JavaScript function applied to the generated object before returning it in the API/SDK response. You define the content of the function - by default, it's empty.
Creating response transformers
You can create multiple transformers for a schema, but only one can be active. The others can be selected when previewing a record, so you can test transformers without changing the active one.
TIP: Transformers are versioned; so you don't need to create different versions of the same transformer as new transformers.
- On the Response transformers tab, click Edit > Add transformer.
Result: The transformer editor opens.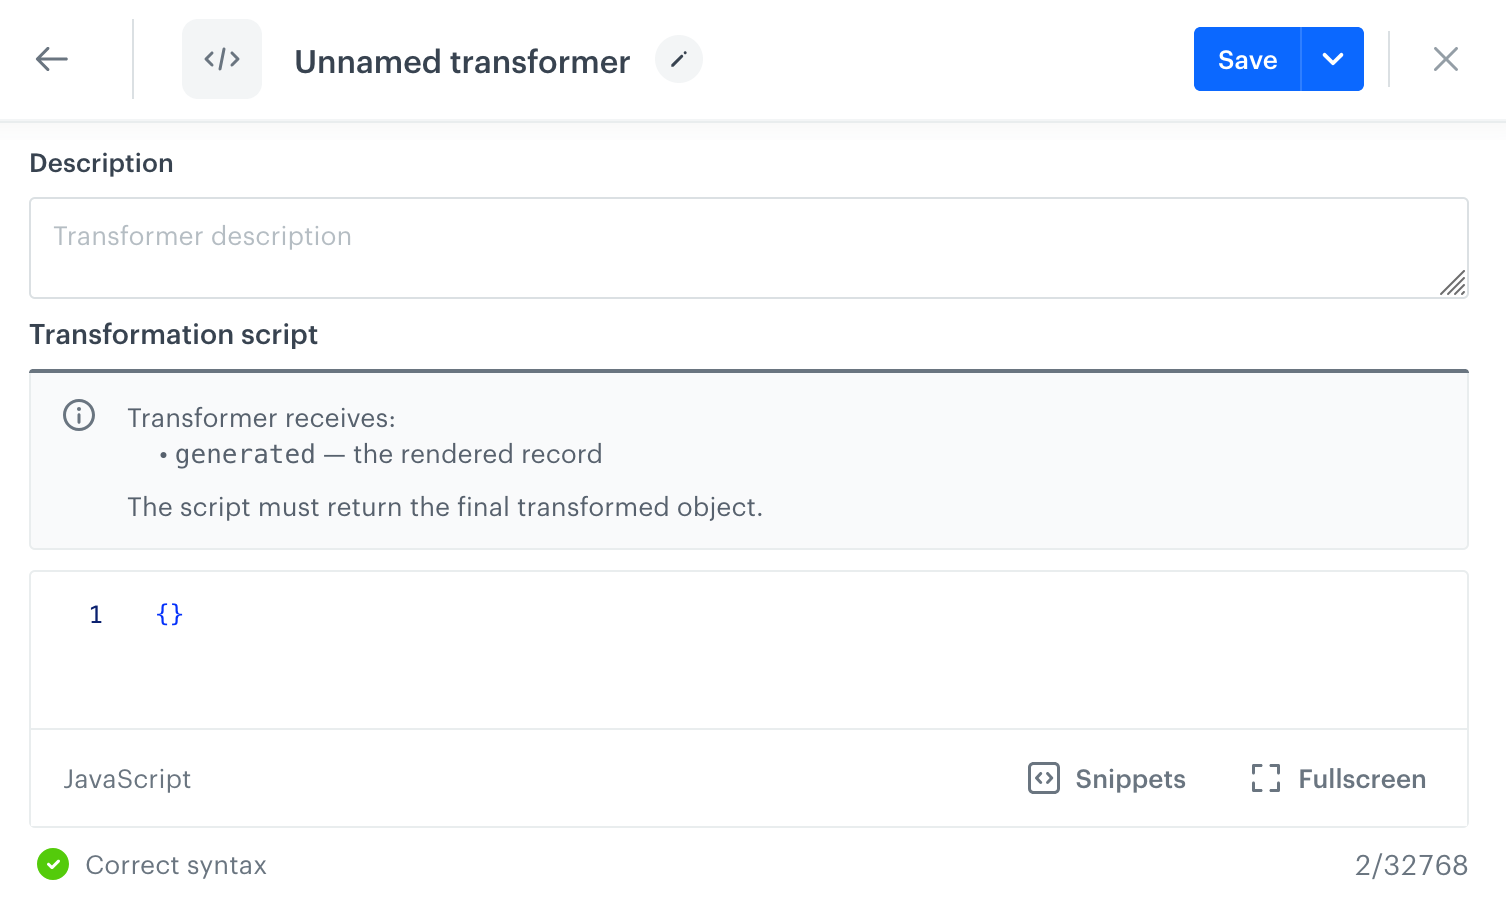
The transformer editor - Enter the transformer name.
- Enter a description.
The description is saved separately for each version of the transformer, so you can use it to differentiate between versions. - Enter the transformation script.
For details, see "Building the transformation script". - Click Save or Save and close.
- If you want to start using the script:
- On the Response transformers tab, select the transformer as the active one.
- Save the schema.
Building the transformation script
The transformation script is a function which the backend runs after generating content, before returning the response to you.
The function can access the content (key/value) map of a generated record by referencing the generated object. To access a field, use dot notation, for example generated.exampleString
Take these requirements and mechanisms into account:
- The script must end with a return statement which returns the transformed object. You can overwrite the properties of the
generatedobject or create a new object from it, modify some values, and return a new object. - The transformer runs only for the top-level record (the one you requested). If the record references other records with their own response transformers, those nested transformers aren't processed.
- After running the function, the generated object is not validated against the schema. The response transformer can change the data type of a field.
- You can add error handling and logging in the function and see its results in the response when the function fails - the API returns an HTTP 400 message with a
detailsobject that shows the error message and logs. - The number of transformers and their versions is limited.
- The transformation script can't make HTTP requests and other external calls; it can only transform data received from a processed record, so you can use an External Data field.
Transformer example 1
Here's a simple transformer example:
- A schema has one field:
exampleString - The transformer is:
This code replaces the value of the{ generated.exampleString = "new value"; return generated; }exampleStringfield in the record with"new value" - When you make a content generation request, the response is:
{
    "__slug": "exampleRecord",
    "__recordVersion": 6,
    "__publishedAt": "2026-06-18T12:04:34.340257Z",
    "__matchedAudience": true,
    "__updatedAt": "2026-06-18T12:04:34.283001Z",
    "exampleString": "new value",
    "__createdAt": "2026-06-18T11:21:06.960940Z",
    "__schemaId": "2e38959d-b9d9-4699-9ace-9e5eeb96b251",
    "__id": "715f4d74-25c3-47ca-874b-861f9d0ab190",
    "__schemaVersion": 20
}
Transformer example 2
- A schema is used to create a visual element by referencing records from another schema.
This is the structure of the schema, with thestoriesfield defined as a reference to records from another schema ("subtype": "one_to_many"):
JSON structure:
Schema editor view:{ "type": "object", "required": ["stories"], "properties": { "title": { "type": "string", "default": "Let's start jogging!" }, "stories": { "type": "array", "subtype": "one_to_many", "items": { "subtype": "one_to_one", "referenceId": "db6df665-..." }, "maxItems": 5 }, "buttonText": { "type": "string", "default": "Shop now!" }, "buttonColor": { "type": "string", "default": "#000" }, "buttonTextColor": { "type": "string", "default": "#fff" } } }
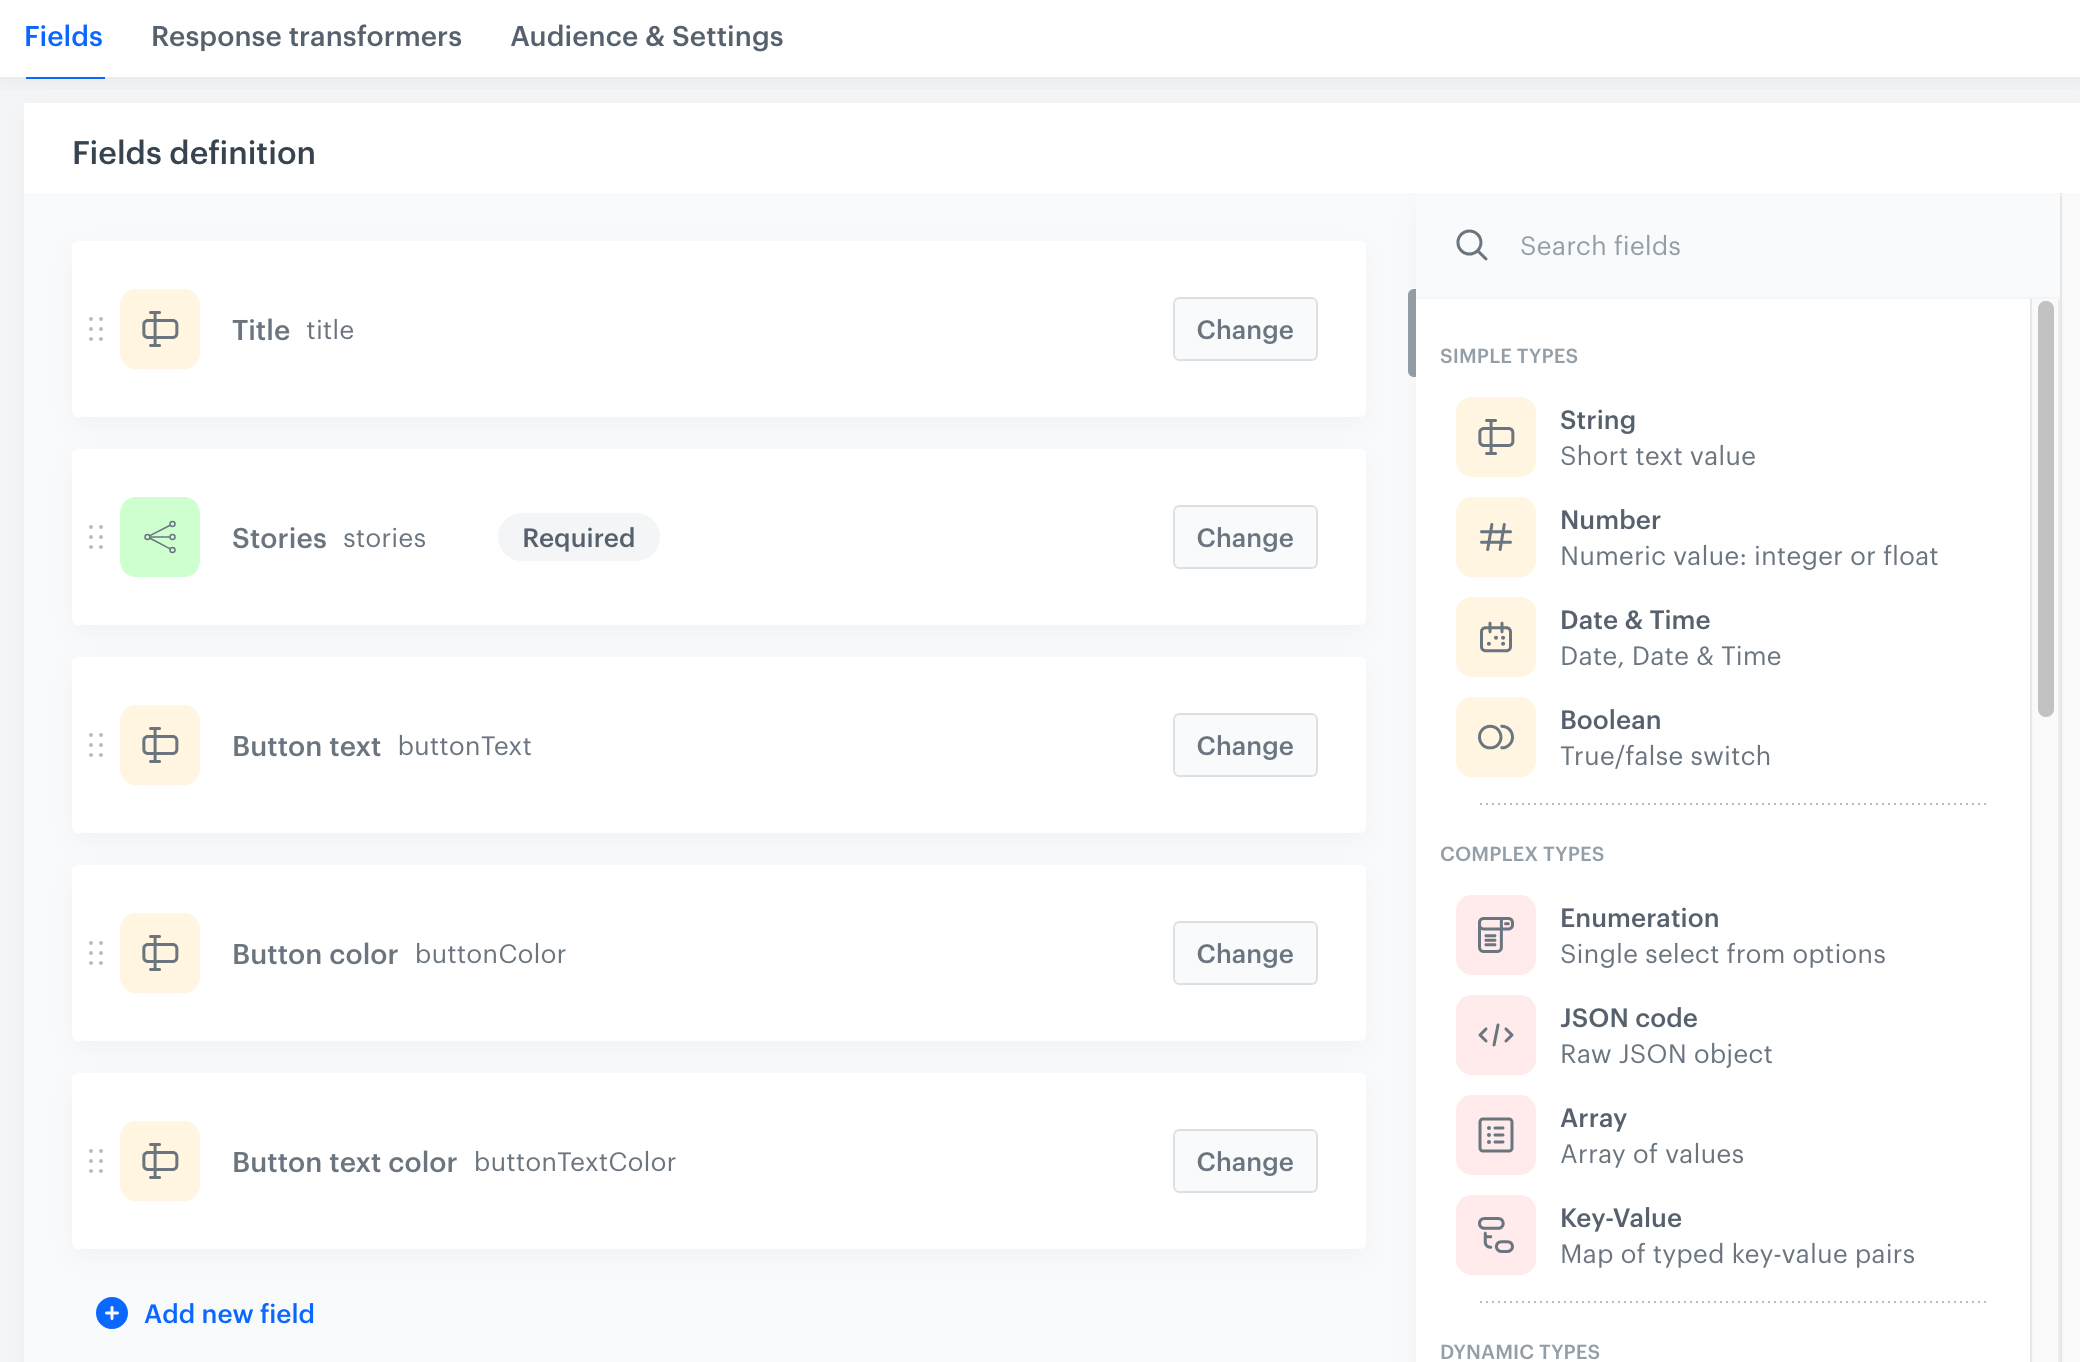
An example schema - When generating an object,
storiesis generated as an array of objects. Each object in the array has animageobject with aurlproperty (string) that points to the image.
This is howstorieslooks before applying the transformer:
"stories": [ { "name": "Example item 1", "image": { "url": "https://example.com/images/image1.png", "thumb": "https://example.com/thumbs/image1.png" } }, { "name": "Example item 2", "image": { "url": "https://example.com/images/image2.png", "thumb": "https://example.com/thumbs/image2.png" } } ] - The following transformer replaces the
imageobject in each story with just the object's URL string. This simplifies handling the output.
{ const updatedStories = generated['stories'].map(story => { return { ...story, image: story.image.url }; }); return {...generated, stories: updatedStories}; } - This is how
storieslooks after applying the transformer:
"stories": [
    {
        "name": "Example item 1",
        "image": "https://example.com/images/image1.png"
    },
    {
        "name": "Example item 2",
        "image": "https://example.com/images/image2.png"
    }
]
Activating response transformers for a schema
Each schema has its own list of transformers. Only one transformer from the list can be active.
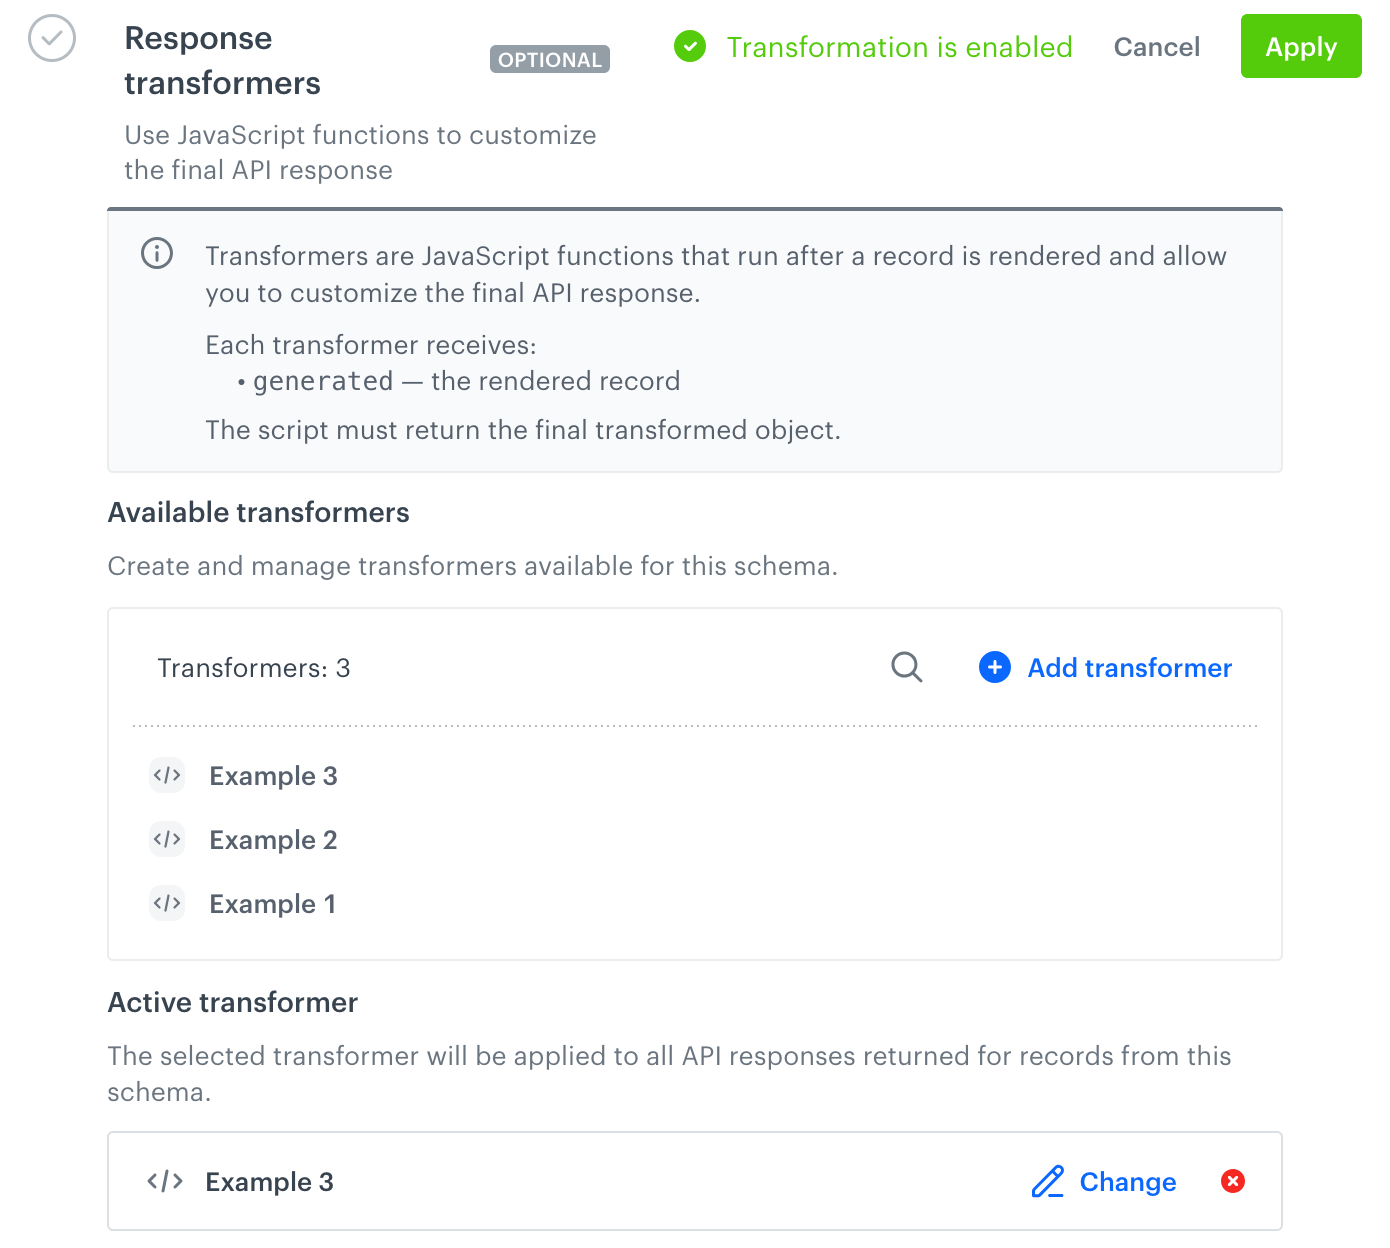
- Create and save your schema.
- In the schema editor, go to the Response transformers tab.
- Click Edit.
- Activate a transformer:
- If no transformers exist or you want to create a new one, proceed to "Creating response transformers".
- If no transformer is active, click Select and select a transformer from the list.
- If a transformer is active and you want to use a different one, click Change on the active transformer and select a different one.
- Click Apply.
- Save the schema by clicking Save.
Previewing transformer results
To preview and test transformers, use the Transforming response tab in a record preview.
The preview lets you test different versions of the schema (drafts) and inactive transformers without affecting the published schema version and active transformer.
Managing response transformers
On the Response transformers tab, in the list of transformers, hover over a transformer and:
- to delete the transformer, click the cross icon, then confirm.
- to duplicate the transformer, click the copy icon.
- to edit a transformer, click the pencil icon and edit the transformer in the same way as when creating one.
NOTE: When you edit and save an active transformer, the change takes effect without saving the schema.
Transformer versions
A transformer version is created whenever you save the transformer in the editor. When you exceed the version limit, the oldest version is removed.
To access and manage versions:
- On the Response transformers tab, in the list of transformers, hover over a transformer and click the pencil icon.
- In the editor that opens, click Versions history.
Result: The version history modal opens.To view a version, select it and click Show.
- To compare versions, select two versions and click Compare.
Result: A git-style diff opens.
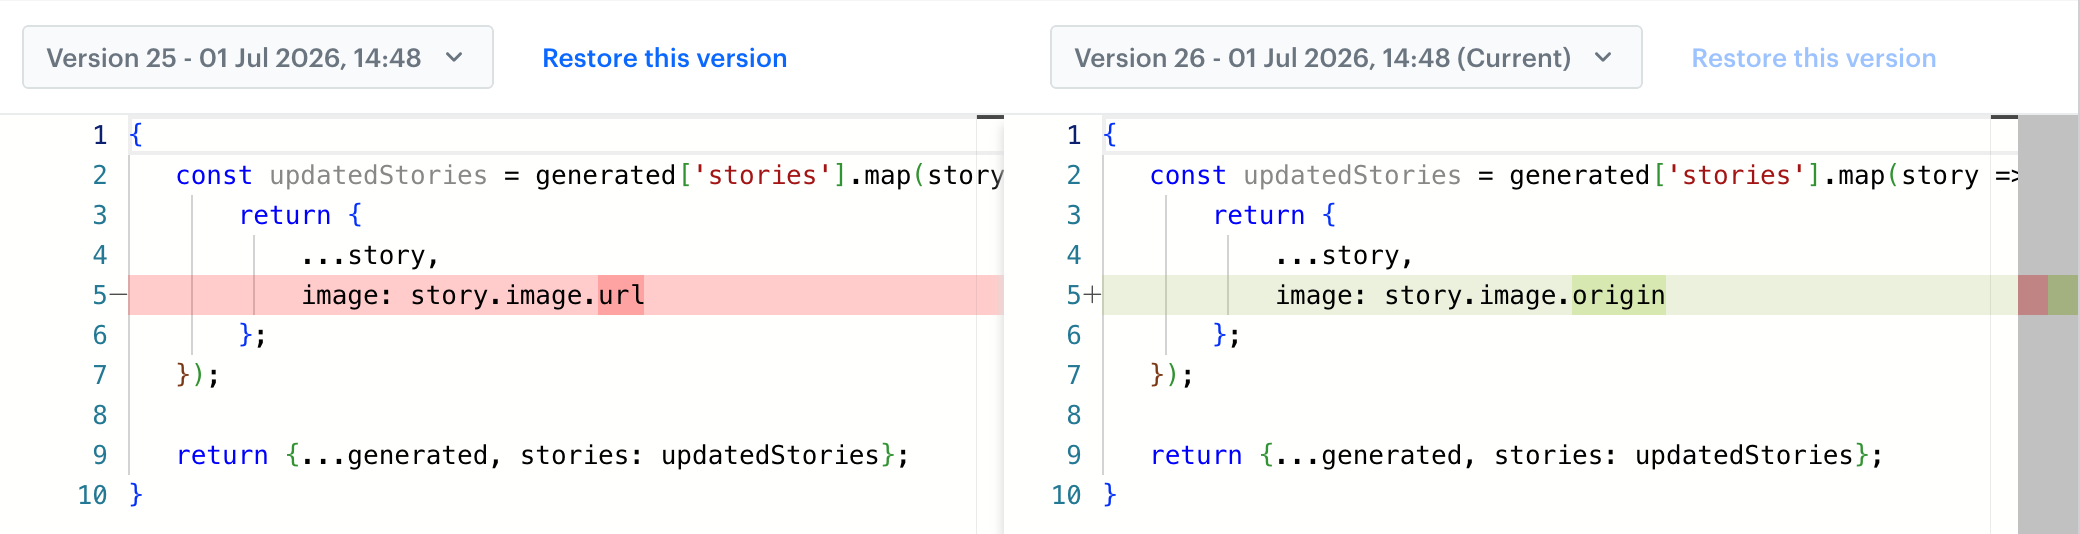
A view of the version comparison To restore a version:
- Open two versions for comparison.
- Above the version that you want to restore, click Restore this version.
Result: The restored version is saved as a new version and the editor closes.
Disabling response transformers
Disabling a transformer doesn't delete it.
- On the Response transformers tab, next to the active transformer, click the cross icon.
- In the pop-up that opens, confirm the operation.