Personalization lets you define alternative values for schema fields and serve them to selected audiences (for example, a Black Friday campaign or a holiday greeting), without duplicating the schema or overriding individual fields with separate, unrelated rules.
You build a personalization once, at the schema level, then attach it to one or more records created from that schema. This keeps campaign logic in a single place instead of scattering overrides across records.
After being defined for a field in the schema editor, the personalization can be attached to a record, and each record in a schema can have a different personalization for the same field. When previewing a record in the record editor or generating objects from the record, you can only see the results with the personalization that is currently attached.
IMPORTANT: This feature is in a public preview mode.
How personalization works
- Personalization is available for all schema types.
- A schema can have multiple personalizations. For example, you can create separate personalizations for a Black Friday campaign, a holiday campaign, and a Valentine's Day campaign, all based on the same schema.
- A record can have only one active personalization at a time. You attach a single personalization from the schema's list to a record. It's not possible to combine (stack) several personalizations on the same record.
- Personalization doesn't replace the field's base value in the record - the base value remains and is used as the fallback when no condition matches, or when the personalization is detached.
- Content generated from a record doesn't include any indication that the record, or the fields in it, are personalized.
- Personalizations can be edited after being attached to records. Be careful not to break existing integrations.
- For managed schemas, personalization edits require republishing. Editing a personalization's rules doesn't change how an already published record version resolves it - the record must be republished (creating a new record version) for the edit to take effect.
- When a personalization is deleted after being attached to records, the records continue to work without the personalization.
- If a segmentation used in a condition's Audience is deleted, the personalization continues to work, but that condition no longer matches any profile - no one is served its content until you add a different segmentation.
- If a field that has personalization configured is removed from the schema, the field - along with its conditions - disappears from the personalization. The rest of the personalization keeps working for the schema's remaining fields.
Supported field types
You can personalize fields of the following types:
This list will be expanded to support more field types in the future.
Evaluation order and fallback
Within a personalized field, you define one or more conditions, each pairing an audience with a value that should be returned to that audience.
- Conditions are evaluated top to bottom. The first condition whose audience matches the profile wins, and its value is returned.
- If you preview or generate content without a profile context, there's no profile to check against the audiences, so no condition can match and the fallback behavior applies. This also applies when generating content authenticated as a workspace or Synerise user without declaring a profile for context.
- If no condition matches, the Fallback behavior (Else) setting determines the outcome: the base field value defined in the record, no value at all, or a null value. See step 9 in Personalizing a field.
- If the base value in the record is also empty, the field returns the empty value for its data type.
Creating a personalization
Personalizations are created and edited from the schema they belong to.
TIP: You can also start creating a personalization directly from a record: click the Personalization dropdown, then click Add personalization. This opens the same New personalization dialog described in step 3 below. Once you save the personalization, it's automatically attached to the record you started from.
- Open the schema for which you want to create a personalization.
- Click the Personalizations tab.
- Click Add personalizations.
Result: The New personalization dialog opens.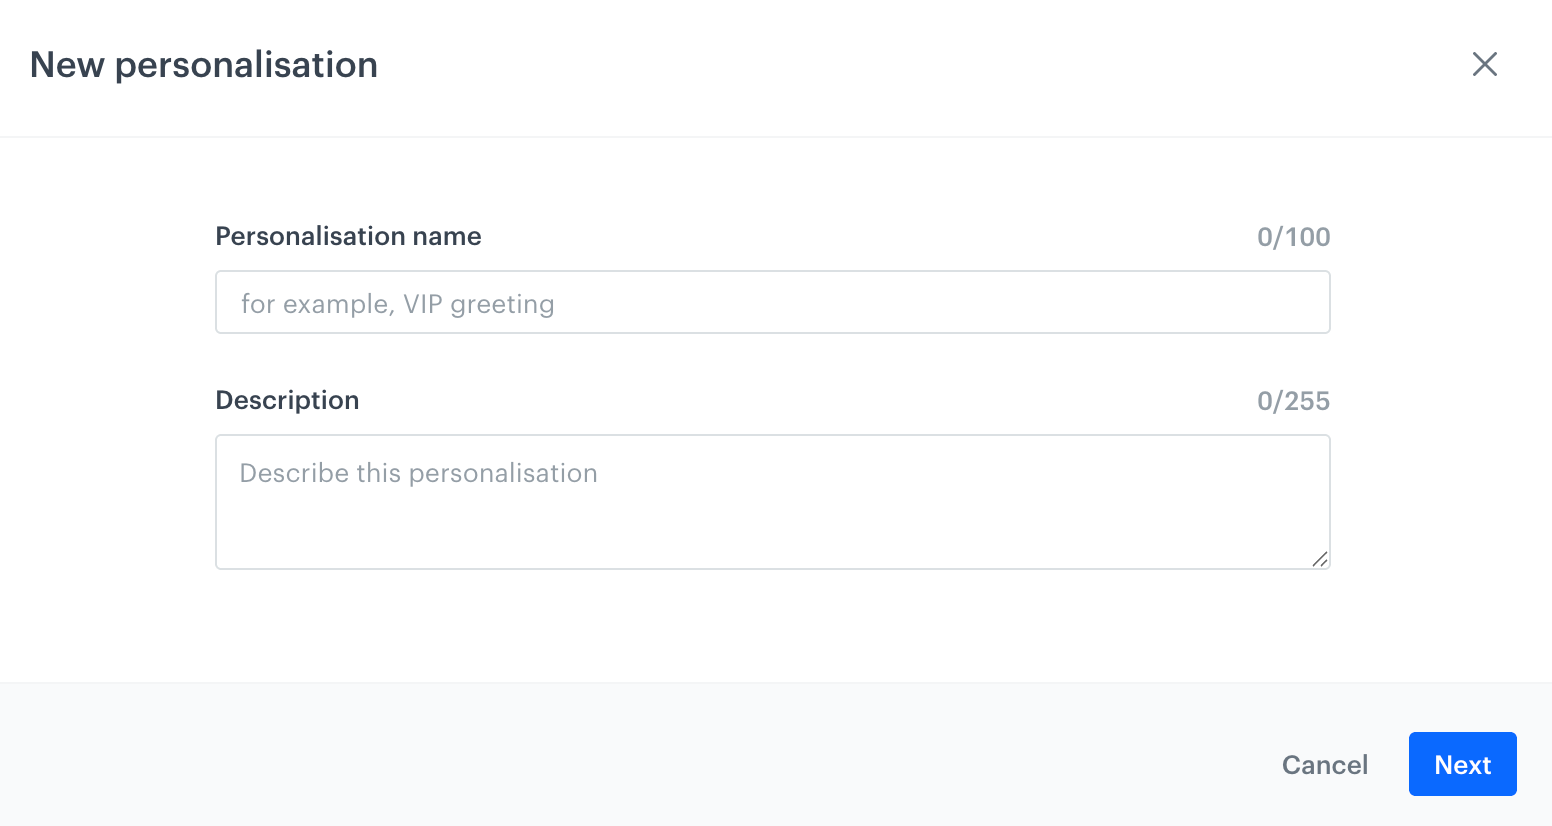
The Personalizations tab of a schema - In Personalization name, enter a name for the personalization, for example,
VIP greeting. - Optionally, in Description, describe the purpose of the personalization.
- Click Next.
Result: The personalization builder opens, listing all fields of the schema.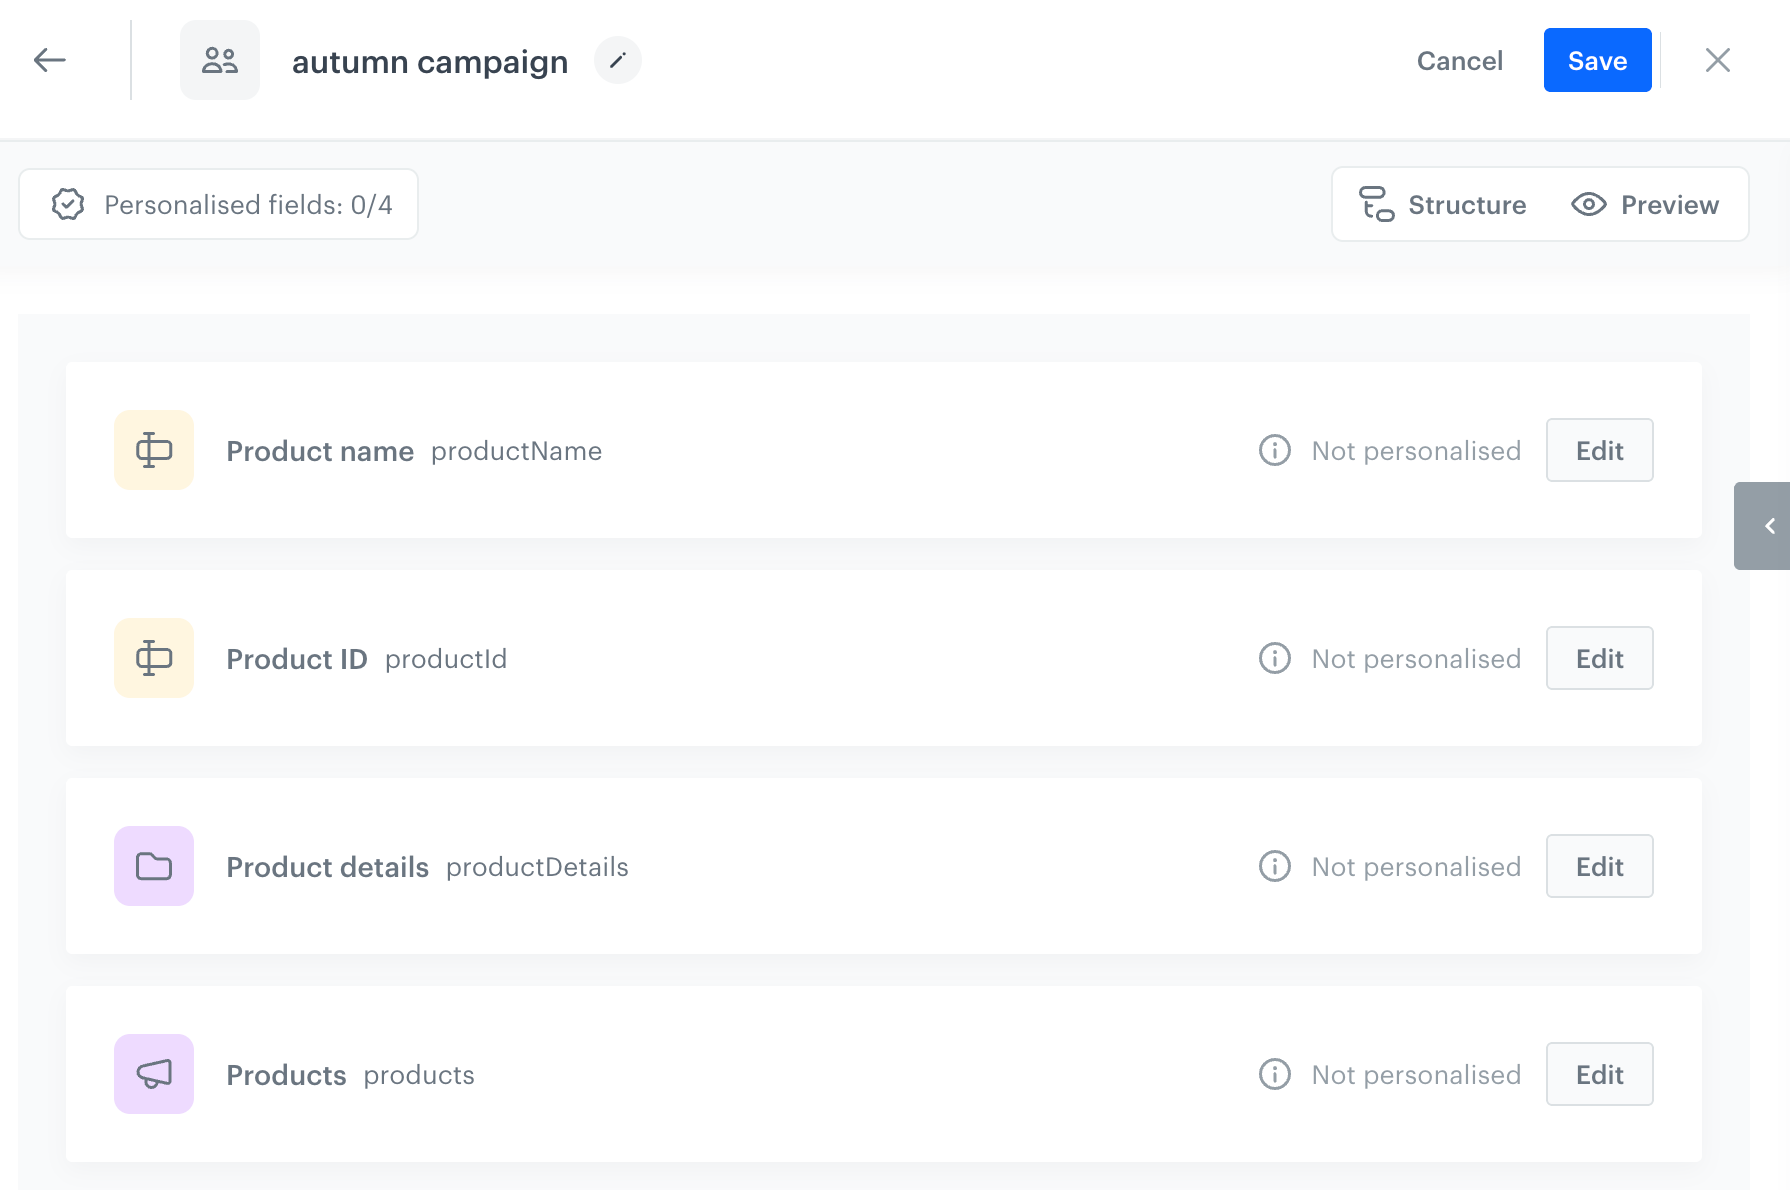
The New personalization dialog - Start personalizing fields.
Personalizing a field
- Next to the field you want to personalize, click Edit.
Result: The field editor opens, with the Personalize this field toggle turned off.
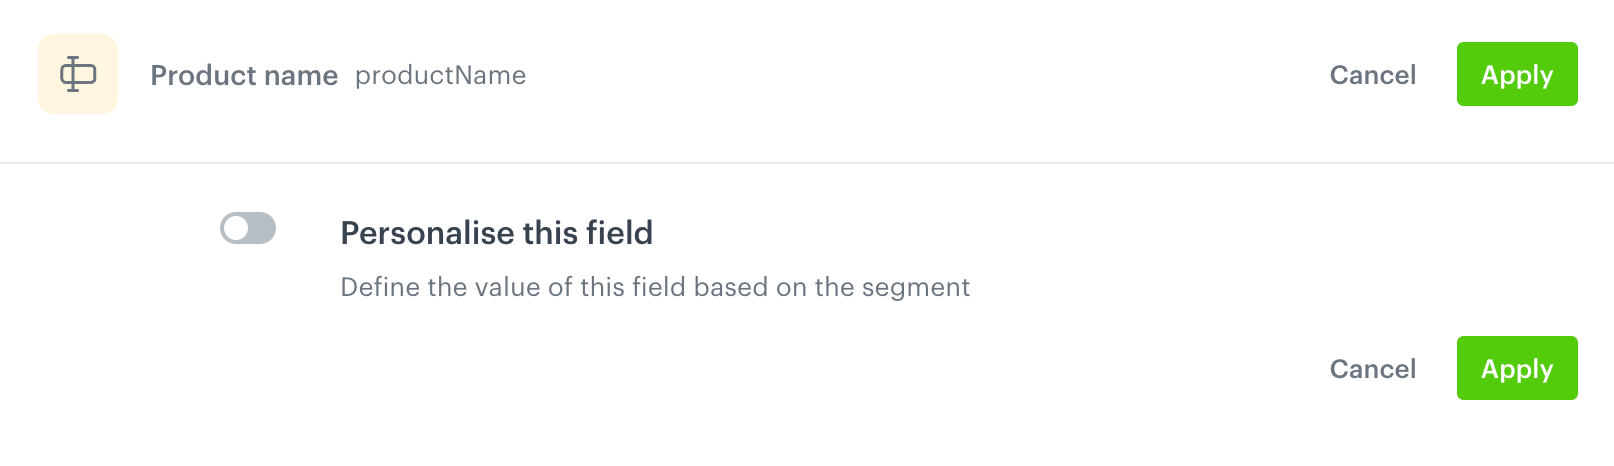
The field editor with the Personalize this field toggle turned off - Enable Personalize this field.
Result: A configuration form opens.
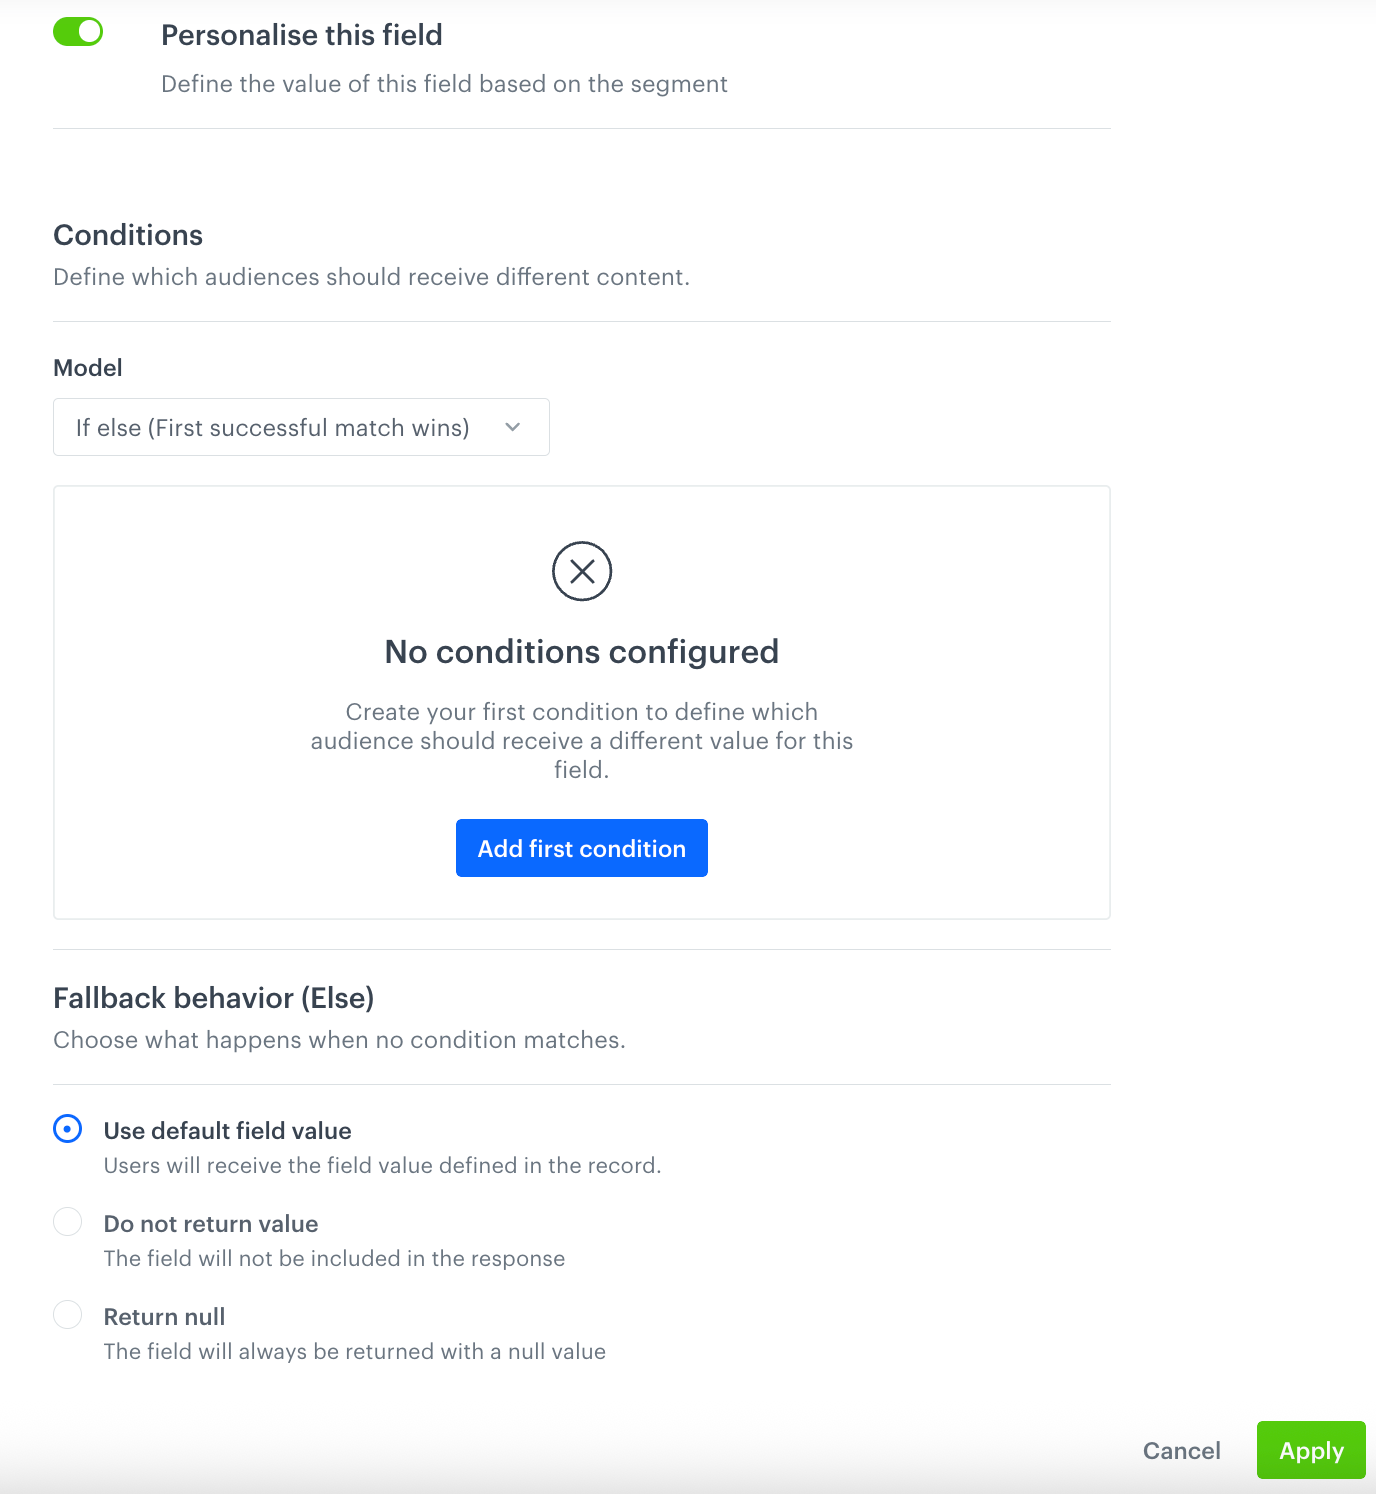
The field editor with no conditions configured yet - Click Add first condition (or Add condition if the field already has conditions).
Result: A new If condition block is added.
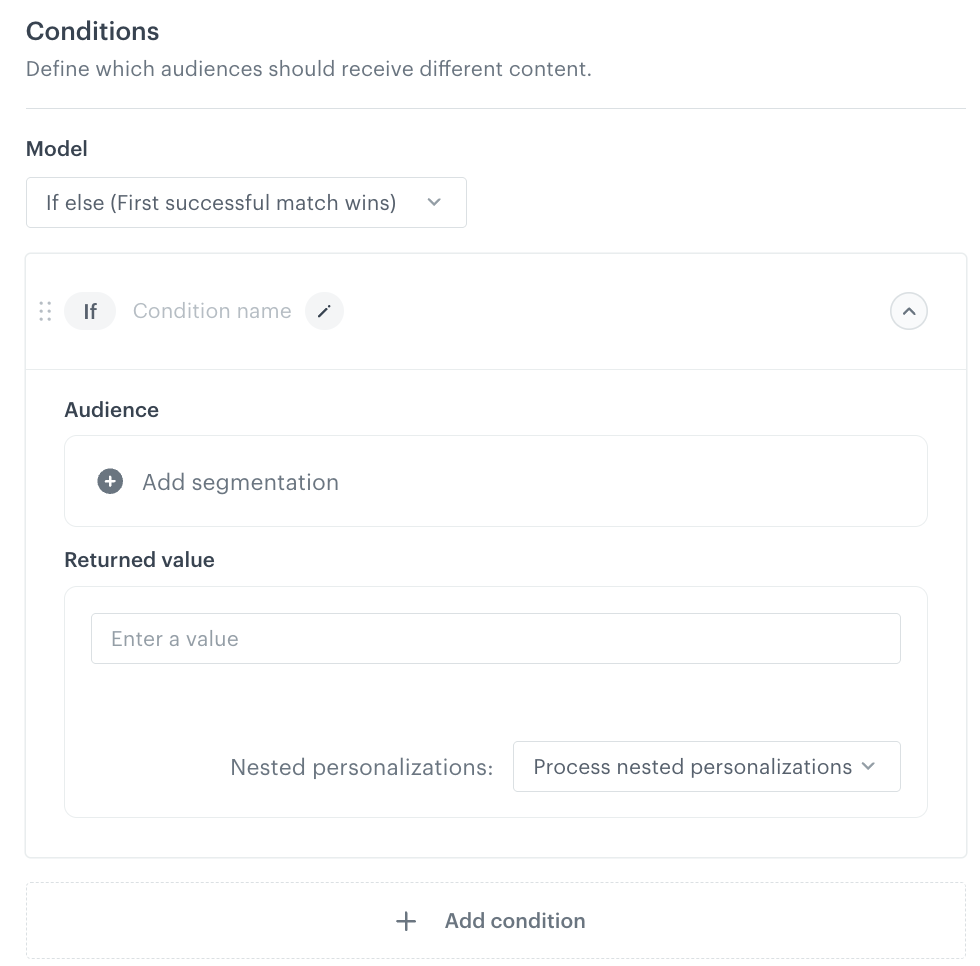
An expanded condition block - Optionally, click the pencil icon next to Condition name and name the condition.
- In Audience, click Add segmentation and select the segmentations that should receive this variant.
TIP: If you use the Create new segmentation button, a new tab opens with the segmentation editor. After you save the segmentation and return to the personalization form, click Add segmentation again to refresh the list of segmentations.
- In Returned value, enter the value that this audience should receive for the field.
- If the returned value references another record (for example, through a relation field), personalizations defined on that referenced record are always resolved automatically - there's no option to skip them.
- Repeat steps 2-6 to add further conditions.
To change the evaluation order, drag a condition block by its handle (::) - conditions are evaluated top to bottom, and the first matching one wins. See Evaluation order and fallback. In Fallback behavior (Else), choose what happens when no condition matches:
- Use default field value - the profile receives the field value defined in the record.
- Do not return value - the field isn't included in the response.
- Return null - the field is returned with a null value.
- Click Apply.
- Repeat this procedure for every field you want to personalize.
The Personalized fields counter in the upper-left corner of the builder tracks your progress.
Reviewing the field structure
The Structure tab (selected by default when you open the personalization builder) shows the schema's fields on the left, and a Fields structure panel on the right that summarizes the personalization conditions defined for every field, without opening each field's editor.
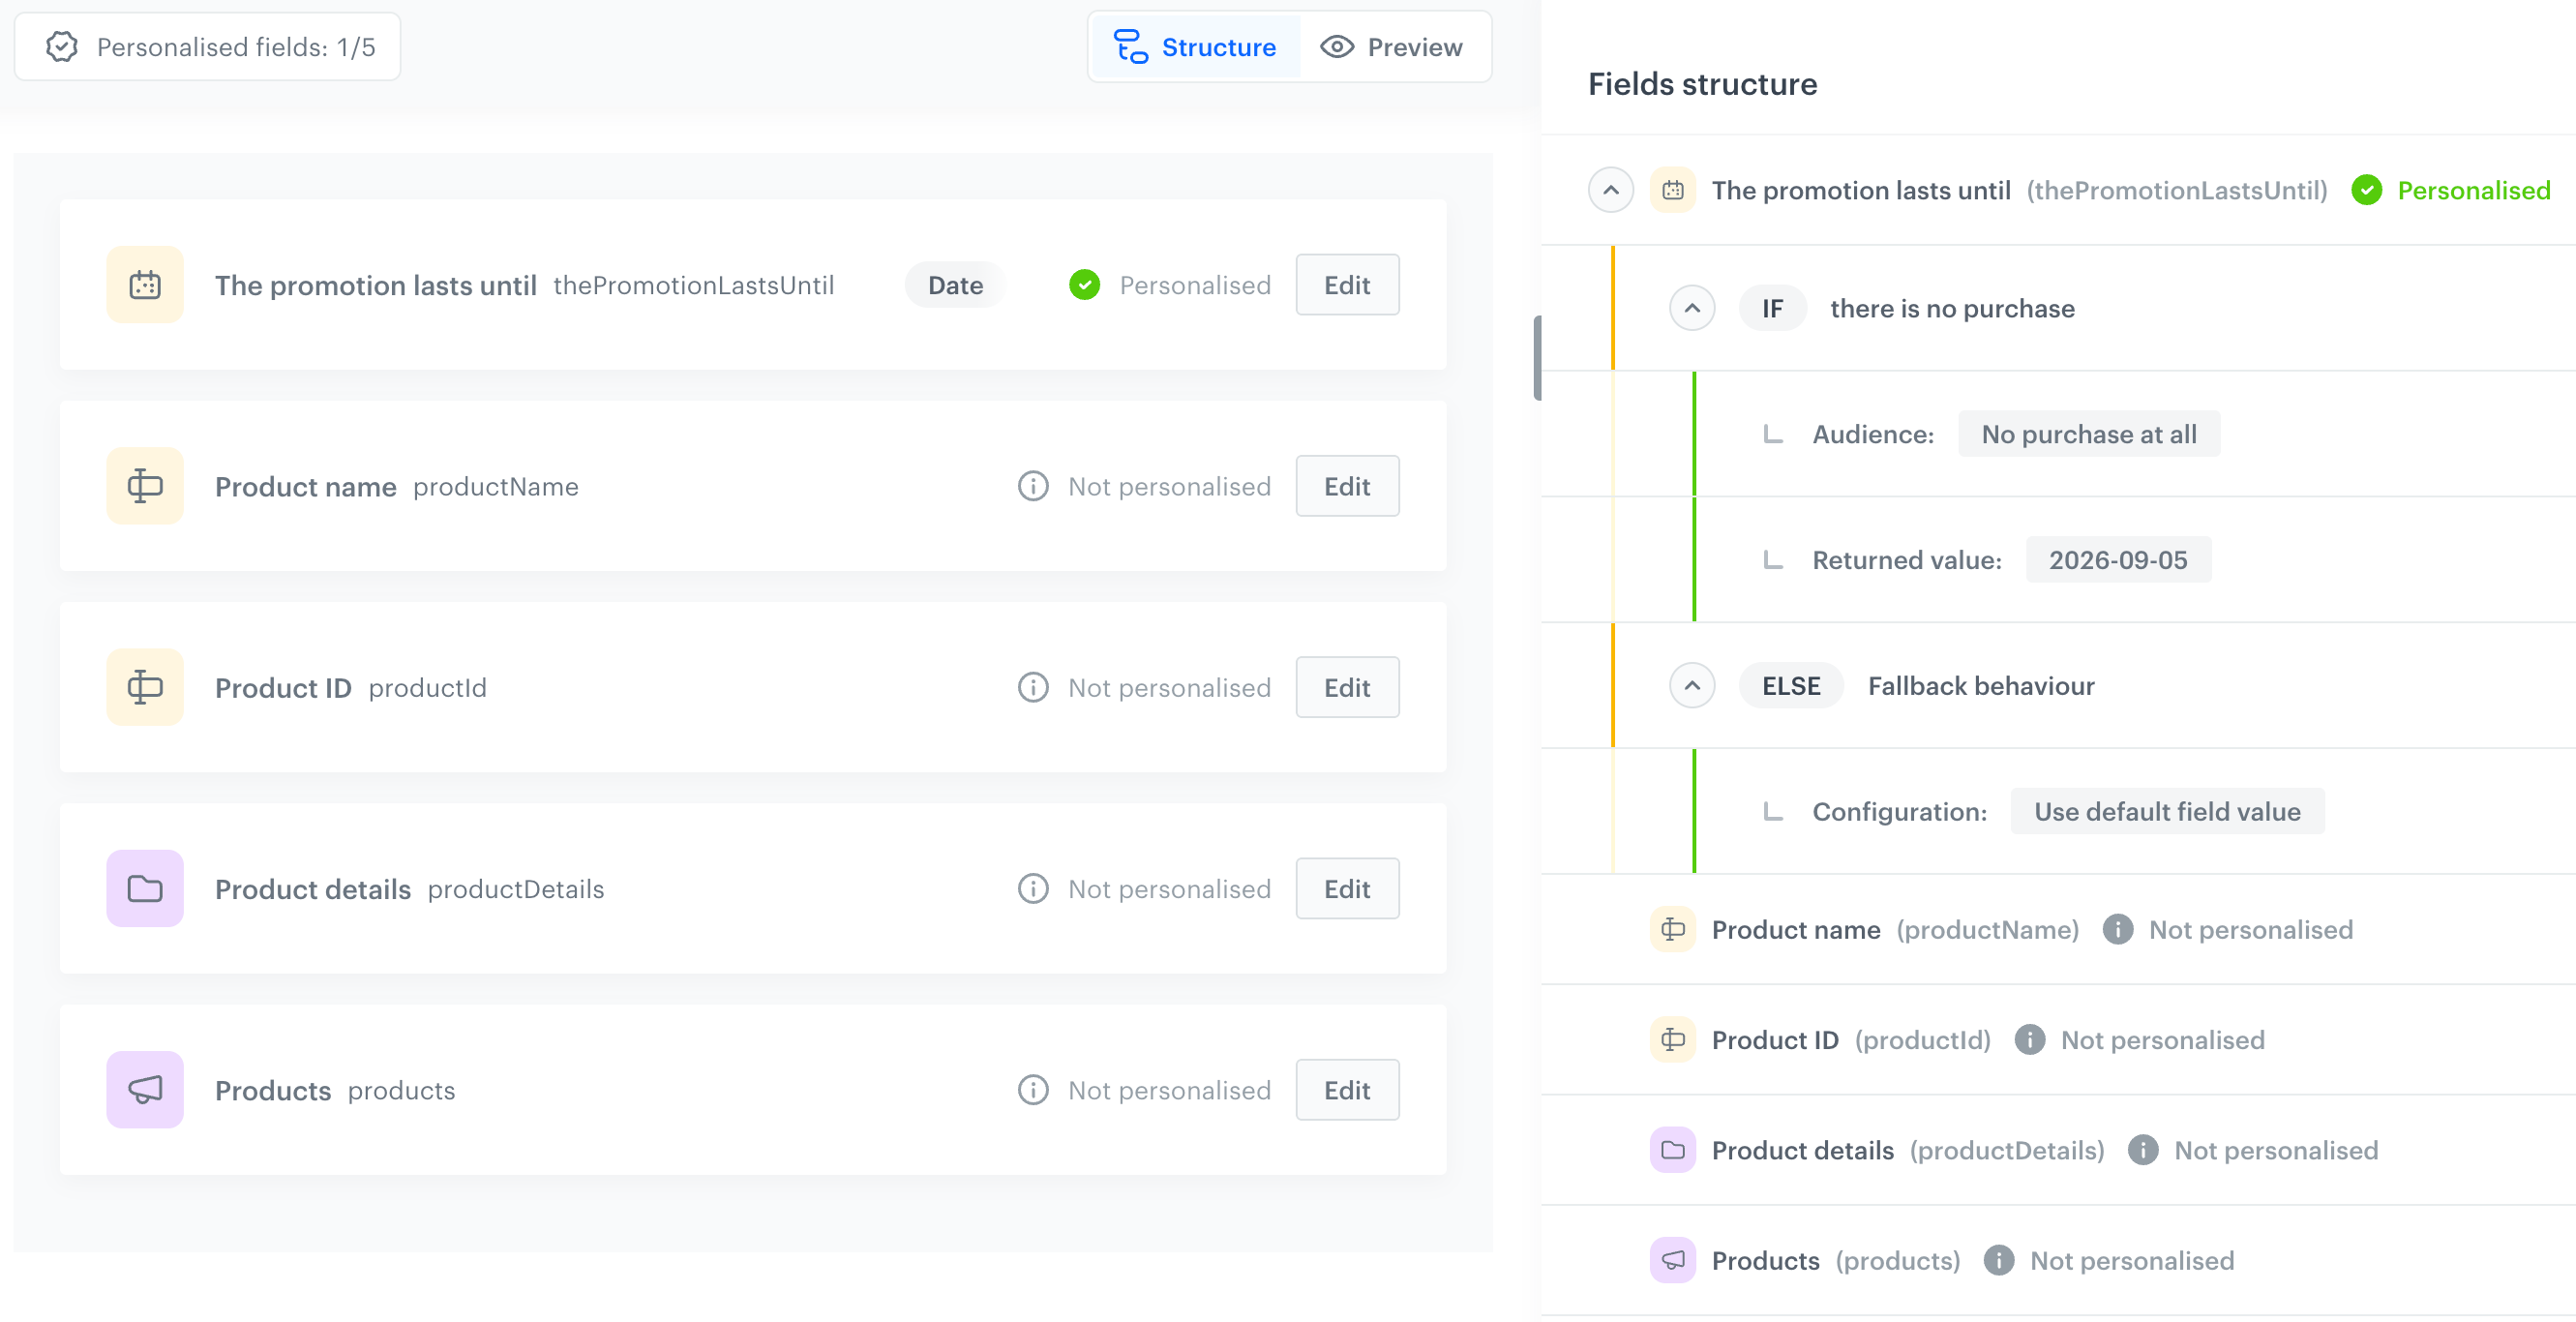
Use this view to review the conditions and fallback behavior across all fields before switching to Preview or saving.
Previewing a personalization
Before saving, you can preview how the personalization resolves for a specific record without leaving the builder.
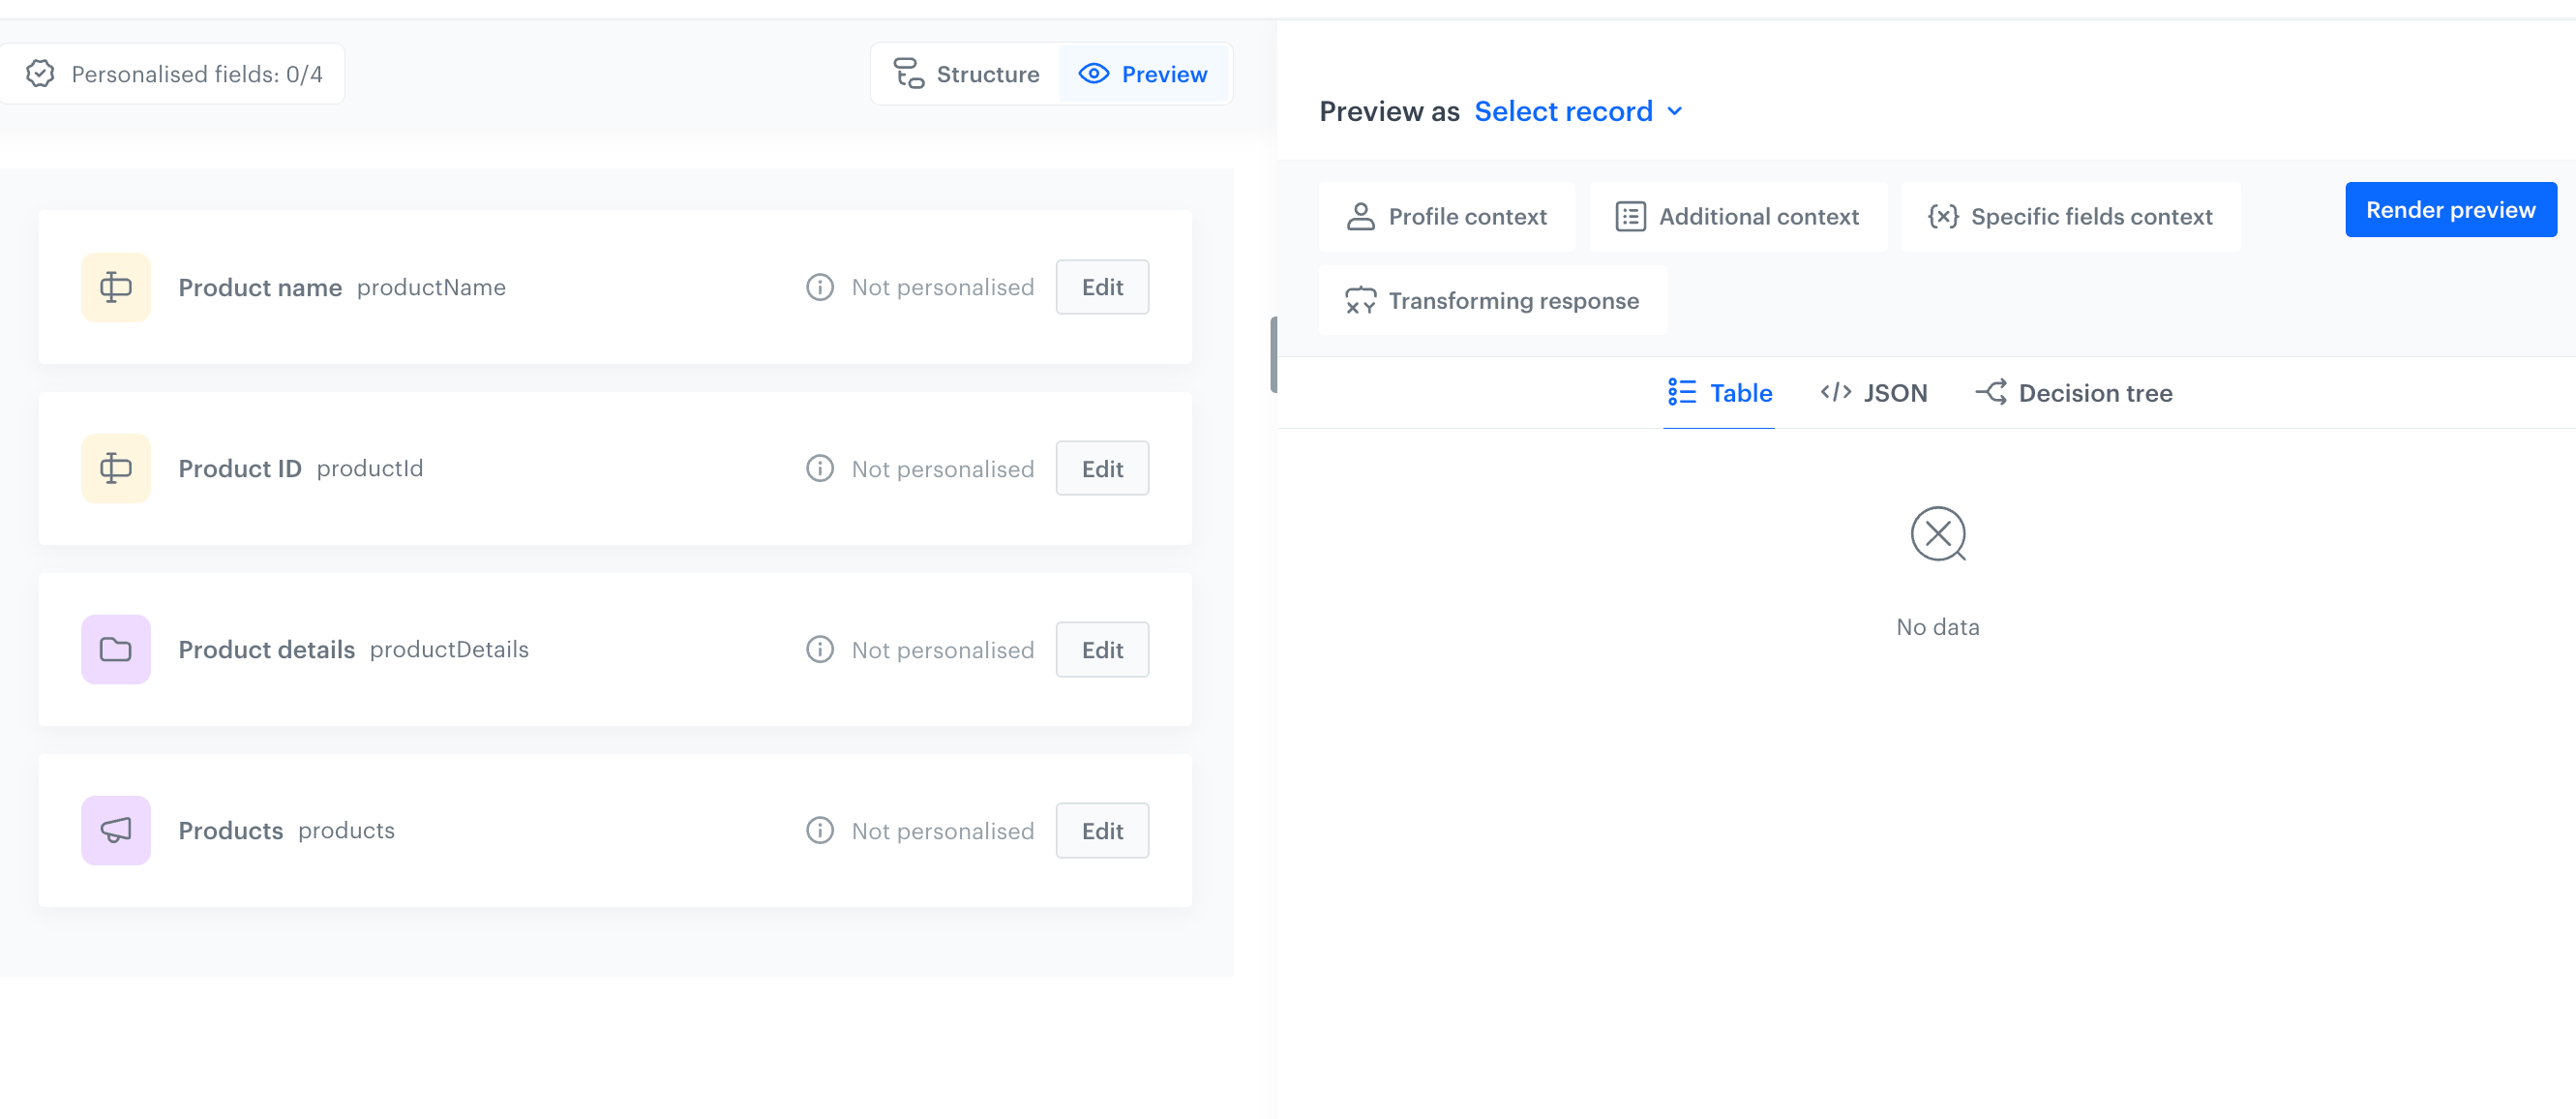
- At the top of the builder, switch from Structure to Preview.
- Next to Preview as, click Select record and choose the record to preview.
- Provide the context data that the personalized fields depend on:
- On the Profile context tab, select the profile whose segment membership will be used to evaluate audience conditions.
- On the Additional context tab, enter data for
{{ context.* }}inserts used in the record. - On the Specific fields context tab, provide additional data for fields that need it. This is only used for recommendation and relation fields.
- On the Transforming response tab, you can preview the result of a response transformer, if the record uses one.
- Click Render preview.
- Review the result in one of the following views:
- Table - the resolved value of each personalized field.
- JSON - the raw resolved output.
- Decision tree - which condition matched (or that the fallback was used) for each personalized field. Use this to confirm the evaluation order behaves as expected.
The tree is collapsed by default. If a field references another record (for example, through a relation field), expand it to see how personalizations defined on that nested record were resolved.
Saving the personalization
In the upper-right corner, click Save.
Result: The personalization is saved and ready to use. You return to the personalization list and don't need to save the schema settings in this view.
Attaching a personalization to a record
A personalization only takes effect once it's attached. How you attach it depends on the schema type:
- Managed and Simple schemas:
- Open the record to which you want to attach a personalization.
- From the Personalization dropdown, select the personalization created as described in Creating a personalization.
Result: The personalization is attached to the record. Fields the personalization overrides are marked with a visual indicator.
- Singleton schema - A singleton schema doesn't store records, so personalizations are attached at the schema level instead:
- Open the schema and click the Personalizations tab.
- Next to Active personalization, click Select personalization and choose the personalization created as described in Creating a personalization.
Result: The personalization is attached and takes effect the next time content is generated from the schema.
Saving the personalization doesn't attach it on its own - this step is still required right after creating it.
Since only one personalization can be active at a time, selecting a different personalization replaces the one that's currently attached.
The base field values remain editable and continue to serve as the fallback for profiles who don't match any condition in the active personalization - see Evaluation order and fallback.
For managed schemas, personalization is attached per record version - each version of a record can have a different personalization (or none) attached.
Detaching a personalization
How you detach a personalization depends on the schema type:
- Managed schema - Unpublish the record, then publish it again without selecting a personalization from the Personalization dropdown.
- Simple schema - Open the record and remove the personalization from the record's settings.
- Singleton schema - Open the schema, click the Personalizations tab, and clear the Active personalization selection.
Detaching a personalization doesn't delete it - it remains available in the schema's Personalizations tab and can be attached again, to this or another record.
Examples
Each example describes what is configured in the record and in the personalization, and then shows the generated content for a profile that matches the condition and for a profile that doesn't.
String
Returned value in each condition is plain text, entered the same way as the field's base value. The generated content only differs in which string is returned - it has the same shape as the field's own object generation example.
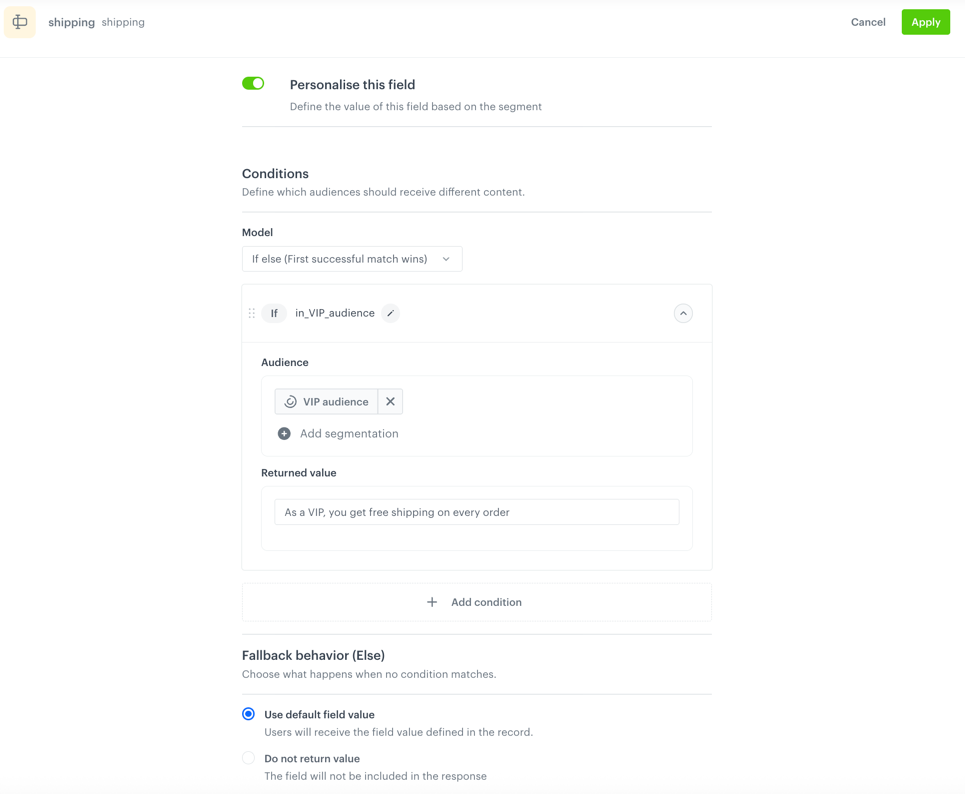
In this example, a record has a shipping field that displays a shipping message. Most profiles see a standard message, while profiles in the "VIP audience" segmentation see a personalized one.
Configuration
- In the record, the base value of the
shippingfield isFree shipping on orders over $50 - In the personalization, the
shippingfield has one condition, namedin_VIP_audience:- Audience: the "VIP audience" segmentation
- Returned value:
As a VIP, you get free shipping on every order
- Fallback behavior (Else) is set to Use default field value, so profiles outside the segmentation receive the base value from the record.
Result
When you preview the record and select a profile from the "VIP audience" segmentation on the Profile context tab, the in_VIP_audience condition matches, so the returned value from the condition is used.
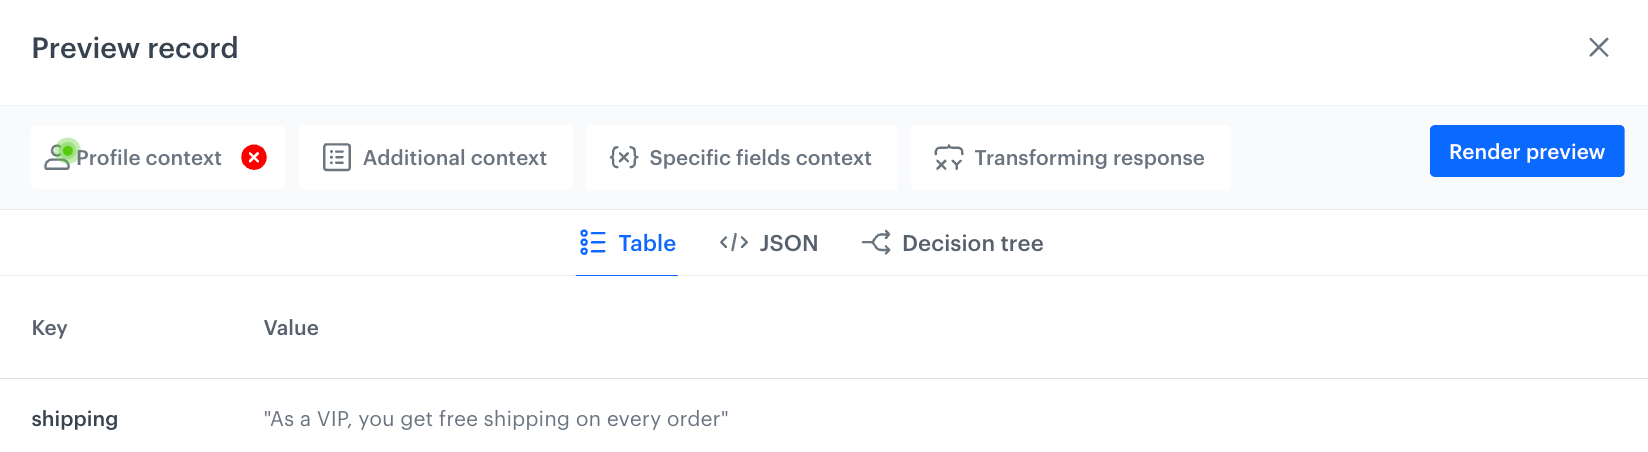
Generated content of the field:
"As a VIP, you get free shipping on every order"When the profile doesn't belong to the "VIP audience" segmentation, or when no profile is selected on the Profile context tab, no condition matches. The fallback behavior applies, so the base value from the record is used.
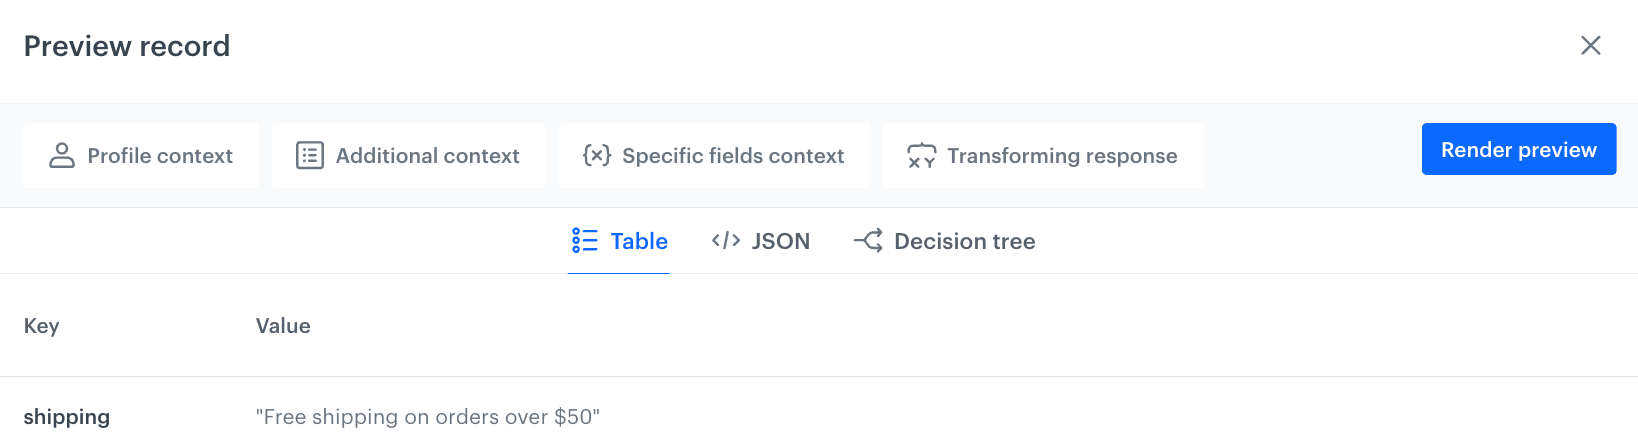
Generated content of the field:
"Free shipping on orders over $50"One to one
Returned value in each condition shows the field's target schema (fixed, same as configured for the field) and a Record picker, where you select which record from that schema is returned to the matching audience.
The generated content is the processed content of the record you selected for the matching condition - in the same shape as the field's own object generation example.
In this example, a Message about promotions schema has a message field that displays a promotion stored in a Bank of promotions schema. Most profiles see the autumn sale promotion, while profiles in the "VIP audience" segmentation see a VIP promotion.
Configuration
- The Bank of promotions schema has two string fields:
bannerTitleanddiscountPercent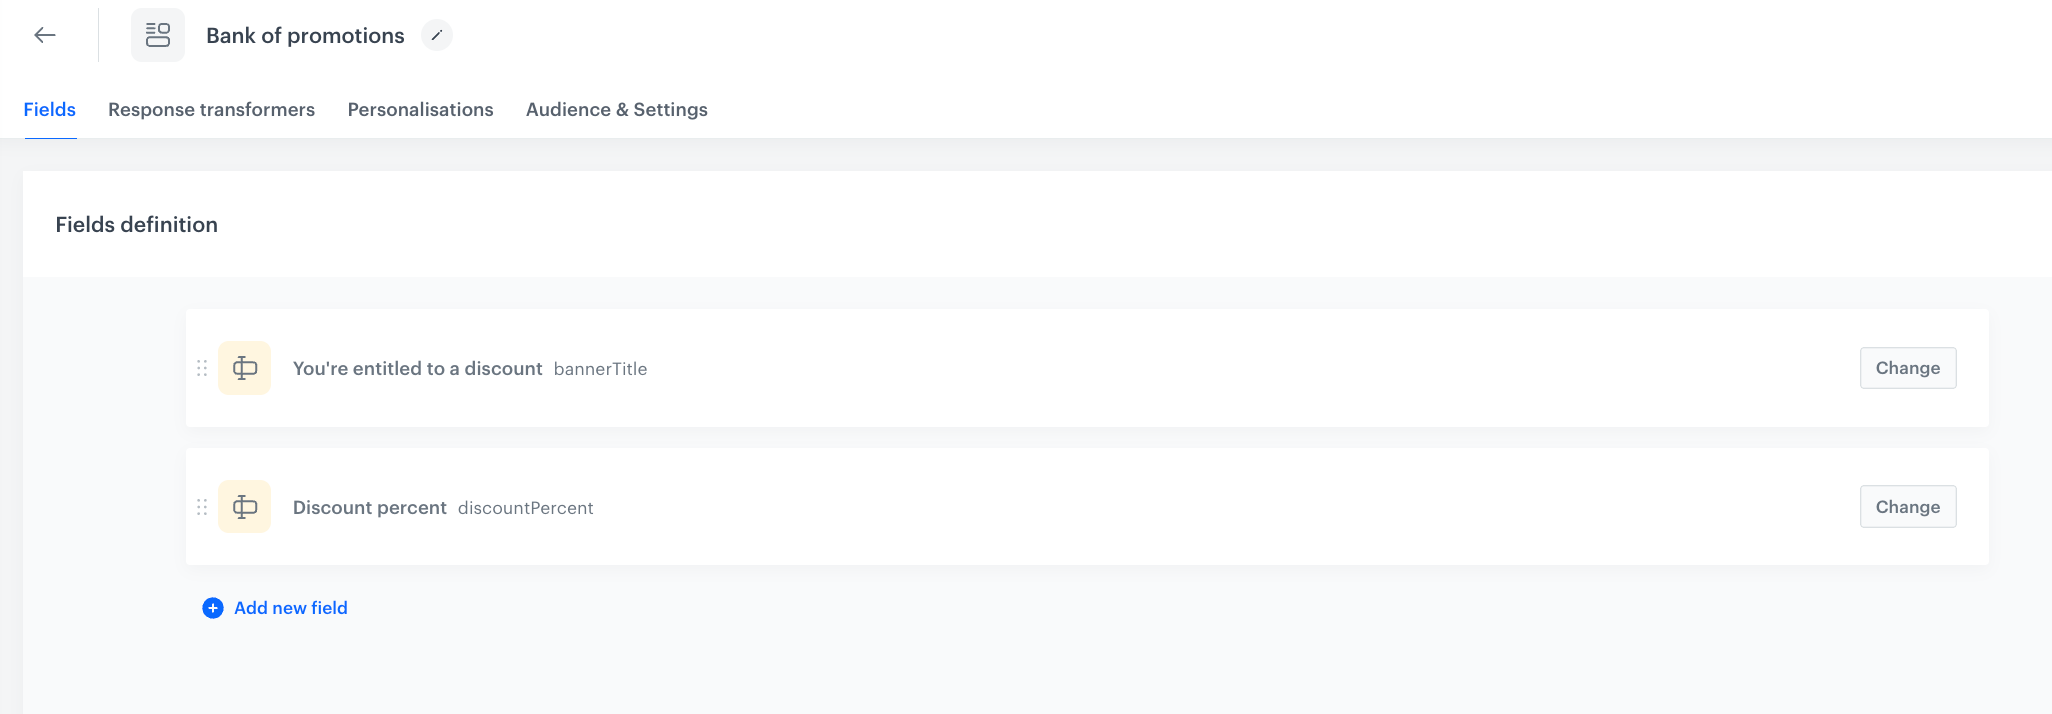
Fields of the Bank of promotions schema - The Bank of promotions schema has two records:
- Autumn sale - up to 10% off, with
discountPercentset to10 - VIP exclusive - 20% off, just for you, with
discountPercentset to20
- Autumn sale - up to 10% off, with
- In the Message about promotions schema, the
messagefield is a one-to-one relation to the Bank of promotions schema. Its default value is the Autumn sale - up to 10% off record. This is the base value of the field.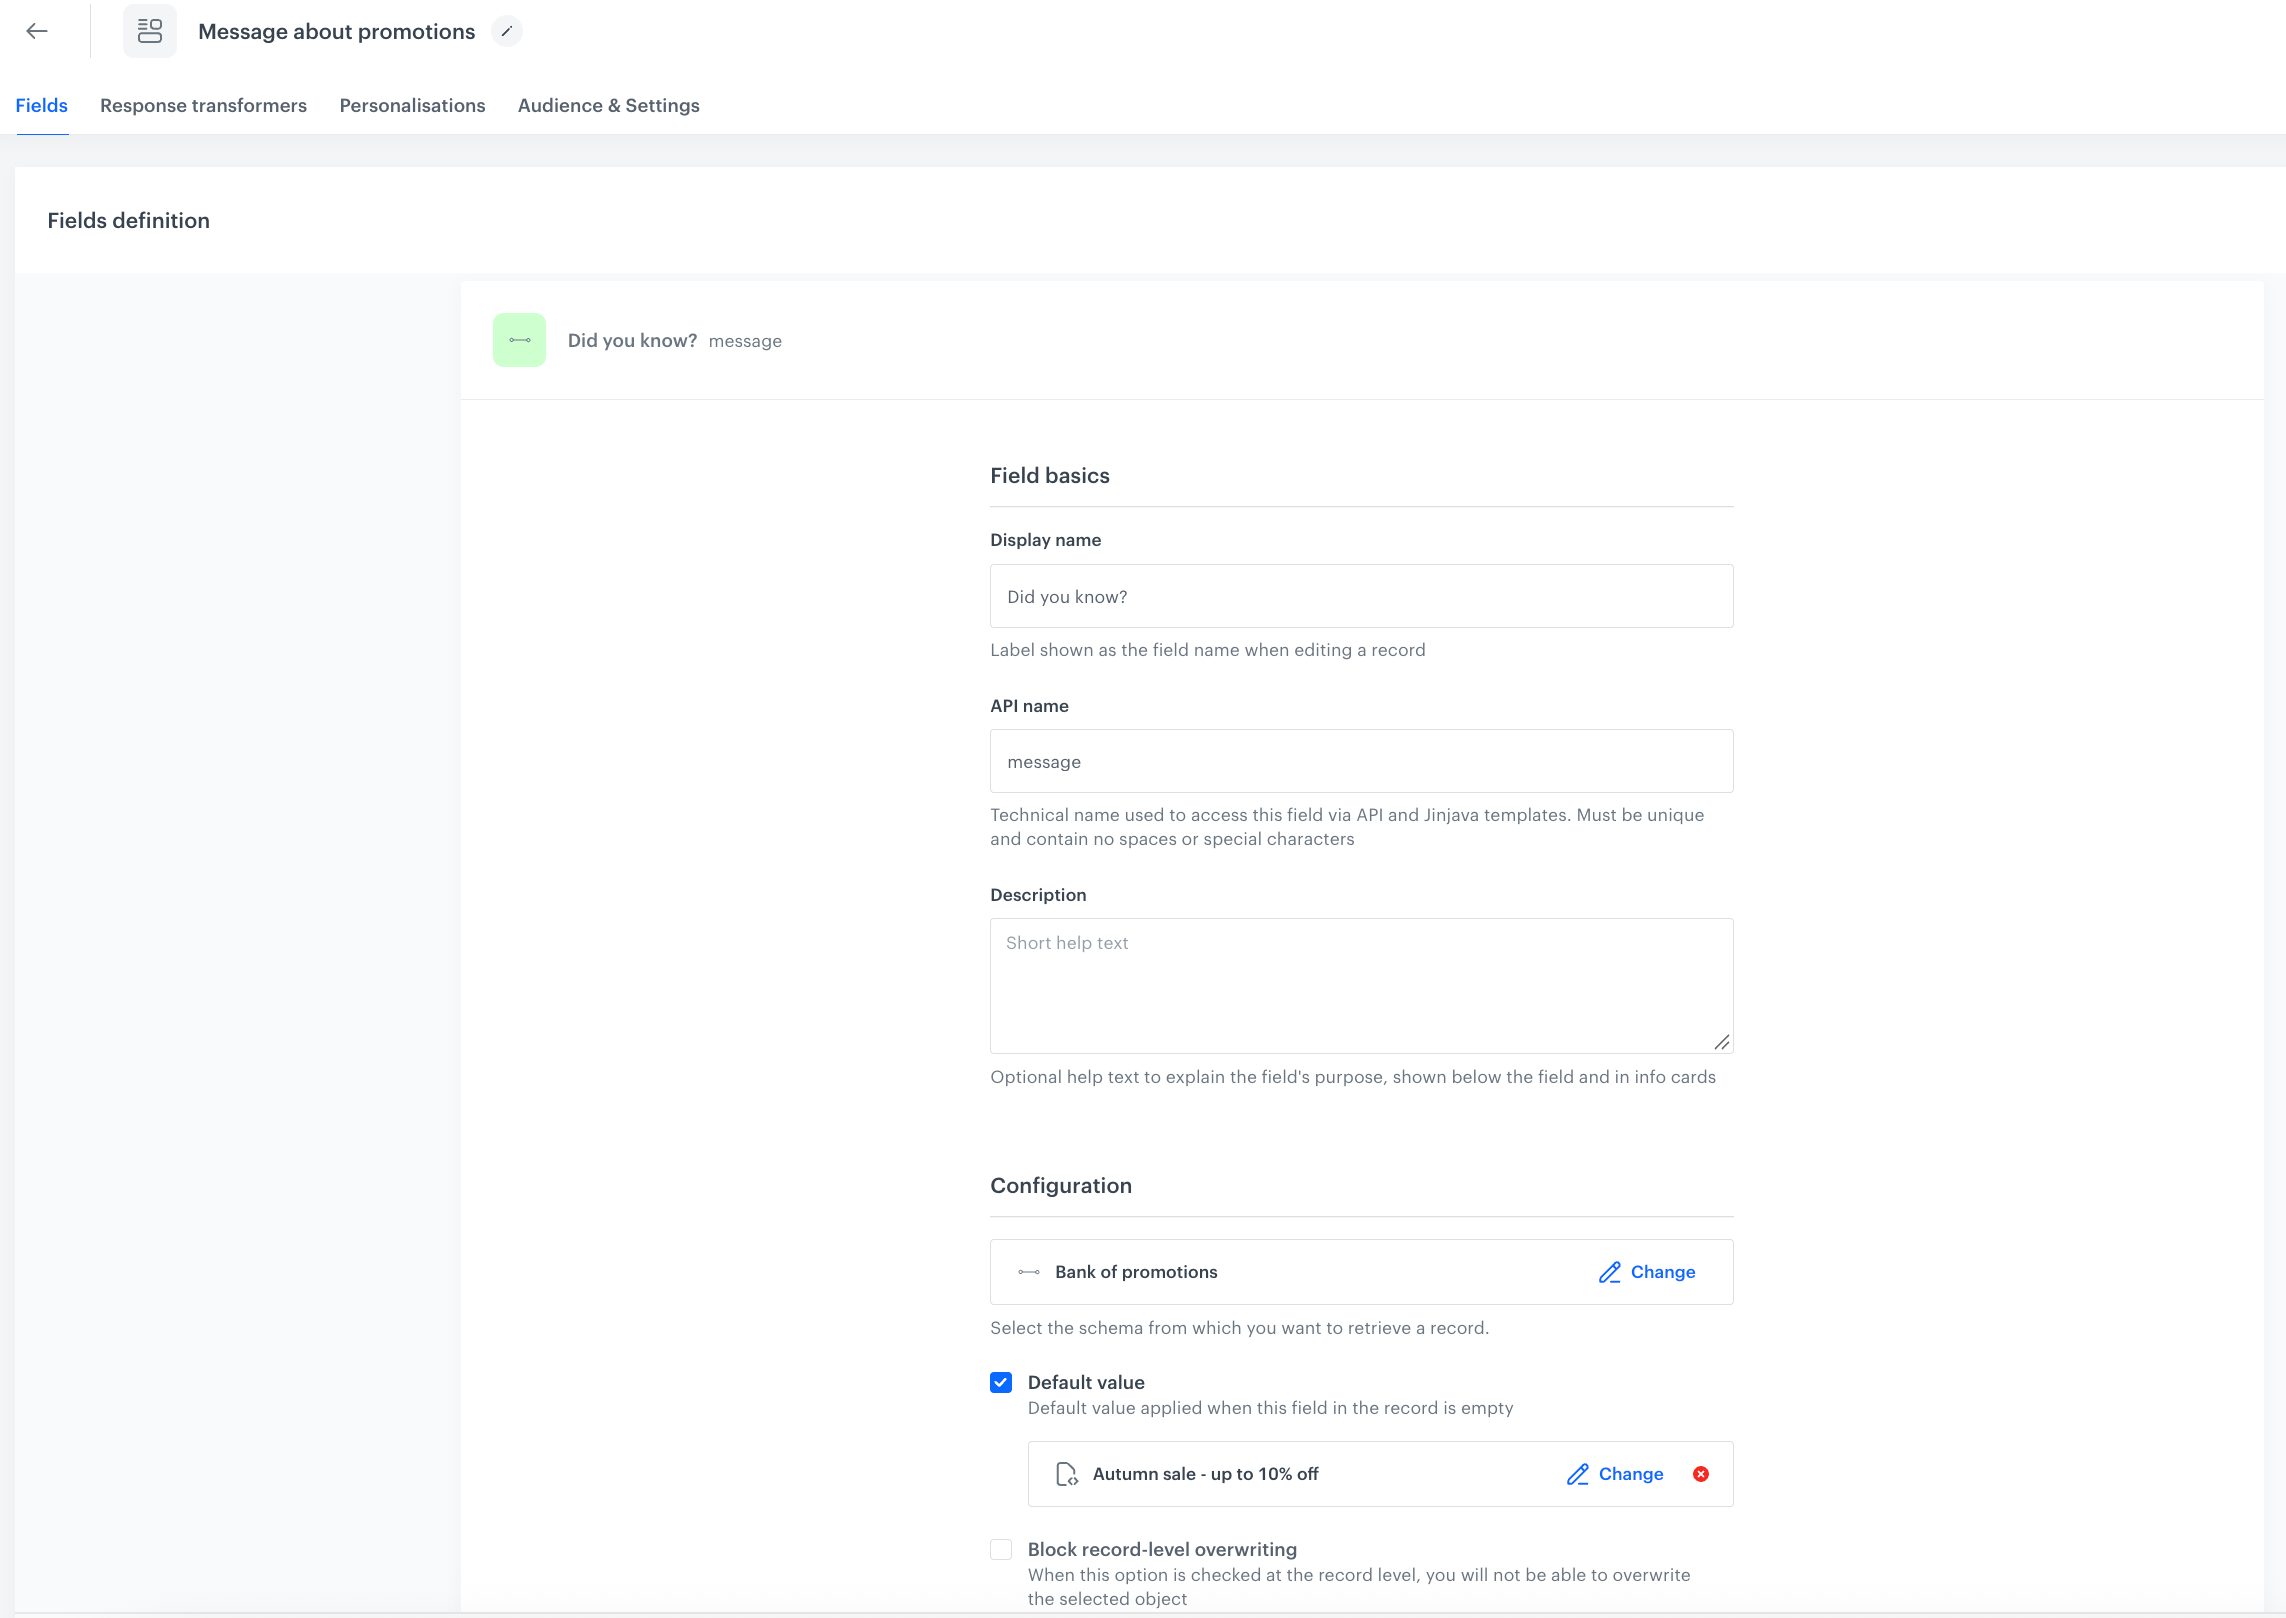
Configuration of the message field - In the personalization of the Message about promotions schema, the
messagefield has one condition:- Audience: the "VIP audience" segmentation
- Returned value: the Schema is fixed to Bank of promotions, and the VIP exclusive - 20% off, just for you record is selected in Record.
- Fallback behavior (Else) is set to Use default field value, so profiles outside the segmentation receive the base value.
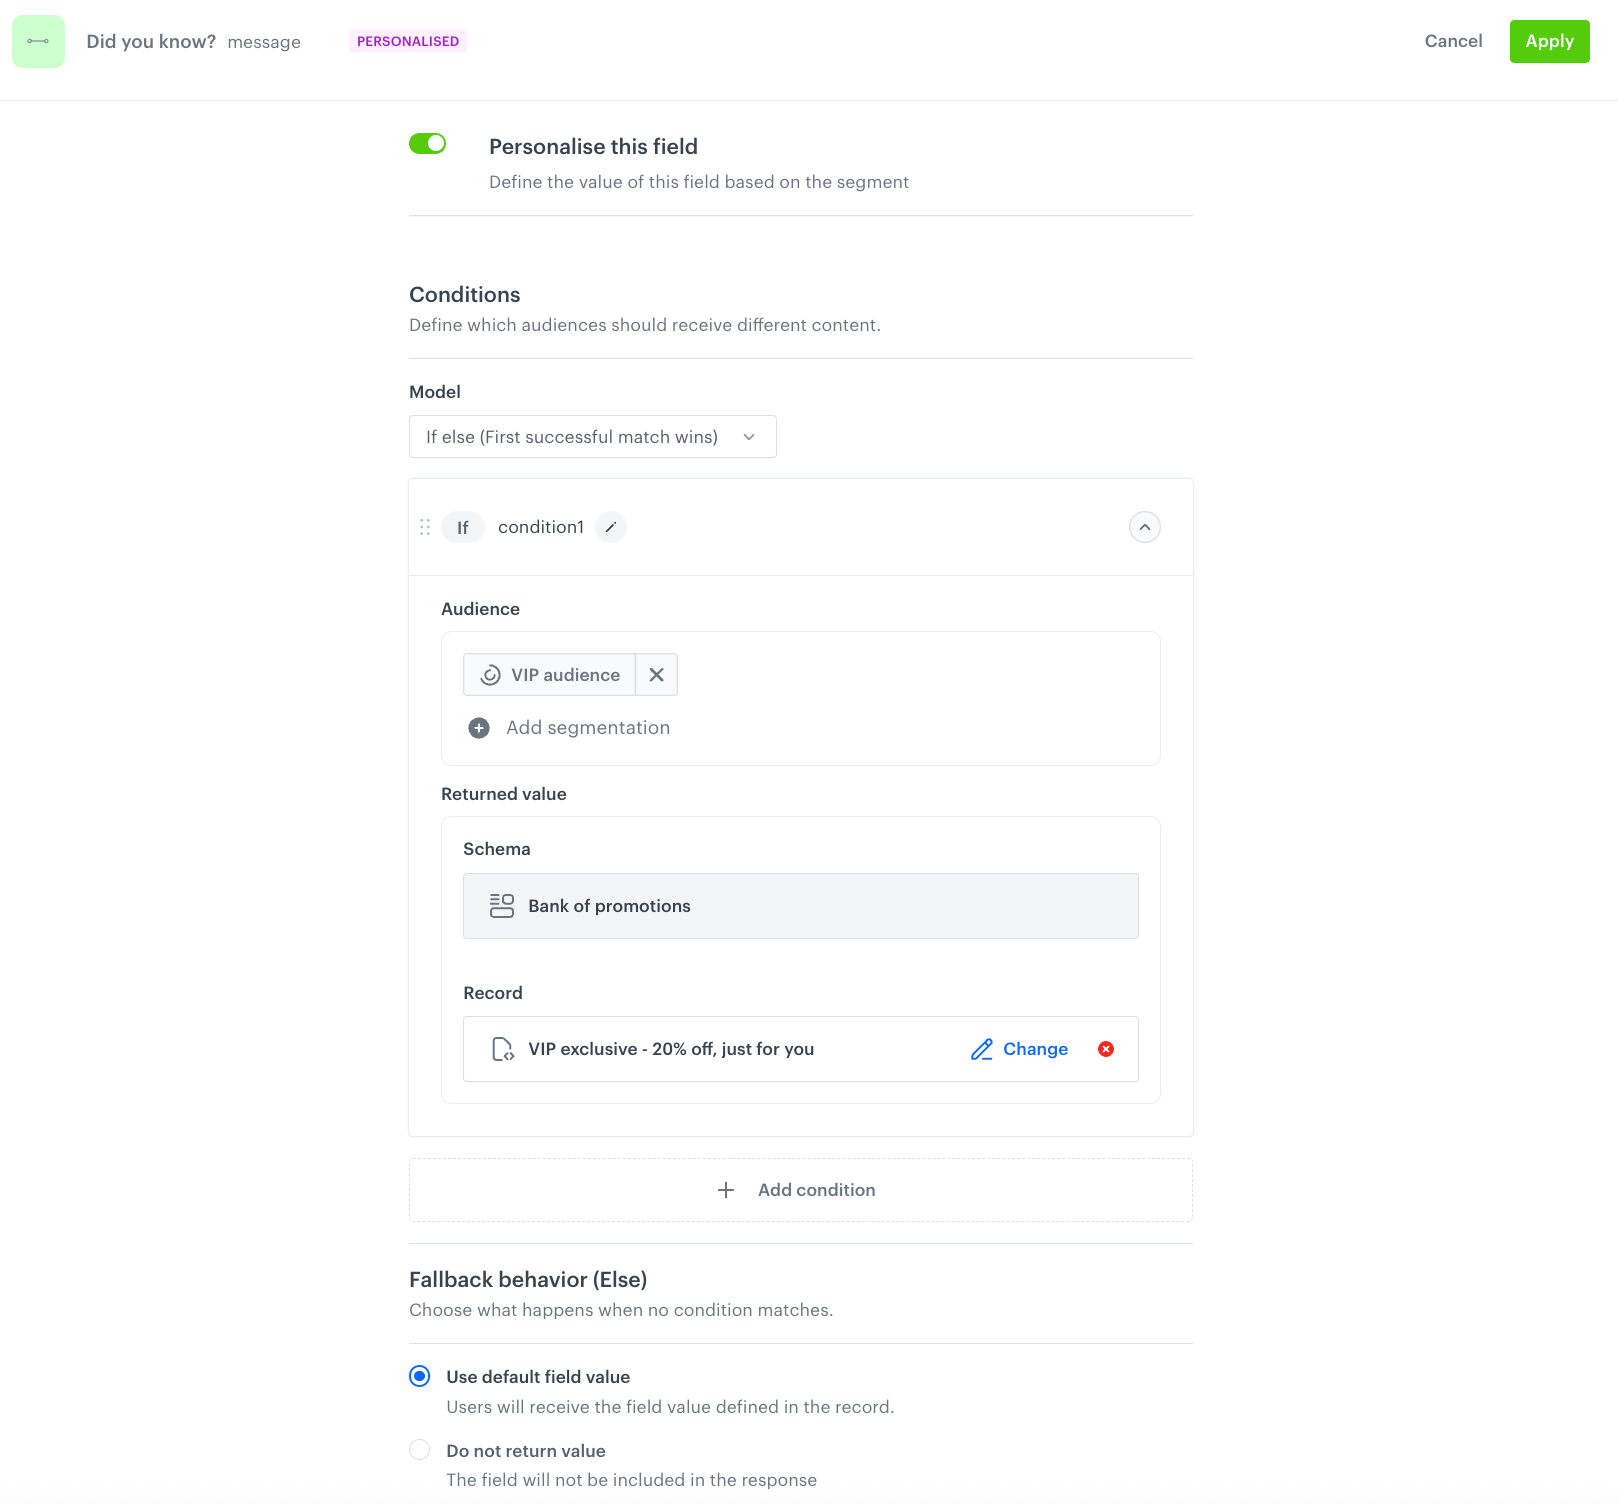
Personalization of the message field
Result
When you preview the content with a profile from the "VIP audience" segmentation selected on the Profile context tab, the condition matches, so the content of the VIP exclusive - 20% off, just for you record is returned.
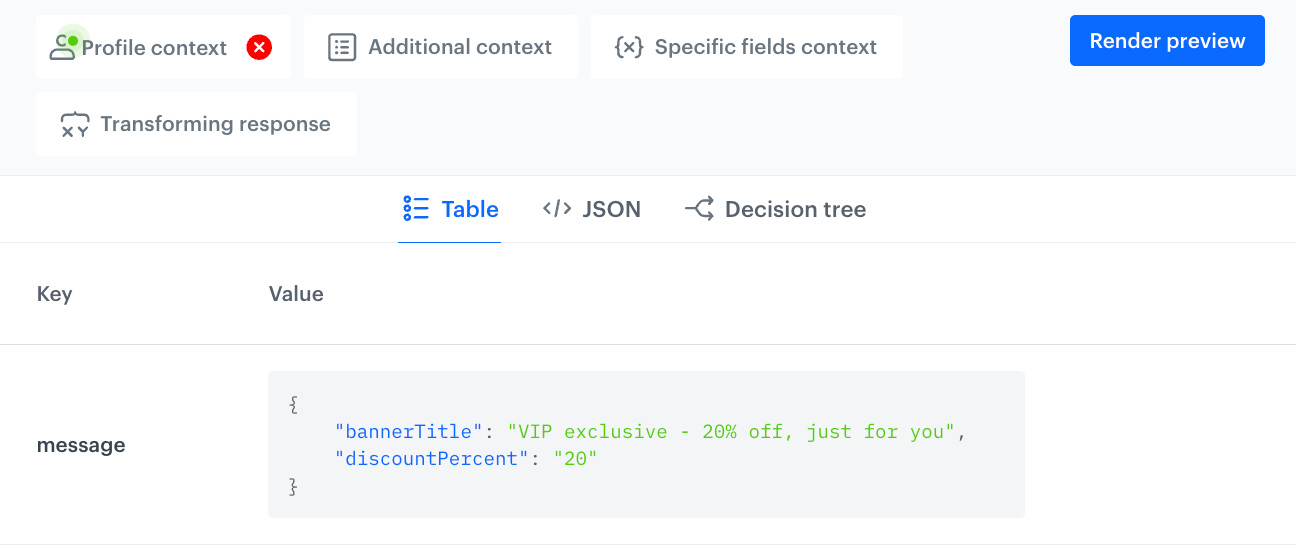
Generated content of the field:
{
    "bannerTitle": "VIP exclusive - 20% off, just for you",
    "discountPercent": "20"
}
When the selected profile doesn't belong to the "VIP audience" segmentation, or no profile is selected on the Profile context tab, no condition matches. The fallback behavior applies, so the content of the Autumn sale - up to 10% off record (the base value) is returned.
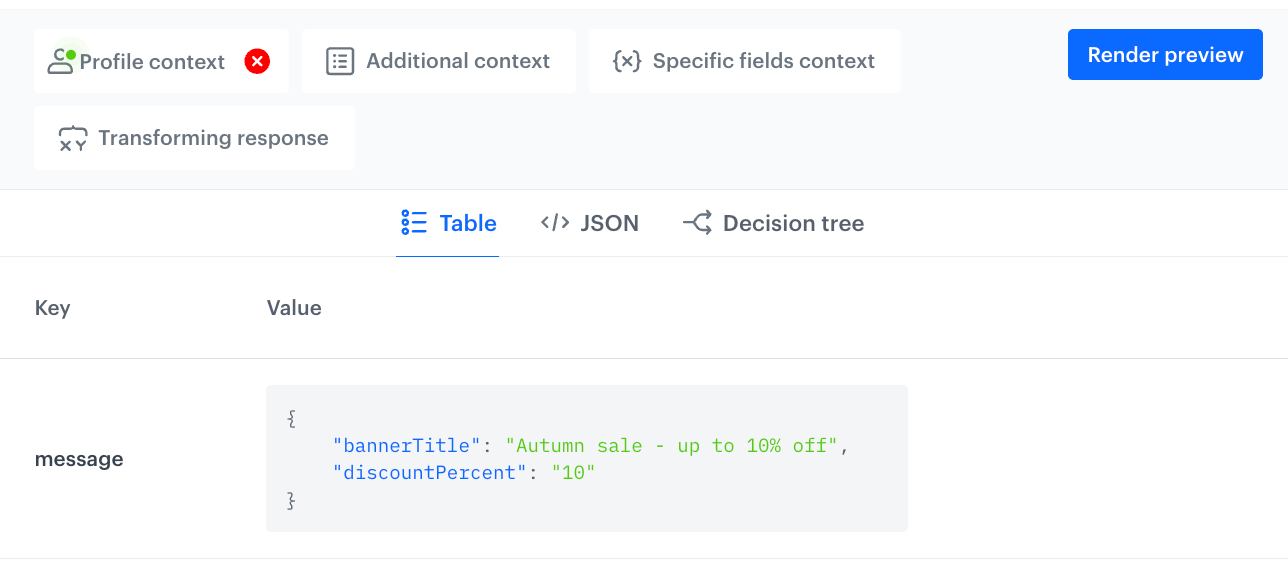
Generated content of the field:
{
    "bannerTitle": "Autumn sale - up to 10% off",
    "discountPercent": "10"
}