With inline analyses, you can create segments, aggregates, expressions, and metrics directly while building an analysis. You define or adjust analytics objects in place, without leaving the area you are working in. You can also nest local objects inside one another, for example a local metric containing a local event aggregate.
Objects created inline are local by default, meaning they are scoped to the analysis where they were created. You can promote them to global objects to make them available across your workspace.
NOTE: A local object can only be used in the single place where you created it. If you need the same object in two different places, either save it as global, or create a regular analysis and use in both places.
Availability and permissions
You can create inline objects in:
- Analyses in Decision Hub, except dashboards and Sankey diagrams. There, you can only select existing global objects.
- Profile filters.
To create, edit, or apply a local object, you only need permission to the main analysis type you are working in (for example, the segmentation or report). No separate permission is required for the local objects you create or edit inside it.
You can clone an analysis to another workspace even if it contains local objects - they're cloned together with the main analysis.
Which object types are available for inline creation
You can create a local object of a given type wherever you could otherwise select an existing global object of that type. For example, if a field lets you choose a profile aggregate, you can also create a local profile aggregate there instead.
Limits
- You can create up to 100 local objects (of any type, including nested ones) within a single analysis.
- Local objects can be nested up to 100 levels deep. This limit is enforced automatically - in practice, you'll reach the limit of 100 total local objects first.
- A local segment can only contain a single segment definition. Creating multiple segments, as you can in the standalone Segmentations, isn't supported inline.
Creating a local object
- In the analysis you are building, open a field that supports inline creation - for example, click Add condition or Choose metric, or open the dropdown for event parameters.
Result: A search panel opens. It looks the same regardless of which field you opened it from, though the available options depend on the field (see step 2).
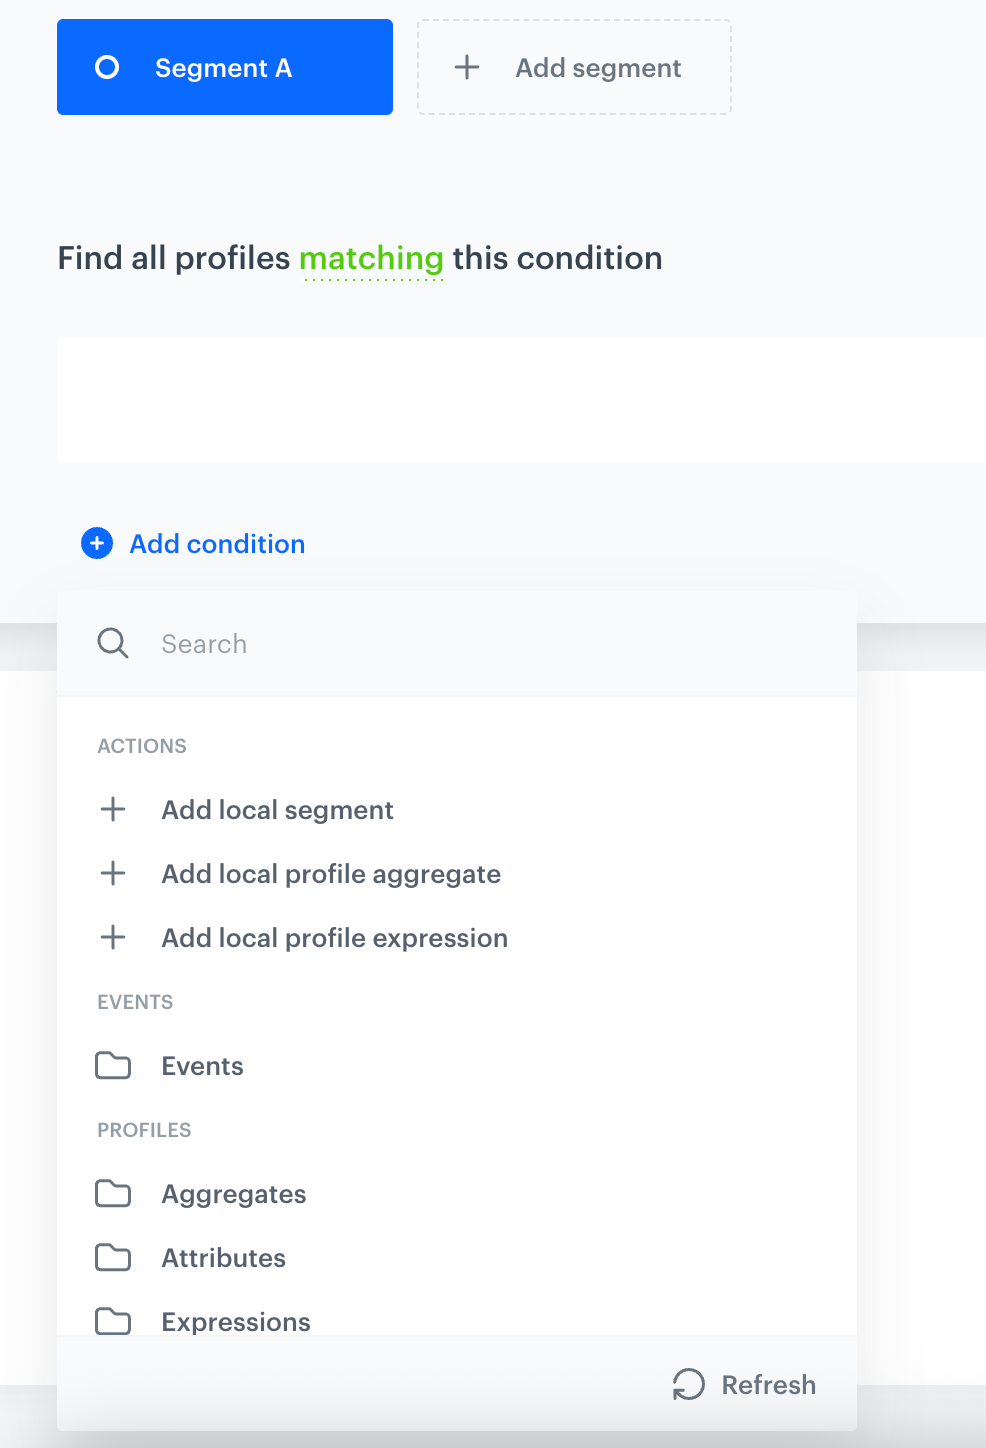
An example search panel, opened by clicking Add condition in a segmentation In the search panel that opens, under Actions, select the type of object to create. The available options depend on the field:
Add local segment
- Add local profile aggregate
- Add local profile expression
- Add local event aggregate
- Add local event expression
- Add local metric
NOTE: When you create a local metric, the system doesn't check whether it's compatible with the report or histogram you're adding it to. If it isn't compatible, you'll only find out when you save the main analysis - the save will fail with an error.
An editor opens. Fill in the details:
- Name - enter a name for the object.
- Local analysis conditions - define the conditions of the local analysis.
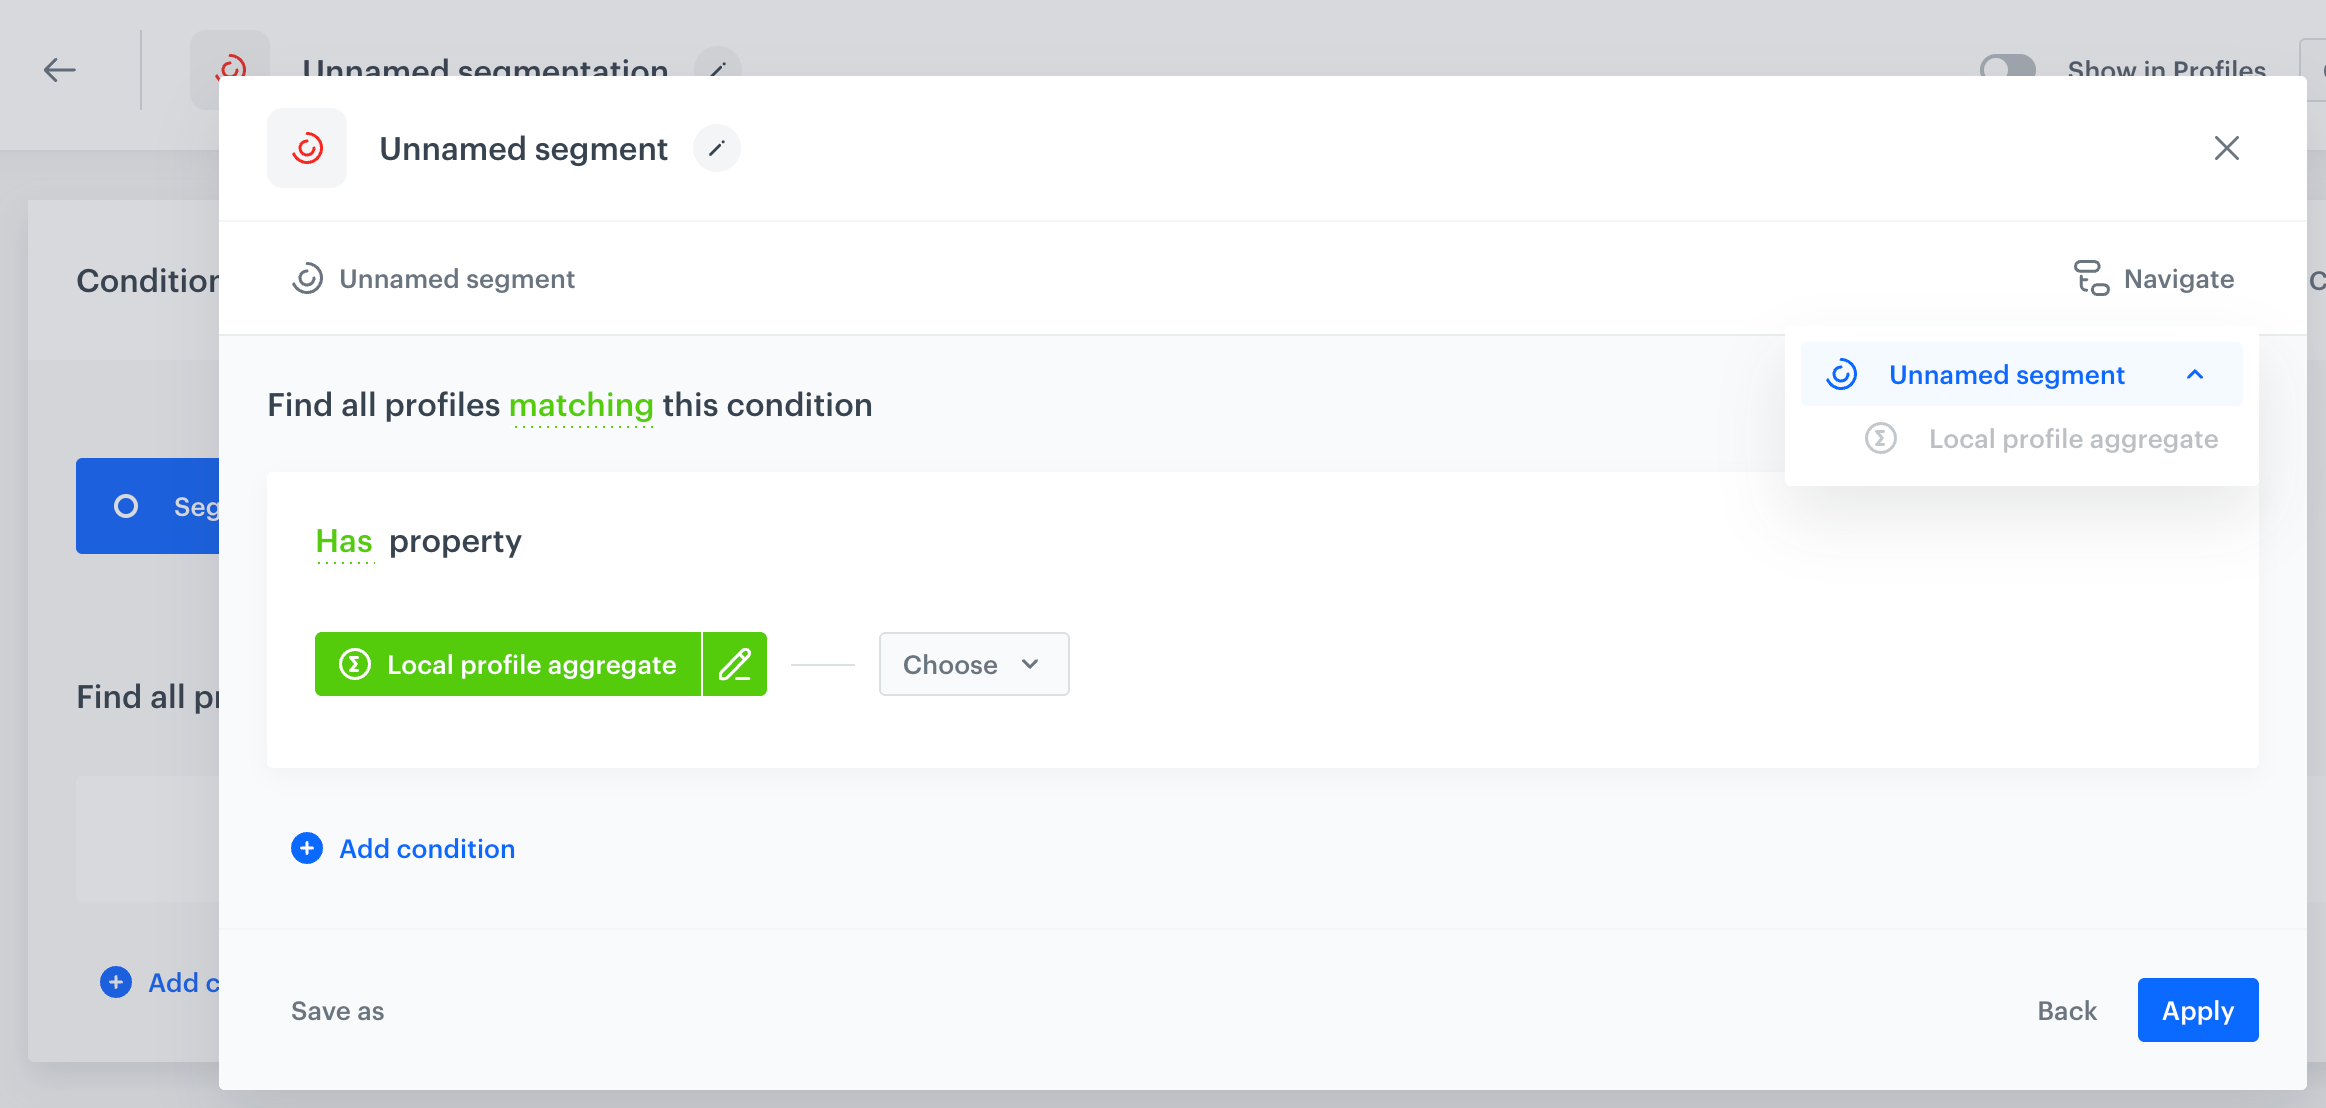
A local segment with a nested local profile aggregate, shown in the Navigate panel - Apply only confirms the local object's definition into the analysis you are building. It doesn't save the object or the analysis. Your changes are persisted only when you save the main analysis itself.
- If the object isn't nested inside another local object, the Back button discards your changes and closes the pop-up, returning you to the main analysis.
- If the object is nested inside another local object, the Back button discards your changes and returns you one level up.
- Click Apply.
Result:
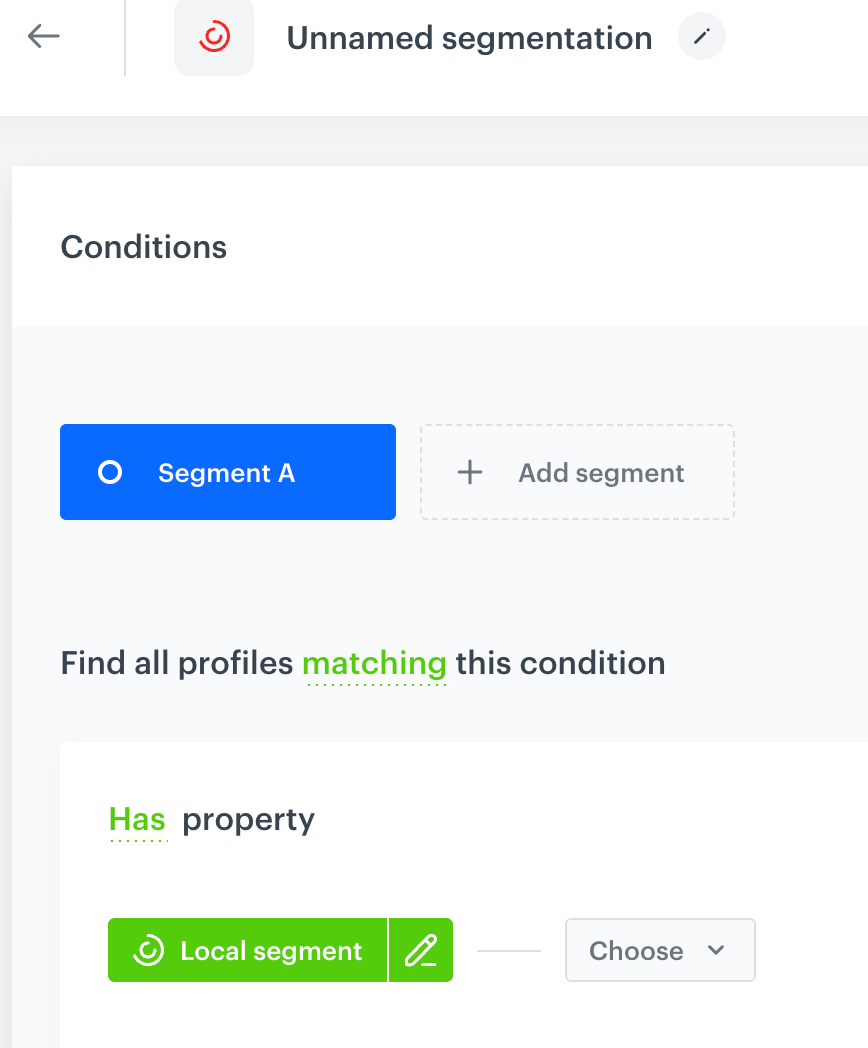
A local segment added to the conditions of the segmentation
Editing a local object
You can edit a local object the same way you would edit its global counterpart. Open its editor by clicking its name (or the pencil icon next to it), then adjust its conditions or definition using the same options available when creating it.
Whenever you are in a local object's editor (while creating it or editing it later), you can create another local object inside it, following the same steps as in Creating a local object. This lets you nest local objects, for example, a local metric containing a local event aggregate, which in turn contains a local event expression.
In the object editor, click Navigate to open a panel that shows the objects related to the one you are editing (including any nested local objects), along with their status. Use it to move between nesting levels.
Saving a local object as global
If you want the object to be available in other hubs and analyses, you can save the object.
- On the pop-up with the local object editor, at its bottom, click Save As.
- In the confirmation dialog, click Yes, save.
After saving, the object is available in the corresponding module list (for example, in Metrics). In the analysis you're building, the local object is replaced with the newly saved global object.
NOTE: If you click No, keep it local, the object remains scoped to the current analysis.
Deleting a local object
A local object doesn't appear in search results, so you can't find and delete it directly. To delete a local object, delete the condition, dimension, or parameter of the main analysis that contains it.
WARNING: Deleting the condition, dimension, or parameter where a local object was created also deletes all local objects created inside it. This deletion isn't final until you save the main analysis - until then, you can revert it, for example by closing the analysis without saving.