In Synerise, you can create your own funnels based on many different customer activities and characteristics.
Each step of a funnel is built on an event — an action performed by a profile (for example, viewing a page or adding a product to a cart) or an action a workspace user performs toward a profile (for example, sending a message).
Profiles who trigger the event defined in a step move on to the next one — at each following step, the funnel checks only those customers, then shows how many progress through the whole sequence. Steps are always joined with the AND operator, so customers must complete them in the exact order you define.
Optionally, you can also cap the analysis to a maximum time allowed between the first and last step — customers who complete all the steps but take longer than that are not included in the results. In addition to events, you can narrow down the funnel as a whole, with a filter based on event parameters or profile attributes.
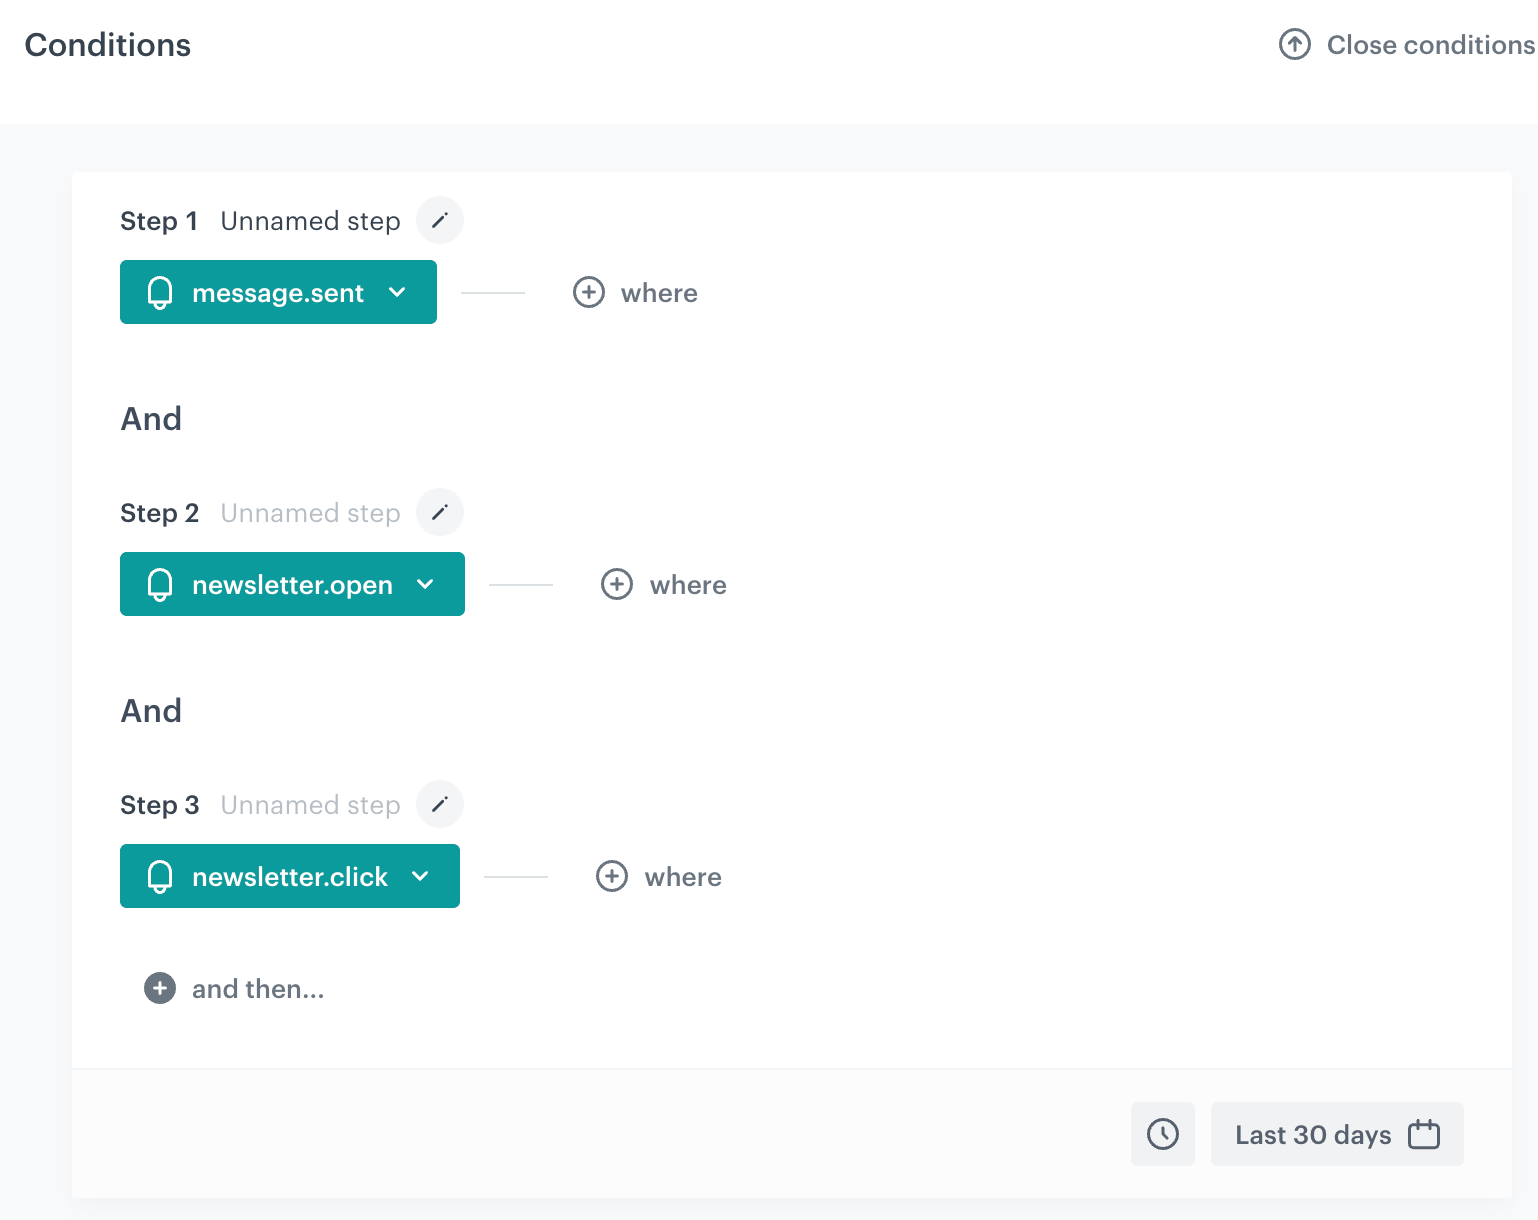
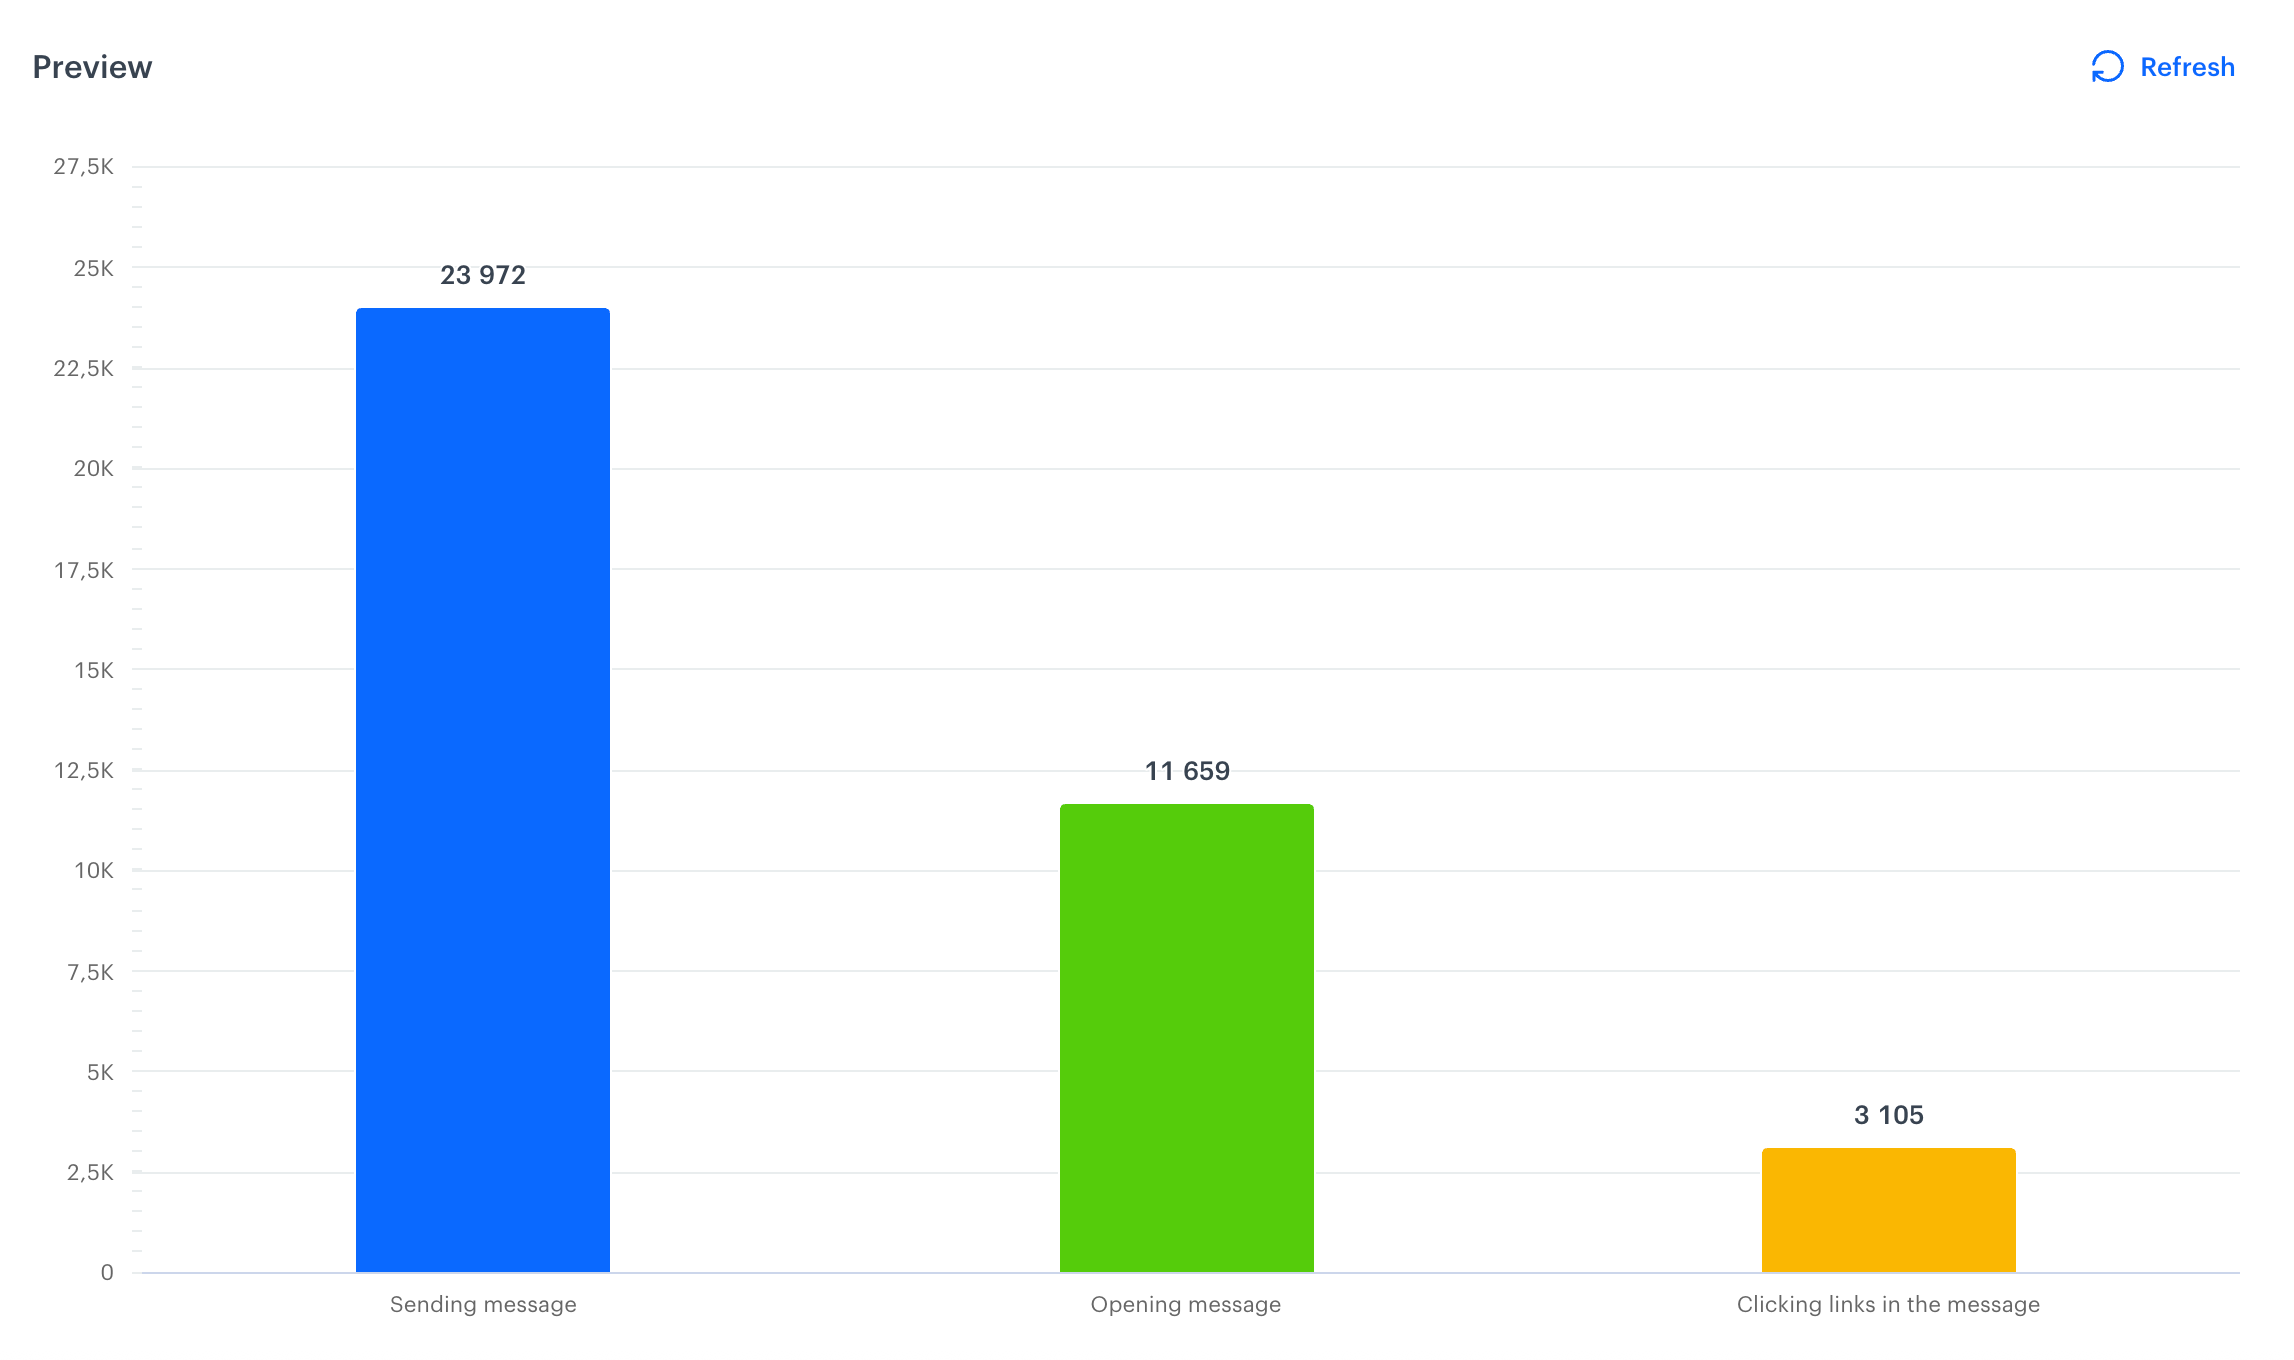
For example, a funnel analyzing an email campaign could consist of three steps — message.sent, newsletter.open, and newsletter.click — showing how many recipients opened the email and how many of them went on to click a link inside it.
Requirements
You must have a user role with the following permissions:
- access the Decision Hub
- view analyses
- create analyses
- edit analyses
- preview results
- You need events to build the steps of your funnel on. Events are generated as a result of event tracking — for example, by implementing a tracking code on your website, using the mobile SDK, or importing historical event data.
Creating a funnel
- Go to
 Decision Hub > Funnels > New funnel.
 - Click the
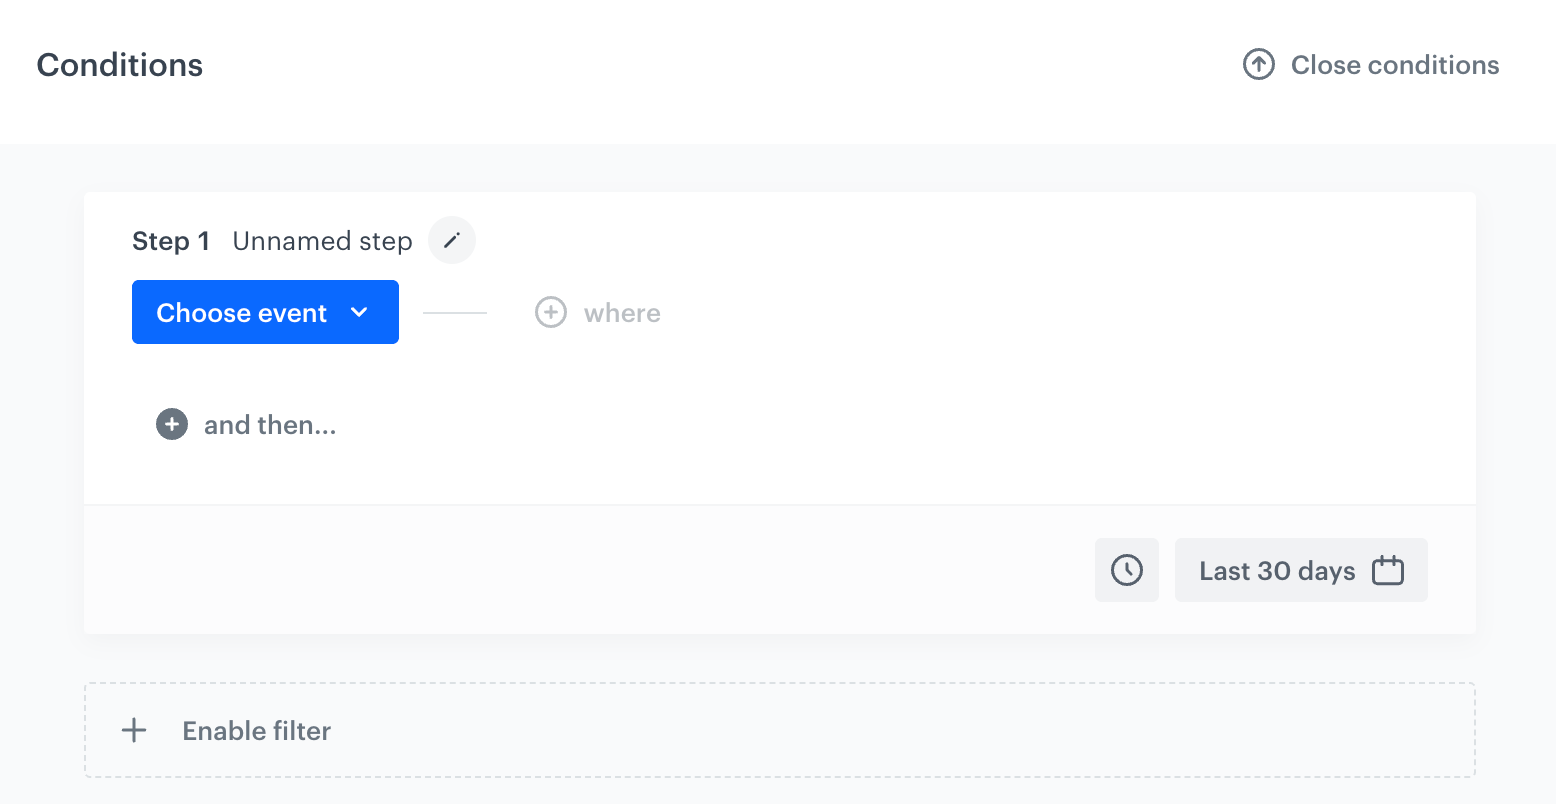
 icon next to Unnamed step to enter the name of the funnel. This name is displayed in the funnel preview — if you skip this, the step is labeled Unnamed step instead.
 - Click Choose event and select an event from the dropdown list. Customers who performed a specific action (that triggers the selected event) are considered in the analysis. To narrow your analysis to only particular occurrences of a type of event, click where to select event parameters.
- To add another step to the funnel, click and then... below the previous step, and repeat step 3. Steps are always joined with And, so customers must complete them in the order you define.
- To define the maximum time allowed between the first and last step of the funnel, click the clock icon in the lower-right corner of the Conditions panel and set the Completed within interval. Profiles who complete all the steps, but take longer than the specified time, are not included in the results.
- To determine the time range from which the data will be analyzed, click the calendar button (for example, Last 30 days) and confirm your choice with the Apply button.
- If you want to narrow down the scope of customers, click Enable filter below the Conditions panel. In the Profile filter window that opens, click Add condition to build the query, and confirm with Apply. This profile filter works as an additional condition a profile has to meet in order to be counted in the funnel.
- Optionally, you can preview the results before you save the funnel. The Preview chart below the Conditions panel shows how many profiles reached each step. Click Refresh to reload it with the latest data, or click Close conditions to collapse the Conditions panel and see more of the chart.
- To complete the process, click the Save button. When you save the funnel, you can find it on the list of funnels under the name you entered in step two.