Approval Services
This feature lets you establish a process of deciding which templates can be used in communications. By assigning reviewers and an approver, you indicate the users who will be responsible for verifying the quality and correctness of the templates and approving them.
In the decision-making process, a user can have one of the following roles:
-
Regular user - A user who isn’t a reviewer or an approver. Such a user creates a template and sends it to reviewers to get approval.
-
Reviewer - Responsible for verifying the template and giving a pre-approval. There is no limit on the number of reviewers in the system.
-
Approver - Gives a final approval for a template after the reviewers give their approvals.
The process involves the following steps:
Creating a template > Testing > Pre-approval by reviewers > Final approval by an approver
Configuration
 Go to Settings > Approval services > Add service.
Result: A configuration pop-up appears.
Configuration form of approval service - On the pop-up:
- In the Service name field, type the name of your service. This name will be used only for identification purposes. The service you create will be displayed on the list of services marked with the name you enter here.
- From the Microservice dropdown list, choose the microservice within the application you want to design a decision-making process for. For one microservice you can create only 1 approval service.
- From the Approver dropdown list, assign one approver out of the users who are added to a workspace.
An approver is a person who gives a final approval to a message, without it the message cannot be sent. - Add reviewers by clicking + Add user. Similarly to the approver, from the dropdown list, select a user who will act as a reviewer. You can add as many reviewers as you want to. Before an approver gives a final approve to the message, the reviewers need to verify and confirm the template.
- If you want the approval of all reviewers to be required before the final approval from the approver, select the All reviewers have to approve checkbox. If this option is unselected, approval from only one reviewer is required before the final approval.
- Confirm the settings by clicking Save.
The approval flow
Regular user perspective
- The first step is creating a template by a regular user. Go to Experience Hub and when creating any type of communication, create a new template. In the upper-right corner, click Send to approval to send the template to reviewers.

Send to approval - Then the template is checked by reviewers.

Pre-approval - In this stage all reviewers have approved the template and a user awaits for a final approve.

Pre-approval - The final approval is granted and the user may send the message.

Approved
Reviewer perspective
- A reviewer can check the list of message templates sent to be approved in Settings > Approval Requests.

A list of approval requests - The reviewer goes to the Templates folder (it is available in the message type in the Experience Hub feature) and accepts or rejects the templates that await for the review. When the reviewer decides to unapprove the template, then they can write reasons for this decision.

Template before the reviewer's approval
Approver perspective
-
An approver can check the list of message templates sent to be approved in Settings > Approval Requests.

A list of approval requests -
The approver goes to the Templates folder (it is available in the message type in the Experience Hub feature). The approver can either approve or unapprove the template. When the approver decides to unapprove the template, then they can write reasons for this decision.

Template before the final approve
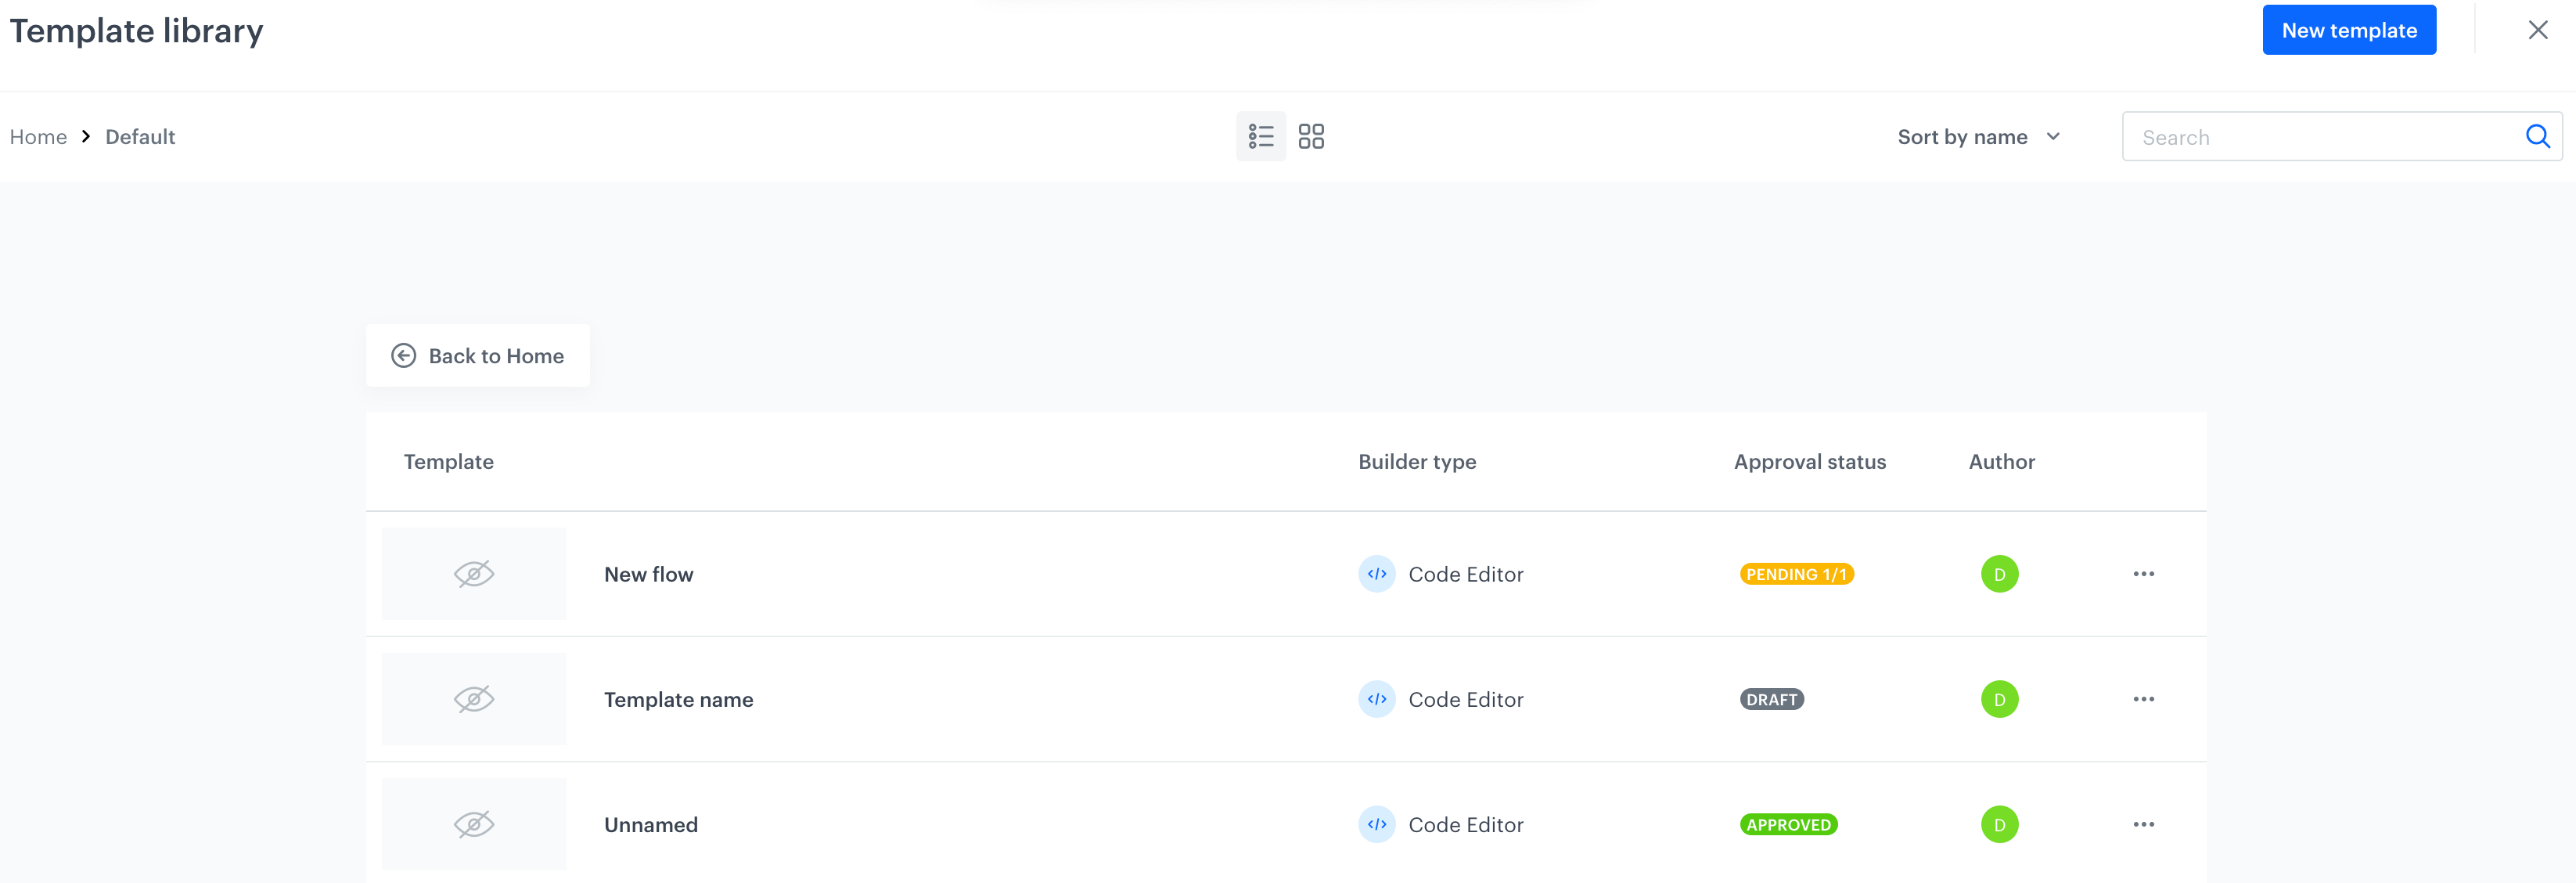
Template statuses in library view
Any user that belongs to a workspace can see the template status in the template library.
- Approved - The template received final approval and can be used in communication.
- Draft - The template was rejected by the approver/reviewers.
- Pending X/X - This label appears on the template that waits for pre-approval or final approval.
