This is a guide to the integration between Synerise and Microsoft Entra ID (formerly Microsoft Azure Active Directory (Azure AD)), which enables your users to authorize with their Microsoft Entra ID accounts. The integration with Microsoft Entra ID is offered through the SAML 2.0 protocol.
Benefits
Centralized user management - With Microsoft Entra ID, you get to administer users from one central place in your organization.
Increased security - The benefit of a single user account in many applications helps to maintain a single identity and credentials, so users don’t have to remember too many credentials. Authentication takes place only with Microsoft Entra ID, with a single set of security-related policies regardless of the application.
Improved user experience - Your users only need to sign in once to use multiple applications. This approach ensures faster authentication, saves time and relieves users from remembering multiple credentials.
Prerequisites
To get started, you need the following items:
An Microsoft Entra ID subscription with permission to create applications
Go to Microsoft Entra ID > Manage > Enterprise Applications.
Select All applications and then click New application.
In the Add from the gallery section, in the search box type Synerise AI Growth Operating System.
From the results, select Synerise AI Growth Operating System and add the application. Result: Your application is added.
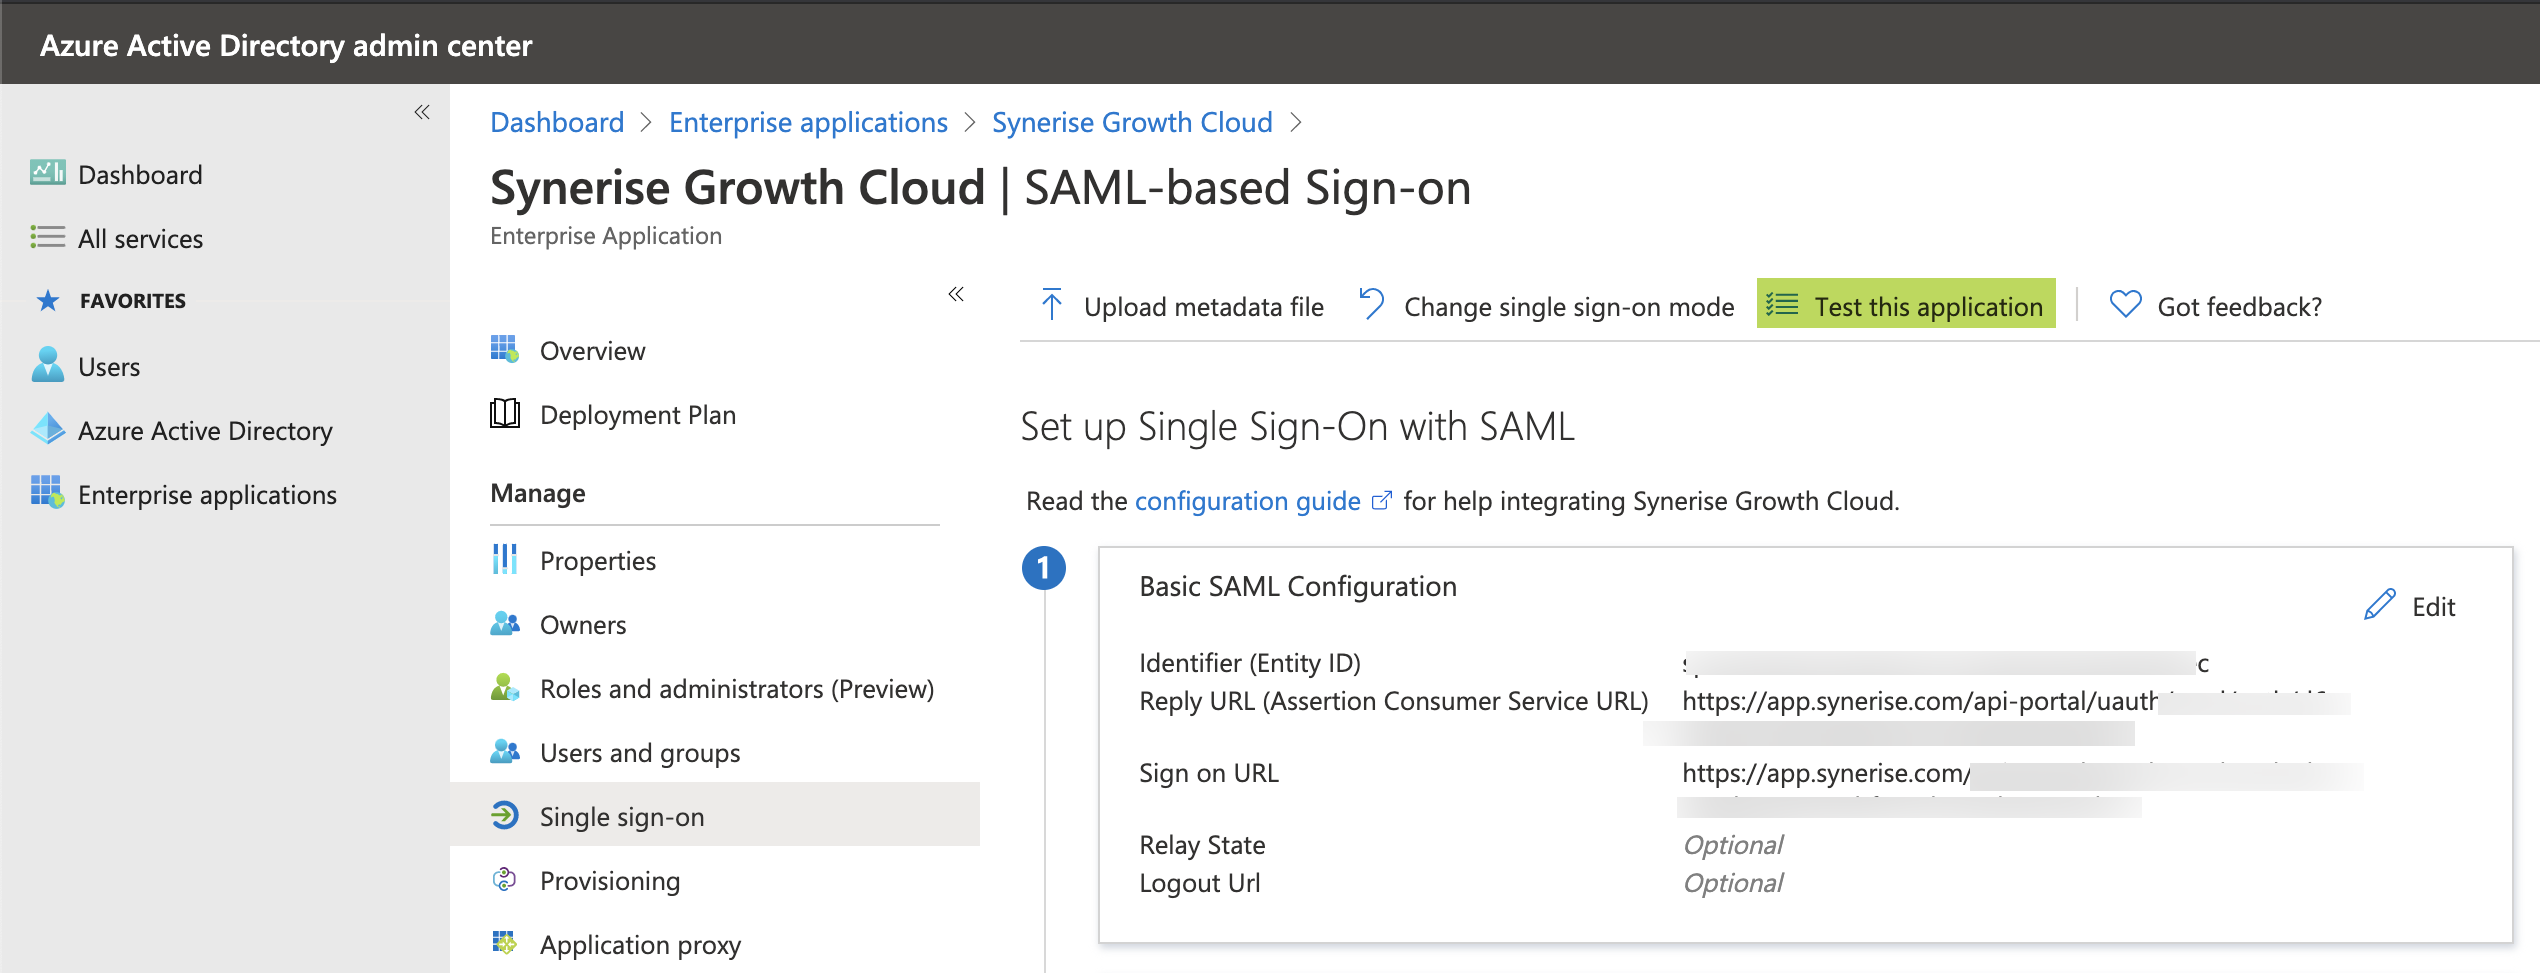
On the Synerise AI Growth Operating System application integration page, go to Manage > Single sign-on. Configuration in the Microsoft Azure portal
In the Basic SAML Configuration section, on the right side, click the Edit button.
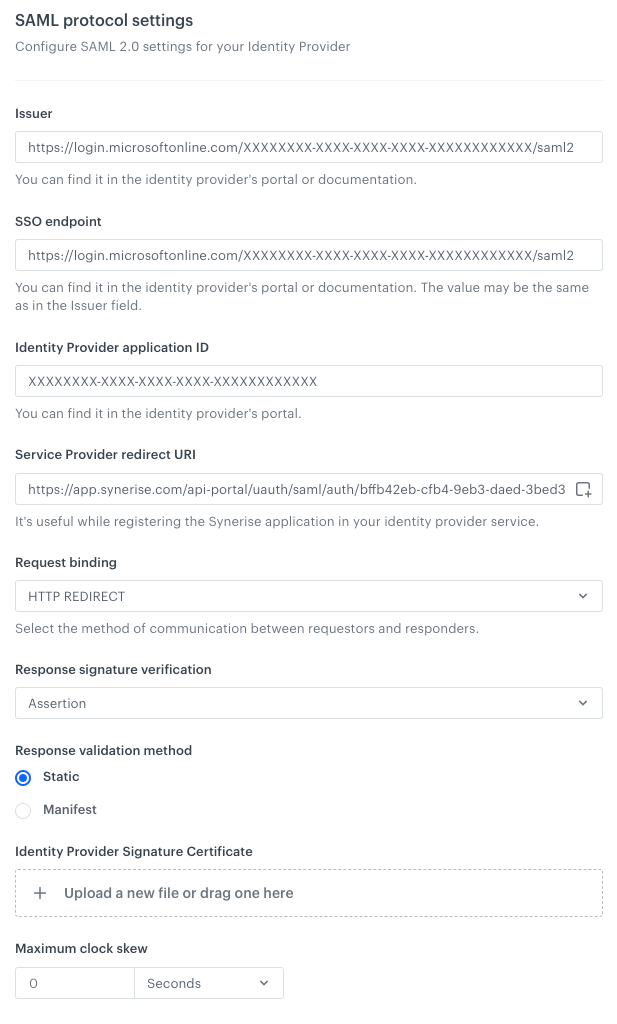
Obtain the value of the Service Provider Redirect URI field (you can find it in Synerise, go to Settings > Access Control > Identity Providers), and enter this value in the following fields in Azure MD:
Reply URL (Assertion Consumer Service URL)
Sign on URL
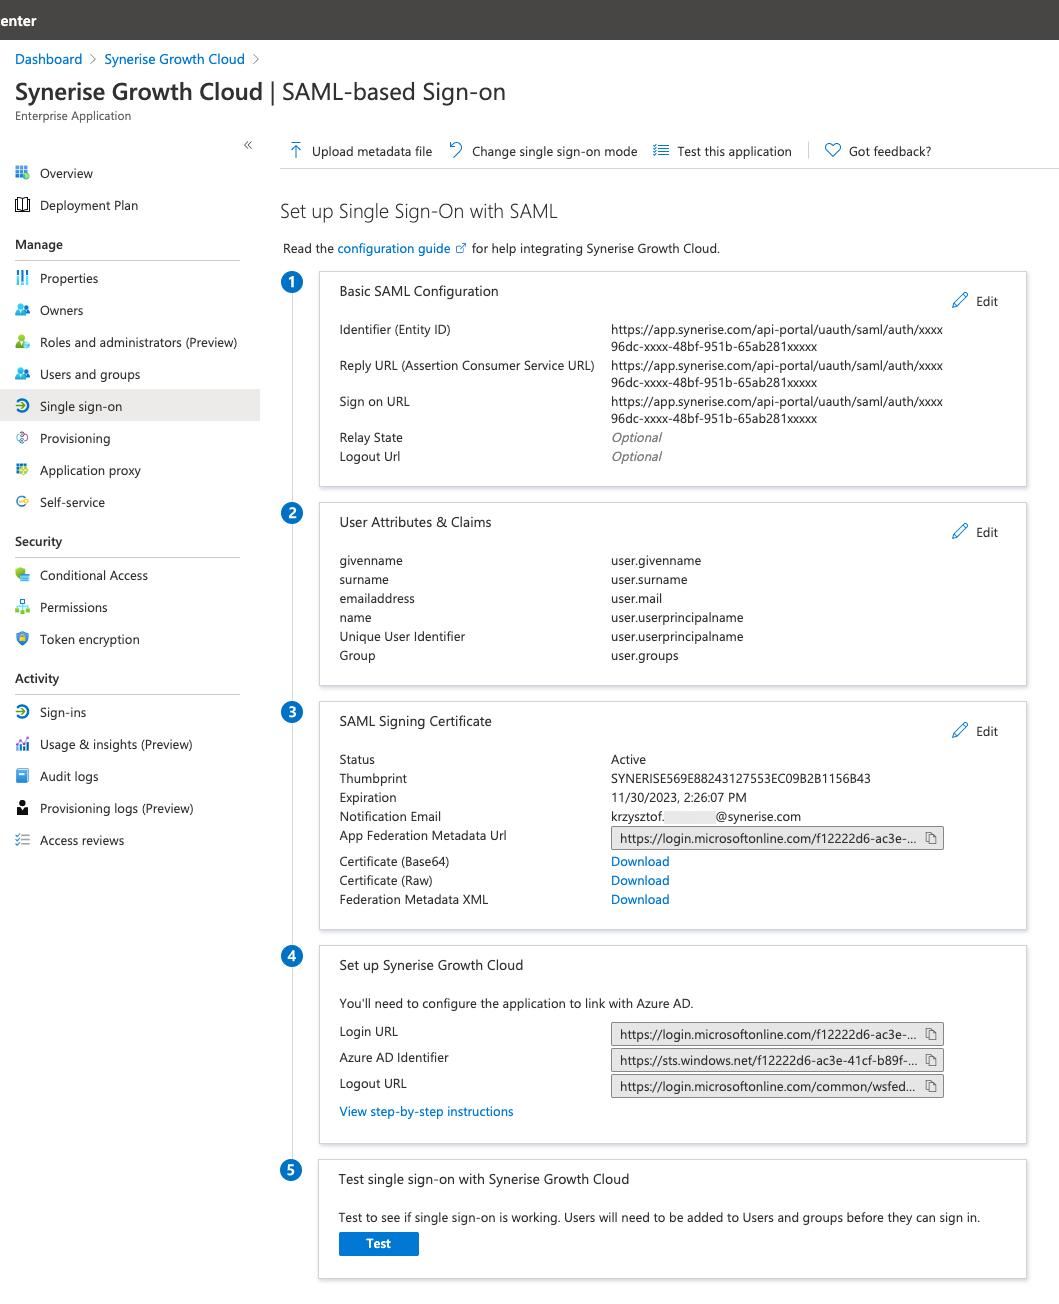
In the SAML Signing Certificate section, download Certificate (Base64).
From the Set up Synerise AI Growth Cloud section, note down the value of the Login URL field (it's required in the further part of the integration process).
From the Set up Synerise AI Growth Cloud section, note down the value of the Azure AD Identifier field (it's required in the further part of the integration process).
Configuring user assignment to the application
You can assign users to the Synerise application in several ways within Microsoft Entra ID depending on your needs. The configuration settings allow you to let all your users use Synerise or only the selected user groups/individuals.
Go to Microsoft Entra ID > Manage > Enterprise Applications.
Select the Synerise application.
Go to the Manage > Properties section.
If you want to require assigning users to the app (unassigned users won’t be able to use the application, regardless of any further configuration), set Assignment required? to Yes.
Further procedure when you select Yes
Go to Users and groups and click Add user.
Select individual users or groups who will be granted access to the Synerise application.
Confirm the selection by clicking Assign.
If you don’t want to assign users to the app, set the Assignment required? to No.
Results when you set No
All users and groups have access to the application.
If you want to grant access to specific user groups, you can map those user groups in Dynamic group assignment in Synerise.
If there was no role assignment mapping, whenever a user accesses the Synerise app, this user receives information about the lack of access and a request to contact Organization admin.
Configuring application access based on Microsoft Entra ID security groups
Select the security groups you want to enable access for.
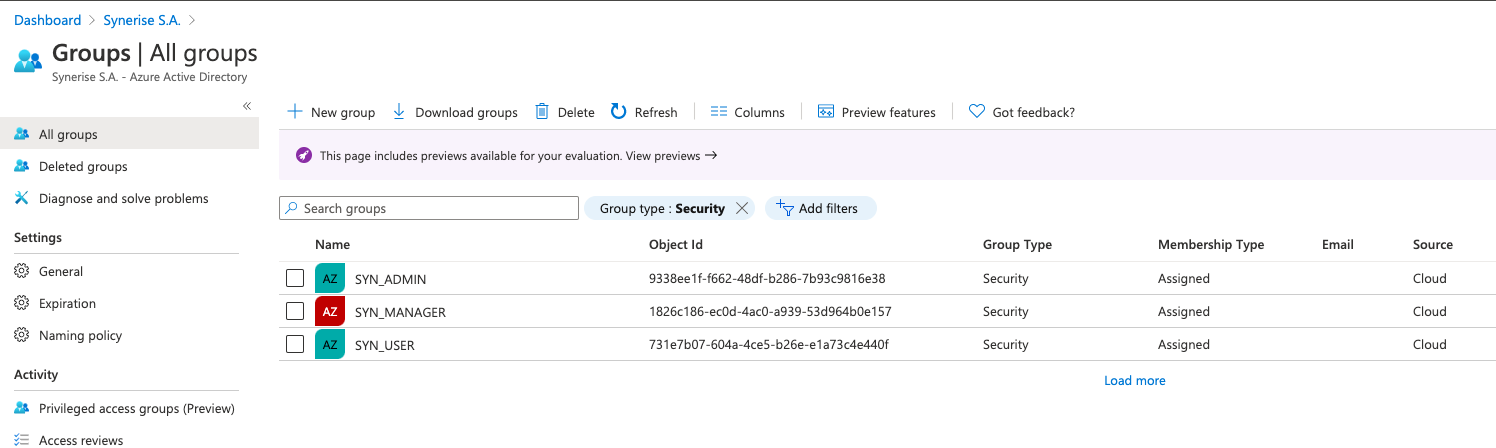
Note down the Object Ids of the security groups for which you want to enable access to Synerise. In this example, access will be granted for three security groups:
Example groups
SYN_ADMIN with Object Id: 9338ee1f-f662-48df-b286-7b93c9816e38) where we want to assign the PROFILE_ADMIN role in Synerise
SYN_MANAGER with Object Id: 1826c186-ec0d-4ac0-a939-53d964b0e157 where we want to assign the PROFILE_MANAGER role in Synerise
SYN_USER with Object Id: 731e7b07-604a-4ce5-b26e-e1a73c4e440f where we want to assign the PROFILE_USER role in Synerise
These are just example Object Ids. While performing the procedure, replace them with the actual IDs for your security groups.
After noting down the IDs, go to Synerise (Settings > Access Control > Identity Providers ) to the Just-in-Time provisioning section.
If you want to enable access to the application based on Active Directory security group assignment for users, click Security groups.
If you want to enable access to the application based only on groups assigned to the Synerise application, click Groups assigned to the application.
Optionally, go to the SAML section and select Emit groups as role claims.
If you select it, the claim will use the following attribute name: http://schemas.xmlsoap.org/ws/2005/05/identity/claims/role
If you leave this checkbox unselected, the SAML integration will use the following attribute name: http://schemas.xmlsoap.org/ws/2005/05/identity/claims/groups or http://schemas.microsoft.com/ws/2008/06/identity/claims/groups
Continue the configuration depending on your selection in step 5:
If you selected Security groups, continue to this procedure.
If you selected Groups assigned to the application, continue to this procedure.
Configuring Microsoft Entra ID as an Identity Provider in Synerise
Log in to Synerise.
Select the workspace you want to configure single sign-on for.
Go to Settings > Access Control > Single Sign-On (SSO).
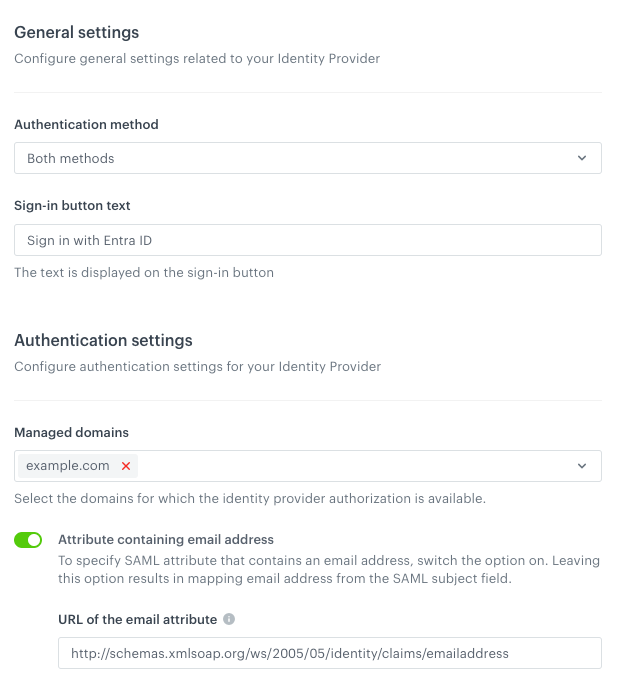
In the General settings section:
From the Authentication methods dropdown list, select the authentication method to the value of your choice. Read more information about it the Make log-in screen modifications section.
At the beginning, we suggest setting it to Both methods unless you have a separate account that’s in different domain than you will be setting up SSO for.
In the Sign-in button text field, type the name that is displayed on the sign-in button, for example Sign in with Microsoft Entra ID.
In the Authentication settings section:
From the Managed domains, select the domains you want to use for your SSO.
Enable Attribute containing email address. Result: The URL of the email attribute text field appears.
In the URL of the email attribute, enter the email attribute name: http://schemas.xmlsoap.org/ws/2005/05/identity/claims/emailaddress (use it only for Microsoft Entra ID integration).
The result
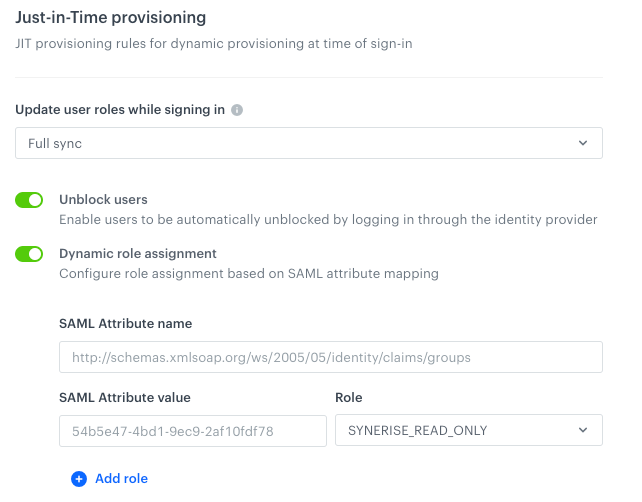
In the Just-in-Time provisioning section, follow the procedure described here.
If you kept the default role assignment: Filled in dynamic assignment settings Result: In this model, every authenticated person has a role (or roles) assigned according to the settings defined here regardless of any configuration on Identity Provider side and depending on setup in the Update user roles while signing in field.
If you selected dynamic role assignment: Filled in dynamic assignment settings Result: Every authenticated person has a role (or roles) assigned based on group/role mapping between Microsoft Entra ID and Synerise depending on setup in the Update user roles while signing in field.
Click the Sign in with Microsoft Entra ID (the text on the button depends on the value you entered in this step). Result: You will be redirected to Microsoft where you will be authenticated immediately if there is an active session or you will be asked to authenticate and as a result you'll be redirected back to Synerise.
In case you can't authenticate
In the Synerise application, review the SAML setup for any typos or errors in the Just-In-Time provisioning configuration.
In Microsoft Entra ID portal:
Click Test this application. Result: You are automatically signed in to the Atlassian Cloud for which you can configure SSO. The result of configuring SAML settings in Synerise
Alternatively, Synerise is available in https://myapplications.microsoft.com/ if you didn't set the Visible to users? option to No in the Enterprise application setup.
Congratulation! You signed in through Microsoft Entra ID.
When the process works as expected, you can switch the Authentication Mode setting, so only the SSO authentication method is allowed, excluding the option of authorizing through email and password.
 Settings > Access Control > Identity Providers), and enter this value in the following fields in Azure MD: