Google Firebase is used for notifications in mobile apps and websites.
From May 15, 2024, tokens which are inactive for 270 days become expired. More information is available in Google Firebase documentation.
Requirements
- Create a Firebase project.
- Enable FCM Registration API for your project.
- If you want to use push encryption, you must implement decryption in your mobile applications. Client apps without decryption implemented will not receive push messages at all. See the following articles:
Collecting integration parameters from Firebase
- Go to Firebase Console website.
- Go to Project Settings.
Result: You are redirected to the General tab. - Copy the value of Project ID and save it in a text editor.
- If you want to use web push:
- On the General tab, scroll down to the Your apps section.
- If you don't have a Web app, create one:
- Click Add app and then </>
- Enter a name for your app.
- Leave Also set up Firebase Hosting for this app unselected (default).
Synerise doesn't require Firebase Hosting. You can enable it if your other integrations require that. - Click Register App and wait until the app is registered.
Result: The app is created. You don't need to integrate the displayed SDK code. Synerise handles the integration after you configure the integration, as described in the next steps. - Click Continue to console.
- Click the Web app.
- From the code snippet shown in SDK set up and configuration, copy the following values into a text editor:
apiKeyappId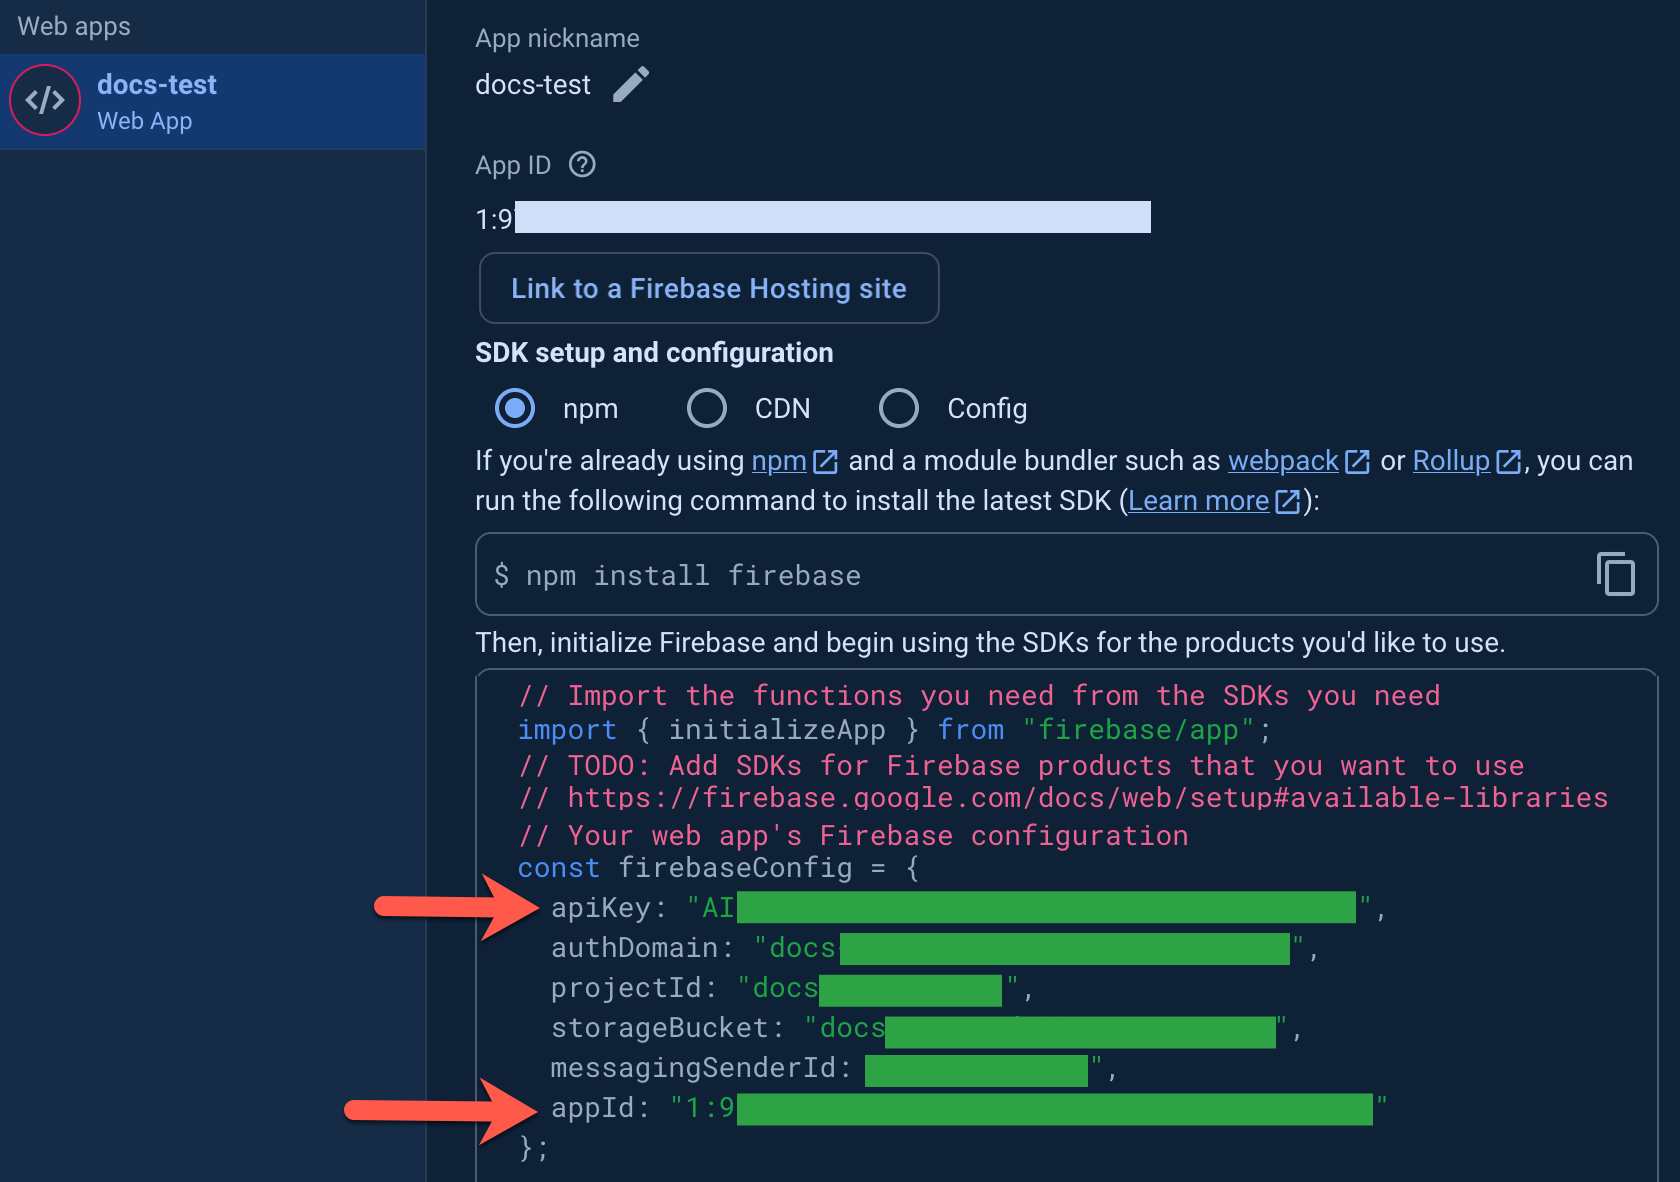
The values to copy
- Go to the Cloud Messaging tab.
- Copy the value of Sender ID and save it in a text editor.
- Go to the Service accounts tab.
- Click Generate new private key.
- Confirm with Generate key and wait a few seconds.
- Save the key.
Depending on your browser and settings, the key may open in a window or be saved as a JSON file.
Save the entire contents (all properties).
- Proceed to Enabling Firebase in Synerise.
Enabling Firebase in Synerise
- [Collect integration parameters from Firebase](Collecting integration parameters from Firebase).
- Go to
 Settings > Apps & Services.
 - In the list of integrations, next to Firebase, click Show.
Result: A list of existing Firebase connections opens. - Click Add connection.
- Under Connection with Firebase, switch the toggle on.
- In the Connection name field, enter the name of the connection.
It will be available only on the list of Firebase connections in Synerise. Select the channel for which you are enabling integration:
- Fill in the following fields, using the data you retrieved in Collecting integration parameters from Firebase:
- Sender ID
This field is required. - Project ID
This is required to send notifications. If you haven’t copied it earlier in the process, you can find it in your Firebase Console project settings on the General tab. - Private key
Private key is required to create authentication tokens. In this field , you must paste the entire JSON file you downloaded when Collecting integration parameters from Firebase.
- Sender ID
- Click Apply.
Fill in the following fields, using the data you retrieved in Collecting integration parameters from Firebase:
- Sender ID
Filling out this field is required to implement web push mechanism into your website. - Project ID
This is required to send notifications. If you haven’t copied it earlier in the process, you can find it in your Firebase Console project settings on the General tab. - App ID
If you haven’t copied it earlier in the process, you can find it in your Firebase Console project settings on the General tab. - Web API key If you haven't copied it earlier in the process, you can find it in your Firebase Console project settings on the General tab.
- Private key
Private key is required to create authentication tokens. In this field , you must paste the entire JSON file you downloaded when Collecting integration parameters from Firebase.
- Sender ID
- Click Apply.
- Fill in the following fields, using the data you retrieved in Collecting integration parameters from Firebase:
Enabling push encryption
- When you enable encryption, web push agreements of all Profiles are changed to
false. You must collect new web push agreements. - When push encryption is enabled, it becomes active both for web push and mobile push. You must enable decryption is in your mobile application.
Web push only:
- In Firebase Console, open the project settings.
- Go to the Cloud Messaging tab.
- Retrieve the encryption keys:
- Scroll down to Web configuration.
- In Web Push certificates, create or retrieve a key pair.
To access the private key, you may need the Owner role in the Firebase project.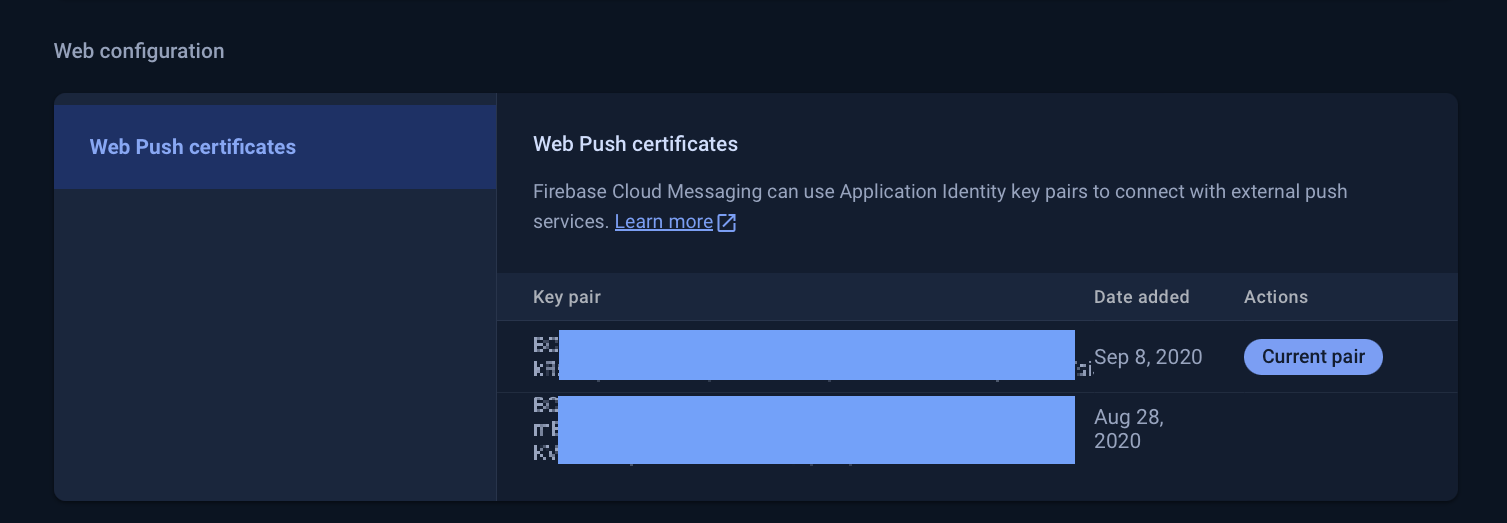
Cloud Messaging section - Save the key pair in a text editor.
In Synerise, these keys are called VAPID keys.
- In Synerise, go to Settings > Apps & Services.
- In the list of integrations, next to Firebase, click Show.
Result: A list of existing Firebase connections opens. - On the connection you want to update, click
 > Edit.
 Perform the following actions:
The setting applies both to mobile and web push. You must implement mobile push decryption!
- Switch on the Push encryption toggle.
- Web push only: Fill in the following fields:
If you do not provide the keys, web push messages won't be sent at all.
1. **Public VAPID key** If you haven’t copied it earlier in the process, you can find it in your Firebase account settings, on the **Cloud Messaging** tab, under **Web push certificates**. To access the private key, you may need the Owner role in the Firebase project. 2. **Private VAPID key** If you haven’t copied it earlier in the process, you can find it in your Firebase account settings, on the **Cloud Messaging** tab, under **Web push certificates**. To access the private key, you may need the Owner role in the Firebase project.- Click Apply.