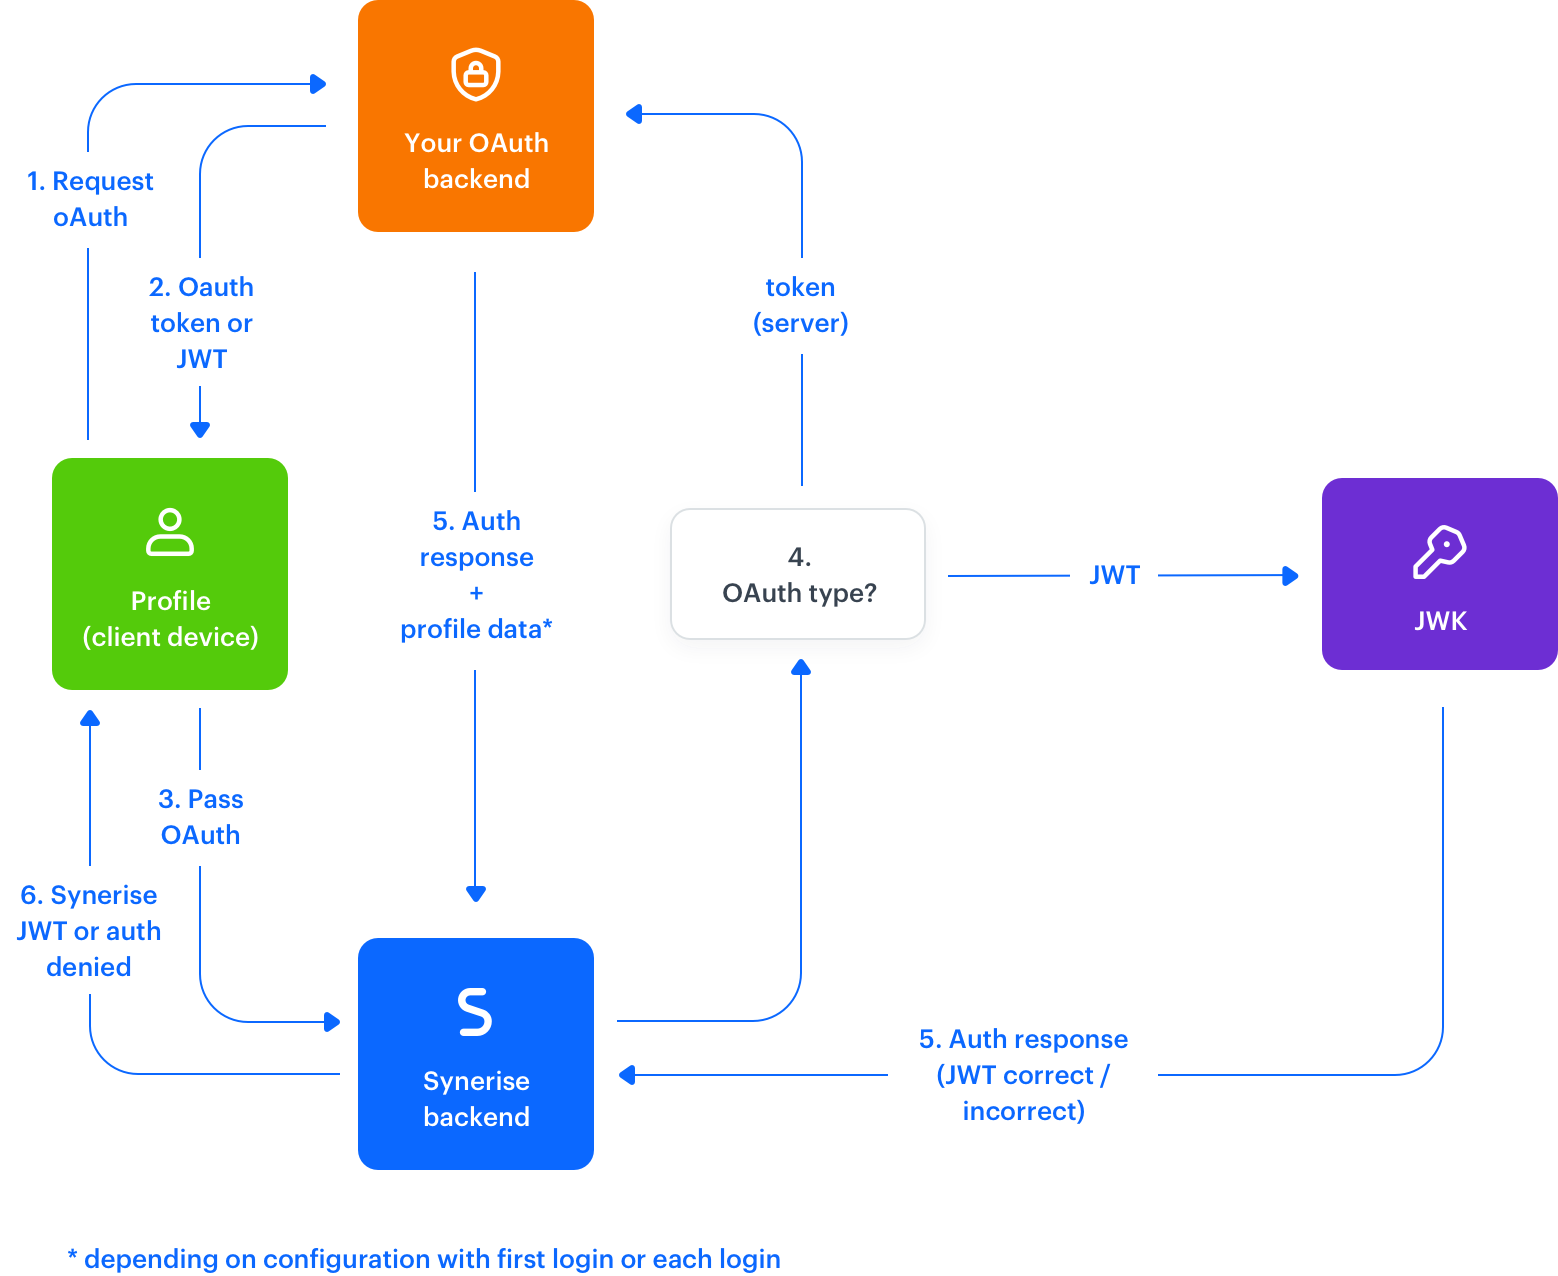
This feature lets you configure authentication through your existing IT systems that have RESTful APIs, allowing you to authenticate a profile through an HTTP call to an endpoint (checking if the provided token is valid and returning a response with the user's data).
Example response from the OAuth server:
{
    "Response": {
        "PersonQCCode": "XXXXXXXX-XXXX-XXXX-XXXX-XXXXXXXXXXXX",
        "LoyaltyQCCode": "XXXXXXXX-XXXX-XXXX-XXXX-XXXXXXXXXXXX",
        "Email": "example.email@example.com",
        "CardNumber": "0000000000000",
        "Role": 8,
        "IsBusiness": false,
        "firstname": "john",
        "lastname": "doe"
    },
    "Success": true,
    "Errors": null
}
Configuration
- Go to
 Settings > Authentication for mobile apps.
 - In the OAuth section, click Show.
- Enable the Sign-in with OAuth toggle.
Result: The OAuth settings appear. - In the Endpoint Configuration section, in the Endpoint name field, enter the name.
You can enter any name - depending on further settings, it may be used to name the attribute which stores the profile identifier provided by your OAuth server. - From the Authentication method dropdown, select how you want to confirm customer credentials:
- SERVER - A request with a token is sent to the external identity provider to confirm user credentials.
- JWT_TOKEN - Use JSON Web Token (JWT) verified by a JSON Web Key (JWK).
- Enter the URI:
- for SERVER: URI of the OAuth endpoint (GET method)
- for JWT_TOKEN: URI of the JWK
- SERVER method only: In the Headers section, enter all headers required by the endpoint you entered in the previous step.
If you want to inject a JWT from Synerise in the headers, enter the following value:Bearer {{_snrs_access_token}} - In the Identification based on OAuth response data section, you can:
- Leave the setting at default (enabled) - the identifier from OAuth is saved in the Profile as the
<Endpoint name>-oauthIdattribute. This identifier is used in subsequent requests to your OAuth server.- In the OAuth unique identifier key field, enter the name of the profile's unique identifier attribute in the OAuth response.
- Disable the setting - when logging in, the user is identified by
customIdsent in the authentication request. The profile must have acustomId.
- Leave the setting at default (enabled) - the identifier from OAuth is saved in the Profile as the
- In the Additional attributes section, from the dropdown list, select the attributes to be passed to Synerise from the OAuth response after the authorization. To retrieve data from the response, use the following pattern:
Response.AttributeName.
On the left, enter the name of the attribute saved in Synerise. On the right, enter the name of the attribute in the OAuth response.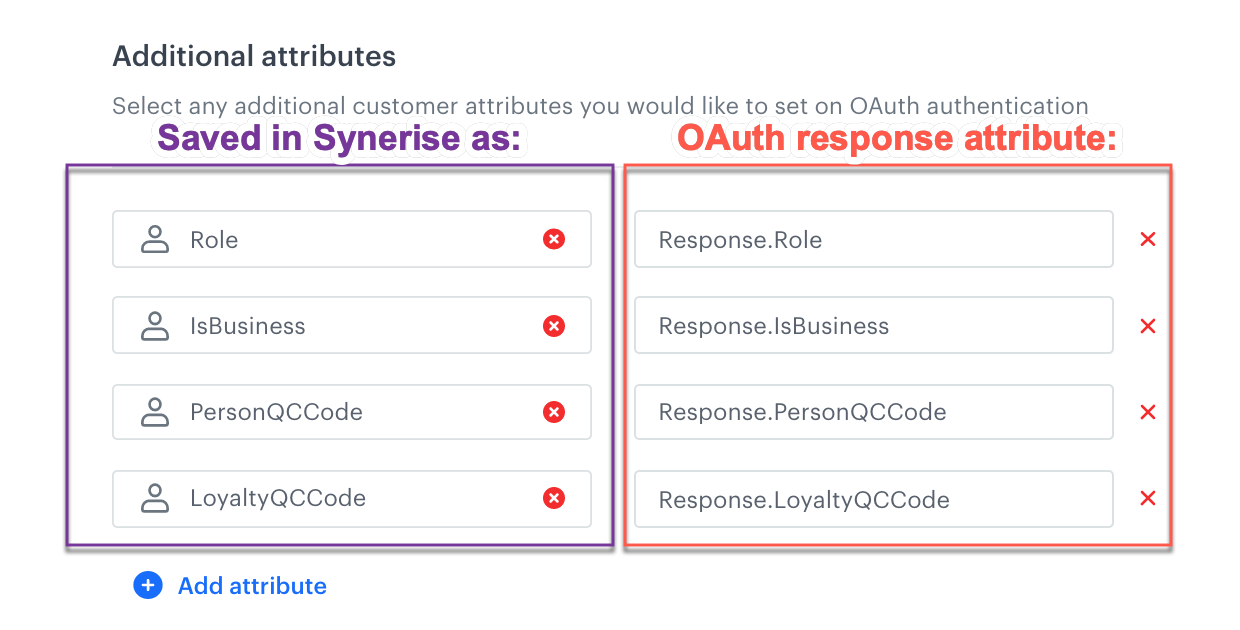
Example additional attributes - In the Claims section, add claims that will be added to the JWT payload.
This lets you differentiate between JWTs generated from the same JWK. - In the Data synchronization while logging in section, you can enable data synchronization with the OAuth server every time a customer logs in.
When this option is disabled, the data from the OAuth server is saved to Synerise only during the first log-in.
Implementation
After you configure OAuth, you can implement it in your applications with:
- Mobile SDK methods
- API methods (
/v3/auth/login/clientand/v3/auth/login/client/conditional)