Loyalty
In this section, you can configure global loyalty settings that apply to all promotions in your workspace. The settings are organized into four groups.
To access these settings, go to ![]() Settings > (Configuration) Loyalty.
Settings > (Configuration) Loyalty.
General
In this section, you can configure the expression used to check a profile’s point balance and define profile groups eligible to transfer loyalty points.
-
Go to
 Settings > (Configuration) Loyalty.
 -
On the General section, click Show.
Result: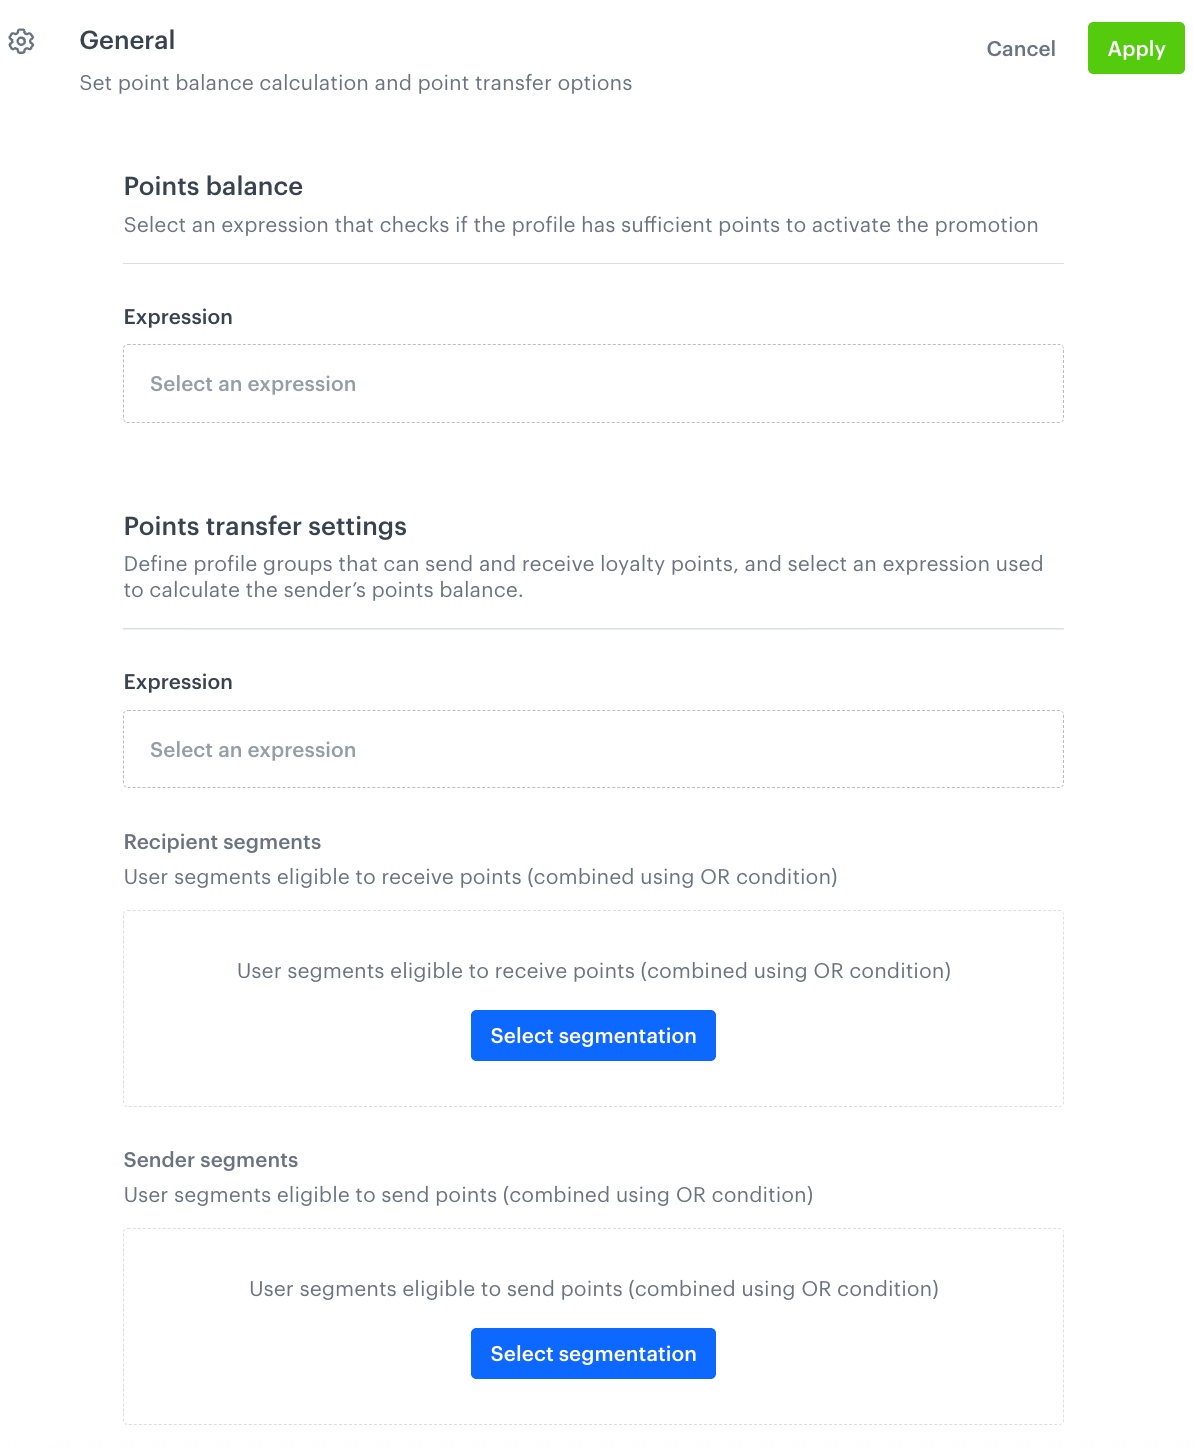
The General section of the global promotion settings -
In the Points balance section, from the Expression dropdown, select an expression that checks whether a profile has sufficient points to activate a promotion:
Tip: In Loyalty programs basics use case, you can learn how to create an expression that calculates point balance. -
In the Points transfer settings section, define which profile groups can send and receive loyalty points:
- From the Expression dropdown, select an expression used to calculate the sender’s point balance.
- In the Recipient segments section, click Select segmentation and select the segmentation(s) with profiles who are eligible to receive points. If you select several segmentations, they are combined using an OR condition.
- In the Sender segments section, click Select segmentation and select the segmentation(s) with profiles who are eligible to send points. If you select several segmentations, they are combined using an OR condition.
-
Click Apply.
Security & Locks
In this section, you can configure which profiles are blocked from receiving promotions, manage points restoration on deactivation, and apply locks to prevent simultaneous promotion requests from multiple points of sale.
-
Go to
Settings > (Configuration) Loyalty. -
On the Security & Locks section, click Show.
Result: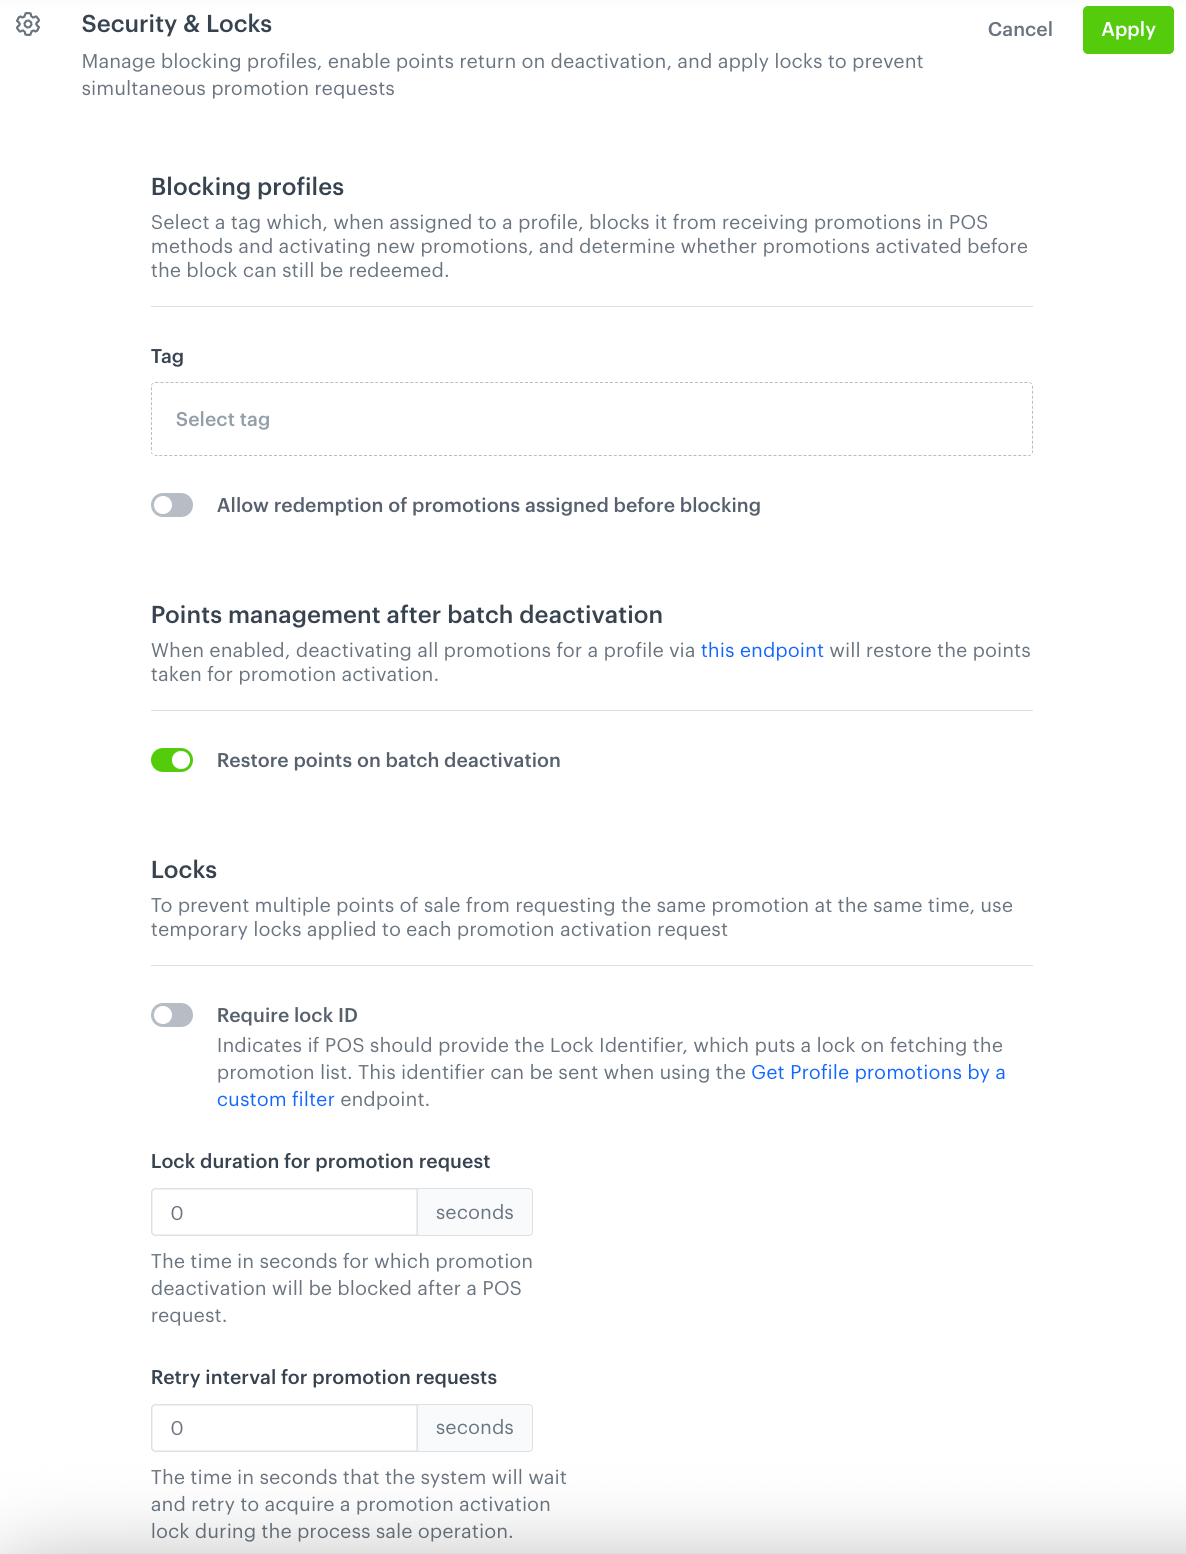
The Security and Locks section of the global promotion settings -
In the Blocking profiles section, configure which profiles are blocked from receiving promotions:
- From the Tag dropdown, select a tag.
Profiles assigned with this tag are blocked from receiving promotions through POS methods and from activating new promotions. - To allow profiles to redeem promotions that were assigned before the tag was applied, enable Allow redemption of promotions assigned before blocking.
- From the Tag dropdown, select a tag.
-
In the Points management after batch deactivation section, to return the loyalty points spent on promotion activation when all of a profile’s promotions are deactivated through the batch deactivation endpoint, enable Restore points on batch deactivation.
-
In the Locks section, configure temporary locks that prevent multiple points of sale from requesting the same promotion at the same time:
- To require POS to provide a Lock Identifier when fetching the promotion list, enable Require lock ID. This identifier can be sent using the Get Profile promotions by a custom filter endpoint.
- In Lock duration for promotion request, enter the time in seconds during which promotion deactivation is blocked after a POS request.
- In Retry interval for promotion requests, enter the time in seconds the system waits before retrying to acquire a promotion lock during the process sale operation.
-
Click Apply.
Basket & pricing rules
In this section, you can configure whether basket promotions can be combined during checkout and define how discounts are ordered and calculated.
-
Go to
Settings > (Configuration) Loyalty. -
On the Basket & pricing rules section, click Show.
Result:
The Basket and pricing rules section of the global promotion settings -
In the Combine basket promotions section, configure combining promotions:
- To allow multiple basket promotions to apply to a single checkout, enable Enable combining promotions.
- If combining is enabled, select the price to use as the basis for discount calculation:
- Always use original price — each discount is calculated from the original item price.
- Use current price (discounted if applicable) — each subsequent discount is calculated from the price after the previous discount was applied.
-
In the Discount value strategy section, define the order in which discounts are applied:
- In the Synerise identifier field, enter the number that identifies the discount type assigned to Synerise discounts in the Basket/Checkout flow.
- In the Discount order field, select the value used as the basis for ordering (for example, Discount value).
- Select the direction in which discounts are applied: Ascending or Descending.
-
Click Apply.
Promotions settings
In this section, you can define the format of automatically generated promotion codes and configure cashback and spending limit rules.
-
Go to
Settings > (Configuration) Loyalty. -
On the Promotions settings section, click Show.
Result: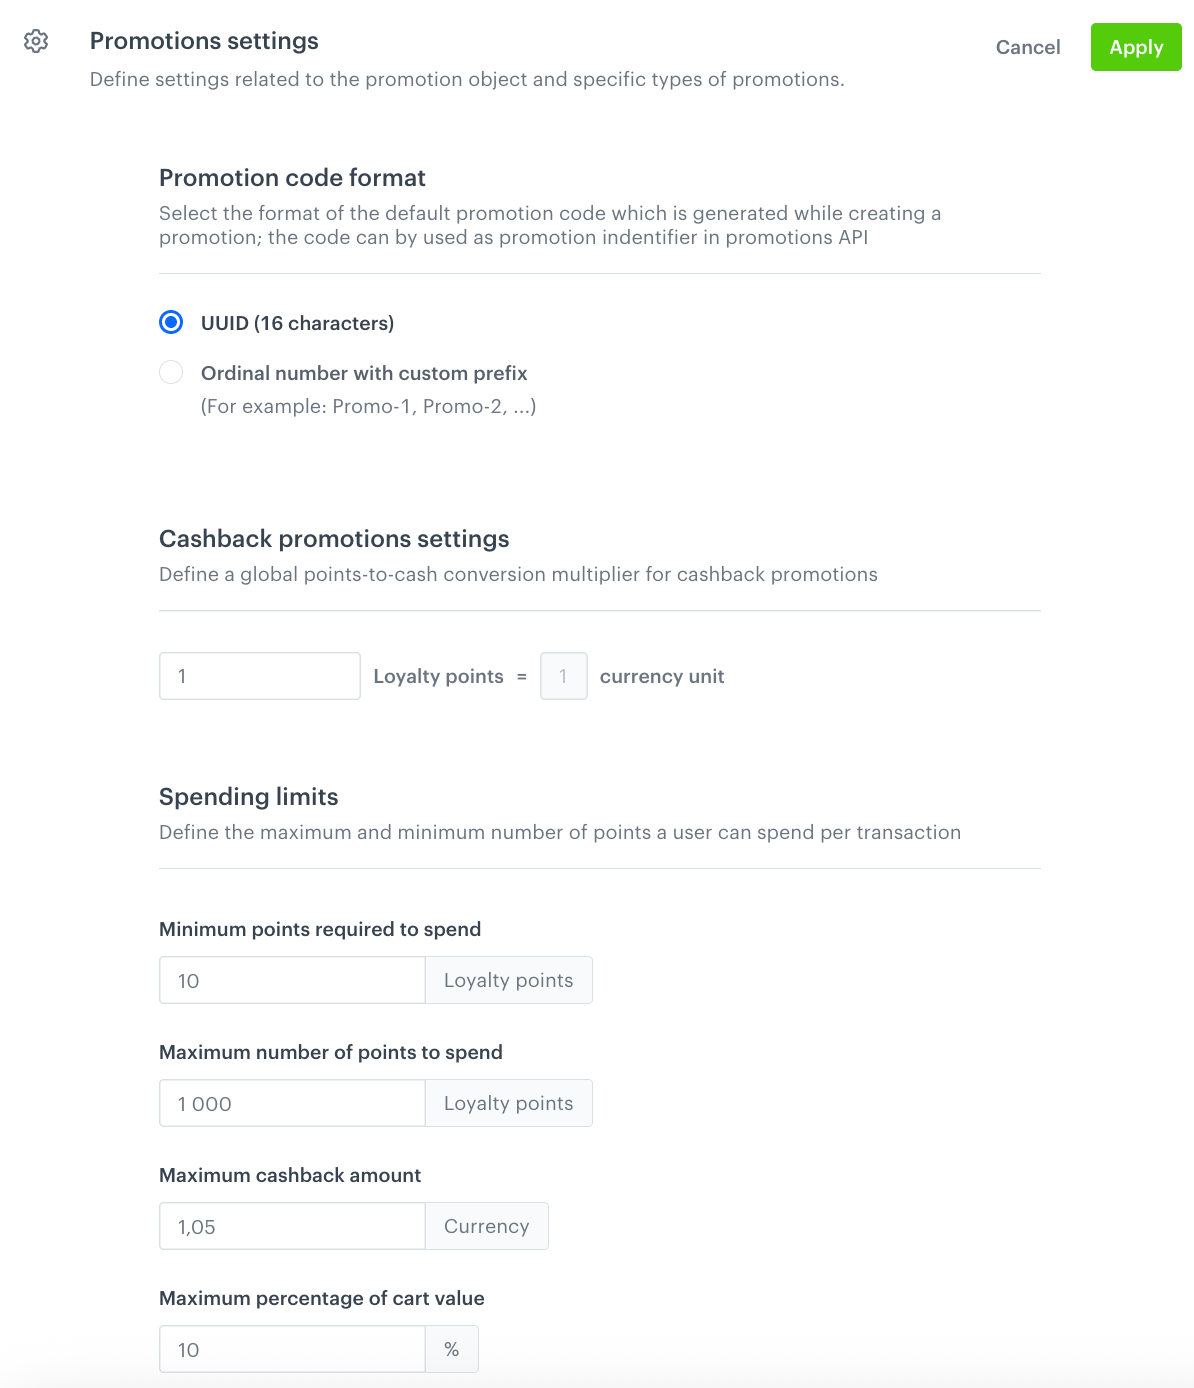
The Promotions settings section -
In the Promotion code format section, select the format for the default promotion code generated when creating a promotion. The code can be used as the promotion identifier in the promotions API:
- UUID (16 characters) — generates a UUID as the promotion code.
- Ordinal number with custom prefix — generates a code with a custom prefix and an incremental number (for example, Promo-1, Promo-2).
-
In the Cashback promotions settings section, enter the global points-to-cash conversion multiplier for cashback promotions. Define how many loyalty points equal one currency unit. These settings serve as global defaults for cashback promotions. When Creating promotions for entire basket, you can choose to apply these global rules or define a custom multiplier and spending limits for that promotion only.
-
In the Spending limits section, define the point spending boundaries per transaction:
- In Minimum points required to spend, enter the minimum number of loyalty points a profile must spend per transaction.
- In Maximum number of points to spend, enter the maximum number of loyalty points a profile can spend per transaction.
- In Maximum cashback amount, enter the maximum cashback value expressed in currency units.
- In Maximum percentage of cart value, enter the maximum cashback amount as a percentage of the cart value.
-
Click Apply.