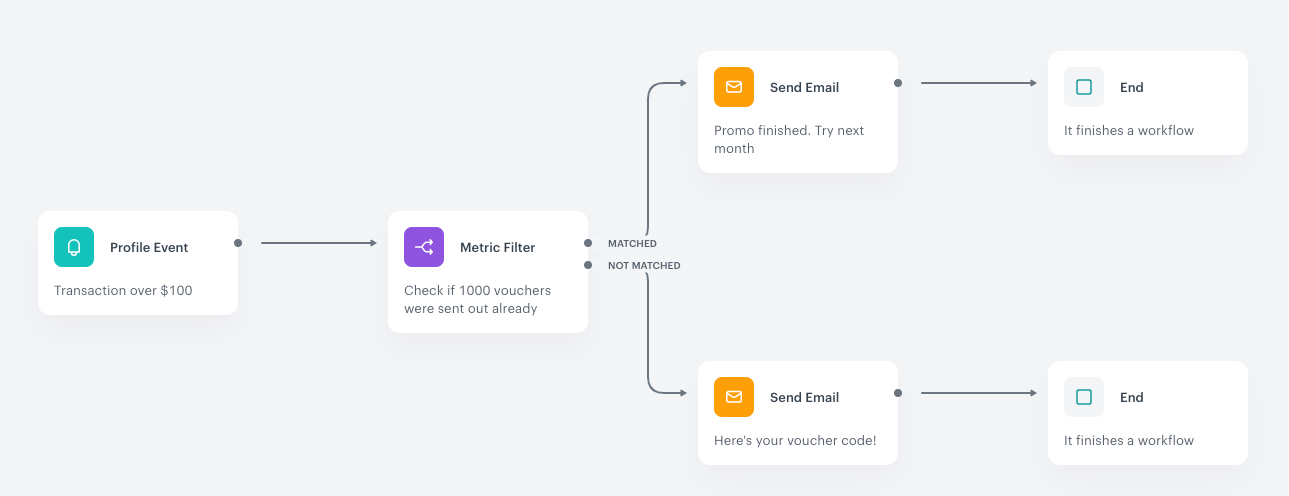
Metric Filter node
This condition allows splitting paths of a scenario in two. The result of the metric decides which path is continued.
Requirements
- You must implement a tracking code into your website.
- You must create a metric to be used in the automation process.
Configuration
- Click the pencil icon.
Result: A pop-up opens. - From the Define condition dropdown, select the metric or create a new one.
Read more about creating metrics. - Select a mathematical symbol.
- In the next field, enter the value of the metric.
- If the condition met, the
matchedpath is continued. If not, then thenot matchedpath is selected. - If
If you want to monitor the entries into this step, switch the Track datapoints toggle on. As a result, events related to the movement between nodes (
automation.clientPathStep) will be available in Decision Hub to use. These events (automation.clientPathStep,automation.clientEndStep,automation.startPath) are displayed on the activity list on the profile card regardless of the configuration of this option. - Confirm by clicking Apply.
Example of use

- It starts with a Profile Event trigger node. In the trigger settings, a transaction amount is defined at over 100$.
- The Metric Filter contains a metric that counts the number of emails with a discount code. The critical value entered in the condition is 1000.
- Then the customer proceeds to action:
- If the value defined in the condition is not exceeded, the customer follows the path in which the email with voucher code is sent.
- If the value defined in the condition is exceeded, the customer receives an email with information that the voucher pool just run out.
- When an email is sent, the process is completed.