End node
A workflow ends when a profile path or a process in a business workflow reaches this node. In this node, you can configure the logic of terminating paths and processes in workflows.
-
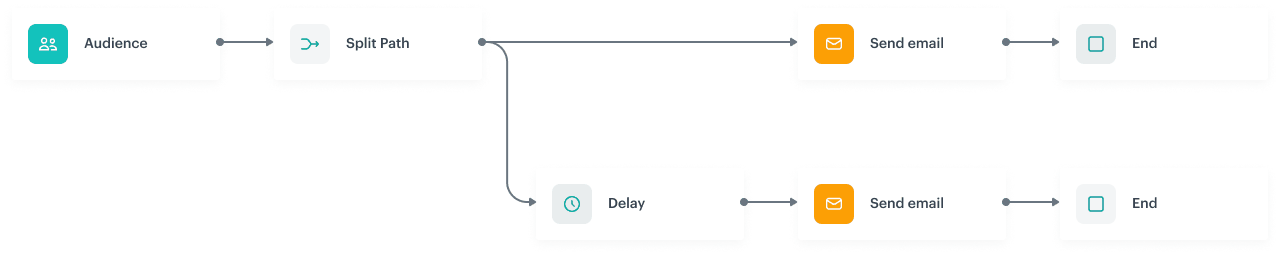
Default behavior: The workflow ends when a path or a process reaches the End node. For example, if a profile started more than one path within the workflow, other paths are stopped regardless of their progress. This behavior is presented on an image below:

-
If a workflow contains more than one End node, the first process/path that reaches the node doesn’t terminate the remaining processes/paths that have been started. This behavior is presented on an image below:
You can customize the configuration of the End nodes in your workflow. This feature lets you designate specific branches that, when completed, will terminate all remaining processes or paths in the entire workflow. However, for other branches, continuation is possible even if one of them reaches the final node.
This flexibility in configuring the End nodes lets you control the flow and termination of processes or paths, allowing you to influence the frequency of actions performed towards customers, such as sending messages, in specific circumstances:
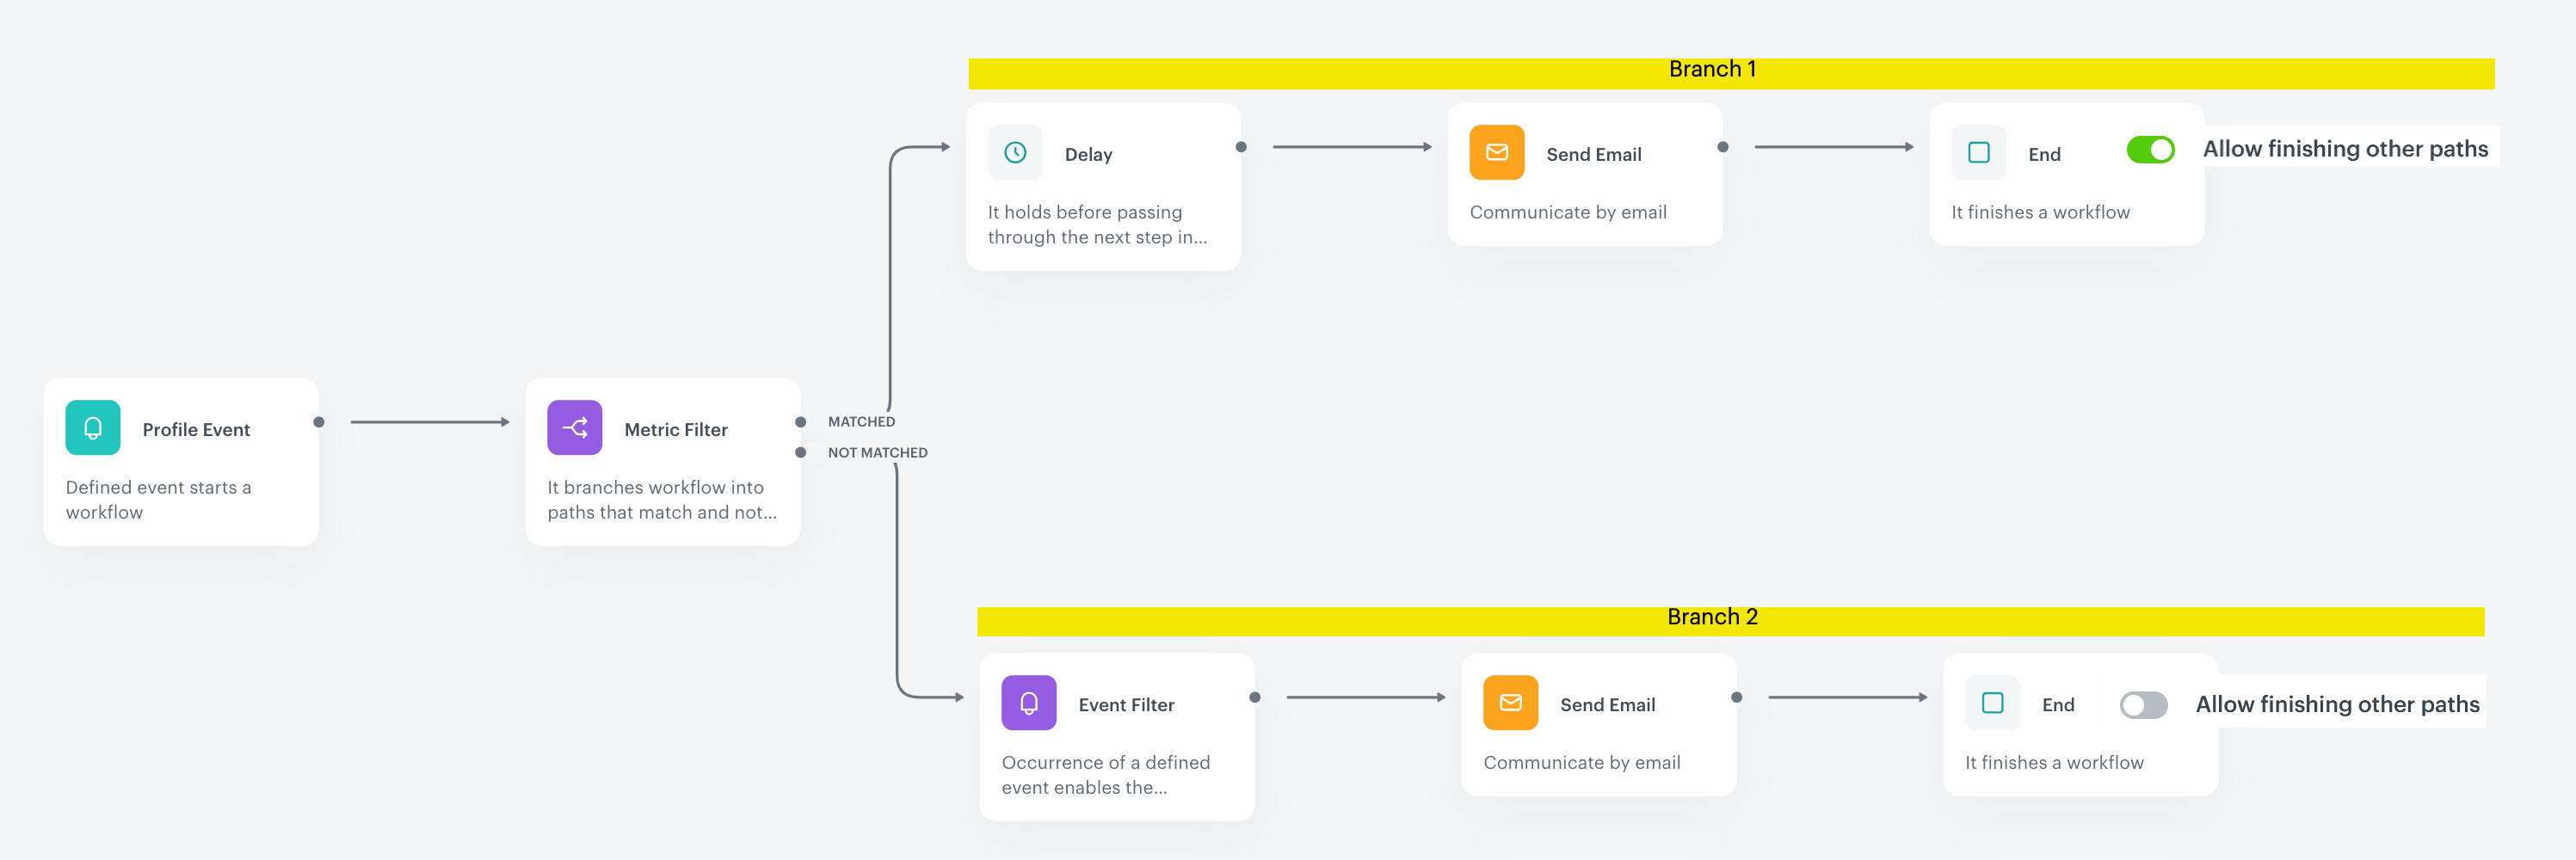
In the figure above, in Branch 2 the first path that reaches the End node terminates all paths in this branch, whereas in Branch 1 the first path that reaches the final node doesn’t affect other paths in this branch. As a result of passing through in Branch 1, the email can be sent multiple times to a profile.
Node usage in workflow
The following instructions explain how to add the End node to a workflow diagram. Once added, this node does not require any additional configuration.
- Click THEN on the node after which you want to have the End node.
Result: A dropdown list opens. - From the dropdown list, select End.
- Click the node to open its settings.
- If you want allow finishing all initiated paths within a workflow, enable Allow finishing other paths.
Example of use

This workflow is triggered by a purchase. As a result, the system automatically sends a purchase summary to a profile who bought products.
- Add a Profile Event trigger node. In the settings of the trigger, select the
transaction.chargeevent from the list. If you want to restrict the source of transactions, select an appropriate parameter and its value. - When the system detects an occurrence of the event, a profile receives an email with a purchase summary.
- When the email is sent to the profile, the workflow ends.