"Send Email" node
The Send Email node allows you to communicate with your customers through emails based on events and other conditions defined in a workflow.
When a workflow that contains this node is launched, an email campaign is created as a result. You can find its statistics in the Experience Hub as well as in the Send Email node itself.
The configuration of the node requires:
- selecting an email account from which the message will be sent,
- selecting an email template or creating a new one from scratch,
- defining the subject of the email (which displays in the recipient’s inbox)
Optionally, you can:
- define UTM parameters, URL parameters, custom parameters;
- send a test email,
- add static attachments (for example, terms and conditions, instructions, and so on) which do not contain dynamic elements generated for an individual customer,
- add dynamic attachments (for example, documents dedicated for an individual customer)
- Allowed formats:
.png,.jpg,.pdf - Maximum size of all attached files in the Send Email node is 10MB
- Allowed size of attachments in a workflow: 20MB
- Allowed formats:
Dynamic attachments
Dynamic attachments is a feature that lets you send tailored attachments through emails to each customer.
Providing dynamic attachment to Synerise
To be able to send dynamic attachments by means of the Send Email node, you must integrate your system that generates files dedicated to customers and upload them to Synerise through the Synerise API (with content encoded in base64).
When the request is successful, an attachment.upload event is generated in the context of a specific customer. While decoding the file or files, they are scanned to detect any malicious content. The file time to live is configurable and by default it is 30 days.
Adding a file to the workflow
To use a dynamic file or files uploaded to Synerise, you must use an attachment.upload event and its parameters to specify an event from which the file or files will be sourced. If the attachment.upload event contains more than one file, all of them will be included.
- Use the
attachment.uploadevent in a workflow (for example, in the Profile Event trigger). - In the settings of the node that contains this event:
- enter a unique title
- by using the event parameters, identify a specific event from which you want to source the file/files.
There is no possibility to select specific files out of the event.
- Add the Send Email node to the workflow. In the configuration of the node, from the Dynamic attachment dropdown list, select the node from which the dynamic file/files will be sourced.
All files from theattachment.uploadevent in the selected node will be attached.
Event information
- When the file is uploaded to Synerise, an
attachment.uploadevent is generated on the customer’s profile. - You can send several requests with a single file or one request with up to 5 files.
Important: In the case of sending several files in one request, the order of the files matter.
- On the user interface, the attachment parameter names will be preceded by the
attachment.[number].prefix. - You can add your own custom parameters in the request body which will let you easily indicate a particular file you want to use.
- When the request for uploading the file or files to Synerise is unsuccessful, the
attachment.failedevent is generated on the customer’s profile. - When the file expires, the
attachment.expiredevent is generated on the customer’s profile.
{
  "action": "attachment.upload",
  "eventUUID": "xxxxxxxx-xxxx-xxxx-xxxx-xxxxxxxxxxxx",
  "unique": null,
  "createDate": 1690540914606,
  "label": "Attachments uploaded",
  "params": {
    "attachment.0.size": 35,
    "attachment.0.filename": "mysamplefile.csv",
    "attachment.0.extension": "csv",
    "attachment.0.mimeType": "text/csv",
    "attachment.0.id": "xxxxxxxx-xxxx-xxxx-xxxx-xxxxxxxxxxxx",
    "attachments": [
      {
        "mimeType": "text/csv",
        "id": "xxxxxxxx-xxxx-xxxx-xxxx-xxxxxxxxxxxx",
        "minioBucketName": "c87e604e446098039e47861c04f082d268c1e5d3",
        "filename": "mysamplefile.csv",
        "extension": "csv",
        "path": "/ac584986810501a8387e41ccb794a3bf4cc4750a/709fe9f6-4d19-4e72-a406-5e20fb824bda",
        "size": 35
      }
    ]
  }
}{
"action": "attachment.upload",
"eventUUID": "xxxxxxxx-xxxx-xxxx-xxxx-xxxxxxxxxxxx",
"unique": null,
"createDate": 1690540956960,
"label": "Attachments uploaded",
"params": {
"attachment.1.filename": "file2.csv",
"attachment.0.size": 35,
"attachment.0.extension": "csv",
"attachment.2.size": 35,
"attachment.0.mimeType": "text/csv",
"attachment.1.id": "xxxxxxxx-xxxx-xxxx-xxxx-xxxxxxxxxxxx",
"attachment.2.extension": "csv",
"attachment.2.filename": "file3.csv",
"attachment.1.mimeType": "text/csv",
"attachment.1.extension": "csv",
"attachment.2.mimeType": "text/csv",
"attachment.0.filename": "file1.csv",
"attachment.0.id": "xxxxxxxx-xxxx-xxxx-xxxx-xxxxxxxxxxxx",
"attachments": [
{
"mimeType": "text/csv",
"id": "xxxxxxxx-xxxx-xxxx-xxxx-xxxxxxxxxxxx",
"minioBucketName": "c87e604e446098039e47861c04f082d268c1e5d3",
"filename": "file1.csv",
"extension": "csv",
"path": "/ac584986810501a8387e41ccb794a3bf4cc4750a/aab5fe6b-e14e-432c-ab79-fce47c0761e0",
"size": 35
},
{
"mimeType": "text/csv",
"id": "xxxxxxxx-xxxx-xxxx-xxxx-xxxxxxxxxxxx",
"minioBucketName": "c87e604e446098039e47861c04f082d268c1e5d3",
"filename": "file2.csv",
"extension": "csv",
"path": "/ac584986810501a8387e41ccb794a3bf4cc4750a/aab5fe6b-e14e-432c-ab79-fce47c0761e0",
"size": 35
},
{
"mimeType": "text/csv",
"id": "xxxxxxxx-xxxx-xxxx-xxxx-xxxxxxxxxxxx",
"minioBucketName": "c87e604e446098039e47861c04f082d268c1e5d3",
"filename": "file3.csv",
"extension": "csv",
"path": "/ac584986810501a8387e41ccb794a3bf4cc4750a/aab5fe6b-e14e-432c-ab79-fce47c0761e0",
"size": 35
}
],
"attachment.1.size": 35,
"attachment.2.id": "xxxxxxxx-xxxx-xxxx-xxxx-xxxxxxxxxxxx"
}
}Node requirements
- Create an email account which you will use to send emails.
More details about configuring and managing emails are available in “Email”. - If you plan to use dynamic attachments to your emails, you must prepare a service that generates files encoded in base64 and send them to this endpoint. These files cannot be protected with a password.
Node configuration
- To create a workflow that lets you send emails to your customers, go to Automation Hub > Workflows > New workflow.
- Select one of the profile trigger nodes, for example Profile Event.
- Click THEN > Send Email.
- To open the configuration form of the node, click it.
- Optionally, next to the node name, you can add a custom node title which will be displayed on the node.
- If you want to assign a tag to the email campaign you will send through the workflow, under the node title, click Add tag.
- From the dropdown list, select the tag.
The list contains only the tags which are available in the predefined campaigns tag folder.Tip: Assigning tags helps you organize your communications by categorizing campaigns across different channels. Additionally, you can control communication limits by applying restrictions to these tags.
Select sender account
In this part of the node configuration, you will define the email account from which the message will be sent and define the email address to which the recipients can send replies.
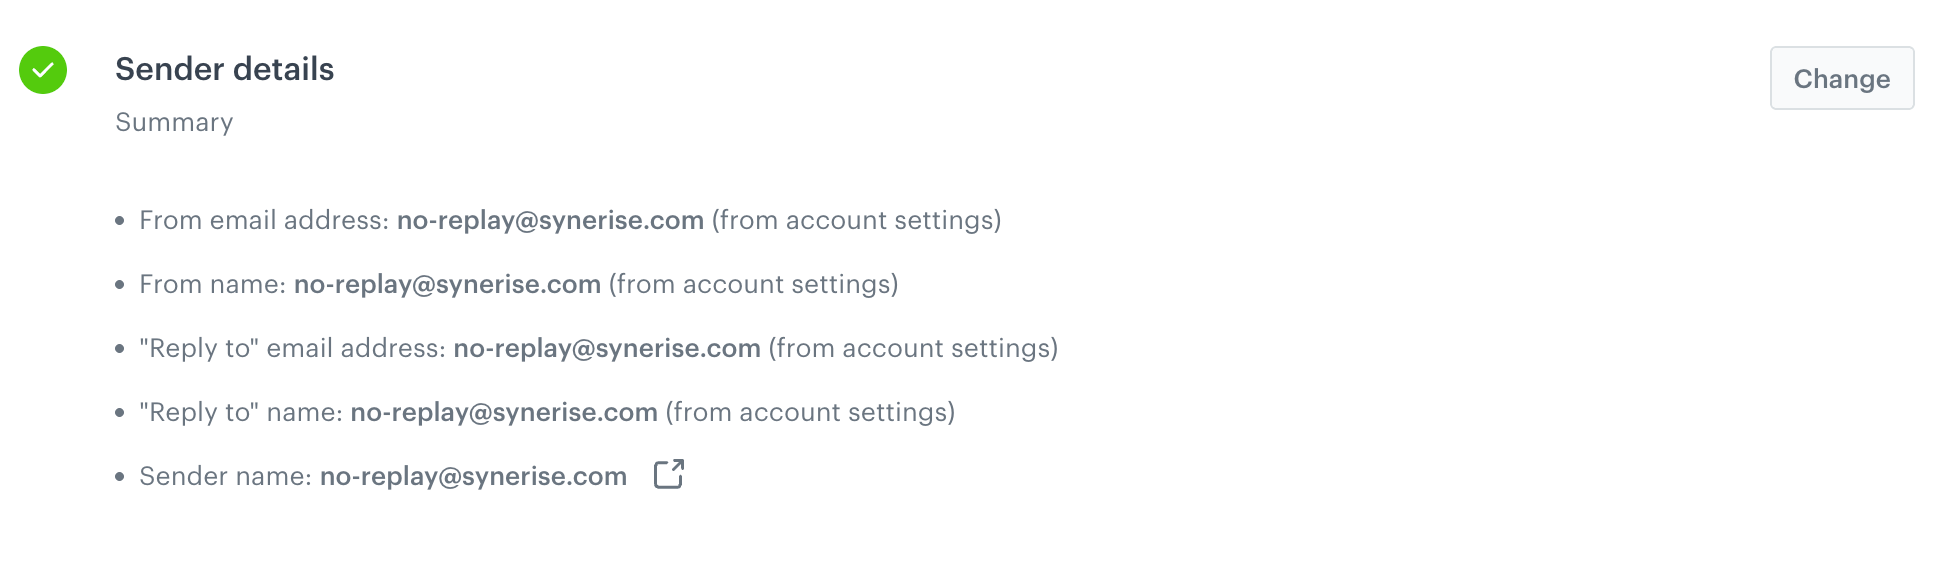
- In the Sender details section, perform the following actions:
- In the From email address, from the dropdown list, select an email account from which the email is sent.
- In the From name, enter the name of the sender that is displayed in the inbox.
- In the Reply to email address, enter the email address to which the responses to the email are delivered. Dynamic values are allowed in this field.
- In the Reply to name, enter the name of the receiver of responses. Dynamic values are allowed in this field.
- Confirm the settings in this section by clicking Apply.
Prepare email content
In this part of the node configuration, you will define the email subject that will be displayed in the recipient’s inbox and create the content of the message.
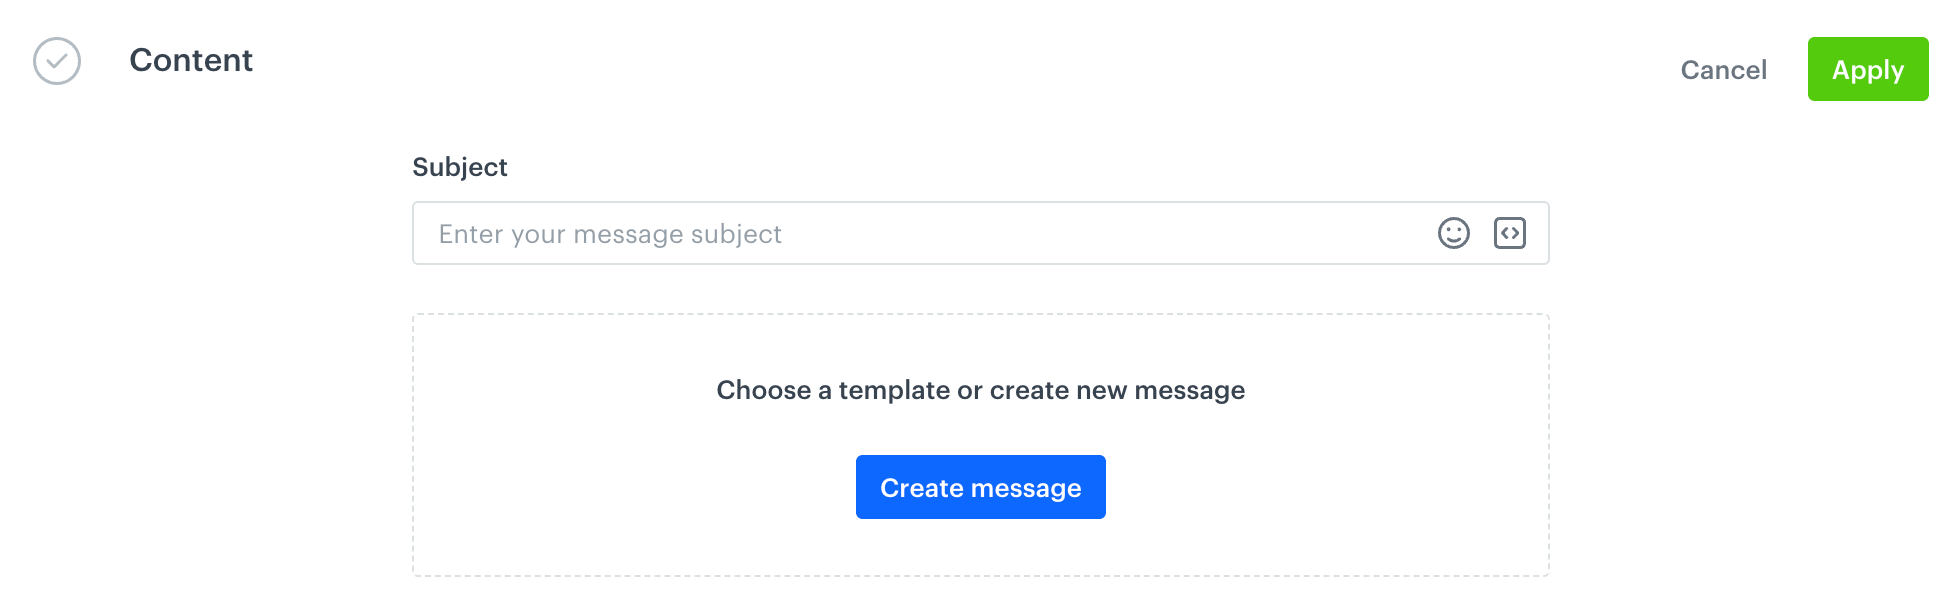
- In the Content section, click Define.
- In the Subject field, enter the subject of the email that is shown in the inbox.
- Optionally, by clicking
 you can select a snippet which will let you personalize the message subject.
 - If you want to:
- Select an email template, click Create message. From the list of the templates, select the one you want to use.
- If you make changes to the template, click Save and then Use in node.
- If you don’t make changes to the template, click Use in node.
- Create a message from scratch, click Create message > New template. The template will be available only in this node for preview and modifications.
- Select one of the builders you want to use to create a message: email template builder or basic drag&drop builder. You can also import email templates to an email builder.
- After finishing the template, click Use in node.
- Select an email template, click Create message. From the list of the templates, select the one you want to use.
- Confirm settings in the section by clicking Apply.
Adding attachments
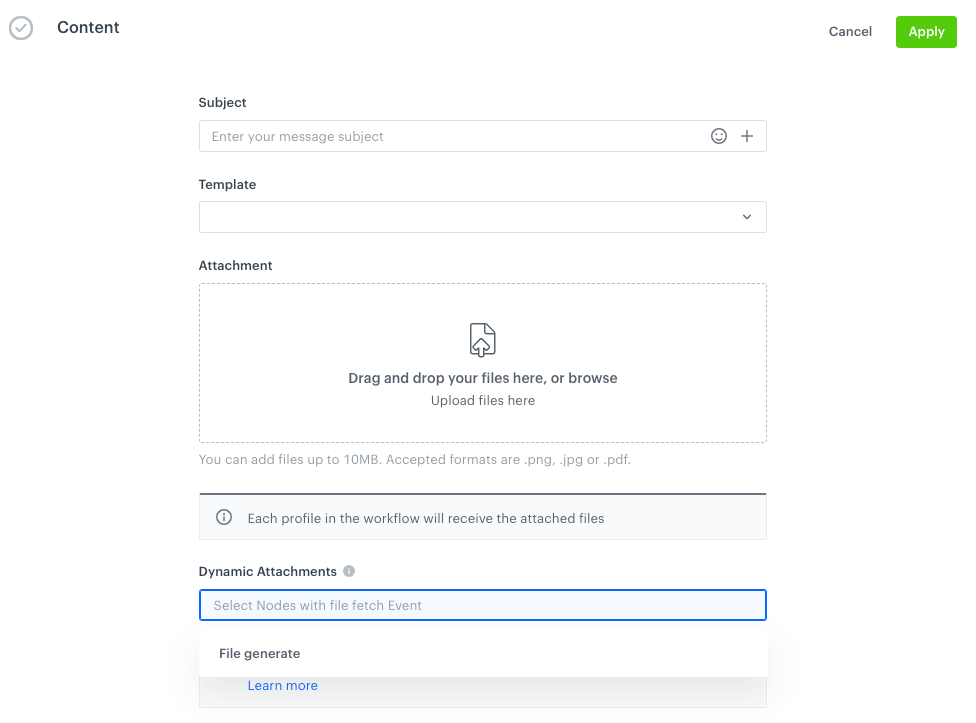
In this part of the node configuration, you will add a static attachment or a dynamic attachment. This part is optional.
-
In the Attachment section, click Define.
-
To add a static attachment, in the Attachment field, upload a file from your device. This file will be sent with the email when a profile arrives at this node.
-
To add a dynamic attachment, from the Dynamic Attachment dropdown list, select the title of the node from which this file will be sourced.
Important: The list will be empty if there is no reference to anattachment.uploadevent in any preceding node and/or the node with this event has no title. -
Confirm by clicking Apply.
Adding UTM and URL parameters
In this part of the node configuration, you will define UTM and URL parameters that will be added to the email campaign launched with the start of the workflow. This part is optional.
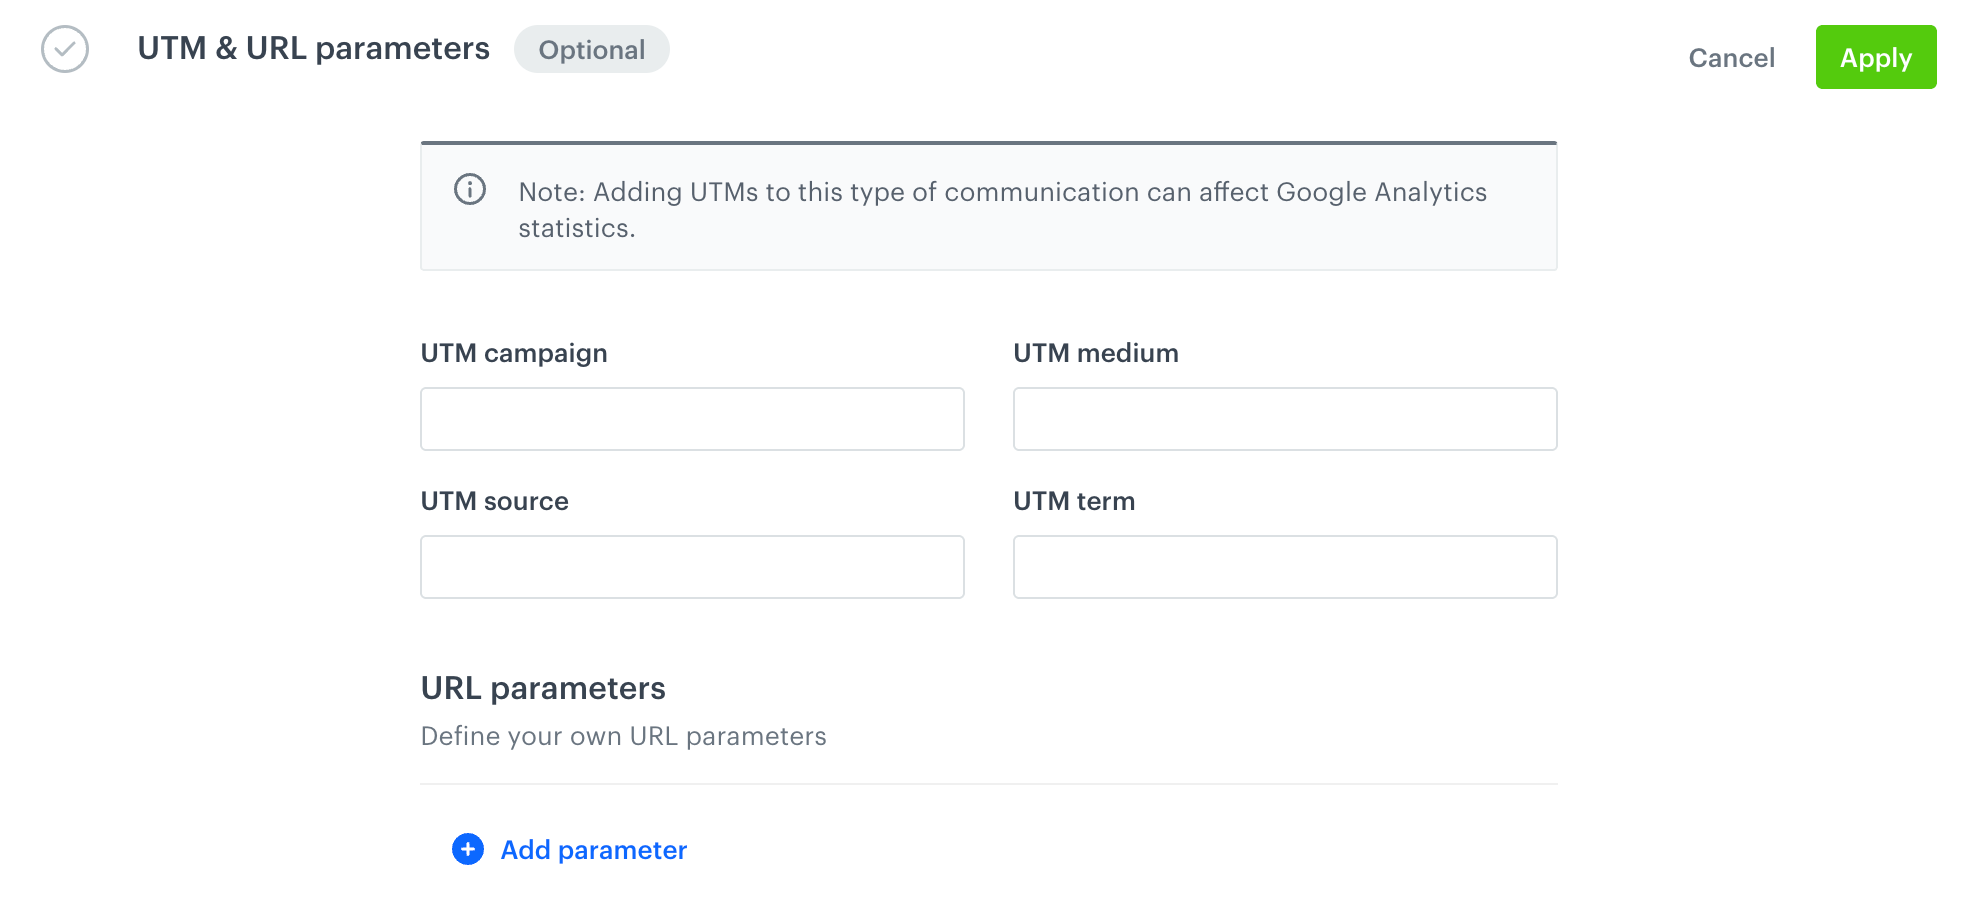
- In the UTM & URL parameters section:
- To omit this step, click Skip step. Otherwise, you won’t be able to save the workflow with this empty section.
- To add UTM and/or URL parameters, click Define.
- Fill in the following fields: UTM campaign, UTM medium, UTM source, and UTM term.
- To add URL parameters, in the URL parameters section, click Add parameter.
- Enter values for the Parameter and Value fields.
- Confirm by clicking Apply.
Adding additional parameters
If you want to add the custom event parameters with constant values to the automatically generated events in the email channel, in the Additional parameters section, click Define. Add additional parameters according to the instructions in the “Adding custom parameters” section.
This part is optional.
Sending a test email
In this part of the node configuration, you can send a test email to users available in Behavioral Data Hub or any external email address. This part is optional.
-
In the Test email section, click Define.
-
In the Profiles tab, enter the email address(es) to which you want to send a test message.
-
Click Add.
Result: The list of email addresses you added is shown.
When you send a test message to a test user who is not added to Behavioral Data Hub > Profiles in Synerise, the inserts will not display in the message. -
When your message is ready to be sent, in the upper right corner of the section, click Send test.
Defining additional node settings
- To
impose a limit on the action, switch the Action limit toggle. Enter a number and from the dropdown list, select the time unit. You can define how many times this action can be executed for the whole automation process (workflow), or you can define how many times per second/minute/hour/day/week/month can be executed.
If you want to make sure that this message is sent to a customer, even it exceeds the global limit of this type of messages for a single customer per day (more information is available here), enable the Ignore limits toggle. You may apply it to system messages such as a transaction confirmation, notifications about order delays, and so on.
- If you want to exclude customers who belong to global control group from the recipients, enable the Enable Global Control Group option.
- Confirm by clicking Apply.
Example of use
The purpose of the scenario is to control the number of vouchers granted to users who spend over $100 in an online shop. If the number of vouchers is exceeded, future customers who spend more than $100 get an email with information that the promotion has finished.
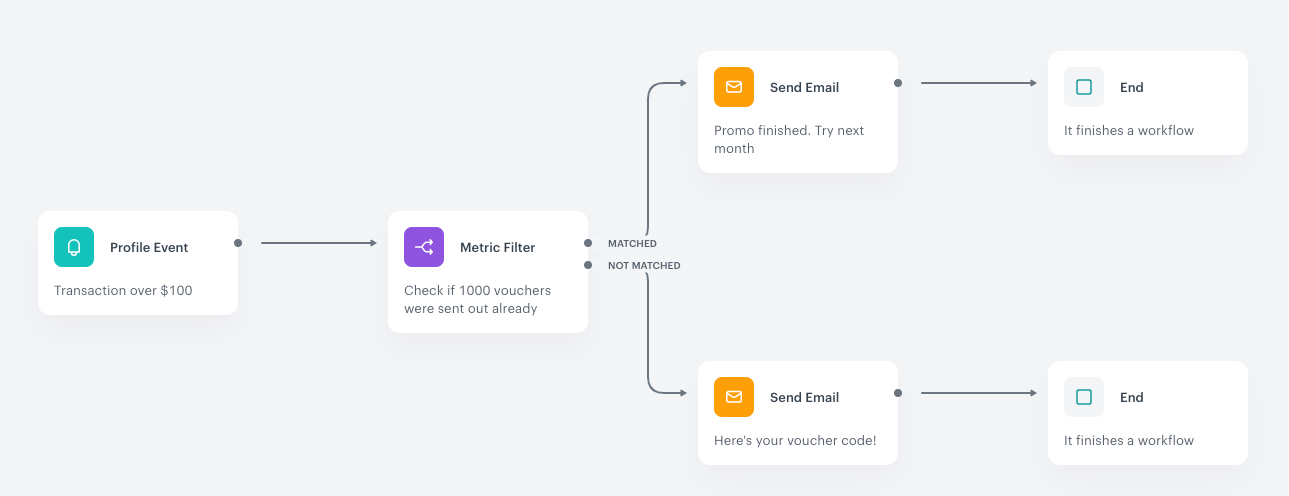
- The scenario starts with a Profile Event trigger in which the required transaction amount is more than $100.
- The Metric Filter contains a metric that counts the number of emails with a discount code. The maximum value defined in the condition is 1000.
- When the customer makes a purchase:
- If the value defined in the condition is not exceeded, the customer follows the path in which the email with voucher code is sent.
- If the value defined in the condition is exceeded, the customer receives an email with information that the voucher pool just run out.
- When an email is sent, the process is completed.
Example of use with dynamic attachment
The purpose of the scenario is to trigger a workflow when an insurance document is generated for a specific customer. Then the email is sent with the generated insurance document for this customer.
- Start with the Profile Event node. In the configuration of the node, select the
attachment.uploadevent. Specify the file you want to attach by using the event parameters. - Add the Send email node. In the configuration of the node:
- Fill out the configuration form as described in the Node configuration.
- From the Dynamic attachment dropdown list, select the title of the node from which the file will be sourced.
- Add the End node.
Result:
Example workflow