"Remove Profiles from Custom Audience" node
The Remove Profiles from Custom Audience node is one of the integration nodes from the Facebook collection. The node allows you to build a workflow that removes selected customers from a Custom Audience.
For example:
- You have a Custom Audience of customers who abandoned a cart.
- A customer makes a purchase.
- You can use the node to remove the customer from that Custom Audience.
Prerequisites
- Generate the system user access token in Facebook; as the
scopevalue, selectads_management. - Create a Custom Audience in Facebook. Save the ID o the Custom Audience in the notepad.
Node configuration
- Click the node.
- Click Select connection.
- From the dropdown list, select the connection.
If you haven’t established a connection yet, see Create a connection.
Create a connection
Generate an access token which allows you to send a request (send a segmentation of customers from Synerise to Facebook).
- At the bottom of the Select connection dropdown list, click Add connection.
- In the Access token field, enter the app access token.
Note: You can read more about access tokens in Facebook documentation. - Click Next.
- In the Connection name field, enter the name for the access token you generated.
- Click Apply.
Result: A connection is created and selected.
Define the integration settings
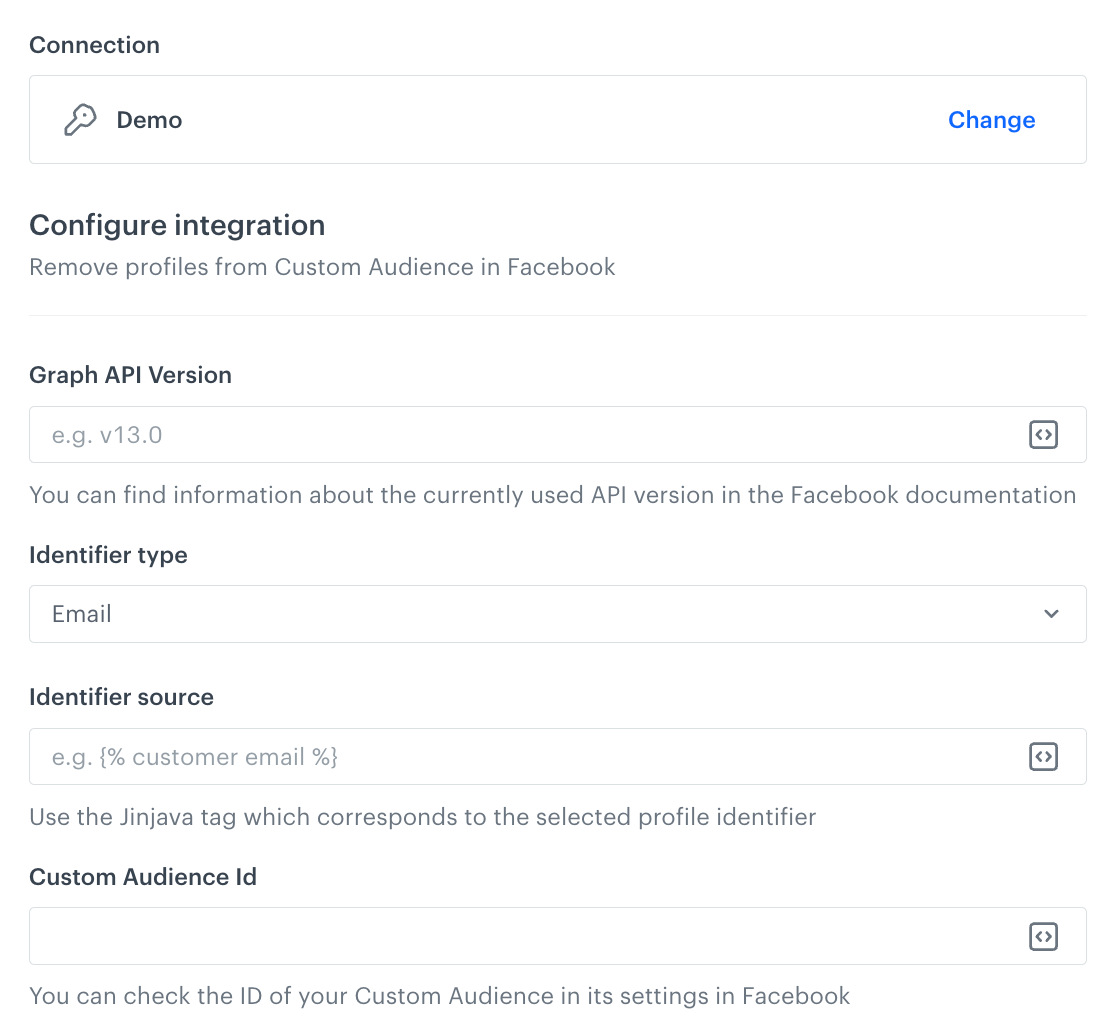
In this part of the configuration process, you select the ID of the custom audience from which you want to remove customers, you define the API version of Facebook and select the type of customer ID based on which they will be identified.

- In the Graph API version field, enter the currently used version of Facebook API.
- From the Identifier type dropdown list, select the ID of customers based on which they will be identified.
You can select either an email address or a phone number. - In the Identifier source dropdown list, enter the Jinjava tag that corresponds to the identifier type you selected step before. It can be a
{{ customer.email }}tag, for example.
Tip: You can read more about Jinjava tags in Automation Hub here. - In the Custom Audience Id field, enter the ID of the Custom Audience.
You can source this information from the settings of the Custom Audience settings in Facebook. - Confirm by clicking Apply.
Example of use

You can use this node in a workflow that removes customers with the “ABC” tag from the Custom Audience.
- Start the workflow with the Audience node.
- In the configuration of the node:
- Set the Run trigger option to one time and Immediately.
- In the Define audience section, select New audience.
- Click Define conditions.
- From the Choose filter dropdown list, select the name of the tag. In this example, it’s ABC.
- From the Choose operator dropdown list, select Is true.
- Click Apply.
- Click Apply.
- As the next node, select Remove Profiles from Custom Audience.
- Configure the settings of the node according the instruction above.
- As the final node, add End.