You can use the Send Custom Event node to transmit any event to Facebook. As a result, you'll be able to create an analysis in Facebook or create a new Custom Audience based on those events.
Prerequisites
Node configuration
- Click the node.
- Click Select connection.
- From the dropdown list, select the connection.
If you haven't established a connection yet, see Create a connection.
Create a connection
After you generate a system access token in Facebook, use it a node to establish a connection.
- At the bottom of the Select connection dropdown list, click Add connection.
- In the Access token field, enter the app access token from Facebook.
You can read more about access tokens in Facebook documentation.
- Click Next.
- In the Connection name field, enter the name for the access token you generated.
- Click Apply.
Result: A connection is created and selected.
Define the integration settings
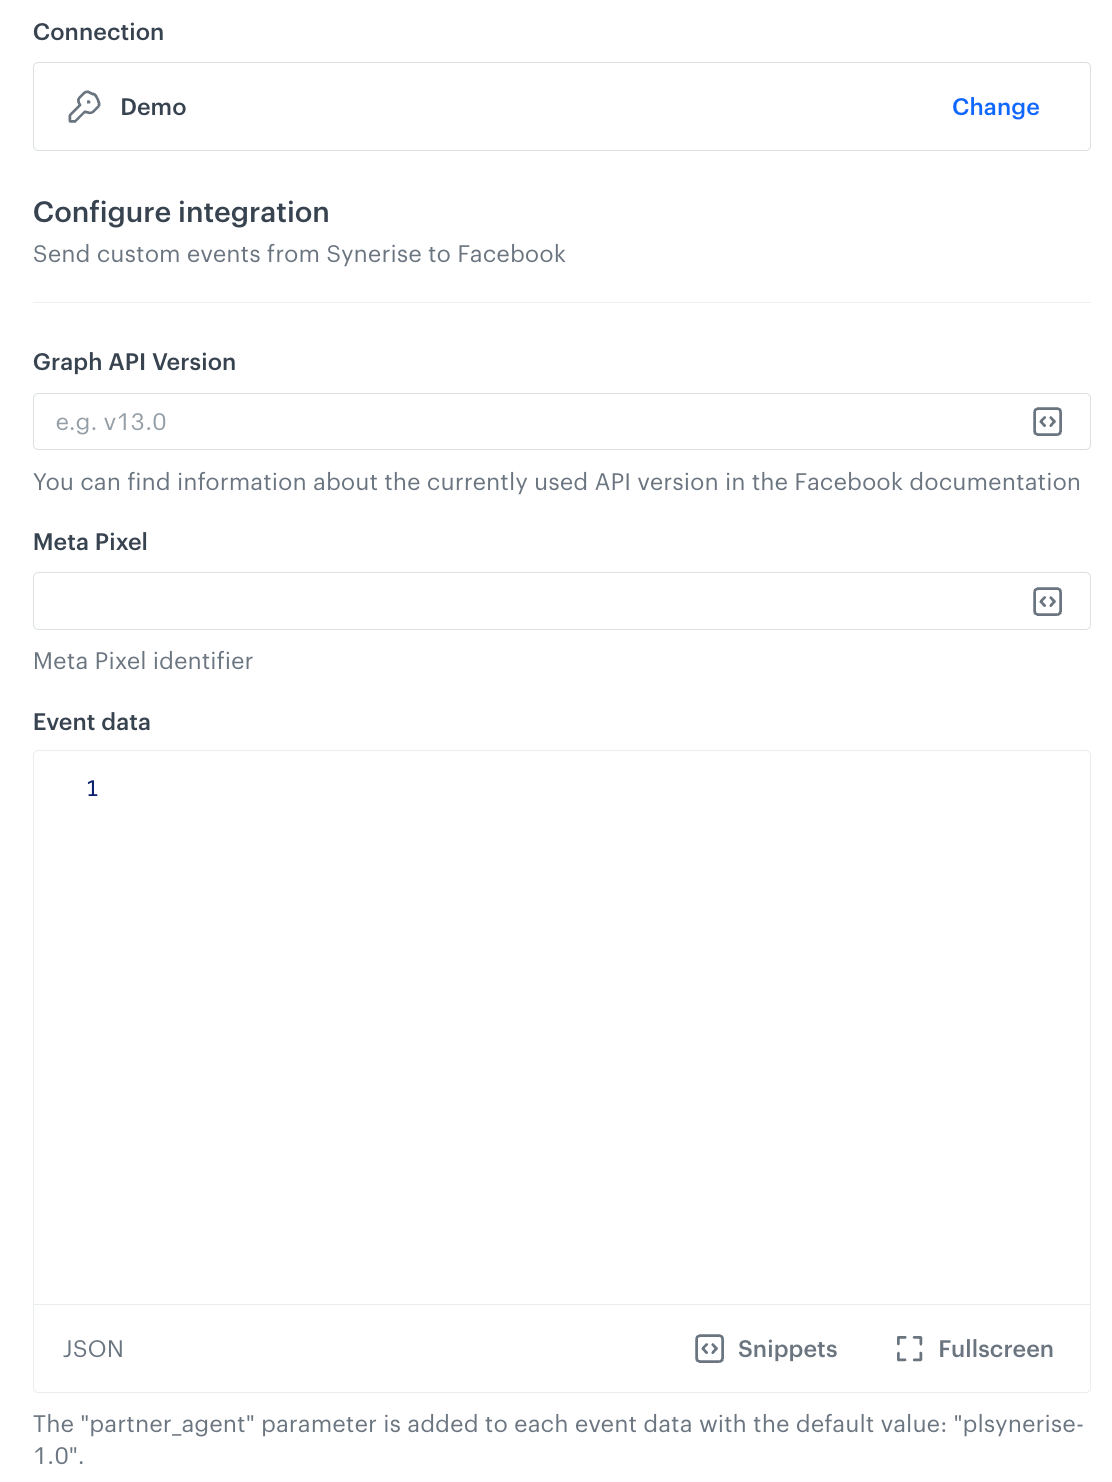
- In the Graph API version field, enter the currently used Facebook API version.
You can find information about the currently used API version in the Facebook documentation. - In the Meta Pixel field, enter the identifier of the Pixel you use in Facebook.
You can find information about how to find the ID of the Pixel in the Facebook documentation. - In the Event data field, enter your event body. Different types of events may require different data in the request body. Refer to Facebook developer documentation.
Read the article about the Automation inserts.
- Confirm by clicking Apply.
Result: When the Send Custom Event node is executed, afacebook.sendCustomEventevent is generated on the activity list of the profile who is the actor in the workflow.
Test integration
You can run a test request. If the request body contains a dynamic reference to a profile attribute and/or an event data from preceding nodes, then you can define the context using test profile data.
Complete description of the feature is available in Testing outgoing integrations.
- In the Test integration section, click Send test request.
Result: A test request builder opens. If:- a request body contains dynamic references, the request preview appears after you select the context of test profiles and events.
- a request body contains static data, the preview of the body request appears immediately.
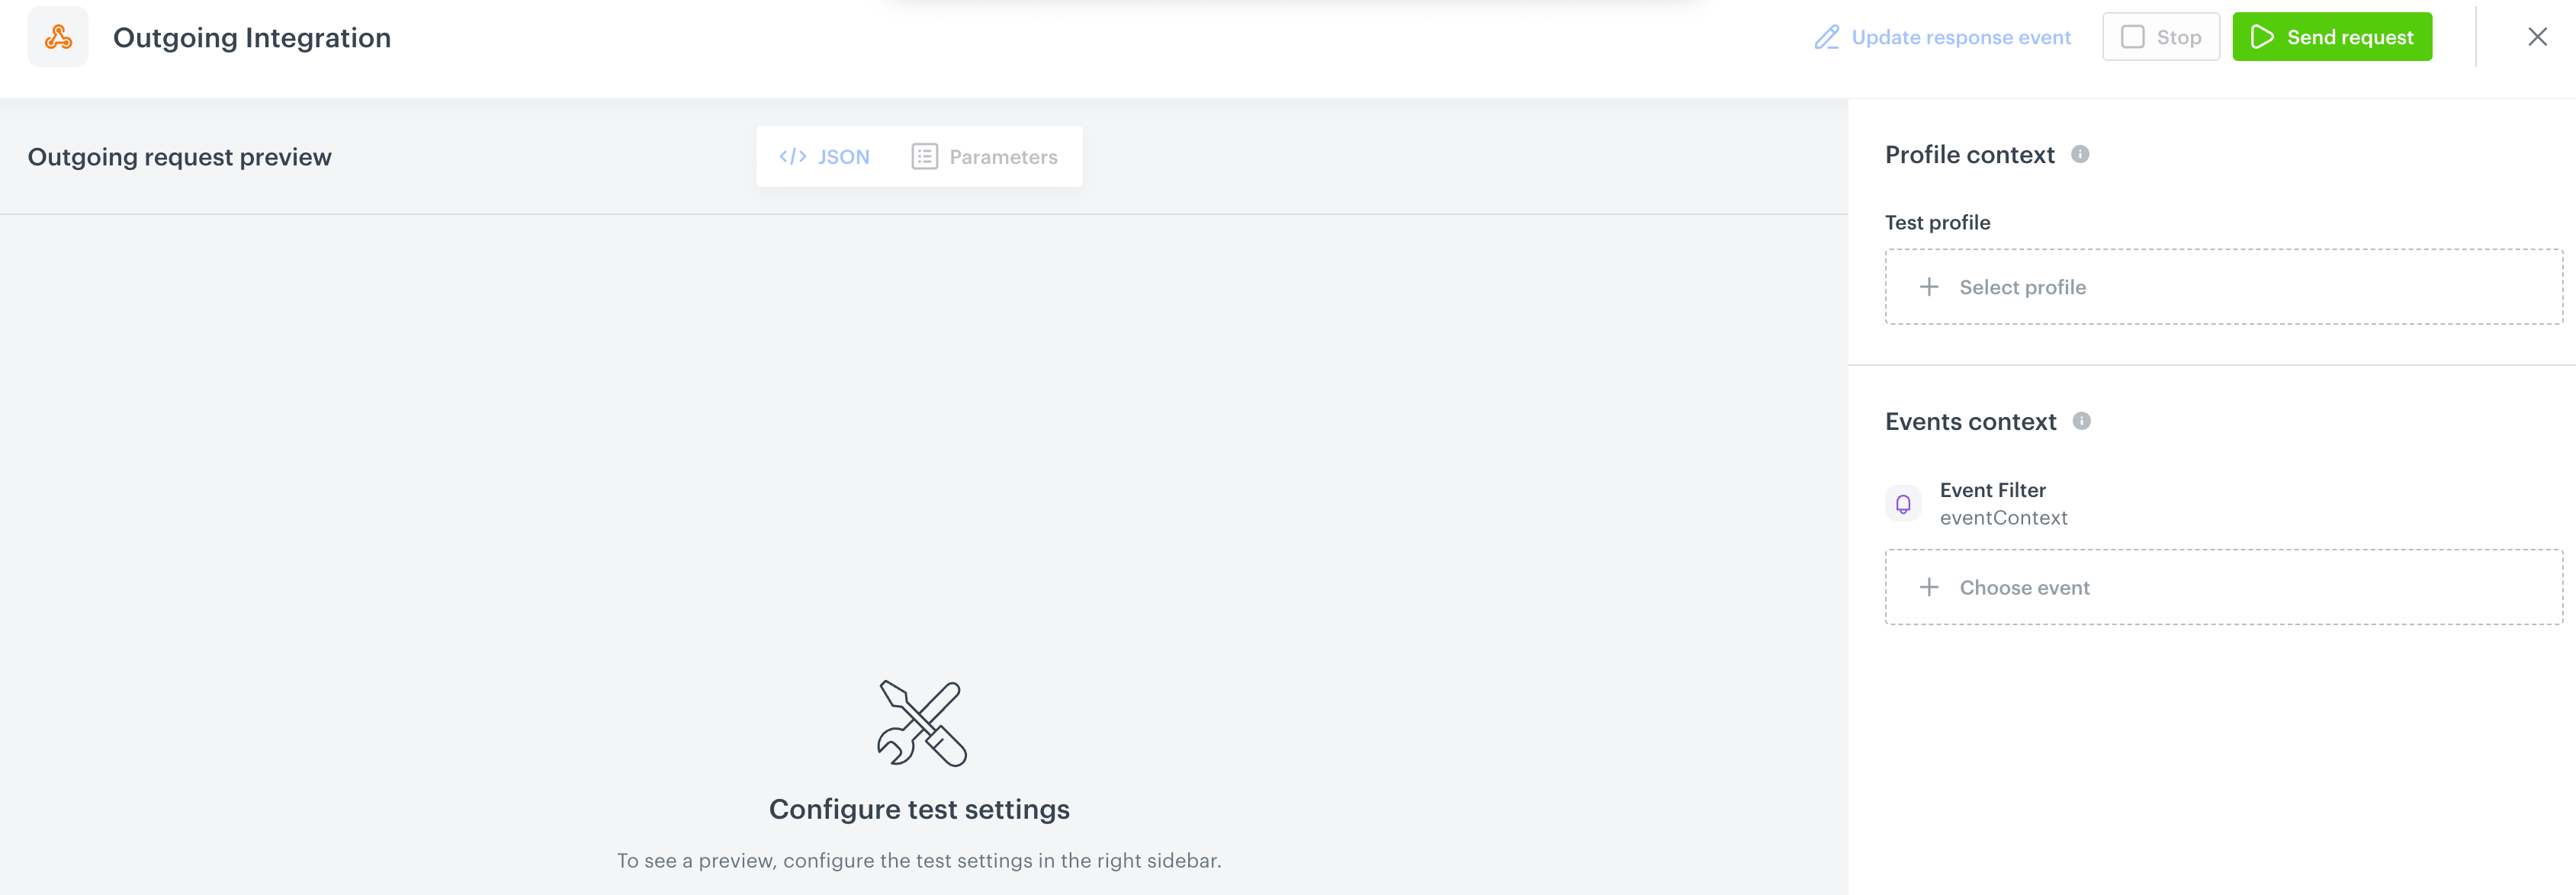
An empty test request builder - If your request contains dynamic references (otherwise, the options aren't available):
- From the Test profile dropdown, select a test profile in the context of whom the test request will be performed.
- From the Event context dropdown list, you can select a particular occurrence of an event whose values/information will be used for the test request.
- Select a test profile.
Result: A history of test profile events appears.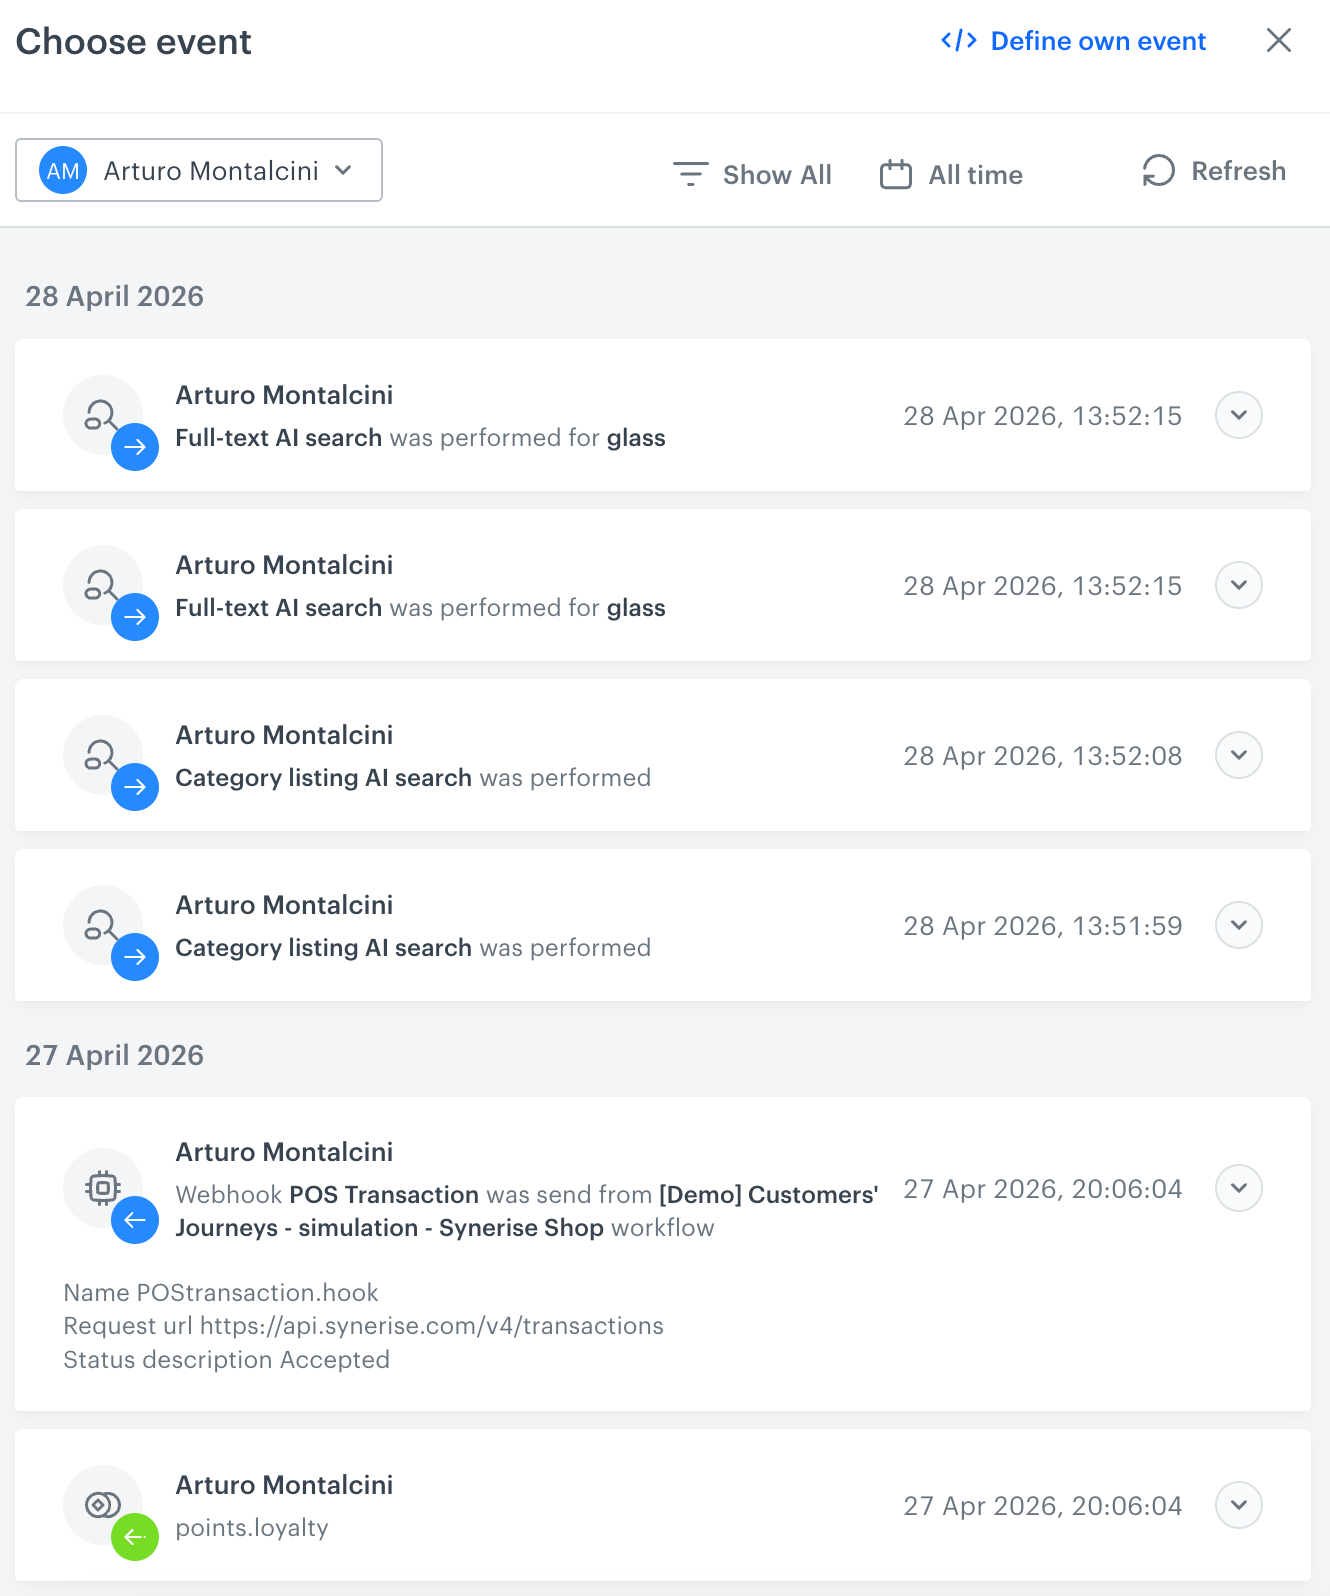
A stream of events of a test profile - From the list of events, select one whose data you want use as a context. If there is no event you can use, in the upper-right corner of the pop-up, click Define own event and provide the body of the event.
- Confirm by clicking Apply.
- Select a test profile.
- Verify the request body. If there is something you want to change, come back to the node settings from previous steps.
- If the request body is ready to test, in the upper-right corner, click Send request.
Result: The response section appears and the Update response event button becomes active. - Optionally, you can update response event with new parameters by clicking Update response event in the upper-right corner.
Example of use
For an example of use refer to our use case.