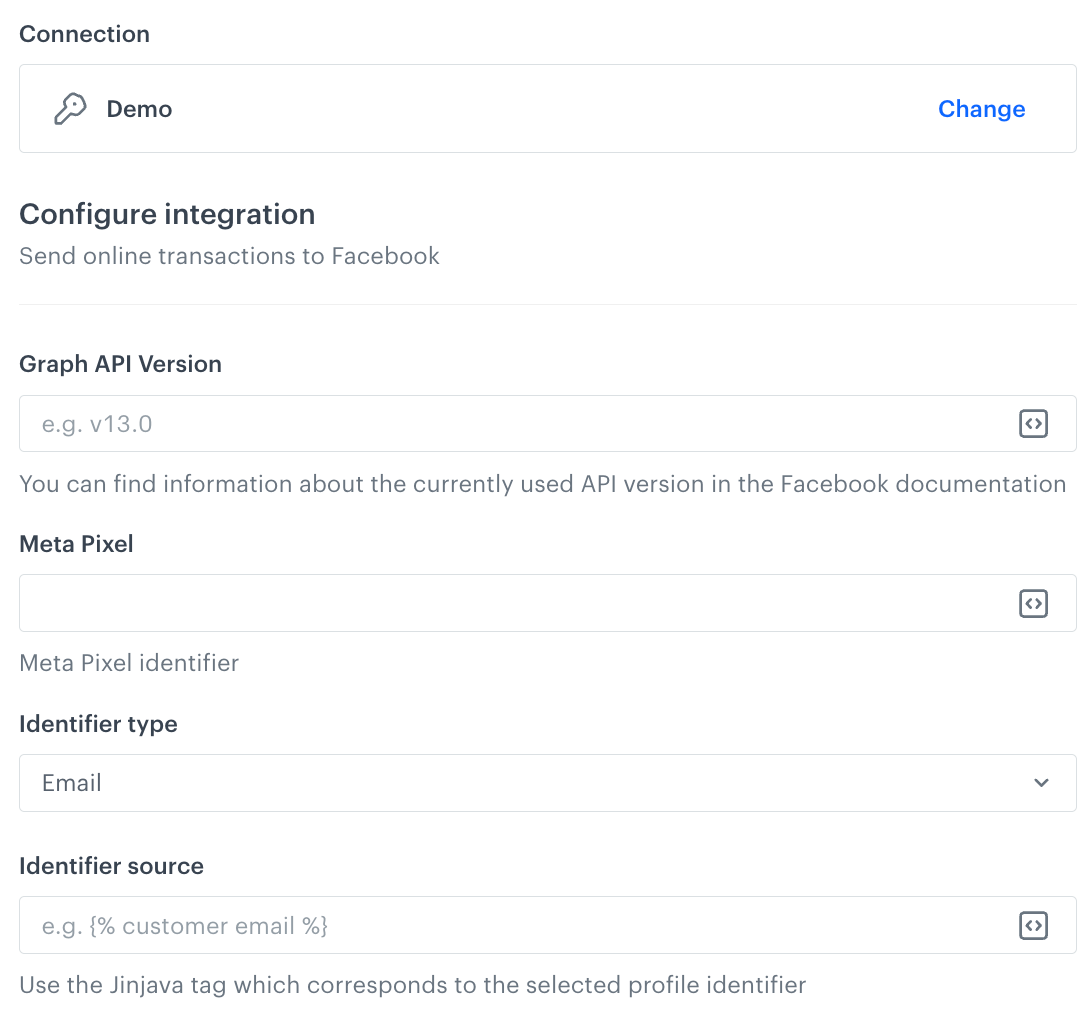
"Send Online Transactions" node
You can use the Send Online Transactions node to export online transactions to Facebook and then create audience for next marketing actions in Facebook on the basis of the transaction information.
Prerequisites
Node configuration
- Click the node.
- Click Select connection.
- From the dropdown list, select the connection.
If you haven’t established a connection yet, see Create a connection.
Create a connection
After you generate a system access token in Facebook, use it a node to establish a connection.
- At the bottom of the Select connection dropdown list, click Add connection.
- In the Access token field, enter the app access token from Facebook.
Note: You can read more about access tokens in Facebook documentation. - Click Next.
- In the Connection name field, enter the name for the access token you generated.
- Click Apply.
Result: A connection is created and selected.
Define the integration settings

- In the Graph API version field, enter the currently used Facebook API version.
You can find information about the currently used API version in the Facebook documentation. - In the Meta Pixel field, enter the identifier of the Pixel you use in Facebook.
You can find information about how to find the ID of the Pixel in the Facebook documentation. - From the Identifier type dropdown list, select the identifier of customer - an email address of phone number.
Online transactions will be matched with customers based on this identifier. - In the Identifier source field, enter the Automation insert (Jinjava tag) that corresponds to the identifier you selected as the Identifier type.
Note: Read the article about the Automation inserts. - Confirm by clicking Apply.