The integration between Synerise and Google Sheets opens up possibilities of exporting data collected in Synerise. By using the Upload Data to Spreadsheet node, you can push data from Synerise to add it in the form of a row or a column in a spreadsheet. You can use this connection in various scenarios such as exporting transactions, event data, customer information (such as marketing agreements), results of metrics, aggregates, expressions, reports, and many more to Google Sheets.
During the configuration of the node, you can use Jinjava inserts which let you dynamically refer to the profile attributes and event parameters in the workflow.
This node is not optimized for batch operations that send large volumes of data (for example, updating all events for each profile). Use it to export changes within one event, profile attribute (for example, marketing agreement), analysis results, and so on.
Prerequisites
- You must have an account in Google Sheets.
- Your account must have permissions to edit the spreadsheet you want to update.
Node configuration
- Click Google Sheets > Upload Data to Spreadsheet.
- Click Select connection.
- From the dropdown list, select the connection.
- If no connections are available or you want to create a new one, see Create a connection.
- If you selected an existing connection, proceed to defining the integration settings.
Create a connection
To allow the data exchange, establish a connection between Synerise and Google Sheets.
- At the bottom of the Select connection dropdown list, click Add connection.
- On the pop-up, click Sign in with Google.
- Select a Google account which has access to the spreadsheet you want to upload data to. The account must have editing permissions.
- Follow the instructions on the interface.
- After the successful authentication, click Next.
- In the Connection name field, enter the name of the connection.
It's used to find the connection on the list. - Click Apply.
Result: A connection is created and selected.
Define the integration settings
In this step, fill in the form that allows you to send data from Synerise to a table in Google Sheets.
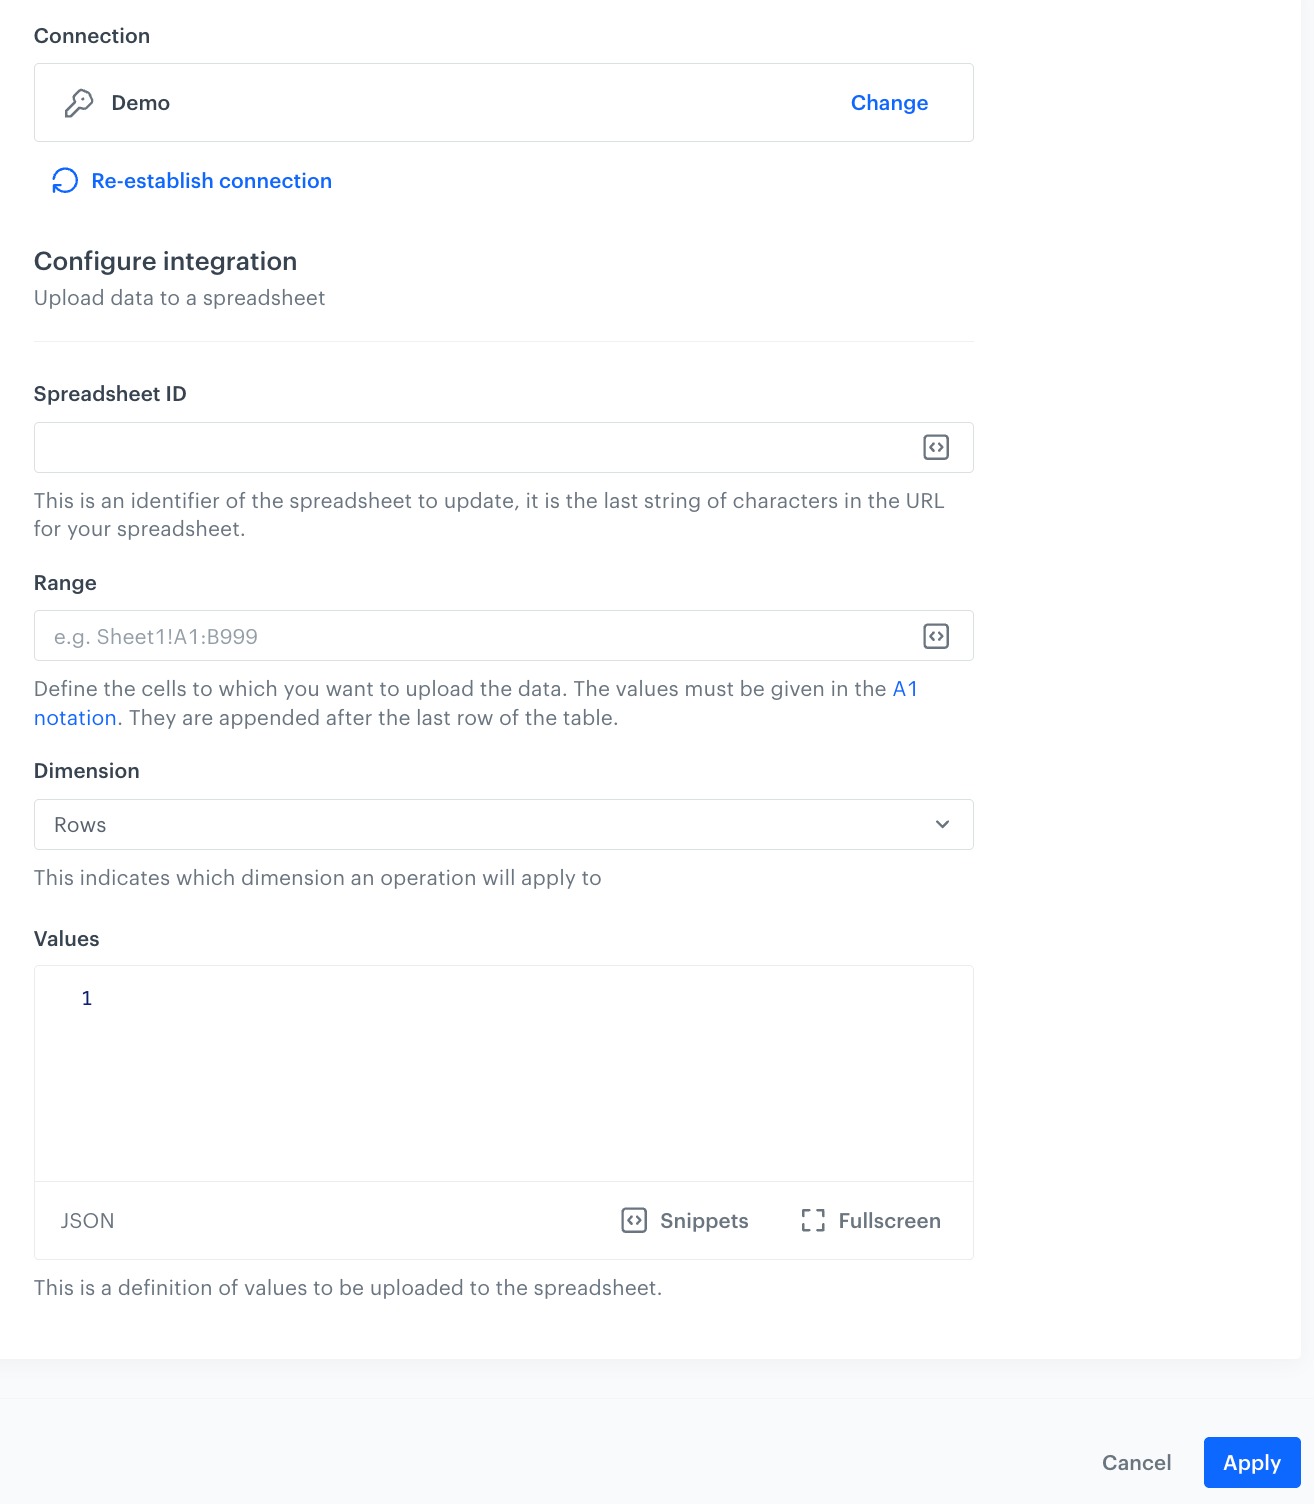
- In the Spreadsheet ID field, enter the ID of the spreadsheet to which you want to upload data.
You can find the ID in the URL of the spreadsheet. - In the Range field, define the range of cells to which the data will be uploaded. The values will be inserted to the first empty cell available in a defined range.
The value in this field must be given in the A1 notation, for exampleSheet1!A4:A5, then the data will be added to A4 and A5 cells in theSheet1spreadsheet only if the cells defined in a notation are empty. - From the Dimension dropdown list, select whether you want to add values in a column (vertically) or in a row (horizontally). Select this option in accordance with the value defined in the Range field (step 2).
The screens below present adding the following values:
John,Doein a column and row dimension, respectively:
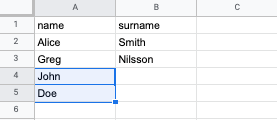
The screen presents values added in a column dimension 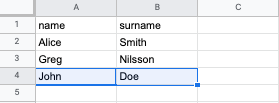
The screen presents values added in a row dimension - In the Values field, enter the data you want to upload to the spreadsheet. For example:
[
    [
        "John", "Doe"
    ],
[
        "Alice", "Anderson"
    ]
]
In the request body with the values you can use inserts and use Jinjava to refer to the data gathered in Synerise, such as results of the analyses (metrics, aggregates, expressions). For more information about appending values to spreadsheets, go to Google documentation.
- Confirm by clicking Apply.
Result: When the Upload Data to Spreadsheet node is executed, agoogleSheets.uploadDataevent is generated on the activity list of the profile who is the actor in the workflow.
Test integration
You can run a test request. If the request body contains a dynamic reference to a profile attribute and/or an event data from preceding nodes, then you can define the context using test profile data.
Complete description of the feature is available in Testing outgoing integrations.
- In the Test integration section, click Send test request.
Result: A test request builder opens. If:- a request body contains dynamic references, the request preview appears after you select the context of test profiles and events.
- a request body contains static data, the preview of the body request appears immediately.
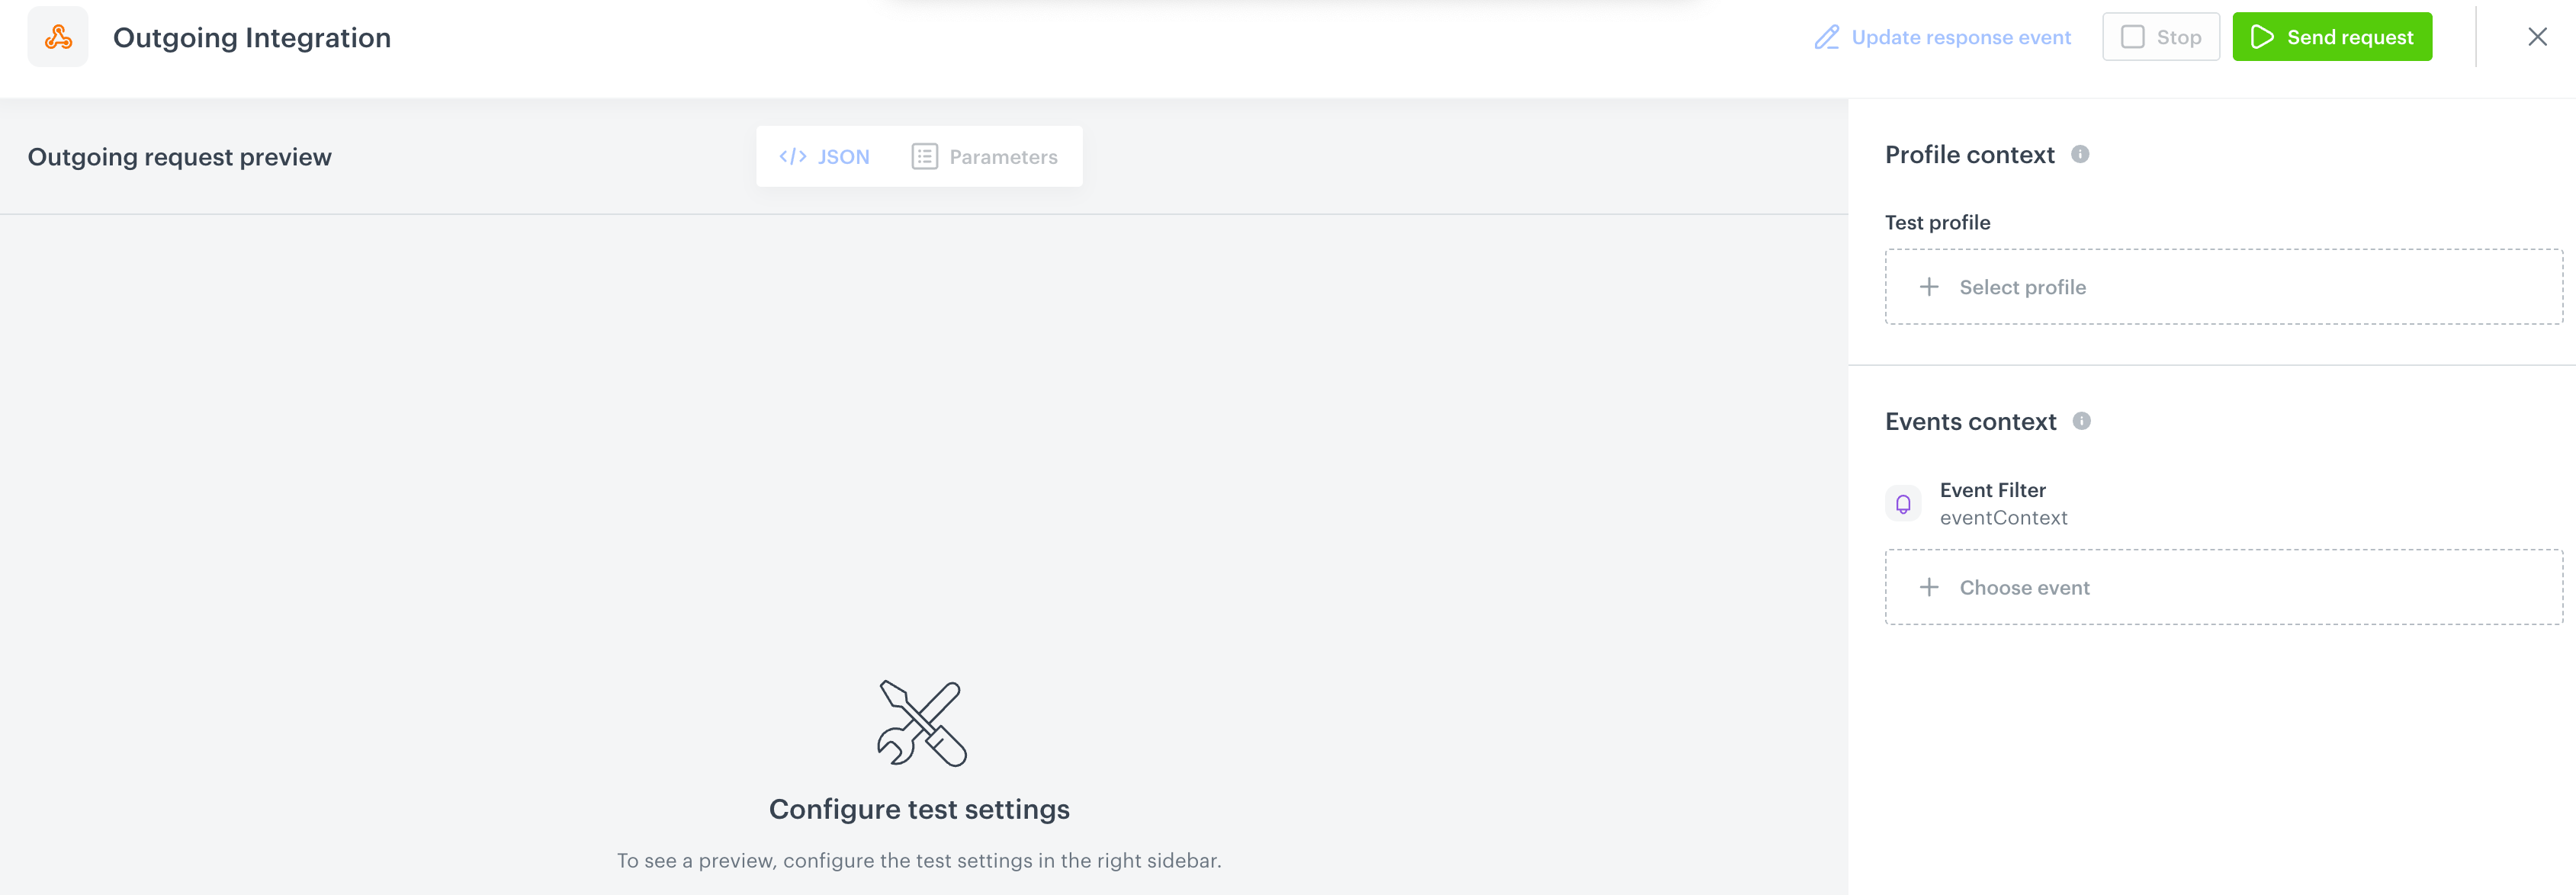
An empty test request builder - If your request contains dynamic references (otherwise, the options aren't available):
- From the Test profile dropdown, select a test profile in the context of whom the test request will be performed.
- From the Event context dropdown list, you can select a particular occurrence of an event whose values/information will be used for the test request.
- Select a test profile.
Result: A history of test profile events appears.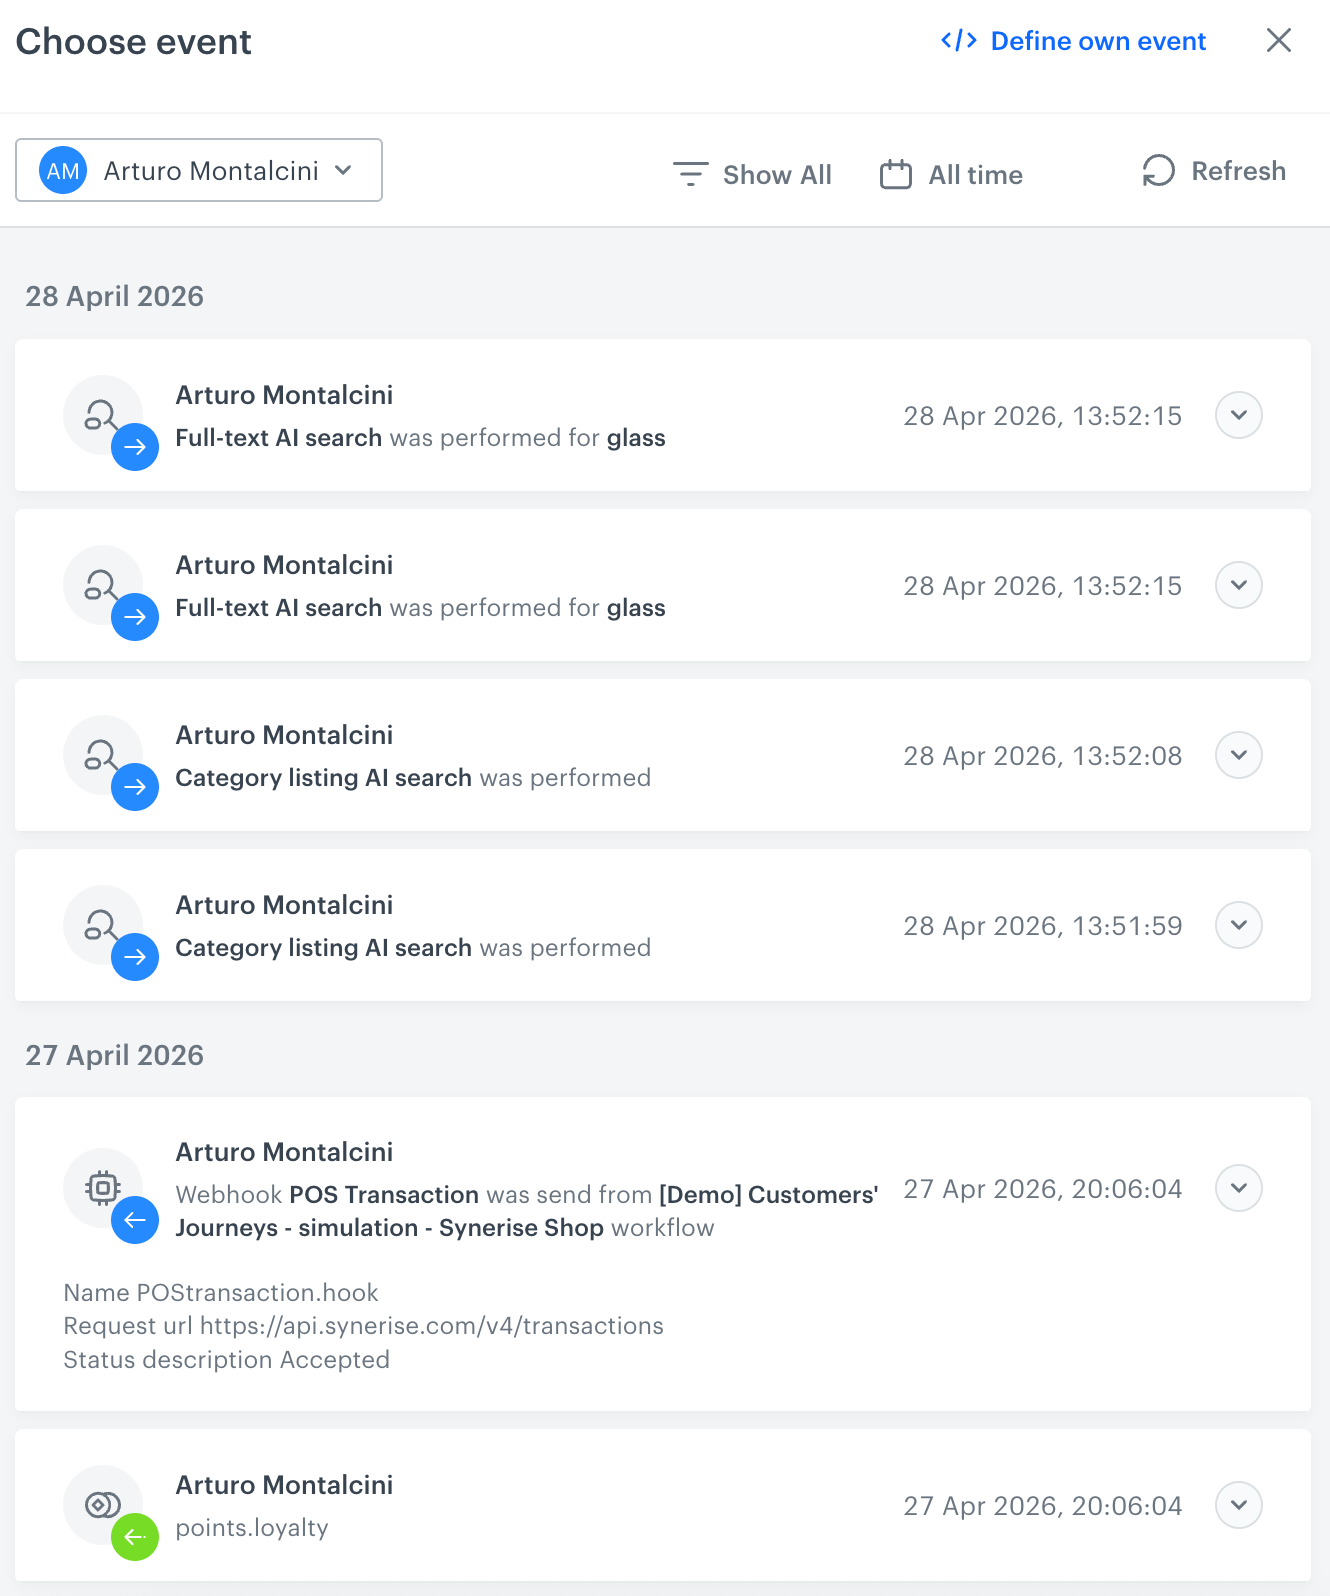
A stream of events of a test profile - From the list of events, select one whose data you want use as a context. If there is no event you can use, in the upper-right corner of the pop-up, click Define own event and provide the body of the event.
- Confirm by clicking Apply.
- Select a test profile.
- Verify the request body. If there is something you want to change, come back to the node settings from previous steps.
- If the request body is ready to test, in the upper-right corner, click Send request.
Result: The response section appears and the Update response event button becomes active. - Optionally, you can update response event with new parameters by clicking Update response event in the upper-right corner.
Example of use
Refer to these use cases to see how you can use this node: