The Send Channel Message node lets you create a workflow for sending notifications to your team members in a Microsoft Teams channel. For example, you may send notifications immediately after a deviation occurs in your workspace.
Prerequisites
- Go to Power Automate to create a workflow from a channel in Teams. Save workflow to generate incoming webhook URL.
- Edit the created workflow by filling out the TeamId and ChannelId fields. These values will be suggested. If not:
- To get the value of TeamId, go to the MS Teams application and retrieve a link to the team. TeamId is the part of generated URL groupId=XXXX.
- To get the value of ChannelId, go to the MS Teams application and retrieve a link to the channel. ChannelId is a part of generated URL channel/XXXXXXXX.
- Save the changes in the workflow.
- If you want to send an interactive message (such message can contain links, simple surveys, sections), prepare it in AdaptiveCard.
Recommended
Optionally, you can test the integration by posting a request to the webhook URL generated as a part of prerequisites. Body of the request must be as follows:
{
  "type": "message",
  "attachments": [
    {
      "contentType": "application/vnd.microsoft.card.adaptive",
      "contentUrl": null,
      "content": { // your AdaptiveCard goes here
        "type": "AdaptiveCard",
        "$schema": "http://adaptivecards.io/schemas/adaptive-card.json",
        "version": "1.3" // webhook integrations support only 1.3 version!
      }
    }
  ]
}
Node configuration
- Click the node.
- On the pop-up, click Create connection.
- In the Incoming webhook URL field, enter the webhook you created earlier.
- Click Next.
- In the Connection name field, enter the name for the connection you created.
- Click Apply.
Result: A connection is created and selected.
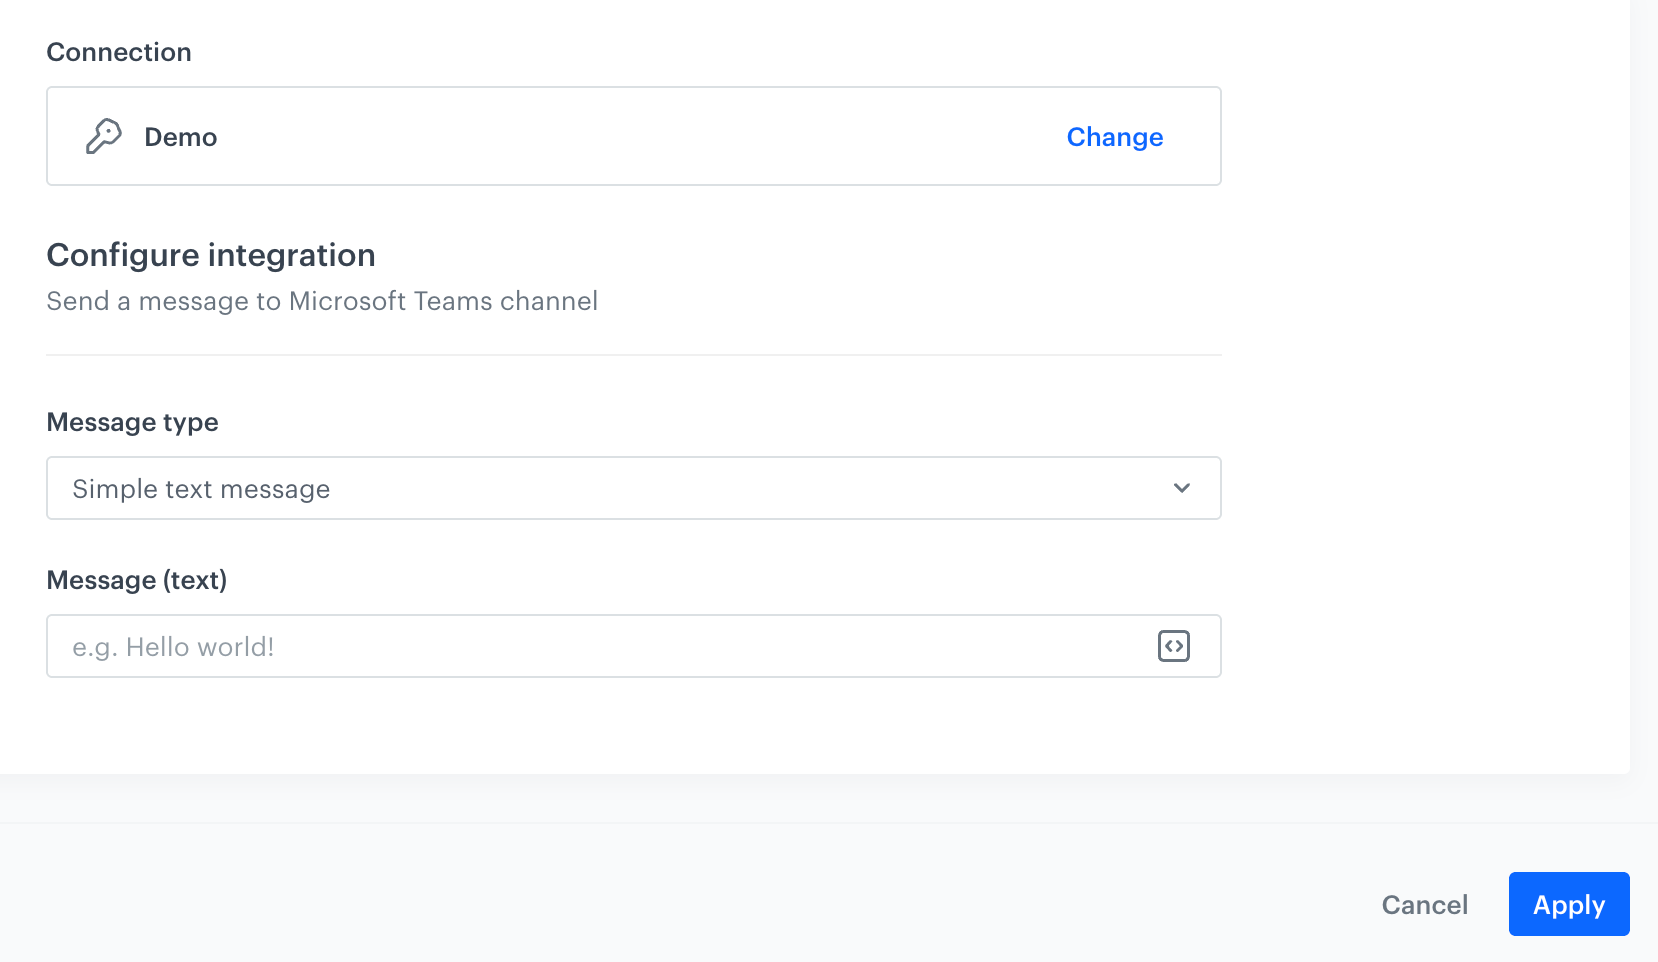
Blank node configuration form From the Type of message dropdown list, select the type of the message you want to create:
- Simple text message - Choosing this option lets you write a plain text.
- Interactive message (JSON) - Choosing this option lets you build messages with sections, buttons, links, simple surveys.
Follow the scenario according to the message type you selected:
- If you selected the Simple message option:
- In the Text of message field, enter the text you want to include in the message.
- If you selected the Interactive message (JSON) option:
- In the JSON body of message field, enter the structure of the message you have prepared in AdaptiveCard as a part of prerequisites.
- If you selected the Simple message option:
- Confirm by clicking Apply.
Result: When the Send Channel Message node is executed, aMSteams.sendChannelMessageevent event is generated on the activity list of the profile who is the actor in the workflow.
Test integration
You can run a test request. If the request body contains a dynamic reference to a profile attribute and/or an event data from preceding nodes, then you can define the context using test profile data.
Complete description of the feature is available in Testing outgoing integrations.
- In the Test integration section, click Send test request.
Result: A test request builder opens. If:- a request body contains dynamic references, the request preview appears after you select the context of test profiles and events.
- a request body contains static data, the preview of the body request appears immediately.
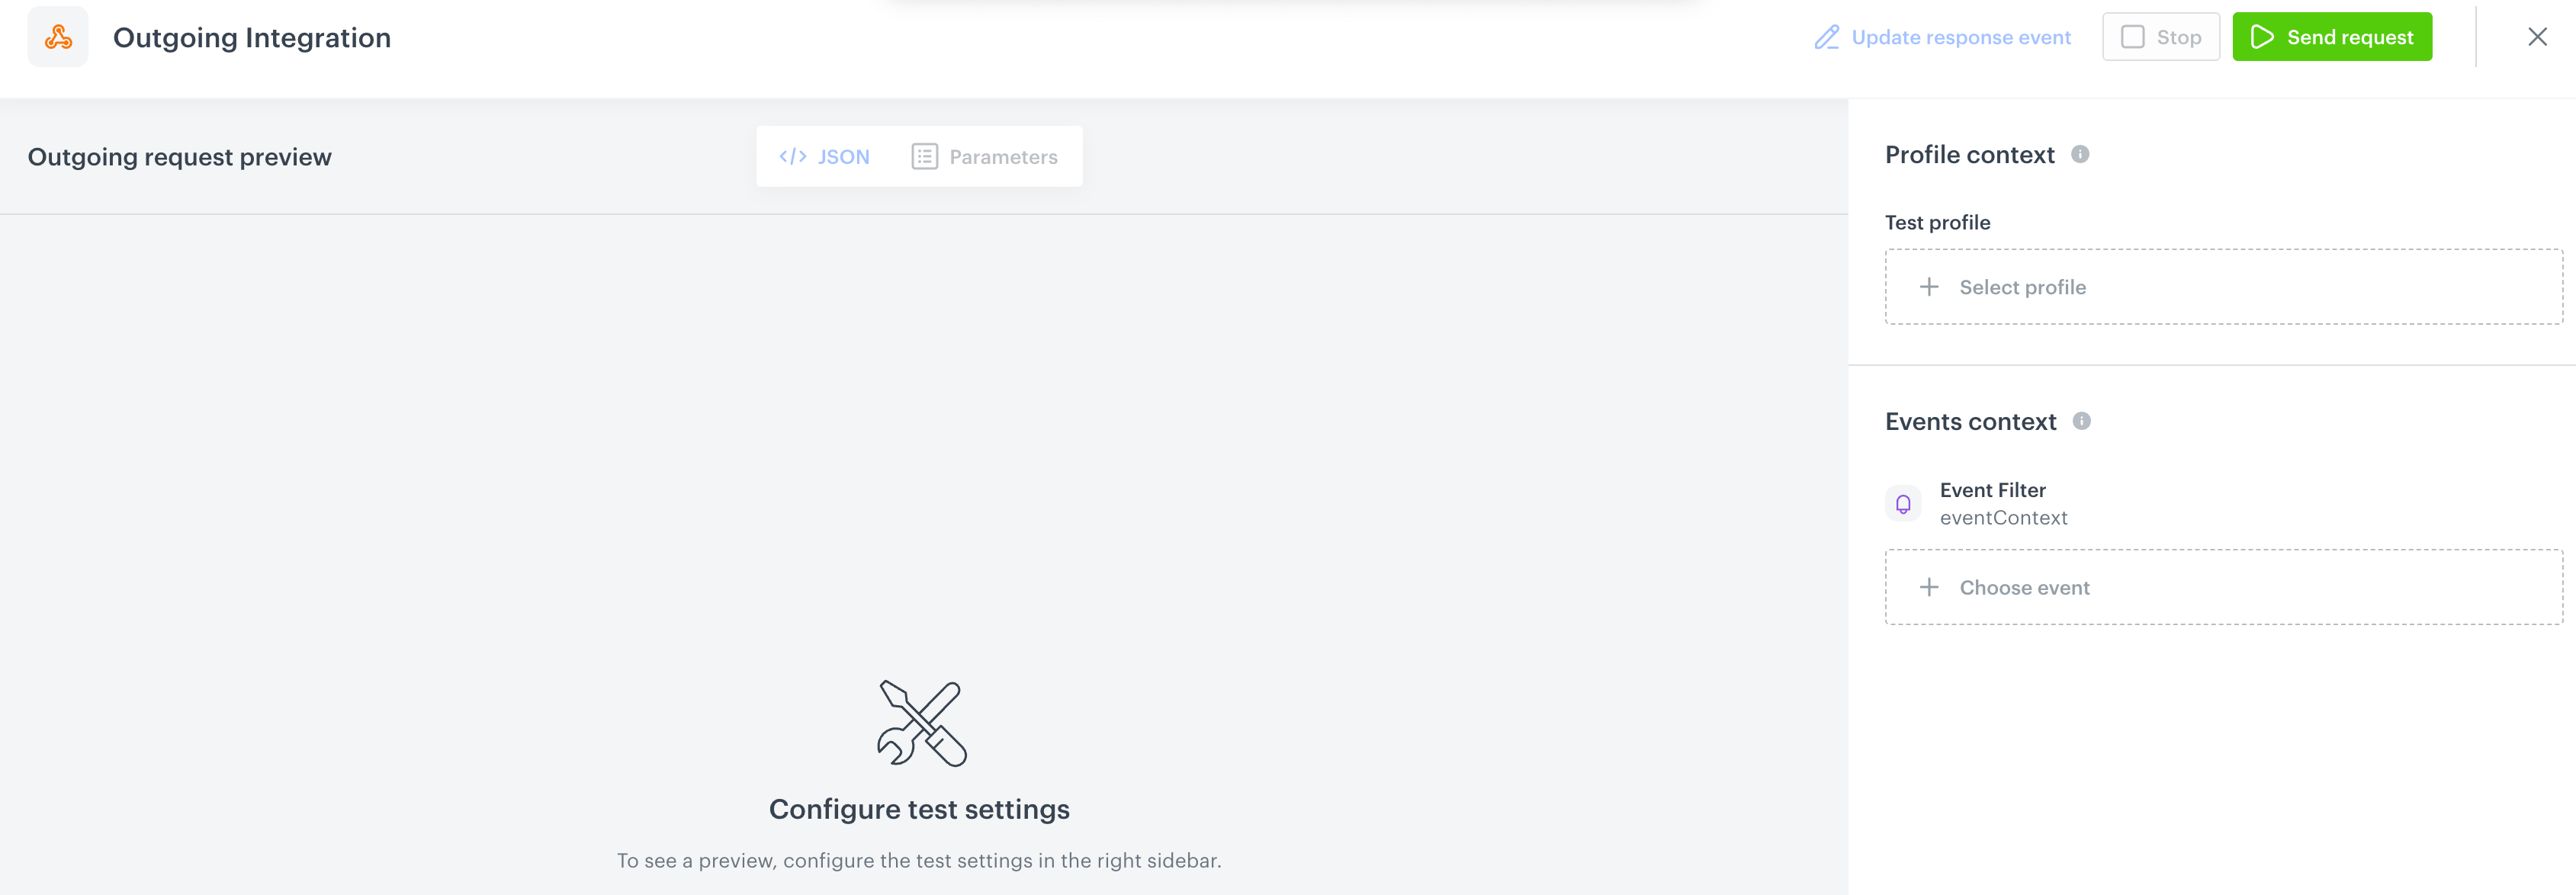
An empty test request builder - If your request contains dynamic references (otherwise, the options aren't available):
- From the Test profile dropdown, select a test profile in the context of whom the test request will be performed.
- From the Event context dropdown list, you can select a particular occurrence of an event whose values/information will be used for the test request.
- Select a test profile.
Result: A history of test profile events appears.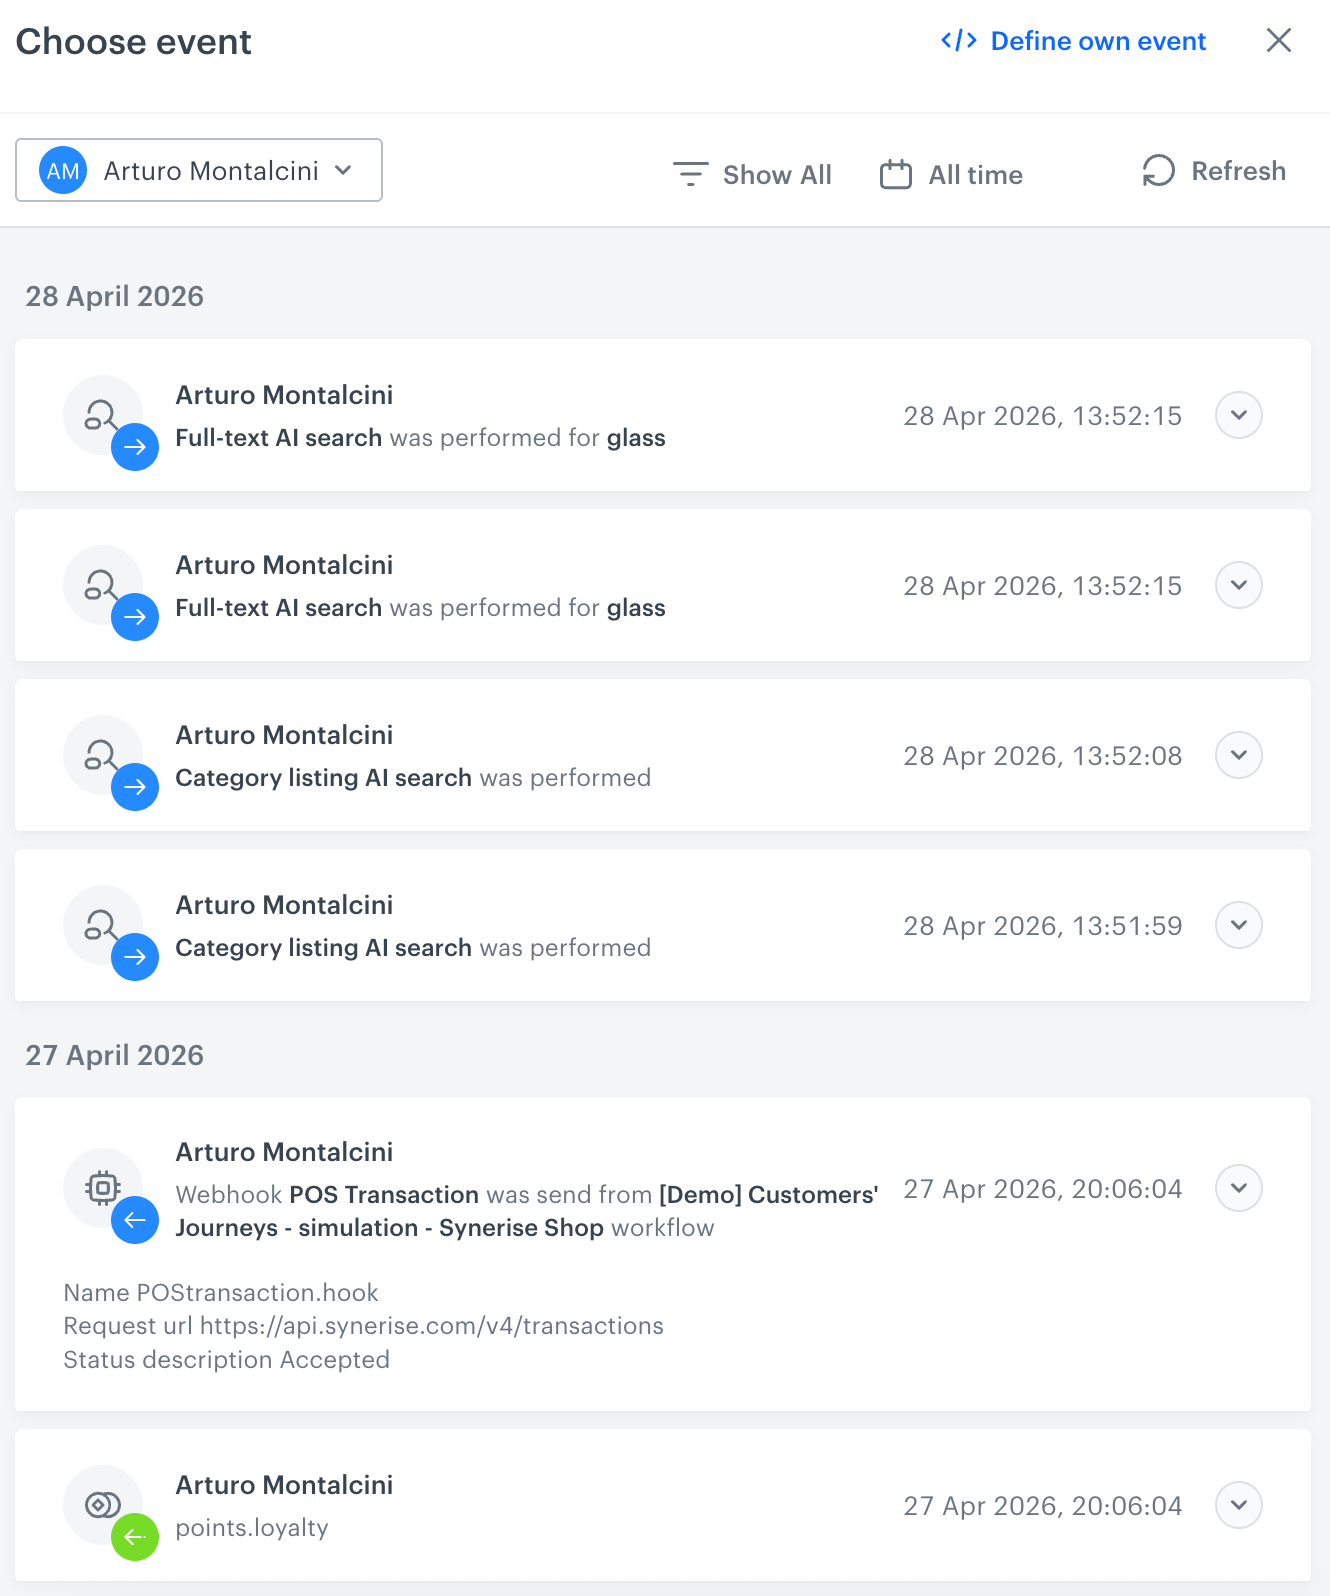
A stream of events of a test profile - From the list of events, select one whose data you want use as a context. If there is no event you can use, in the upper-right corner of the pop-up, click Define own event and provide the body of the event.
- Confirm by clicking Apply.
- Select a test profile.
- Verify the request body. If there is something you want to change, come back to the node settings from previous steps.
- If the request body is ready to test, in the upper-right corner, click Send request.
Result: The response section appears and the Update response event button becomes active. - Optionally, you can update response event with new parameters by clicking Update response event in the upper-right corner.
Example of use
For example of use, refer to our Send an alert to Microsoft Teams channel use case.