"Profile Event" node
This trigger starts the scenario immediately when Synerise receives information that a customer has performed a specific action, for example, submitted a form or reacted to a notification by opening it or clicking a link in it. Such actions are called events and they define customers’ activities in the touchpoints integrated with Synerise.
Requirements
- You must have customers in your database.
- You must implement a tracking code into your website.
Node configuration
- Click the pencil icon.
Result: A pop-up shows up. - Click Choose event.
Result: A dropdown list shows. - From the dropdown list, select the event which is to trigger the workflow.
The list only includes events whose definitions exist in Data Modeling Hub > Events.
Important: The following events can’t be used as triggers:automation.clientStartPath;automation.clientEndPath;automation.clientPathStep - Optionally, click the + where button to select the event parameters. This lets you narrow down the event occurrence that triggers the workflow.
- Select the parameter.
- Define the operator.
- Enter the value of the parameter.
- Confirm the settings by clicking the Apply button.
Defining the date of event occurrence
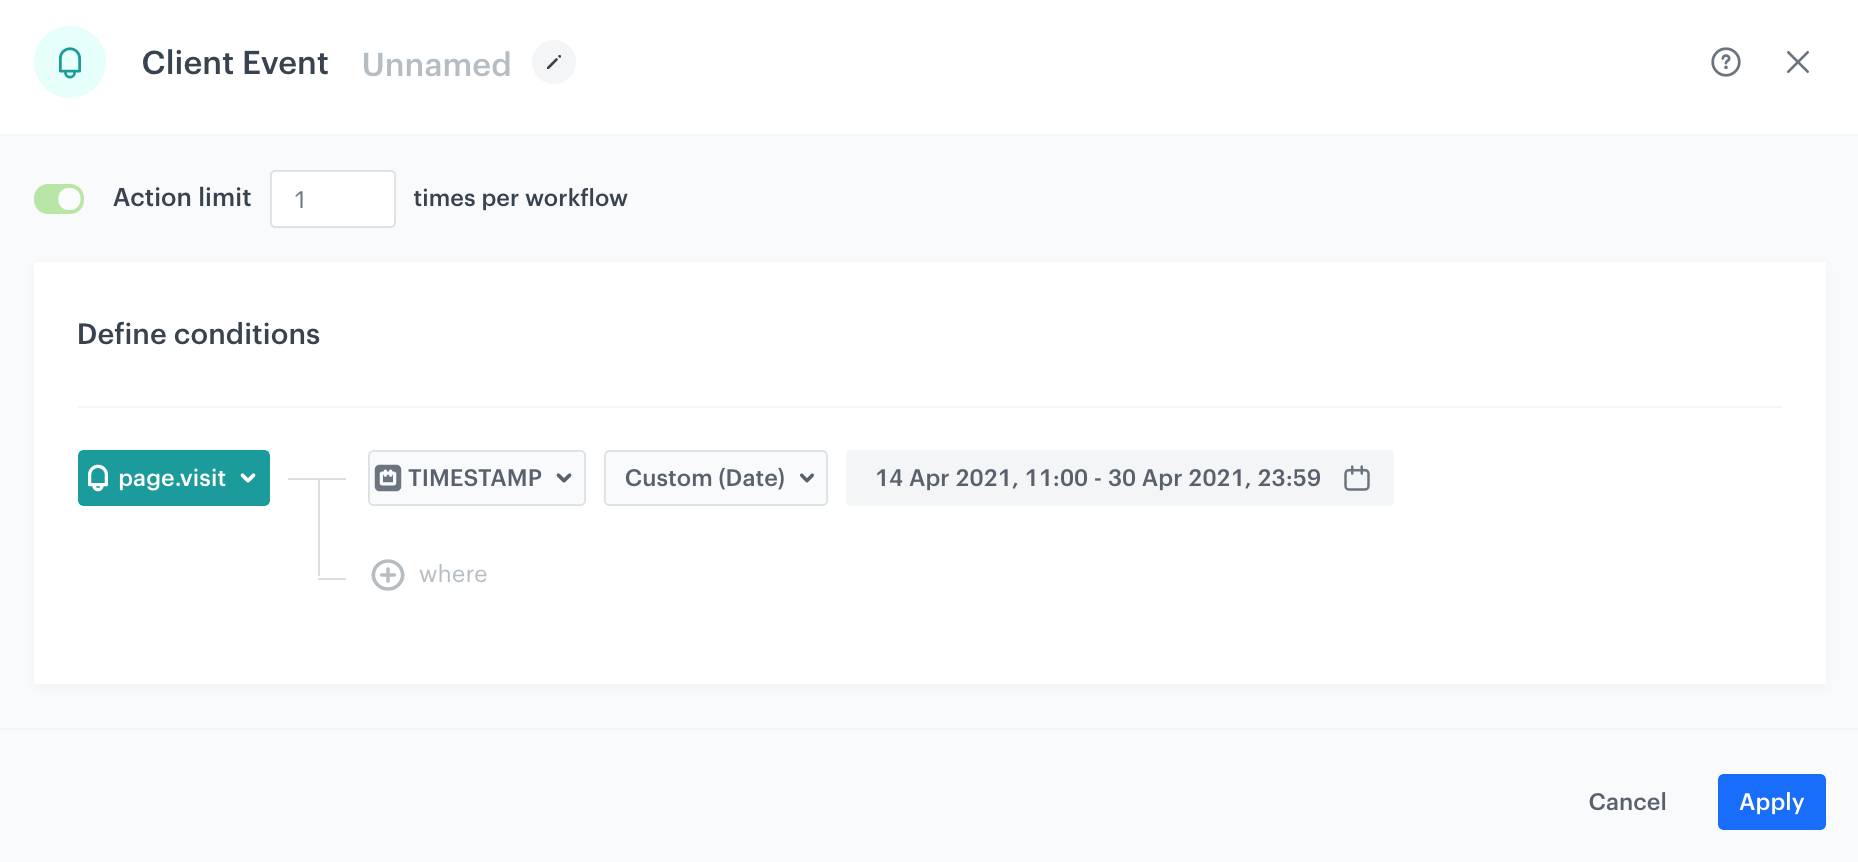
You can determine when exactly the customer activity launches the workflow. In the example on the screen, the workflow is triggered only when a user visits a website between 0:00 on the 14th of April to 23:59 on the 30th of April, 2021.

-
From the Choose event dropdown list, select the event.
-
Click + where button.
-
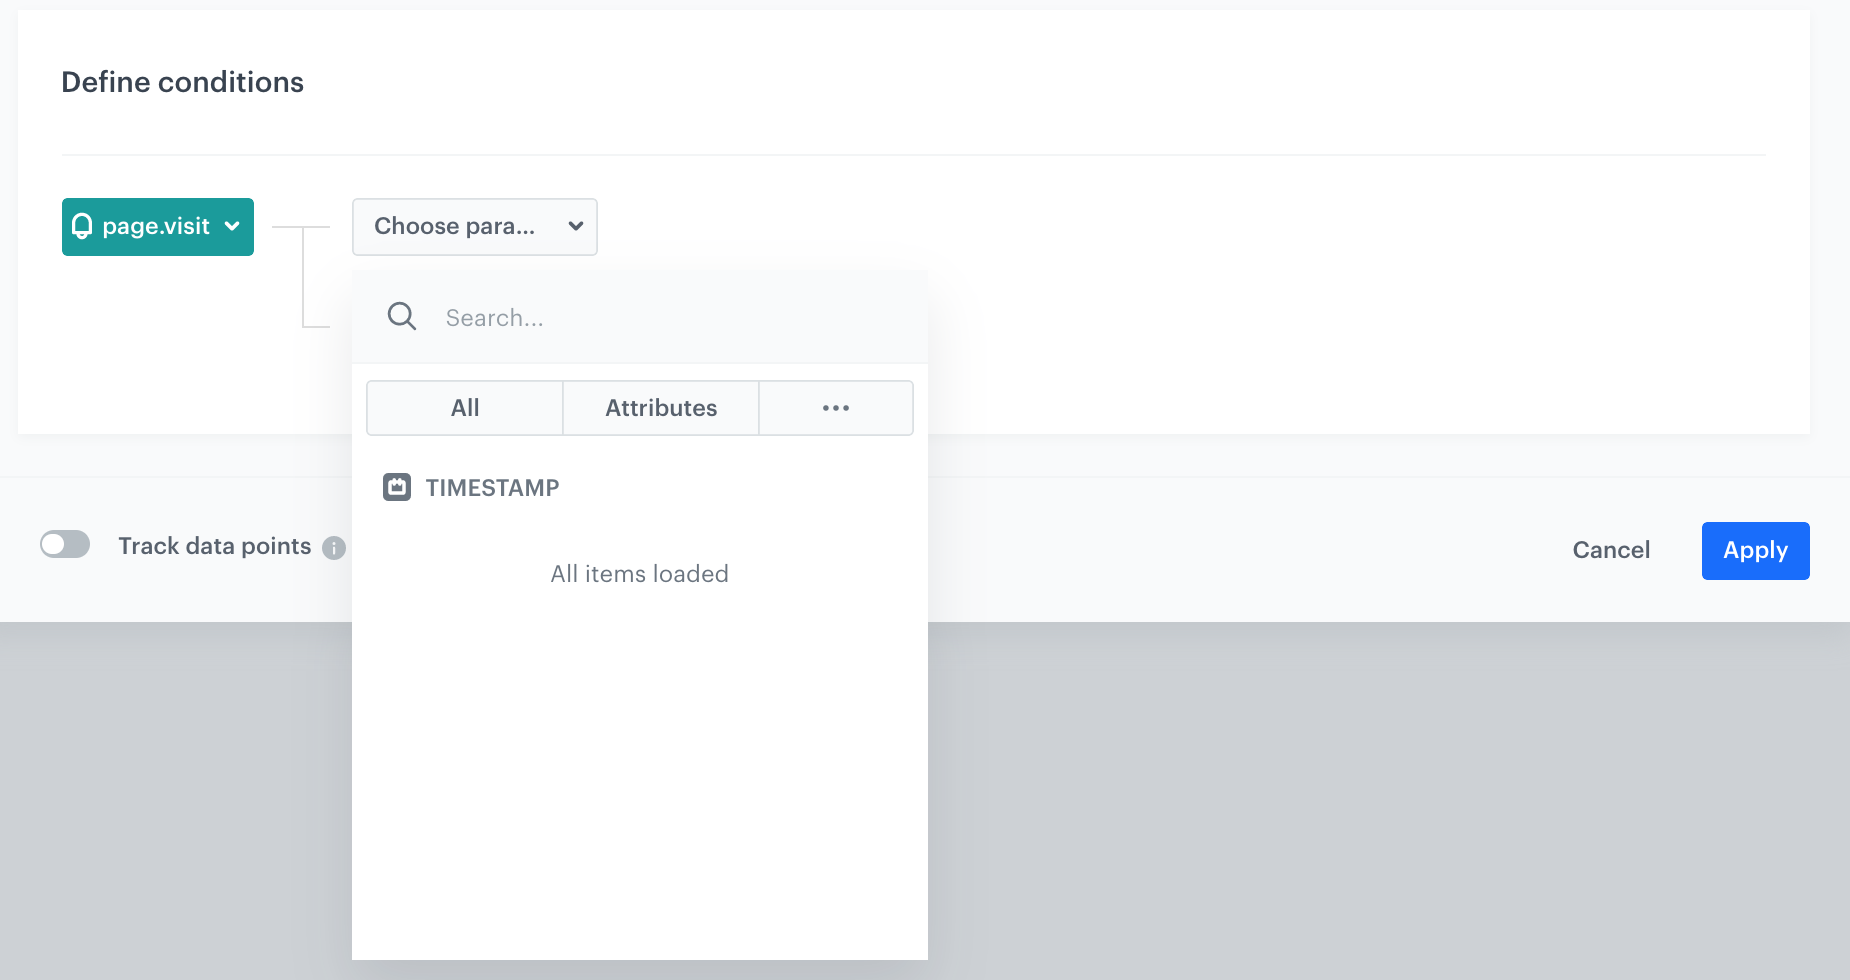
In the list of parameters, click the
 tab.
tab. -
Select Specials.
-
Select TIMESTAMP.

Timestamp parameter -
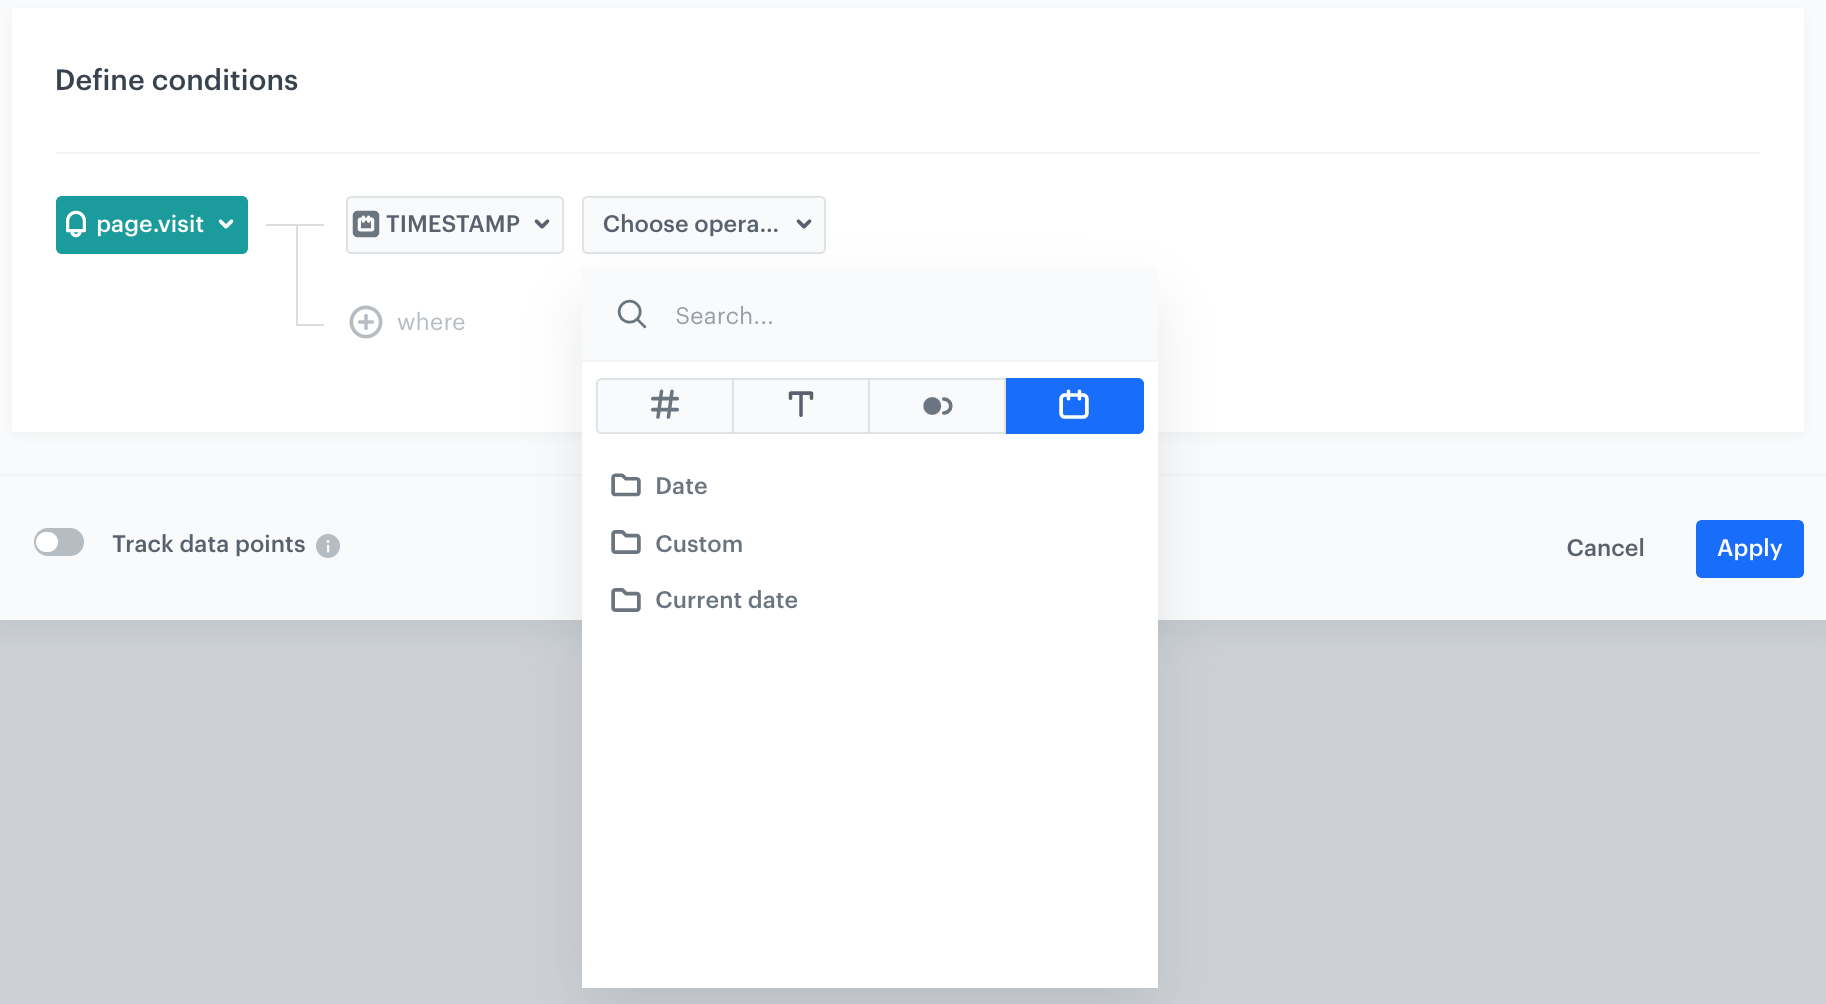
From the Choose operator list, select:

Timestamp parameter -
Date - if you want to select a start or end date
Click to see the explanation of operator options- More than - You choose dates after the selected date (including the selected date).
- Less than - You choose dates before the selected date (including the selected date).
-
Custom - apart from standard date ranges, you can use non-standard (dynamic) dates, for example, everyday from 8:00 to 14.00; Mondays and Thursdays between 15:00 and 17:00; the first and the fourteenth day of the month, and so on.
Tip: To use non-standard (dynamic) dates, click this option in the calendar.
The Enable date filter option -
Current date - if you want to include those event occurence that happen.
Click to see the explanation of operator options- Matches the current hour - matches only date that fits the current hour, day, month, and year (example: if current date is 2024-05-20 17:00:00, dates from 2024-05-20 17:00:00.000 to 2024-05-20 17:59:59.999 matches)
- Matches current day - matches only date that fits the current day, month, and year (example: if current day is 2024-05-20, only 2024-05-20 matches)
- Matches current month - matches any date that fits the current month in current year (example: if current month is May 2024, dates from 2024-05-01 to 2024-05-31 match)
- Matches current year - matches any date that fits the current year (example: if current year is 2024, dates from 2024-01-01 to 2024-12-31 match)
-
Example of use

The purpose of the workflow is to send an email with a purchase summary every time a customer buys a product.
- Add the Profile Event trigger node. From the list of events, choose the event which signifies a purchase (
product.buy). - Connect the trigger with the Send email action. In the settings of the node, select the appropriate template or create a new one.
- Complete the process with the finishing node (End).